Home>Articles>How To Make Fried Chicken In An Electric Pressure Cooker
Articles
How To Make Fried Chicken In An Electric Pressure Cooker
Modified: February 23, 2024
Learn how to make delicious fried chicken in an electric pressure cooker with our informative articles. Discover the best techniques and recipes for perfectly crispy chicken every time!
(Many of the links in this article redirect to a specific reviewed product. Your purchase of these products through affiliate links helps to generate commission for Storables.com, at no extra cost. Learn more)
Introduction
In the world of cooking, few dishes are as universally beloved as fried chicken. Its crispy golden exterior, paired with tender and juicy meat, makes it a true comfort food favorite. Traditionally, fried chicken is prepared by deep-frying in a pot or a deep fryer. However, with the rise in popularity of electric pressure cookers, you can now enjoy the same delicious results with less oil and in a fraction of the time.
Cooking fried chicken in an electric pressure cooker offers several advantages. Firstly, the pressure cooker seals in the moisture, resulting in incredibly tender and flavorful chicken. Additionally, the high heat and sealed environment help to achieve a crispy outer coating. With the convenience of an electric pressure cooker, you can have homemade fried chicken on the table in no time, without the mess and hassle of traditional frying methods.
To get started, let’s gather all the necessary equipment and ingredients for this mouthwatering dish.
Key Takeaways:
- Enjoy crispy, tender fried chicken in a fraction of the time with an electric pressure cooker. Marinate, season, and cook for juicy, flavorful results without the mess of traditional frying methods.
- Elevate your fried chicken game by finishing in the oven for extra crispiness. Experiment with coatings and serve with your favorite dipping sauces for a delectable meal.
Equipment Needed
Before diving into the cooking process, let’s make sure you have all the necessary equipment to prepare fried chicken in an electric pressure cooker. Here’s what you’ll need:
1. Electric pressure cooker: To make this recipe, you’ll need an electric pressure cooker with a capacity of at least 6 quarts. Ensure that it has a high-pressure setting for optimal results.
2. Trivet: A trivet is a metal rack that fits inside the pressure cooker. It’s essential for elevating the chicken pieces and allowing the hot air to circulate evenly during cooking, resulting in a crispy exterior.
3. Tongs: You’ll need a good pair of tongs to safely handle the chicken pieces when placing them in the pressure cooker and removing them afterward.
4. Measuring cups and spoons: Accurate measurement of ingredients is crucial for achieving the perfect balance of flavors in your fried chicken. Make sure you have measuring cups and spoons on hand for precise measurements.
5. Mixing bowls: You will need both a large mixing bowl to marinate the chicken and a smaller bowl for combining the dry breading ingredients.
6. Whisk: A whisk is handy for combining the wet ingredients for the chicken marinade, ensuring they are thoroughly mixed together.
7. Kitchen thermometer: To ensure that the chicken is fully cooked, it’s essential to have a kitchen thermometer to check the internal temperature. The chicken should reach a minimum of 165°F (74°C).
8. Plate or wire rack: Once the chicken is cooked, you’ll need a plate or wire rack to place the pieces on to drain any excess oil and allow them to cool and crisp up slightly.
Make sure you have all these items ready before you begin the cooking process. Now that we have the equipment sorted, let’s move on to the required ingredients for making delicious fried chicken in an electric pressure cooker.
Ingredients
To make fried chicken in an electric pressure cooker, you’ll need the following ingredients:
– 2.5 pounds (1.1 kg) of chicken pieces (such as drumsticks, thighs, or a combination of both)
– 1 cup (240 ml) of buttermilk
– 2 cups (240 g) of all-purpose flour
– 1 tablespoon of paprika
– 1 tablespoon of garlic powder
– 1 tablespoon of onion powder
– 1 teaspoon of salt
– 1 teaspoon of black pepper
– 1/2 teaspoon of cayenne pepper (adjust according to your desired level of spiciness)
– Vegetable oil, for greasing the trivet and brushing the chicken
Optional ingredients for additional flavor:
– 1 teaspoon of dried thyme
– 1 teaspoon of dried oregano
– 1 teaspoon of dried rosemary
You can adjust the seasonings according to your preference, adding more or less of each spice to suit your taste. The buttermilk helps to tenderize the chicken and adds moisture, resulting in juicy and flavorful meat.
Before proceeding with the cooking process, ensure that you have all these ingredients on hand and that you’ve properly measured them out. With the right equipment and ingredients ready, it’s time to start preparing your fried chicken.
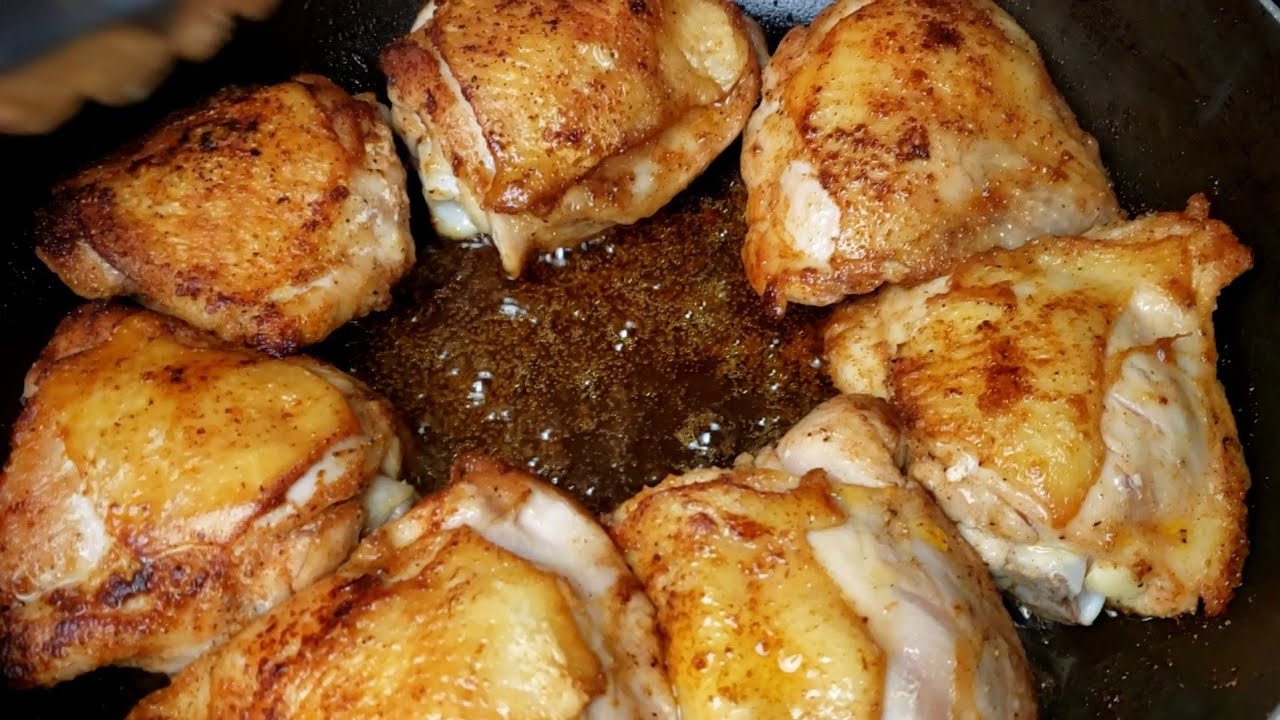
Step 1: Preparing the Chicken
The first step in making fried chicken in an electric pressure cooker is to properly prepare the chicken pieces. Here’s how:
1. Start by rinsing the chicken pieces under cold water and patting them dry with paper towels. This helps to remove any excess moisture and ensures that the seasoning adheres well to the chicken.
2. If desired, you can remove the skin from the chicken pieces for a healthier version. However, keeping the skin on adds flavor and helps to achieve a crispy texture.
3. Trim away any excess fat or loose skin from the chicken pieces using a sharp knife. This helps to prevent flare-ups and ensures even cooking.
4. Place the prepared chicken pieces in a large mixing bowl.
5. Now, it’s time to marinate the chicken. Pour the buttermilk over the chicken, making sure each piece is coated. The buttermilk helps tenderize the meat and adds flavor. If you don’t have buttermilk, you can make a substitute by adding 1 tablespoon of lemon juice or vinegar to 1 cup of milk and letting it sit for 5 minutes.
6. Cover the bowl with plastic wrap or a lid and refrigerate for at least 1 hour, or preferably overnight. Marinating the chicken allows the flavors to penetrate the meat and makes it more tender and juicy.
Now that the chicken is marinating, you can move on to the next step and prepare the seasoning mixture. Continue reading to learn how to season the chicken for that irresistible flavor.
Step 2: Seasoning the Chicken
Properly seasoning the chicken is crucial for achieving a mouthwatering flavor. Here’s how to season the marinated chicken for your fried chicken in an electric pressure cooker:
1. In a smaller bowl, combine the all-purpose flour, paprika, garlic powder, onion powder, salt, black pepper, and cayenne pepper. You can also add optional herbs like dried thyme, oregano, or rosemary at this stage for added flavor.
2. Mix the dry ingredients together using a whisk or fork until well combined. This ensures that the seasonings are evenly distributed throughout the flour mixture.
3. Take one piece of marinated chicken at a time and dredge it in the seasoned flour mixture, making sure to coat it thoroughly. Press the flour onto the chicken to ensure a good coating. Shake off any excess flour and place the coated chicken piece on a clean plate.
4. Repeat this process for all the chicken pieces, making sure each one is evenly coated with the seasoned flour mixture.
5. Once all the chicken pieces are coated, allow them to rest on the plate for about 10-15 minutes. This resting period helps the flour adhere better to the chicken and creates a crispy texture when cooked.
Now that the chicken is properly seasoned and coated, it’s time to move on to the next step of preparing the electric pressure cooker. Continue reading to learn how to set up the pressure cooker for perfect fried chicken.
Before frying the chicken, make sure to pat it dry with paper towels to remove any excess moisture. This will help the breading to adhere better and result in a crispier coating.
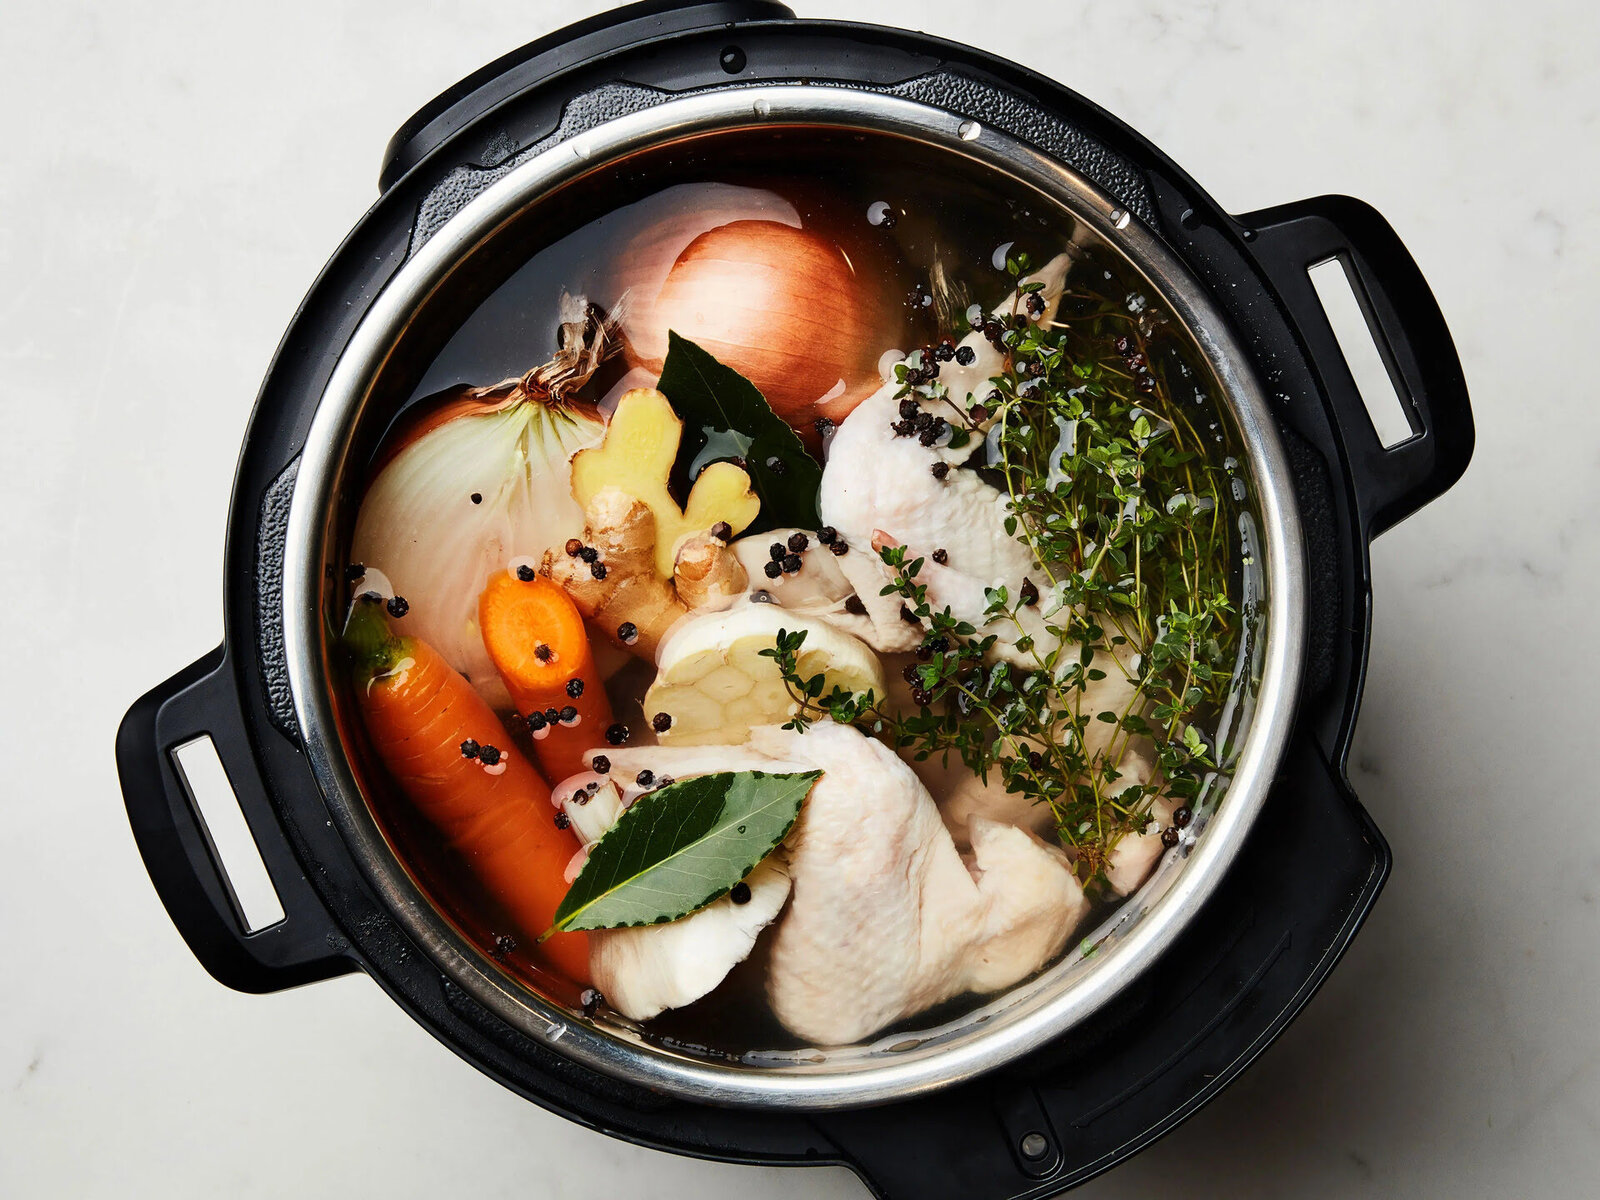
Step 3: Preparing the Pressure Cooker
Now that the chicken is seasoned and ready, it’s time to prepare the electric pressure cooker for cooking. Here’s what you need to do:
1. Begin by ensuring that the inner pot of your electric pressure cooker is clean and dry. Remove any accessories or attachments that are not necessary for this cooking process.
2. Grease the trivet with a small amount of vegetable oil to prevent the chicken from sticking to it during cooking.
3. Place the greased trivet at the bottom of the pressure cooker. The trivet helps elevate the chicken pieces, allowing hot air to circulate around them for even cooking and a crispy exterior.
4. Next, add a small amount of water to the pressure cooker. The amount will depend on the manufacturer’s instructions, but generally, 1 to 1.5 cups of water is sufficient. The water creates steam, which generates the pressure needed to cook the chicken.
5. Double-check that the sealing ring is properly in place in the lid of the pressure cooker. This ensures a tight seal and prevents any steam from escaping during cooking.
6. Place the lid on the pressure cooker and lock it into position. Ensure that the pressure release valve is in the closed position.
Now that the pressure cooker is properly set up, it’s time to move on to the next step and start cooking the chicken. Keep reading to learn how to cook the chicken to perfection in the electric pressure cooker.
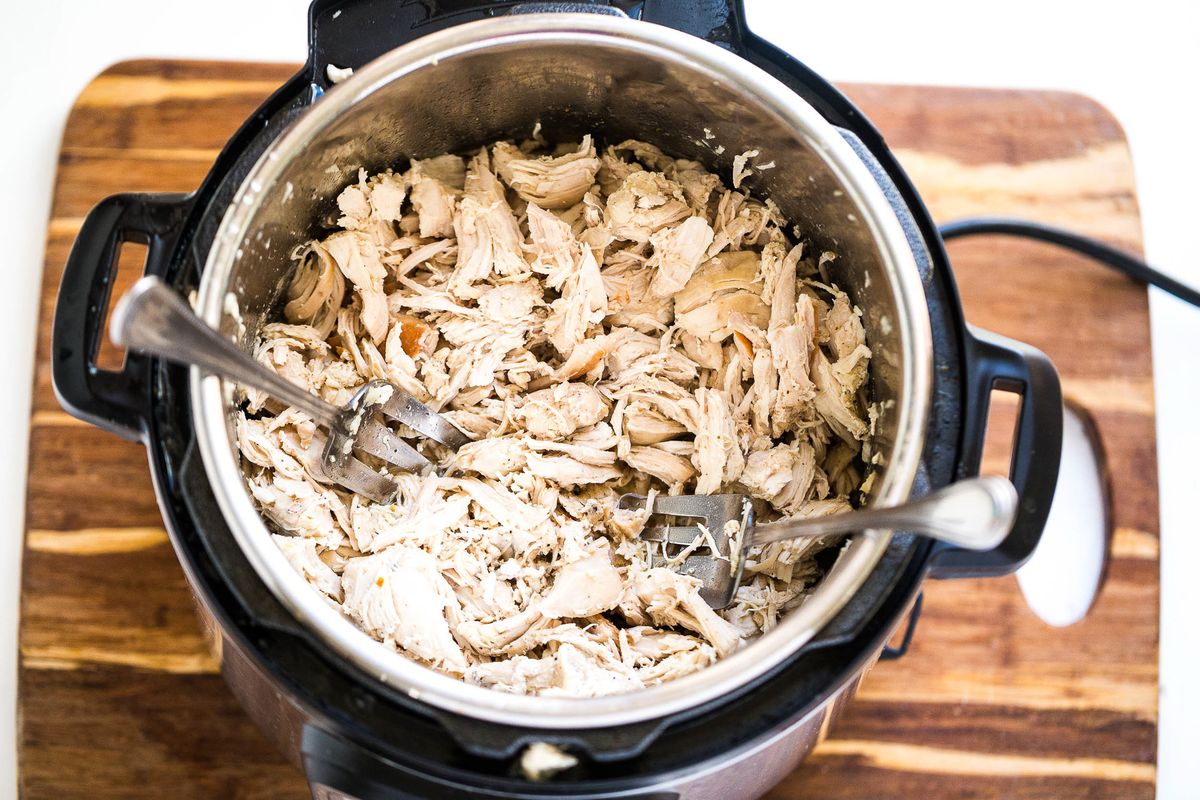
Step 4: Cooking the Chicken in the Pressure Cooker
With the pressure cooker prepared and the chicken properly seasoned, it’s time to cook the chicken to perfection. Follow these steps for cooking fried chicken in an electric pressure cooker:
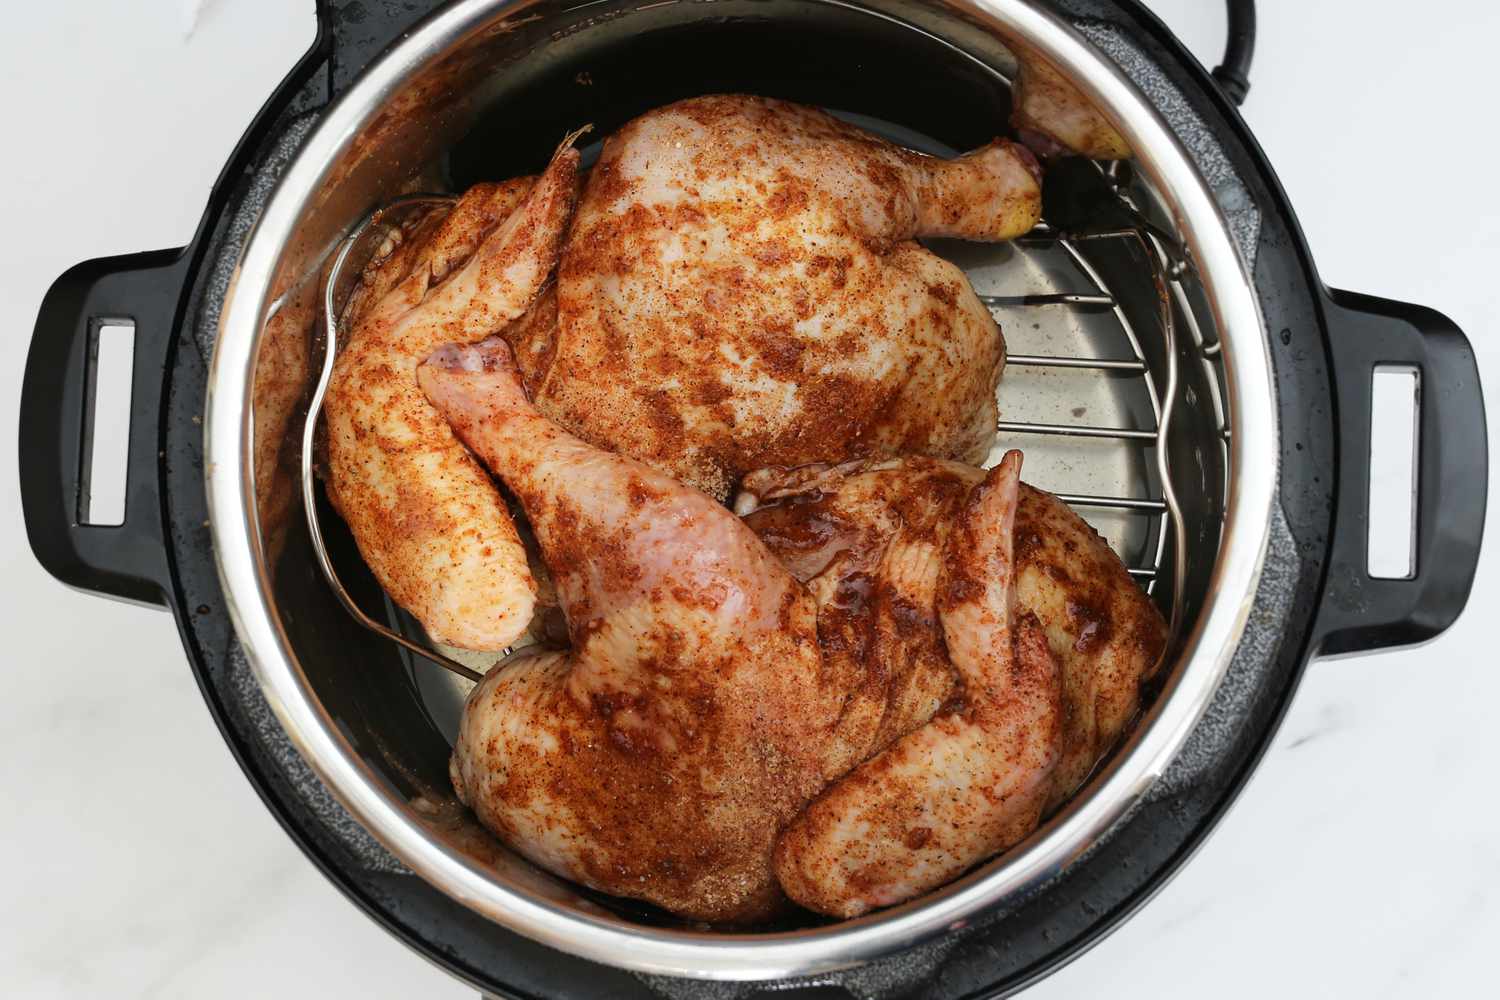
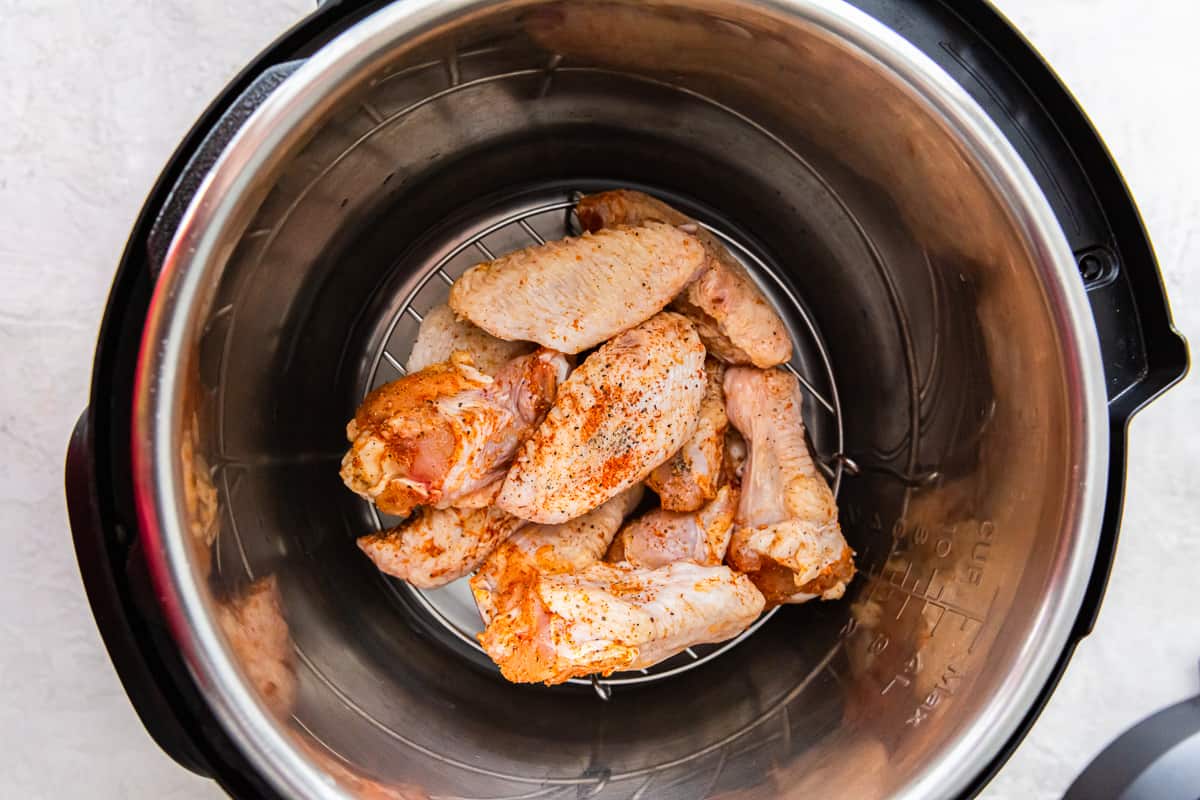
1. Place the coated chicken pieces onto the greased trivet inside the pressure cooker. Make sure not to overcrowd the pot, leaving some space between the pieces for even cooking.
2. Close the lid of the pressure cooker securely, ensuring that it is properly aligned and locked in place. Double-check that the pressure release valve is in the closed position.
3. Set the pressure cooker to its high-pressure setting. The cooking time will vary depending on the size and type of chicken pieces used. As a general guideline, cook drumsticks and thighs for about 8-10 minutes.
4. Once the cooking time is set, allow the pressure cooker to come up to pressure. This may take a few minutes, depending on your specific model.
5. Once the pressure cooker has reached full pressure, the cooking time will begin. The pressure cooker will automatically regulate the temperature and pressure throughout the cooking process, ensuring even and consistent cooking.
6. After the cooking time is complete, carefully release the pressure by moving the pressure release valve to the venting position. This can be done manually or using the natural release method, following the manufacturer’s instructions.
7. Once the pressure has been fully released, carefully open the lid of the pressure cooker, taking caution to avoid any steam. The chicken should be cooked through and tender.
Now that the chicken is cooked, it’s time to finish off your fried chicken by giving it an extra crispiness. Continue reading to learn the final step of the process.
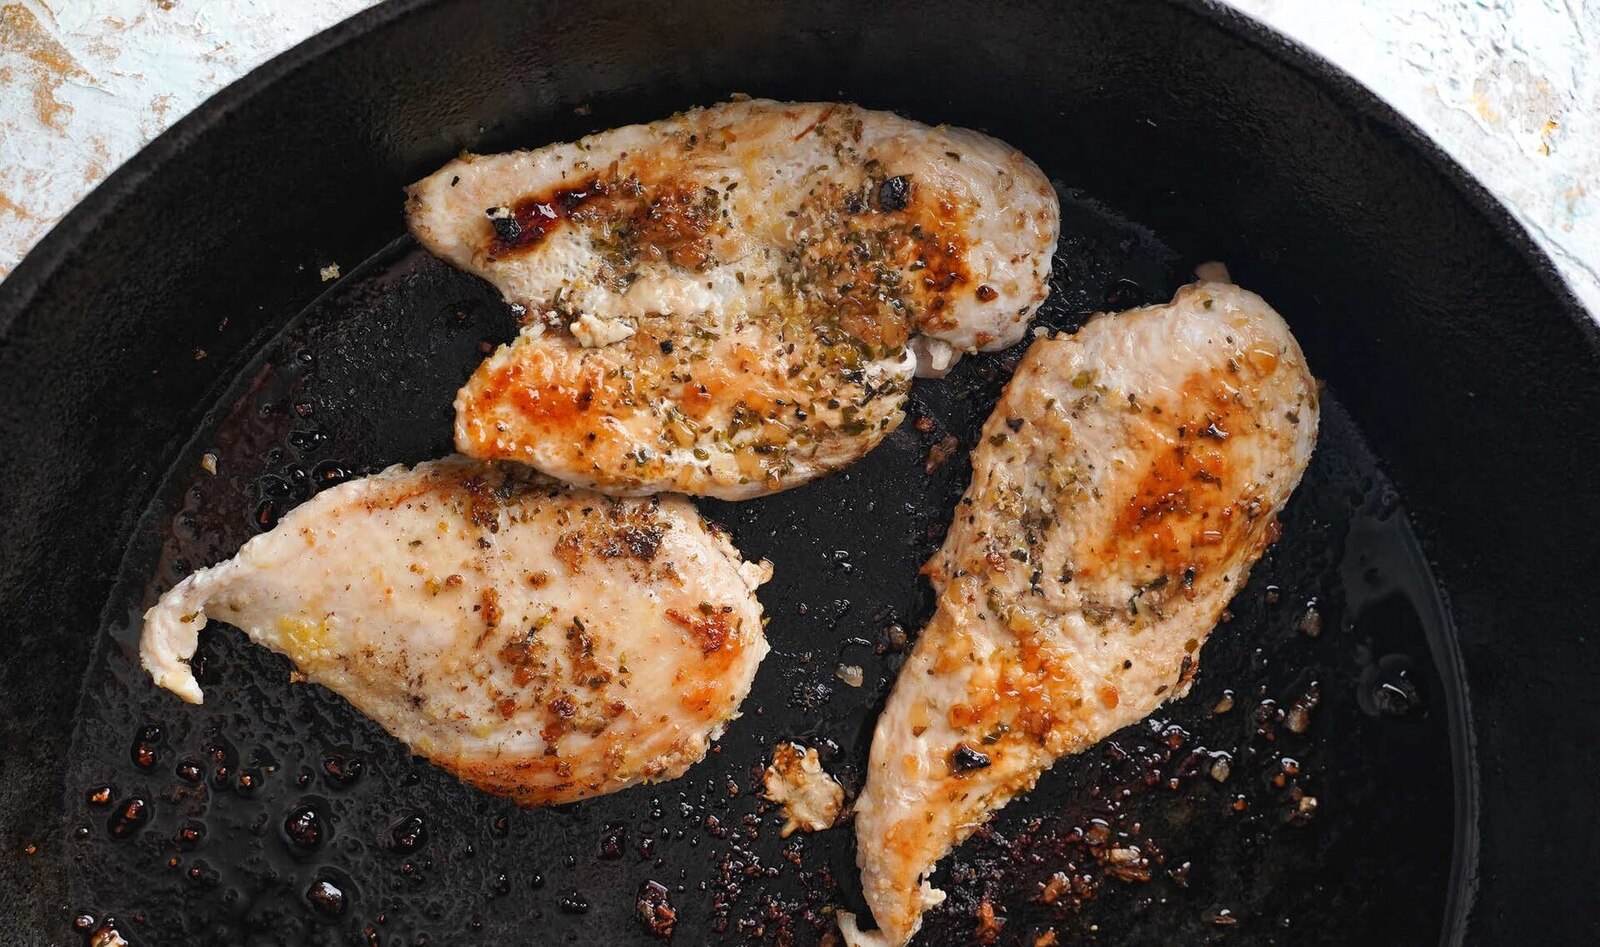
Step 5: Finishing the Fried Chicken
To achieve that perfect crispy and golden finish on your fried chicken, you’ll need to follow these final steps:
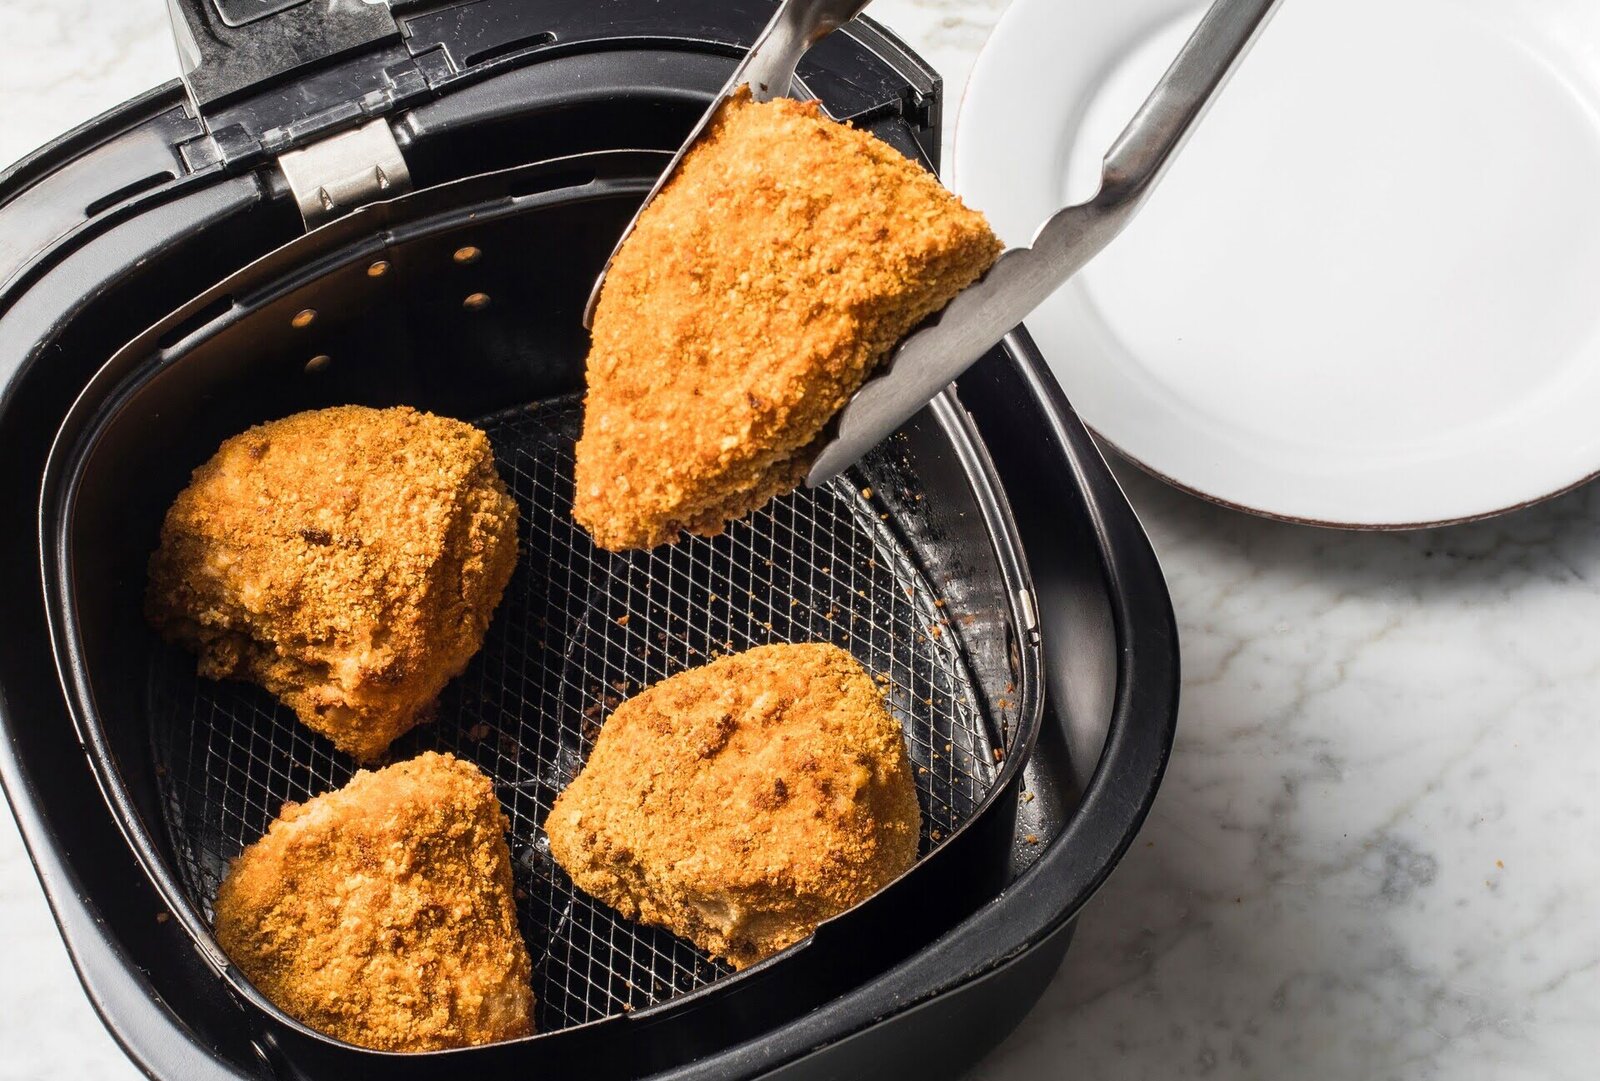
1. Carefully remove the cooked chicken from the pressure cooker using tongs. Place the chicken pieces on a wire rack or a plate lined with paper towels to drain any excess oil.
2. Preheat your oven to 425°F (220°C) while the chicken is draining. This will help crisp up the chicken even further.
3. Once the oven is preheated, transfer the drained chicken pieces onto a baking sheet lined with parchment paper. Arrange the chicken in a single layer, making sure they are not touching each other.
4. Lightly brush the top of each chicken piece with some vegetable oil. This will help the chicken get that extra crunch and color in the oven.
5. Place the baking sheet in the preheated oven and bake for about 10-15 minutes, or until the chicken is golden brown and crispy. Keep an eye on the chicken to prevent it from burning.
6. Once the chicken is done, remove it from the oven and let it cool for a few minutes. This will help the coating become even crispier and hold its shape.
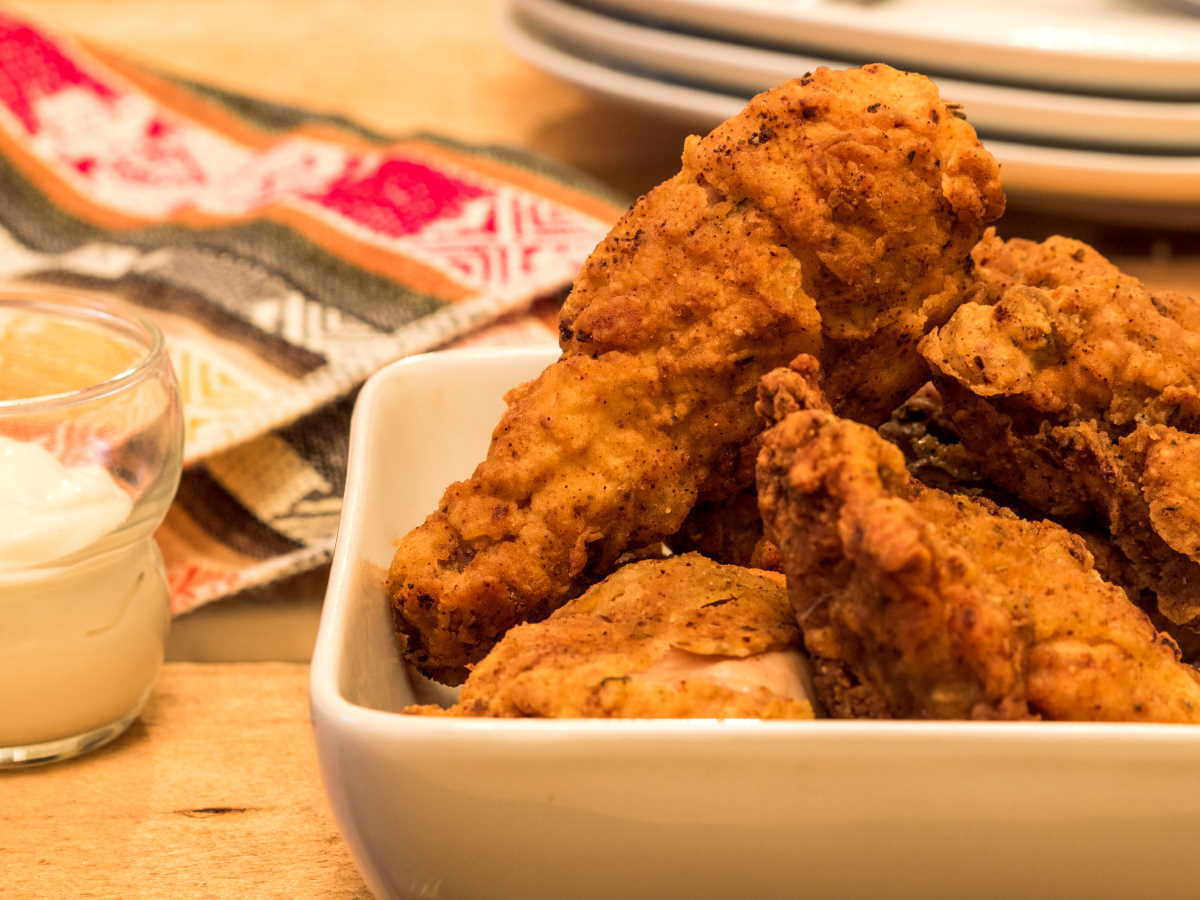
7. Serve your delicious homemade fried chicken warm and enjoy!
Now that you’ve completed the final step, your fried chicken is ready to be served and savored. Serve it alongside your favorite sides and enjoy the crispy, juicy goodness of your homemade fried chicken.
Tips and Tricks
To ensure your fried chicken in the electric pressure cooker turns out perfectly every time, here are some helpful tips and tricks:
1. Use bone-in chicken pieces: Bone-in chicken pieces, such as drumsticks and thighs, work best for this recipe. The bones help retain moisture and add flavor to the meat.
2. Let the chicken come to room temperature: Before marinating the chicken, allow it to sit at room temperature for about 30 minutes. This helps the chicken cook more evenly.
3. Customize the seasoning: Feel free to adjust the seasoning to suit your taste preferences. Add more spices or herbs for additional flavor, or adjust the level of spiciness by increasing or decreasing the amount of cayenne pepper.
4. Be patient with marinating time: For the most flavorful results, marinate the chicken for at least 1 hour, or ideally overnight. This allows the flavors to penetrate the meat and tenderize it.
5. Avoid overcoating the chicken: Shake off any excess flour when coating the chicken to prevent a thick, clumpy crust. A thin coating allows for optimal crispiness.
6. Don’t overcrowd the pressure cooker: Leave some space between the chicken pieces when placing them in the pressure cooker. This allows for better air circulation and ensures even cooking.
7. Use a meat thermometer: To ensure the chicken is cooked through, use a meat thermometer to check the internal temperature. The chicken should reach a minimum of 165°F (74°C) for safe consumption.
8. Finish in the oven: While the pressure cooker cooks the chicken perfectly, finishing it in the oven helps achieve that extra crispy texture. It also allows for excess oil to drain away, resulting in a healthier dish.
9. Experiment with coatings: Once you’ve mastered the basic recipe, feel free to get creative with different coatings. Add spices, herbs, or even grated Parmesan cheese to the flour mixture for added flavor and texture.
10. Serve with dipping sauces: Fried chicken pairs wonderfully with a variety of dipping sauces such as barbecue sauce, honey mustard, or ranch dressing. Serve them on the side for an extra burst of flavor.
By following these tips and tricks, you’ll be able to make delectable fried chicken in your electric pressure cooker that will leave everyone asking for seconds. Enjoy the process and savor every crispy bite!
Conclusion
Making fried chicken in an electric pressure cooker is a game-changer when it comes to convenience and flavor. With the right equipment, ingredients, and a few simple steps, you can enjoy crispy, tender, and delicious fried chicken in a fraction of the time it takes with traditional frying methods.
Through marinating the chicken in buttermilk, coating it with a flavorful seasoned flour mixture, and cooking it under pressure, you can achieve moist and juicy chicken with a satisfyingly crisp exterior. Finishing the chicken in the oven adds that final touch of golden brown perfection.
Remember, the key to success lies in properly preparing the chicken, seasoning it well, and ensuring the pressure cooker is set up correctly. Don’t forget to follow safety precautions when using the pressure cooker, such as releasing the pressure properly and avoiding overcrowding the pot.
Feel free to experiment with different herbs, spices, and coatings to customize the flavor to your liking. Serve your fried chicken alongside your favorite sides and dipping sauces for a complete and satisfying meal.
Now you have all the information and steps needed to make fried chicken in an electric pressure cooker. So why not give it a try? Impress your family and friends with this easy and delicious dish that brings the flavors of crispy, homemade fried chicken to your table in no time. Enjoy the process, savor the results, and happy cooking!
Frequently Asked Questions about How To Make Fried Chicken In An Electric Pressure Cooker
Was this page helpful?
At Storables.com, we guarantee accurate and reliable information. Our content, validated by Expert Board Contributors, is crafted following stringent Editorial Policies. We're committed to providing you with well-researched, expert-backed insights for all your informational needs.


0 thoughts on “How To Make Fried Chicken In An Electric Pressure Cooker”