Articles
How To Build A Drawer With Hand Tools
Modified: December 7, 2023
Learn how to build a sturdy drawer using only hand tools in this comprehensive step-by-step article. Master the art of woodworking with our detailed instructions and expert tips.
(Many of the links in this article redirect to a specific reviewed product. Your purchase of these products through affiliate links helps to generate commission for Storables.com, at no extra cost. Learn more)
Introduction
Building a drawer with hand tools can be a satisfying and fulfilling woodworking project. Whether you are looking to enhance the functionality of a piece of furniture or you want to showcase your woodworking skills, constructing a drawer from scratch allows you to create a custom piece that perfectly fits your needs.
In this article, we will guide you through the process of building a drawer using traditional hand tools. From selecting the right materials to the final finishing touches, you’ll learn step by step how to create a sturdy and functional drawer that will stand the test of time.
While power tools can certainly speed up the process, using hand tools offers a unique experience and allows you to connect with the craftsmanship of old. It’s also a great way to challenge your woodworking skills and gain a deeper appreciation for the art of woodworking.
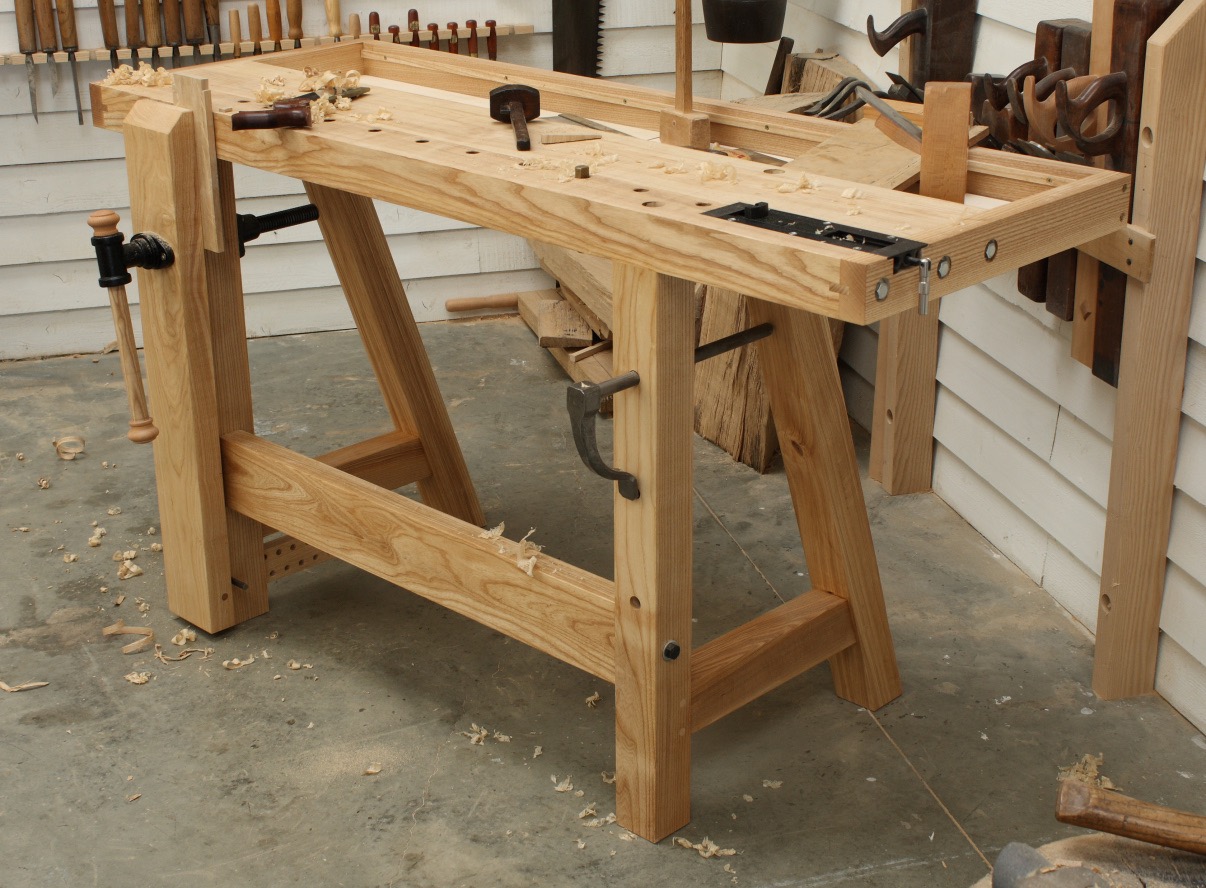
Before you embark on this project, ensure that you have the necessary tools. Some essential tools for this project include a hand saw, chisels, a marking gauge, a mallet, a coping saw, a smoothing plane, and a set of hand planes. Additionally, having a workbench or a sturdy table to work on will make the process much easier.
Now that we’re all set, let’s dive into the process of building a drawer with hand tools.
Key Takeaways:
- Embrace the art of woodworking by building a custom drawer with hand tools, connecting with craftsmanship of old and gaining a deeper appreciation for the woodworking process.
- Create a sturdy and visually appealing drawer by carefully selecting high-quality materials, measuring accurately, employing appropriate joinery techniques, and finishing with attention to detail.
Read more: How To Build A Tool Chest With Drawers
Choosing the Right Materials
When it comes to building a drawer, choosing the right materials is crucial for ensuring durability and longevity. Selecting high-quality wood will not only enhance the appearance of the drawer but also provide structural integrity.
One of the most popular choices for drawer construction is hardwood, such as oak, maple, or cherry. These woods are known for their strength and resistance to wear and tear. Additionally, they offer a beautiful grain pattern that can add an aesthetic appeal to the finished piece.
When selecting hardwood, look for pieces that are straight and free from knots or defects. This will ensure that your drawer is stable and will not warp over time. You can purchase hardwood from local lumberyards or online suppliers.
In addition to the main wood for the drawer front, back, and sides, you will also need materials for the bottom of the drawer. While solid wood can be used for the bottom, using plywood or MDF (medium-density fiberboard) is a more cost-effective option. These materials are stable and can withstand the weight of the drawer contents.
Once you have chosen the wood for your drawer, you will need to determine the thickness. Typically, drawer sides are around 1/2 inch to 3/4 inch thick, while the front and back can be slightly thicker to add strength and stability.
Lastly, consider the finish you want for your drawer. You can leave the wood natural with a clear varnish or stain it to achieve the desired color. Whichever finish you choose, make sure to apply a protective topcoat to prevent damage from moisture or scratches.
By carefully selecting the right materials, you can ensure that your handcrafted drawer not only looks beautiful but also stands the test of time.
Measuring and Marking
Accurate measurements and precise markings are fundamental for building a well-fitting and functional drawer. Taking the time to measure and mark your materials correctly will ensure that all the pieces fit together seamlessly.
Before you begin measuring, it’s important to have a clear understanding of the overall dimensions of the drawer. Consider the space where the drawer will be installed and any specific requirements you may have. Once you have these measurements, you can start planning the dimensions of the individual parts.
Start by determining the height and width of the drawer front and back pieces. Measure and mark the dimensions on your chosen wood, ensuring that your lines are straight and accurate. Use a marking gauge or a square to help you achieve precise measurements.
Next, measure and mark the length of the drawer side pieces. Keep in mind that the length of the sides should correspond to the width of the front and back pieces, minus the combined thickness of the front and back materials. This ensures the proper fit and allows for the thickness of the joinery that will be used later.
When marking the wood, it’s helpful to use a sharp pencil or a marking knife to create clear and visible lines. If you’re using hardwood, a marking knife may be the better option, as it creates a sharper and more precise line. These markings will serve as your reference points when cutting and joining the pieces together.
Additionally, it’s crucial to mark the locations for any joinery methods you plan to use. If you’re opting for dovetail joints or box joints, mark the precise positions where the cuts will be made. This will ensure that the joinery is accurate and strong.
Remember to double-check your measurements and markings before moving on to the next step. Accuracy is key to achieving a well-constructed drawer.
By taking the time to measure and mark your materials correctly, you will ensure that your drawer fits together perfectly and functions flawlessly.
Cutting the Pieces
Once you have accurately measured and marked your materials, it’s time to cut the pieces for your drawer. This step is crucial in achieving precise fits and smooth edges.
Start by setting up a sturdy workbench or table where you can comfortably and safely cut your wood. Make sure you have a sharp hand saw that is appropriate for the type of wood you are working with. A crosscut saw is ideal for cutting the pieces to length, while a dovetail or backsaw is perfect for making more intricate joinery cuts.
Begin by cutting the drawer front and back pieces to their desired length, using your marks as a guide. Take your time to ensure a clean and straight cut, using the proper sawing technique. It’s important to follow the line exactly to maintain accuracy in the dimensions of the drawer.
Next, move on to the drawer side pieces. Cut them to their appropriate length, making sure to account for the thickness of the front and back pieces. Take extra care when cutting the pieces, as they are usually narrower and require more precision.
If you are using joinery techniques such as dovetail or box joints, it’s now time to make the necessary cuts. Follow your markings carefully and use a chisel or a coping saw to remove the waste material. Take your time and work carefully to achieve clean and accurate joinery.
After all the pieces have been cut, it’s a good practice to check their fit and make any necessary adjustments. Use a square to ensure that all the corners are perfectly 90 degrees. If any adjustments need to be made, use a hand plane or sandpaper to fine-tune the fit.
Remember to always prioritize safety when cutting the wood. Wear appropriate protective equipment, such as safety goggles and gloves, and be mindful of your fingers and hands when working with sharp tools.
By carefully cutting the pieces of your drawer, you will achieve precise fits and clean edges, laying the foundation for a well-constructed and visually appealing final product.
Joinery Techniques
Choosing the right joinery techniques for your drawer is essential in creating a strong and durable structure. There are various joinery methods you can use, each with its own advantages and considerations.
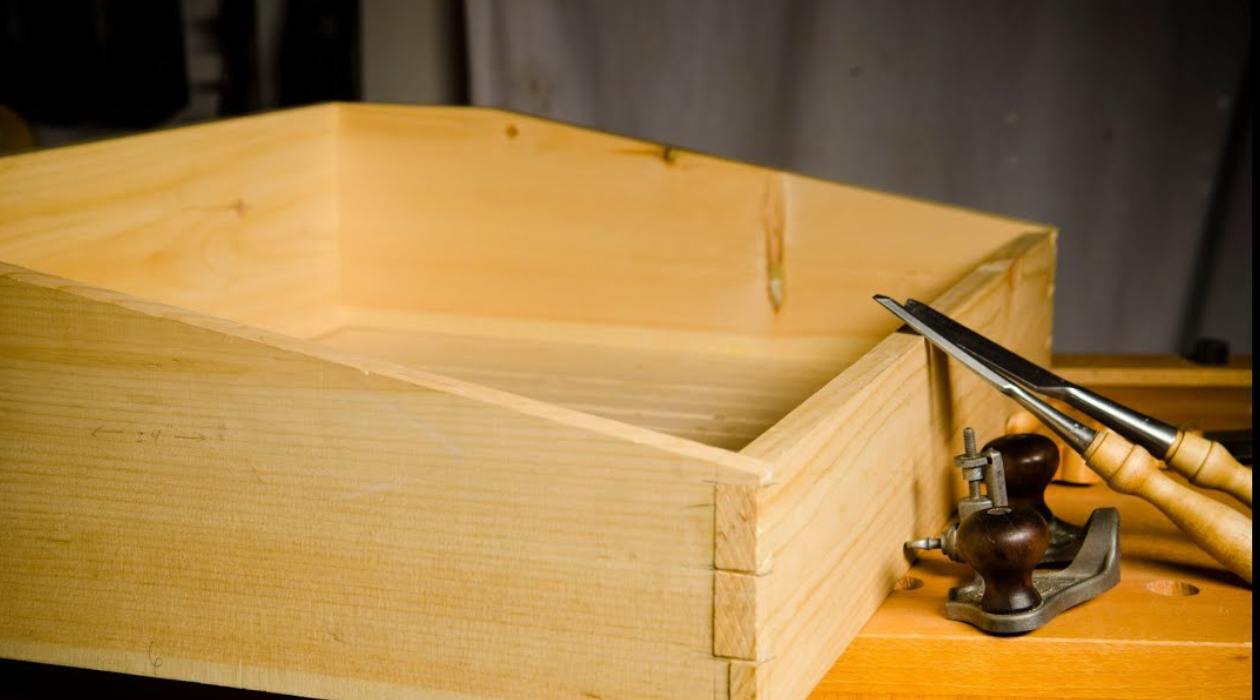
One popular joinery technique for drawers is the dovetail joint. Dovetail joints are known for their strength and aesthetics. They involve interlocking trapezoidal pins and tails that create a tight, mechanical bond. Dovetail joints require precision and skill to create, but the end result is a visually stunning and long-lasting joint.
If you prefer a simpler approach, you can opt for box joints or finger joints. Box joints involve cutting rectangular interlocking fingers that fit together tightly. They provide good strength and are relatively easy to create. Finger joints are similar to box joints, but the fingers are typically smaller in size. Both box joints and finger joints offer a visually appealing joint and are suitable for drawers that will not be subjected to heavy use or weight.
Another common joinery method for building drawers is the dado joint. This joint involves creating a groove or channel in one piece of wood that matches the thickness of the adjoining piece. The other piece then fits into the groove, creating a strong connection. Dado joints are relatively simple to make and provide good alignment and stability for your drawer.
When choosing a joinery technique, consider the level of difficulty, the strength required for your specific application, and the appearance you desire. It’s always a good idea to practice the joinery technique on scrap pieces of wood before committing to your final project.
Additionally, it’s crucial to ensure that your joinery cuts and fits are precise. Take your time and use sharp, well-maintained chisels and saws to achieve clean and accurate joinery. A slight misalignment can compromise the strength and functionality of your drawer.
Remember that the joinery techniques you choose will depend on your woodworking skills, the tools you have available, and the specific requirements of your project. Be willing to experiment and learn as you go, as mastering joinery techniques is a continuous process that improves with practice and experience.
By using appropriate joinery techniques, you will create a solid and reliable drawer that can withstand the test of time and daily use.
When building a drawer with hand tools, make sure to measure and mark your cuts accurately to ensure a precise fit. Use a sharp hand saw and a quality chisel for clean and precise cuts.
Read more: How To Build A Desk With Hand Tools
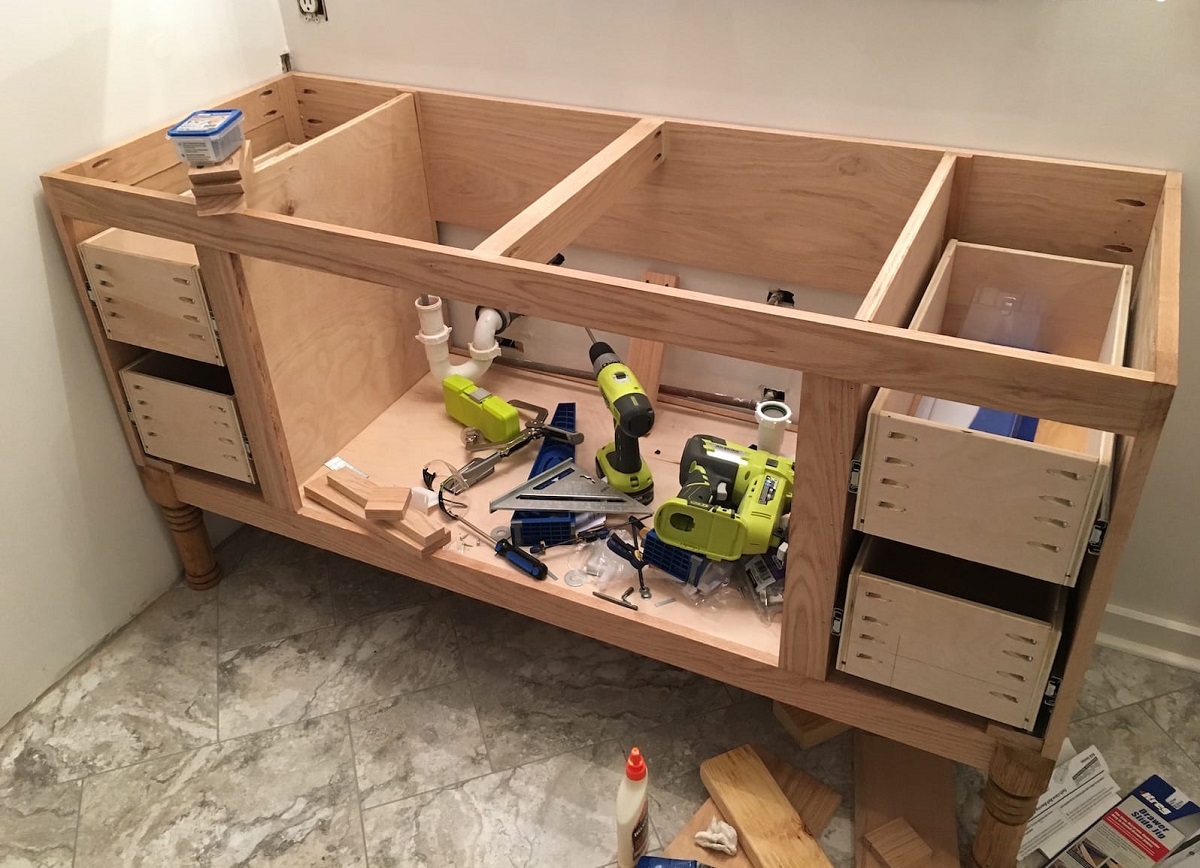
Assembling the Drawer
With all the pieces cut and the joinery techniques prepared, it’s time to assemble your drawer. Assembling the drawer requires careful attention to detail and precision to ensure a snug and secure fit.
Start by dry-fitting the pieces together to ensure everything aligns properly. Check the fit of the front, back, and side pieces, making sure that the joints are tight and the corners are square. This step is crucial before applying any glue or fasteners as it allows you to make any necessary adjustments.
Once you’re satisfied with the fit, it’s time to apply glue to the joints. Apply a thin, even layer of woodworking glue to the mating surfaces of the joints. Use a brush or your finger to evenly distribute the glue and remove any excess. It’s important to work quickly to avoid the glue drying before the assembly is complete.
Join the pieces together, making sure to align the joints accurately. Apply gentle pressure to ensure a tight fit. You can use clamps or rubber bands to hold the pieces together while the glue dries. Check the corners with a square to ensure they are perfectly 90 degrees.
After the glue has dried according to the manufacturer’s instructions, it’s time to reinforce the joints and add additional strength. You can use nails or screws to secure the joints further. Make sure to pre-drill the holes to prevent splitting the wood. Alternatively, if you used dovetail or box joints, the glue should provide sufficient strength, and additional fasteners may not be necessary.
Once the drawer is assembled, check for any gaps or irregularities. If needed, use a chisel, hand plane, or sandpaper to level and smooth the surfaces. This step ensures a professional and flawless appearance.
Finally, sand the entire surface of the drawer to achieve a smooth and splinter-free finish. Start with a coarse grit sandpaper and gradually move to finer grits until the surface is silky and ready for finishing.
Congratulations! You have successfully assembled your drawer. Take a moment to admire your handiwork and envision how it will enhance your furniture piece.
It’s important to note that woodworking can have multiple approaches and techniques. Adapt and modify the assembly process based on your specific project and woodworking style.
Next, we will move on to the finishing touches and sanding of the drawer to ensure a beautiful and professional end result.
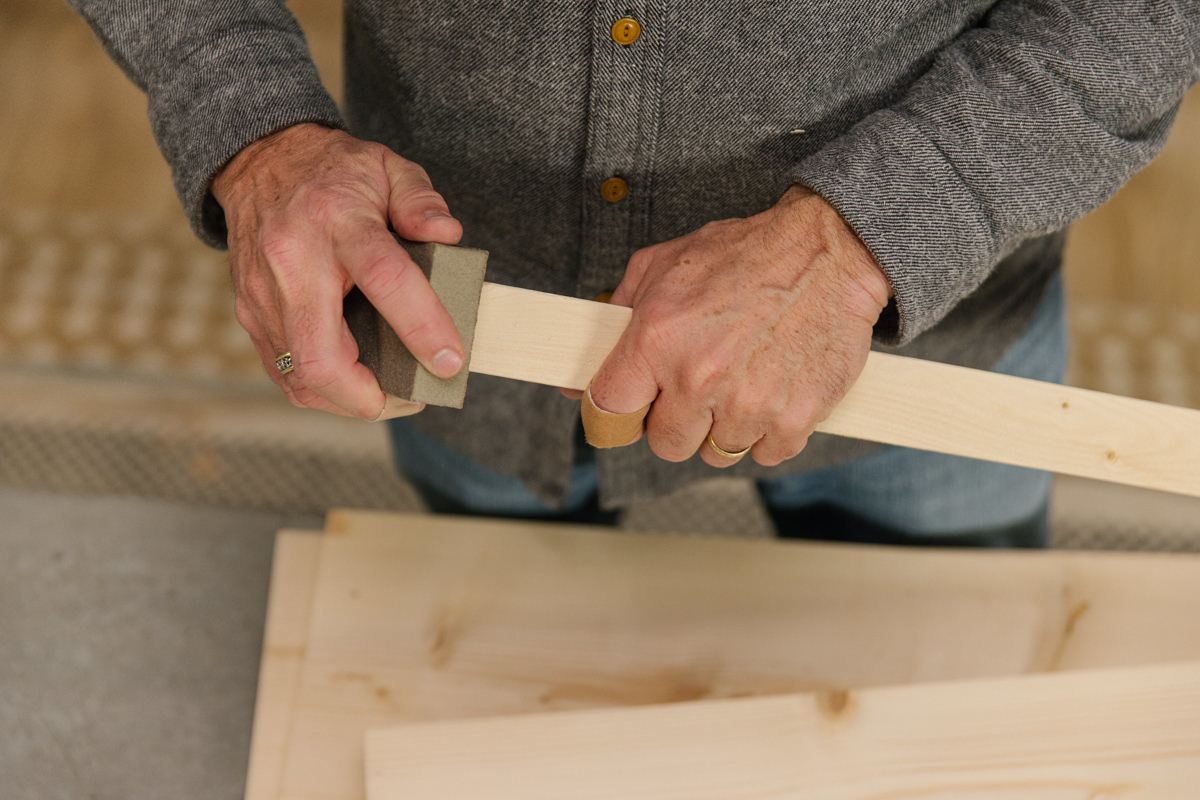
Finishing and Sanding
Finishing and sanding are the final steps in creating a beautiful and polished drawer. These steps not only enhance the appearance of the wood but also protect it from moisture, scratches, and other forms of wear and tear.
Before applying any finish, it’s essential to ensure that the surface of the drawer is smooth and free of imperfections. Begin by sanding the entire surface using a medium-grit sandpaper, such as 120 or 150 grit. Sand with the grain of the wood, applying even pressure to achieve a consistent result. This initial sanding will help remove any rough spots, tool marks, or unevenness.
After the initial sanding, progress to a finer grit sandpaper, such as 220 or 320 grit. This finer sandpaper will help further smooth the surface and prepare it for the finish application. Again, sand with the grain and make sure to remove any sanding marks or scratches from the previous sanding stage.
If you desire an even smoother surface, you can continue sanding with even higher grits, such as 400 or 600. This extra step will result in an incredibly smooth and velvety finish. However, keep in mind that the choice of grit depends on personal preference and the type of finish you plan to apply.
When sanding, be sure to pay extra attention to the edges and corners of the drawer. They tend to be areas where imperfections or roughness can occur. Use a sanding block or a folded piece of sandpaper to maintain consistency and prevent uneven sanding.
Once you are satisfied with the smoothness of the surface, it’s time to choose and apply a finish. The type of finish will depend on personal preference and the intended use of the drawer. Common options include varnishes, stains, oils, or lacquers.
If you prefer a natural look, you can choose a clear varnish or shellac that will protect the wood while allowing the natural beauty of the grain to shine through. If you want to add color or depth to the wood, consider using a stain or dye before applying the protective finish. Always follow the manufacturer’s instructions for applying the finish, ensuring even coverage and proper drying time between coats.
After the finish has dried, give the surface a final light sanding with a very fine grit sandpaper, such as 400 or 600, to remove any imperfections or dust particles that may have settled on the surface.
By thoroughly sanding and applying an appropriate finish, you will bring out the natural beauty of the wood and provide long-lasting protection for your handcrafted drawer.
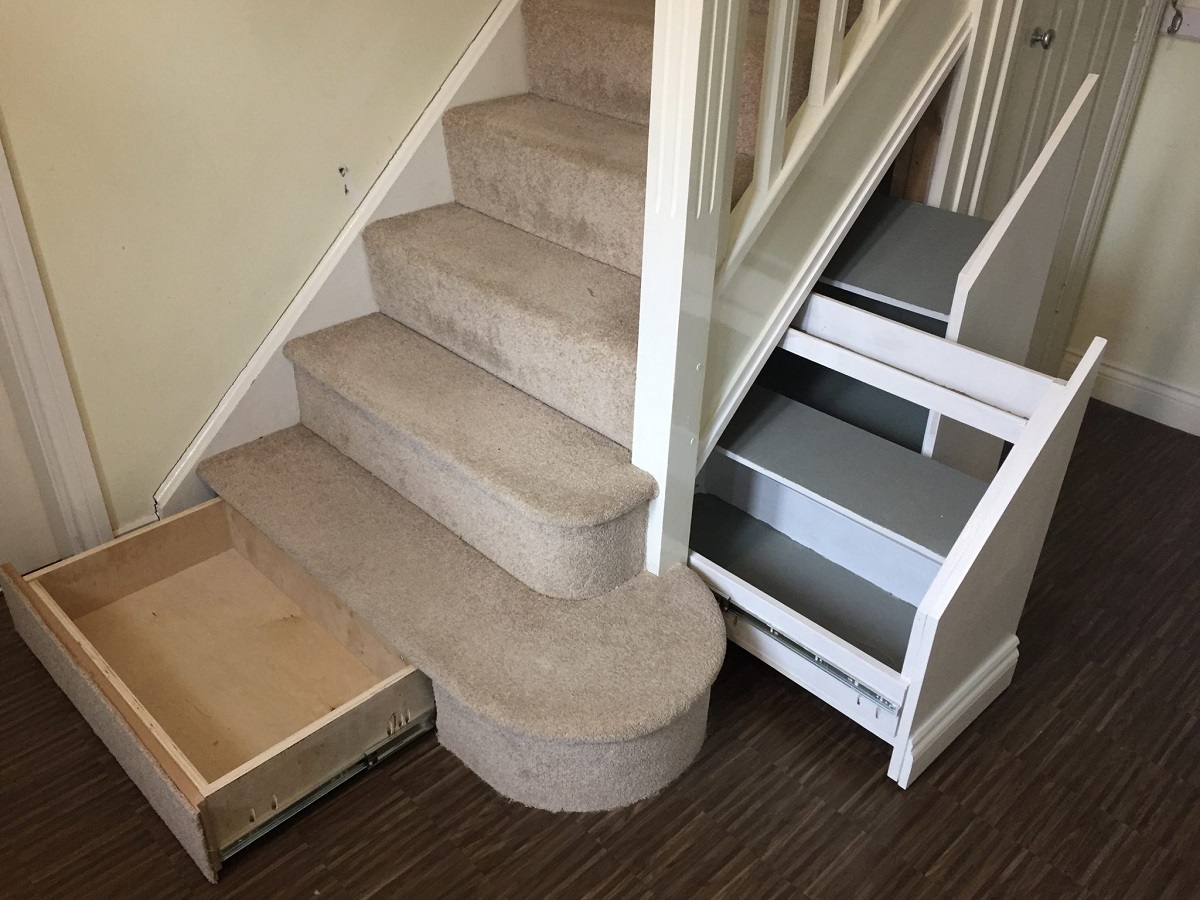
Installing the Drawer
Installing the drawer is the final step in completing your handcrafted masterpiece. Proper installation ensures that the drawer functions smoothly and securely within its intended furniture piece.
Before installing the drawer, ensure that the opening or cavity in the furniture piece is clean and free from any debris or obstructions. Make any necessary adjustments to the opening, ensuring that it is square and level.
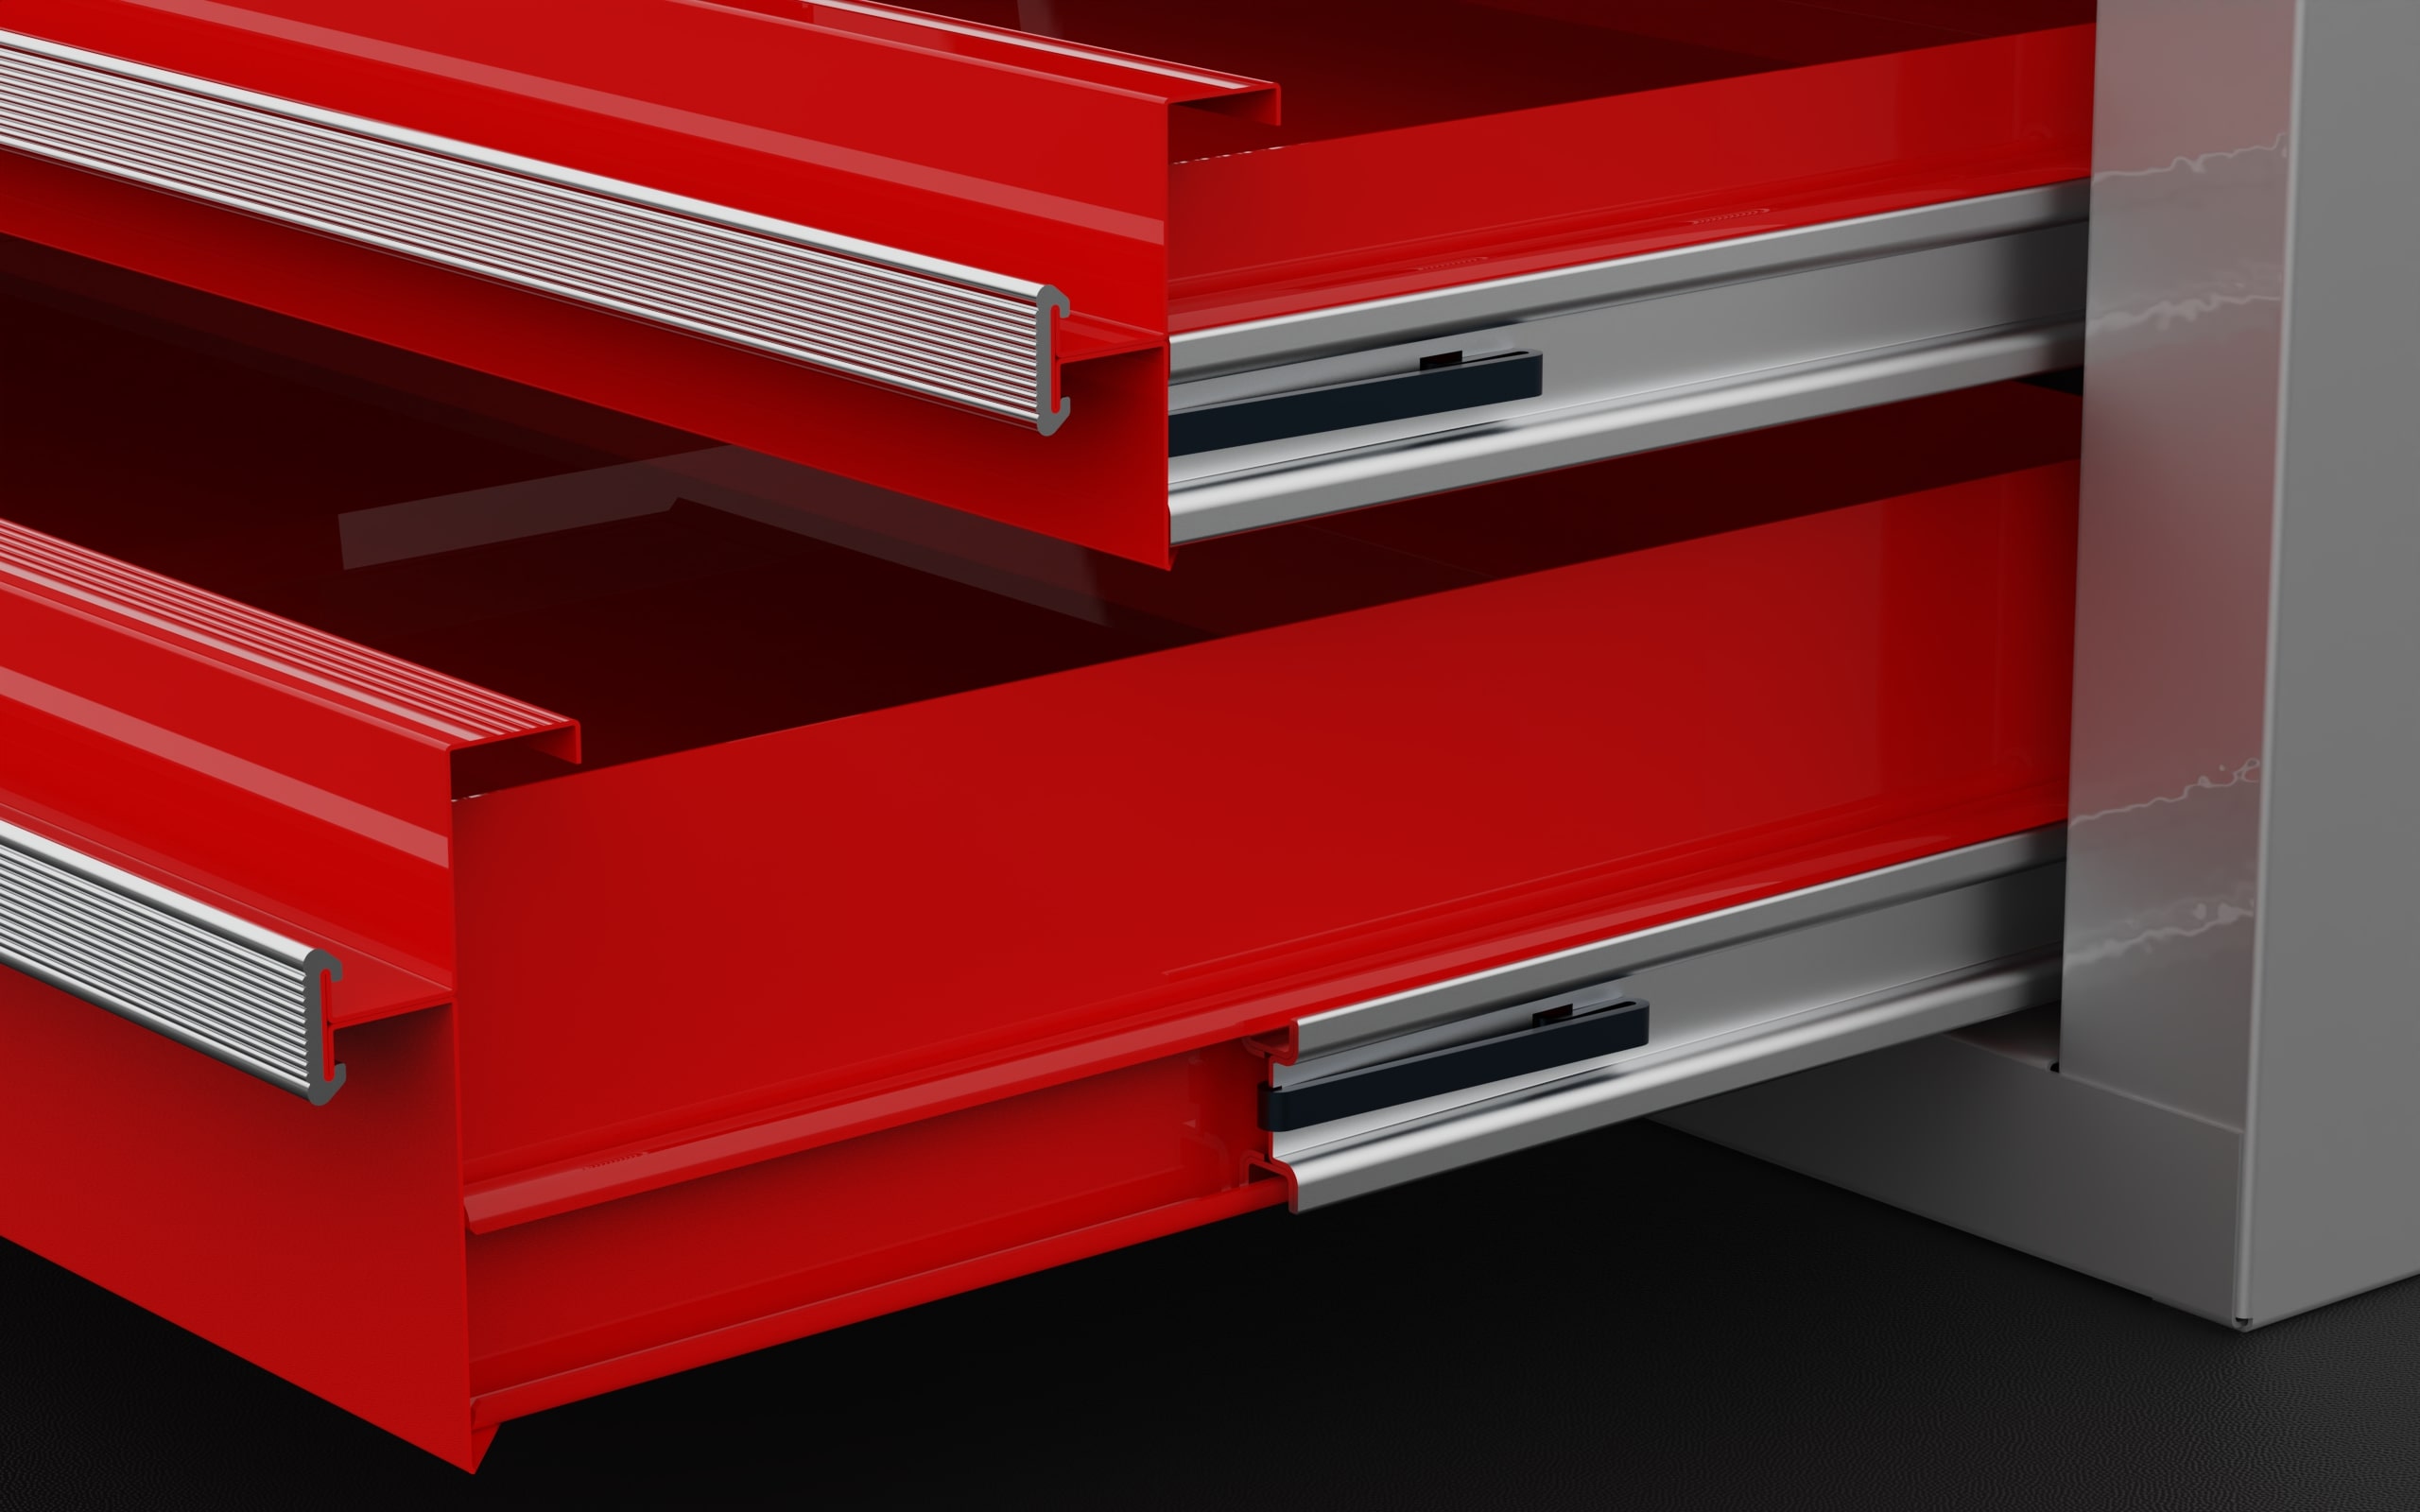
Next, determine the appropriate slides or runners for your drawer. There are several types of drawer slides to choose from, including side-mount slides, under-mount slides, and center-mount slides. Select the slides that match the size and weight of your drawer, as well as the specific requirements of your furniture piece.
Carefully follow the manufacturer’s instructions for installing the drawer slides. Typically, this involves attaching the slides to the sides of the drawer box and then securing the corresponding slides to the inside of the furniture piece. Use a level and measuring tape to ensure that the slides are installed evenly and aligned properly.
Once the slides are securely attached, carefully fit the drawer into the opening. Gently slide it in, making sure that it glides smoothly along the slides. Test the movement of the drawer, ensuring that it opens and closes without any resistance. Make any necessary adjustments to the slides if the drawer is not moving freely.
Check the alignment of the drawer within the opening. Ensure that it sits flush with the front of the furniture piece and is centered within the opening. Adjust the slides or the position of the drawer if needed.
If your drawer includes a drawer front, use screws or other appropriate fasteners to attach it securely to the front of the drawer box. Take care to align the front evenly with the surrounding furniture piece and ensure that it opens and closes smoothly.
Test the drawer’s functionality by opening and closing it multiple times. Ensure that it operates smoothly and doesn’t wobble or bind. If any issues arise, inspect the slides and make any necessary adjustments to ensure proper alignment and movement.
With the drawer successfully installed, step back and admire your handiwork. Your beautifully crafted drawer is now ready to provide functional storage and add aesthetic appeal to your furniture piece.
Remember, the installation process may vary depending on the specific type of slides and furniture piece you are working with. Always consult the manufacturer’s instructions and take the necessary precautions to ensure a safe and secure installation.
Conclusion
Building a drawer with hand tools allows you to create a custom and functional piece that showcases your woodworking skills. Throughout this article, we’ve covered the key steps involved in constructing a drawer, from choosing the right materials to installing it in your furniture piece.
By carefully selecting high-quality materials, measuring accurately, and employing appropriate joinery techniques, you can create a drawer that is not only visually appealing but also sturdy and durable.
Using hand tools adds a unique touch to the woodworking process, allowing you to connect with the craft and create something truly special. While power tools can provide efficiency, hand tool woodworking offers a deeper understanding and appreciation for the artistry of woodworking.
Throughout the construction process, remember to prioritize safety. Always wear appropriate protective gear, exercise caution when using sharp tools, and work methodically to avoid accidents.
Once your drawer is assembled and installed, taking the time to sand and finish the wood will add a professional and polished touch. Choose a finish that suits your preferences and the requirements of your project, whether it’s a clear varnish to highlight the natural beauty of the wood or a stain to add color and depth.
Lastly, step back and admire your handiwork. A well-built drawer not only enhances the functionality of your furniture piece but also reflects your craftsmanship and attention to detail. Enjoy the satisfaction of knowing that you have created something with your own hands that will be useful and appreciated for years to come.
Remember, woodworking is a continuous learning process. Embrace the opportunity to experiment with different techniques, expand your skillset, and refine your woodworking abilities. Whether you’re a seasoned woodworker or just starting out, building a drawer with hand tools is an enriching and rewarding experience.
So, gather your tools, select your materials, and embark on the journey of crafting a beautiful and functional drawer. Let your creativity and passion for woodworking guide you as you create a truly one-of-a-kind piece that will stand the test of time.
Frequently Asked Questions about How To Build A Drawer With Hand Tools
Was this page helpful?
At Storables.com, we guarantee accurate and reliable information. Our content, validated by Expert Board Contributors, is crafted following stringent Editorial Policies. We're committed to providing you with well-researched, expert-backed insights for all your informational needs.


0 thoughts on “How To Build A Drawer With Hand Tools”