Articles
How To Operate A VEVOR Slush Machine
Modified: December 7, 2023
Learn the step-by-step process of operating a VEVOR slush machine with our comprehensive articles. Master the art of slush making and create refreshing drinks effortlessly.
(Many of the links in this article redirect to a specific reviewed product. Your purchase of these products through affiliate links helps to generate commission for Storables.com, at no extra cost. Learn more)
Introduction:
Welcome to the world of frozen delights! If you’re the proud owner of a VEVOR slush machine, you’re in for a treat. This versatile appliance allows you to create refreshing slushies, frozen cocktails, and other icy beverages in the comfort of your own home or business.
Whether you’re looking to beat the summer heat or add a special touch to your next party, operating the VEVOR slush machine is a breeze. In this comprehensive guide, we’ll walk you through the necessary steps to get started, from setting up the machine to pouring the perfect slush mix.
But before we dive into the operational details, let’s cover some important safety precautions. It’s crucial to ensure that you’re using the slush machine correctly and taking appropriate measures to protect yourself and others.
Key Takeaways:
- Master the art of creating refreshing slushies and frozen beverages with the VEVOR slush machine. Prioritize safety, understand the components, and follow the operational steps for a delightful frozen beverage experience.
- Embrace experimentation and creativity while operating the VEVOR slush machine. Adjust temperature and mixing speed, troubleshoot common issues, and maintain the machine for consistent and delicious slushies.
Read more: How To Clean VEVOR Slush Machine
Safety Precautions:
When operating any appliance, including the VEVOR slush machine, it’s essential to prioritize safety. By following these precautions, you can minimize the risk of accidents and ensure a smooth and enjoyable slush-making experience:
1. Read the Manual:
Before using the VEVOR slush machine, carefully read the instruction manual provided by the manufacturer. Familiarize yourself with the machine’s features, functions, and safety guidelines.
2. Placement:
Position the slush machine on a stable and level surface, away from any flammable materials or direct sunlight. This will prevent any potential accidents or damage to the machine.
3. Power Supply:
Ensure that the slush machine is connected to a grounded electrical outlet that matches its voltage requirements. Avoid using extension cords or power adapters, as they can lead to overheating or electrical hazards.
Read more: How To Operate A Washing Machine
4. Liquid Ingredients Only:
Only use liquid ingredients that are recommended for the slush machine. Avoid using solid foods, ice cubes, or other non-liquid items, as they can damage the machine’s components and affect its performance.
5. Temperature Awareness:
Be cautious when working with hot liquids or slush mixtures. Allow them to cool down before handling or pouring them into the machine. This will prevent burns or other injuries.
6. Cleaning and Maintenance:
Regularly clean and maintain the slush machine according to the manufacturer’s guidelines. This includes unplugging the machine before cleaning, using non-abrasive cleaning solutions, and never submerging the machine in water.
By adhering to these safety precautions, you can ensure a safe and enjoyable slush-making experience with the VEVOR slush machine. Now that we’ve covered the safety basics, let’s delve into the components of the machine itself.
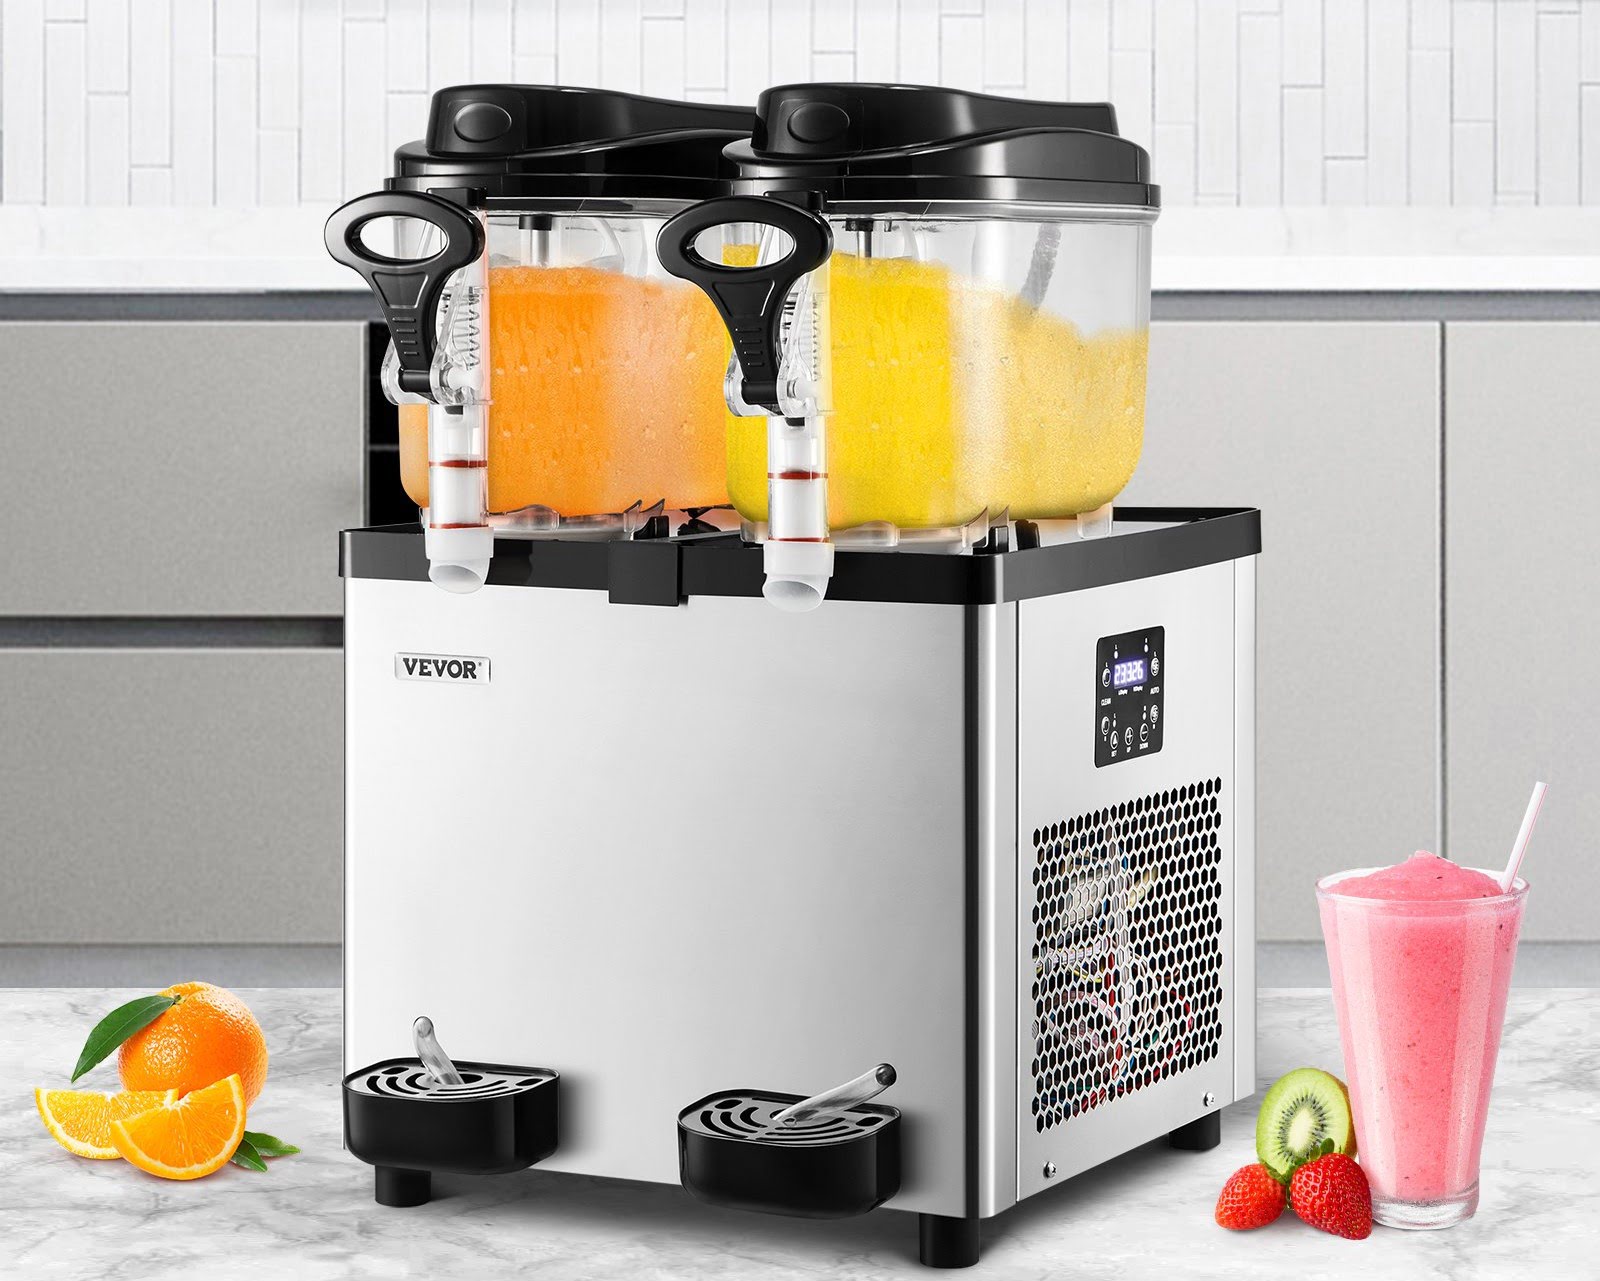
Components of the VEVOR Slush Machine:
Before you start operating the VEVOR slush machine, it’s important to familiarize yourself with its various components. Understanding the machine’s parts will help you in the setup process and ensure proper functioning. Here are the key components you’ll find in a typical VEVOR slush machine:
1. Machine Body:
The machine body is the main structure of the slush machine, usually made of durable stainless steel. It houses the inner components and provides stability and support.
2. Mixing Chamber:
The mixing chamber is where the slush mixture is stored and churned. It’s typically a transparent or translucent container with enough capacity to hold a significant volume of liquid.
3. Dispensing Valve:
The dispensing valve, located at the bottom of the mixing chamber, allows you to control the flow of the slush mixture. It has a handle or lever that you can slide or twist to dispense the desired amount of liquid.
4. Control Panel:
The control panel is usually found on the front or top of the machine and houses the various control buttons or knobs. It allows you to adjust settings such as temperature, mixing speed, and time.
5. Temperature Display:
A temperature display is often included on the control panel, indicating the current temperature of the slush mixture in the machine. This helps you monitor and adjust the temperature as needed.
6. Mixing Paddle or Agitator:
The mixing paddle or agitator is an essential component that stirs and blends the slush mixture. It can be a rotating paddle or an oscillating arm, ensuring a consistent and smooth texture.
7. Lid or Cover:
A lid or cover fits securely on top of the mixing chamber, preventing any contaminants from entering the slush mixture. It also helps maintain the desired temperature and prevents spills during transport.
These are the main components that make up the VEVOR slush machine. Each component plays a crucial role in the slush-making process. Now that you understand the machine’s parts, it’s time to move on to the next step: operating the VEVOR slush machine.
Operating the VEVOR Slush Machine:
Now that you’re familiar with the components of the VEVOR slush machine, it’s time to dive into the operational steps. Follow these instructions to ensure a seamless slush-making experience:
Read more: How To Operate A Lux Thermostat
1. Setting Up the Machine:
Start by placing the slush machine on a stable and level surface. Ensure that the machine is properly connected to a grounded electrical outlet. Check that all the components, such as the mixing chamber and dispensing valve, are securely attached.
2. Preparing the Slush Mix:
Prepare your slush mixture of choice. This can be a combination of juice, syrup, or any other liquid ingredients. Follow the recipe instructions and ensure that the mixture is well-chilled before pouring it into the machine.
3. Pouring the Slush Mix:
Gently pour the prepared slush mix into the mixing chamber of the slush machine. Be mindful not to overfill the chamber, as the mixture expands during the freezing process. Leave enough headspace to allow for proper mixing and freezing.
4. Adjusting the Temperature and Mixing Speed:
Use the control panel on the slush machine to adjust the temperature and mixing speed according to your preference. Lower temperatures and slower mixing speeds will yield a firmer slush texture, while higher temperatures and faster mixing speeds will result in a softer consistency.
Read more: How To Install VEVOR Handrail
5. Start the Machine:
Once you’ve set the desired temperature and mixing speed, start the slush machine by pressing the appropriate button or turning the knob. The machine will begin the freezing and mixing process, transforming your slush mix into a delightful frozen beverage.
6. Monitor and Adjust:
Keep an eye on the machine throughout the slush-making process. Check the temperature display regularly to ensure that it remains within the desired range. If needed, adjust the settings to achieve the perfect slush texture.
7. Dispensing the Slush:
Once the slush is frozen and well-mixed, it’s time to dispense it. Slide or twist the dispensing valve handle to control the flow of the slush. Fill your desired serving vessels, such as cups or glasses, with the refreshing slushy goodness.
8. Cleaning and Maintenance:
After enjoying your slushy treats, be sure to properly clean and maintain the slush machine. Follow the manufacturer’s instructions to dismantle and clean the various components. Regular maintenance will ensure the longevity and optimal performance of the machine.
That’s it! With these simple steps, you’re now equipped to operate the VEVOR slush machine and create delectable frozen beverages. Experiment with different flavors and serve up refreshing slushies to impress your guests or customers. Cheers to a delightful slush-making journey!
Read more: How To Use VEVOR Heat Press
Setting Up the Machine:
Before you can begin creating delicious slushies and frozen beverages, it’s important to properly set up the VEVOR slush machine. Follow these steps to ensure a smooth and efficient setup process:
1. Choose the Right Location:
Select a suitable location for your slush machine. It’s important to find a flat and stable surface that can support the weight of the machine. Ensure the area is well-ventilated and away from direct sunlight or heat sources.
2. Unpack and Inspect:
Carefully unpack the slush machine and inspect all the components. Look for any signs of damage or loose parts. If you notice any issues, contact the manufacturer for assistance before proceeding with the setup.
3. Clean the Machine:
Before using the slush machine for the first time, it’s crucial to clean it thoroughly. Use a mild dish soap and warm water to clean the mixing chamber, dispensing valve, and any removable components. Rinse them well and dry them thoroughly before reassembling.
Read more: How To Use VEVOR Moonshine Still
4. Connect the Power Supply:
Ensure that the slush machine is powered off and unplugged. Connect the power cord to a grounded electrical outlet that matches the machine’s voltage requirements. Avoid using extension cords, as they can affect the machine’s performance.
5. Assemble the Components:
Follow the manufacturer’s instructions to assemble the various components of the slush machine. This typically includes attaching the mixing chamber, lid, and dispensing valve securely. Double-check that all connections are snug and secure.
6. Add Slush Mix:
Prior to pouring the slush mix into the machine, ensure that it is well-chilled and thoroughly mixed. Follow the manufacturer’s guidelines for the recommended slush mix ratio and flavor options. Pour the slush mix into the mixing chamber, leaving enough space for expansion during freezing.
7. Turn On the Machine:
Once everything is set up and the slush mix is in place, it’s time to turn on the machine. Locate the power switch or button and switch it on. The machine will start freezing and mixing the slush mix, gradually transforming it into a frozen beverage.
Read more: How To Operate A Cuisinart Food Processor
8. Adjust Settings:
Refer to the machine’s user manual to understand the control panel and adjust the temperature and mixing speed as desired. Experiment with different settings to achieve the perfect slush consistency for your preference.
9. Monitor and Troubleshoot:
Keep an eye on the machine as it operates. Monitor the temperature display and ensure that it remains within the recommended range. If you encounter any issues or have concerns, consult the troubleshooting section of the user manual or contact the manufacturer’s support team.
By following these steps, you’ll be able to set up your VEVOR slush machine with ease. Once the machine is up and running, you can start creating icy and refreshing slushies to enjoy or serve to others. So, gather your favorite slush mix flavors and get ready for a delightful frozen beverage experience!
Preparing the Slush Mix:
One of the key factors in creating delicious slushies with your VEVOR slush machine is preparing the slush mix properly. The slush mix serves as the base for your frozen beverages and can be customized with various flavors and ingredients. Follow these steps to prepare the perfect slush mix:
1. Choose the Right Ingredients:
Start by selecting the ingredients that will form the base of your slush mix. This can include fruit juice, syrup, carbonated beverages, or a combination of these. Ensure that the ingredients are of high quality and free from any additives or preservatives that might affect the texture or taste of the slush.
Read more: Where Is The VEVOR Company Located
2. Measure the Ingredients:
Using a measuring cup or scale, carefully measure the required quantities of each ingredient. Follow the recipe or your own preferences to determine the desired ratios. Accurate measurements will help ensure a consistent and balanced slush mix.
3. Mix the Ingredients:
In a mixing bowl or pitcher, combine the measured ingredients. Stir or whisk them together until they are well blended. Make sure that any syrups or concentrates are fully dissolved in the liquid. This will ensure a smooth and uniform slush mix.
4. Chill the Slush Mix:
After mixing the slush ingredients, refrigerate the mixture for a sufficient amount of time. This allows the flavors to meld together and the mixture to cool down. The exact chilling time will depend on the recipe and the temperature of your refrigerator but aim for a minimum of two hours.
5. Test the Slush Mix:
Before pouring the slush mix into the VEVOR slush machine, it’s a good idea to taste it and make any necessary adjustments. You can add more flavoring, sweetener, or acidity according to your personal preference. Remember that the taste may become slightly subdued once it is frozen.
Read more: How To Operate Jacuzzi Hot Tub
6. Strain the Slush Mix (optional):
If desired, strain the slush mix to remove any pulp, seeds, or unwanted solids. This step is particularly useful when working with homemade fruit juice or using fresh fruits. Using a fine-mesh strainer or cheesecloth, strain the mixture into a clean container.
7. Allow the Slush Mix to Rest:
Before pouring the slush mix into the VEVOR slush machine, let it sit at room temperature for a few minutes. This allows the mix to come to a slightly higher temperature, which will help it freeze better in the machine and result in a smoother texture.
That’s it! By following these steps, you’ll have a well-prepared slush mix ready to be transformed into refreshing frozen beverages. Now, it’s time to pour the slush mix into the VEVOR slush machine and let it work its magic. Enjoy the process and get ready to indulge in icy goodness!
Pouring the Slush Mix:
Now that you have prepared the delicious slush mix, it’s time to pour it into your VEVOR slush machine. This step is crucial in ensuring that the slush mix freezes properly and results in a refreshing frozen beverage. Follow these instructions to pour the slush mix correctly:
1. Prepare the Mixing Chamber:
Before pouring the slush mix, make sure that the mixing chamber of your VEVOR slush machine is clean and dry. Remove the lid or cover from the chamber and set it aside. This will allow for easy access and prevent any spills during the pouring process.
2. Stir the Slush Mix:
Give the slush mix a gentle stir or swirl to ensure that all ingredients are well combined. This will help distribute any settling that may have occurred during the chilling period. It’s important to have a homogeneous slush mix for optimal freezing and texture.
3. Pour the Slush Mix Gradually:
Slowly and steadily pour the slush mix into the mixing chamber of the slush machine. Aim for a controlled and steady stream to prevent any overflow or splashing. Be mindful not to overfill the chamber, as the slush mix will expand during the freezing process.
4. Leave Headroom:
To allow for proper mixing and expansion during freezing, leave some headroom in the mixing chamber. It’s recommended to not fill the chamber beyond 75-80% of its capacity. This will ensure that there is enough space for the slush mix to churn and freeze without overflowing.
5. Avoid Overcrowding:
If you plan on making different flavors or variations of slush, avoid pouring multiple slush mixes into the same mixing chamber simultaneously. Overcrowding the chamber may lead to inconsistent freezing and mixing. It’s best to pour one slush mix at a time for optimal results.
Read more: How To Operate Blinds Without A Wand
6. Secure the Lid:
Once you have poured the slush mix into the mixing chamber, securely place the lid or cover back onto the machine. This will help maintain the desired temperature and prevent any contaminants from entering the slush mix during the freezing process.
7. Start the Machine:
Now that the slush mix is safely inside the mixing chamber and the lid is secured, it’s time to start the VEVOR slush machine. Locate the power button or switch, and turn it on. The machine will begin the freezing and mixing process, gradually transforming the slush mix into a delightful frozen beverage.
With these steps, you have smoothly poured the slush mix into your VEVOR slush machine. Now, all that’s left to do is wait for the magic to happen as the machine freezes and churns the slush mix. Get ready to enjoy the icy goodness of your homemade slushies and frozen delights!
Adjusting the Temperature and Mixing Speed:
The temperature and mixing speed are crucial factors in achieving the perfect consistency and taste of your slushies. The VEVOR slush machine allows you to adjust these settings according to your preferences. Here’s how to make the necessary adjustments:
1. Temperature Control:
Locate the temperature control feature on the control panel of your VEVOR slush machine. This can be in the form of a digital display or a dial. The temperature range can typically be adjusted between -2°C to -4°C (28°F to 24.8°F).
To make your slushies firmer, lower the temperature. If you prefer a softer texture, raise the temperature slightly. Keep in mind that extreme temperature changes can affect the freezing process and consistency of the slush mix, so adjust in small increments.
Read more: Where Is VEVOR Slicers Made
2. Mixing Speed Control:
Most VEVOR slush machines come with adjustable mixing speed settings. The mixing speed control can usually be found next to the temperature control on the control panel. It allows you to control how fast the mixing paddle or agitator rotates.
A slower mixing speed will result in a denser and firmer slush, while a faster speed will create a lighter and softer texture. Experiment with different mixing speeds to find the ideal consistency for your slushies.
3. Testing and Adjusting:
It’s a good idea to test the slush consistency periodically while adjusting the temperature and mixing speed settings. Take a sample of the slush from the mixing chamber and observe its texture. If it’s too icy or hard, decrease the temperature or increase the mixing speed. If it’s too soft or runny, try raising the temperature or lowering the mixing speed.
Make small adjustments and give the slush machine some time to stabilize before testing again. This will give you a better sense of how the adjustments impact the overall slush consistency.
4. Balance and Optimal Setting:
Finding the perfect balance of temperature and mixing speed may require some experimentation. Pay attention to the texture, consistency, and overall taste of the slushies you’re producing. Adjust the temperature and mixing speed settings incrementally until you achieve the desired results.
Remember that external factors, such as the room temperature and the ingredients in your slush mix, can also affect the slush consistency. Take note of any changes you make and the corresponding impact on the final product, and use that information as a reference for future batches.
By mastering the temperature and mixing speed adjustments, you can create slushies with the perfect texture and flavor. Enjoy the process of experimenting and fine-tuning, and delight in the refreshing frozen beverages that your VEVOR slush machine can produce.
Cleaning and Maintenance:
To keep your VEVOR slush machine in optimal condition and ensure hygienic operation, regular cleaning and maintenance are crucial. Follow these steps to effectively clean and maintain your slush machine:
Read more: How To Operate A Fujitsu Air Conditioner
1. Unplug the Machine:
Before beginning the cleaning process, always make sure that the slush machine is unplugged from the power source. This will prevent any electrical accidents or damage during the cleaning process.
2. Disassemble Removable Parts:
Remove any removable parts from the slush machine, such as the mixing chamber, lid, agitator, and dispensing valve. Carefully follow the manufacturer’s instructions for disassembling these parts. This will make cleaning more thorough and accessible.
3. Rinse and Wash:
Rinse the removable parts under warm water to remove any residual slush or syrup. Use a mild dish soap and a non-abrasive sponge or cloth to wipe and wash each part. Pay special attention to any areas that may have accumulated dirt or debris.
4. Clean the Mixing Chamber:
In the mixing chamber, use warm soapy water and a sponge or cloth to clean the interior surfaces thoroughly. Remove any slush residue or buildup on the sides and bottom of the chamber. Rinse the chamber with clean water to remove any soap residue.
Read more: How To Operate A Childproof Gas Bottle
5. Clean the Dispensing Valve:
The dispensing valve is a critical component that requires regular cleaning. Disassemble the valve according to the manufacturer’s instructions. Clean each part individually with warm water and a brush or cloth. Pay attention to removing any clogs or buildup that may affect the smooth dispensing of the slush.
6. Wipe the Exterior:
Using a damp cloth, wipe down the external surfaces of the slush machine. This includes the control panel, outer body, and any other visible parts. Remove any spills, stains, or residue that may have accumulated during use.
7. Dry and Reassemble:
Thoroughly dry all the cleaned parts, both the removable components and the slush machine’s body. Ensure that there is no moisture remaining before reassembling the machine. Follow the manufacturer’s instructions to accurately reassemble the parts, ensuring a secure fit.
8. Maintenance Tips:
Regular maintenance can help prolong the lifespan of your slush machine. Here are some additional maintenance tips:
- Regularly wipe and clean the control panel to prevent dust or grime buildup.
- Inspect the power cord for any signs of damage, and replace it if necessary.
- Periodically check the sealing gaskets or O-rings and replace them if worn out.
- Refer to the manufacturer’s guidelines for any specific maintenance or lubrication requirements.
By following these cleaning and maintenance practices, your VEVOR slush machine will stay in excellent condition, ensuring optimal performance and hygienic operation. Regular cleaning will prevent clogs, maintain the integrity of the ingredients, and deliver consistent and delicious slushies with every use.
Read more: How To Operate A Childproof Gas Bottle
Troubleshooting Common Issues:
While the VEVOR slush machine is designed for smooth operation, occasional issues may arise. Here are some common problems that users may encounter while using the slush machine, along with possible solutions:
1. Slush Not Freezing:
If the slush mix is not freezing properly, check the following:
- Ensure that the slush mix is well-chilled before pouring it into the machine.
- Adjust the temperature setting to a lower setting for a firmer freeze.
- Verify that the mixing paddle or agitator is functioning properly. Clean or replace if necessary.
- Check for any obstructions or blockages in the dispensing valve or mixing chamber.
2. Slush Too Thick or Thin:
If the slush consistency is not as desired, consider the following troubleshooting steps:
- Adjust the mixing speed to increase or decrease the amount of air incorporation.
- Try adjusting the temperature setting to achieve the desired texture.
- Review the slush mix recipe and ensure accurate measurements and ingredient ratios.
- If using fresh fruits or pulp-based mixes, strain the mixture to remove any solids that may affect the thickness.
3. Machine Making Unusual Noise:
If you notice unusual noises coming from the slush machine, take the following steps:
- Check that all components are properly assembled and secure.
- Inspect the mixing paddle or agitator for any damage or loose parts. Replace if necessary.
- Clean the machine thoroughly to remove any ice or debris that may be causing friction or blockages.
- Verify that the slush machine is on a stable surface and not vibrating excessively.
Read more: How To Operate A Childproof Gas Bottle
4. Dispensing Issues:
If there are problems with the slush dispensing process, try the following solutions:
- Ensure that the dispensing valve is fully closed before starting the freezing process.
- Clean the dispensing valve and any associated parts to remove any clogs or blockages.
- Verify that the dispensing valve handle or lever moves freely and is not stuck or jammed.
- If the slush is dispensing too slowly, adjust the temperature to a slightly higher setting.
5. Machine Not Powering On:
If the slush machine is not powering on, consider these troubleshooting steps:
- Check that the machine is properly plugged into a functioning power outlet.
- Inspect the power cord for any damage or fraying. If found, replace the power cord.
- Check the circuit breaker or fuse box to ensure that there is power supply to the outlet.
- Contact the manufacturer’s support team for further assistance if the issue persists.
If you encounter any other issues or problems that are not covered here, refer to the instruction manual provided by the manufacturer. It often contains a comprehensive troubleshooting section with specific solutions for different scenarios. Remember to follow all safety precautions and guidelines while troubleshooting or seeking assistance.
By troubleshooting and addressing common issues promptly, you can ensure a smooth slush-making experience with your VEVOR slush machine. With a little troubleshooting know-how, you’ll be back to enjoying refreshing frozen beverages in no time!
Conclusion:
Congratulations! You’ve now become well-versed in operating your VEVOR slush machine, from setting it up to troubleshooting common issues. With this knowledge, you can confidently create an array of delicious slushies and frozen beverages to delight yourself, your family, and your guests.
Remember to prioritize safety by following the recommended precautions and reading the instruction manual thoroughly. This will ensure that you can enjoy the slush machine’s capabilities while keeping yourself and others protected from potential accidents.
Understanding the components of the VEVOR slush machine is essential for efficient operation. The machine body, mixing chamber, dispensing valve, control panel, and mixing paddle all work together to create the perfect slushy texture and taste. Familiarize yourself with these components and their functionalities to optimize your slush-making experience.
The process of operating the VEVOR slush machine involves steps such as setting up the machine, preparing the slush mix, pouring it into the mixing chamber, adjusting the temperature and mixing speed, and cleaning and maintaining the machine regularly. By following these steps, you can ensure that your slushies turn out perfect every time.
Throughout your slush-making journey, don’t be afraid to experiment with different flavors, ratios, and techniques. Fine-tune the temperature and mixing speed to adapt to your personal preferences. Have fun and get creative, whether you’re making slushies for a party or adding a delightful touch to your business offerings.
Finally, remember the importance of proper cleaning and maintenance. Regularly clean the slush machine, inspect the components, and address any issues promptly. By doing so, you’ll enjoy consistent performance and extend the lifespan of your VEVOR slush machine.
Now that you’re equipped with the knowledge and skills to make the most of your VEVOR slush machine, it’s time to let your imagination run wild. Delight in the refreshing and delicious slushies you create, and enjoy sharing these icy treats with others.
Cheers to your slush-making adventures with your VEVOR slush machine!
Frequently Asked Questions about How To Operate A VEVOR Slush Machine
Was this page helpful?
At Storables.com, we guarantee accurate and reliable information. Our content, validated by Expert Board Contributors, is crafted following stringent Editorial Policies. We're committed to providing you with well-researched, expert-backed insights for all your informational needs.
0 thoughts on “How To Operate A VEVOR Slush Machine”