Articles
How To Paint Steel Siding
Modified: January 7, 2024
Learn the best techniques and step-by-step instructions for painting steel siding in our comprehensive articles. Gain valuable insights and achieve professional results.
(Many of the links in this article redirect to a specific reviewed product. Your purchase of these products through affiliate links helps to generate commission for Storables.com, at no extra cost. Learn more)
Introduction
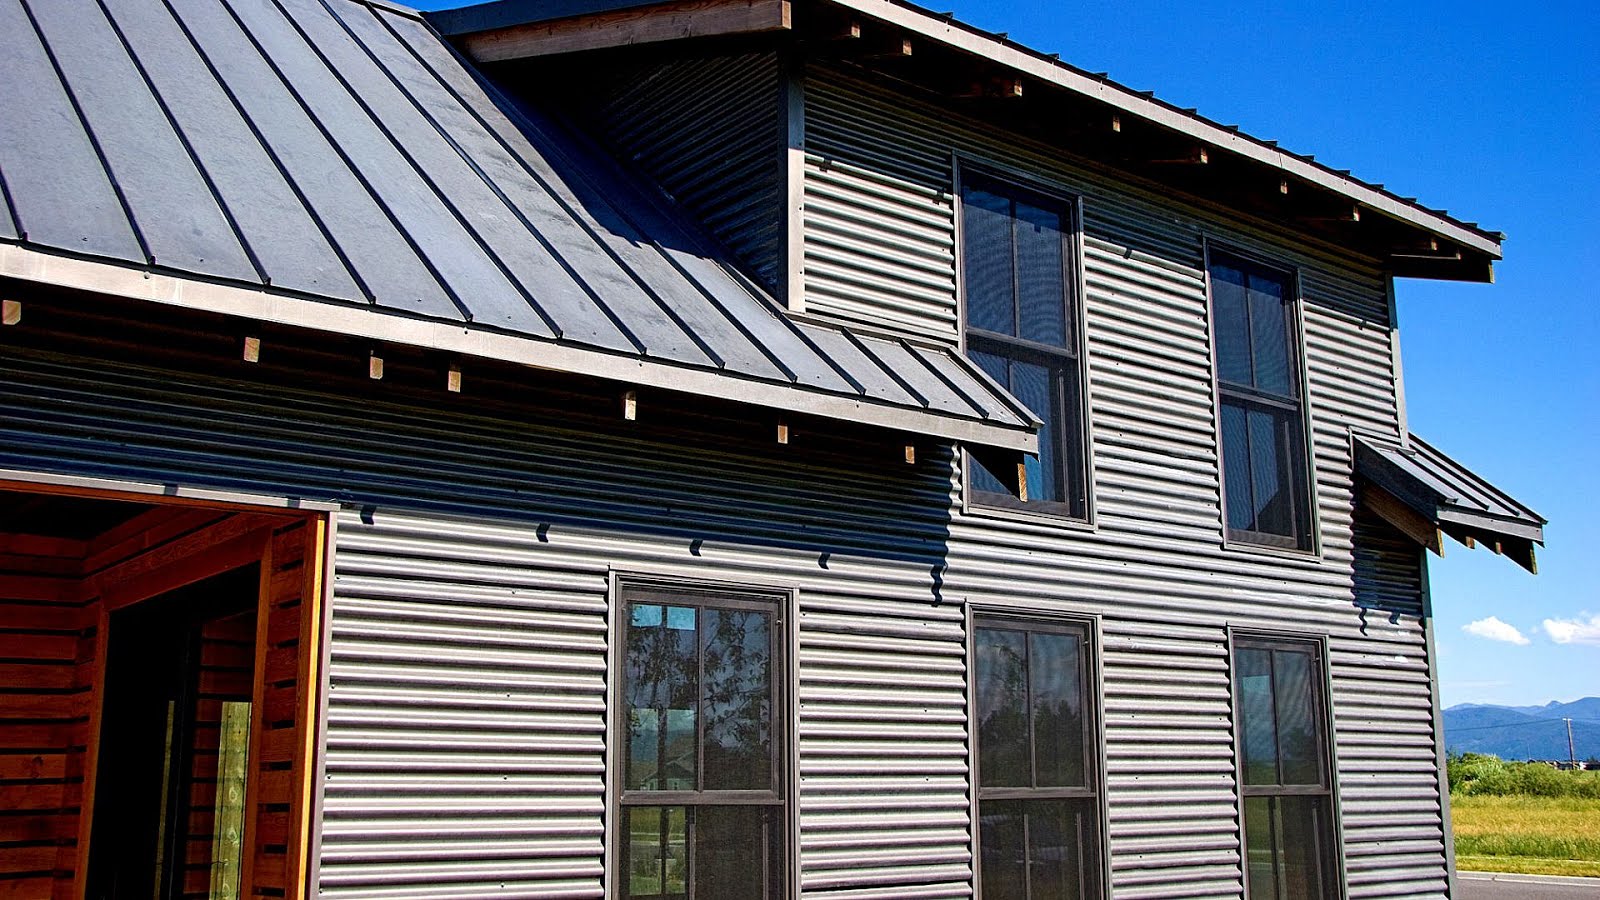
When it comes to updating the exterior of your home, painting the steel siding can make a dramatic difference in improving its appearance and protecting it from the elements. Steel siding offers durability and longevity, but over time, it may start to fade, chip, or develop rusty spots. By painting it, you can give your home a fresh, new look while extending the lifespan of the siding.
In this article, we will guide you through the process of painting steel siding, from selecting the right paint and equipment to properly preparing the surface and applying the paint. We will also provide tips on maintaining and touching up the paint to ensure long-lasting results.
Before diving into the painting process, it’s important to consider a few factors. First, check if your homeowners’ association or local regulations have any restrictions on exterior color choices. Additionally, be mindful of the weather conditions during the painting process. It’s recommended to choose a time when the weather is dry, with mild temperatures, to allow for optimal paint adhesion and drying.
Now, let’s explore the step-by-step process of painting steel siding and transforming the look of your home!
Key Takeaways:
- Transform the look of your home by painting steel siding with high-quality exterior paint and proper preparation. Follow the step-by-step process for a professional, long-lasting finish.
- Maintain the appearance and protection of your steel siding by regularly cleaning, inspecting for damage, and performing timely touch-ups. Preserve the fresh, vibrant look for years to come.
Read more: How To Clean Steel Siding
Selecting the Right Paint and Equipment
Choosing the right paint and equipment is crucial for a successful steel siding painting project. Here are some key considerations:
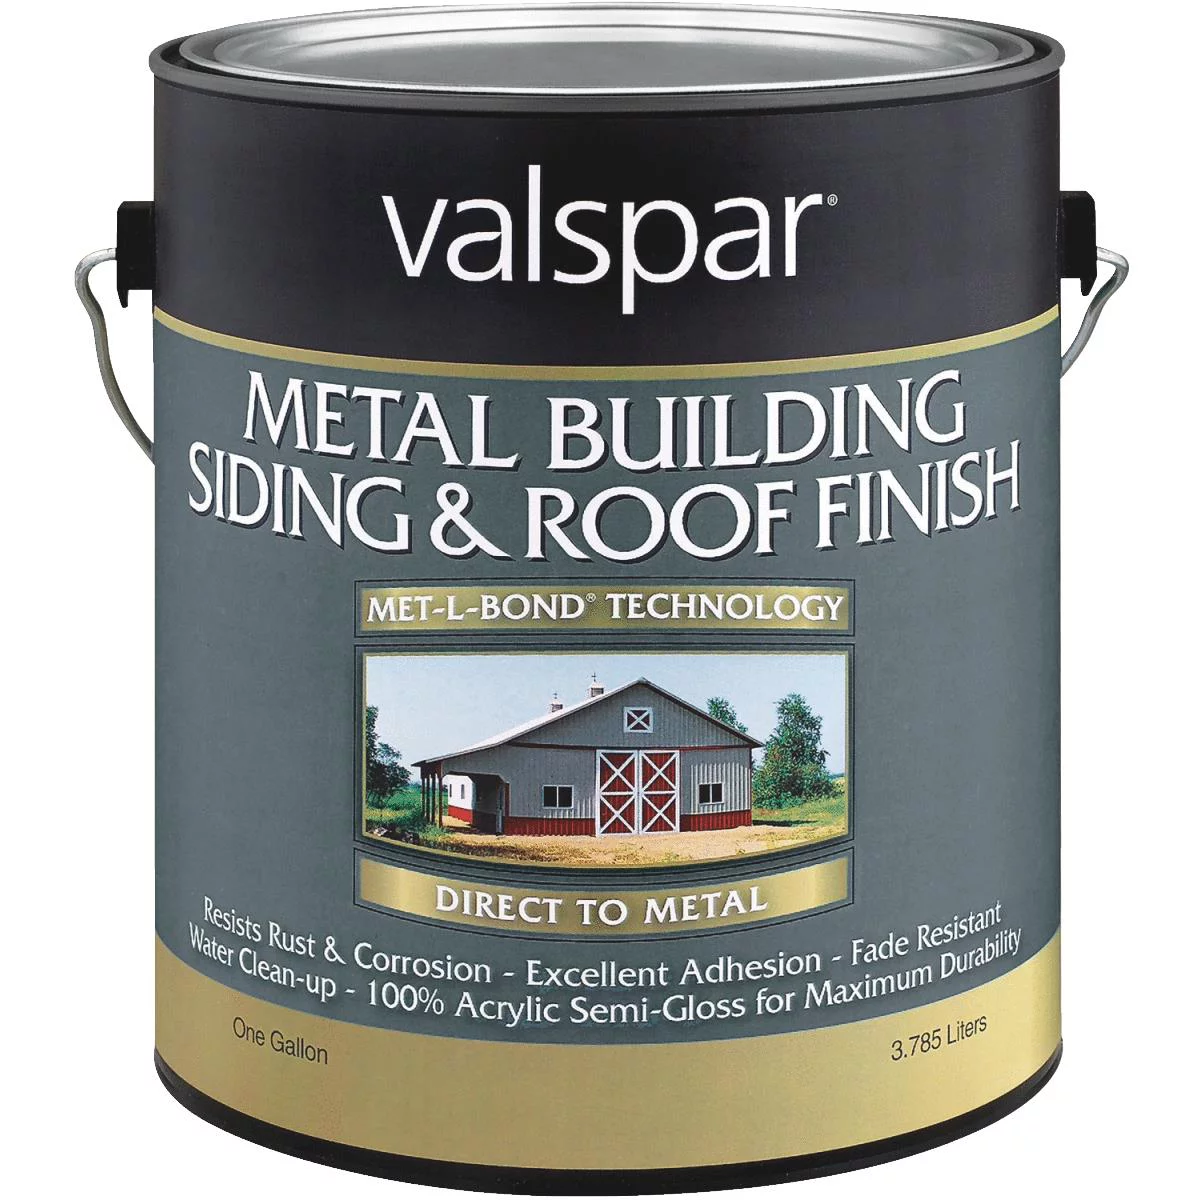
1. Paint Type: Opt for a high-quality exterior paint that is specifically formulated for metal surfaces. Look for paints that offer good adhesion, durability, and weather resistance. Acrylic latex paints are often recommended for steel siding as they provide excellent coverage and can withstand harsh weather conditions.
2. Color Selection: Selecting the right color for your steel siding can completely transform the look of your home. Consider factors such as the architectural style of your home, the surrounding environment, and your personal preferences. It’s a good idea to test a small area with the chosen paint color before committing to it.
3. Equipment: Here’s a list of essential equipment you’ll need for the project:
– Paint sprayer or roller: A paint sprayer can provide a smooth and even finish, covering large areas quickly. However, a roller can be a more practical option for smaller projects or if you prefer a more controlled application.
– Paintbrushes: Have a selection of brushes in different sizes for applying paint to hard-to-reach areas or for touch-ups.
– Drop cloths or plastic sheeting: Cover any nearby surfaces or plants to protect them from paint splatters.
– Painters tape: Use tape to mask off areas you don’t want to be painted, such as windows, doors, and trim.
– Safety gear: Wear gloves, safety goggles, and a respirator mask to protect yourself from paint fumes and any potential hazards.
It’s crucial to use high-quality equipment to ensure a professional and seamless paint job. Investing in good tools will make the process easier and yield better results.
Preparing the Steel Siding
Properly preparing the steel siding before painting is essential to ensure a smooth and long-lasting finish. Follow these steps to prepare the surface:
1. Clean the Surface: Start by cleaning the siding to remove any dirt, debris, or mildew. Use a mild detergent diluted in water and a soft-bristle brush or sponge to scrub the surface. Rinse thoroughly with clean water and allow it to dry completely before moving on to the next step.
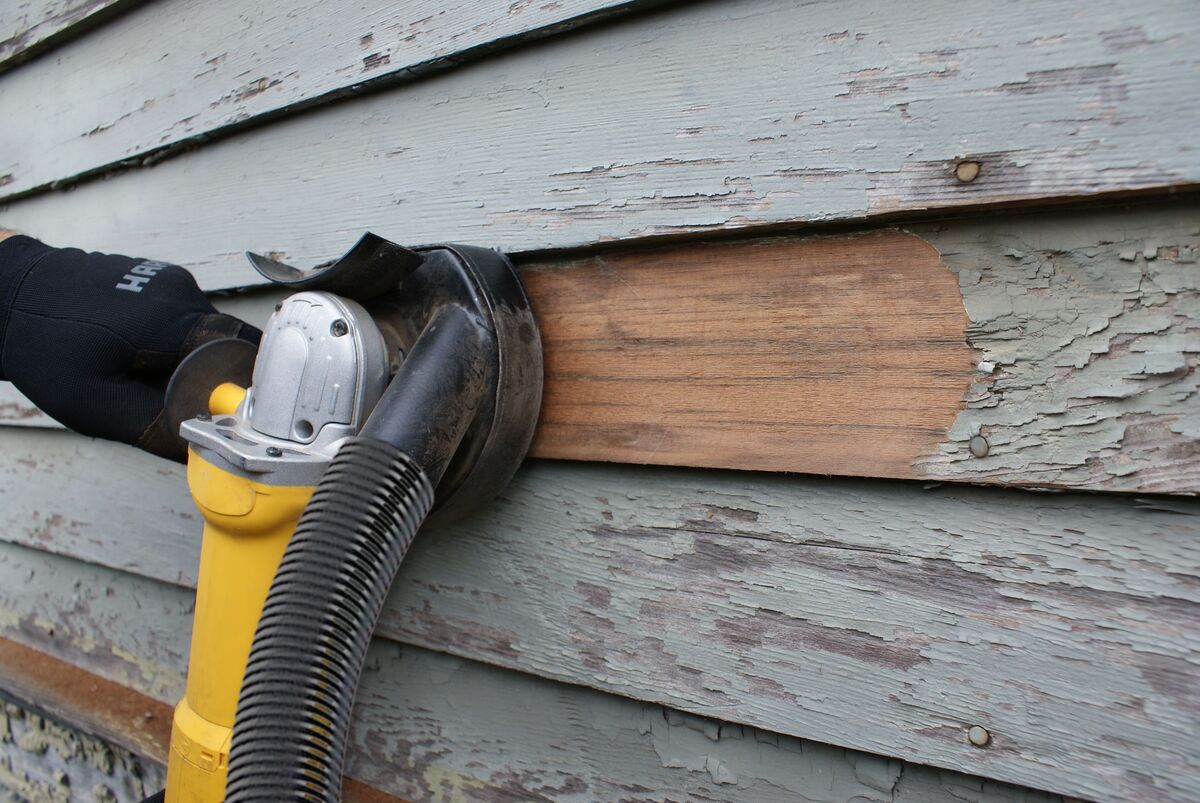
2. Remove Any Loose Paint or Rust: Inspect the surface for any loose or peeling paint. Use a scraper or wire brush to remove the loose paint and smooth out any rough edges. If there are any rust spots, use sandpaper or a wire brush to remove the rust until you reach bare metal. Wipe away any dust or debris with a clean cloth.
3. Repairing any Damaged Areas: Inspect the siding for any dents, holes, or damaged areas. Use a suitable filler, such as auto body filler, to fill in any indentations or gaps. Smooth out the filler using a putty knife, following the manufacturer’s instructions. Allow it to dry and sand it lightly to achieve a smooth surface.
4. Prime the Steel Siding: Applying a primer is highly recommended to improve paint adhesion and ensure a uniform finish. Choose a primer specifically formulated for metal surfaces. Apply the primer according to the manufacturer’s instructions, using a brush or sprayer. Allow the primer to dry completely before moving on to the next step.
Preparing the steel siding is a crucial step that should not be overlooked. It helps create a clean, smooth surface for the paint to adhere to properly. Taking the time to prepare the siding will result in a more professional and long-lasting paint job.
Cleaning the Surface
Cleaning the surface of the steel siding is an essential step in the preparation process. This ensures that the paint adheres properly and allows for a smooth, flawless finish. Here’s how to clean the surface effectively:
1. Gather Your Supplies: Before starting, gather all the necessary supplies. You will need a bucket, mild detergent, a soft-bristle brush or sponge, and a hose with a spray nozzle.
2. Pre-Rinse the Surface: Begin by pre-rinsing the steel siding with clean water. Use a hose with a spray nozzle to remove loose dirt, dust, and debris. This will make the cleaning process more effective.
3. Prepare a Cleaning Solution: In a bucket, mix a mild detergent with warm water according to the manufacturer’s instructions. Avoid using harsh chemicals or abrasive cleaners as they can damage the siding.
4. Scrub the Surface: Dip the soft-bristle brush or sponge into the cleaning solution and gently scrub the surface of the steel siding. Work in small sections, starting from the top and moving downwards. Apply enough pressure to remove dirt, stains, and any other contaminants. Be thorough, paying extra attention to areas that are more heavily soiled.
5. Rinse Thoroughly: After scrubbing, thoroughly rinse the steel siding with clean water. Use the hose with a spray nozzle to remove any soap residue or loosened dirt. Ensure that all cleaning solution is completely rinsed off.
6. Allow to Dry: Allow the steel siding to air dry completely before proceeding to the next steps. Make sure there is no moisture left on the surface, as it can affect paint adhesion.
Cleaning the surface of the steel siding is a crucial step that ensures a clean canvas for painting. It removes dirt, grime, and other contaminants that can interfere with the paint’s adhesion. By following these steps, you’ll create an ideal surface for a flawless paint job.
Removing Any Loose Paint or Rust
Before painting steel siding, it’s important to remove any loose paint or rust from the surface. This step ensures that the new paint adheres properly and provides a smooth, even finish. Here are the steps to remove loose paint or rust from the steel siding:
1. Gather Your Tools: You will need a scraper, wire brush, sandpaper, drop cloth or plastic sheeting, and a clean cloth.
2. Protect Surrounding Areas: Lay down a drop cloth or plastic sheeting to protect the ground, plants, and other nearby surfaces from paint chips or debris.
3. Scraper for Loose Paint: Start by using a scraper to gently remove any loose or peeling paint from the steel siding. Hold the scraper at a slight angle and apply light pressure to avoid damaging the siding. Work in small areas, moving from top to bottom.
4. Wire Brush for Stubborn Paint or Rust: For areas where the scraper may not be sufficient to remove all the loose paint or if there is rust, use a wire brush. Scrub the affected areas using the wire brush, applying enough pressure to remove the paint or rust.
5. Sanding for Smooth Finish: After removing the loose paint and rust, use sandpaper to smooth out the surface. Sand the entire area where the paint or rust was removed, creating a smooth and even surface for the new paint to adhere to. Wipe away any dust or debris with a clean cloth.
6. Dispose of Paint and Debris: Properly dispose of the removed paint chips and debris according to local regulations. Ensure they are safely contained and disposed of in an appropriate manner.
Removing loose paint or rust is essential for a successful paint job. It prevents the old paint from affecting the new coat and ensures the adhesion of the paint to the steel siding. By following these steps, you’ll achieve a clean and prepared surface ready for the next stages of the painting process.
When painting steel siding, be sure to clean the surface thoroughly before applying any paint. Use a high-quality primer designed for metal surfaces to ensure proper adhesion and long-lasting results.
Read more: How To Install Steel Siding
Repairing any Damaged Areas
Before painting the steel siding, it’s important to inspect for any dents, holes, or other damaged areas. Repairing these areas ensures a smooth and even surface for the paint application. Here’s how to repair any damaged areas on your steel siding:
1. Gather Your Materials: You will need a suitable filler (such as auto body filler), a putty knife, sandpaper, a clean cloth, and a primer.
2. Clean the Damaged Area: Begin by cleaning the damaged area to remove any dirt, dust, or debris. Use a damp cloth to wipe the surface clean. This will ensure proper adhesion of the filler.
3. Apply the Filler: Follow the manufacturer’s instructions to mix and apply the suitable filler. Using a putty knife, spread the filler over the damaged area, ensuring it fills any gaps or indentations. Smooth out the filler with the putty knife, removing any excess. Allow it to dry according to the manufacturer’s instructions.
4. Sand the Surface: Once the filler is completely dry, use sandpaper to smooth out the repaired area. Start with a coarse-grit sandpaper and gradually work your way to a finer grit. This will create a seamless surface, blending the repair with the surrounding steel siding. Wipe away any dust or debris with a clean cloth.
5. Apply Primer: To ensure proper adhesion of the paint, apply a primer to the repaired area. Use a primer specifically formulated for metal surfaces. Follow the manufacturer’s instructions to apply the primer evenly, using a brush or sprayer. Allow the primer to dry completely before proceeding to the next steps.
Repairing any damaged areas on the steel siding is crucial for achieving a professional-looking paint job. By following these steps, you’ll be able to repair dents, holes, or other imperfections and create a smooth and seamless surface ready for painting.
Priming the Steel Siding
Priming the steel siding is a vital step in the painting process as it helps create a strong bond between the surface and the paint, ensuring long-lasting results. Here’s how to prime the steel siding:
1. Choose the Right Primer: Select a high-quality primer specifically designed for metal surfaces. Look for a primer that offers good adhesion, corrosion protection, and compatibility with the type of paint you’ll be using. Consult with a paint specialist at your local home improvement store if you’re unsure about which primer to choose.
2. Prepare the Surface: Ensure that the steel siding is clean, dry, and free of any loose paint, rust, or debris. Clean the surface using mild detergent and water, and remove any loose paint or rust using a scraper or wire brush. Follow the steps outlined earlier in this article for cleaning and removing loose paint or rust.
3. Apply the Primer: Stir the primer thoroughly before applying. Use a brush or sprayer to apply the primer to the steel siding. If using a sprayer, make sure to wear appropriate protective gear and follow the manufacturer’s instructions for safe use. Work from the top to the bottom, using smooth and even strokes. Pay extra attention to any repaired or damaged areas, ensuring they are adequately coated.
4. Allow the Primer to Dry: Check the manufacturer’s instructions for the recommended drying time of the primer. Allow sufficient drying time to ensure that the primer is fully cured before applying the paint. Avoid painting over the primer until it is completely dry, as this may compromise the quality of the paint job and affect its durability.
Priming the steel siding provides a solid foundation for the paint and enhances its adhesion to the surface. It also helps in preventing corrosion and extends the lifespan of the paintwork. By taking the time to prime the steel siding, you’ll ensure a professional-looking and long-lasting finish.
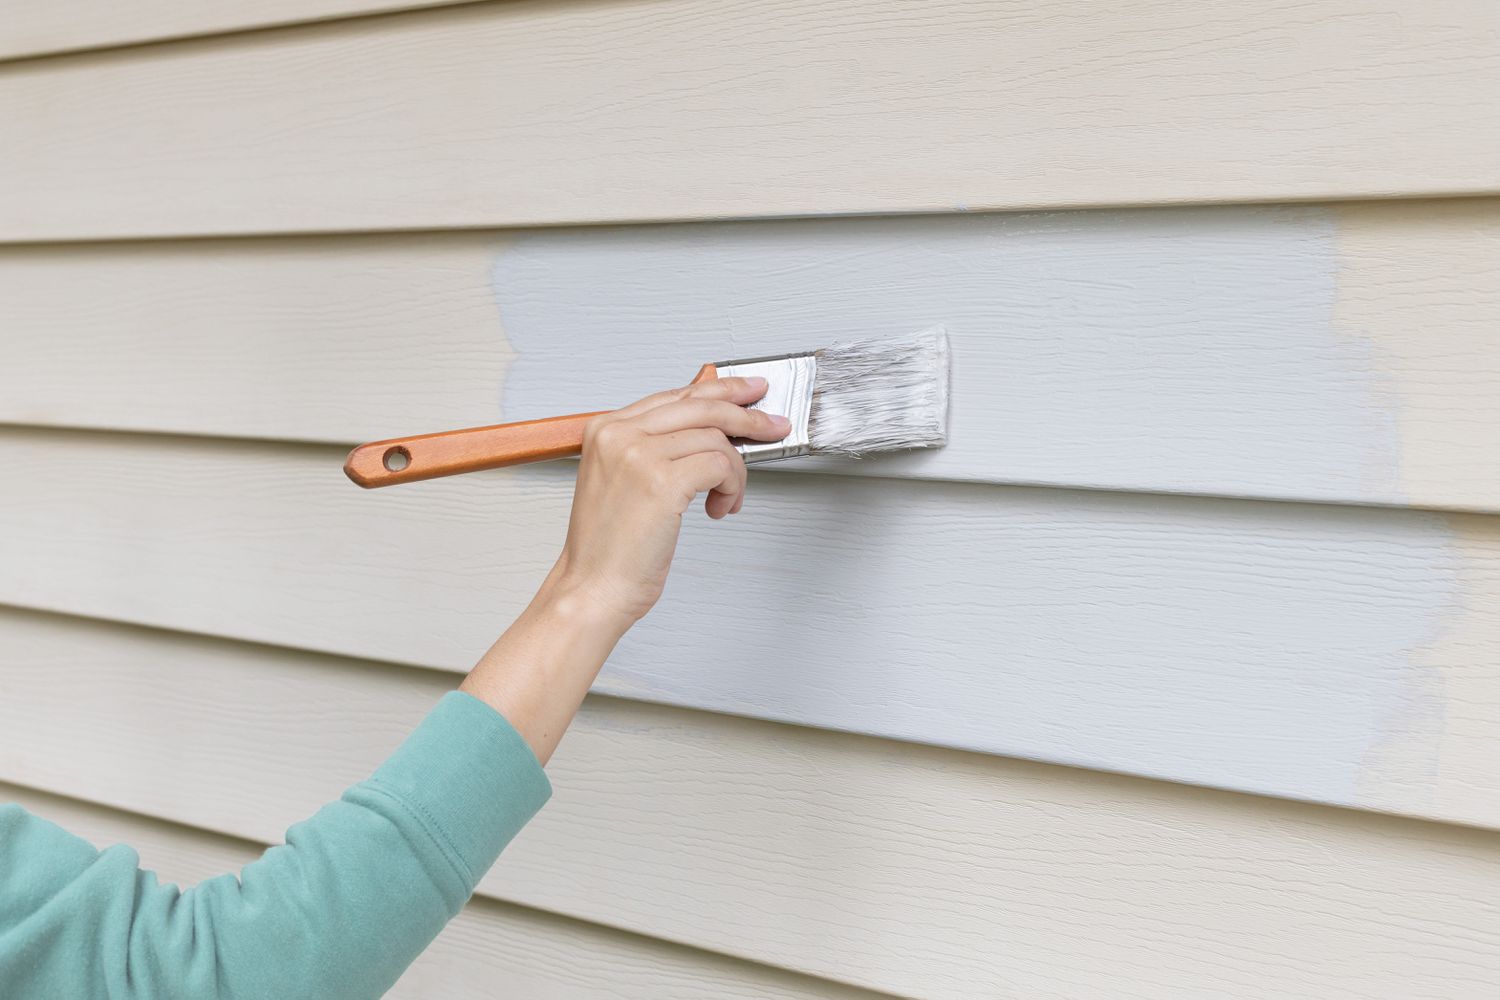
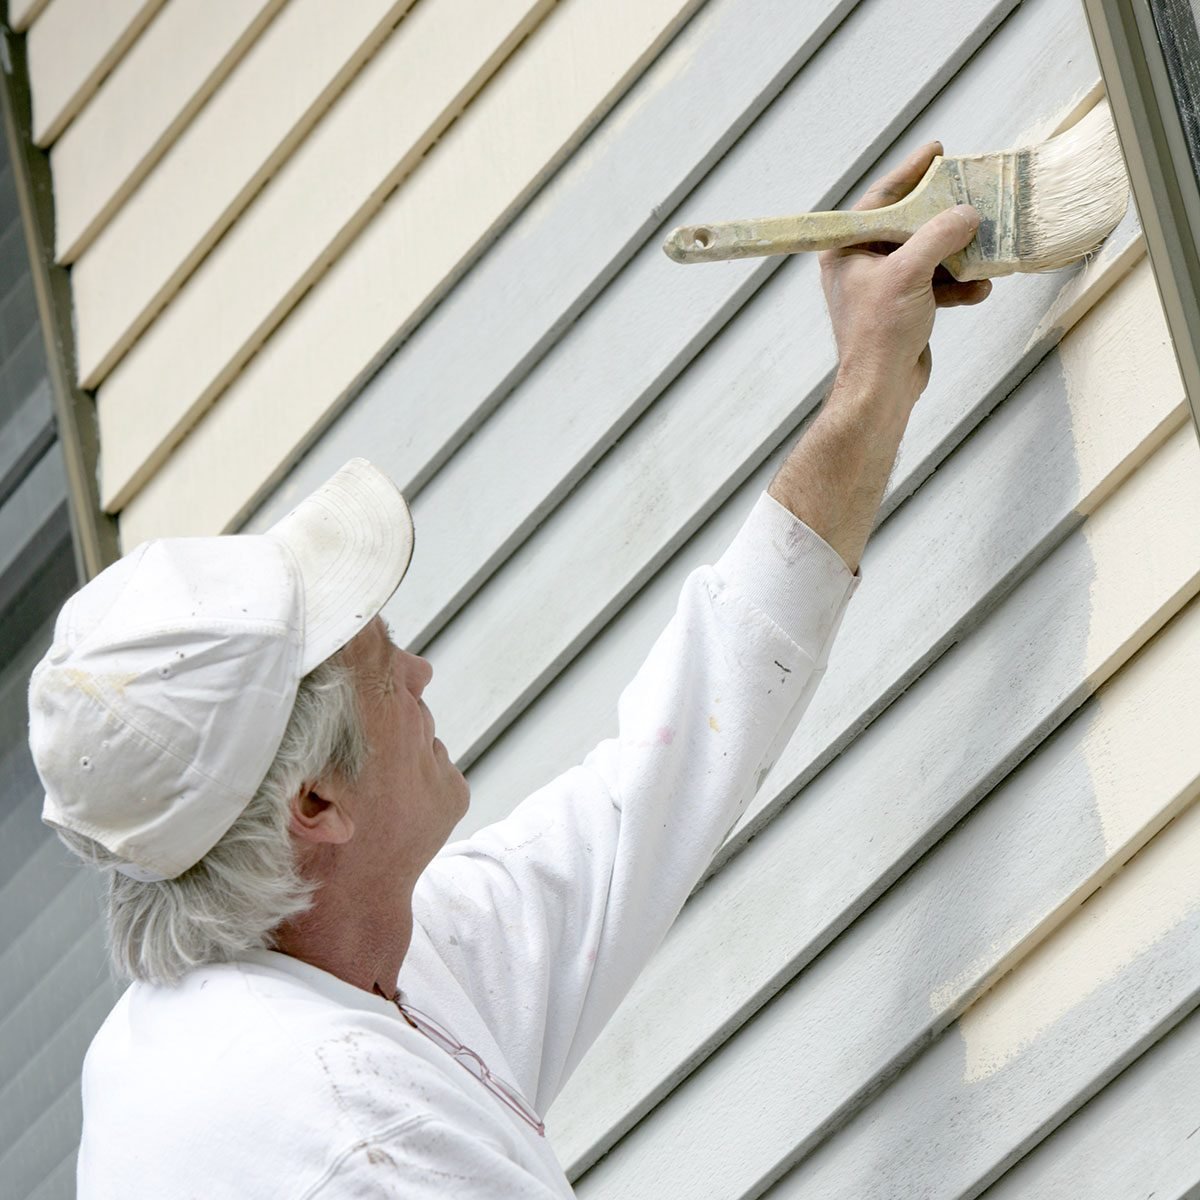
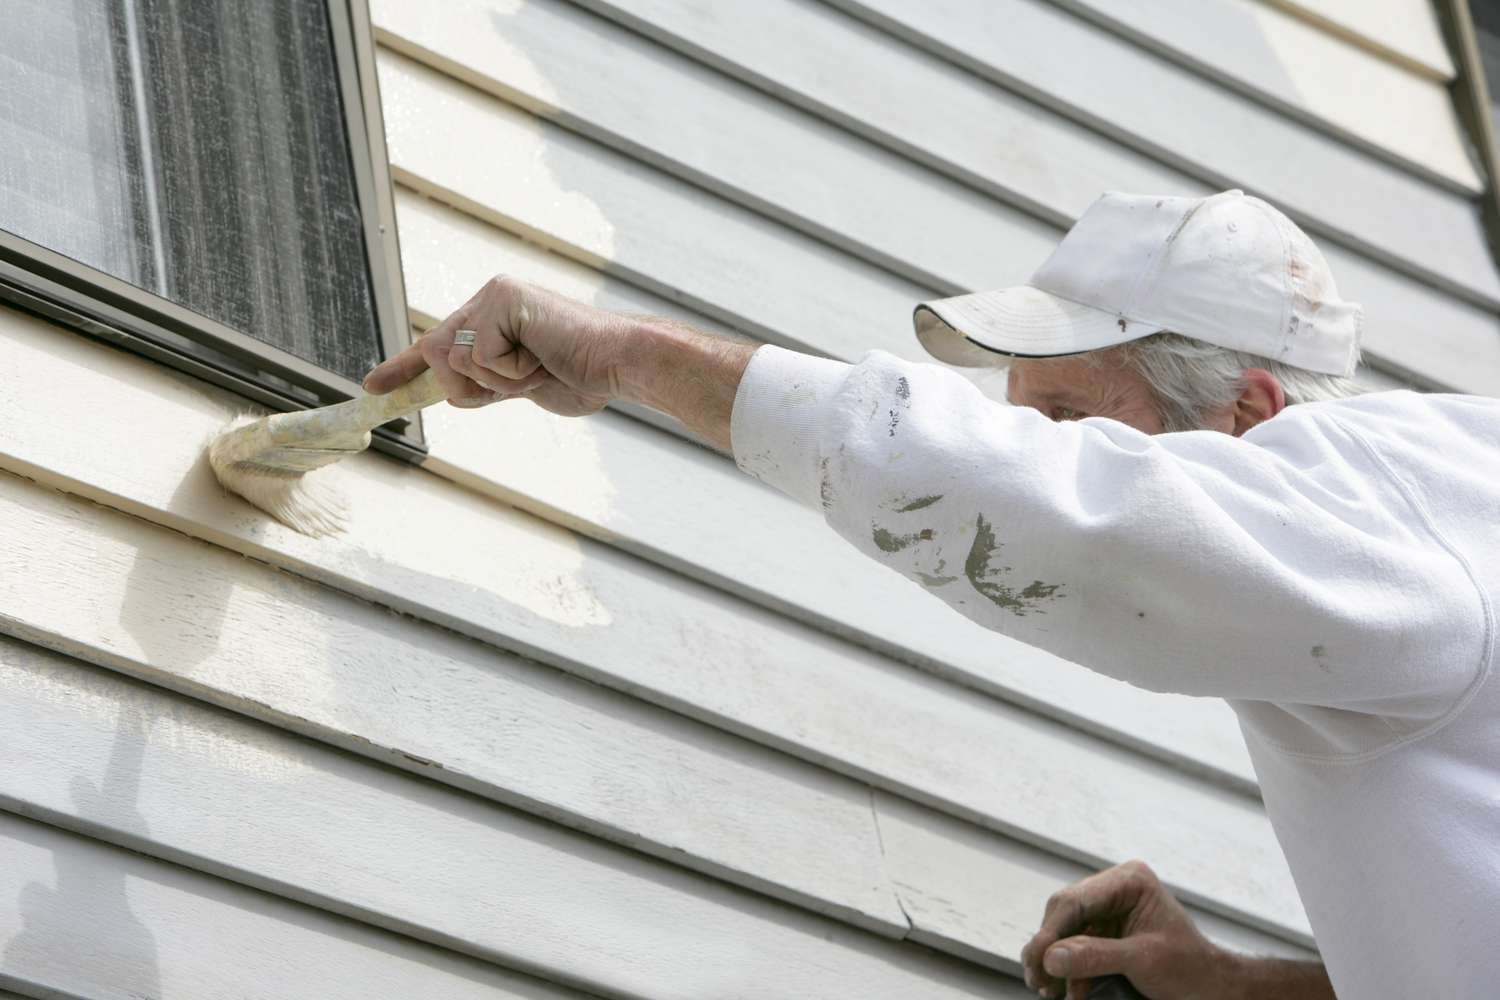
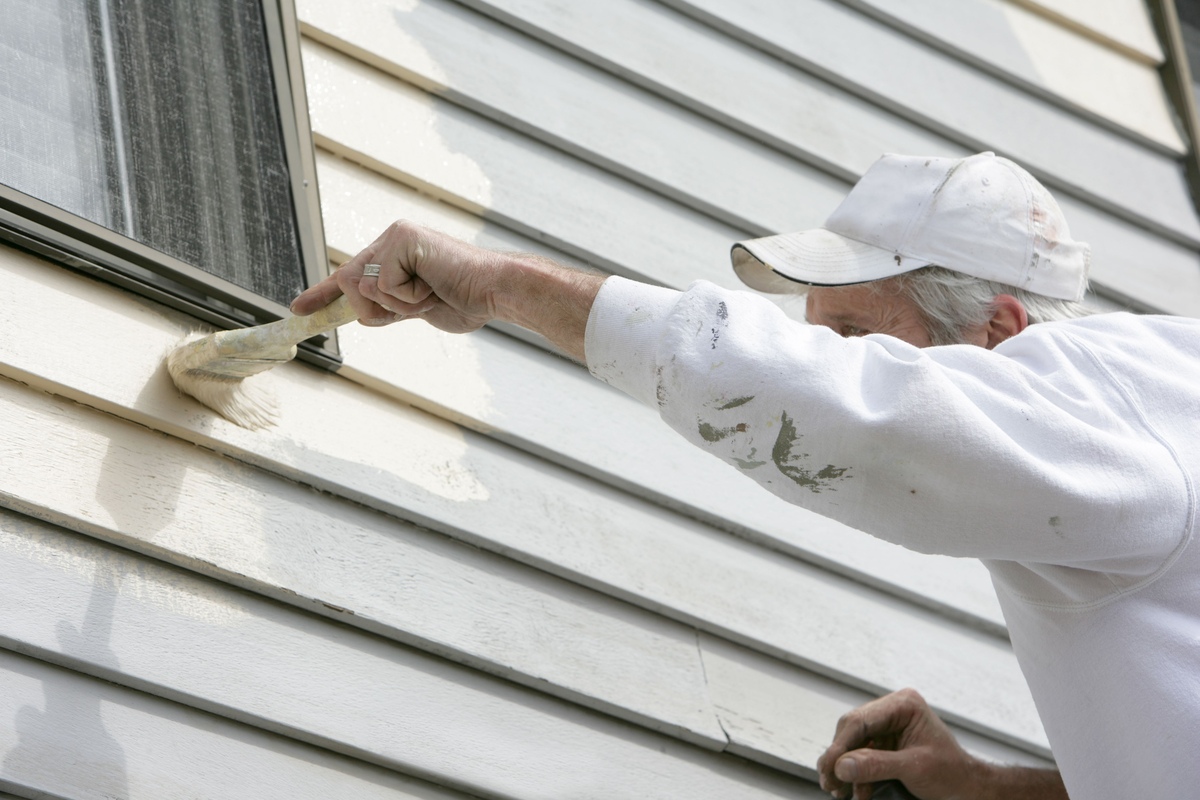
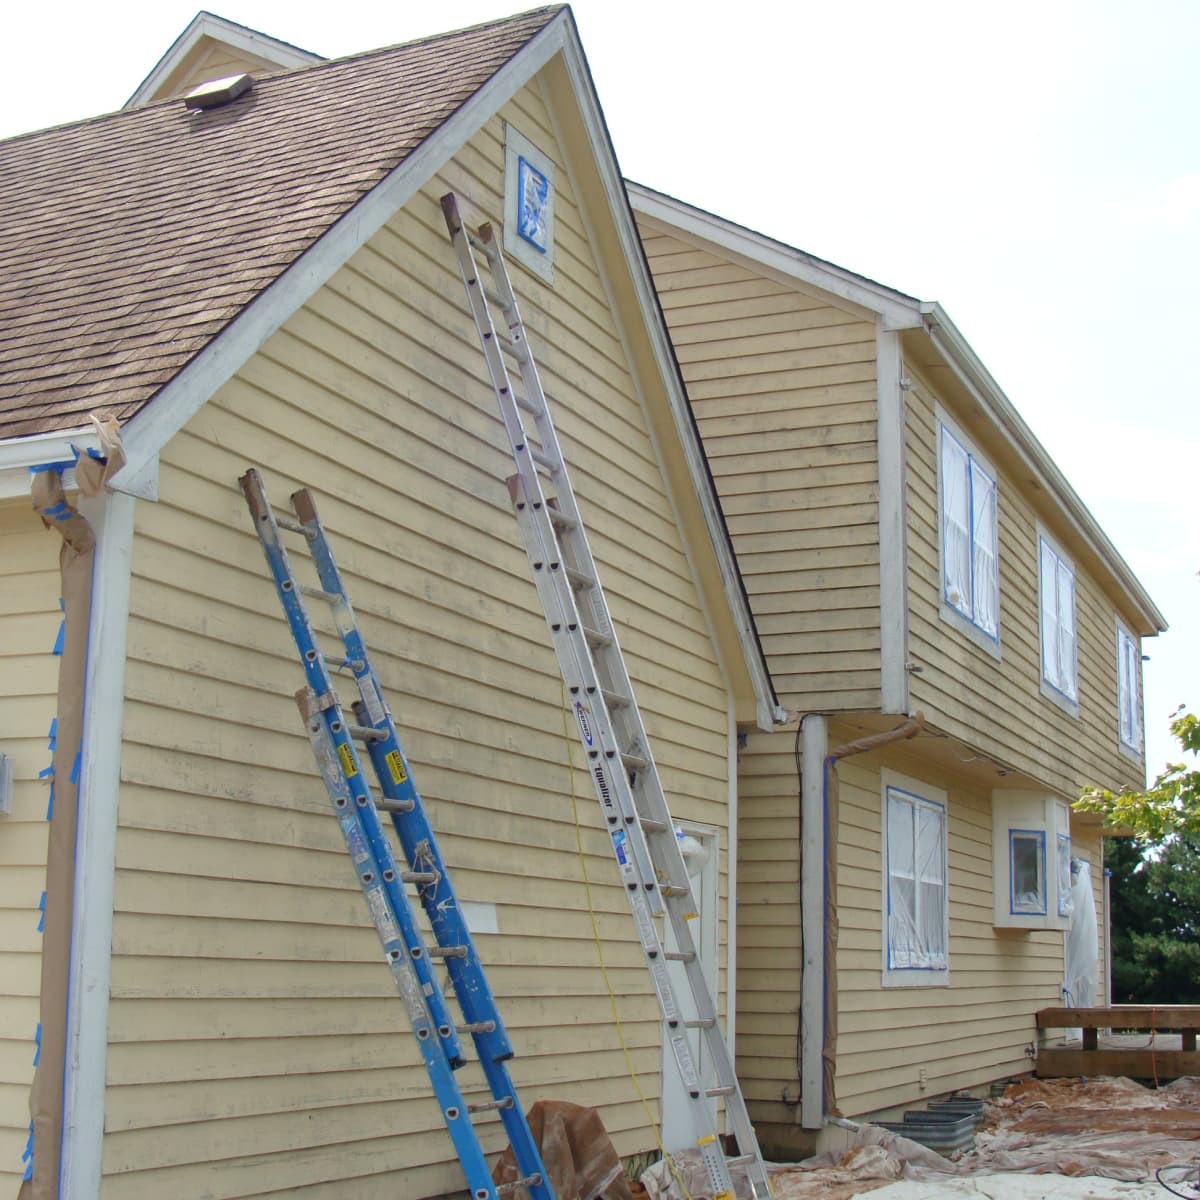
Applying the Paint
Now that the steel siding is properly prepped and primed, it’s time to apply the paint. Follow these steps to ensure a flawless finish:
1. Choose the Right Paint: Select a high-quality exterior paint that is specifically formulated for metal surfaces. Consider the color, finish, and durability of the paint. Opt for a paint that offers good coverage, weather resistance, and UV protection to ensure long-lasting results.
2. Stir the Paint: Thoroughly stir the paint before use to ensure an even consistency and proper color distribution. Follow the manufacturer’s instructions on how to properly mix the paint.
3. Start with a Brush: Begin by using a brush to paint around the edges, corners, and any intricate details that are difficult to reach with a roller. Apply the paint in even strokes, going in the direction of the siding. This technique helps in achieving better coverage and blending with the rest of the paint.
4. Use a Roller or Sprayer: Once the edges are painted, switch to a roller or sprayer for the main area of the steel siding. A paint sprayer can provide a fast and even application, especially for large surfaces, while a roller is suitable for smaller areas or for those who prefer a more controlled application. Work in manageable sections, applying the paint evenly and smoothly.
5. Apply Multiple Coats: Depending on the color and coverage of the paint, you may need to apply multiple coats. Allow each coat to dry completely before applying the next. Follow the manufacturer’s instructions on drying time between coats. Applying multiple thin coats will ensure a more durable and uniform finish.
6. Feathering Technique for Seamless Finish: To avoid visible brush or roller marks, use a feathering technique. When applying the paint, slightly overlap each stroke with the previous one. This will blend the paint and create a seamless finish.
7. Let the Paint Dry: Allow the paint to dry fully before exposing it to any moisture or harsh weather conditions. Follow the manufacturer’s instructions for the recommended drying time. Be patient during the drying process to prevent any smudging or damage to the freshly painted surface.
Applying the paint requires attention to detail and proper technique. By following these steps, you’ll achieve a professional-looking paint job, transforming the appearance of your steel siding and enhancing the overall aesthetic of your home.
Drying and Curing the Paint
After applying the final coat of paint to your steel siding, it’s important to allow proper drying and curing time. This ensures that the paint fully sets and provides long-lasting protection. Follow these guidelines for drying and curing the paint:
1. Follow Manufacturer’s Instructions: Different types and brands of paint may have specific instructions regarding drying and curing time. It’s crucial to carefully read and follow the manufacturer’s recommendations for the paint you are using. These instructions will provide the most accurate guidance for optimal drying and curing.
2. Initial Drying: Allow the paint to dry initially. This typically takes around 24 hours, but it’s essential to refer to the specific drying time provided by the manufacturer. Avoid touching or putting any pressure on the paint during this period to prevent smudging or ruining the finish.
3. Curing Time: Curing time refers to the period during which the paint fully hardens and reaches its maximum durability. This process can take several days or even weeks, depending on the paint and environmental conditions. Generally, it’s recommended to give the paint at least a week to fully cure before subjecting it to heavy rain, intense sunlight, or other potentially damaging factors.
4. Protect the Painted Surface: During the drying and curing process, it’s important to protect the freshly painted surface from any potential damage. Avoid touching, leaning against, or placing objects on the painted area. Be cautious when performing any maintenance or cleaning tasks near the newly painted siding. If necessary, use caution tape or signs to deter others from coming into contact with the painted surface.
5. Be Mindful of Weather Conditions: Weather conditions can impact the drying and curing process of the paint. Avoid painting when rain, high humidity, or extreme temperatures are expected. Optimal conditions for drying and curing are typically moderate temperatures, low humidity, and dry weather.
By following these steps and allowing the proper drying and curing time, you ensure that the paint on your steel siding fully sets and provides long-lasting protection. Taking the time to allow the paint to dry and cure properly will help maintain the integrity and appearance of your freshly painted steel siding for years to come.
Read more: How To Paint A Stainless Steel Sink
Maintaining and Touching Up the Paint
Maintaining the paint on your steel siding is crucial for preserving its appearance and protecting it from the elements. Over time, the paint may experience wear and tear, fading, or minor damage. Here are some tips for maintaining and touching up the paint:
1. Regular Cleaning: Keep your steel siding clean by regularly washing it with mild detergent and water. This helps remove dirt, dust, and grime that can accumulate on the surface and dull the paint’s appearance. Use a soft-bristle brush or sponge to gently scrub the siding, then rinse with clean water.
2. Inspect for Damage: Periodically inspect your steel siding for any signs of damage, such as chipping, peeling, or cracking paint. Also, look out for any areas where the paint may have been scratched or damaged by external factors. Promptly address these issues to prevent further damage.
3. Prepare the Surface: Before touching up the paint, it’s essential to prepare the surface properly. Clean the area using mild detergent and water, then rinse thoroughly and allow it to dry completely. If needed, gently sand the damaged area to create a smooth surface for the touch-up paint.
4. Match the Paint: When touching up the paint, ensure that you use the same type and color of paint that was originally applied. This helps maintain a consistent appearance. If you no longer have the original paint, bring a sample or the paint swatch to a local paint store to find the closest match.
5. Apply the Touch-Up Paint: Use a small brush or a fine-tip paint pen to apply the touch-up paint to the damaged area. Apply thin layers of paint, allowing each layer to dry completely before applying the next. Be careful not to over-apply the paint, as this may result in uneven texture or color variation.
6. Blend the Touch-Up: After the touch-up paint has dried, gently feather the edges of the repaired area with a fine-grit sandpaper to blend it with the surrounding paint. Clean the area again to remove any dust or residue.
7. Maintain Regular Maintenance: Keep up with regular maintenance tasks to extend the lifespan of the paint on your steel siding. This includes cleaning as mentioned earlier, as well as inspecting for any signs of damage or wear. Address any issues as soon as possible to prevent further deterioration.
By following these maintenance tips and staying proactive with touch-ups, you can keep the paint on your steel siding looking fresh and vibrant. Regular care and timely repairs will help preserve the appearance and protection of your siding for years to come.
Frequently Asked Questions about How To Paint Steel Siding
Was this page helpful?
At Storables.com, we guarantee accurate and reliable information. Our content, validated by Expert Board Contributors, is crafted following stringent Editorial Policies. We're committed to providing you with well-researched, expert-backed insights for all your informational needs.
0 thoughts on “How To Paint Steel Siding”