Articles
How To Plug Gamecube Adapter Into Switch
Modified: August 28, 2024
Learn how to plug a Gamecube adapter into your Nintendo Switch with these helpful articles. Get step-by-step instructions and enhance your gaming experience now!
(Many of the links in this article redirect to a specific reviewed product. Your purchase of these products through affiliate links helps to generate commission for Storables.com, at no extra cost. Learn more)
Introduction
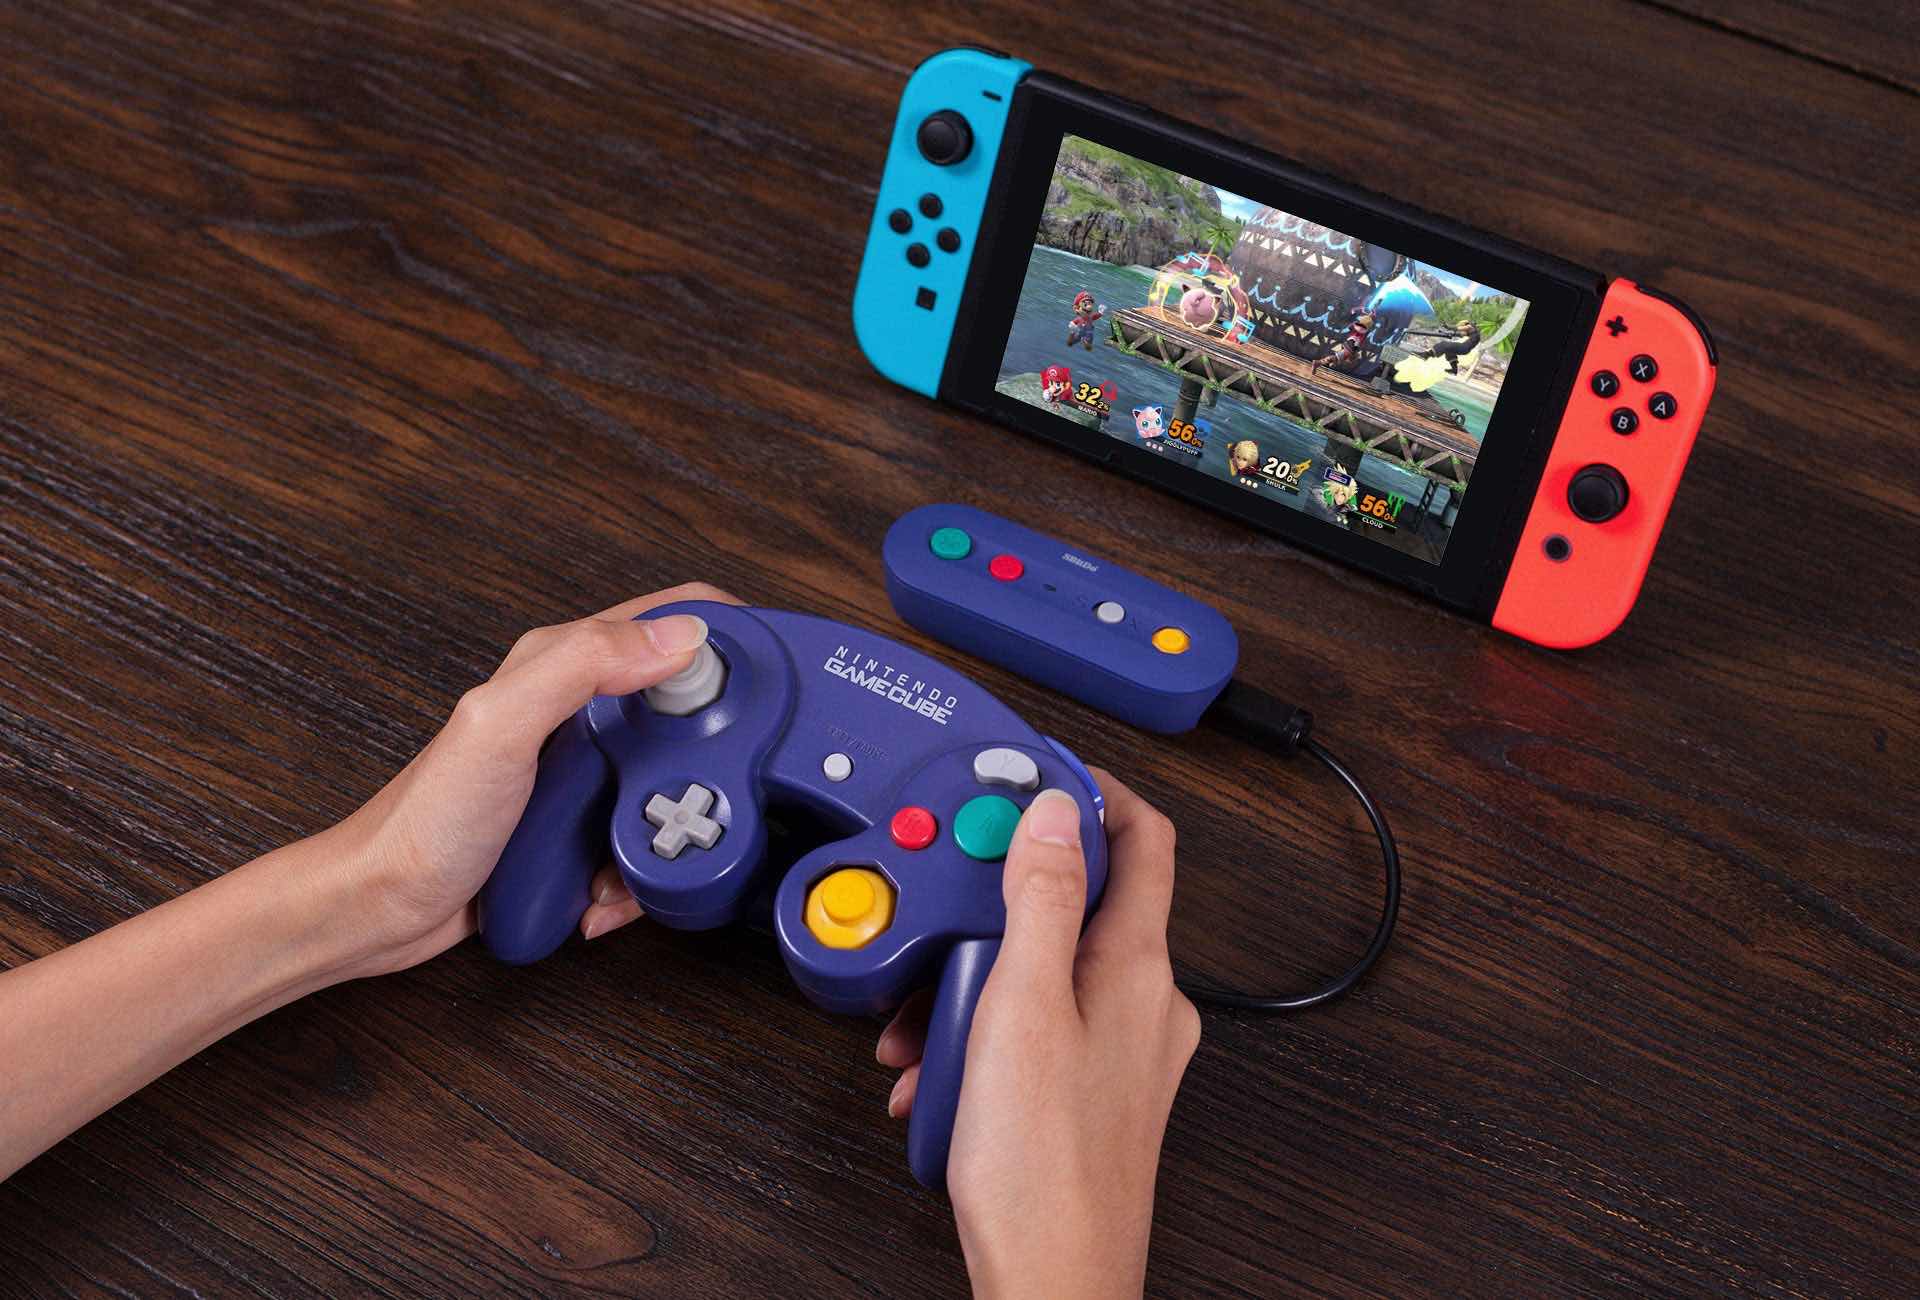
Welcome to our guide on how to plug a GameCube adapter into a Nintendo Switch! If you’re a fan of the classic GameCube controller and want to use it with your Nintendo Switch, you’re in the right place. The GameCube adapter allows you to connect up to four GameCube controllers to your Switch, giving you the authentic feel of playing your favorite games with the controller you know and love.
Whether you’re a seasoned GameCube player or just looking to add a new controller option to your Nintendo Switch setup, this guide will walk you through the steps of connecting the GameCube adapter and controllers to your device.
Before we dive into the steps, let’s go over what you’ll need for this process. Firstly, you’ll need a Nintendo Switch console and its dock, which is included with the console. You’ll also need a GameCube adapter, which can be purchased separately. Lastly, you’ll need one or more GameCube controllers, depending on how many players you plan to connect.
Now that we have all the necessary equipment, let’s move on to the step-by-step process of plugging in the GameCube adapter into your Nintendo Switch.”
Key Takeaways:
- Embrace the nostalgia and multiplayer fun by connecting a GameCube adapter to your Nintendo Switch, allowing you to use up to four classic GameCube controllers for an authentic gaming experience.
- With the GameCube adapter, you can seamlessly connect and configure GameCube controllers for your Nintendo Switch, unlocking the potential for hours of gaming enjoyment with a touch of nostalgia.
Read more: How To Use Gamecube Adapter For Pc
Step 1: Gather the necessary equipment
Before we begin, make sure you have all the equipment needed to connect the GameCube adapter to your Nintendo Switch. Here’s a checklist of what you’ll need:
- Nintendo Switch console and dock
- GameCube adapter
- GameCube controller(s)
Once you have everything in place, you’re ready to move on to the next step.
Step 2: Prepare the Nintendo Switch
Before connecting the GameCube adapter to your Nintendo Switch, it’s important to prepare the console for the setup process. Here’s what you need to do:
- Start by turning off your Nintendo Switch console. This will ensure a safe and smooth connection process.
- If your Nintendo Switch is already docked, remove it from the dock by sliding it out gently.
- Locate the USB ports on the side or back of the Nintendo Switch dock. These ports are where you’ll be plugging in the GameCube adapter.
- Ensure that the USB ports are free from any debris or obstructions that may hinder the connection. Use a soft cloth or compressed air to clean the ports if necessary.
- If you have any other USB devices connected to the Nintendo Switch dock, such as a charging cable or a LAN adapter, temporarily remove them to make space for the GameCube adapter.
By preparing the Nintendo Switch in advance, you’ll be able to seamlessly connect the GameCube adapter and controllers without any interruptions. With the console ready, it’s time to move on to the next step: connecting the GameCube adapter to the Nintendo Switch dock.
Step 3: Locate the USB ports on the Nintendo Switch dock
Now that your Nintendo Switch console is prepared, the next step is to find the USB ports on the Nintendo Switch dock. These ports are where you’ll be plugging in the GameCube adapter.
The USB ports on the Nintendo Switch dock can be found either on the side or the back of the dock, depending on the model of your console. You may need to gently lift up or adjust the console to locate the USB ports more easily.
Once you’ve located the USB ports, take a moment to inspect them and ensure they’re free from any dust, dirt, or debris. A clear port will ensure a solid connection between the GameCube adapter and the Nintendo Switch.
If necessary, use a soft cloth or a can of compressed air to clean the USB ports. This will prevent any interference or connectivity issues during the setup process.
Once the USB ports are clean and ready, you’re now ready to proceed to the next step: connecting the GameCube adapter to the Nintendo Switch dock.
Make sure to use the official Nintendo GameCube adapter for the Switch. Plug the adapter into the USB port on the Switch dock, then connect the GameCube controller to the adapter. You’re all set to play!
Step 4: Connect the GameCube adapter to the Nintendo Switch dock
Now that you’ve located the USB ports on the Nintendo Switch dock, it’s time to connect the GameCube adapter. Follow these steps:
- Take the GameCube adapter and plug the USB cable attached to it into one of the available USB ports on the Nintendo Switch dock. Make sure the USB connection is secure.
- Once the GameCube adapter is connected to the USB port, you should see a small LED light up on the adapter to indicate that it’s receiving power.
- Position the GameCube adapter and the attached USB cable in a way that allows for easy access to the controller ports.
With the GameCube adapter now connected to the Nintendo Switch dock, you’re one step closer to using your GameCube controllers with the Switch. However, we still need to connect the controllers to the adapter, so let’s move on to the next step.
Step 5: Connect GameCube controllers to the adapter
Now that the GameCube adapter is connected to the Nintendo Switch dock, it’s time to connect your GameCube controllers to the adapter. Here’s how:
- Take your GameCube controller and locate the controller ports on the GameCube adapter. These ports are typically located on the top of the adapter.
- Insert the GameCube controller’s plug into one of the available controller ports on the adapter. The plug should fit snugly into the port, ensuring a secure connection.
- If you are connecting multiple GameCube controllers, repeat the previous step for each controller, making sure to plug them into separate controller ports on the adapter.
Once you’ve connected your GameCube controllers to the adapter, you’re all set to enjoy your favorite games using the classic GameCube controller on your Nintendo Switch. However, there’s one more step to ensure the controllers are functioning correctly, so let’s move on to the next step.
Step 6: Test the connection and configure controller settings
With the GameCube controllers connected to the GameCube adapter, it’s time to test the connection and configure the controller settings on your Nintendo Switch. Follow these steps:
- Power on your Nintendo Switch console and navigate to the home menu.
- Select “System Settings” from the menu, and then select “Controllers and Sensors.”
- Under “Controllers and Sensors,” select “Change Grip/Order” to begin the controller configuration process.
- On the GameCube controller, press any button to wake it up.
- Press and hold the small button located on the GameCube adapter. This will initiate the syncing process between the adapter and the GameCube controllers.
- On the Nintendo Switch console, you should see the LED light up on one of the Joy-Con or Pro controller slots. This indicates that the GameCube controller has been successfully connected.
- Repeat step 5 for each connected GameCube controller until all the controllers are synced with the Nintendo Switch.
Once the controllers are connected and synced, you can now enjoy playing your favorite games on the Nintendo Switch using the GameCube controllers.
Keep in mind that some games may not be compatible with the GameCube controllers or may require specific controller configurations. It’s recommended to check the game’s manual or online documentation for controller compatibility and instructions on how to configure the controls.
Now that the GameCube adapter is connected, the controllers are synced, and the controller settings are configured, you’re all set to embark on your gaming adventures with the classic GameCube controllers on your Nintendo Switch!
Conclusion
Congratulations! You have successfully learned how to connect a GameCube adapter to your Nintendo Switch and use GameCube controllers to play your favorite games. By following the steps outlined in this guide, you can enjoy the familiar feel of the classic GameCube controller while immersing yourself in the latest Switch titles.
Remember, the GameCube adapter allows you to connect up to four GameCube controllers, making it perfect for multiplayer gaming sessions with friends and family. Whether you’re battling it out in Super Smash Bros. Ultimate, exploring the vast landscapes of The Legend of Zelda: Breath of the Wild, or engaging in intense races in Mario Kart 8 Deluxe, the GameCube controllers offer precise control and a nostalgic experience.
Keep in mind that not all games may be compatible with the GameCube controllers or require additional configuration. It’s always a good idea to check the game’s documentation or online resources for any specific instructions on using GameCube controllers.
So, plug in your GameCube adapter, connect your controllers, configure the settings, and get ready for hours of gaming fun! Enjoy the best of both worlds as you combine the modern capabilities of the Nintendo Switch with the classic gameplay of the beloved GameCube controllers.
Now, go ahead and start gaming with the GameCube adapter and experience the joy of using a controller that has stood the test of time!
Frequently Asked Questions about How To Plug Gamecube Adapter Into Switch
Was this page helpful?
At Storables.com, we guarantee accurate and reliable information. Our content, validated by Expert Board Contributors, is crafted following stringent Editorial Policies. We're committed to providing you with well-researched, expert-backed insights for all your informational needs.
0 thoughts on “How To Plug Gamecube Adapter Into Switch”