Articles
How To Put On Faucet Cover
Modified: October 31, 2024
Learn how to properly put on a faucet cover with our informative articles. Protect your faucets during winter and prevent freezing and damage.
(Many of the links in this article redirect to a specific reviewed product. Your purchase of these products through affiliate links helps to generate commission for Storables.com, at no extra cost. Learn more)
Introduction
As the cold winter weather approaches, it is important to take steps to protect your outdoor faucets from freezing temperatures. One effective way to do this is by using a faucet cover. A faucet cover is a simple and cost-effective solution that helps to insulate your outdoor faucets, preventing them from freezing and potentially causing costly damage.
In this article, we will guide you through the process of putting on a faucet cover to ensure that your outdoor faucets are well-protected during the winter months. By following these steps, you can have peace of mind knowing that your faucets are safeguarded against freezing temperatures.
Whether you have a free-standing outdoor faucet or one attached to your house, the process of putting on a faucet cover is relatively straightforward. We will break down the steps for you, providing clear instructions and tips along the way.
Before we begin, it is important to note that the specific instructions and materials required may vary depending on the type of faucet you have and your location. However, the general process of putting on a faucet cover remains the same. Let’s get started!
Key Takeaways:
- Protect your outdoor faucets from freezing temperatures by following simple steps to put on a faucet cover. Gather materials, clean and dry the faucet, measure for the right cover size, and secure it in place for worry-free winter maintenance.
- Insulate exposed pipes and consider advanced options for extreme weather conditions to enhance the functionality and longevity of your faucet cover. Regularly check and clean the cover, and avoid overtightening for optimal protection.
Read more: How To Put On Mattress Cover
Step 1: Gather the necessary materials
Before you begin putting on a faucet cover, gather all the necessary materials. Having everything prepared beforehand will make the process smoother and more efficient. Here are the materials you will need:
- A faucet cover or an insulating foam cover
- Duct tape or zip ties
- A measuring tape
- Scissors or a utility knife
- A clean cloth or sponge
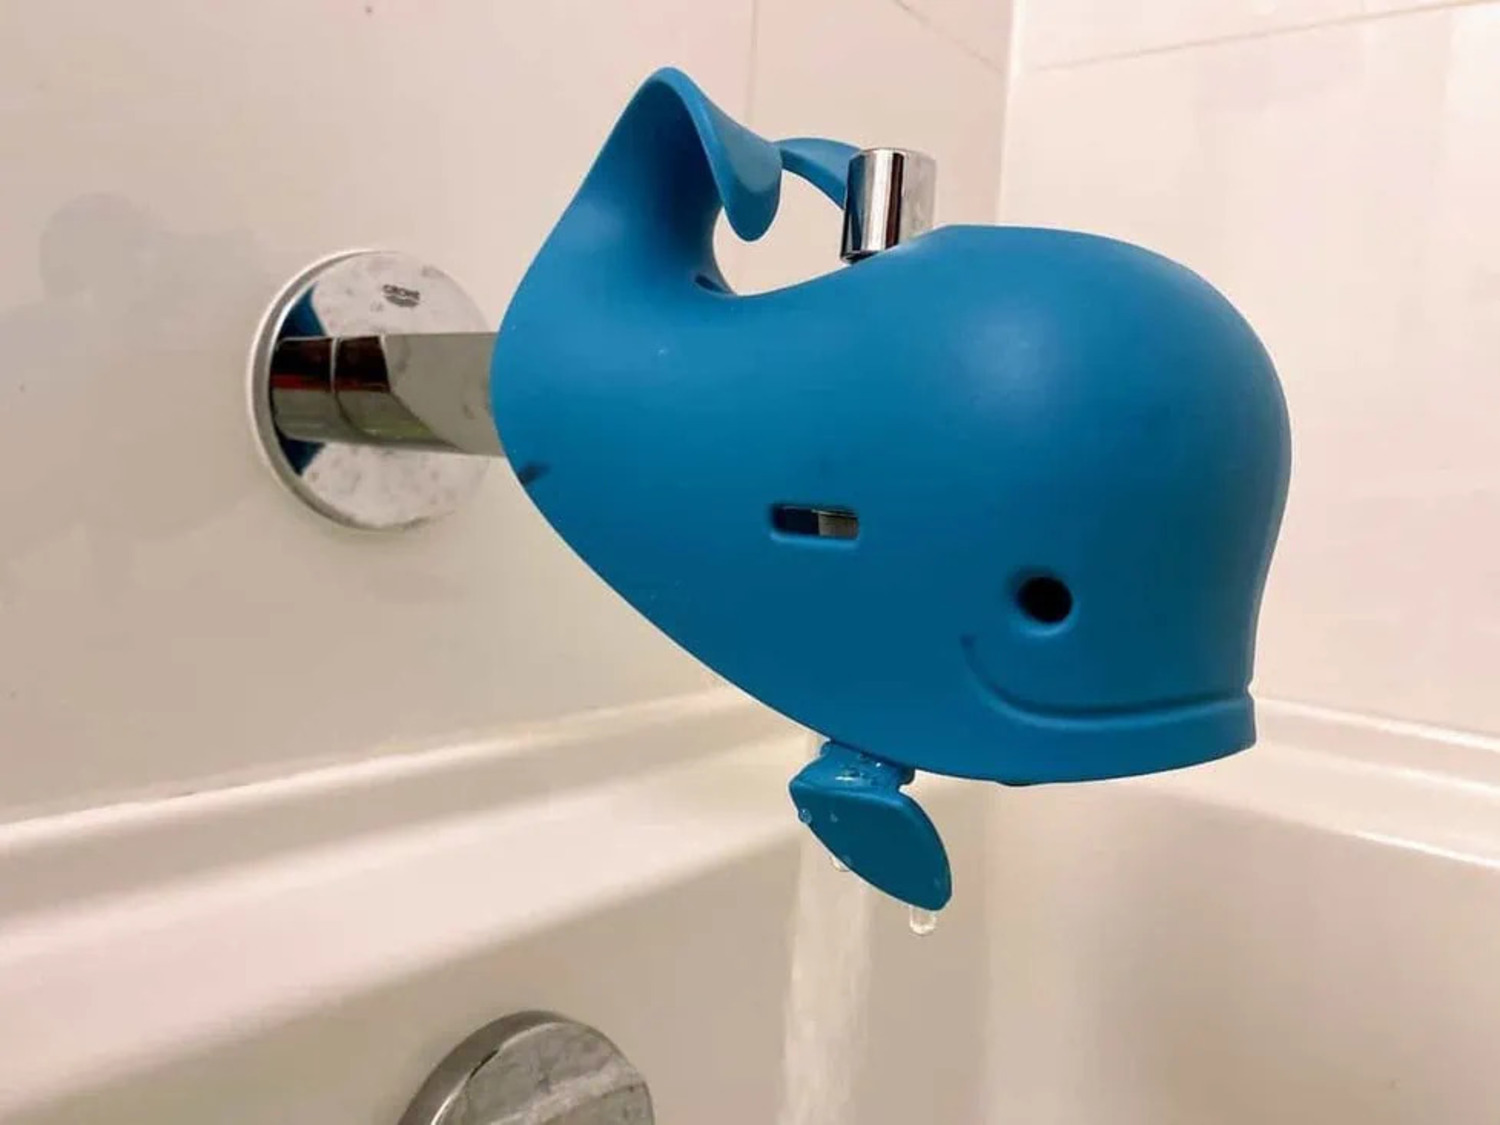
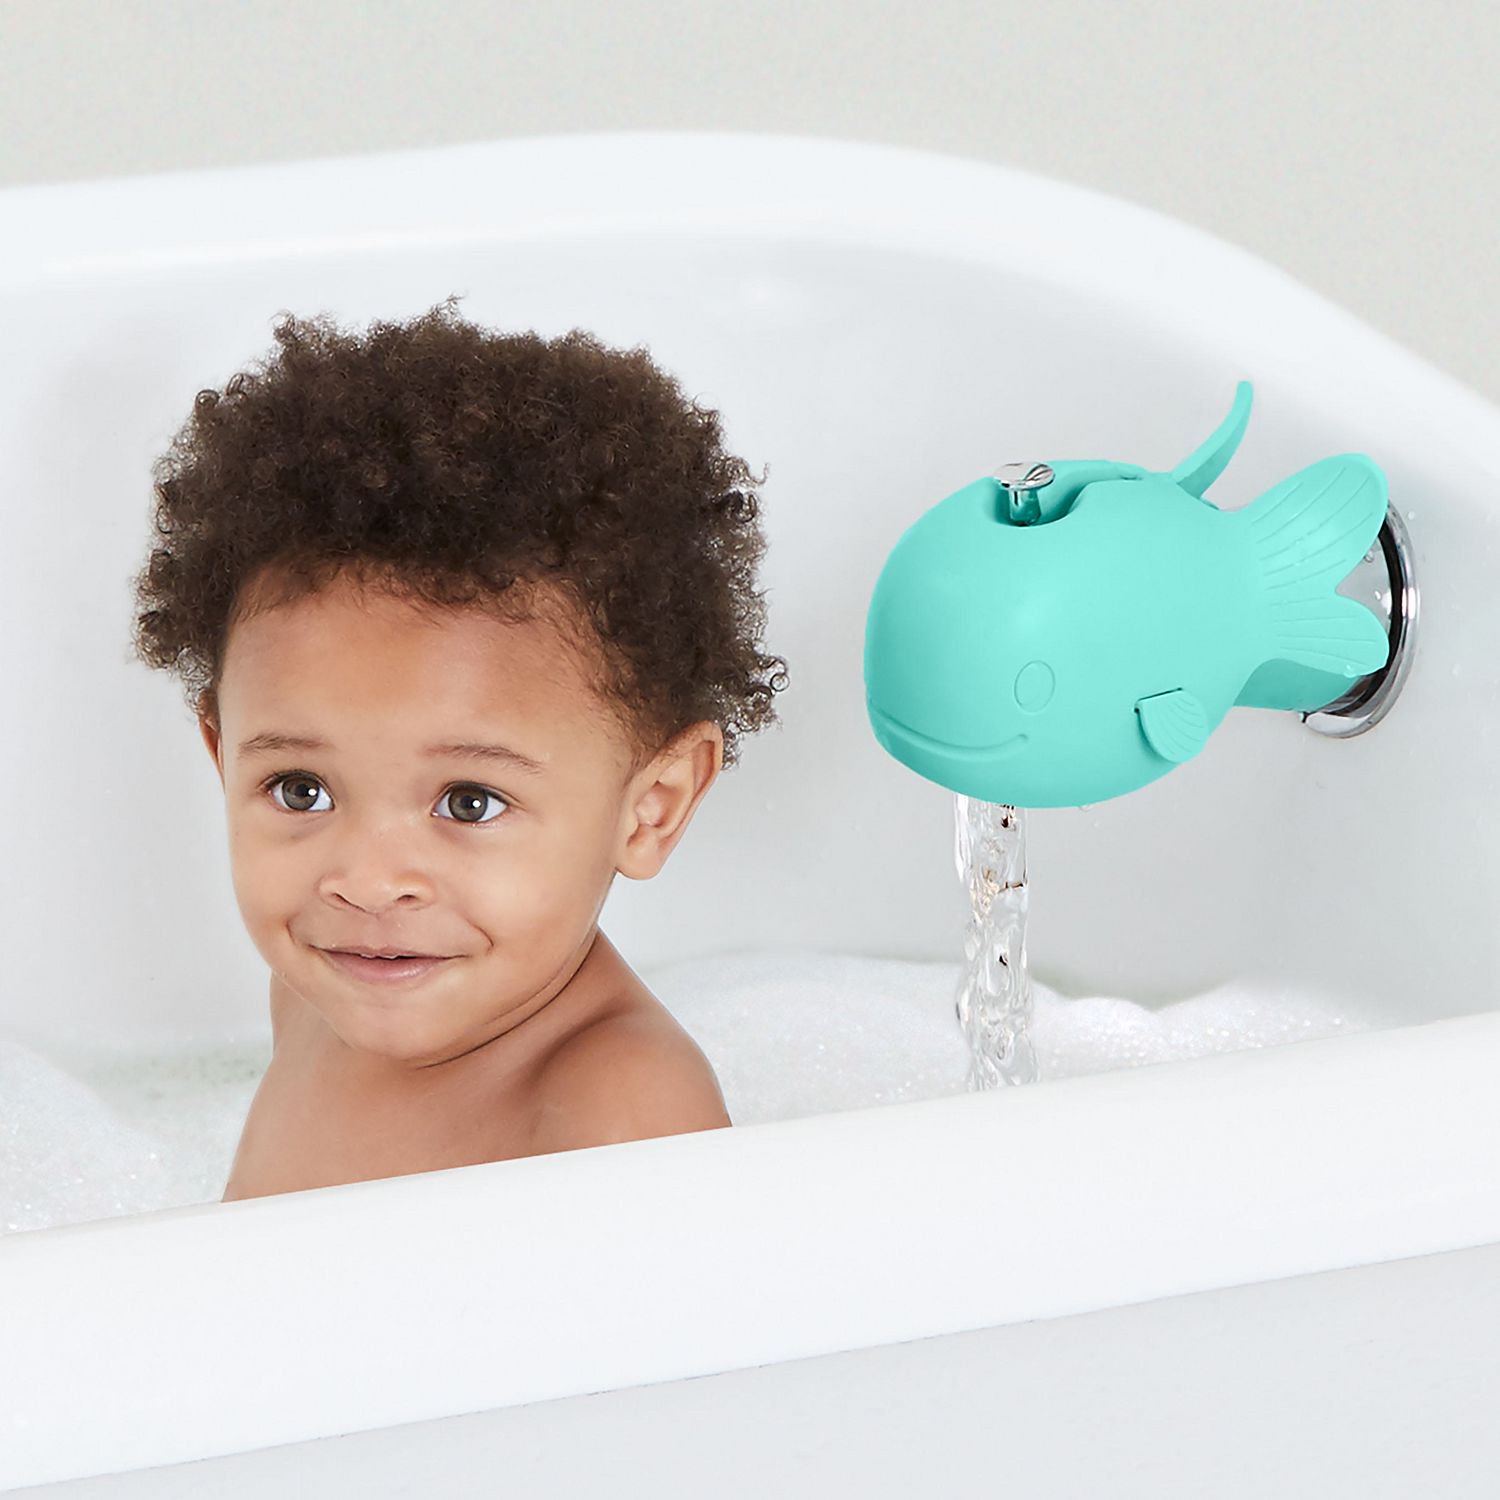
The faucet cover is the most important item on this list. There are various types available, including basic covers made of insulating foam and more advanced covers with built-in insulation. It’s essential to choose a cover that fits your faucet properly and provides sufficient insulation.
Duct tape or zip ties will be used to secure the cover in place. Duct tape is a versatile option as it can be easily cut and adjusted as needed. Zip ties provide a more secure fastening but may require cutting and replacing if adjustments are necessary.
A measuring tape is necessary to determine the size of your faucet accurately. Measure the length and diameter of your faucet to ensure you choose the appropriate size faucet cover.
Lastly, have a clean cloth or sponge on hand to wipe down and dry the faucet before covering it. This will help remove any dirt or debris and ensure a proper seal.
Once you have gathered all the necessary materials, you can proceed to the next step: cleaning and drying the faucet.
Step 2: Clean and dry the faucet
Before you can effectively put on a faucet cover, it is crucial to clean and dry the faucet thoroughly. This step ensures that there is no dirt, grime, or moisture left on the faucet, allowing the cover to adhere properly and create a tight seal.
Start by using a clean cloth or sponge to wipe down the entire surface of the faucet. Remove any dirt, debris, or residue that may have accumulated over time. Pay close attention to the area where the cover will be placed, as this is where a secure seal is required.
If the faucet is particularly dirty or covered in grime, you may need to use a mild detergent or cleaning solution to remove stubborn stains. Be sure to rinse off any cleaning agents and thoroughly dry the faucet before proceeding.
Once the faucet is clean, use a dry cloth or towel to thoroughly dry the entire surface. It is essential to remove any moisture to prevent freezing or the growth of mold and mildew under the cover.
Ensure that the faucet is completely dry, including the handle, spout, and surrounding areas. Take your time with this step as a dry surface is crucial for the faucet cover to adhere properly and provide adequate insulation.
By cleaning and drying the faucet before covering it, you create the ideal conditions for a secure and effective seal. Now that the faucet is clean and dry, you are ready to move on to the next step: measuring the faucet to choose the appropriate cover size.
Step 3: Measure the faucet
Measuring the faucet is an important step in the process of putting on a faucet cover. This step ensures that you choose the appropriate size cover that will fit your specific faucet properly, providing optimal insulation and protection.
To measure the faucet, you will need a measuring tape. Start by measuring the length of the faucet from the base to the end of the spout. This measurement will help you determine the length of the cover needed to adequately protect the entire faucet.
Next, measure the diameter of the faucet. This measurement is essential to ensure that the cover fits snugly around the faucet without any gaps or loose ends. Measure the widest part of the faucet to get an accurate diameter measurement.
Take note of the measurements you have obtained, as you will need them when selecting the appropriate faucet cover. Keep in mind that the cover should fit securely without being too tight or too loose.
When choosing a faucet cover, look for one that offers a range of sizes. Some covers are adjustable and can accommodate different faucet dimensions. This flexibility allows for a more customized fit and ensures maximum insulation.
It is always better to choose a cover that is slightly larger than your faucet than one that is too small. A cover that is too small may not provide adequate insulation and may fall off or become loose over time.
By accurately measuring your faucet and choosing the appropriate cover size, you can ensure a proper fit and optimal protection against freezing temperatures. Once you have selected the right cover, it’s time to move on to the next step: positioning the faucet cover.
Step 4: Choose the appropriate faucet cover
Choosing the appropriate faucet cover is crucial to ensure proper insulation and protection against freezing temperatures. There are various types of faucet covers available, each offering different levels of insulation and convenience. Here are some factors to consider when selecting the right cover:
- Type of cover: There are two main types of faucet covers: basic foam covers and advanced covers with built-in insulation. Foam covers are affordable and easy to install, but they may not provide as much insulation as covers with built-in insulation.
- Size: Your faucet measurements from the previous step will determine the size of the cover you need. Look for a cover that matches or slightly exceeds the length and diameter measurements you obtained.
- Weatherproofing: Consider the climate in your area. If you experience harsh winters with sub-zero temperatures, look for a cover specifically designed to withstand extreme cold. These covers often have additional layers of insulation or built-in heating elements.
- Easy installation: Some faucet covers require minimal effort to install, while others may have more complex installation methods. Choose a cover that is easy to put on and take off, especially if you need to use the faucet during the winter.
When selecting a faucet cover, read product descriptions, customer reviews, and manufacturer recommendations to make an informed decision. It’s important to choose a cover that suits your specific needs and provides adequate insulation for your climate.
Once you have chosen the appropriate faucet cover, you are ready to move on to the next step: positioning the cover over the faucet.
Read more: How To Put Bark As A Ground Cover
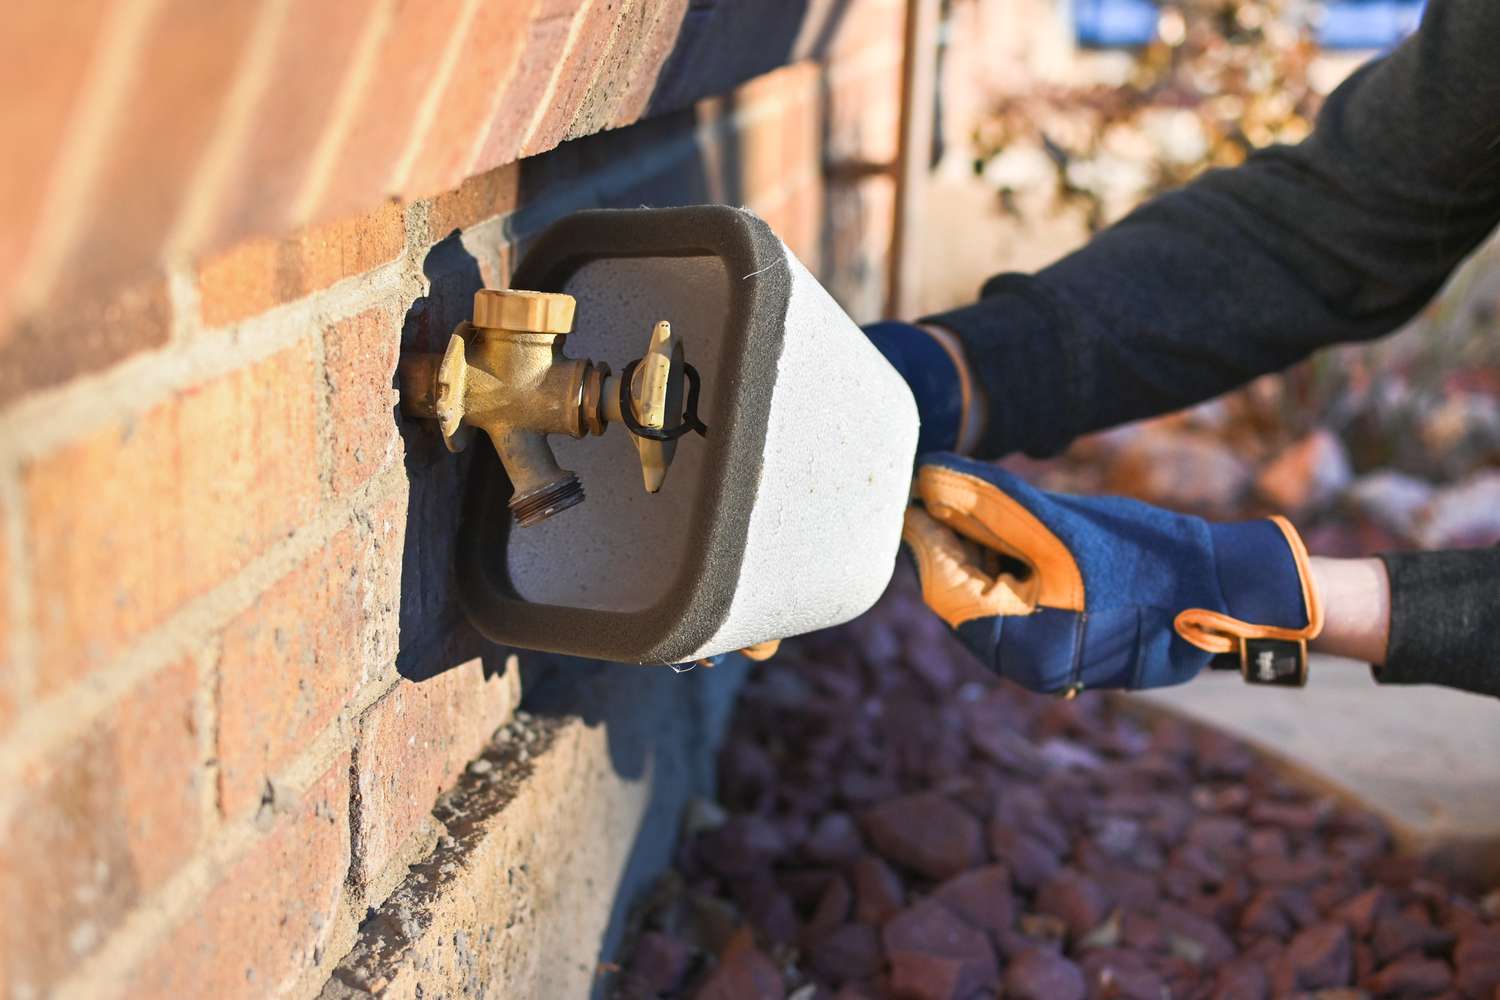
Step 5: Position the faucet cover
Now that you have selected the appropriate faucet cover, it’s time to position it over the faucet. Proper positioning is essential to ensure a secure fit and optimal insulation. Follow these steps to position the cover correctly:
- Hold the faucet cover in your hand and locate the opening that corresponds to the spout of your faucet. Ensure that the cover is oriented correctly, with the opening aligned properly.
- Carefully slide the cover over the faucet, starting from the top and working your way down. Make sure the cover extends to cover the entire length of the faucet, from the base to the end of the spout.
- Adjust the cover as needed to ensure that it fits snugly. Align any straps, Velcro, or ties if your cover has them, ensuring they are lined up properly for fastening later.
- Check that the cover completely encloses the faucet, leaving no gaps or exposed areas. A properly positioned cover should provide a tight seal, preventing cold air from reaching the faucet.
- If your cover has any additional flaps or features that need to be secured, make sure to position them properly and attach them as instructed by the manufacturer.
- Take a step back and evaluate the positioning of the cover. Ensure that it is aligned properly and securely in place, ready for the next step.
By carefully positioning the faucet cover, you can ensure that it provides maximum protection against freezing temperatures. A properly positioned cover creates an effective barrier, preventing cold air from reaching the faucet and reducing the risk of freezing and damage.
Once you have positioned the faucet cover, you can proceed to the next step: securing the cover in place.
When putting on a faucet cover, make sure to disconnect the hose and drain any remaining water to prevent freezing and damage during the winter months.
Step 6: Secure the faucet cover
After positioning the faucet cover over the faucet, the next step is to secure it in place. Properly securing the cover ensures that it remains in position and provides optimal insulation throughout the winter season. Follow these guidelines to secure the faucet cover:
- If your cover has straps, Velcro, or ties, use them to tighten and secure the cover. Wrap the straps or ties around the cover and fasten them tightly to hold the cover in place. Make sure the fastening mechanism is secure but not overly tight to prevent damage to the cover or faucet.
- If your cover does not come with straps or ties, you can use duct tape or zip ties as alternative fasteners. Carefully wrap the tape or zip ties around the cover, ensuring that it is tightly secured. Trim any excess tape or zip tie length using scissors or a utility knife.
- Double-check that the cover remains properly aligned and snug after fastening it. Adjust the straps, ties, tape, or zip ties as needed to maintain a secure fit. The cover should not be loose or shift easily when touched.
- Inspect the fasteners and ensure that they are tightly secured. Loose or loose-fitting fasteners may cause the cover to slip or fall off, compromising its effectiveness. Reinforce any loose areas by adding additional tape or zip ties if necessary.
By securely fastening the faucet cover, you can prevent it from coming loose or shifting during winter weather conditions. A properly secured cover provides consistent insulation and protects the faucet from freezing temperatures.
Once you have securely fastened the faucet cover, it’s time to move on to the next step: checking for any gaps or loose ends.
Step 7: Check for any gaps or loose ends
After securing the faucet cover, it is important to thoroughly inspect it for any gaps or loose ends. These gaps can significantly reduce the effectiveness of the cover and expose the faucet to the cold weather. Follow these steps to check for any gaps or loose ends:
- Carefully examine the cover’s edges and seams. Look for any areas where the cover may not be tightly sealed or where there may be gaps.
- Run your hand along the edges of the cover, feeling for any cold air drafts. If you feel any cold air or notice any gaps, it indicates that the cover may not be properly positioned or secured.
- Check the area around the spout, handle, and any other protrusions on the faucet. Make sure that the cover fits snugly around these areas, leaving no gaps or exposed sections.
- Inspect the fasteners or ties used to secure the cover. Ensure that they are still tightly in place and have not become loose or undone.
- If you discover any gaps or loose ends, readjust the cover as necessary. Tighten the straps, ties, or fasteners to eliminate any gaps. If using duct tape or zip ties, add additional layers or replacements to reinforce the cover’s seal.
Checking for any gaps or loose ends is a critical step in the process of putting on a faucet cover. It ensures that your faucet is fully protected from freezing temperatures and reduces the risk of damage caused by cold air exposure. By identifying and addressing any gaps or loose ends, you can maximize the efficacy of your faucet cover.
Now that you have checked for gaps and loose ends, it’s time to move on to the next step: insulating any exposed pipes.
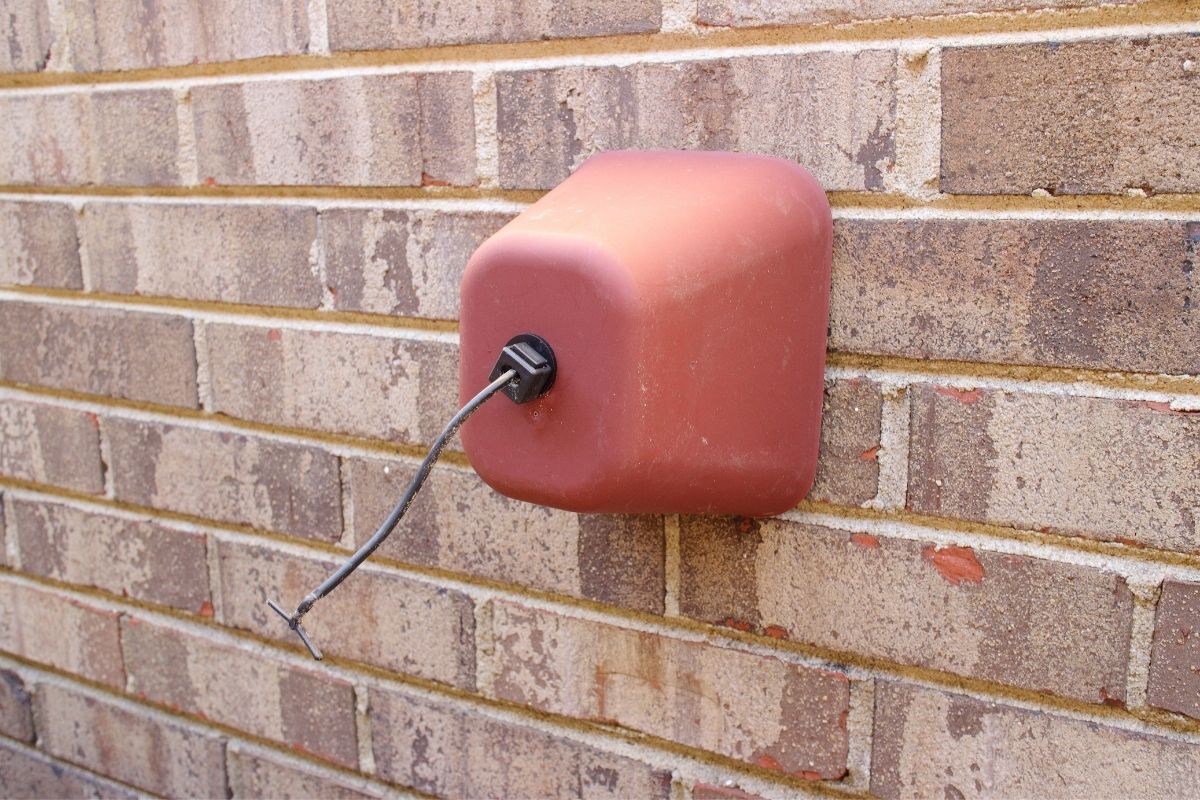
Step 8: Insulate any exposed pipes
In addition to covering the faucet, it is important to insulate any exposed pipes connected to the faucet. Exposed pipes are vulnerable to freezing temperatures and can lead to costly damage if they burst. Insulating these pipes adds an extra layer of protection and helps to prevent freezing. Follow these steps to insulate any exposed pipes:
- Identify any pipes that are exposed and connected to the faucet. These pipes may be visible above the ground or in crawl spaces, basements, or other areas.
- Measure the length and diameter of the exposed pipes. This will help you determine the appropriate size of insulation.
- Select the appropriate pipe insulation material. Foam pipe insulation, which is available at most hardware stores, is a popular choice. It comes in various sizes and can be easily cut to fit the pipes.
- Cut the foam pipe insulation to the appropriate length, using a utility knife or scissors. Make sure to leave enough insulation to cover the entire exposed section of the pipe.
- Split the foam insulation lengthwise along one side. This will allow you to easily wrap it around the pipe.
- Carefully slide the split foam insulation over the exposed pipes, ensuring that it completely covers the exposed area. The split side of the insulation should be facing towards the pipe to provide a tight seal.
- If necessary, secure the foam insulation using duct tape or zip ties. This will help keep it in place and ensure a snug fit.
- Inspect the insulated pipes to ensure there are no gaps or exposed areas. If you notice any gaps, adjust or add additional insulation as needed.
Insulating any exposed pipes helps to prevent freezing and reduces the risk of burst pipes. By following these steps and properly insulating the pipes, you can protect your plumbing system from potential damage caused by freezing temperatures.
Now that you have insulated any exposed pipes, you are ready to move on to the next step: additional tips and considerations for faucet cover installation.
Read more: How To Put Toilet Seat Cover
Step 9: Additional tips and considerations
As you complete the installation of your faucet cover, there are some additional tips and considerations to keep in mind to ensure optimal protection and functionality:
- Regularly check the cover: Periodically inspect the faucet cover throughout the winter season to ensure it remains securely in place and there are no signs of damage or wear. If you notice any issues, make necessary adjustments or replace the cover if needed.
- Keep the faucet cover clean: Maintain the cleanliness of your faucet cover by gently wiping it down with a clean cloth or sponge as needed. This helps to remove any debris or dirt that may accumulate and ensures the cover remains effective.
- Do not overtighten: When securing the cover or fastening straps, be careful not to overtighten as this may cause damage to the cover or faucet. Use a firm but gentle touch to ensure a secure fit without unnecessary strain.
- Consider using insulation tape: For additional insulation, you can use insulation tape to wrap around the exposed pipes before adding the foam pipe insulation. This extra layer of insulation provides an added barrier against freezing temperatures.
- Prepare for extreme weather conditions: In regions with severe winter weather, consider using more advanced faucet covers with built-in insulation or even investing in freeze-proof faucets. These additional measures can provide extra protection against freezing temperatures.
By following these additional tips and considerations, you can ensure that your faucet cover remains effective and your outdoor faucets are well-protected throughout the winter season.
Congratulations! You have successfully completed the installation of your faucet cover and taken the necessary steps to protect your outdoor faucets from freezing temperatures. By following these steps and guidelines, you can enjoy peace of mind knowing that your faucets are safeguarded against potential damage.
Remember to remove the faucet cover and insulation in the spring once the threat of freezing temperatures has passed. Store them in a safe and dry place for future use.
Thank you for following this guide, and we hope that you find these steps and additional tips helpful in keeping your outdoor faucets protected and functional during the winter months.
Stay warm and enjoy a worry-free winter season!
Conclusion
In conclusion, putting on a faucet cover is a simple and effective way to protect your outdoor faucets from freezing temperatures. By following the steps outlined in this guide, you can ensure that your faucets are well-insulated and safeguarded against potential damage during the winter season.
We started by gathering the necessary materials, including a faucet cover, duct tape or zip ties, a measuring tape, scissors or a utility knife, and a clean cloth or sponge. Then, we proceeded to clean and dry the faucet to ensure a proper seal. Measuring the faucet helped us choose the appropriate cover size, and selecting the right cover was important for optimal insulation.
Positioning the faucet cover and securing it in place were crucial steps in ensuring a tight seal and maximum protection. We checked for any gaps or loose ends, making necessary adjustments to maintain an effective barrier against freezing temperatures. Insulating any exposed pipes added an extra layer of protection to prevent pipe damage.
Furthermore, we provided additional tips and considerations to enhance the functionality and longevity of the faucet cover, such as regular check-ups, proper cleaning, avoiding overtightening, and considering advanced options for extreme weather conditions.
By taking the time to properly put on a faucet cover, you can avoid the costly consequences of frozen pipes and ensure that your outdoor faucets remain functional and intact throughout the winter season.
We hope this guide has been informative and helpful in assisting you with the installation of a faucet cover. Remember to remove the cover and insulation in the spring and store them for future use.
Stay proactive in protecting your outdoor faucets, stay warm, and enjoy a worry-free winter!
Now that you've mastered putting on a faucet cover, why not dive deeper into keeping your home in tip-top shape? Our next guide covers essential home maintenance tasks that every homeowner should tackle. From checking roof tiles to cleaning gutters, we've outlined simple yet effective ways to keep your living space safe and sound throughout the year. Don't miss out on these valuable insights that can save you time and money!
Frequently Asked Questions about How To Put On Faucet Cover
Was this page helpful?
At Storables.com, we guarantee accurate and reliable information. Our content, validated by Expert Board Contributors, is crafted following stringent Editorial Policies. We're committed to providing you with well-researched, expert-backed insights for all your informational needs.


0 thoughts on “How To Put On Faucet Cover”