Articles
How To Recharge An AC System
Modified: October 20, 2024
Learn how to recharge your AC system with this helpful guide. Follow these step-by-step articles to get started.
(Many of the links in this article redirect to a specific reviewed product. Your purchase of these products through affiliate links helps to generate commission for Storables.com, at no extra cost. Learn more)
Introduction
With the arrival of summer, keeping our homes and cars cool becomes a top priority. One of the key components in achieving a comfortable indoor environment is a well-functioning air conditioning (AC) system. However, over time, AC systems can lose their efficiency and may need to be recharged.
In this article, we will guide you through the steps to successfully recharge an AC system, whether it’s in your home or your car. We will provide a comprehensive overview of the process, from understanding the AC system to checking for leaks, adding refrigerant, using a recharge kit, recharging the system, and finally testing the AC system to ensure it’s working optimally.
It’s important to note that recharging an AC system is not a substitute for fixing any underlying mechanical or electrical issues. If you suspect there may be a major problem with your AC system, it’s recommended to seek professional help. However, if the issue is simply low refrigerant levels, you can follow the steps in this article to recharge the system yourself.
Before we begin, it’s essential to understand the AC system and how it works. Let’s dive into the basics of how an AC system functions to cool the air.
Key Takeaways:
- Understanding the AC system and checking for leaks are crucial steps before recharging. Properly adding refrigerant and using a recharge kit can help maintain optimal cooling efficiency in both vehicles and homes.
- Testing the AC system after recharging is essential to ensure proper functionality. Monitoring air temperature, cooling performance, and pressure levels can help identify any underlying issues that require professional attention.
Read more: How Much Is An AC Recharge
Understanding the AC System
Before you can successfully recharge an AC system, it’s crucial to have a basic understanding of how the system works. AC systems work on the principles of fluid dynamics and heat transfer to cool the air. They consist of several key components, including the compressor, condenser, expansion valve, and evaporator.
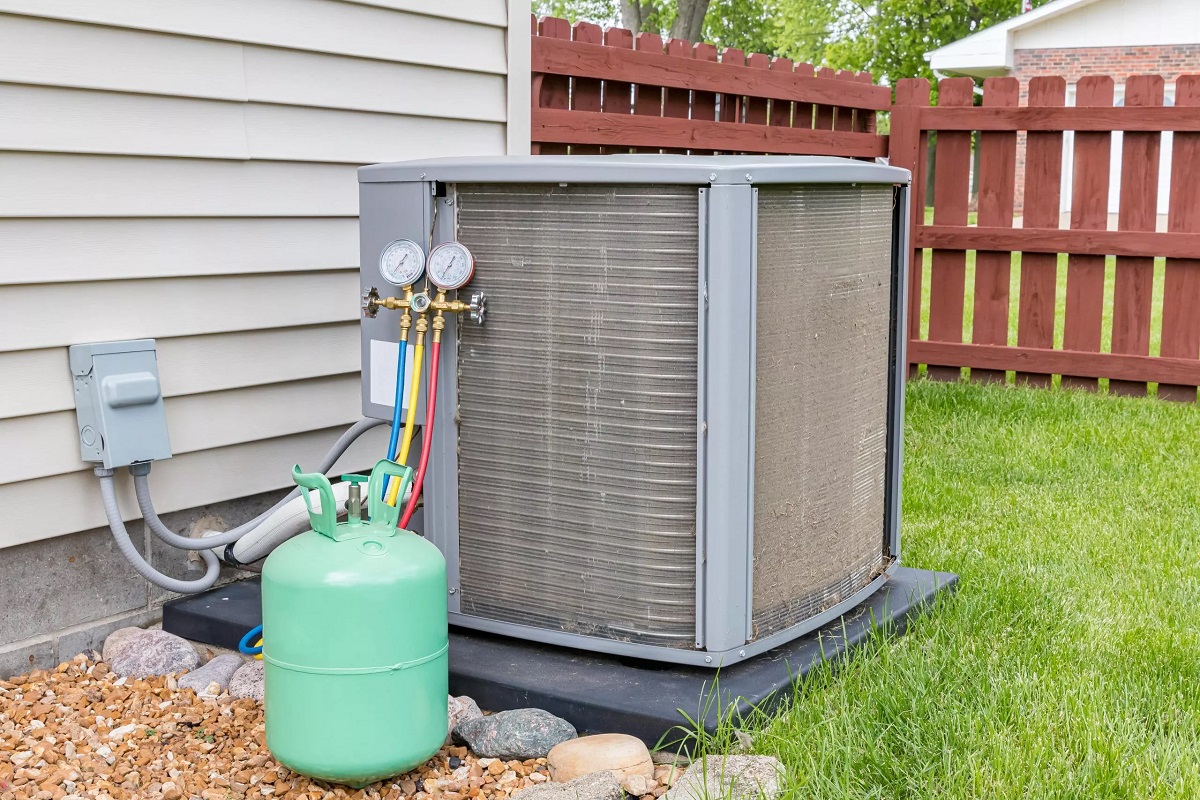
The compressor is the heart of the AC system. It compresses low-pressure refrigerant gas into high-pressure gas, increasing its temperature in the process. The high-pressure gas then flows to the condenser, where it releases heat and condenses into a high-pressure liquid. The condenser is located in front of the vehicle’s radiator or in the outdoor unit of a home AC system.
From the condenser, the high-pressure liquid refrigerant passes through the expansion valve, which regulates the flow of refrigerant into the evaporator. As the refrigerant moves through the expansion valve, it undergoes a rapid expansion, causing its temperature and pressure to drop.
The cooled and low-pressure refrigerant then enters the evaporator, which is located inside the vehicle’s cabin or the indoor unit of a home AC system. The warm air from the surroundings is blown over the cold evaporator coil, causing the refrigerant to absorb heat from the air. This cools down the air and removes moisture, resulting in a comfortable indoor environment.
Understanding the AC system’s components and how they work together is essential for properly recharging the system. In the next section, we will discuss how to check for leaks, which can be a common cause of reduced refrigerant levels.
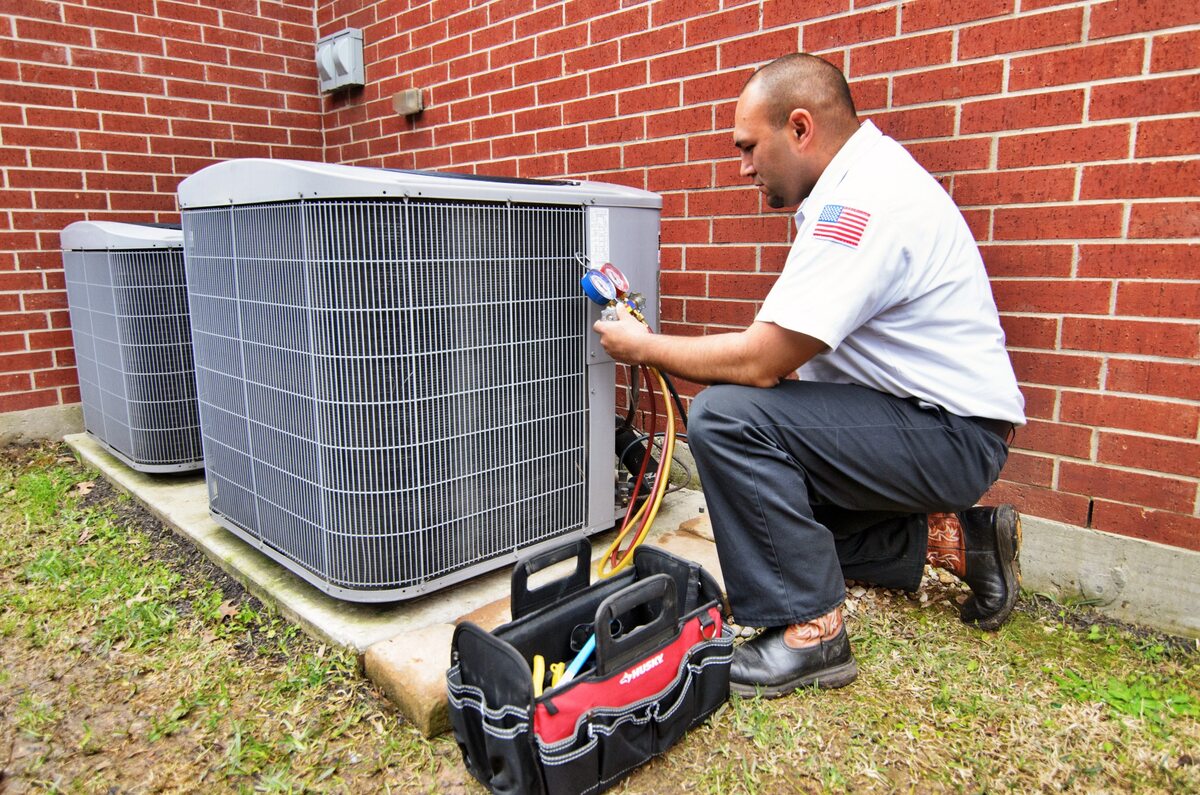
Checking for Leaks
Before adding refrigerant to your AC system, it’s important to check for any leaks that may be causing the refrigerant levels to drop. Leaks can occur in various parts of the system, such as the hoses, fittings, or the condenser. Detecting and fixing leaks is crucial to ensure the long-term efficiency and performance of your AC system.
One way to check for leaks is by using an electronic leak detector. This device is designed to detect refrigerant leaks by sensing the presence of the gas in the surrounding air. Follow the manufacturer’s instructions to effectively use the leak detector and systematically check all the components of the AC system, including the fittings, hoses, and condenser.
Another method to check for leaks is by using an ultraviolet (UV) dye. UV dye is injected into the AC system, and if there is a leak, the dye will escape with the refrigerant. To detect the leak, you will need a UV light. Shine the UV light on the AC system components, and if there is a leak, the dye will fluoresce under the UV light, indicating the exact location of the leak.
If you find any leaks during the inspection process, it’s important to fix them before proceeding with the recharge. Depending on the severity of the leak, you may need to replace a faulty component or repair a damaged section of the system. Seek professional assistance if you are uncertain or uncomfortable with performing these repairs yourself.
Once you have ensured that there are no leaks or have fixed any leaks that were detected, you can move on to the next step of adding refrigerant to your AC system.
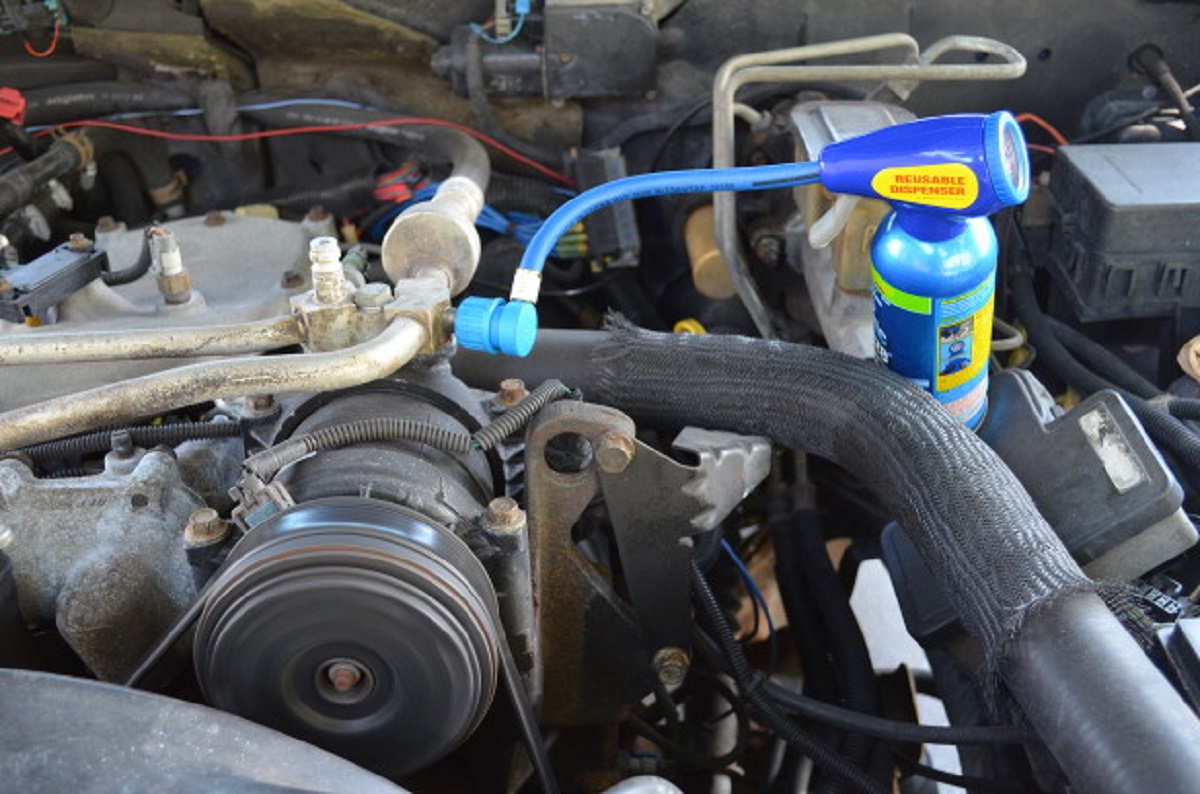
Adding Refrigerant
Adding refrigerant to your AC system is a crucial step in recharging it. Before you begin, it’s important to identify the correct type of refrigerant for your system. AC systems typically use either R-134a or R-410A refrigerants, but the specific type required will depend on the make and model of your AC system.
Once you have the correct refrigerant, follow these steps to add it to your AC system:
-
Locate the low-pressure service port: The service ports are typically located on the air conditioning lines or hoses. The low-pressure port is usually marked with an “L” or the word “Low.” Refer to your AC system’s manual for the exact location if you are unsure.
-
Prepare the refrigerant canister: Shake the canister of refrigerant well to ensure proper mixing of the contents. Attach the recharge hose to the canister’s valve, making sure it is securely connected.
-
Connect the recharge hose to the low-pressure service port: Insert the recharge hose’s fitting onto the low-pressure service port. Ensure a tight and secure connection to prevent any leaks.
-
Start the engine or turn on the AC system: If you are recharging the AC system in a vehicle, start the engine. For home AC systems, switch on the system and set it to its maximum cooling level.
-
Add the refrigerant: Slowly and carefully squeeze the trigger on the refrigerant canister to release the refrigerant into the system. Keep an eye on the pressure gauge to monitor the pressure levels. Be cautious not to overfill the system, as it can lead to damage or reduced efficiency.
-
Monitor the pressure: Continue adding refrigerant until the pressure reaches the recommended level specified in the AC system’s manual or guidelines. This level may vary depending on the ambient temperature and the specific requirements of your system.
-
Disconnect the recharge hose: Once you have reached the desired pressure level, disconnect the recharge hose from the low-pressure service port. Ensure that the valve on the refrigerant canister is tightly closed to prevent any leaks.
By following these steps, you can successfully add refrigerant to your AC system and prepare it for the next stage of recharging.
When recharging an AC system, always use the manufacturer’s recommended refrigerant and follow the proper procedure for adding the refrigerant to ensure optimal performance and prevent damage to the system.
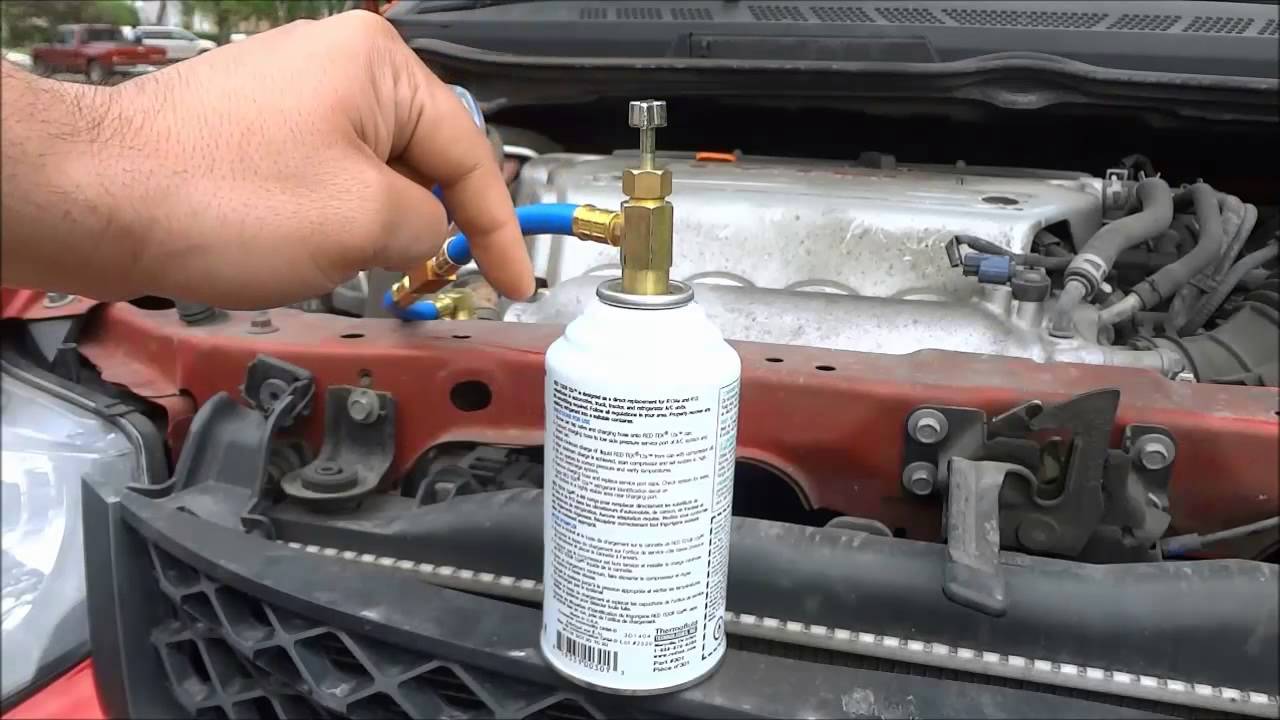
Using a Recharge Kit
Using a recharge kit is a convenient option for recharging your AC system, especially for those who are not familiar with the technical aspects of the process. A recharge kit typically includes a canister of refrigerant, a recharge hose with a pressure gauge, and instructions on how to use the kit correctly.
Here’s a step-by-step guide on using a recharge kit to recharge your AC system:
-
Read the instructions: Before you start, carefully read the instructions provided with the recharge kit. Familiarize yourself with the components and understand the precautions and guidelines for proper usage.
-
Locate the low-pressure service port: The service ports on your AC system are typically located on the air conditioning lines or hoses. Identify the low-pressure port, usually marked with an “L” or the word “Low.” Refer to your AC system’s manual for the exact location if needed.
-
Prepare the recharge kit: Attach the recharge hose to the canister of refrigerant, making sure it is securely connected. Some kits may require you to pierce the canister to release the refrigerant.
-
Connect the recharge hose: Insert the fitting of the recharge hose onto the low-pressure service port. Ensure a tight and secure connection to prevent any leaks.
-
Start the engine or turn on the AC system: If you are recharging the AC system in a vehicle, start the engine. For home AC systems, switch on the system and set it to its maximum cooling level.
-
Add the refrigerant: Slowly and steadily squeeze the trigger on the recharge kit to release the refrigerant into the system. Monitor the pressure gauge to ensure you do not overfill the system. Follow the instructions provided with the kit to determine the correct amount of refrigerant to add.
-
Monitor the pressure: Keep an eye on the pressure gauge while adding the refrigerant. Once the pressure reaches the recommended level specified in the AC system’s manual or guidelines, stop adding refrigerant.
-
Disconnect the recharge hose: Once you have achieved the desired pressure level, disconnect the recharge hose from the low-pressure service port. Ensure that the valve on the recharge kit canister is tightly closed to prevent any leaks.
Using a recharge kit provides a straightforward and user-friendly approach to add refrigerant to your AC system. However, it’s essential to follow the instructions carefully and use the kit responsibly to ensure a safe and effective recharge.
Read more: How Often To Recharge AC In Car
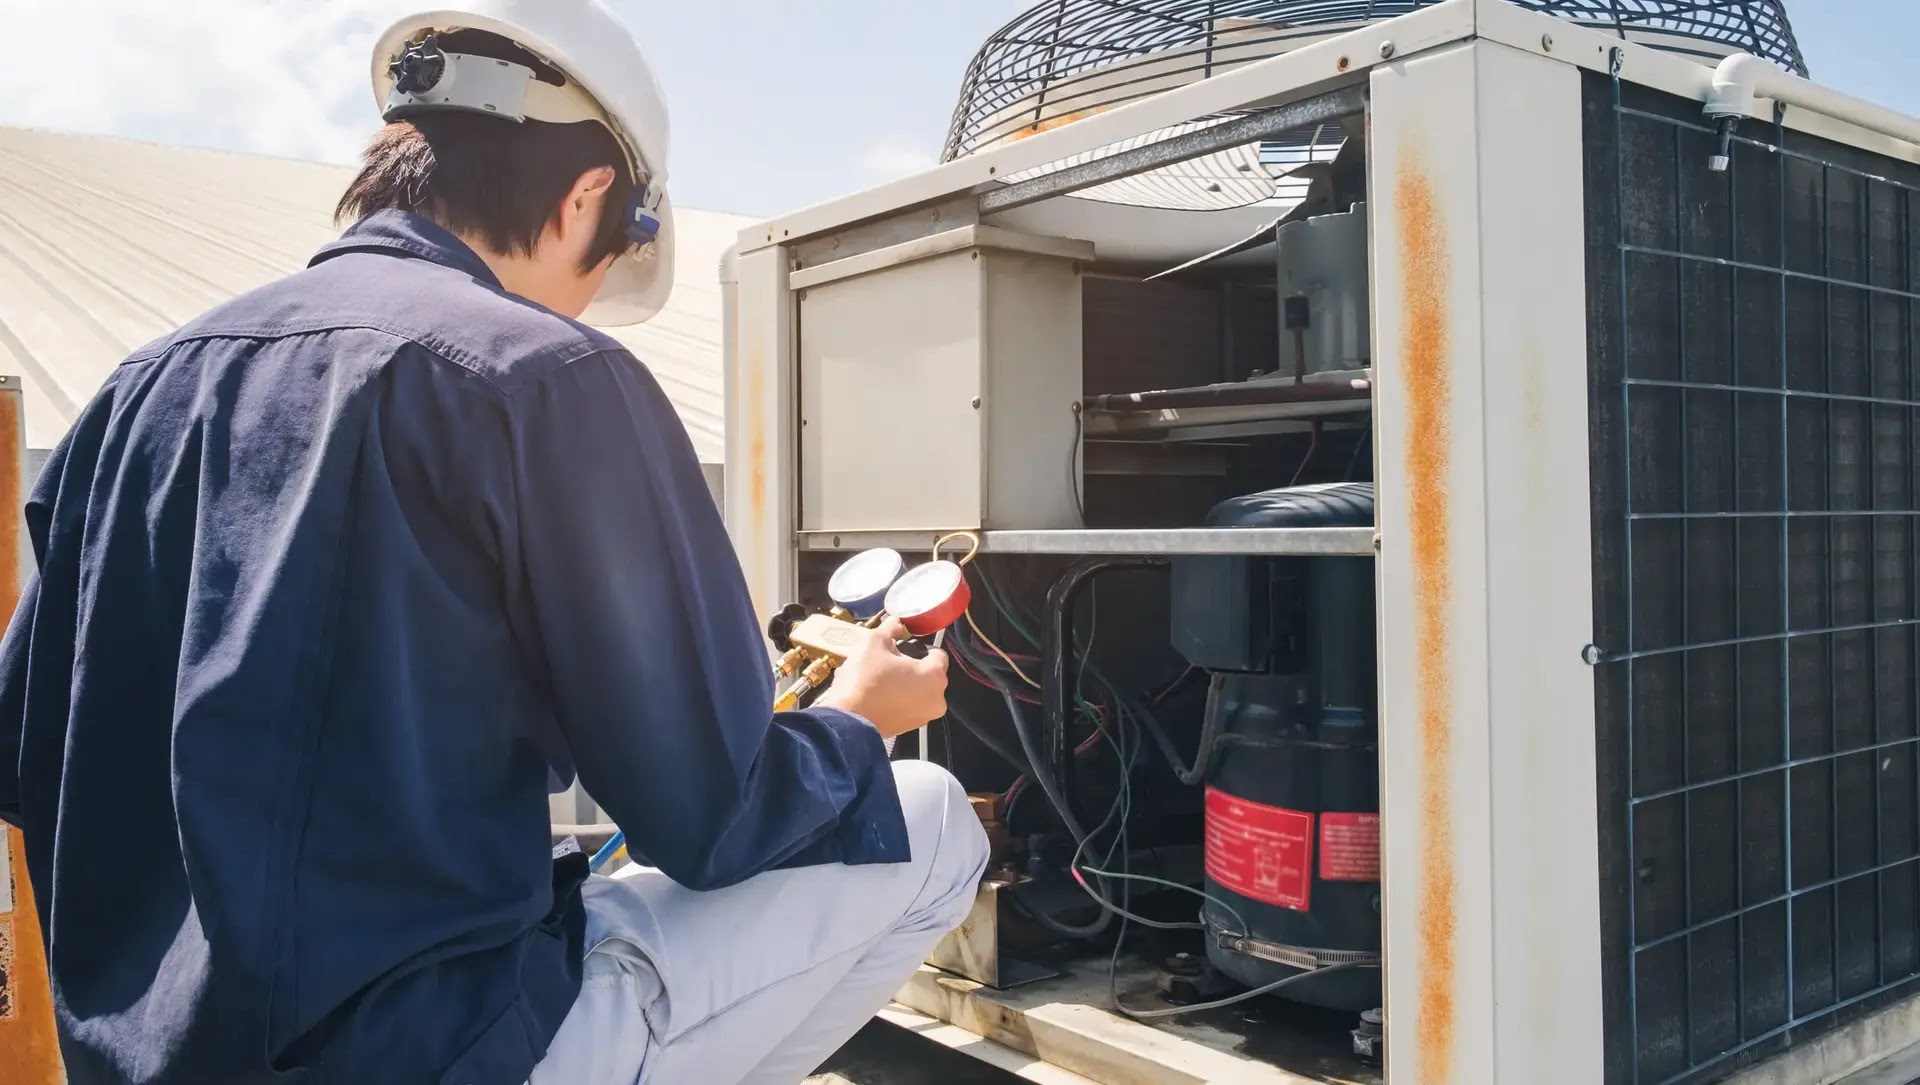
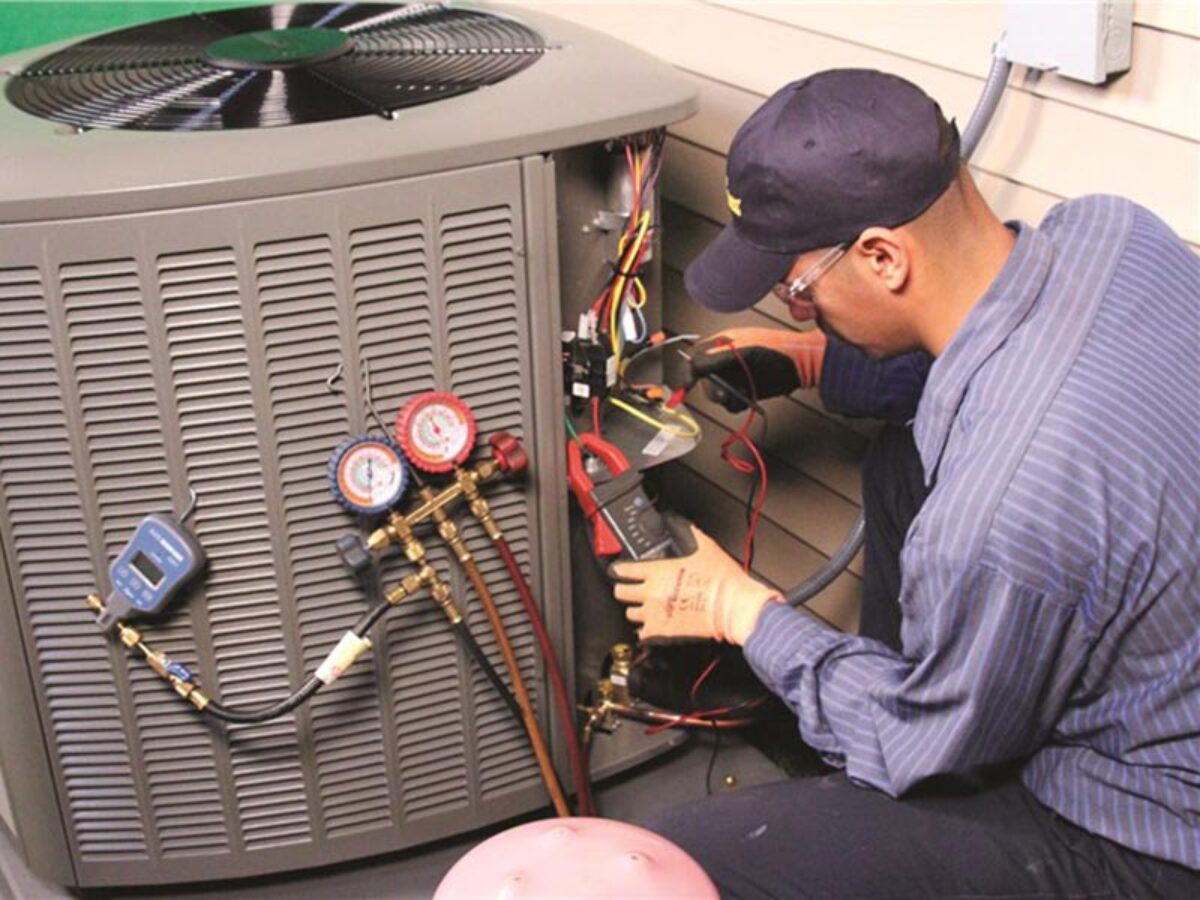
Recharging the AC System
Now that you have checked for leaks and added the refrigerant, it’s time to recharge the AC system. Recharging involves restoring the correct refrigerant levels in the system, allowing it to function optimally and cool the air effectively. Here are the steps to recharge your AC system:
-
Start the engine or turn on the AC system: If you are recharging the AC system in a vehicle, start the engine. For home AC systems, switch on the system and set it to its maximum cooling level.
-
Set the AC system to its coldest setting: Adjust the temperature control to the lowest setting possible. This will activate the AC compressor and allow the refrigerant to circulate through the system.
-
Run the AC system for a few minutes: Let the AC system run for about 5 to 10 minutes to allow it to stabilize and ensure that the refrigerant is evenly distributed throughout the system.
-
Monitor the cooling performance: Check the airflow and the temperature of the air coming from the vents. If you notice that the air is not as cold as expected or if the cooling performance is not satisfactory, it may indicate further issues with the AC system that need to be addressed.
-
Observe the pressure gauge: Keep an eye on the pressure gauge during the recharge process. The pressure readings can help you determine if the system is properly charged. Refer to your AC system’s manual or consult a professional to understand the ideal pressure range for your specific system.
-
Adjust the refrigerant levels if necessary: If the pressure readings are too low, you may need to add more refrigerant to the system. Follow the steps mentioned earlier for adding refrigerant using a recharge kit or consult a professional for assistance.
-
Continue observing and adjusting as needed: Recharging an AC system is a gradual process, and it may require multiple iterations to achieve the desired performance. Monitor the cooling performance and the pressure readings, adjusting the refrigerant levels as necessary until the AC system is functioning optimally.
-
Take note of any other issues: If you encounter any issues during the recharge process, such as unusual sounds or leaks, it’s important to address them promptly. It may be necessary to seek professional assistance to diagnose and resolve any underlying problems.
By following these steps and monitoring the performance of your AC system, you can successfully recharge it and ensure efficient cooling in your vehicle or home.
Testing the AC System
After recharging the AC system, it is crucial to perform a thorough test to ensure that it is functioning properly and delivering the desired cooling performance. Testing the AC system will help you determine if any additional adjustments or repairs are required. Follow these steps to test your AC system:
-
Allow the AC system to run for an extended period: After recharging, let the AC system run for at least 15 minutes to ensure that it has reached its optimal operating conditions.
-
Check the air temperature at the vents: Use a thermometer to measure the temperature of the air coming from the vents. The air should be noticeably colder than the ambient temperature. If the air is not as cold as expected, it may indicate an issue that requires further investigation.
-
Observe the cooling performance: Assess the overall cooling performance of the AC system. Pay attention to factors such as airflow, consistency of cooling throughout the space, and the time it takes to achieve the desired temperature.
-
Listen for any unusual sounds: Running the AC system gives you an opportunity to listen for any unusual sounds, such as grinding, squealing, or rattling noises. Unusual sounds could indicate a mechanical issue that needs to be addressed by a professional.
-
Monitor for any leaks: While the AC system is running, inspect the system and its components for any signs of refrigerant leaks. Check for puddles or drips beneath the vehicle or around the AC unit in your home. If you notice any leaks, it’s important to address them promptly to prevent further damage or refrigerant loss.
-
Assess the cooling efficiency: Evaluate whether the AC system is effectively cooling the air and maintaining the desired temperature. If you find that the cooling performance is not satisfactory, it may indicate an underlying issue, and it is advisable to seek professional assistance to diagnose and rectify any problems.
-
Review the pressure levels: Take note of the pressure readings on the AC system’s gauge. The pressure should be within the recommended range specified in the AC system’s manual or guidelines. Any abnormalities in the pressure could indicate a problem that needs to be addressed.
By conducting a comprehensive test of your AC system, you can identify potential issues and ensure that the system is functioning optimally. If you encounter any persistent problems or are unsure about the performance of your AC system, it is advisable to consult a professional for a thorough inspection and appropriate repairs.
Conclusion
Recharging an AC system is a crucial maintenance task to ensure optimal cooling performance in both vehicles and homes. By understanding the AC system, checking for leaks, adding refrigerant, and properly recharging the system, you can enjoy a comfortable indoor environment during the hot summer months.
During the recharge process, it is important to monitor the AC system’s performance and make necessary adjustments to achieve the desired cooling efficiency. Regularly testing the system and addressing any issues that arise will help maintain its functionality and prevent further damage.
While recharging an AC system can be done by following the steps outlined in this article, it is important to note that it may not be a permanent solution to underlying mechanical or electrical problems. If you suspect there may be significant issues with your AC system, it is recommended to seek professional assistance for a thorough inspection and necessary repairs.
Remember to prioritize safety and follow all manufacturer instructions and guidelines when working with refrigerants and AC system components. If you are unsure or uncomfortable performing any of the procedures, it is best to consult with a qualified professional.
By following the proper procedures and taking the necessary precautions, you can successfully recharge your AC system and enjoy the cool and refreshing air it provides, ensuring comfort and satisfaction during the scorching hot summer season.
Frequently Asked Questions about How To Recharge An AC System
Was this page helpful?
At Storables.com, we guarantee accurate and reliable information. Our content, validated by Expert Board Contributors, is crafted following stringent Editorial Policies. We're committed to providing you with well-researched, expert-backed insights for all your informational needs.


0 thoughts on “How To Recharge An AC System”