Articles
How To Clean AC Unit
Modified: September 2, 2024
Learn the best articles on how to clean your AC unit and ensure optimal performance and air quality in your home.
(Many of the links in this article redirect to a specific reviewed product. Your purchase of these products through affiliate links helps to generate commission for Storables.com, at no extra cost. Learn more)
Introduction
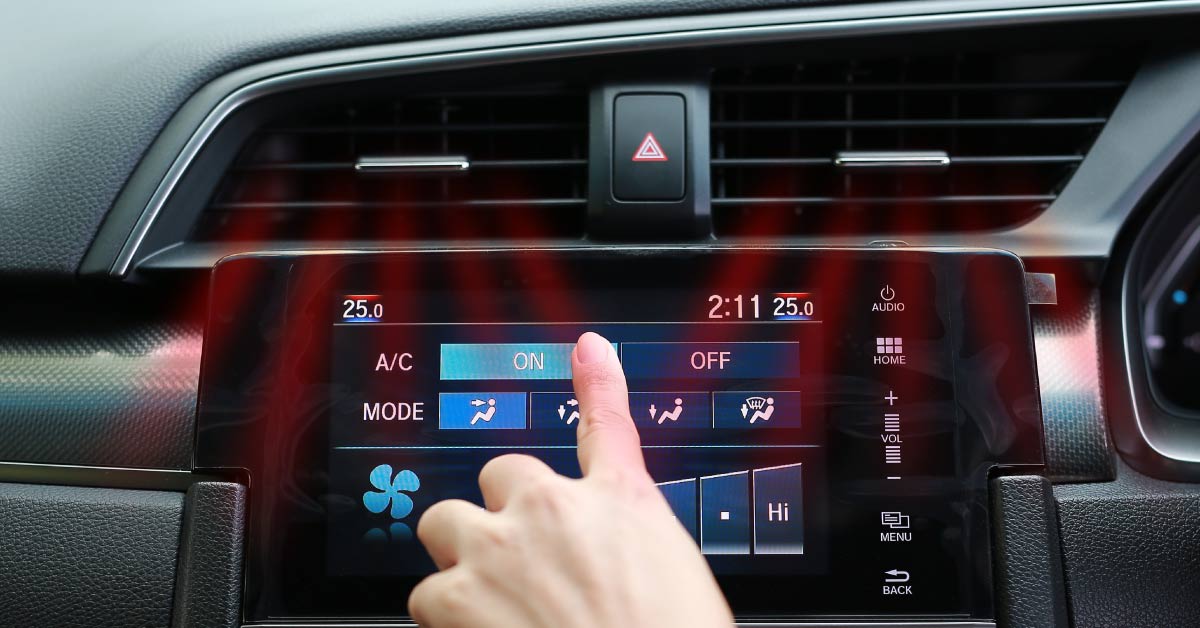
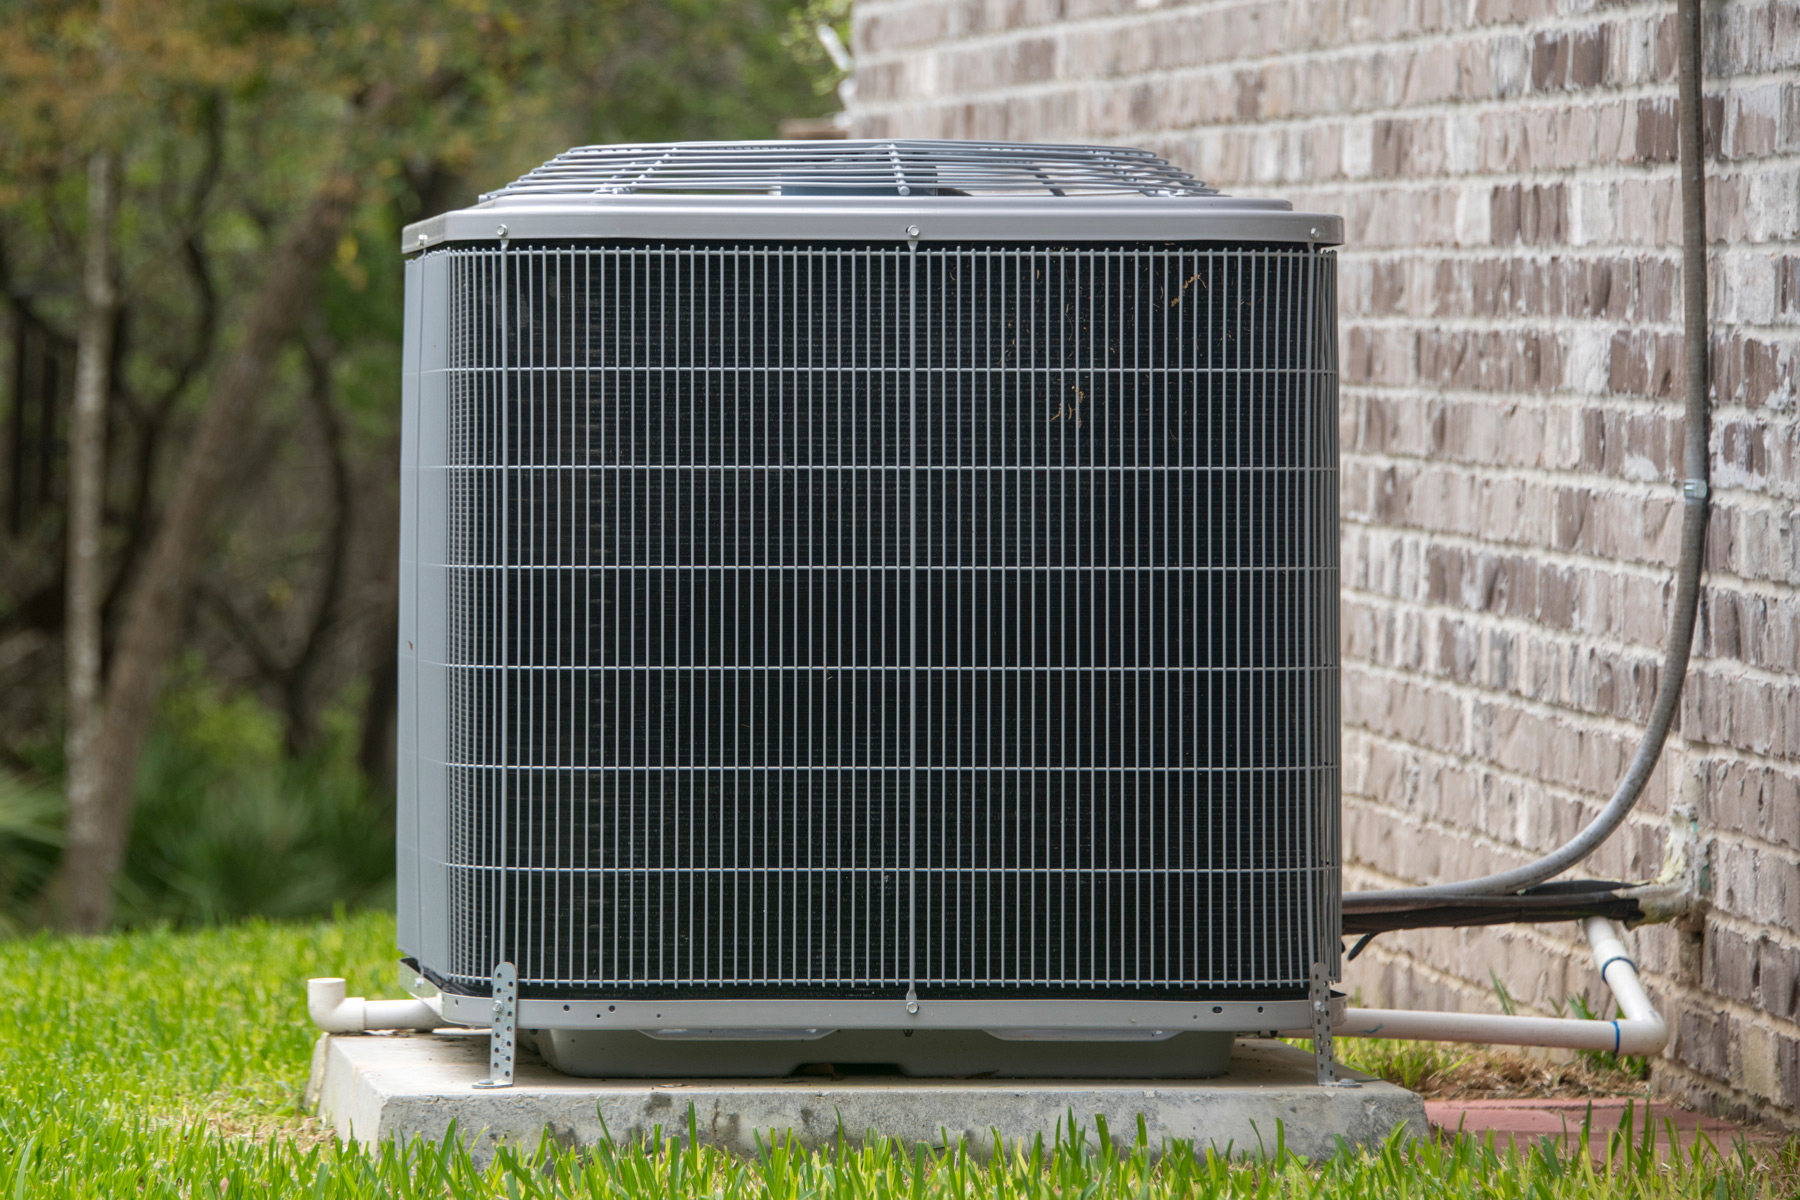
Welcome to our comprehensive guide on how to clean your AC unit. Regular maintenance of your air conditioner is essential to keep it running efficiently and prolong its lifespan. One important aspect of maintenance is cleaning the AC unit to ensure that it is free from dust, debris, and any other contaminants that can hinder its performance.
Over time, dust and dirt can accumulate on the fins, coils, and other components of your AC unit, reducing its efficiency and potentially leading to costly repairs. Additionally, a dirty AC unit can harbor allergens and pollutants, affecting the air quality in your home or office.
While it is recommended to have a professional service your AC unit annually, performing routine cleaning yourself can help maintain its performance between professional visits. In this guide, we will walk you through the step-by-step process of cleaning your AC unit to help you keep it in optimal condition.
Before we dive into the cleaning process, it’s important to note that your safety should be the top priority. Always follow safety precautions and guidelines provided in the manufacturer’s manual. If you are unsure or uncomfortable with any step, it is best to consult a professional.
Now that we have covered the basics, let’s move on to the safety precautions you should keep in mind before cleaning your AC unit.
Key Takeaways:
- Safety First
Before cleaning your AC unit, prioritize safety by turning off the power, wearing protective gear, and following manufacturer’s instructions. This ensures a safe and effective cleaning process, protecting both you and your unit. - Regular Maintenance Pays Off
Regularly cleaning your AC unit not only improves its efficiency and lifespan but also enhances air quality. By following the step-by-step guide, you can maintain a healthy and efficient cooling system, saving you from potential costly repairs or replacements.
Read more: How To Clean AC Vent
Safety Precautions
Before you start cleaning your AC unit, it’s important to follow these safety precautions to protect yourself and avoid any accidents or injuries:
- Turn off the power: Before beginning any cleaning or maintenance task, make sure to turn off the power to your AC unit. This can typically be done by switching off the circuit breaker or disconnecting the power supply from the main panel. This step will help prevent any electric shock accidents.
- Wear protective gear: While cleaning, protect yourself by wearing gloves, safety goggles, and a dust mask. This will help shield your hands, eyes, and respiratory system from any harmful particles or chemicals that may be present.
- Use a stable ladder: If you need to access high areas of your AC unit, use a sturdy ladder to ensure your safety. Ensure that the ladder is placed on a stable and level surface, and have someone assist you if needed.
- Follow manufacturer’s instructions: Every AC unit may have specific cleaning instructions provided by the manufacturer. Consult these instructions before starting the cleaning process to ensure you are following the proper procedures.
- Avoid excessive force: Be gentle when cleaning your AC unit to prevent damage to the fins, coils, or other delicate components. Using excessive force can lead to bending or breaking of these parts, resulting in a decrease in performance.
- Keep children and pets away: During the cleaning process, it’s important to keep children and pets away from the AC unit to prevent accidents or injuries. Ensure they are in a safe area while you work.
- Avoid using harsh chemicals: While cleaning, refrain from using harsh chemicals or abrasive cleaners that can damage the surfaces of the AC unit. Opt for mild detergents or specialized AC coil cleaners recommended by the manufacturer.
By following these safety precautions, you can ensure a safe and effective cleaning process for your AC unit. Now let’s move on to the tools and materials you will need for the job.
Tools and Materials Needed
Before you start cleaning your AC unit, gather the following tools and materials to ensure you have everything you need for the job:
- Screwdriver: You may need a screwdriver to remove screws or fastenings that hold the external cover of the AC unit in place.
- Soft-bristle brush or fin comb: A soft-bristle brush or a fin comb will help you clean the fins of your AC unit gently. This tool is essential for removing dust and debris that may have accumulated between the fins.
- Detergent or AC coil cleaner: Depending on the type of AC unit you have, you may need a mild detergent or specialized AC coil cleaner to clean the fins, coils, and other components. Check the manufacturer’s instructions for the recommended cleaning solution.
- Clean cloth: A clean, lint-free cloth will come in handy for cleaning the surfaces of the AC unit, including the exterior and interior components.
- Vacuum cleaner with a brush attachment: Using a vacuum cleaner with a brush attachment will help you remove loose debris and dust from the AC unit more effectively.
- Bucket and sponge: Having a bucket and sponge will be useful for cleaning the condensate drain line and other parts that require wiping or soaking.
- Gloves, safety goggles, and dust mask: Protect yourself during the cleaning process by wearing gloves, safety goggles, and a dust mask. This will shield your hands, eyes, and respiratory system from any potential hazards.
Make sure to gather all these tools and materials before you begin cleaning your AC unit. Having everything prepared will help streamline the process and ensure you have a successful cleaning experience. Now that you have everything you need, let’s move on to the step-by-step guide on how to clean your AC unit.
Step 1: Turn Off the Power
Before you start cleaning your AC unit, it is crucial to turn off the power supply to avoid any potential electric shock accidents. Follow these steps to ensure the power is safely disconnected:
- Locate the circuit breaker or disconnect switch for your air conditioning unit. This is usually found in your main electrical panel or near the outdoor unit.
- Identify the correct circuit breaker or switch that controls power to the AC unit.
- Switch off the circuit breaker or disconnect the power by flipping the switch to the “Off” position.
- Verify that the power to the AC unit is off by attempting to turn on the air conditioner from your thermostat. If it does not turn on, you have successfully disconnected the power.
It is important to note that some AC units may have a separate disconnect switch located near the outdoor unit. If this is the case, ensure that you also switch it off to cut off power completely.
Turning off the power before starting the cleaning process will help protect you from any electrical hazards. Remember, safety should always be a top priority. With the power supply safely disconnected, you can now move on to the next steps in cleaning your AC unit.
Step 2: Remove the External Cover
Now that you have turned off the power to your AC unit, you can proceed to remove the external cover. The external cover protects the inner components of the AC unit and can accumulate dust and debris over time. Follow these steps to remove the cover:
- Locate the screws or fastenings that secure the external cover to the AC unit.
- Using a screwdriver, carefully remove the screws or fastenings and set them aside.
- Gently lift and slide the cover off the AC unit, taking care not to damage any wires or components.
- Place the cover in a safe location where it will not be damaged during the cleaning process.
Once the external cover is removed, you will have better access to the internal components of the AC unit for thorough cleaning. Take a moment to inspect the cover for any signs of damage or wear. If you notice any issues, you may need to replace the cover before reassembling the unit.
With the external cover removed, you can now proceed to the next step, which involves cleaning the fins and coils of your AC unit. This step is crucial in maintaining the efficiency and performance of your air conditioner. Let’s move on to Step 3: Clean the Fins and Coils.
Read more: How To Clean Wall AC Unit
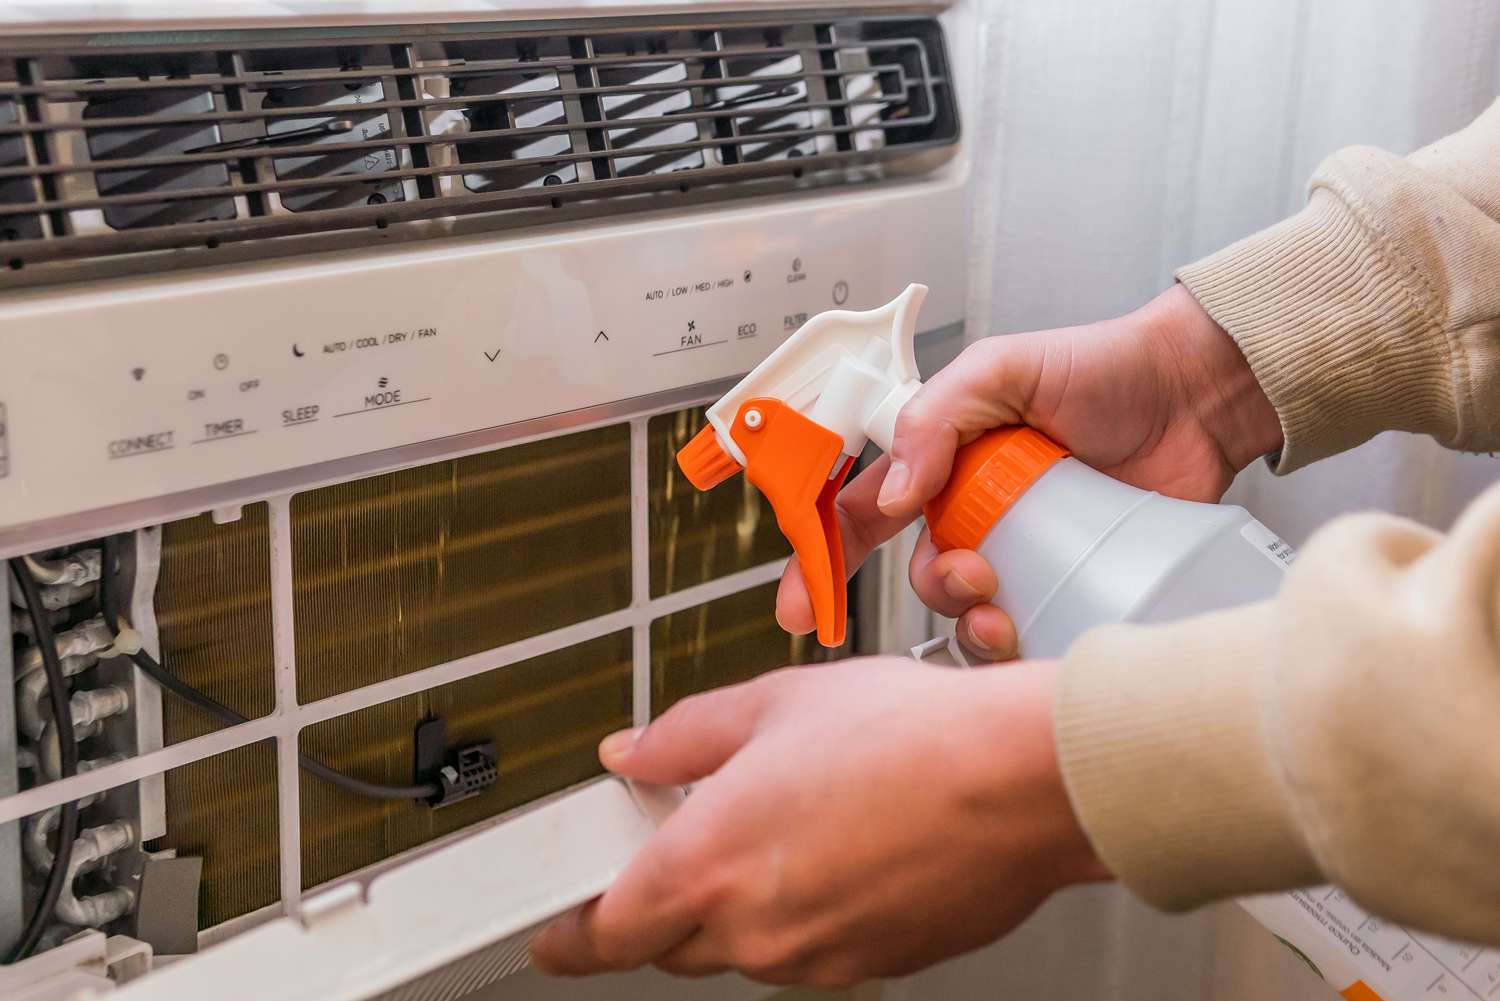
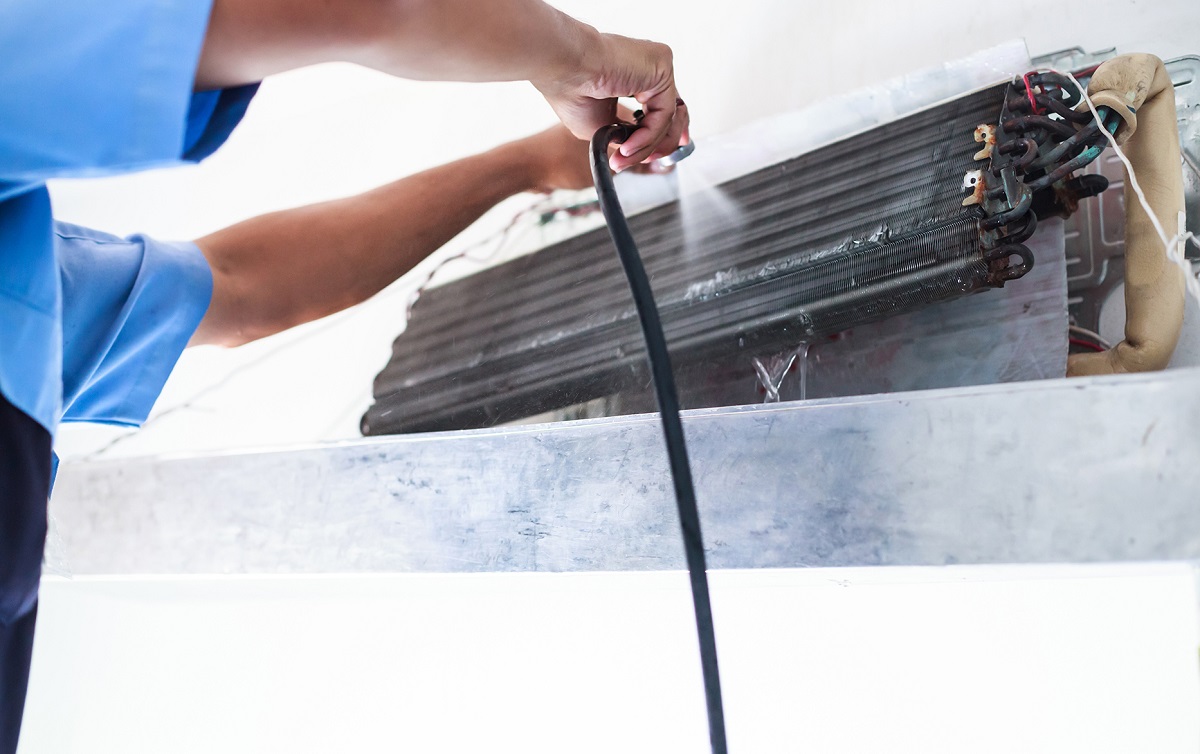
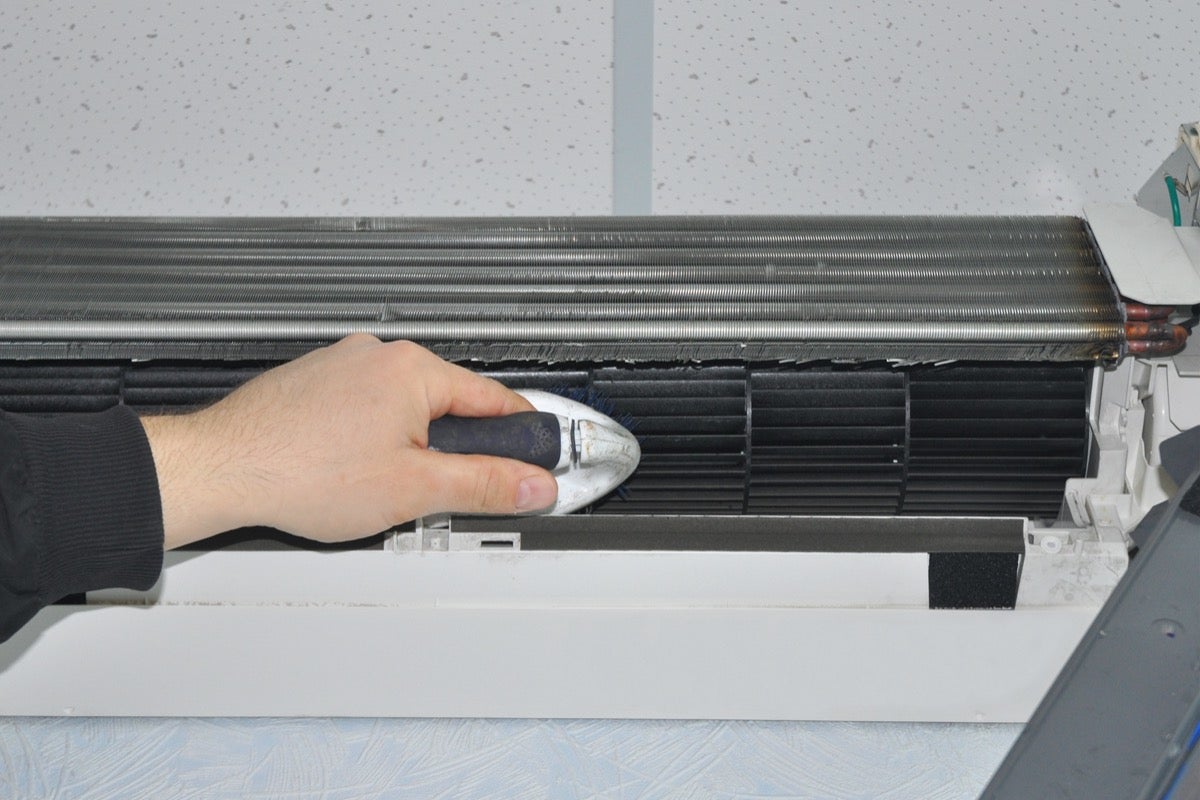
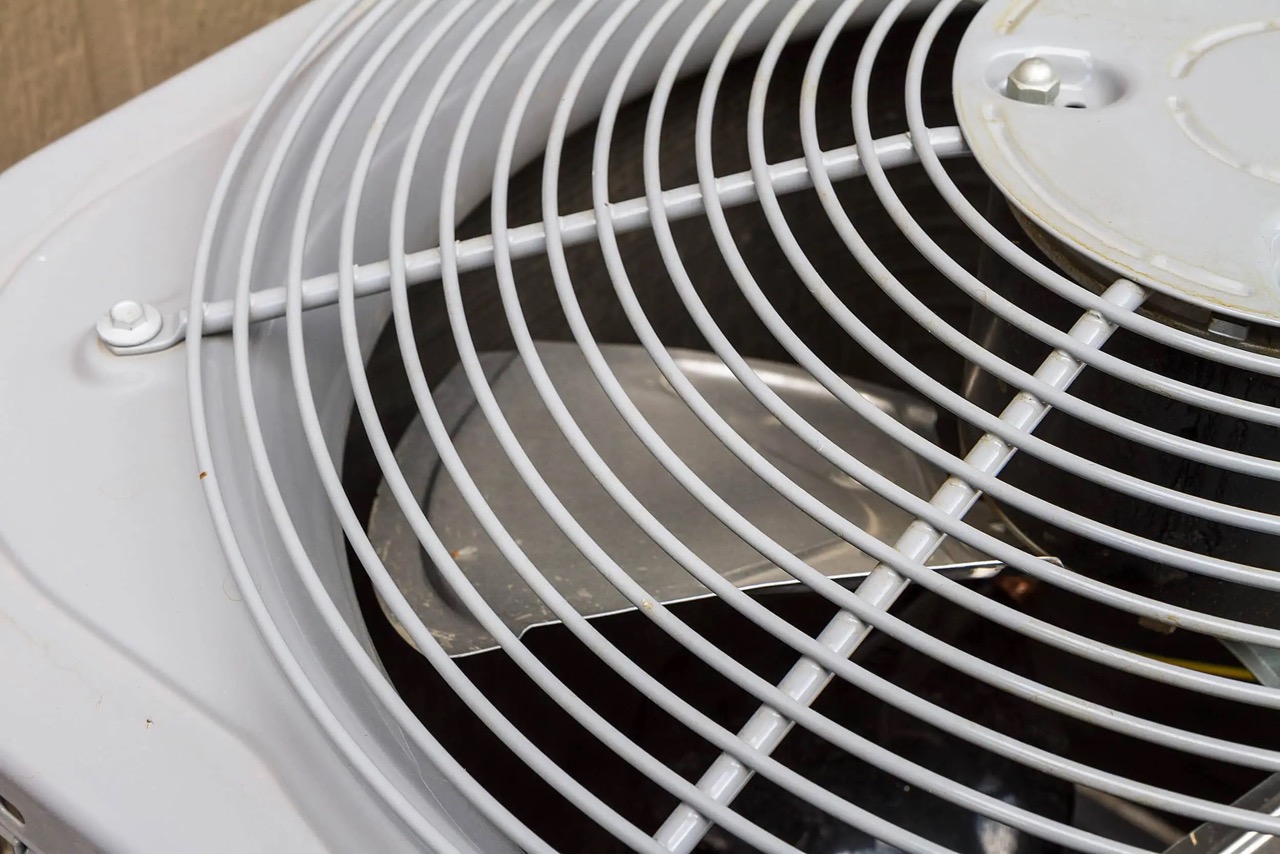
Step 3: Clean the Fins and Coils
Cleaning the fins and coils of your AC unit is an essential part of maintaining its efficiency. Over time, these components can become clogged with dirt, dust, and debris, which can restrict airflow and reduce cooling capacity. Follow these steps to clean the fins and coils:
- First, use a soft-bristle brush or a fin comb to gently remove any loose debris or dust from the fins. Be careful not to apply too much pressure, as the fins are delicate and can bend easily.
- Next, use a vacuum cleaner with a brush attachment to remove any remaining dirt or debris from the fins and coils. Carefully run the brush attachment along the fins and coils, ensuring all surfaces are thoroughly cleaned.
- If the fins are heavily soiled, you may need to use a mild detergent or specialized AC coil cleaner. Dilute the cleaner according to the manufacturer’s instructions and gently apply it to the fins using a clean cloth or sponge.
- Allow the cleaner to sit on the fins for a few minutes to loosen any stubborn dirt or grime. Avoid letting the cleaner come into contact with electrical components.
- After the cleaning solution has had time to work, use a clean cloth or sponge to wipe away the cleaner and any loosened dirt from the fins and coils.
- Continue this process until the fins and coils are clean and free from debris.
Pay close attention to the fins, as they play a vital role in the AC unit’s cooling process. Ensuring they are clean and unobstructed will help optimize airflow and improve the overall performance of your air conditioner.
Once you have thoroughly cleaned the fins and coils, you can move on to the next step, which involves cleaning or replacing the air filter. This step is crucial in maintaining good air quality and efficient airflow within your AC unit. Let’s proceed to Step 4: Clean or Replace the Air Filter.
Regularly clean or replace the air filters in your AC unit to ensure proper airflow and efficiency. This will also help to improve the air quality in your home.
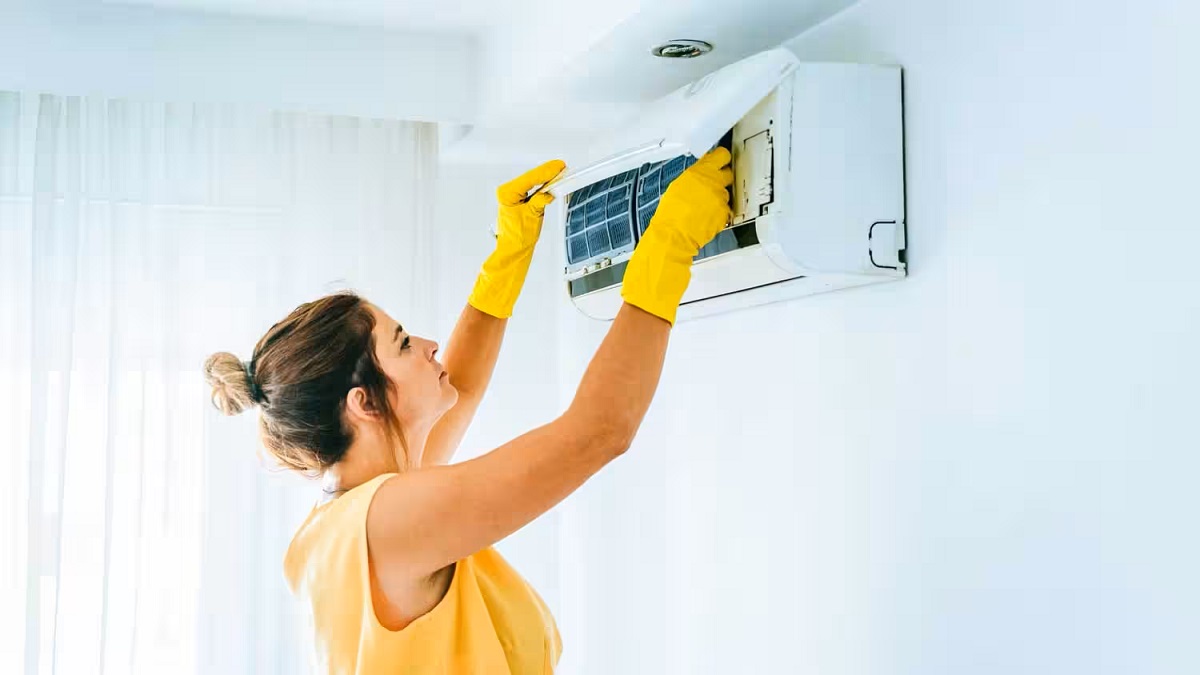
Step 4: Clean or Replace the Air Filter
The air filter in your AC unit helps capture dust, pollen, and other particles from the air, preventing them from entering the system. Over time, the filter can become clogged with debris, obstructing airflow and reducing the efficiency of your air conditioner. Follow these steps to clean or replace the air filter:
- Locate the air filter compartment, which is typically located near the return air duct or on the side of the AC unit.
- Open the compartment by releasing the latches or removing any screws holding it in place.
- Take out the air filter and inspect its condition. If it is dirty or clogged, it is time to clean or replace it.
- If the filter is washable, gently clean it with water or a mild detergent. Rinse it thoroughly and allow it to dry completely before reinstalling.
- If the filter is non-washable or too damaged, replace it with a new one. Ensure you purchase the correct size and type of filter specified by the manufacturer.
- Once the filter is clean or replaced, carefully reinsert it into the compartment, ensuring it fits securely.
- Close the air filter compartment and secure it with latches or screws.
Regularly cleaning or replacing the air filter is important to maintain good air quality and ensure proper airflow within your AC unit. A clean filter allows the air conditioner to operate more efficiently and can even help extend the lifespan of the unit.
With the air filter cleaned or replaced, you can now move on to the next step, which involves cleaning the condensate drain line. This step helps prevent clogs and ensures proper drainage from your AC unit. Let’s proceed to Step 5: Clean the Condensate Drain Line.
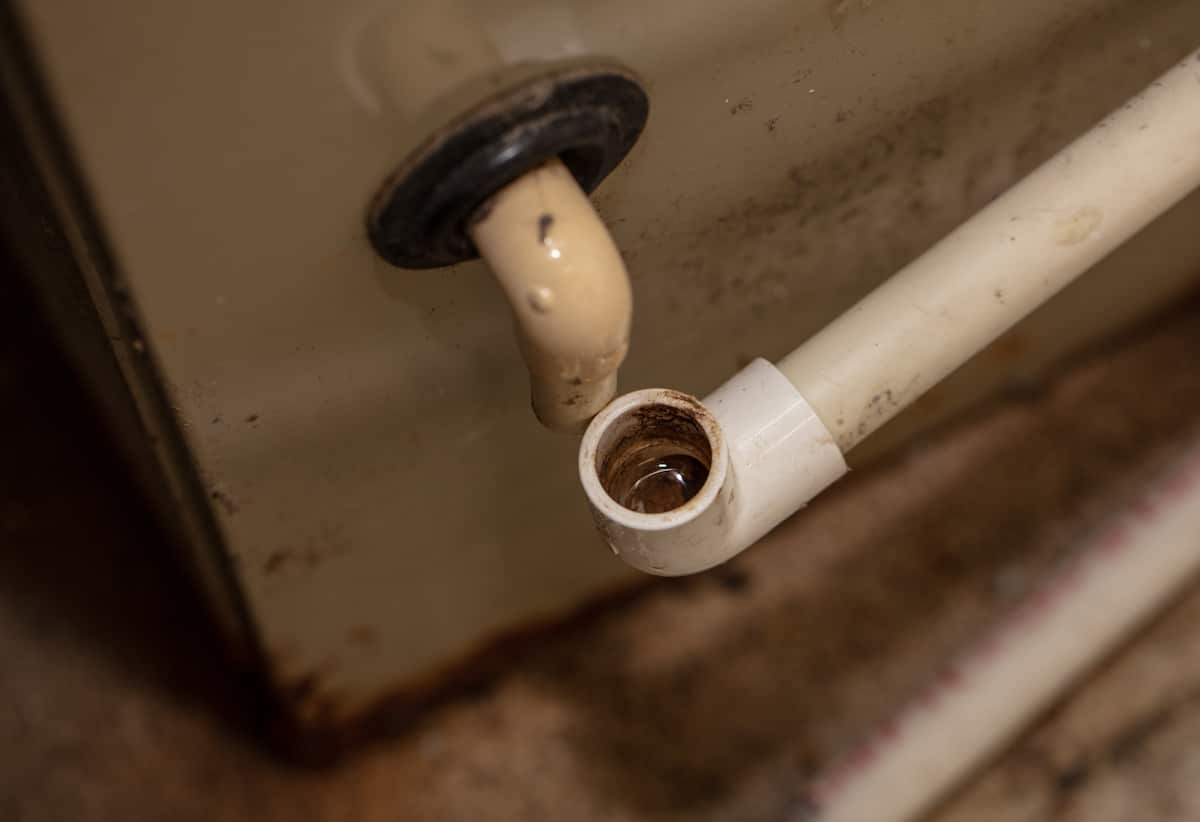
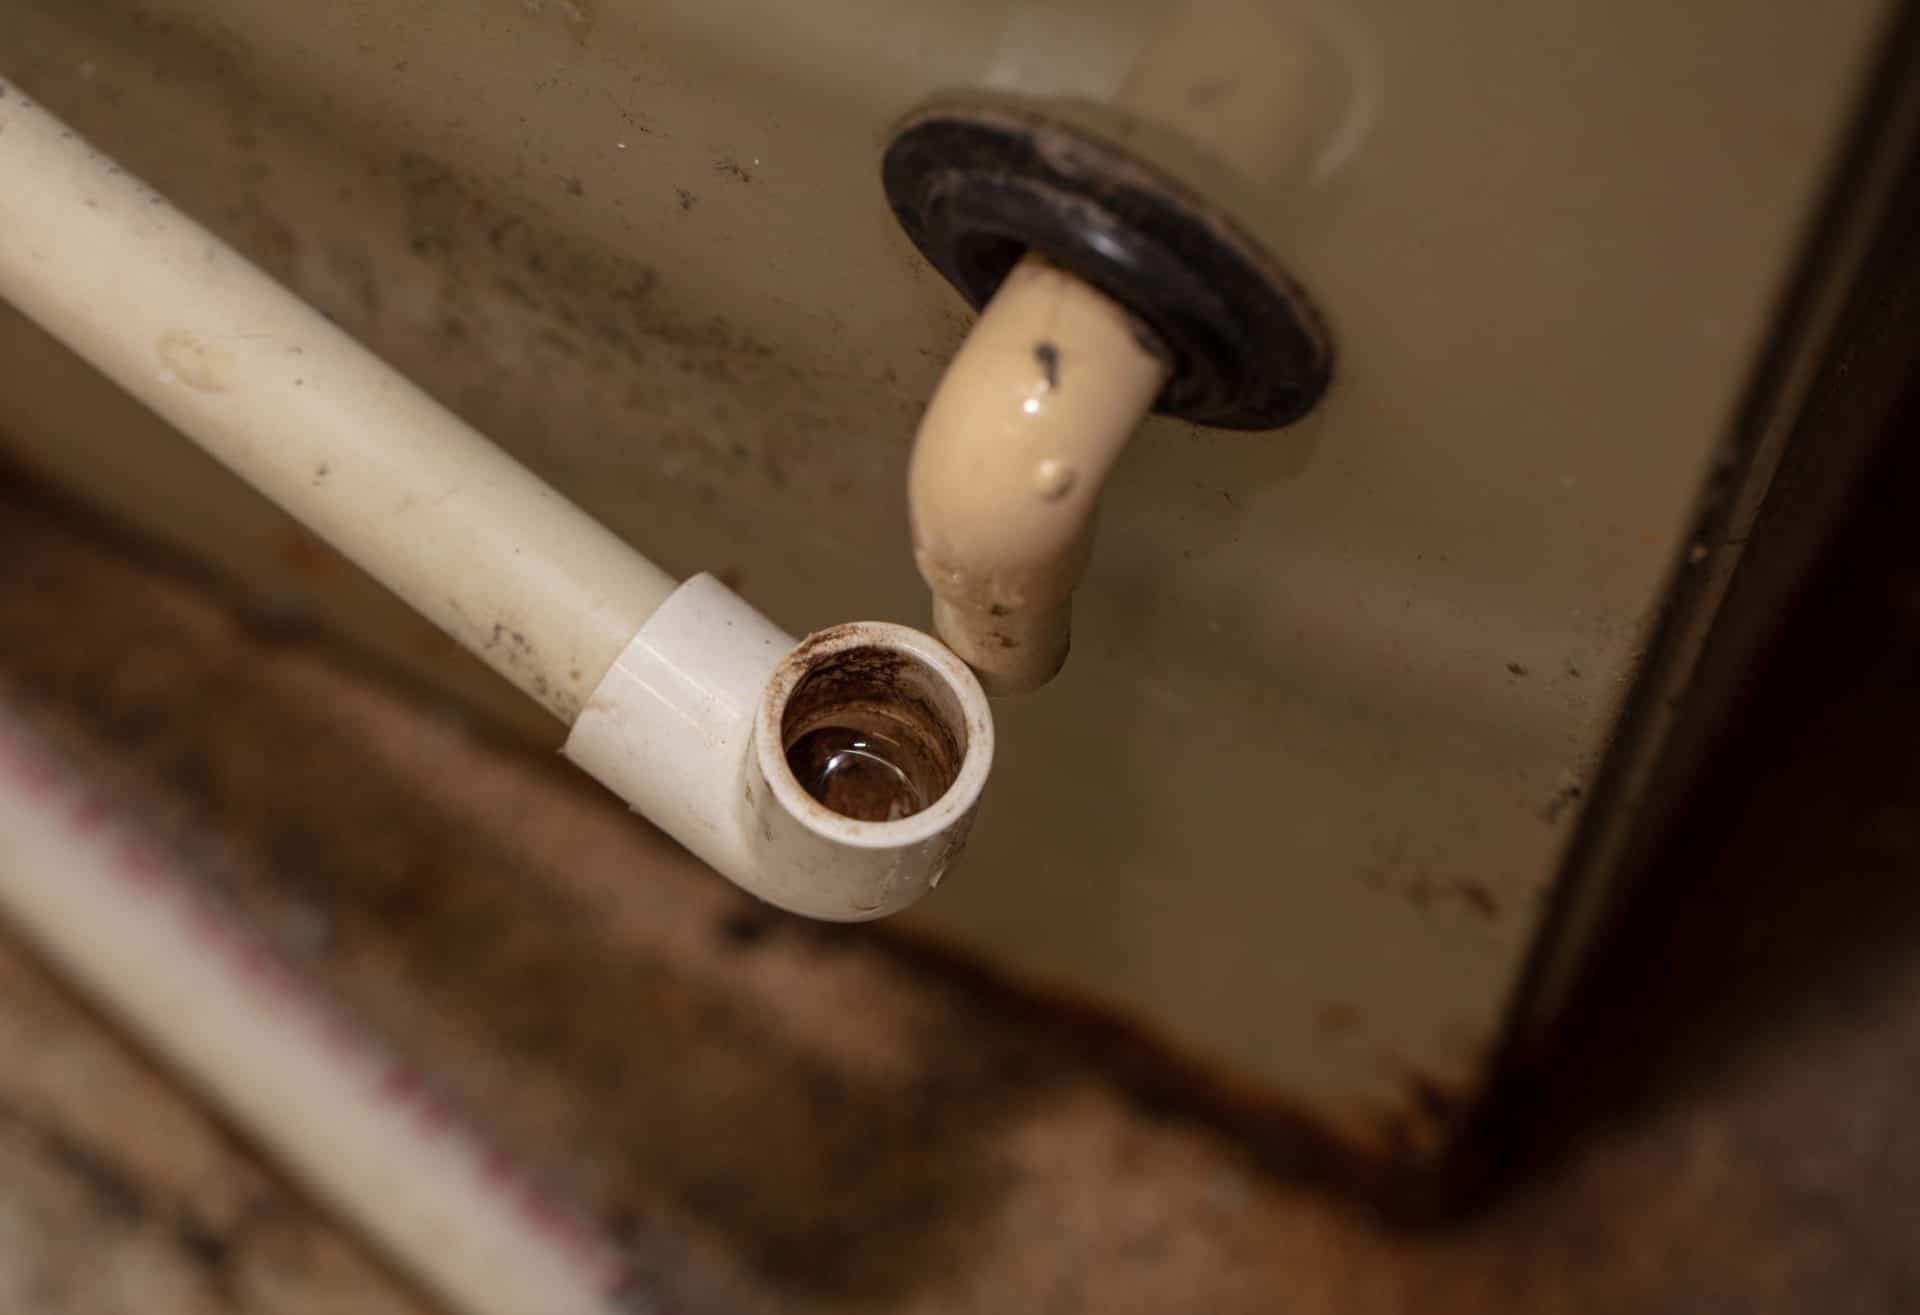
Step 5: Clean the Condensate Drain Line
The condensate drain line is responsible for removing excess moisture that is produced by your air conditioner. Over time, this drain line can become clogged with dirt, algae, or other debris, leading to potential water leaks or even damage to your AC unit. Follow these steps to clean the condensate drain line:
- Locate the condensate drain line, which is typically a PVC pipe connected to the indoor unit of your AC system. It can be found near the evaporator coil or air handler.
- Inspect the drain line for any signs of clogs or blockages. Look for water pooling or moisture around the area as an indicator of potential issues.
- If you spot any visible clogs, use a wet/dry vacuum with a brush attachment to remove the blockage. Gently insert the attachment into the drain line and turn on the vacuum to suck out the debris.
- If the clog persists or the drain line cannot be easily accessed, you can use a mixture of equal parts water and bleach to help remove any blockages and prevent algae growth. Pour the solution into the drain line and let it sit for about 30 minutes.
- After the bleach solution has had time to work, flush the drain line with water to remove any remaining debris or residue. Use a funnel or a small container to pour water into the drain line. Ensure that the water flows freely out of the drain line.
- Once the drain line is clear and water is flowing properly, you can consider installing a condensate drain line pan or a wet switch, which can help detect clogs or water leaks and trigger an alert.
Cleaning the condensate drain line regularly is important to prevent water damage and ensure the efficient operation of your AC unit. A clear and functioning drain line allows the excess moisture to drain properly, reducing the risk of mold and other issues.
Now that you have cleaned the condensate drain line, let’s proceed to Step 6: Check and Adjust the Fan. This step helps optimize airflow and improve cooling efficiency in your AC unit.
Step 6: Check and Adjust the Fan
The fan in your AC unit plays a crucial role in circulating air and ensuring proper airflow. Over time, the fan blades may become dirty or misaligned, affecting the performance of your air conditioner. Follow these steps to check and adjust the fan:
- Locate the fan unit, which is usually inside the outdoor unit of your AC system.
- Inspect the fan blades for any dirt, debris, or signs of damage. If the blades are dirty, gently clean them using a soft-bristle brush or cloth. Be cautious not to bend or damage the blades in the cleaning process.
- Check for any misalignment of the fan blades. If you notice any issues, use a screwdriver or wrench to carefully adjust the fan blades, ensuring they are straight and balanced.
- While inspecting the fan, also check for any loose or damaged fan motor mounts or brackets. If you find any issues, tighten the mounts or replace them if necessary.
- Once you have cleaned and adjusted the fan, turn on the power to the AC unit. Observe the fan in operation to ensure it is running smoothly and without any unusual noises or vibrations.
- If you notice any persistent issues with the fan, such as excessive noise, vibration, or difficulty spinning, it is recommended to consult a professional technician for further inspection and repair.
Checking and adjusting the fan is important to maintain proper airflow and ensure efficient cooling. A clean and properly aligned fan will help your AC unit operate more effectively and reduce strain on the system.
With the fan checked and adjusted, you can now proceed to the next step, which involves reassembling the unit. This step brings all the components together and prepares the AC unit for operation. Let’s move on to Step 7: Reassemble the Unit.
Read more: How To Clean Portable AC Filter
Step 7: Reassemble the Unit
After completing the necessary cleaning and adjustments, it’s time to reassemble your AC unit. Follow these steps to ensure all components are properly put back together:
- Retrieve the external cover that you removed earlier in the cleaning process.
- Carefully position the cover back onto the AC unit, aligning it with the screw holes or fastening points.
- Insert and tighten the screws or fastenings to secure the cover in place. Ensure that the cover is firmly attached but not overtightened to avoid any damage.
- Double-check that all electrical connections and wires are properly tucked away and not pinched or damaged.
- Inspect the area surrounding the AC unit to ensure there are no tools or debris left behind.
- If you have disconnected power from the main electrical panel, turn the power back on by flipping the circuit breaker or reconnecting the power supply.
- Give the unit a final visual check to ensure everything looks in order and ready for operation.
By reassembling the unit properly, you are ensuring that all components are securely in place and there are no loose ends. This step marks the completion of the cleaning process and allows you to move on to the final step of turning on the power.
Now that you have successfully reassembled the unit, let’s move on to the last step, Step 8: Turn On the Power, to bring your AC unit back to life.
Step 8: Turn On the Power
After completing the cleaning and reassembly process, it’s time to turn on the power to your AC unit. Follow these steps to safely restore power and bring your air conditioning system back to functioning:
- Ensure that all the cleaning tools and materials are safely stored away from the AC unit.
- If you had turned off the power from the main electrical panel, locate the circuit breaker that controls the AC unit.
- Flip the circuit breaker to the “On” position to restore power to the AC unit. Wait a few moments for the unit to initialize.
- Head over to your thermostat and set it to the desired cooling temperature. Ensure that the system is set to “Cool” mode and the fan is set to “Auto.”
- Listen for the AC unit to come to life, with the fan starting to spin and the compressor kicking in.
- Observe the unit for any unusual noises, vibrations, or signs of malfunction. If you notice anything out of the ordinary, turn off the power immediately and consult a professional technician.
- Allow the AC unit to run for a while and check if cool air is being produced and properly circulated in your space.
- Periodically monitor your AC unit’s performance to ensure it is operating smoothly and efficiently.
By following these steps, you have successfully turned on the power to your AC unit and completed the entire cleaning process. Regular maintenance, including cleaning, will help your air conditioner run efficiently, extend its lifespan, and provide you with optimal cooling performance.
Remember, if you encounter any issues with the functioning or performance of your AC unit, it’s always best to seek professional assistance. They can provide expert guidance, identify any underlying problems, and offer the necessary repairs or maintenance.
Congratulations on completing the cleaning process of your AC unit! Enjoy the cool and comfortable air it will provide for you and your space.
If you have any further questions or require additional assistance, do not hesitate to reach out to a professional HVAC technician.
Wishing you a pleasant and refreshing climate with your clean AC unit!
Conclusion
Cleaning your AC unit is a vital part of its regular maintenance and keeping it functioning optimally. By following the step-by-step guide outlined in this article, you can effectively clean your AC unit and ensure its efficiency, longevity, and reliable performance.
We started by emphasizing the importance of safety precautions, including turning off the power, wearing protective gear, and following manufacturer instructions. Ensuring your safety is paramount throughout the cleaning process.
We then discussed the tools and materials you will need to clean your AC unit, such as a screwdriver, soft-bristle brush, detergent, vacuum cleaner, bucket, and safety gear. Having these items at hand will make the cleaning process smoother and more efficient.
We covered each step in detail, from turning off the power to removing the external cover, cleaning the fins and coils, and cleaning or replacing the air filter. We also highlighted the significance of cleaning the condensate drain line and checking and adjusting the fan.
After reassembling the unit, we emphasized the final step of turning on the power, monitoring the AC unit’s performance, and seeking professional assistance if necessary.
Regularly cleaning your AC unit not only helps maintain proper airflow and energy efficiency but also improves the air quality in your home or office. It is a proactive measure that can save you from potential costly repairs or replacements down the line.
We hope this comprehensive guide has empowered you with the knowledge and confidence to clean your AC unit effectively. Remember to perform routine maintenance tasks and schedule professional servicing periodically to ensure consistent performance and prolong the life of your AC unit.
Enjoy the comfort and cool air provided by your freshly cleaned AC unit, and breathe easy knowing that you’ve taken the necessary steps to maintain a healthy and efficient cooling system.
If you have any further questions or require additional assistance, do not hesitate to consult an HVAC professional who can provide personalized guidance and support.
Stay cool and enjoy the benefits of a clean AC unit!
Frequently Asked Questions about How To Clean AC Unit
Was this page helpful?
At Storables.com, we guarantee accurate and reliable information. Our content, validated by Expert Board Contributors, is crafted following stringent Editorial Policies. We're committed to providing you with well-researched, expert-backed insights for all your informational needs.
0 thoughts on “How To Clean AC Unit”