Home>Articles>How To Refinish Metal Patio Furniture That’s Covered In Rust
Articles
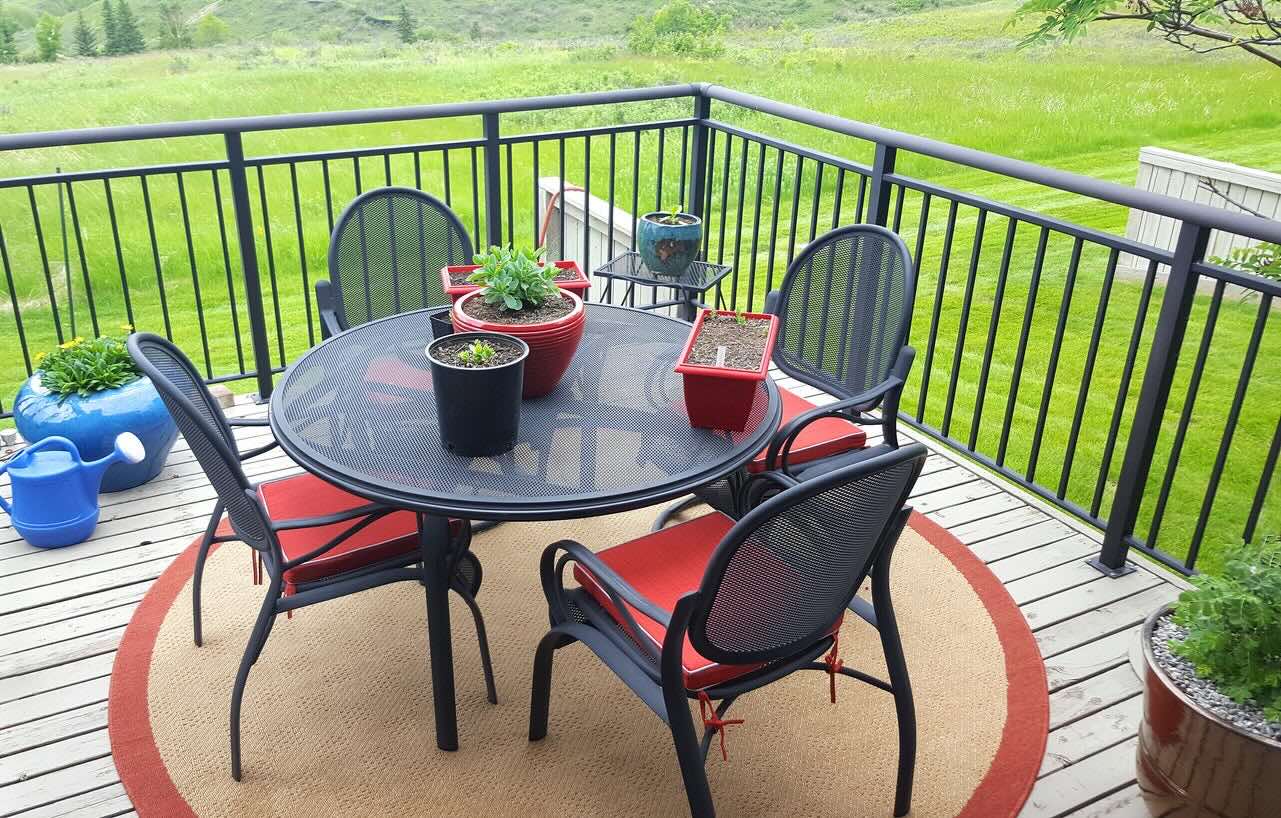
How To Refinish Metal Patio Furniture That’s Covered In Rust
Modified: August 28, 2024
Learn how to refinish your rusty metal patio furniture with our helpful articles. Get expert tips and tricks to bring your outdoor space back to life!
(Many of the links in this article redirect to a specific reviewed product. Your purchase of these products through affiliate links helps to generate commission for Storables.com, at no extra cost. Learn more)
Introduction
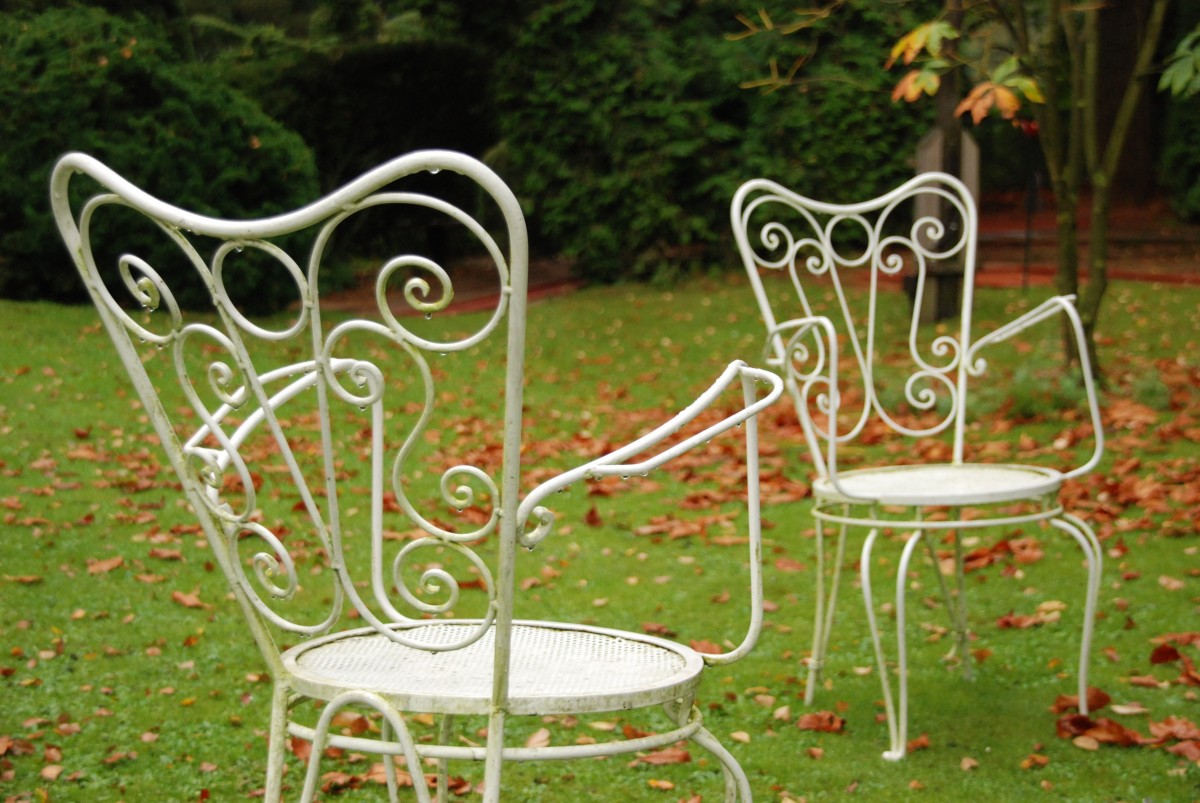
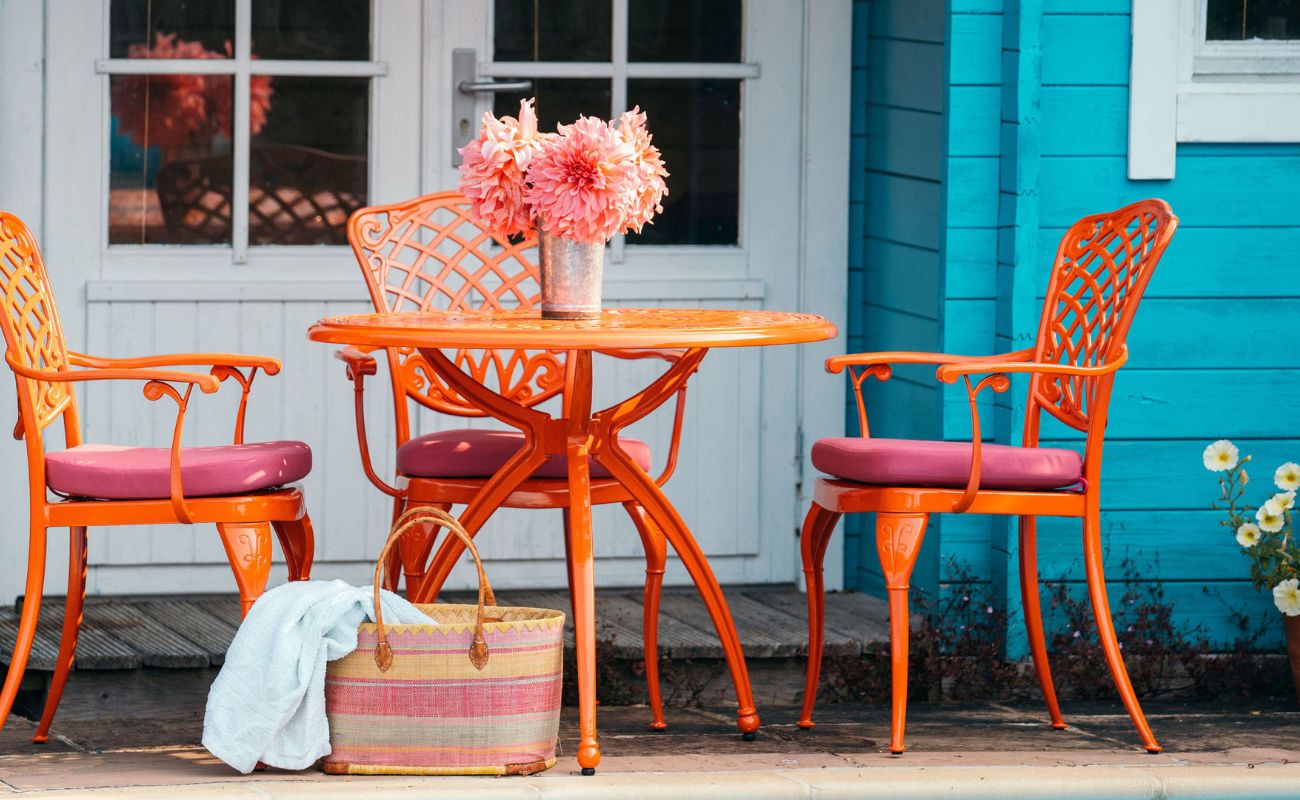
Welcome to our guide on how to refinish metal patio furniture that’s covered in rust. Over time, metal patio furniture can succumb to the elements and develop unsightly rust spots. But fear not! With the right knowledge and a little elbow grease, you can transform your rusty furniture into a vibrant and appealing addition to your outdoor space.
Refinishing metal patio furniture not only improves its appearance but also extends its lifespan. By removing the rust, sanding the surface, and applying a fresh coat of paint, you can revive your furniture and protect it from further damage.
In this article, we will walk you through the step-by-step process of refinishing your metal patio furniture. We will cover everything from assessing the condition of your furniture to the final touches that will ensure a long-lasting and beautiful finish.
So, let’s get started and bring new life to your metal patio furniture!
Key Takeaways:
- Revive your rusty metal patio furniture by removing rust, sanding, applying primer and paint, and sealing the surface. Enjoy a vibrant and long-lasting finish that enhances your outdoor space.
- Thoroughly assess, gather tools, remove rust, sand, apply primer and paint, and seal your metal patio furniture for a successful refinishing project. Preserve its beauty and durability with proper care and maintenance.
Read more: How To Get Rust Off Metal Patio Furniture
Assessing the Condition of Your Metal Patio Furniture
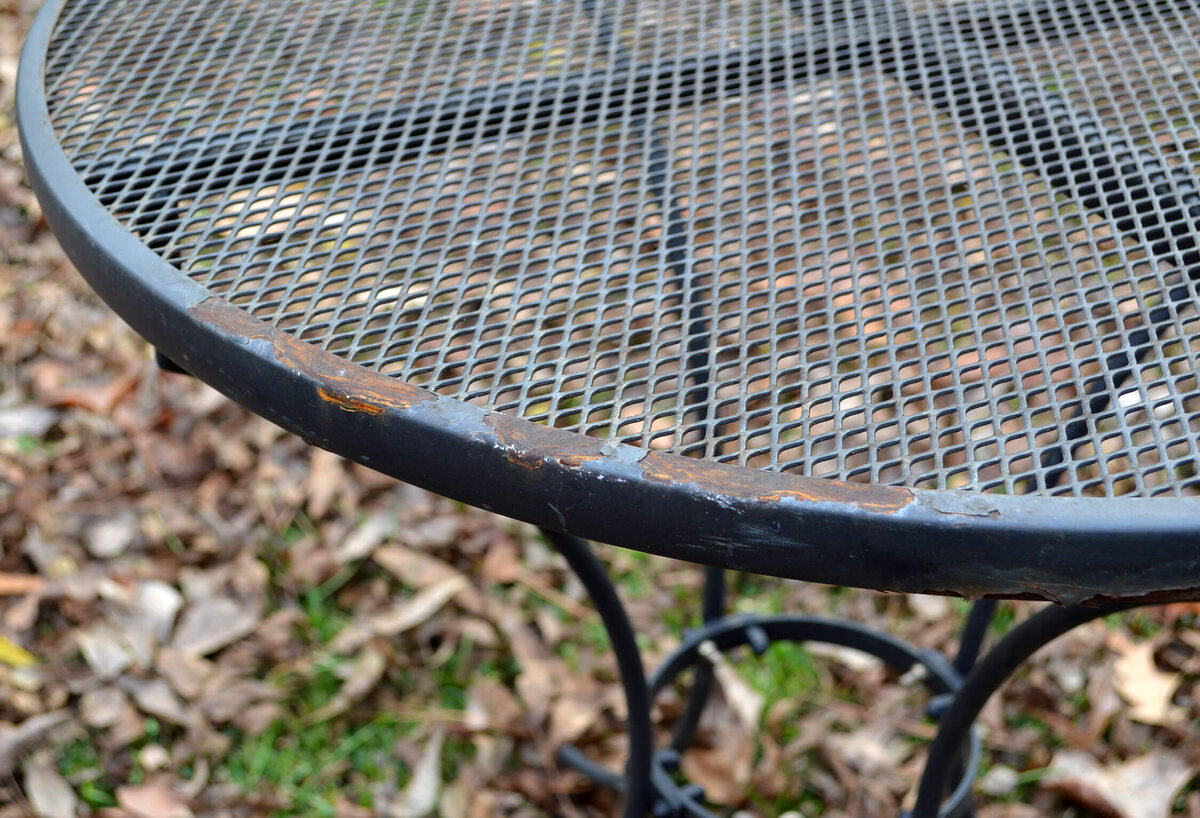
Before you begin the refinishing process, it’s crucial to assess the condition of your metal patio furniture. This will help you determine the extent of the rust damage and plan your restoration accordingly.
Start by thoroughly inspecting your furniture for any signs of rust. Look for areas where the rust has eaten through the metal or has caused significant corrosion. These areas may require more intensive treatment, such as sanding or patching.
Next, check for any loose or damaged components, such as screws, bolts, or broken pieces. You may need to tighten or replace these to ensure the structural integrity of the furniture.
Take note of the overall condition of the paint or finish on your furniture. If the existing paint is chipping, cracked, or faded, you’ll likely need to remove it before proceeding with the refinishing process.
If your furniture has intricate designs or hard-to-reach areas, it’s important to consider the accessibility of these areas for cleaning, sanding, and painting. Some furniture may require dismantling or extra care during the restoration to ensure all surfaces are properly treated.
Lastly, assess the overall stability of your furniture. Check for any wobbling or unevenness, as this could indicate a structural issue that needs to be addressed before refinishing.
By conducting a thorough evaluation of your metal patio furniture, you’ll be able to identify the specific areas that require attention and plan your restoration process accordingly. This assessment will help you determine the amount of time, effort, and materials needed to achieve the desired results.
Gathering the Necessary Tools and Materials
Once you’ve assessed the condition of your metal patio furniture, it’s time to gather the necessary tools and materials for the refinishing process. Having everything on hand will ensure a smooth and efficient restoration.
Here are the essential tools and materials you’ll need:
- Safety gear: Begin by prioritizing your safety. Wear protective gloves, safety goggles, and a dust mask to shield yourself from chemicals, dust, and debris.
- Rust remover: Invest in a high-quality rust remover, such as naval jelly or rust dissolver. These products effectively break down rust and prepare the metal for further treatment.
- Sandpaper or sanding pads: Choose a variety of grits, such as 80, 120, and 220, to accommodate different stages of the refinishing process. Coarse grits are ideal for removing rust, while finer grits help achieve a smooth surface.
- Sandblaster: If you have extensive rust or large pieces of furniture, a sandblaster can make the process more efficient. It uses compressed air and an abrasive material to blast away rust and reveal the bare metal.
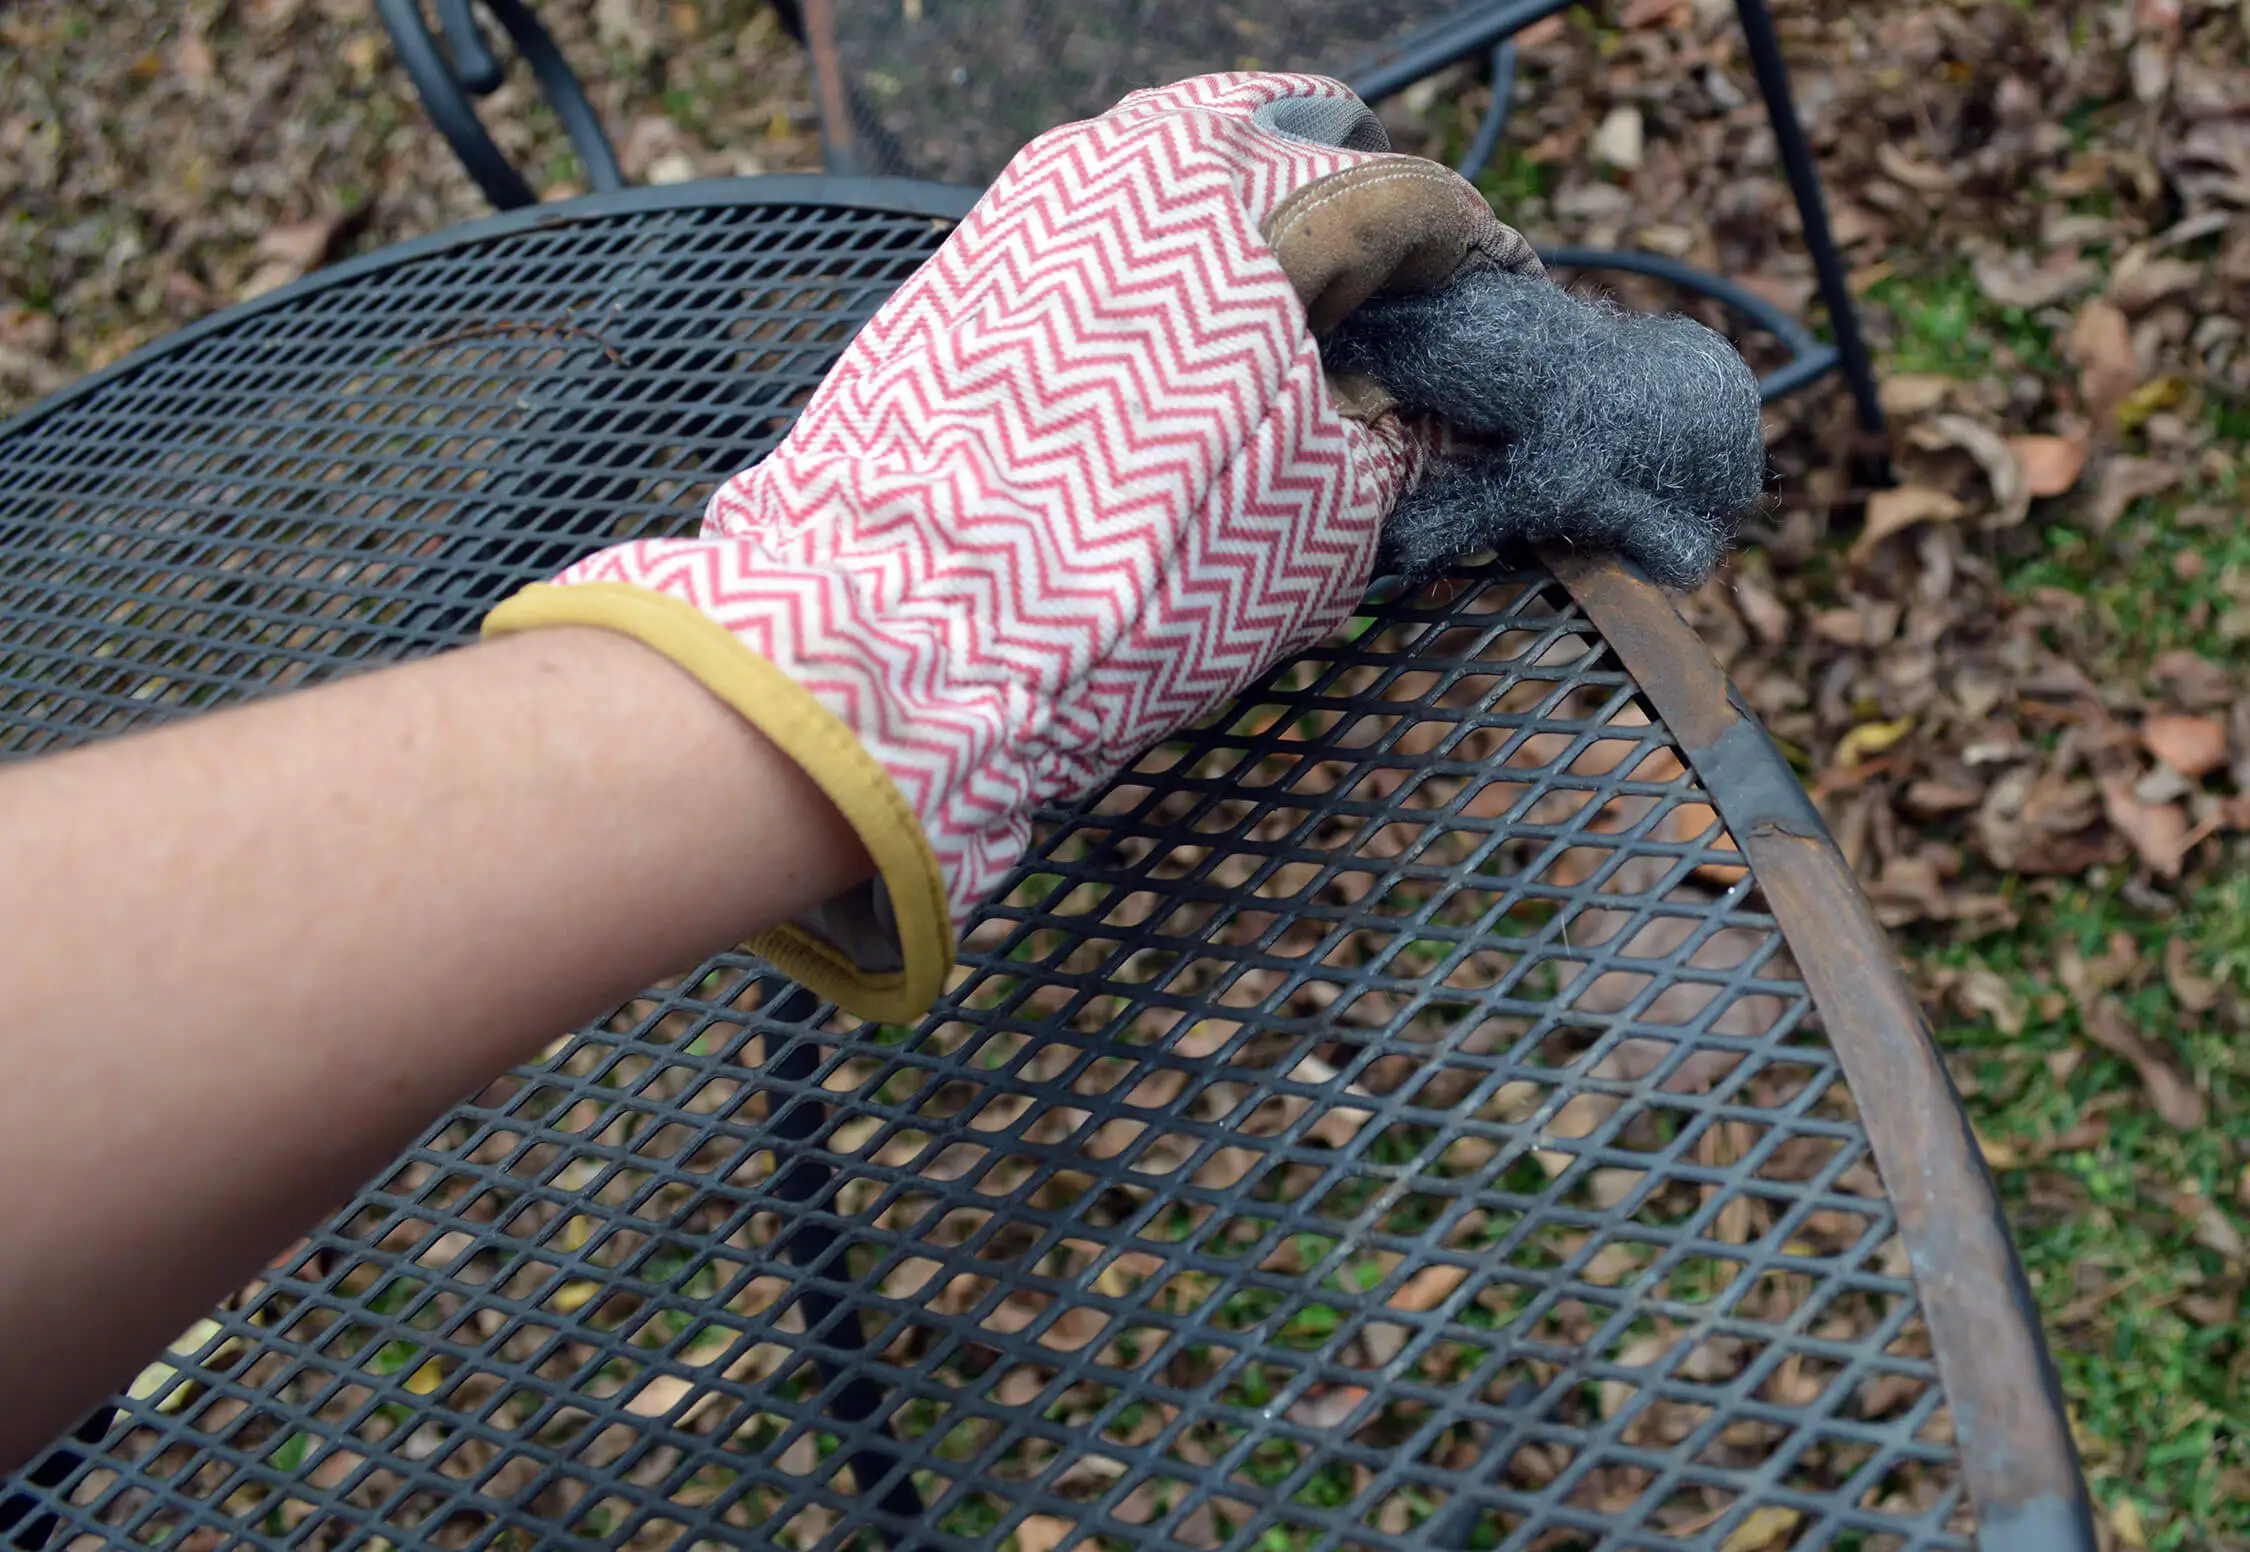
- Wire brush or steel wool: These tools are excellent for scrubbing away loose rust particles and stubborn residue. Use a wire brush for larger areas and steel wool for smaller, more intricate sections.
- Primer: Choose a metal primer specifically formulated for outdoor use. It creates a protective barrier between the metal and the paint, ensuring better adhesion and durability.
- Paint: Opt for a high-quality, outdoor-grade paint in your preferred color. Look for paints that are designed to resist fading, chipping, and peeling when exposed to the elements.
- Paintbrushes or sprayer: Depending on your preference, have a set of paintbrushes in different sizes or a paint sprayer to apply the paint evenly and smoothly.
- Clear coat or sealant: Consider using a clear coat or sealant to protect the painted surface from UV rays, moisture, and other outdoor elements. This will help extend the life of your refinished furniture.
- Drop cloths or tarps: Protect your working area by laying down drop cloths or tarps to catch any paint or debris during the refinishing process.
Make sure all your tools and materials are easily accessible and in good working condition before you begin the restoration. This will set you up for a successful and efficient refinishing project.
Removing the Rust from the Metal Furniture
Now that you have gathered all the necessary tools and materials, it’s time to remove the rust from your metal patio furniture. This step is crucial for achieving a smooth and long-lasting finish.
Here’s a step-by-step guide to remove the rust:
- Start by cleaning the furniture: Use a mild soap or detergent and water to thoroughly clean the surface of your furniture. This will remove dirt, debris, and any loose rust particles. Rinse with clean water and allow the furniture to dry completely.
- Apply the rust remover: Follow the instructions on the rust remover product and apply it generously to the rusted areas. Use a brush or sponge to spread the product evenly and make sure to cover all affected areas. Allow the rust remover to sit for the recommended amount of time, typically 10-15 minutes.
- Scrub the rusted areas: After the rust remover has had time to work, use a wire brush or steel wool to scrub away the loosened rust. Apply gentle pressure and scrub in circular motions to ensure maximum effectiveness. Continue scrubbing until the rust is removed, wiping away any residue with a clean cloth.
- Rinse and dry: Once the rust is removed, thoroughly rinse the furniture with clean water to remove any remaining rust remover or debris. Dry the furniture completely to prevent any moisture from causing new rust to form.
- Inspect for any remaining rust: After the initial rust removal process, inspect your furniture for any areas where rust may still be present. If you notice any lingering rust, repeat the rust removal steps until the surface is completely free of rust.
Removing rust from metal furniture can be a time-consuming process, especially if the rust has spread extensively. Take your time and ensure all rusted areas are properly treated before proceeding to the next step.
By effectively removing the rust, you’ll be one step closer to restoring your metal patio furniture to its former glory.
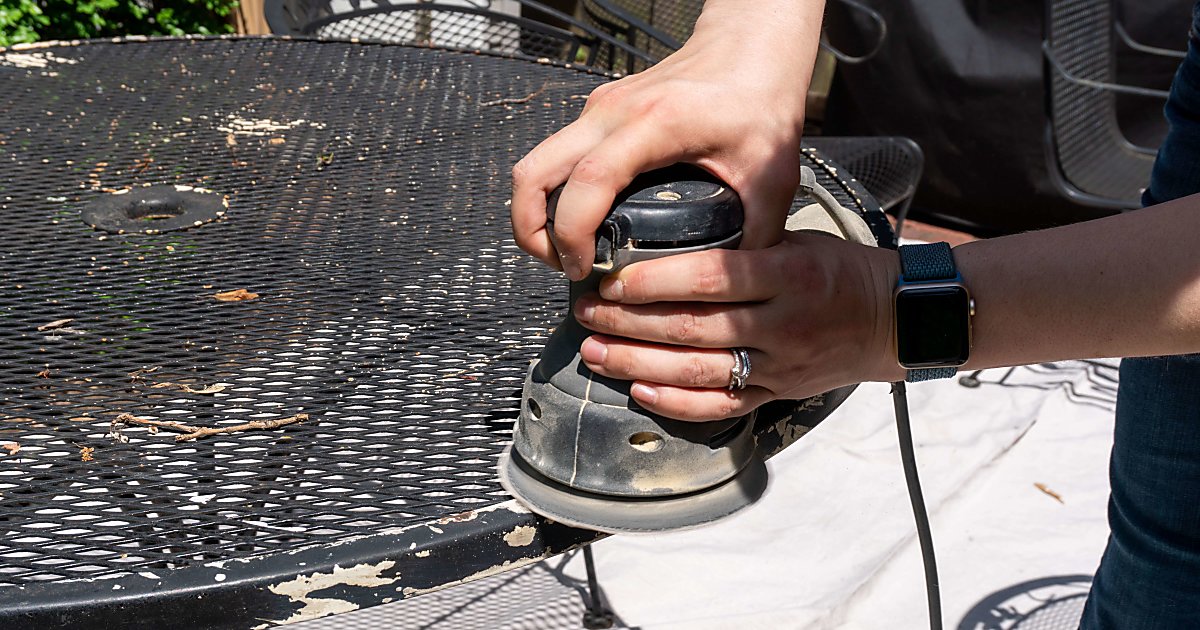
Sanding the Surface
After successfully removing the rust from your metal patio furniture, the next step is to sand the surface. Sanding helps smooth out any rough spots, removes remaining rust particles, and prepares the metal for painting.
Here’s a step-by-step guide for sanding the surface of your furniture:
- Choose the right sandpaper: Select sandpaper with different grits, starting with a coarse grit (around 80) to remove any stubborn rust remnants, and gradually move to finer grits (such as 120 and 220) for a smoother finish.
- Begin sanding: Use the coarse-grit sandpaper to sand the entire surface of the furniture. Apply consistent pressure and move in even strokes, following the direction of the grain if your furniture has one. Sand the rusted areas more thoroughly to ensure they are completely smooth and rust-free.
- Switch to finer grits: Once the surface is mostly smooth, switch to a finer-grit sandpaper. Continue sanding, gradually working your way up to the finest grit, until the entire surface feels smooth to the touch.
- Remove dust and debris: Thoroughly wipe down the furniture with a clean cloth or a tack cloth to remove any sanding dust and debris. This will ensure a clean surface for the subsequent steps.
- Inspect for any remaining imperfections: After sanding, inspect the furniture for any remaining rough spots or areas that may need further attention. If necessary, repeat the sanding process in those specific areas until you achieve a uniformly smooth surface.
Sanding the surface of your metal patio furniture is a critical step in the refinishing process. It helps create an ideal surface for paint adhesion and ensures a flawless finish.
Take your time during this step, as thorough sanding will contribute to the overall quality and longevity of your refinished furniture.
Use a wire brush or sandpaper to remove the rust from the metal patio furniture. Apply a rust-inhibiting primer and then a coat of outdoor metal paint to refinish and protect the furniture.
Read more: How To Repair Rusted Patio Furniture
Applying Primer
With the surface of your metal patio furniture sanded and prepped, it’s time to apply a layer of primer. Primer acts as a foundation for the paint, promoting better adhesion and ensuring a more durable finish.
Follow these steps to apply primer to your furniture:
- Choose the right primer: Look for a primer specifically designed for metal surfaces and outdoor use. Ensure that the primer is compatible with the type of paint you’ll be using.
- Prepare the primer: Thoroughly mix the primer according to the manufacturer’s instructions. If necessary, thin the primer with a compatible thinner to achieve the desired consistency.
- Apply a thin, even coat: Using a paintbrush or a sprayer, apply a thin layer of primer to the entire surface of the furniture. Work in smooth, overlapping strokes to ensure even coverage. Avoid applying the primer too thickly, as it may lead to drips or an uneven finish.
- Allow the primer to dry: Follow the manufacturer’s instructions regarding the drying time for the primer. Typically, it takes about 1-2 hours for the primer to dry completely, but this may vary depending on the product and environmental conditions.
- Sand the primed surface (optional): If you notice any imperfections or rough spots on the primed surface, lightly sand them with a fine-grit sandpaper. Wipe away any dust before proceeding.
- Inspect for complete coverage: After the primer has dried, inspect the furniture for any areas that may require additional primer. If necessary, apply a second coat of primer following the same steps as before.
- Allow the primer to cure: Once the final coat of primer is applied, allow it to fully cure according to the manufacturer’s instructions. This usually takes 24 hours or longer, depending on the product and environmental conditions.
Applying primer to your metal patio furniture helps create a smooth and uniform surface for the paint. It improves paint adhesion and increases the longevity of your furniture’s finish.
Take your time during this step to ensure proper coverage and an even application of primer. This will set the stage for a vibrant and long-lasting paint job.
Painting the Furniture
Now that the primer has dried and cured, it’s time to bring color and life back to your metal patio furniture by applying paint. Painting not only enhances the appearance of the furniture but also provides an added layer of protection against the elements.
Follow these steps to effectively paint your metal patio furniture:
- Choose the right paint: Select a high-quality, outdoor-grade paint that is specifically formulated for use on metal surfaces. Consider using paint with a built-in rust inhibitor for added protection against future rust formation.
- Prepare the paint: Thoroughly stir the paint to ensure an even consistency. If needed, thin the paint slightly with a compatible thinner to achieve the desired viscosity. Follow the manufacturer’s instructions for any specific requirements.
- Apply a thin, even coat: Using a paintbrush or a sprayer, apply a thin layer of paint to the entire surface of the furniture. Work in smooth, overlapping strokes to ensure even coverage. Avoid applying the paint too thickly, as it may result in drips or an uneven finish.
- Allow the paint to dry: Follow the manufacturer’s instructions regarding the drying time for the paint. Depending on the type of paint and environmental conditions, it may take a few hours to dry to the touch.
- Inspect for complete coverage: After the first coat of paint has dried, inspect the furniture for any areas that may require additional paint. If necessary, apply a second or even a third coat of paint, allowing each coat to dry between applications.
- Apply even strokes: To achieve a smooth and professional finish, use long, even strokes in one direction when applying the paint. This will help eliminate brush or roller marks and ensure a seamless appearance.
- Allow the paint to cure: Once all the coats of paint are applied, allow the furniture to fully cure according to the manufacturer’s instructions. This curing process typically takes 24-48 hours or longer, depending on the paint and environmental factors.
Painting your metal patio furniture is the final step in the refinishing process. It adds a fresh and vibrant look to your furniture while providing protection against rust and weathering.
Take your time and be patient during this step to achieve a beautifully painted finish that will last for years to come.
Sealing and Finishing Touches
After painting your metal patio furniture, it’s important to seal the surface to enhance its durability and protect it from the elements. Sealing also adds a polished finish to your refinished furniture.
Here are the final steps to seal and add finishing touches to your metal patio furniture:
- Choose the right sealant: Select a clear coat or sealant specifically designed for outdoor use on metal surfaces. Look for a product that offers UV protection and is resistant to moisture, fading, and peeling.
- Prepare the sealant: Follow the manufacturer’s instructions to prepare the sealant. Make sure to mix it thoroughly and ensure it has the right consistency for application.
- Apply the sealant: Use a paintbrush or a sprayer to apply a thin, even coat of sealant to the painted surface of the furniture. Work in smooth, overlapping strokes to ensure full coverage. Take care to follow the manufacturer’s recommended drying time between coats.
- Allow the sealant to dry and cure: Once the sealant has been applied, allow it to dry and cure according to the manufacturer’s instructions. This usually takes 24-48 hours or longer, depending on the product and environmental conditions.
- Inspect for any touch-ups: After the sealant has fully cured, carefully inspect the furniture for any areas that may require touch-ups or additional sealing. Apply the necessary touch-ups as needed and allow them to cure before using or exposing the furniture to the elements.
- Add decorative elements (optional): If desired, you can add decorative elements to your freshly refinished furniture. Consider adding cushions, pillows, or other accessories to enhance the visual appeal and comfort of your outdoor space.
- Care and maintenance: To ensure the longevity of your refinished furniture, follow proper care and maintenance practices. Regularly clean the furniture with mild soap and water, and avoid using abrasive cleaners or harsh chemicals that may damage the finish. Additionally, inspect the furniture periodically for any signs of rust or wear and address any issues promptly.
Sealing your metal patio furniture provides an extra layer of protection, enhances the appearance, and adds a professional touch to your refinishing project. By properly sealing and taking care of your furniture, you can enjoy its beauty and durability for years to come.
Conclusion
Congratulations on successfully refinishing your metal patio furniture! By following the step-by-step process outlined in this guide, you have transformed your rusty and worn-out furniture into a vibrant and appealing addition to your outdoor space.
Refinishing metal patio furniture not only improves its appearance but also extends its lifespan. By removing rust, sanding the surface, applying primer and paint, and sealing the surface, you have rejuvenated your furniture and protected it from future damage caused by the elements.
Remember, the key to a successful refinishing project is thorough assessment, proper preparation, and attention to detail. Take your time during each step, ensuring that you have the right tools and materials, and follow the manufacturer’s instructions for optimal results.
With your newly refinished metal patio furniture, you can now enjoy outdoor gatherings, relaxed evenings, and moments of tranquility in a beautifully restored setting. Keep in mind the recommended care and maintenance practices to preserve the longevity of your furniture and sustain its stunning appearance over time.
Thank you for joining us on this journey to refinish your metal patio furniture. We hope this guide has been informative and helpful in transforming your outdoor space into a haven of comfort and beauty.
Frequently Asked Questions about How To Refinish Metal Patio Furniture That’s Covered In Rust
Was this page helpful?
At Storables.com, we guarantee accurate and reliable information. Our content, validated by Expert Board Contributors, is crafted following stringent Editorial Policies. We're committed to providing you with well-researched, expert-backed insights for all your informational needs.

0 thoughts on “How To Refinish Metal Patio Furniture That’s Covered In Rust”