Articles
How To Relight A Hot Water Heater
Modified: August 27, 2024
Learn how to relight a hot water heater with our informative articles. Expert tips and step-by-step instructions to get your hot water flowing again.
(Many of the links in this article redirect to a specific reviewed product. Your purchase of these products through affiliate links helps to generate commission for Storables.com, at no extra cost. Learn more)
Introduction
Having a reliable supply of hot water is essential for our daily activities, whether it’s taking a warm shower, washing dishes, or doing laundry. The hot water heater plays a crucial role in providing us with the comfort and convenience of hot water on demand. However, there may come a time when the pilot light on your hot water heater goes out, leaving you with no hot water. The good news is, you can easily relight the pilot light and restore your hot water supply.
In this article, we will guide you through the step-by-step process of relighting a hot water heater. We will provide you with a list of tools and materials you’ll need, important safety precautions to consider, and detailed instructions on shutting off the gas, turning off the water supply, draining the tank, inspecting the pilot light, relighting the pilot light, and turning on the gas and water supply. We will also guide you on how to test your hot water heater to ensure it’s working properly once the pilot light has been relit.
Before we dive into the relighting process, it’s important to note that if you’re uncomfortable or unsure about any step, it’s always best to consult a professional plumber or technician who can safely relight your hot water heater for you. Safety should always be your priority when dealing with gas appliances.
Now, let’s gather our tools and materials and get started on relighting your hot water heater.
Key Takeaways:
- Prioritize safety by following manufacturer’s instructions, shutting off gas and water supply, and wearing protective gear when relighting a hot water heater. Inspect, clean, and test the pilot light for optimal performance.
- Gather necessary tools, shut off gas and water supply, drain the tank, inspect and clean the pilot light, relight the pilot light, and test the hot water heater to ensure proper functioning. Regular maintenance is key to a reliable hot water supply.
Read more: How To Maintain Hot Water Heater
Tools and Materials Needed
Before you begin the process of relighting your hot water heater, make sure you have the following tools and materials readily available:
- Matches or a long-reach lighter: You will need a reliable ignition source to light the pilot light. Make sure you have matches or a long-reach lighter that can safely ignite the pilot light.
- Flashlight: A flashlight will be handy to help you see inside the burner chamber and locate the pilot light.
- Adjustable wrench or pliers: You may need an adjustable wrench or pliers to loosen or tighten any connections that need to be accessed during the relighting process.
- Bucket or drain pan: A bucket or drain pan will be useful to collect any water that may come out when draining the hot water heater.
- Towel or rag: Keep a towel or rag handy to wipe away any water or debris that may be present during the relighting process.
Make sure you have all the necessary tools and materials within reach before you proceed with relighting your hot water heater. This will ensure a smooth and efficient process.
Safety Precautions
When relighting a hot water heater, it’s crucial to prioritize safety to avoid any potential hazards. Here are some important safety precautions to keep in mind:
- Read the manufacturer’s instructions: Before you begin, thoroughly read the manufacturer’s instructions for your specific hot water heater model. Familiarize yourself with the safety guidelines and recommended relighting procedures provided by the manufacturer.
- Turn off the gas supply: Locate the gas valve near the hot water heater and turn it off. This will ensure there is no gas flow during the relighting process. If you’re unsure how to turn off the gas supply, consult the manufacturer’s instructions or contact a professional.
- Allow time for gas to dissipate: After turning off the gas supply, wait for at least five minutes to allow any residual gas to dissipate before attempting to relight the pilot light.
- Ensure proper ventilation: Make sure the area around the hot water heater has proper ventilation. Open windows or doors to ensure a constant flow of fresh air during the relighting process.
- Be cautious of flammable materials: Remove any flammable materials or substances from the area around the hot water heater. This includes cleaning products, gasoline, and other combustible items that could pose a fire hazard during the relighting process.
- Protect your hands and eyes: Wear protective gloves and safety goggles to safeguard yourself from potential burns or injuries during the relighting process.
- Follow proper procedures: Adhere strictly to the step-by-step instructions provided for relighting the pilot light. Avoid taking shortcuts or improvising, as this could lead to accidents or damage to the hot water heater.
- Seek professional help if unsure: If you’re hesitant or unsure about any step of the relighting process, it’s best to seek the assistance of a professional plumber or technician.
By following these safety precautions, you will minimize the risk of accidents and ensure a safe relighting process for your hot water heater.
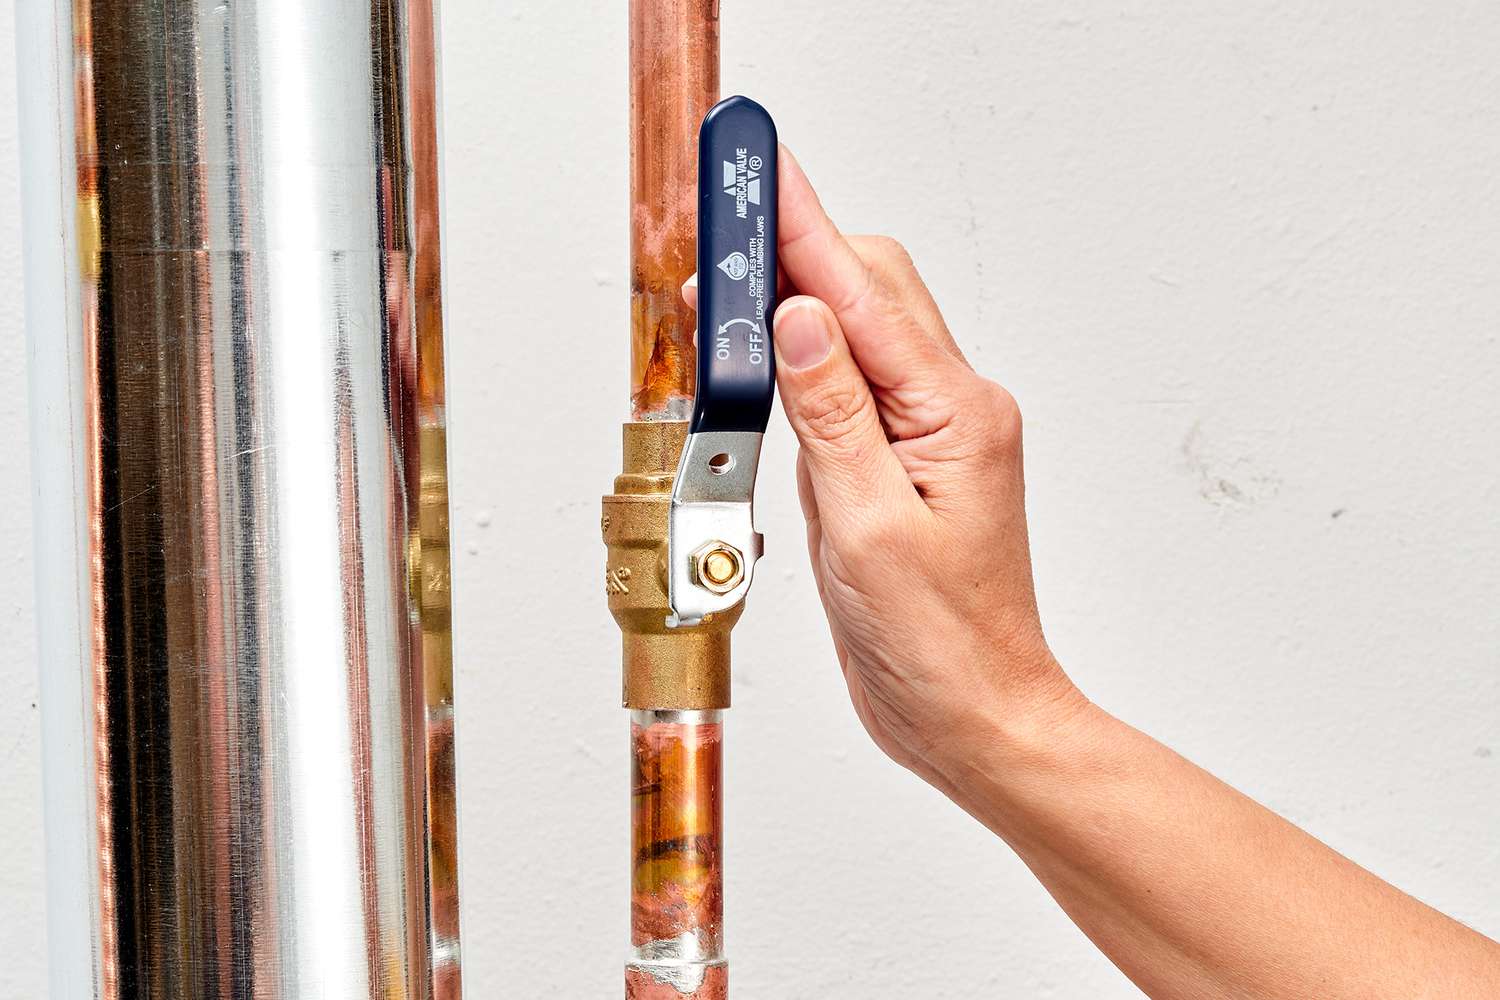
Step 1: Shutting Off the Gas
Before you begin the process of relighting your hot water heater, you need to shut off the gas supply to ensure your safety. Here’s how to do it:
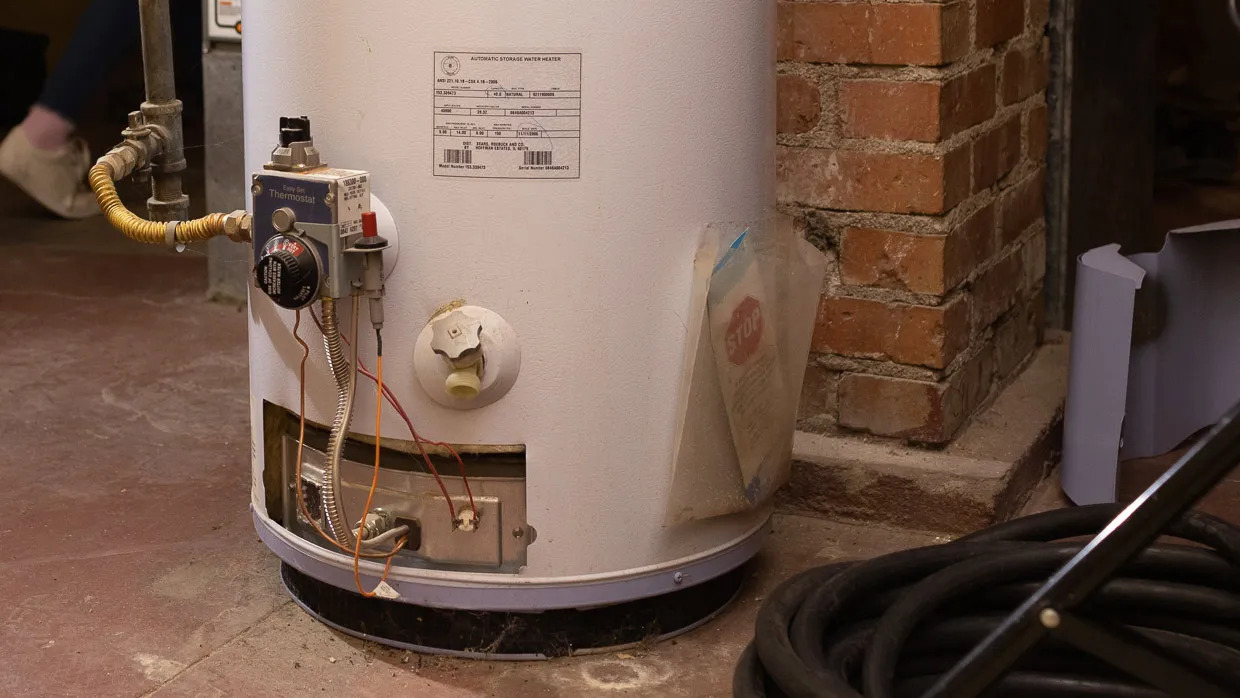
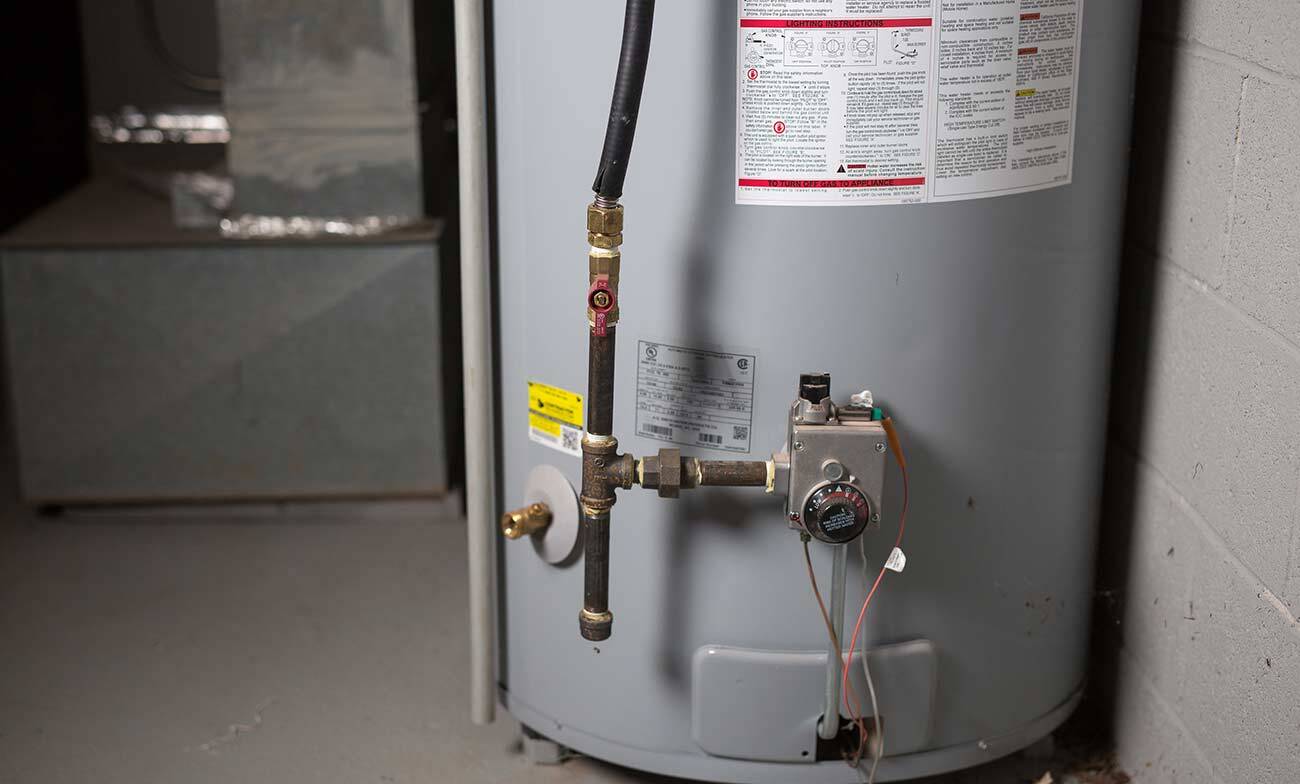
- Locate the gas valve: The gas valve is typically located near the bottom of the hot water heater. It is a knob or lever that controls the flow of gas to the appliance. It may be labeled or have a red tag indicating its purpose. If you’re having trouble locating the gas valve, consult the manufacturer’s instructions or contact a professional.
- Turn the valve to the “off” position: Using an adjustable wrench or pliers, turn the gas valve clockwise until it is fully closed. This will shut off the gas supply to the hot water heater.
- Double-check the gas flow: After turning off the gas valve, confirm that the gas flow has been completely shut off by checking the pilot light. If it is no longer lit or the burner is not firing, it indicates that the gas supply has been successfully cut off.
Shutting off the gas supply is a crucial step to ensure your safety during the relighting process. It prevents the possibility of gas leaks or accidents while you work on the hot water heater. Remember to leave the gas valve in the “off” position until the relighting process is complete.
Step 2: Turning Off the Water Supply
In addition to shutting off the gas supply, it’s important to turn off the water supply to the hot water heater before proceeding with the relighting process. Here’s how to do it:
- Locate the water shut-off valve: The water shut-off valve is usually located near the top of the hot water heater. It may be a lever or a knob that controls the flow of water to the appliance. If you’re having trouble locating the shut-off valve, refer to the manufacturer’s instructions or consult a professional.
- Turn the valve to the “off” position: Use an adjustable wrench or pliers to turn the water shut-off valve clockwise until it is fully closed. This will stop the flow of water to the hot water heater.
- Test the water supply: To confirm that the water supply has been successfully shut off, turn on a faucet or a fixture connected to the hot water line. If no water flows, it indicates that the water supply has been effectively turned off.
By turning off the water supply, you prevent any water from entering the hot water heater while you work on relighting the pilot light. This ensures a dry and safe working environment.
Once you’ve turned off the water supply, proceed to the next step to prepare the hot water heater for relighting.
Read more: How To Fill A Hot Water Heater
Step 3: Draining the Tank
Before relighting the pilot light, it’s important to drain any remaining water from the tank to ensure a clean and efficient restart of the hot water heater. Here’s how to drain the tank:
- Attach a hose to the drain valve: Locate the drain valve at the bottom of the hot water heater. Attach a hose to the drain valve and place the other end of the hose in a suitable drainage area such as a floor drain or outside.
- Open the relief valve: Locate the relief valve, usually at the top of the hot water heater. Pull up on the relief valve handle to open it. This will help the water drain more easily and prevent vacuum lock.
- Open the drain valve: Using a screwdriver or a wrench, slowly open the drain valve by turning it counterclockwise. Allow the water to flow out through the hose and into the drainage area. Be cautious as the water may be hot.
- Flush the tank: Once the water is draining, open a hot water faucet or fixture in your house to allow air into the system, which will help facilitate the draining process. Let the water flow until it stops running or becomes a slow trickle.
It’s important to note that draining the tank may take some time, depending on the size of the hot water heater and the amount of water inside. Be patient and allow the tank to completely drain before proceeding to the next step.
Once the tank is fully drained, close the drain valve and proceed to the next step to inspect the pilot light.
Tip: Before relighting a hot water heater, make sure to turn off the gas supply and allow any lingering gas to dissipate for at least 5 minutes to prevent a potential fire hazard.
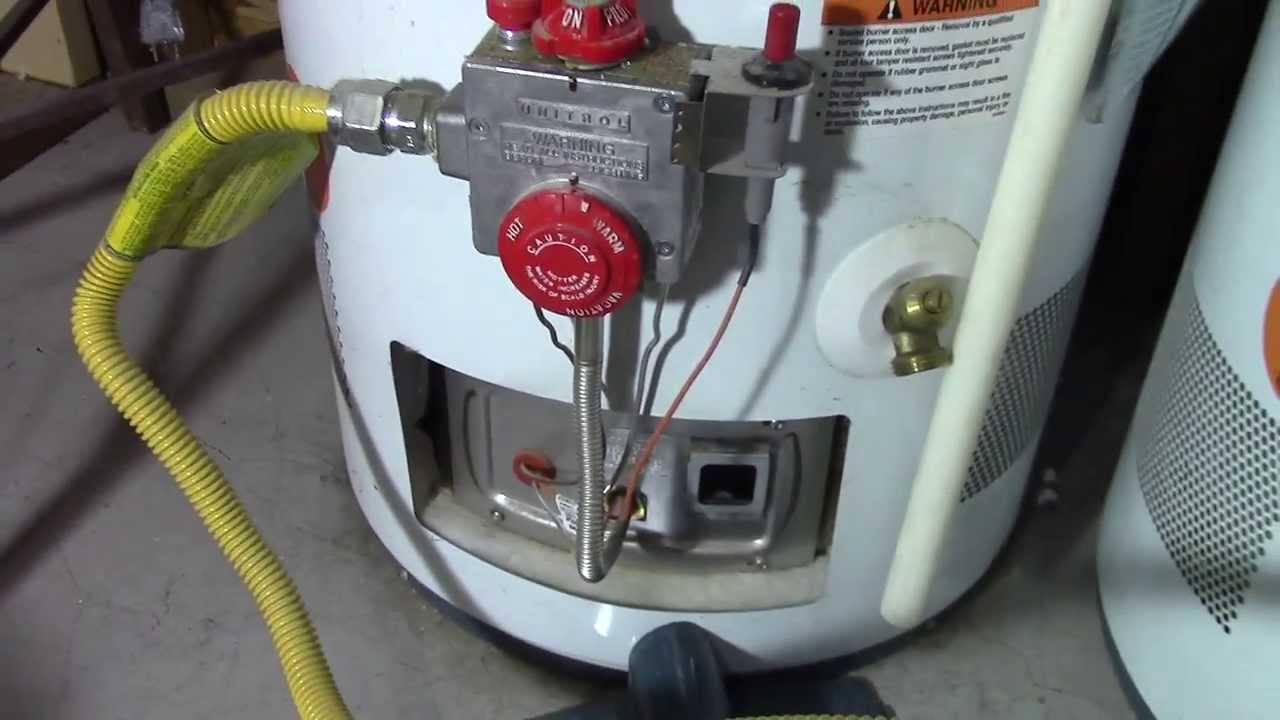
Step 4: Inspecting the Pilot Light
After draining the tank, it’s crucial to inspect the pilot light and ensure it is in proper working condition before attempting to relight it. Here’s how to inspect the pilot light:
- Find the pilot light access panel: Look for a small access panel on the front or side of the hot water heater. Use a screwdriver or a wrench to remove the panel and expose the inner workings of the appliance.
- Locate the pilot assembly: Inside the access panel, you will find the pilot assembly. It consists of the pilot burner, the pilot tube, and the thermocouple. Examine them for any signs of damage, such as soot build-up, debris, or loose connections.
- Clean the pilot assembly: If you notice any debris or soot on the pilot assembly, use a soft brush or a cloth to gently clean them. Make sure to remove any obstructions that may prevent the pilot light from igniting properly.
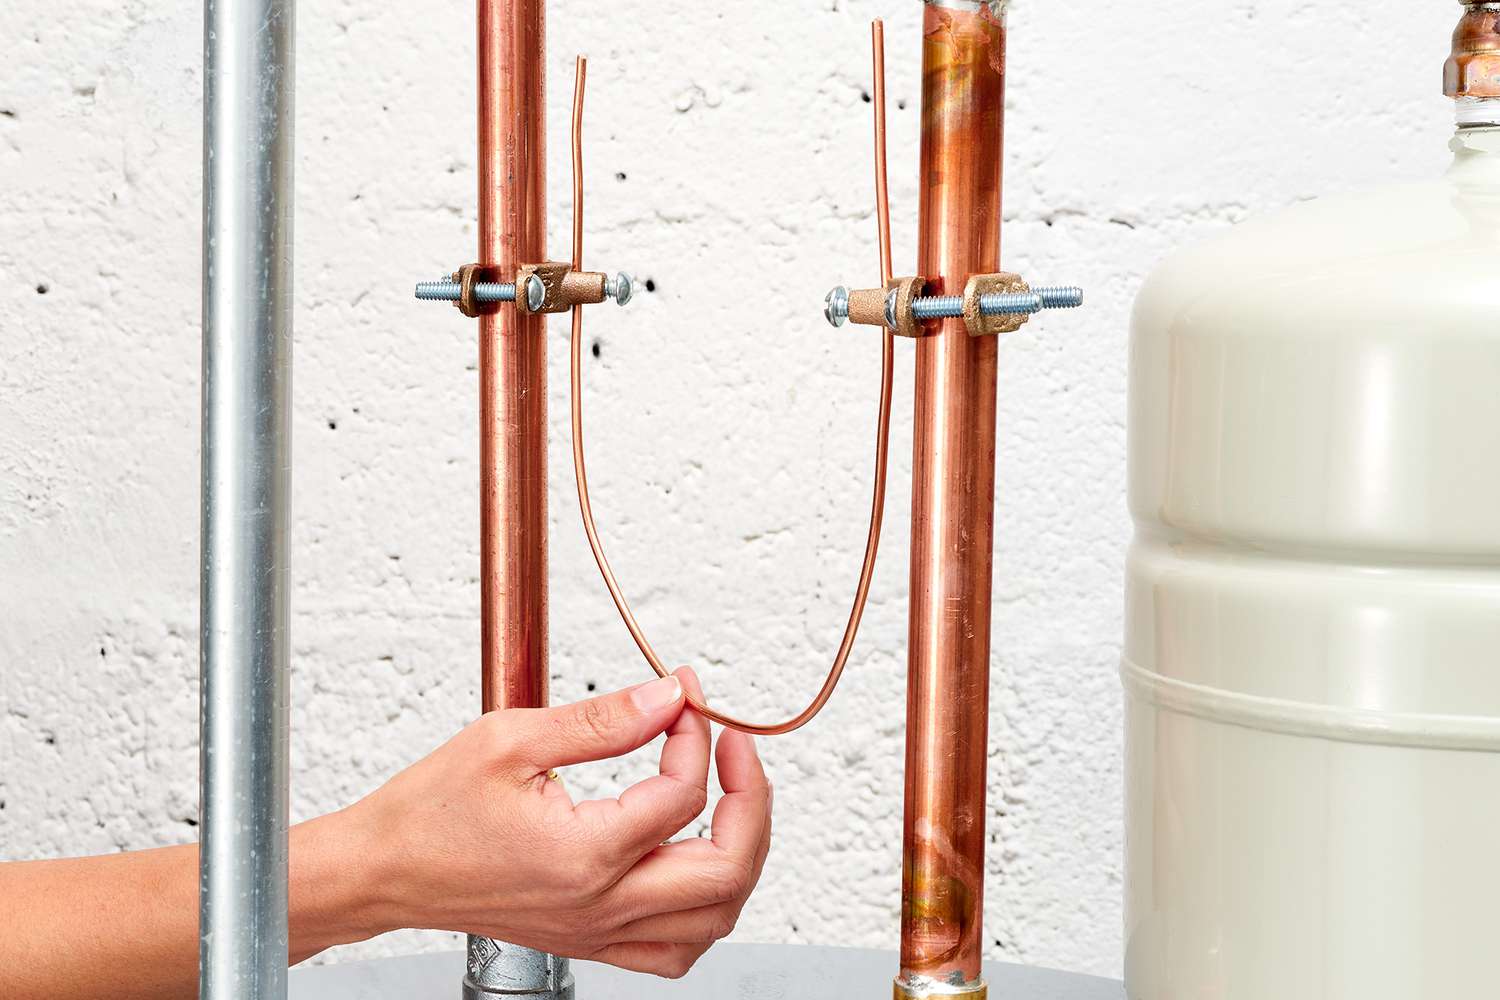
- Check the gas supply tube: Follow the gas supply tube from the gas valve to the pilot assembly. Ensure that the tube is securely connected and there are no visible leaks or damage. If you detect any issues with the gas supply tube, it’s advisable to contact a professional for repairs.
- Inspect the thermocouple: The thermocouple is a safety device that senses the pilot flame. It should be positioned correctly and in close proximity to the pilot burner. Verify that the thermocouple is clean and properly aligned.
By inspecting the pilot light and its components, you can identify any potential issues that may prevent the pilot light from staying lit. Cleaning debris and ensuring proper connections will enhance the chances of a successful relighting process.
Once you have thoroughly inspected the pilot light, proceed to the next step to relight it and restore your hot water supply.
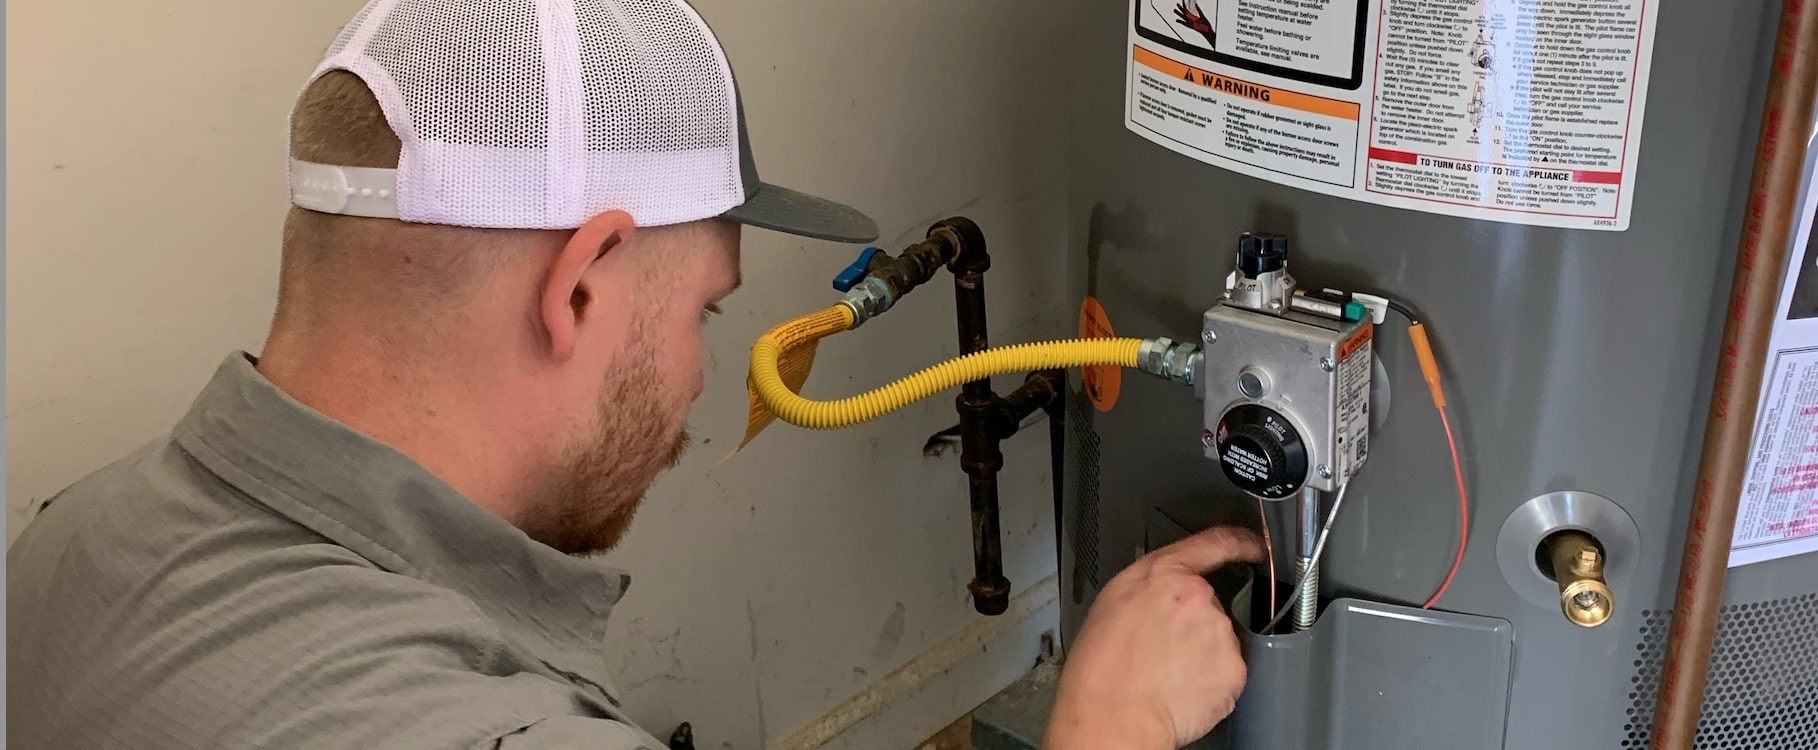
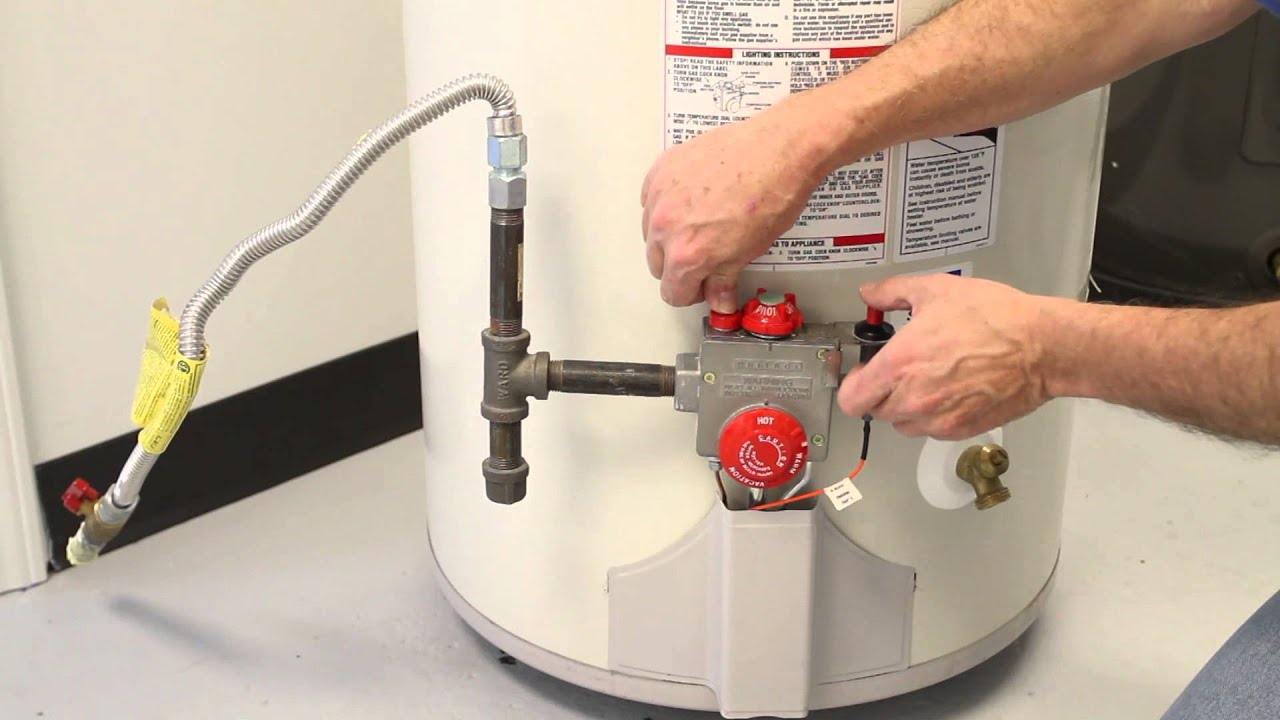
Step 5: Relighting the Pilot Light
Now that you have inspected the pilot light and ensured that everything is in proper working condition, it’s time to relight the pilot light. Follow these steps to relight the pilot light:
- Turn the gas control knob to “Pilot”: Locate the gas control knob on the gas valve. It typically has three settings: “On,” “Off,” and “Pilot.” Turn the knob to the “Pilot” position.
- Press and hold the knob: While holding the gas control knob in the “Pilot” position, locate the pilot burner inside the access panel. Use a long-reach lighter or match and carefully hold the flame near the pilot burner.
- Ignite the pilot light: With the flame near the pilot burner, press the reset button or ignition switch (if applicable) to spark and ignite the pilot light. Keep the gas control knob depressed for about 30 seconds to ensure the pilot light stays lit.
- Release the gas control knob: After 30 seconds, release the gas control knob. The pilot light should continue to burn steadily. If the pilot light goes out, wait for a few minutes and repeat the process of relighting it.
It’s important to note that if the pilot light does not stay lit or repeatedly goes out after relighting, there may be an issue with the thermocouple or other components. In such cases, it’s best to contact a professional technician to diagnose and fix the problem.
Once the pilot light is successfully relit and stays lit, proceed to the next step to turn on the gas and water supply.
Step 6: Turning On the Gas and Water Supply
With the pilot light successfully relit, it’s time to turn on the gas and water supply to your hot water heater. Here’s how to do it:
- Turn the gas control knob to “On”: Once the pilot light is burning steadily, turn the gas control knob on the gas valve from the “Pilot” position to the “On” position. This will allow gas to flow to the main burner and heat the water.
- Turn on the water supply: Locate the water shut-off valve near the top of the hot water heater. Using an adjustable wrench or pliers, turn the valve counterclockwise to fully open it. This will allow water to flow into the hot water heater.
- Check for leaks: After turning on the gas and water supply, carefully inspect all connections for any signs of gas or water leaks. Look for bubbles forming or hissing sounds near connections. If you detect any leaks, immediately turn off the gas and water supply and seek professional assistance.
Once you have safely turned on the gas and water supply, your hot water heater is ready to start heating the water. However, before you start using hot water, it’s important to perform a final step to ensure the proper functioning of the hot water heater.
Read more: How To Repair Hot Water Heater
Step 7: Testing the Hot Water Heater
After relighting the pilot light and turning on the gas and water supply, it’s crucial to test the hot water heater to ensure it’s functioning properly. Here’s how to test your hot water heater:
- Wait for the water to heat up: Give your hot water heater some time to heat up the water. This can take anywhere from 30 minutes to a couple of hours, depending on the size of the tank and the initial temperature of the water.
- Check the temperature: Once the water has had enough time to heat up, test the hot water at a faucet or fixture in your house. Ensure that the water is reaching the desired temperature. If the water is not heating up or is not hot enough, there may be an issue with the hot water heater that requires further inspection or professional assistance.
- Listen for unusual sounds: While the hot water heater is running, pay attention to any unusual sounds, such as banging, rumbling, or hissing noises. These sounds could indicate a potential problem with the heating element or other components. If you notice any abnormal sounds, it’s recommended to contact a professional for evaluation and repairs.
- Check for gas or water leaks: Periodically inspect all connections for any signs of gas or water leaks. Look for hissing sounds, bubbles forming, or any visible signs of leakage. If you detect any leaks, immediately turn off the gas and water supply and seek professional assistance.
By thoroughly testing your hot water heater, you can ensure that it is functioning properly and providing you with a reliable supply of hot water. If you encounter any issues during the testing process or are unsatisfied with the performance of your hot water heater, it’s best to consult a professional technician for further evaluation and assistance.
Remember to perform regular maintenance on your hot water heater to keep it in optimal condition and prevent future issues. This includes flushing the tank periodically, checking the pressure relief valve, and inspecting for any signs of wear or damage.
With proper care and maintenance, your hot water heater will continue to provide you with the comfort and convenience of hot water for years to come.
Conclusion
Relighting a hot water heater is a task that can be easily done with the right tools, knowledge, and precautions. By following the step-by-step process outlined in this article, you can safely relight the pilot light on your hot water heater and restore your hot water supply.
Remember to always prioritize safety when working with gas appliances. Make sure to shut off the gas and water supply before attempting any maintenance or relighting procedures. It’s crucial to read the manufacturer’s instructions and follow recommended guidelines to avoid accidents or damage to the hot water heater.
Inspecting the pilot light, cleaning any debris, and ensuring proper connections are essential for a successful relighting process. Once the pilot light is relit, turn on the gas and water supply, and test the hot water heater to ensure it’s functioning as expected.
If you encounter any issues during the relighting process or are unsure about any step, it’s always best to seek the assistance of a professional plumber or technician who can safely and effectively address any problems.
Regular maintenance and periodic inspections of your hot water heater will help extend its lifespan and prevent future issues. Remember to flush the tank, check for leaks, and listen for any unusual sounds to keep your hot water heater in optimal condition.
Having a reliable supply of hot water is essential for our daily activities, and with the knowledge gained from this article, you can confidently relight your hot water heater and continue to enjoy the comfort and convenience of hot water whenever you need it.
Frequently Asked Questions about How To Relight A Hot Water Heater
Was this page helpful?
At Storables.com, we guarantee accurate and reliable information. Our content, validated by Expert Board Contributors, is crafted following stringent Editorial Policies. We're committed to providing you with well-researched, expert-backed insights for all your informational needs.

0 thoughts on “How To Relight A Hot Water Heater”