Articles
How To Install A Gas Hot Water Heater
Modified: February 22, 2024
Want to learn how to install a gas hot water heater? Check out our informative articles on the step-by-step process of installing a gas hot water heater.
(Many of the links in this article redirect to a specific reviewed product. Your purchase of these products through affiliate links helps to generate commission for Storables.com, at no extra cost. Learn more)
Introduction
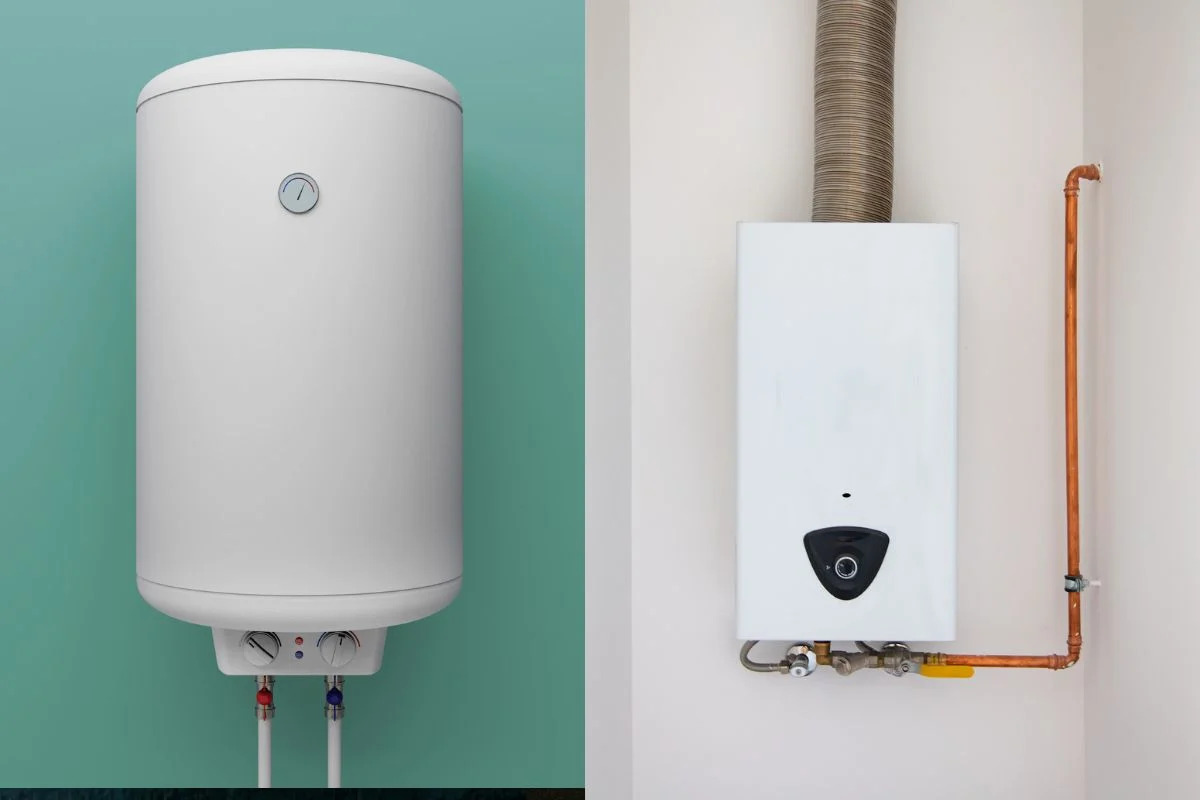
Installing a gas hot water heater is a practical and efficient way to provide a steady supply of hot water for your home. Whether you are replacing an old, inefficient unit or installing a new one, this step-by-step guide will walk you through the process. By following these instructions and taking the necessary precautions, you can successfully install a gas hot water heater and enjoy the comfort and convenience of hot water on demand.
Before starting the installation, it is important to ensure that you have the necessary tools and materials. This includes a new gas hot water heater, pipe wrenches, adjustable pliers, pipe tape, a level, a tape measure, and a bucket for draining the water. Make sure that you have a clear understanding of the installation requirements and any local building codes that may apply to your area.
Remember to turn off the water and gas supply before beginning the installation process. This will prevent any accidents or leaks while you work. In addition, it is essential to drain the existing water heater to avoid any water spillage during the removal process.
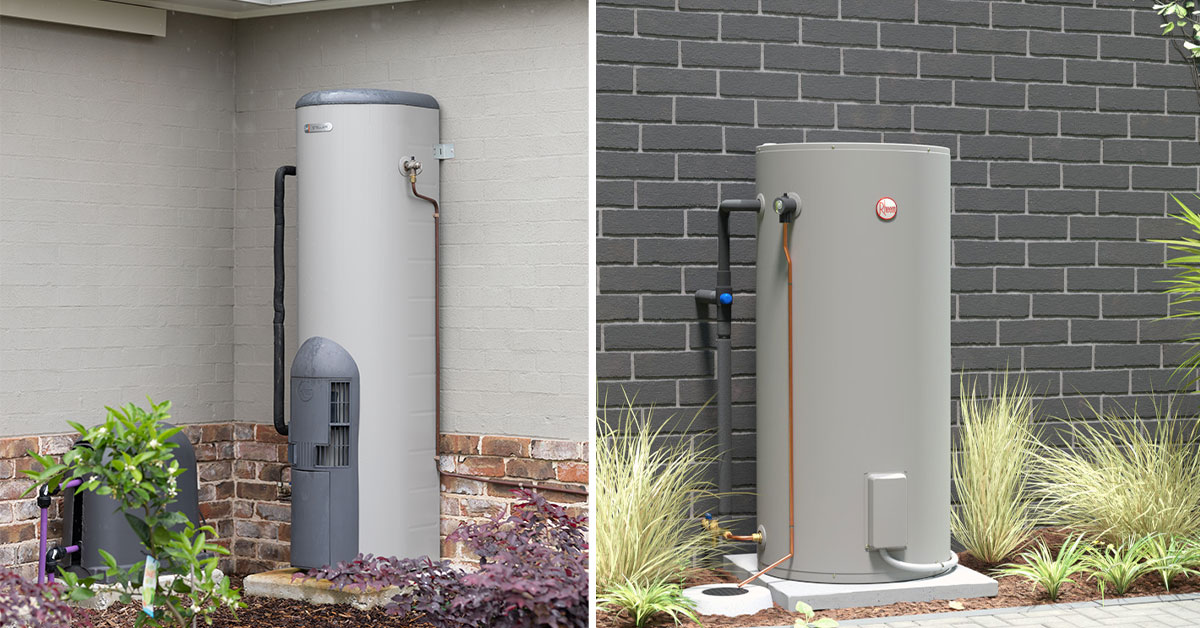
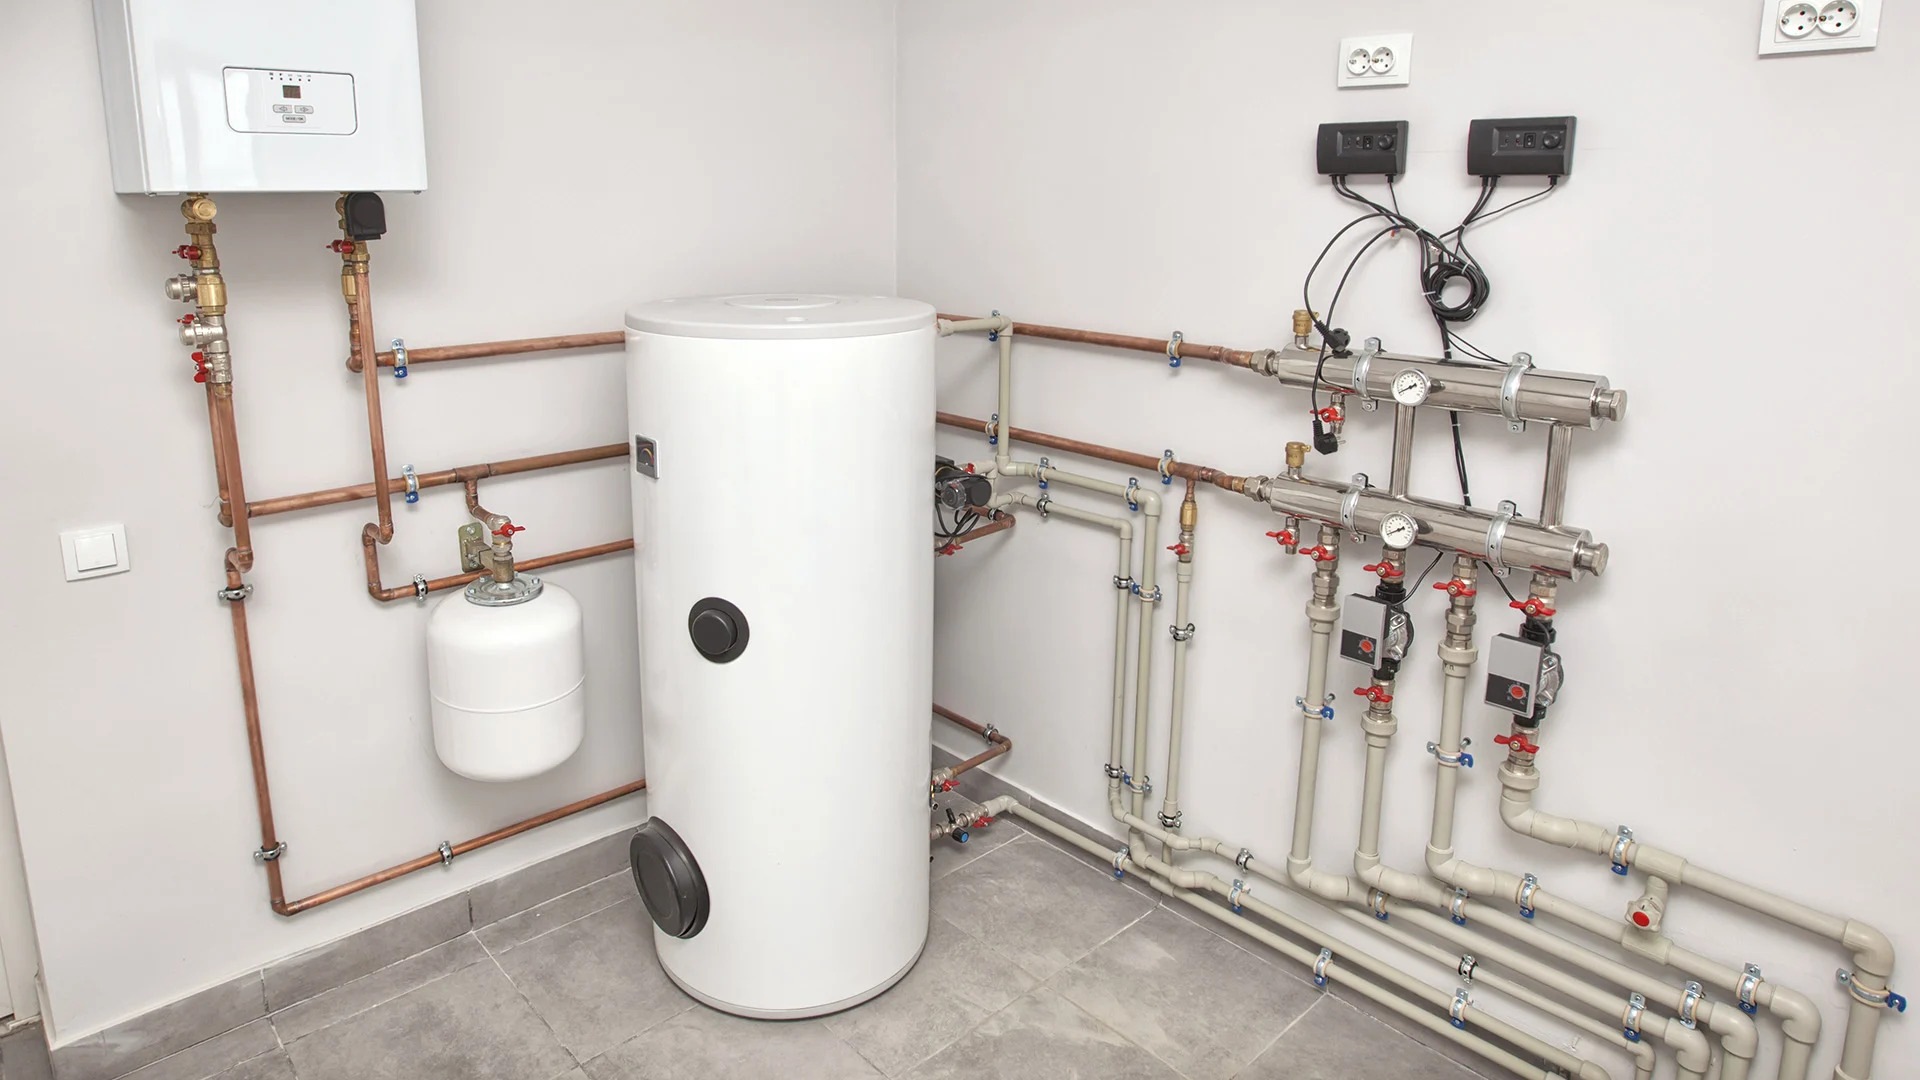
Once the old water heater is disconnected and removed, prepare the installation area by cleaning and leveling the floor. This will provide a stable surface for the new water heater to sit on. Take the time to measure and mark the correct placement for the new unit, ensuring that there is ample space for ventilation and access for maintenance.
Installing the new gas hot water heater involves connecting the gas supply line, water supply lines, and properly sealing any connections to prevent leaks. Check for leaks and proper operation once the installation is complete. Finally, light the pilot light and adjust the thermostat to the desired temperature.
By following these detailed steps and exercising caution throughout the installation process, you can successfully install a gas hot water heater and enjoy the benefits of efficient and reliable hot water for years to come.
Key Takeaways:
- Prioritize safety and preparation when installing a gas hot water heater. Gather necessary tools, turn off water and gas supply, and carefully follow manufacturer’s instructions to ensure a successful and safe installation.
- Thoroughly check for leaks and light the pilot light after connecting gas and water supply. Following these steps will ensure a reliable and continuous supply of hot water from your new gas hot water heater.
Read more: How To Reset Gas Hot Water Heater
Step 1: Gather the Necessary Tools and Materials
Before you begin the installation of your gas hot water heater, it’s important to ensure that you have all the necessary tools and materials on hand. This will make the installation process smoother and more efficient. Here is a list of the tools and materials you will need:
- Gas hot water heater – Make sure you have the correct size and capacity for your home’s needs.
- Pipe wrenches – These will be used to tighten and loosen plumbing connections.
- Adjustable pliers – Useful for gripping and turning pipes and fittings.
- Pipe tape – This will be used to ensure a tight and secure connection for the gas and water supply lines.
- Level – A level will help you ensure that the water heater is installed properly and is not leaning or unbalanced.
- Tape measure – You’ll need a tape measure to measure the space where the water heater will be installed and to ensure proper clearance.
- Bucket – Have a bucket on hand to catch any water that may spill during the installation process.
In addition to these tools, you will also need the following materials:
- Gas supply line – This will connect the water heater to the gas source. Make sure it is the correct size and length.
- Water supply lines – You’ll need both hot and cold water supply lines to connect to the water heater.
- Teflon tape – This tape will be used to seal the threads on the plumbing connections.
- Drip pan – A drip pan will help catch any water leaks or condensation from the water heater.
It’s important to have all these tools and materials ready before you begin the installation process. This will save you time and make the installation go more smoothly. Also, make sure to read and follow the manufacturer’s instructions that come with the water heater to ensure proper installation and avoid any issues down the line.
Step 2: Turn off the Water and Gas Supply
Before you start removing the old water heater and installing the new one, it’s crucial to turn off the water and gas supply to ensure your safety and prevent any accidents or leaks. Here’s how to do it:
- Locate the main water shut-off valve – This is usually located near the water meter or where the main water line enters your home. Turn the valve clockwise to shut off the water supply. This will stop the flow of water to the entire house.
- Drain the water from the existing water heater – Attach a garden hose to the drain valve located at the bottom of the water heater. Place the other end of the hose in a suitable drainage area or a bucket. Open the valve and let the water drain completely.
- Turn off the gas supply – Locate the gas valve on the gas line near the water heater. Use a wrench to turn the valve clockwise until it is perpendicular to the gas line. This will shut off the gas supply to the water heater.
It’s important to turn off both the water and gas supply before proceeding with the installation. This will ensure your safety and prevent any potential leaks or accidents during the process. Additionally, following these steps will make it easier to disconnect the old water heater and prepare for the installation of the new gas hot water heater.
Remember to have a clear understanding of the location of these shut-off valves and practice caution during this step. If you are unsure or uncomfortable with turning off the water and gas supply, it’s recommended to seek the assistance of a professional plumber or gas technician to ensure a safe and successful installation.
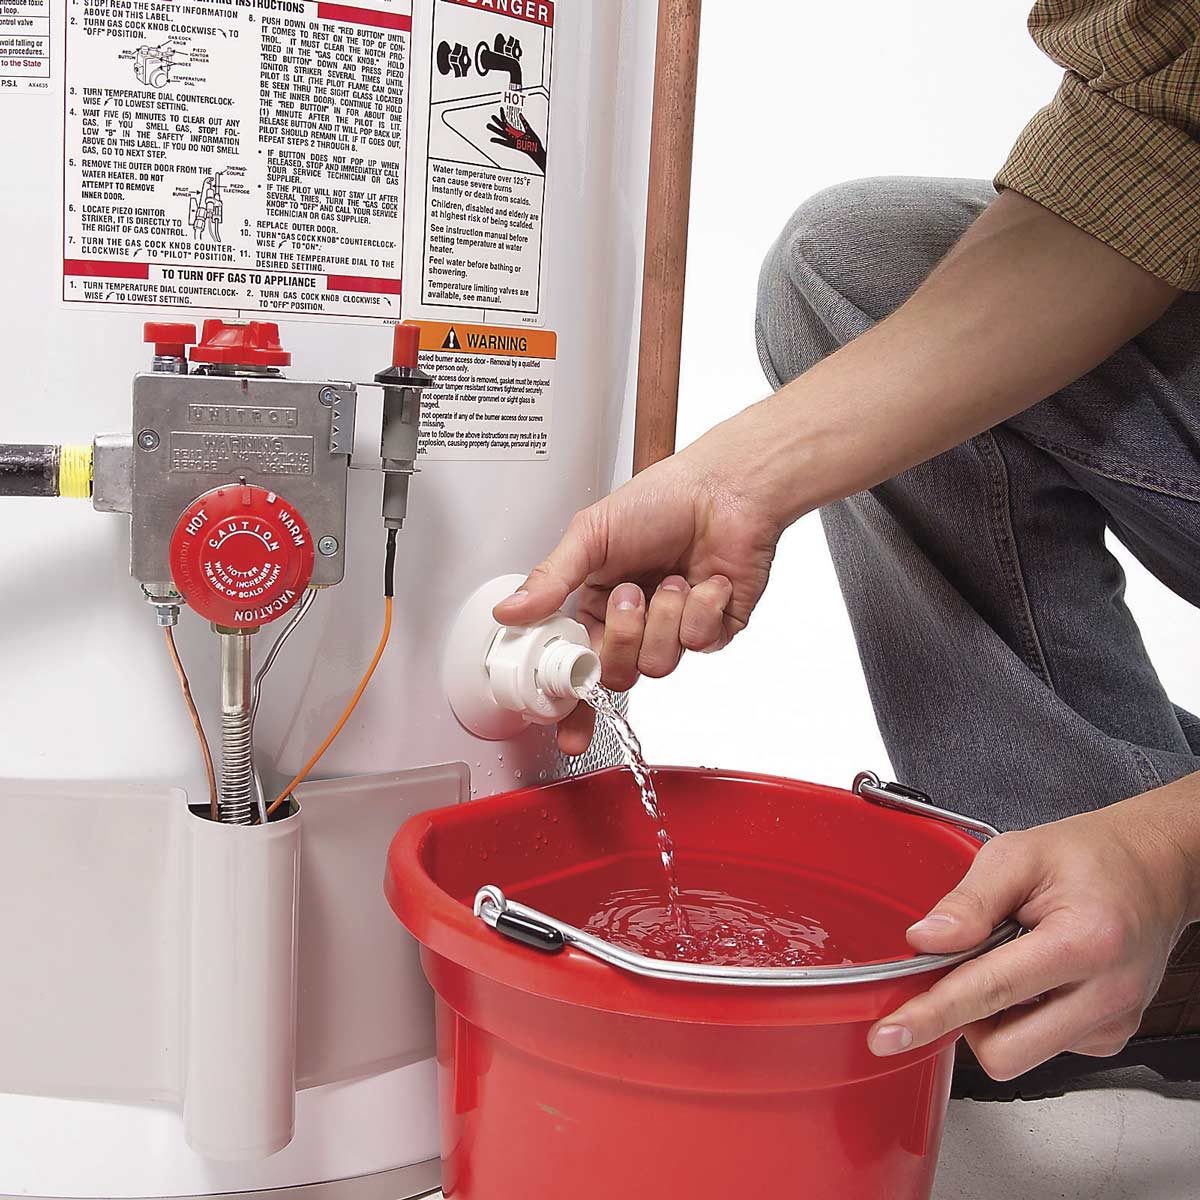
Step 3: Drain the Existing Water Heater
Before removing the old water heater, it’s important to drain it completely to avoid any water spillage during the removal process. Here’s how you can drain the existing water heater:
- Attach a garden hose to the drain valve – The drain valve is typically located at the bottom of the water heater. Connect the garden hose securely to the valve.
- Place the other end of the hose in a suitable drainage area – Ensure that the hose is securely placed and positioned to direct water away without causing any damage or flooding.
- Open a hot water faucet – This will help relieve pressure in the system and allow the water to drain more easily.
- Open the drain valve – Slowly turn the drain valve counter-clockwise to open it. The water from the tank will start flowing through the garden hose and into the drainage area.
- Allow the water heater to drain completely – Depending on the size and condition of the water heater, it may take some time for all the water to drain. Be patient and let it drain fully before proceeding.
- Close the drain valve – Once the water has completely drained, close the drain valve by turning it clockwise.
Draining the existing water heater is essential to prevent any water spillage and make the removal process easier. Remember to exercise caution when dealing with hot water and ensure that the drain hose is properly positioned to avoid any damage or flooding.
It’s also worth noting that the water drained from the water heater may be hot, so take proper precautions to avoid burns. If you’re unsure about the draining process or uncomfortable with handling it yourself, it’s always recommended to seek the assistance of a professional plumber to ensure a safe and successful installation.
Step 4: Disconnect the Old Water Heater
Once the existing water heater has been drained, it’s time to disconnect it from the plumbing and electrical connections. Follow these steps to safely disconnect the old water heater:
- Turn off the electrical power – Locate the electrical circuit breaker or fuse box and turn off the power supply to the water heater. This will ensure your safety while working on the electrical connections.
- Disconnect the electrical wiring – Carefully remove the electrical panel cover on the water heater and disconnect the wiring from the terminal screws. Take note of the specific connections and labels to ensure proper reconnection later.
- Turn off the gas supply – If you have a gas water heater, use a wrench to turn the gas valve on the gas line clockwise until it is perpendicular to the gas line. This will shut off the gas supply to the water heater.
- Disconnect the gas supply line – Using a pipe wrench, carefully disconnect the gas supply line from the gas control valve on the water heater. Make sure to support the water heater to prevent it from tipping or falling.
- Disconnect the water supply lines – Use adjustable pliers or a pipe wrench to disconnect the hot and cold water supply lines from the water heater. Be prepared for any remaining water in the lines to drain out.
When disconnecting the old water heater, it’s important to exercise caution and follow proper safety guidelines. Be mindful of any remaining hot water in the tank and take appropriate measures to avoid burns. If you’re unsure about the disconnection process or uncomfortable with handling it yourself, it’s recommended to seek the assistance of a professional plumber or electrician.
By properly disconnecting the old water heater, you will be ready to proceed with the installation of the new gas hot water heater. With the old unit disconnected and removed, you can now focus on preparing the installation area for the new water heater.
Step 5: Prepare the Installation Area
Now that the old water heater has been disconnected and removed, it’s time to prepare the installation area for the new gas hot water heater. Proper preparation will ensure a stable and secure installation. Follow these steps to prepare the area:
- Clean the installation area – Clear the installation area of any debris, dirt, or dust. Wipe the floor clean and ensure that the area is level.
- Check the local building codes – Before installing the new water heater, check the local building codes to ensure compliance. Familiarize yourself with any specific requirements, such as clearance distances from walls or other appliances.
- Measure and mark the placement – Use a tape measure to determine the correct placement for the new water heater. Take into account the required clearance distances as well as any access needs for maintenance. Mark the floor with a pencil or tape to indicate the precise placement.
- Provide a stable base – If needed, place a sturdy platform or base under the water heater to provide stability. Check that the platform is level and capable of supporting the weight of the water heater.
Taking the time to properly prepare the installation area will ensure a secure and efficient installation. A clean and level area will make it easier to position and level the new water heater. Additionally, adhering to local building codes will help ensure the safety and compliance of the installation.
Once the installation area is prepared, you can proceed to the next step of installing the new gas hot water heater. This will involve connecting the gas supply and water supply lines to the new unit, as well as checking for any leaks once the connections are made.
When installing a gas hot water heater, make sure to properly connect the gas line and check for any leaks using a soapy water solution. This will ensure the safety and efficiency of the unit.
Step 6: Install the New Gas Hot Water Heater
With the installation area prepared, it’s time to install the new gas hot water heater. Follow these steps to ensure a proper installation:
- Position the water heater – Carefully place the new water heater onto the prepared installation area. Make sure it is centered and aligned according to the markings you made earlier.
- Connect the gas supply line – Attach the gas supply line to the gas control valve on the water heater. Use a pipe wrench to securely tighten the connection, ensuring there are no leaks.
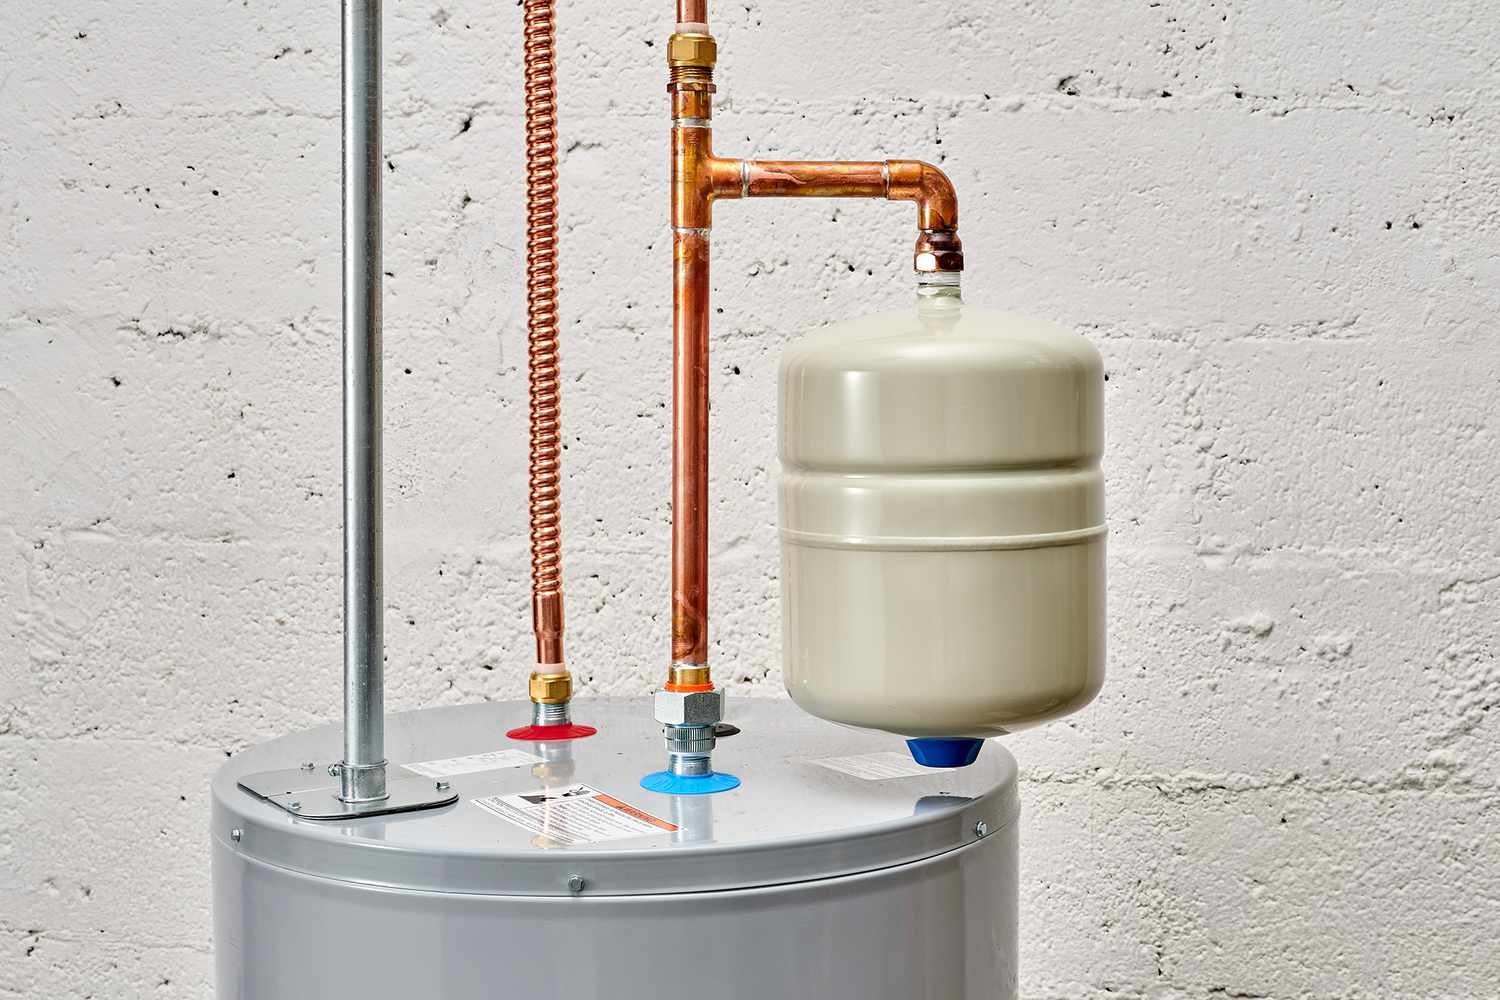
- Connect the water supply lines – Attach the hot and cold water supply lines to the corresponding fittings on the water heater. Use adjustable pliers or a pipe wrench to tighten the connections, ensuring they are snug and leak-free.
- Seal the threaded connections – Wrap Teflon tape around the threaded connections of the gas supply line and water supply lines. This will help create a watertight and airtight seal.
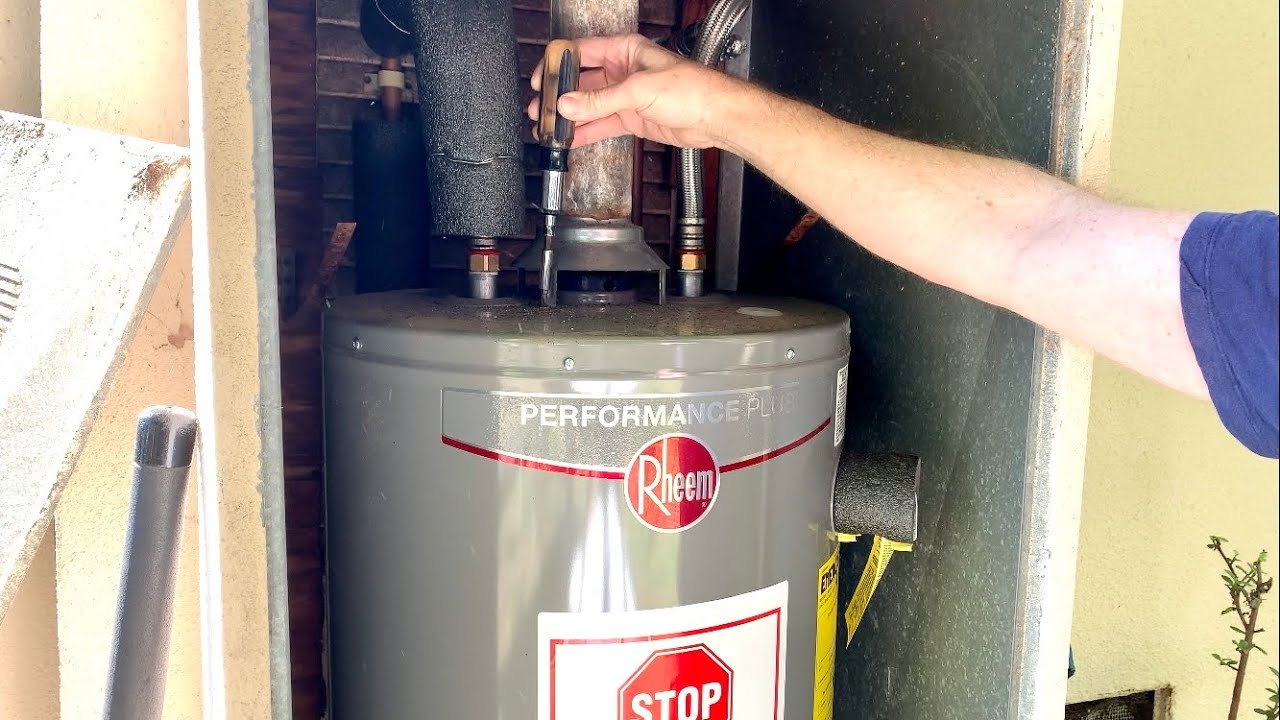
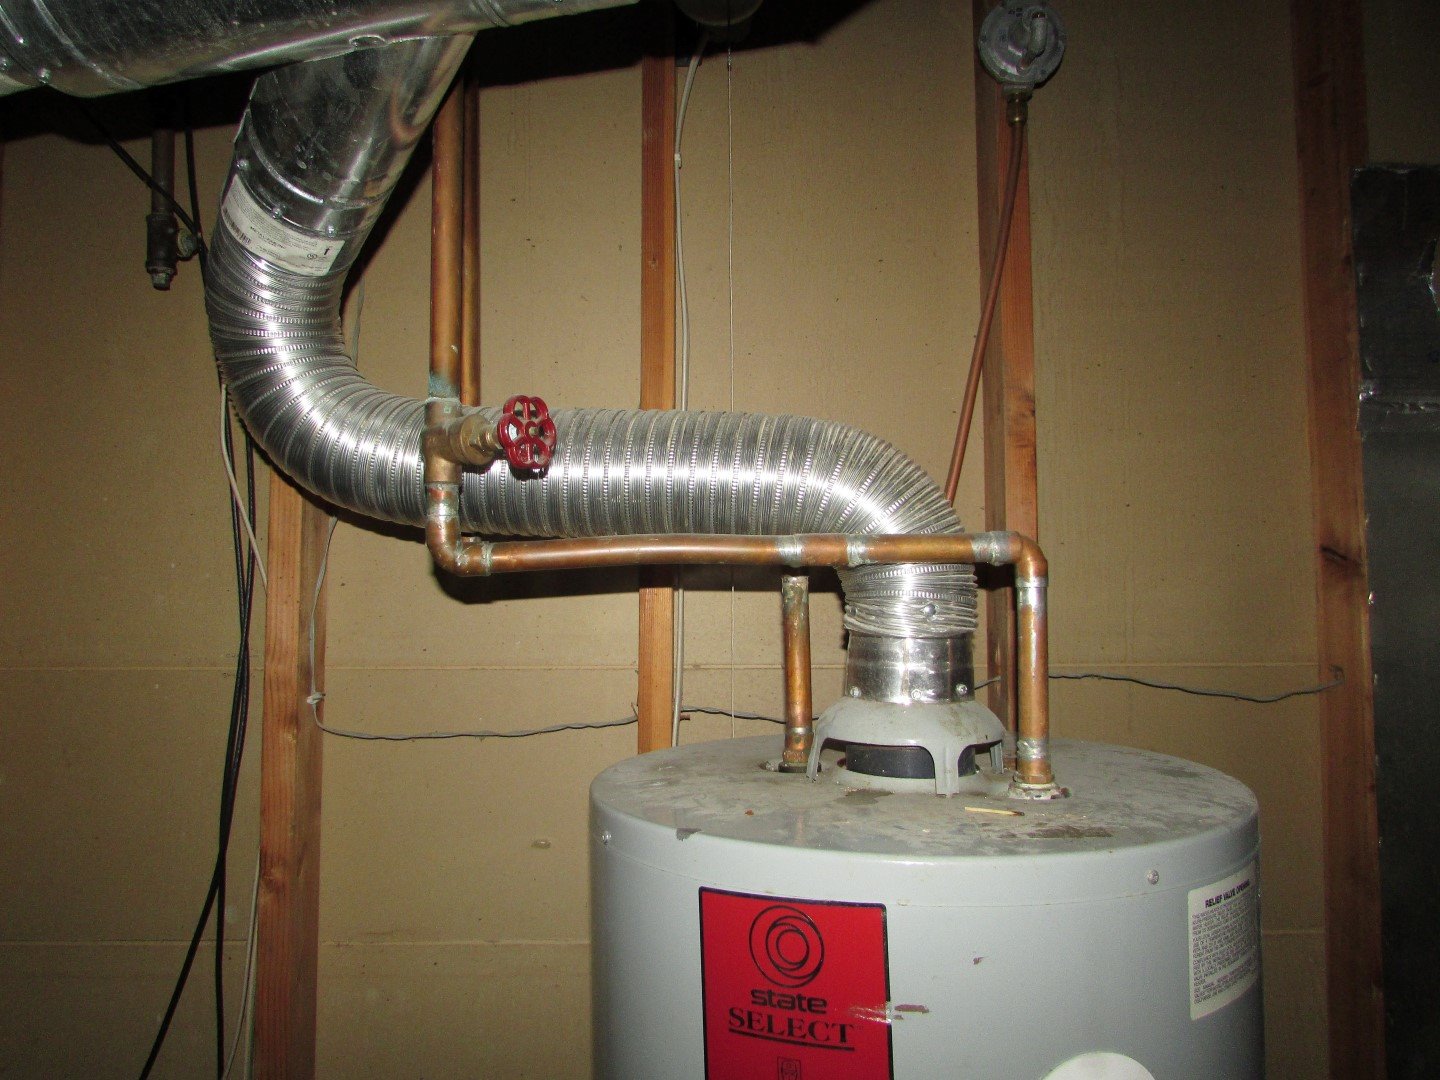
- Ensure proper venting – If your water heater requires venting, ensure that the vent pipe is properly connected to the exhaust outlet on the water heater and directed outside. Follow the manufacturer’s instructions for proper venting requirements.
It’s crucial to pay attention to the manufacturer’s instructions and follow all recommended guidelines during the installation process. Each water heater may have specific requirements and considerations, so refer to the provided manual for any specific details.
Once the new water heater is securely installed, you can proceed to the next steps which involve connecting the gas and water supply, checking for leaks, and ensuring proper operation.
Note: If you are not familiar with gas connections or plumbing, it is recommended to seek the assistance of a professional plumber or gas technician to ensure a safe and successful installation.
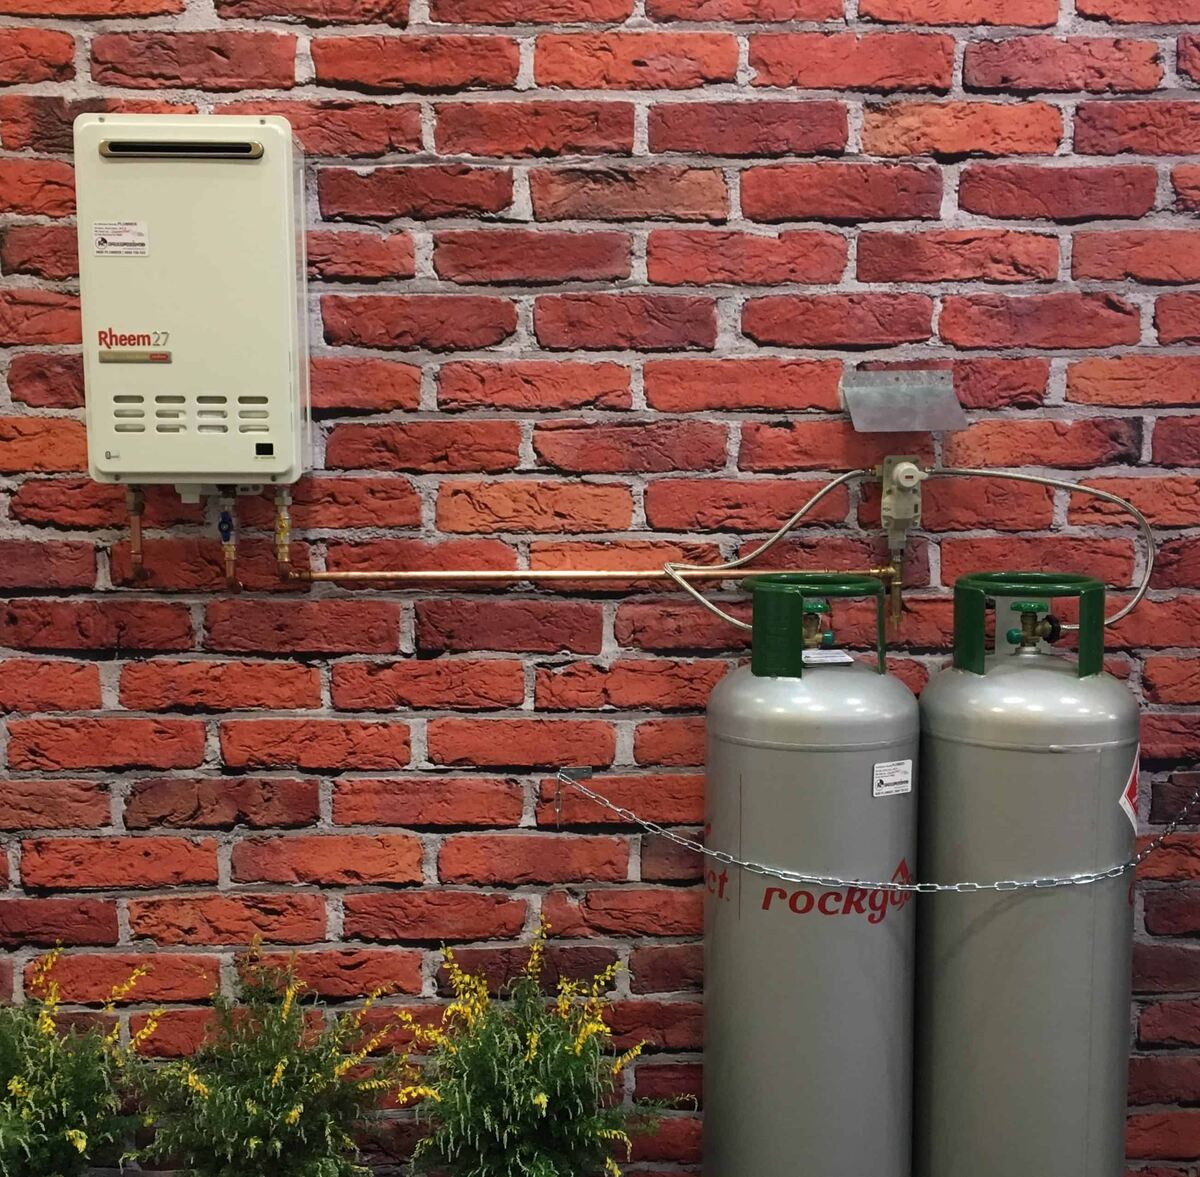
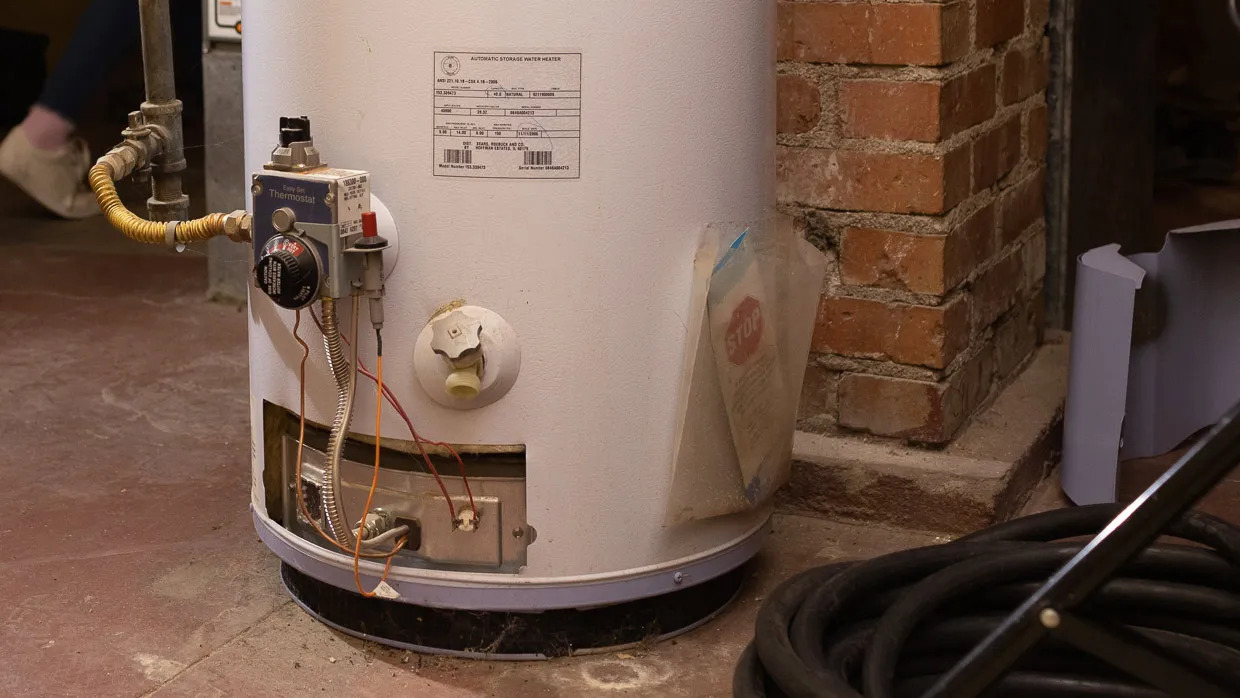
Step 7: Connect the Gas Supply
Now that the new gas hot water heater is properly installed, it’s time to connect the gas supply to ensure it can heat the water effectively. Follow these steps to connect the gas supply:
- Locate the gas shut-off valve – Identify the gas shut-off valve near the water heater. It is usually located on the gas line leading to the water heater.
- Turn off the gas supply – Use a wrench to turn the gas shut-off valve clockwise until it is fully closed. This will shut off the gas supply to the water heater.
- Inspect the gas line – Before connecting the gas supply, inspect the gas line for any damage, corrosion, or leaks. If you notice any issues, it’s important to address them before proceeding.
- Apply pipe joint compound – Apply a thin coating of pipe joint compound or gas-rated Teflon tape to the male threads of the gas pipe connection that will be attached to the water heater’s gas control valve. This will help create a tight and secure seal.
- Connect the gas supply line – Using a pipe wrench, carefully connect the gas supply line to the gas control valve on the water heater. Make sure to tighten the connection securely to prevent any gas leaks.
- Turn on the gas supply – With the gas supply line properly connected, slowly turn the gas shut-off valve counterclockwise to open it. This will allow the gas to flow to the water heater.
Once the gas supply is connected, it’s important to check for any gas leaks. Use a mixture of soap and water and apply it to the connections. If you see any bubbles forming, it indicates a gas leak. If you detect a gas leak, turn off the gas supply immediately and consult a professional to address the issue.
Remember, working with gas lines can be dangerous if not done properly. If you are not confident in your abilities or unfamiliar with gas connections, it is strongly recommended to seek the assistance of a licensed professional to ensure a safe and successful installation.
Next, proceed to connecting the water supply in the following step.
Step 8: Connect the Water Supply
Now that the gas supply is connected, it’s time to connect the water supply to ensure a steady flow of hot water from your new gas hot water heater. Follow these steps to connect the water supply:
- Locate the hot and cold water shut-off valves – Identify the hot and cold water shut-off valves near the water heater. They are typically located on the water lines leading to the heater.
- Turn off the water supply – Use a wrench to turn both the hot and cold water shut-off valves clockwise until they are fully closed. This will shut off the water supply to the water heater.
- Inspect the water supply lines – Before connecting the water supply, inspect the water lines for any damage, corrosion, or leaks. If you notice any issues, address them before proceeding.
- Apply Teflon tape – Wrap Teflon tape clockwise around the male threads of the hot and cold water supply connections on the water heater. This will help create a tight and leak-free seal.
- Connect the water supply lines – Using adjustable pliers or a pipe wrench, securely connect the hot and cold water supply lines to the respective fittings on the water heater. Make sure to tighten the connections properly.
- Turn on the water supply – With the water supply lines properly connected, slowly turn the hot and cold water shut-off valves counterclockwise to open them. This will allow the water to flow into the water heater.
After connecting the water supply, it’s essential to check for any leaks. Observe the connections closely and look for any signs of water dripping or pooling. If you notice any leaks, immediately close the shut-off valves and tighten the connections further. If the leak persists, it may be necessary to replace the faulty fittings or seek the assistance of a professional plumber.
Remember, it’s crucial to ensure proper water supply connections to prevent leaks and ensure the efficient functioning of your new gas hot water heater. If you are unsure about the water supply connections or uncomfortable with the process, it’s wise to consult a professional plumber to ensure a safe and successful installation.
In the next step, we’ll cover how to check for leaks and ensure everything is working properly before completing the installation.
Read more: How Does A Gas Hot Water Heater Work
Step 9: Check for Leaks
After connecting the gas and water supply lines to your new gas hot water heater, it’s crucial to thoroughly check for any leaks. Detecting and addressing leaks promptly will ensure the safe and efficient operation of the water heater. Follow these steps to check for leaks:
- Inspect connections – Carefully examine all the gas and water supply connections on the water heater. Look for any signs of water or gas leaks, such as dripping or pooling.
- Check gas connections – Apply a mixture of soapy water to the gas connections using a brush or a spray bottle. Observe for any bubbles forming, as this indicates a gas leak. If you detect a gas leak, turn off the gas supply and consult a professional plumber or gas technician to address the issue.
- Check water connections – Similarly, apply the soapy water mixture to the water supply connections. Look for any bubbles or signs of water leakage. If you discover a water leak, tighten the connection or replace faulty fittings as necessary.
- Inspect the drain valve – Ensure that the drain valve is securely closed and not leaking. If there are any leaks, tighten the valve or replace it if necessary.
Take your time during this step to thoroughly inspect all the connections and components of the water heater. Any signs of leaks should be addressed immediately to prevent further damage and ensure the safety of your home.
If you encounter persistent leaks or are unsure about how to address them, it is recommended to seek the assistance of a professional plumber. They will have the expertise to diagnose and resolve any leaks, ensuring a reliable and leak-free operation of your new gas hot water heater.
Once you have confirmed that there are no leaks, you can proceed to the final step of lighting the pilot light and preparing the water heater for use.
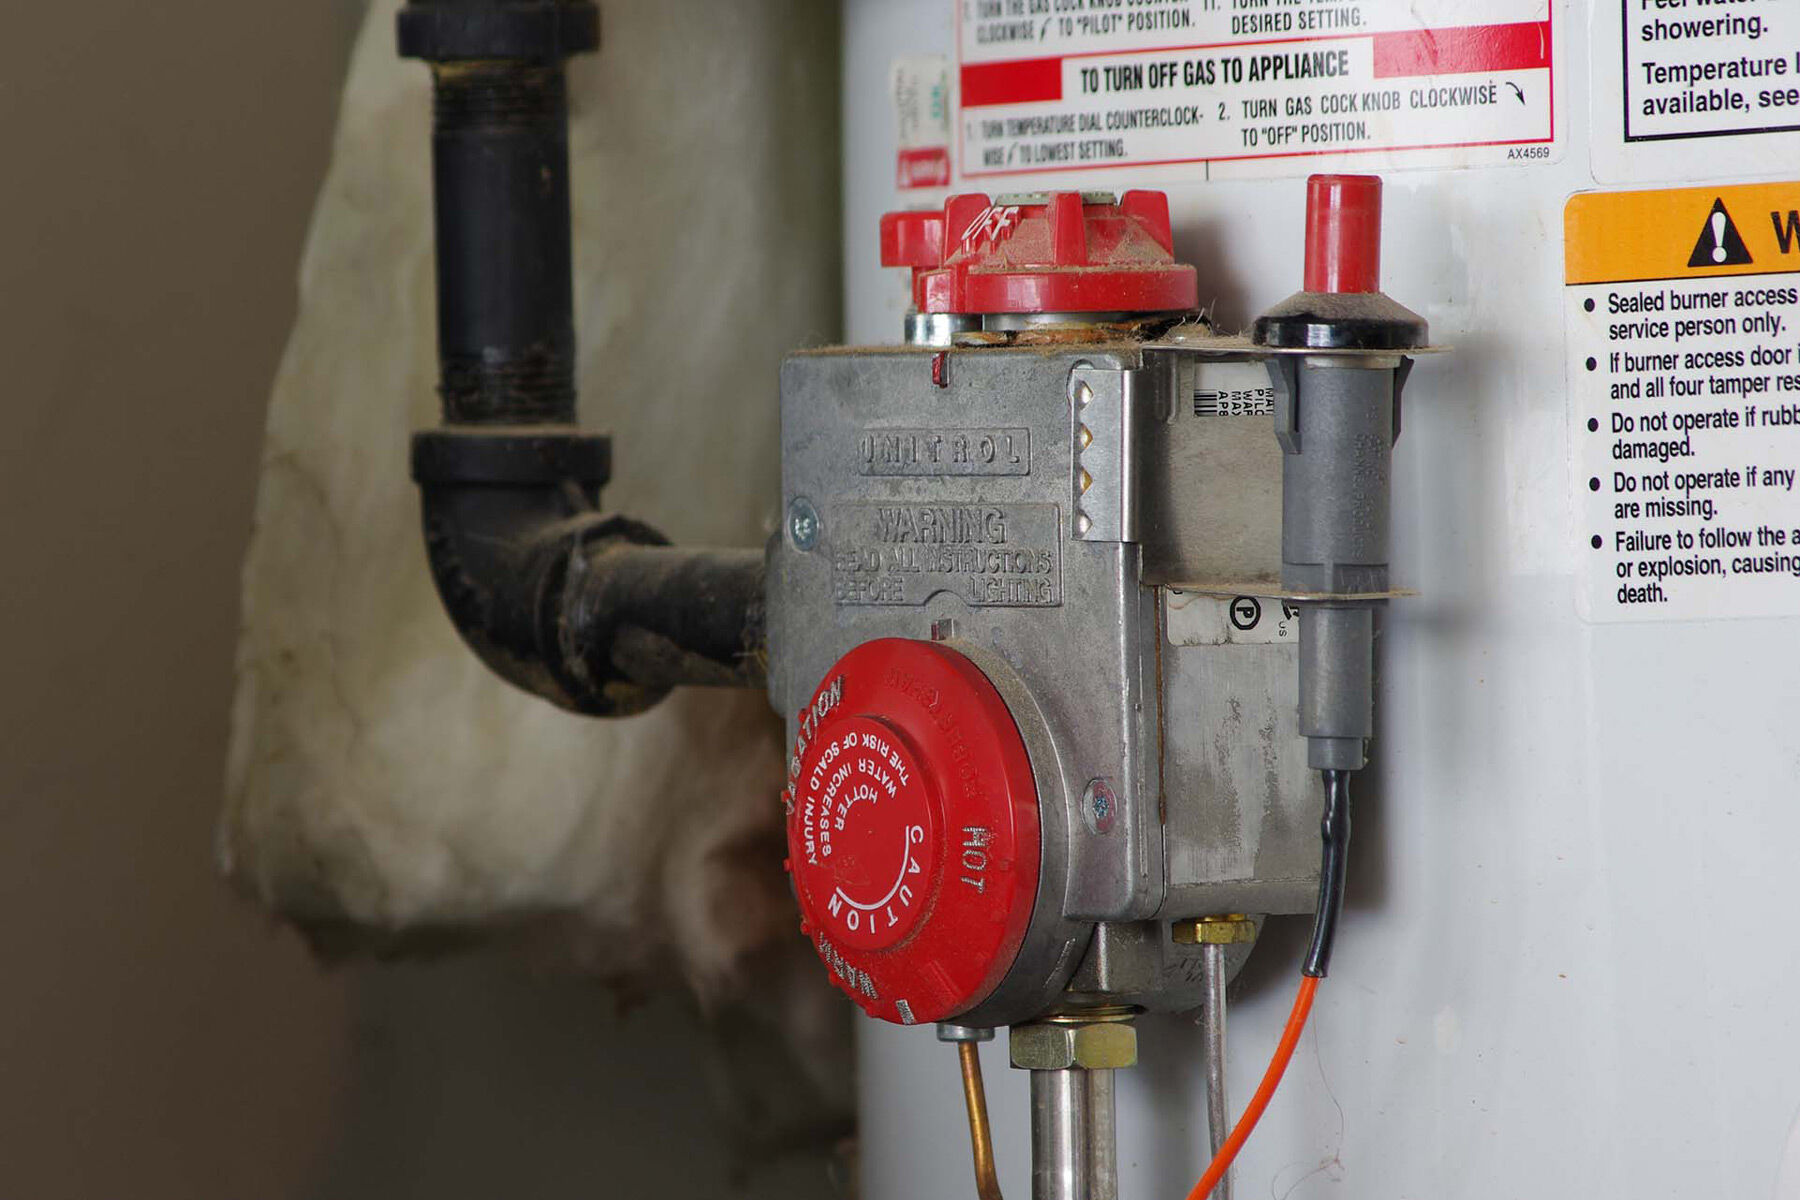
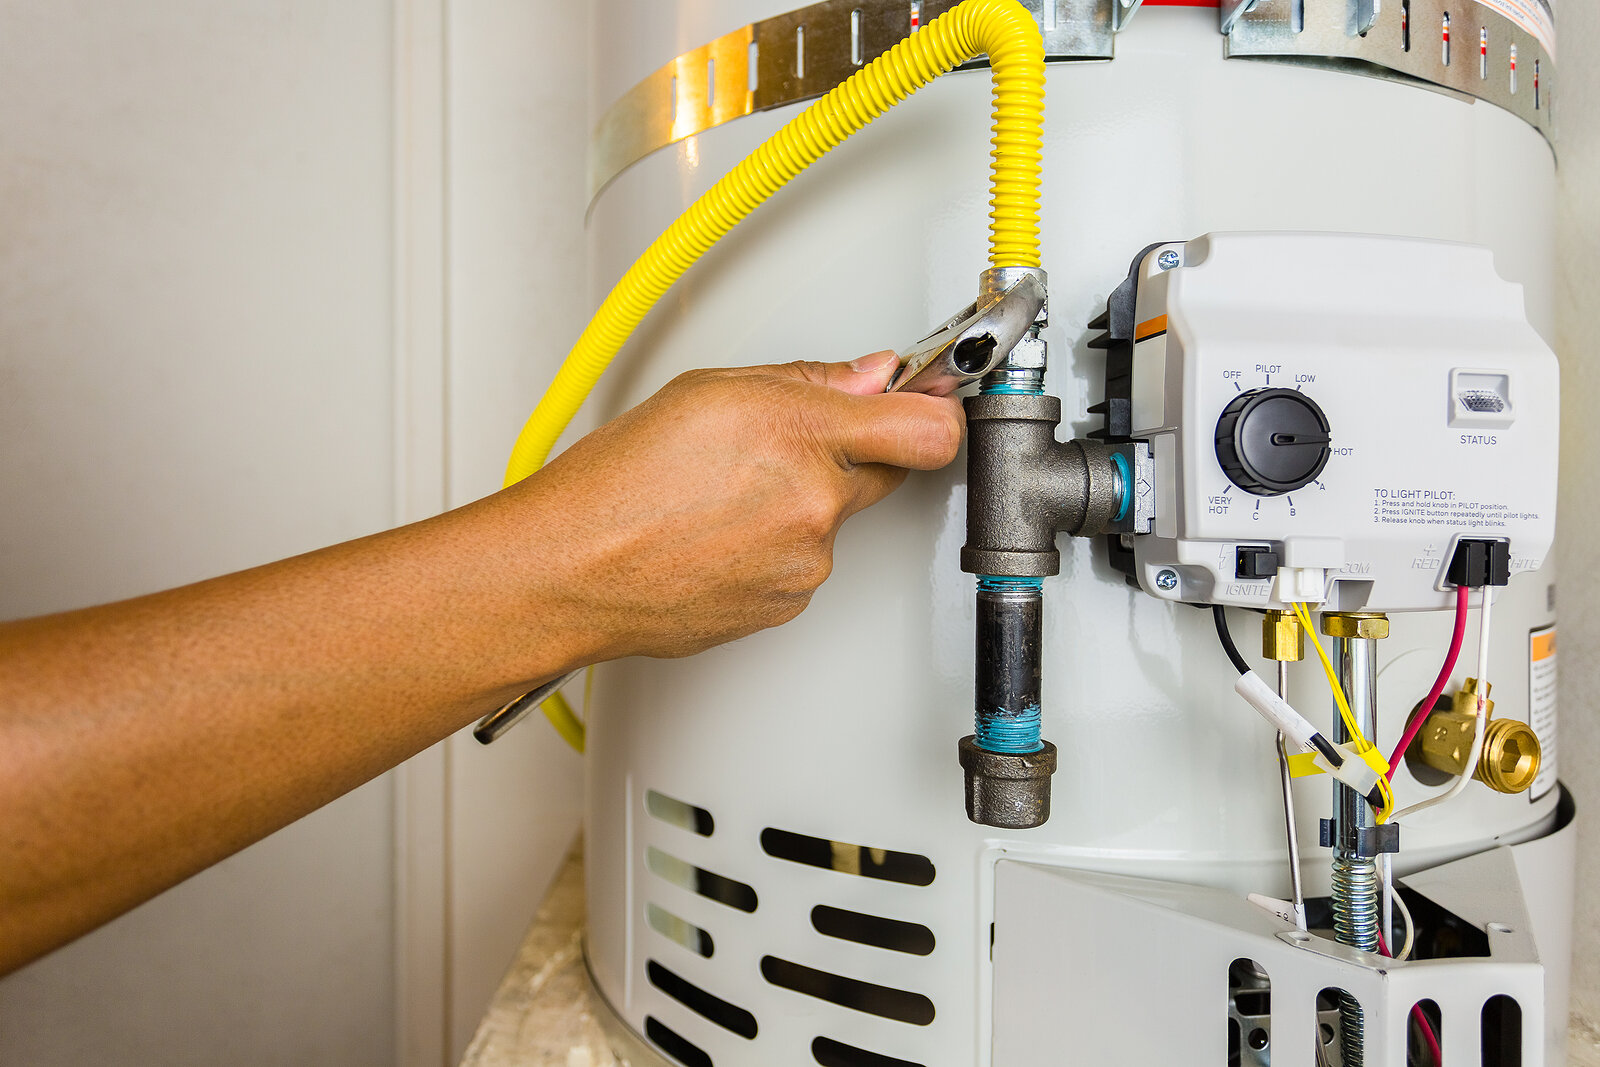
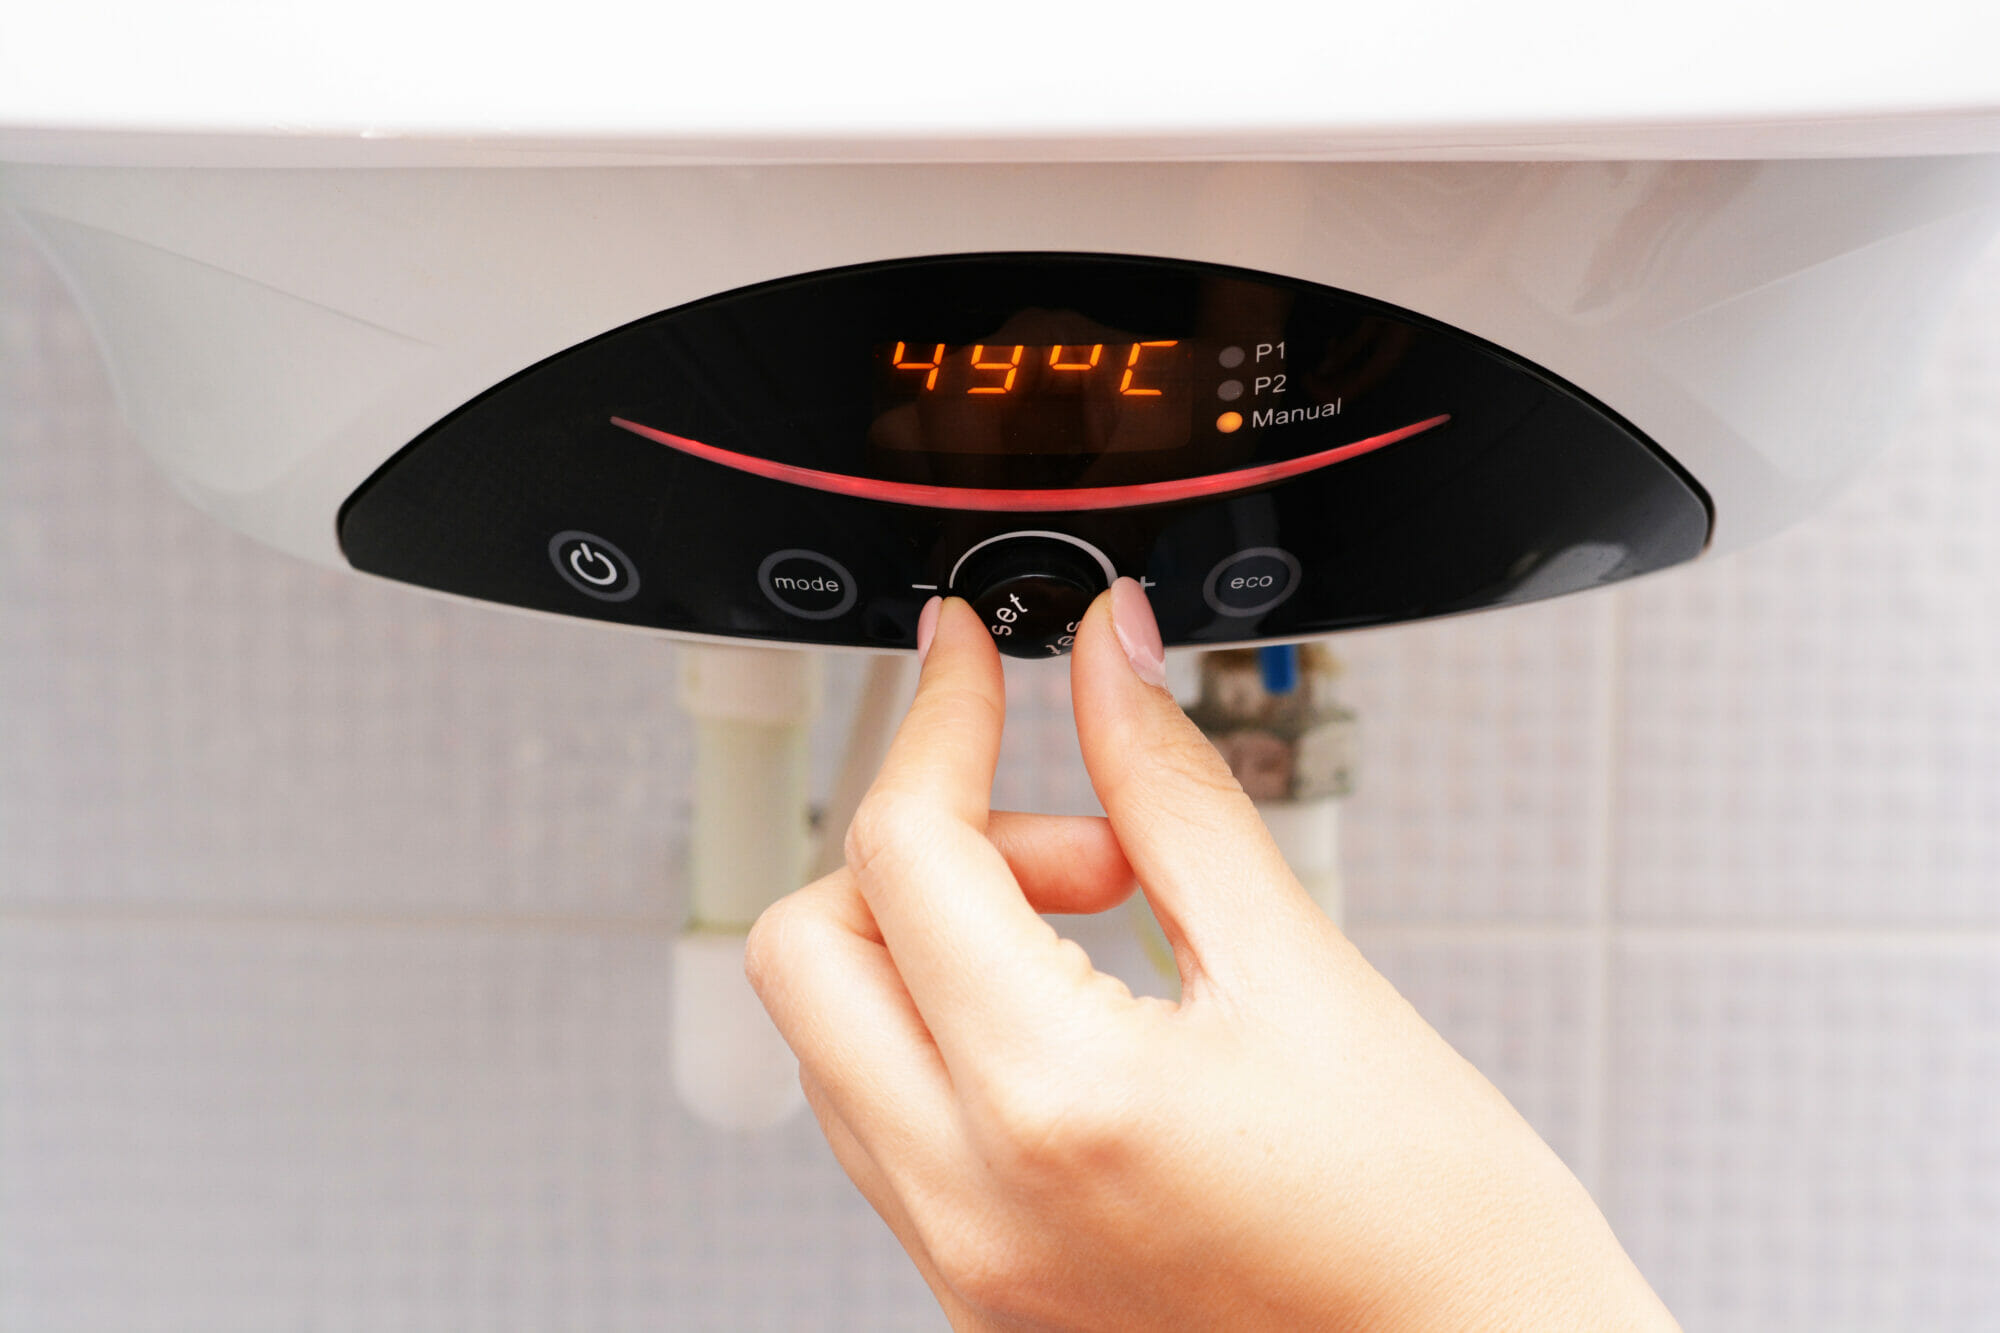
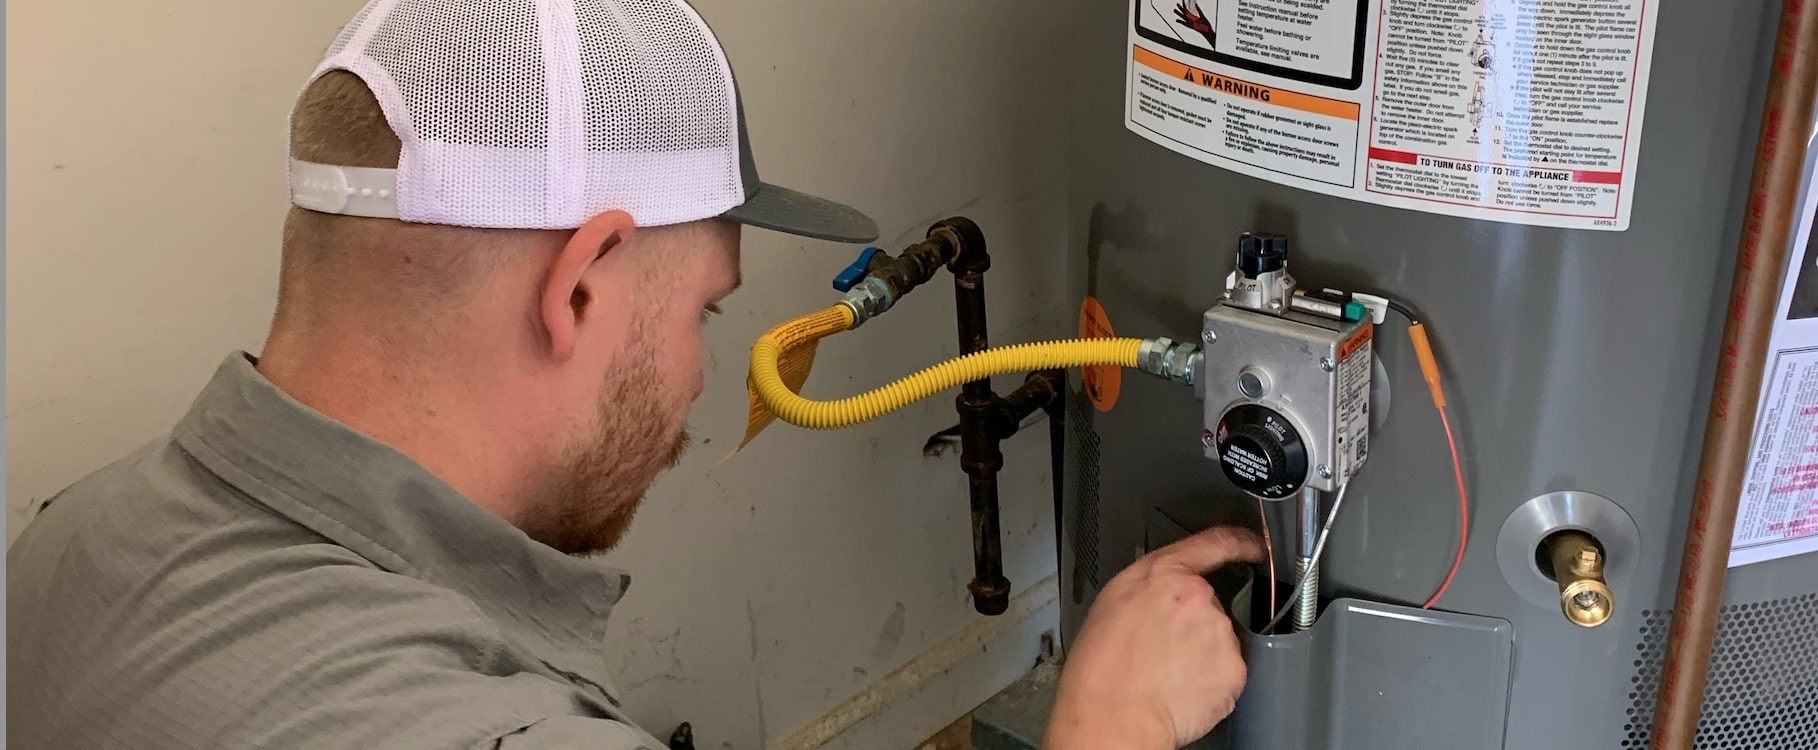
Step 10: Light the Pilot Light
After successfully connecting the gas and water supply and checking for leaks, the final step is to light the pilot light on your gas hot water heater. The pilot light is essential for igniting the gas and ensuring a consistent flow of hot water. Follow these steps to light the pilot light:
- Locate the pilot light assembly – Typically, the pilot light assembly is located near the bottom of the water heater. Refer to the manufacturer’s instructions to identify the specific location.
- Turn the control knob – Locate the control knob on the gas control valve. Set the knob to the “pilot” position.
- Press and hold the reset or ignite button – While holding down the reset or ignite button, use a long-reach lighter or match to light the pilot light through the pilot opening.
- Continue holding the button – After successfully lighting the pilot light, continue holding down the reset or ignite button for about a minute. This allows the thermocouple (a safety device) to heat up and detect the presence of the flame.
- Release the button – After a minute, release the reset or ignite button. The pilot light should remain lit. If it doesn’t, repeat the process, ensuring that the flame is directly hitting the thermocouple.
- Set the control knob – Once the pilot light is lit and stable, turn the control knob from the “pilot” position to the desired temperature setting.
It’s important to note that the process of lighting the pilot light may vary slightly depending on the specific model of your gas hot water heater. Always refer to the manufacturer’s instructions for precise guidelines.
If you encounter any difficulties or are unable to light the pilot light, consult the troubleshooting section of the manufacturer’s instructions or consider seeking assistance from a professional plumber or gas technician.
Once the pilot light is successfully lit and the control knob is set, your gas hot water heater is ready to provide you with a reliable and continuous supply of hot water.
Congratulations! You have successfully completed the installation of your gas hot water heater. Enjoy the comfort and convenience of endless hot water for your home.
Conclusion
Installing a gas hot water heater can be a rewarding project that provides you with a steady and efficient supply of hot water. By following the step-by-step guide outlined in this article, you can successfully install a gas hot water heater and enjoy the comfort and convenience it offers.
Throughout the installation process, it’s important to prioritize safety and adhere to local building codes. Take the time to gather the necessary tools and materials, turn off the water and gas supply, and drain the existing water heater. Carefully disconnect the old water heater and prepare the installation area, ensuring it is clean and level.
Once you have positioned the new water heater, connect the gas supply and water supply lines, ensuring proper sealing and tight connections. Always check for leaks by inspecting the connections and using a soapy water mixture. Address any leaks immediately to prevent further damage and ensure safe operation.
Finally, light the pilot light according to the manufacturer’s instructions to ensure a consistent supply of hot water. Remember to consult the manufacturer’s guidelines for specific details and troubleshooting information.
If you encounter any difficulties during the installation process or are unsure about any steps, it is always recommended to seek the assistance of a professional plumber or gas technician. They have the expertise and knowledge to ensure a safe and successful installation.
By successfully installing a gas hot water heater, you are taking a significant step towards providing your home with an efficient and reliable source of hot water. Enjoy the benefits of endless hot showers, clean dishes, and warm laundry with your new gas hot water heater!
Frequently Asked Questions about How To Install A Gas Hot Water Heater
Was this page helpful?
At Storables.com, we guarantee accurate and reliable information. Our content, validated by Expert Board Contributors, is crafted following stringent Editorial Policies. We're committed to providing you with well-researched, expert-backed insights for all your informational needs.
0 thoughts on “How To Install A Gas Hot Water Heater”