Articles
How To Repair Hot Water Heater
Modified: October 20, 2024
Learn how to repair your hot water heater with informative articles and expert tips. Ensure a steady supply of hot water in your home.
(Many of the links in this article redirect to a specific reviewed product. Your purchase of these products through affiliate links helps to generate commission for Storables.com, at no extra cost. Learn more)
Introduction
Having access to hot water is essential for our daily activities, from taking showers to washing dishes. However, when our hot water heater malfunctions, it can disrupt our routine and cause inconvenience. Fortunately, with a little knowledge and some basic troubleshooting skills, you can often repair your hot water heater on your own.
In this article, we will guide you through the step-by-step process of repairing a hot water heater. Whether you are dealing with a faulty pilot light, a damaged heating element, or a need for a simple maintenance task like flushing the tank, we will provide you with the necessary information and instructions to get your hot water heater back in working order.
Please note that safety should always be your top priority when dealing with any electrical or gas-powered appliance. If you feel uncomfortable or unsure about performing any of the tasks outlined in this article, it is always best to seek professional help. Additionally, remember to follow the manufacturer’s instructions and guidelines specific to your hot water heater model.
Before we dive into the repair process, let’s start by identifying the issue you are experiencing with your hot water heater. By pinpointing the specific problem, you can determine the appropriate steps to take to resolve it.
Key Takeaways:
- Regular maintenance such as draining and flushing the tank can improve the efficiency and lifespan of your hot water heater, ensuring consistent hot water supply.
- Safety should always be a priority when repairing a hot water heater. If unsure, seek professional assistance to avoid potential hazards.
Read more: How To Maintain Hot Water Heater
Step 1: Identify the Issue
The first step in repairing a hot water heater is to identify the issue that is causing the malfunction. This will allow you to focus your efforts on the specific problem and find a solution more efficiently.
There are several common issues that can occur with hot water heaters, including:
- No hot water
- Inadequate hot water
- Water is too hot
- Strange noises coming from the heater
- Leaking water
To determine the cause of the problem, start by checking the obvious signs. Is the heater completely non-functional, or is it producing some hot water but not enough? Is the water temperature too high or too low? Are there any visible leaks or unusual noises?
If you are experiencing a complete lack of hot water, it could be due to a power supply issue, faulty thermostat, or a problem with the heating element. Inadequate hot water may indicate a buildup of sediment in the tank, while excessively hot water may be a result of a malfunctioning thermostat.
Leaks can stem from a variety of sources, including loose connections, a damaged pressure relief valve, or a cracked tank. Lastly, unusual noises may indicate a buildup of sediment, a malfunctioning heating element, or imminent failure of certain components.
Taking the time to properly identify the issue will help you understand the root cause and determine the appropriate course of action. This will save you time and effort in the long run. Once you have identified the issue, you can move on to gathering the necessary tools and materials for the repair process.
Step 2: Gather Necessary Tools and Materials
Before you begin the repair process, it’s important to make sure you have all the necessary tools and materials on hand. This will help streamline the repair process and ensure that you have everything you need to successfully fix your hot water heater.
Here is a list of commonly used tools and materials that you may need:
- Screwdriver set
- Adjustable wrench
- Multimeter
- Flashlight
- Teflon tape
- Garden hose
- Bucket or drain pan
- Replacement parts (if necessary)
The specific tools required will depend on the type and model of your hot water heater. Consult the owner’s manual or manufacturer’s guidelines to ensure you have the correct tools for the job.
Additionally, it’s a good idea to have a basic understanding of your hot water heater’s components. Familiarize yourself with the location of the pilot light, heating element, thermostat, and other essential parts. This will help you navigate the repair process more effectively.
Once you have gathered all the necessary tools and materials, you’ll be ready to move on to the next step in repairing your hot water heater. Keep in mind that safety should always be a priority, so make sure to wear appropriate protective gear, such as safety goggles and gloves, when working on your hot water heater.
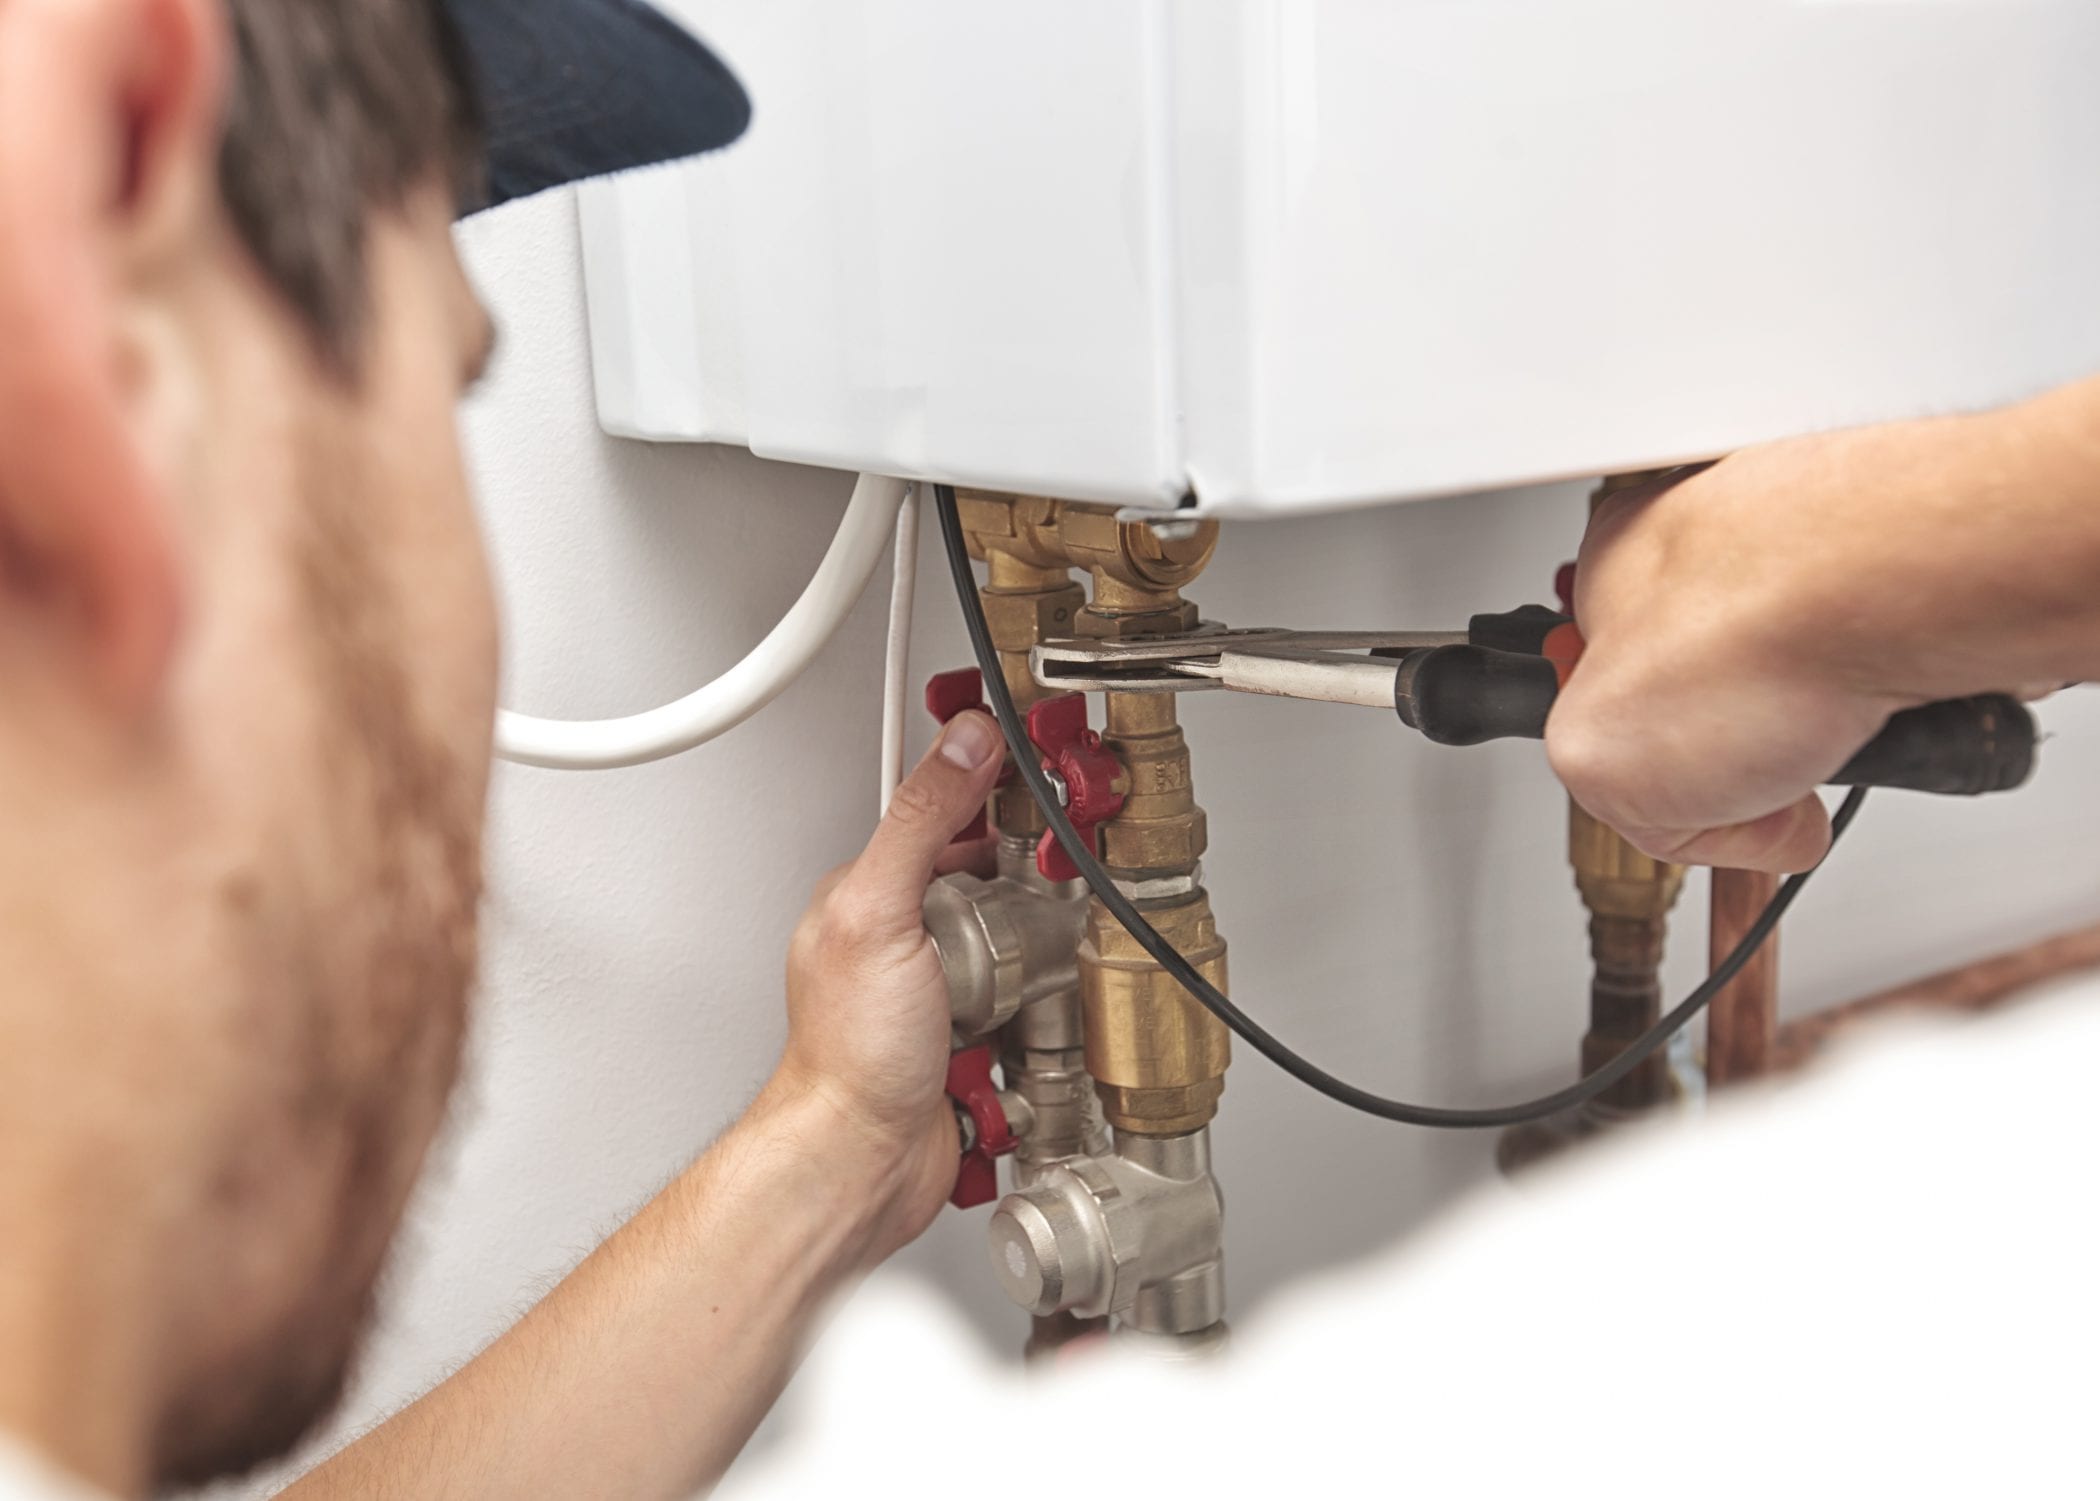
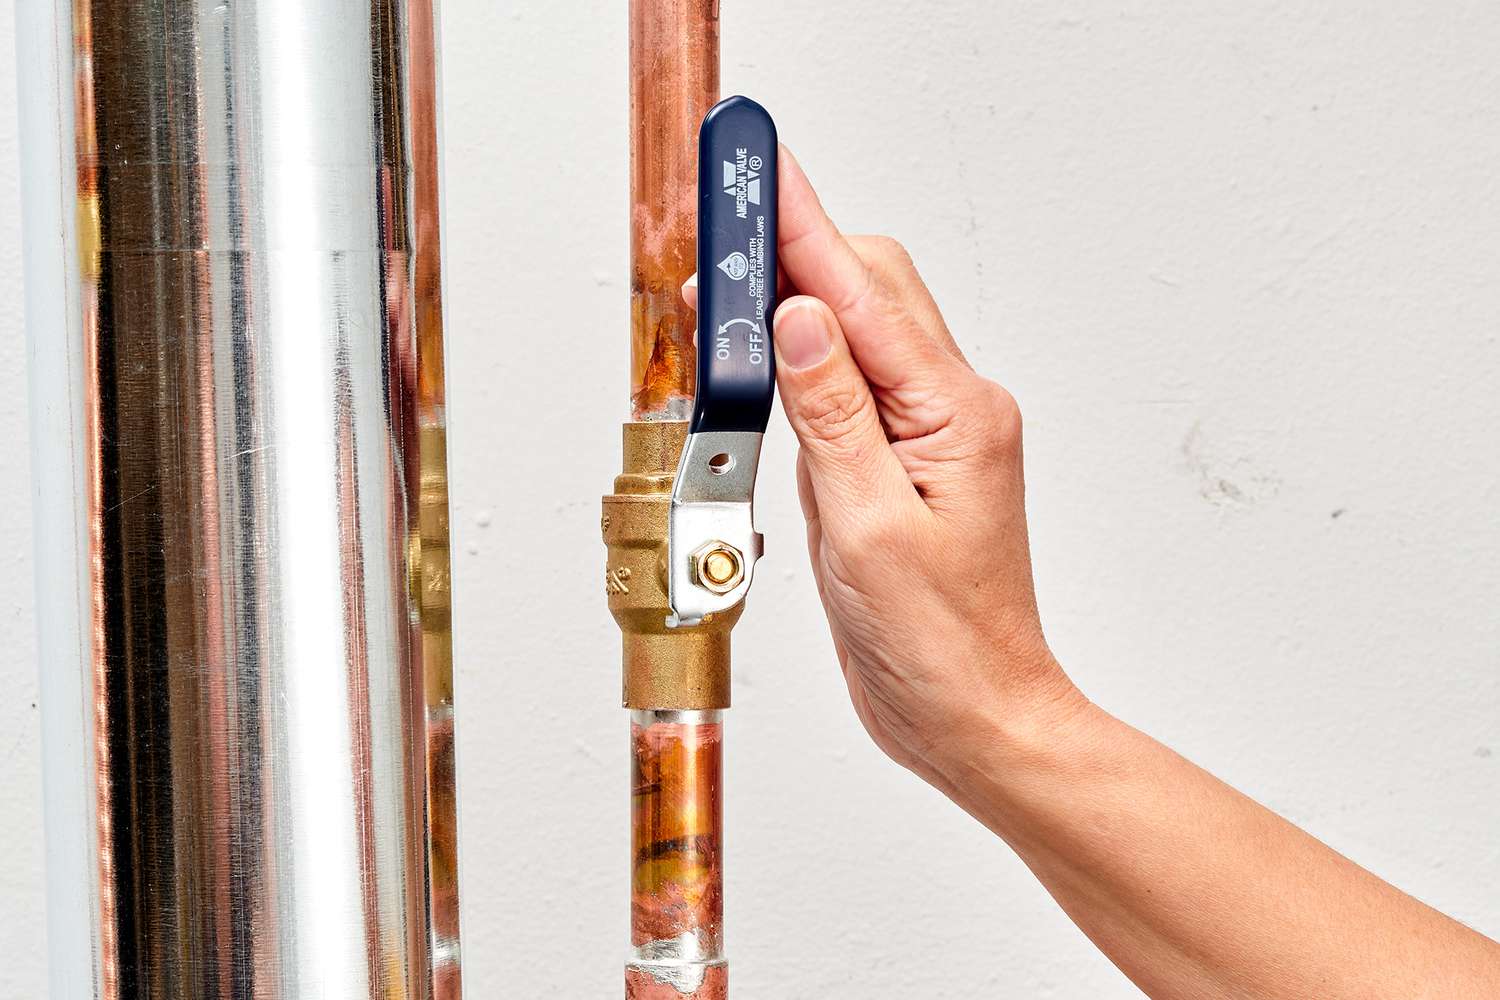
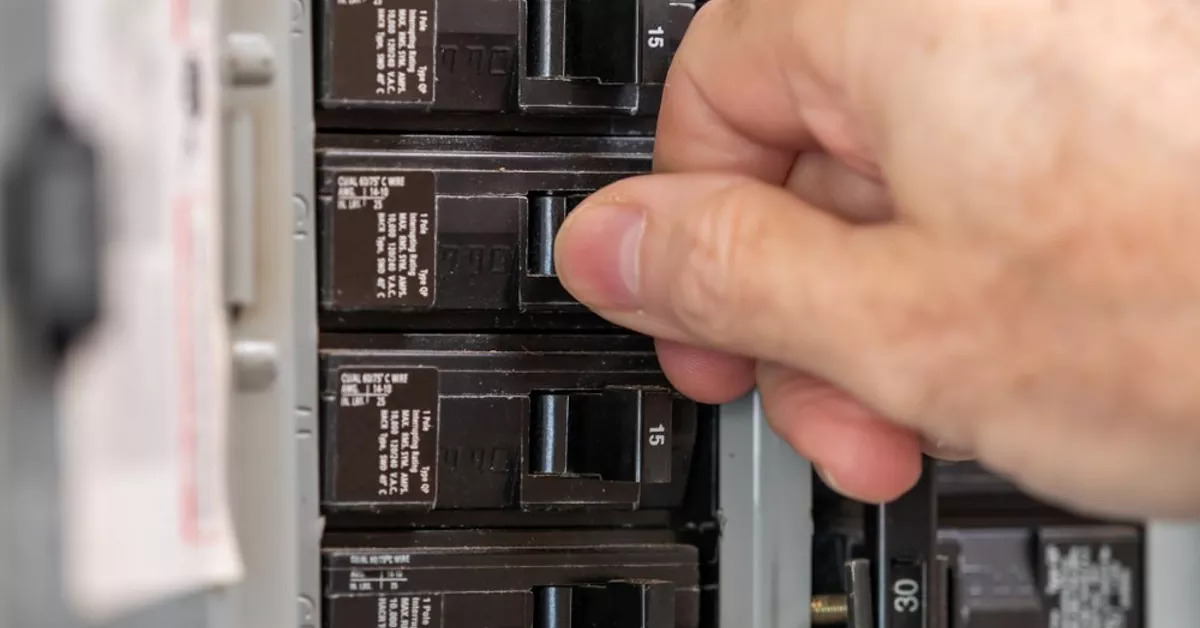
Step 3: Shut Off the Power
Before you begin any work on your hot water heater, it is crucial to shut off the power supply to ensure your safety. Water heaters can be powered by electricity or gas, so the method of disconnecting the power will vary depending on your specific setup.
If your hot water heater is electrically powered, follow these steps to turn off the power:
- Locate the breaker panel in your home.
- Identify the breaker that controls the power to your hot water heater.
- Flip the breaker switch to the “Off” position.
This will effectively cut off the electrical supply to your hot water heater, preventing any potential accidents or electric shock while you perform the repair.
If your hot water heater is gas-powered, follow these steps to turn off the gas supply:
- Locate the gas shut-off valve near your water heater.
- Turn the valve to the “Off” position. It should be perpendicular to the gas line.
By shutting off the gas supply, you ensure that there is no risk of gas leaks or combustion while you work on the water heater.
Remember to verify that the power has been successfully cut off before proceeding with any repairs. You can do this by attempting to turn on the hot water faucet; if there is no hot water flowing, then the power has been properly shut off.
Once you have ensured the power is off, you can move on to the next step in the repair process with peace of mind knowing that you’re working in a safe environment.
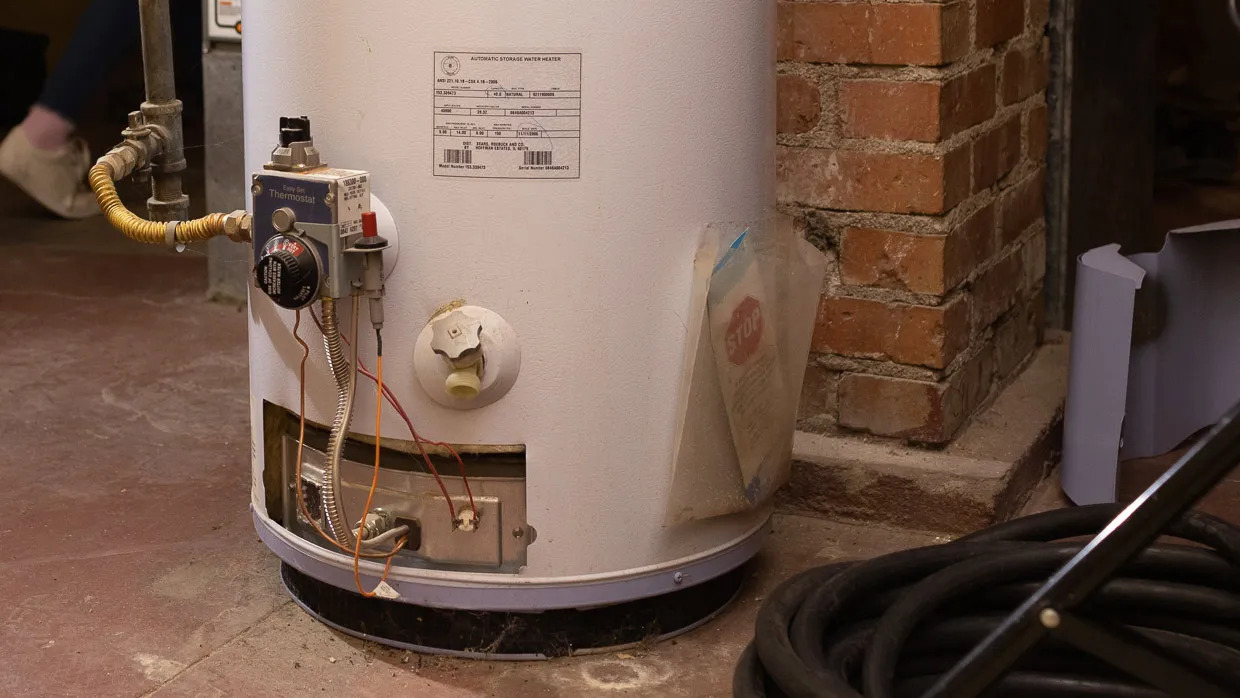
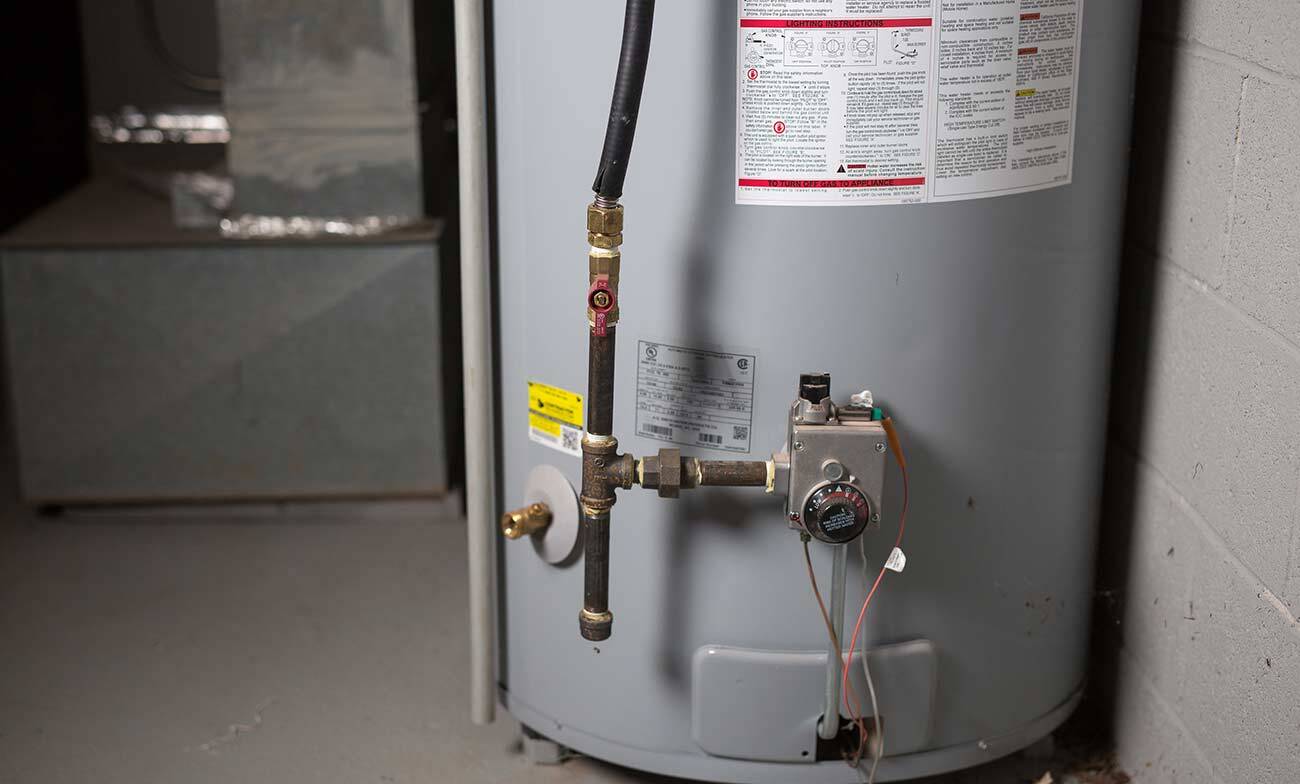
Step 4: Check the Pilot Light
If you have a gas-powered hot water heater, one common issue that can cause a lack of hot water is a malfunctioning pilot light. The pilot light is a small flame that ignites the gas burner and starts the heating process. If the pilot light goes out, the burner won’t ignite, resulting in no hot water.
To check the pilot light, follow these steps:
- Locate the access panel on the front of your hot water heater. This is usually at the bottom of the unit.
- Remove the access panel carefully using a screwdriver or the appropriate tool for your specific model.
- Behind the access panel, you will see the burner assembly. Look for the pilot light assembly, which should be a small tube with a flame.
- Observe the pilot light. It should be a steady blue flame. If the flame is not lit or is flickering, then the pilot light needs to be relit.
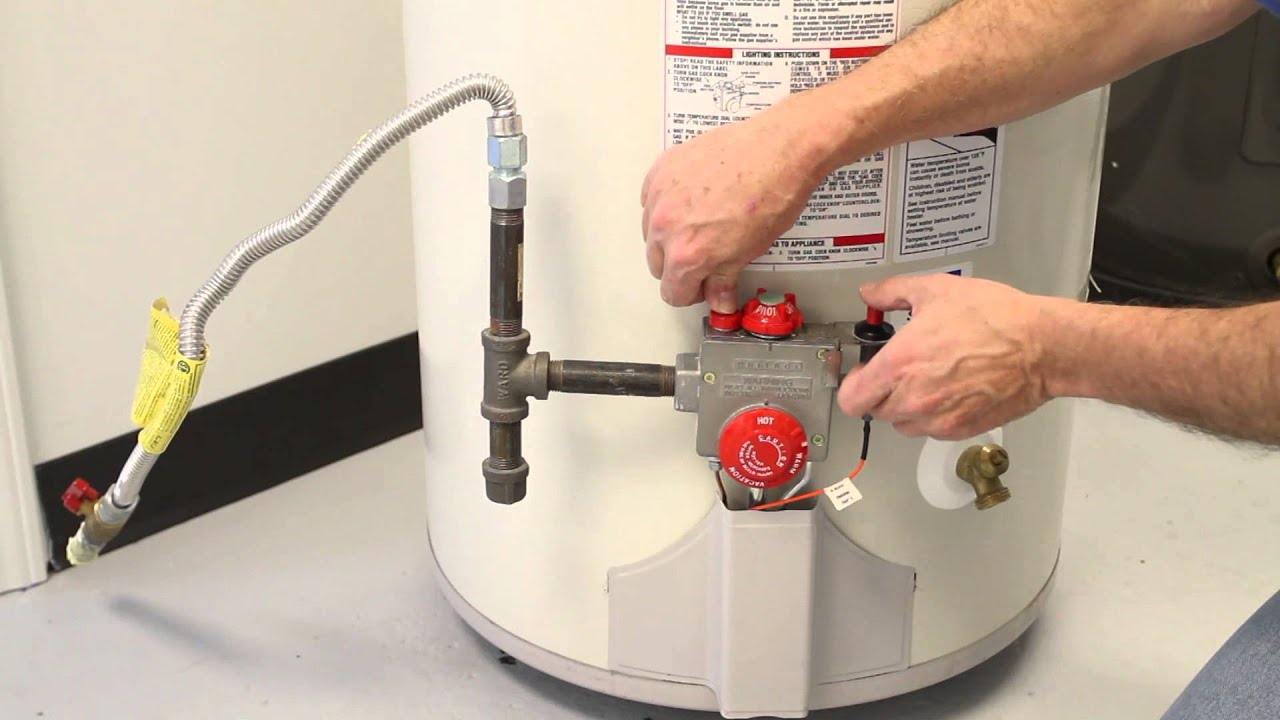
To relight the pilot light, consult your hot water heater’s manual for specific instructions, as the process may vary depending on the model. However, the general steps are as follows:
- Locate the gas control valve, which is usually labeled with “On,” “Off,” and “Pilot” positions.
- Turn the gas control valve to the “Off” position and wait for a few minutes to allow any gas to dissipate.
- Once the waiting period is over, turn the gas control valve to the “Pilot” position.
- While holding down the gas control valve, use a long lighter or match to ignite the pilot light.
- Continue to hold down the gas control valve for a minute or two to allow the thermocouple to heat up.
- After the thermocouple has heated up, release the gas control valve. The pilot light should stay ignited.
- Finally, close the access panel and make sure it is securely in place.
If relighting the pilot light doesn’t solve the issue or if the pilot light continues to go out, there may be a problem with the thermocouple or gas supply. In this case, it is recommended to seek professional assistance to diagnose and repair the issue.
Checking the pilot light is an essential step in troubleshooting a gas-powered hot water heater. By ensuring that the pilot light is lit and functioning properly, you can potentially restore hot water to your home.
Read more: How To Fill A Hot Water Heater
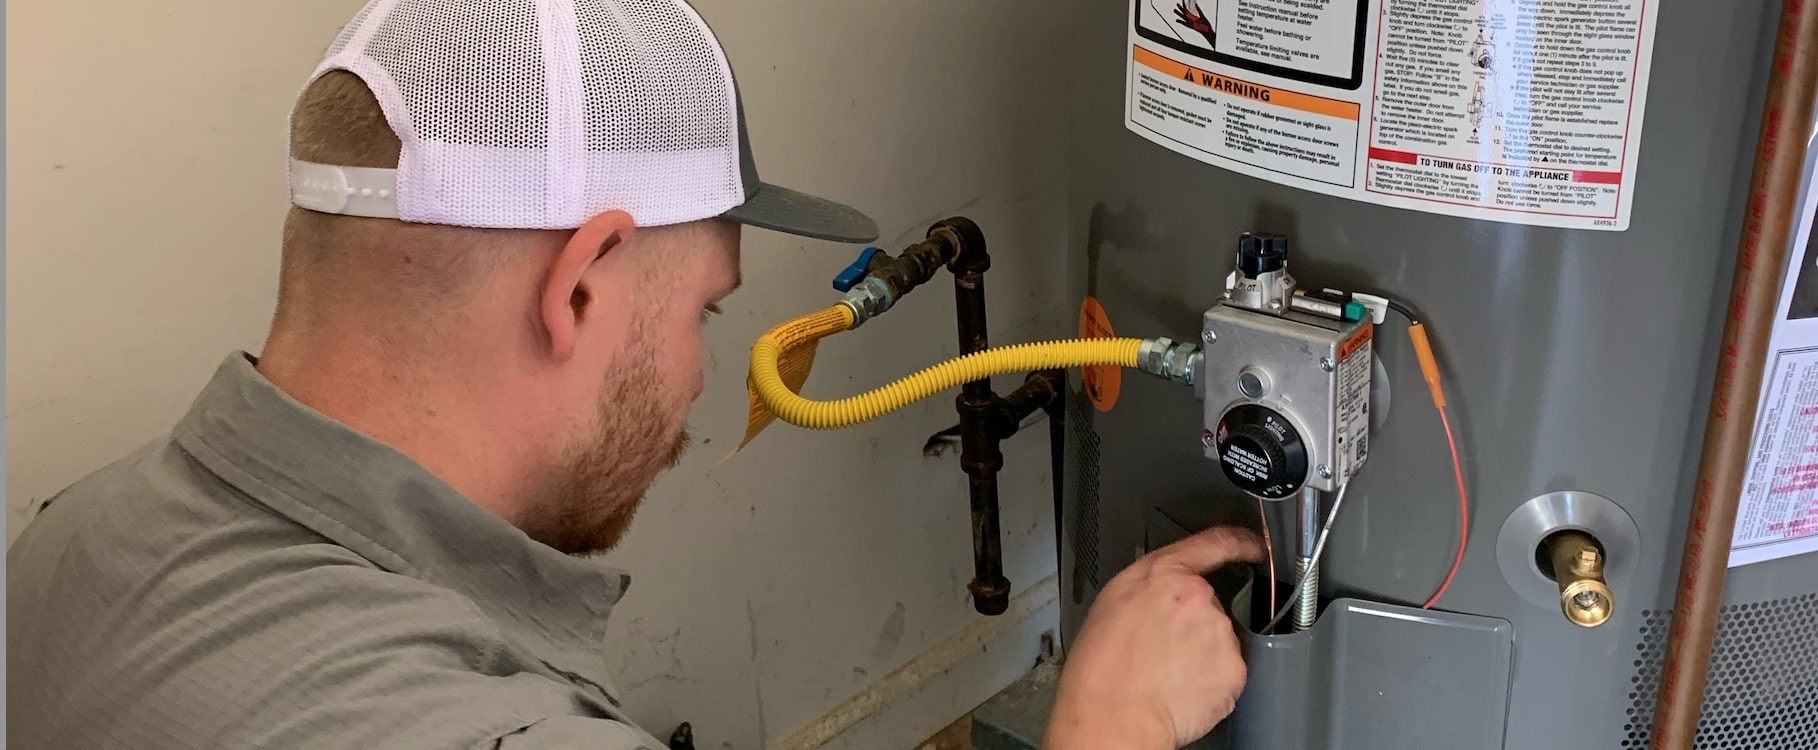
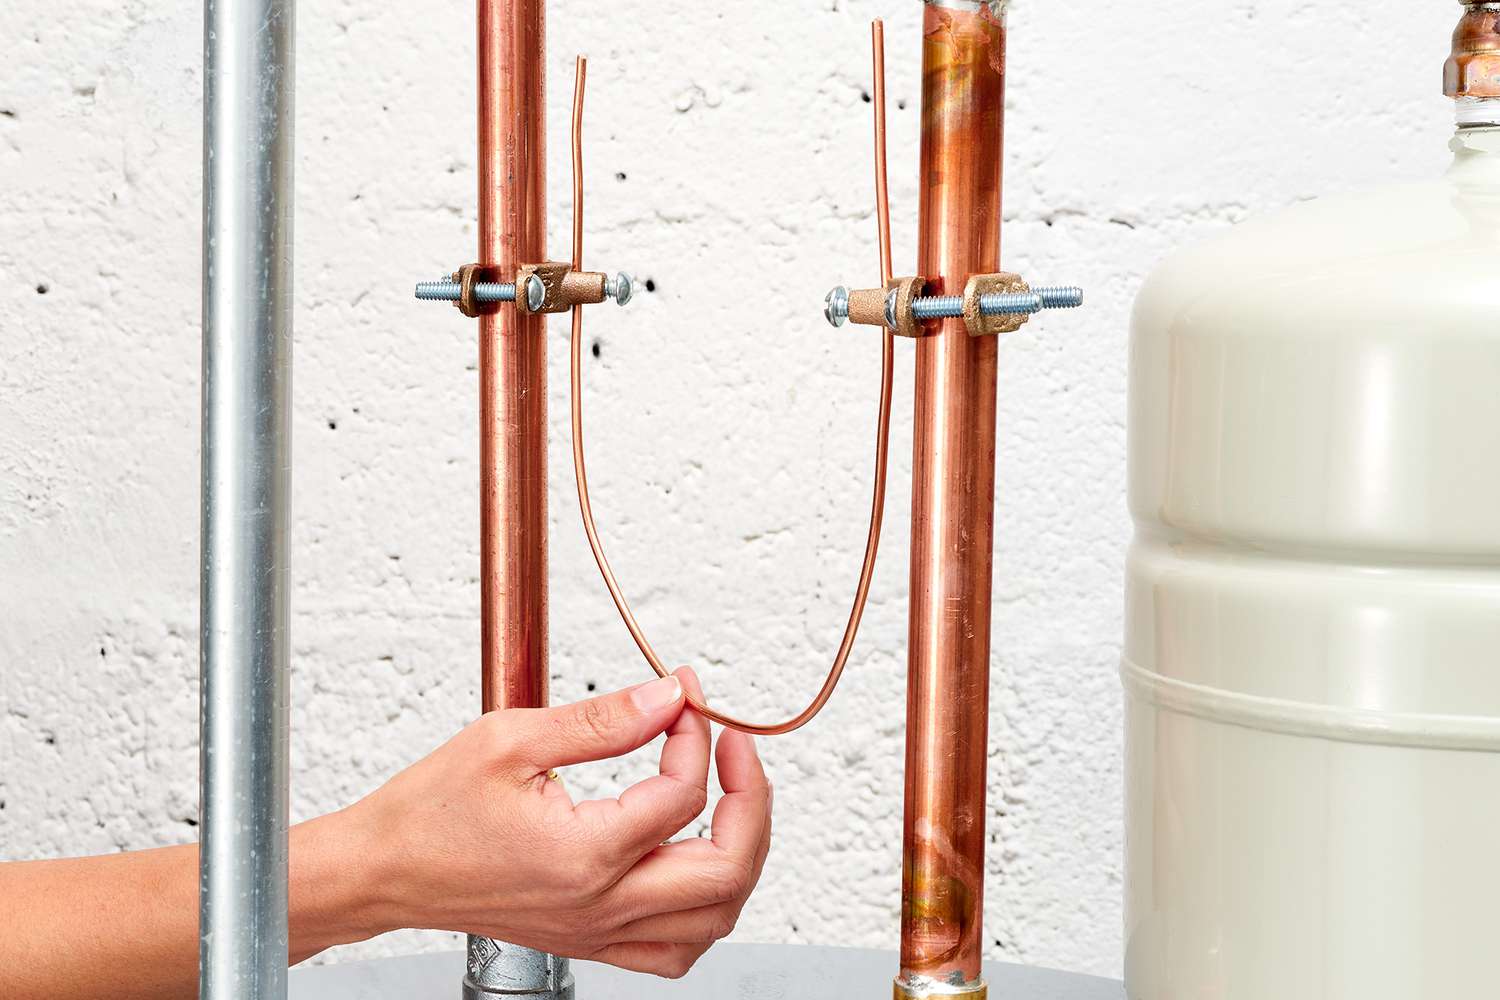
Step 5: Inspect the Thermocouple
If you have a gas-powered hot water heater and you have confirmed that the pilot light is lit but the burner still won’t ignite, the issue may lie with the thermocouple. The thermocouple is a safety device that senses the presence of the pilot light flame. If it detects that the flame has gone out, it shuts off the gas supply to prevent the buildup of gas and potential hazards.
Inspecting the thermocouple involves checking its position and condition. Here’s how you can do it:
- Locate the thermocouple, which is a metal rod located near the pilot light flame.
- Make sure the thermocouple is properly positioned. It should be close enough to the flame to sense its heat but not too close to cause overheating.
- Check for any signs of damage or wear on the thermocouple. Look for bends, breaks, or corrosion. A damaged thermocouple may need to be replaced.
- If the thermocouple appears to be in good condition, use a multimeter to test its functionality. Set the multimeter to the millivolt setting and touch the thermocouple probe with the meter’s probes. The thermocouple should generate a small electrical voltage when heated by the pilot light flame.
- If the multimeter reading shows no voltage or an inconsistent reading, the thermocouple may be faulty and should be replaced.
Replacing the thermocouple involves turning off the gas supply to the water heater, unscrewing the existing thermocouple from the control valve, and installing the new one by following the manufacturer’s instructions. If you’re unsure about replacing the thermocouple, it’s best to consult a professional to avoid any potential gas leaks or other hazards.
The thermocouple plays a crucial role in the safe operation of a gas-powered hot water heater. By inspecting and ensuring its proper functioning, you can address any issues preventing the burner from igniting. If the thermocouple is damaged or malfunctioning, replacing it may be the solution to restore hot water in your home.
Regularly flushing your hot water heater can help prevent sediment buildup and extend the life of the unit. This simple maintenance task can improve efficiency and reduce the risk of damage.
Step 6: Replace Faulty Heating Element
If you have an electric hot water heater and you’re experiencing a lack of hot water, one possible culprit could be a faulty heating element. The heating elements in electric water heaters are responsible for heating the water in the tank. If they become damaged or burned out, they will need to be replaced.
Here’s how you can replace a faulty heating element:
- Before starting any work on the water heater, ensure that the power supply is completely turned off to avoid any electrical accidents. This involves shutting off the circuit breaker that controls the water heater.
- Drain the water from the tank by connecting a garden hose to the drain valve at the bottom of the heater. Direct the other end of the hose to a suitable drainage location or a nearby floor drain. Open the valve to allow the water to flow out.
- Once the tank is completely drained, remove the access covers on the side of the water heater. You may need a screwdriver to do this.
- Locate the heating elements inside the water heater. There are usually two elements, an upper and a lower one.
- Disconnect the electrical wires that are connected to the faulty heating element. Make note of the wiring connections so you can reconnect them correctly later.
- Use a heating element wrench or an adjustable wrench to unscrew the faulty heating element from the water heater tank.
- Install the new heating element by screwing it into place using the wrench.
- Reconnect the electrical wires to the new heating element, following the correct wiring connections.
- Close the access covers on the side of the water heater and ensure they are securely in place.
- Turn on the water supply and fill the tank. Check for any leaks around the heating elements and tighten if necessary.
- Finally, turn on the power supply to the water heater by flipping the circuit breaker back to the “On” position.
Once the new heating element is installed and the power is restored, the water in the tank will start to heat up. Allow some time for the water to reach the desired temperature, and you should have hot water flowing again.
It’s important to note that replacing a heating element can be a complex process, and if you’re not comfortable with electrical work, it’s best to seek the assistance of a professional to ensure safety and proper installation.
By replacing a faulty heating element, you can restore the heating capability of your electric hot water heater and enjoy the comfort of hot water once again.
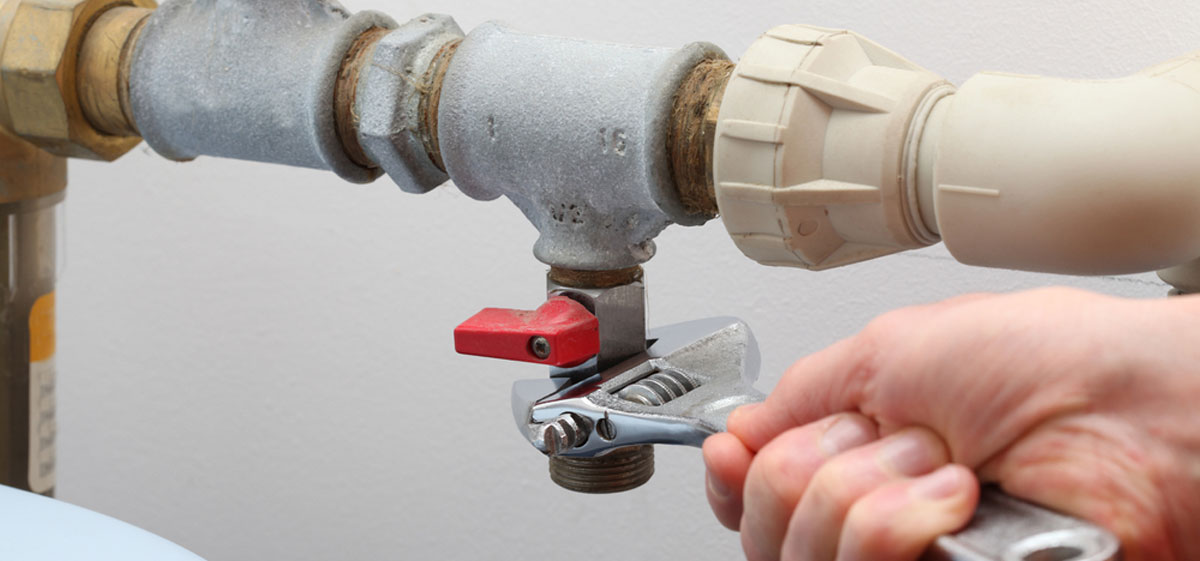
Step 7: Drain and Flush the Tank
Over time, sediment and mineral deposits can accumulate at the bottom of your hot water tank, affecting its efficiency and lifespan. Draining and flushing the tank is an important maintenance step that helps remove these deposits and improve the performance of your water heater.
Follow these steps to drain and flush the tank:
- Turn off the power supply to the water heater. For electric water heaters, turn off the circuit breaker associated with the water heater. For gas water heaters, turn off the gas supply.
- Locate the drain valve at the bottom of the water heater. Attach a garden hose to the drain valve and place the other end of the hose in a suitable drainage area or a nearby floor drain.
- Open the drain valve by turning it counterclockwise. This will start the flow of water from the tank into the hose.
- Allow the tank to fully drain. This may take a while, depending on the size of your tank.
- After the tank has drained, close the drain valve by turning it clockwise.
- To flush the tank, turn on the cold water supply to the tank. This will help remove any remaining sediment or debris in the tank.
- Allow the cold water to flow into the tank for a few minutes, then turn off the cold water supply.
- Open a hot water faucet in your home to relieve any pressure in the tank.
- Once the tank is flushed, close the hot water faucet, and turn on the cold water supply again to refill the tank.
- Check for any leaks around the drain valve or other connections. If there are any leaks, tighten the connections or replace any faulty parts.
- Finally, turn on the power supply to the water heater. For electric water heaters, turn on the circuit breaker. For gas water heaters, turn on the gas supply.
Regularly draining and flushing the tank helps remove sediment and mineral buildup, which can improve the efficiency and lifespan of your hot water heater. It is recommended to perform this maintenance task once a year or as advised by the manufacturer.
Remember to exercise caution when working with hot water and follow the manufacturer’s instructions for your specific water heater model. If you are unsure or uncomfortable performing this task, it’s best to seek the assistance of a professional plumber.
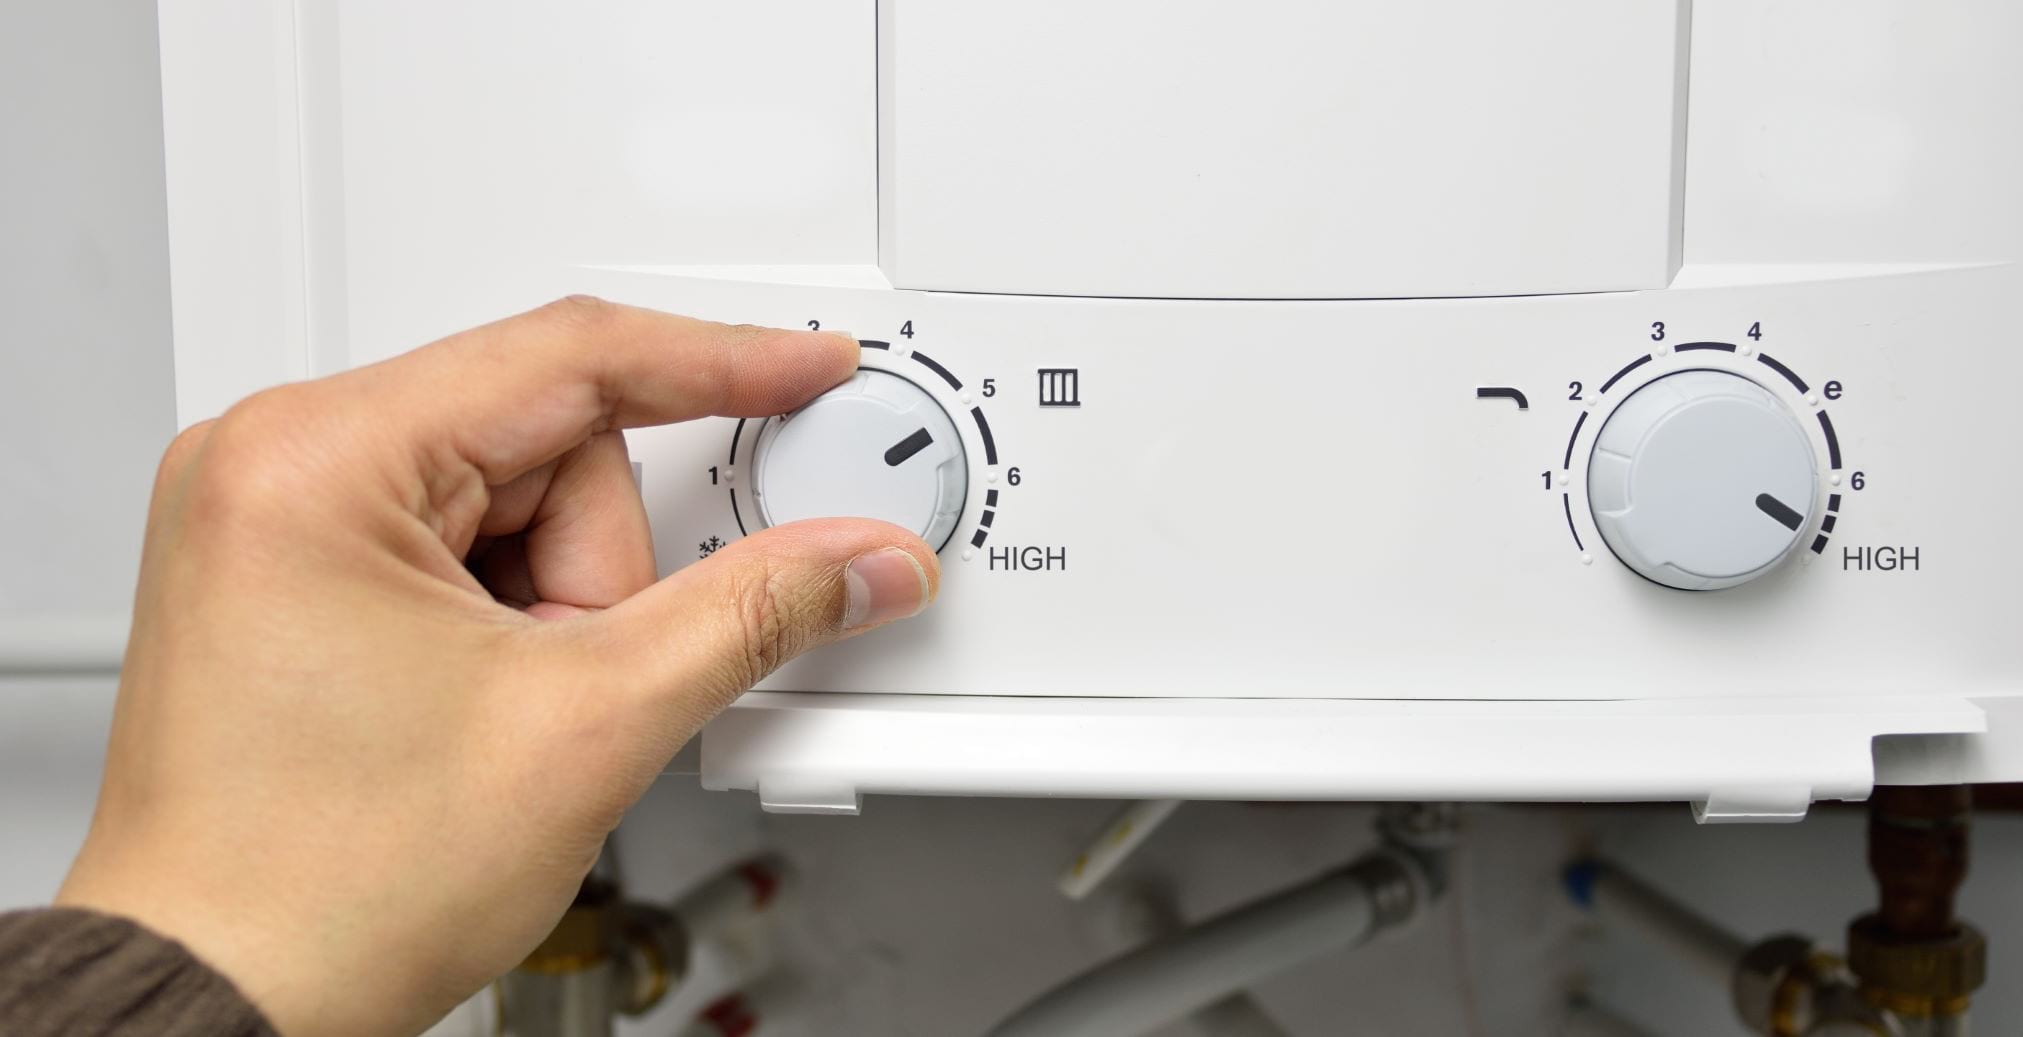
Step 8: Check and Adjust the Temperature Settings
The temperature settings on your hot water heater can greatly affect your comfort and energy efficiency. It’s important to periodically check and adjust the temperature settings to ensure optimal performance.
Follow these steps to check and adjust the temperature settings:
- Turn off the hot water supply to the tank by closing the main water supply valve.
- Locate the thermostat on your hot water heater. This is typically a dial or a digital display.
- Take note of the current temperature setting. The recommended temperature is usually around 120 degrees Fahrenheit (49 degrees Celsius) for most households.
- If the temperature is set too high, it can lead to scalding and higher energy consumption. If it’s set too low, you may not have enough hot water for your needs.
- Using a screwdriver or the appropriate tool, adjust the temperature setting to your desired temperature. Gradual adjustments are recommended to avoid sudden temperature changes.
- Once you have adjusted the temperature, wait for some time for the water to heat up and stabilize at the new setting.
- While waiting for the water to heat up, check for any leaks or signs of water damage around the tank. If you notice any issues, it’s important to address them promptly.
- After the water has reached the desired temperature, turn on a hot water faucet in your home to ensure a steady flow of hot water.
- Monitor the hot water temperature for a few days to ensure it remains consistent. If you experience any issues or fluctuations, it may be a sign of a malfunctioning thermostat or another problem that requires further investigation or professional assistance.
By checking and adjusting the temperature settings on your hot water heater, you can ensure that you have the desired water temperature while optimizing energy efficiency. Additionally, maintaining a safe temperature setting helps prevent accidental scalding, especially if there are children or elderly individuals in your household.
Remember to refer to the manufacturer’s guidelines for your specific hot water heater model and consider any recommendations they provide regarding temperature settings.
Read more: How To Relight A Hot Water Heater
Step 9: Reconnect Power and Test the Heater
After completing the necessary repairs and maintenance on your hot water heater, it’s time to reconnect the power and test the functionality of the heater. This final step ensures that everything is in working order before you resume regular use of your hot water system.
Follow these steps to reconnect the power and test the heater:
- If you have an electric hot water heater, turn on the circuit breaker associated with the water heater. For a gas hot water heater, turn on the gas supply.
- Allow the heater to heat up for some time. This can take a while, especially if the tank had been drained and refilled.
- Check for any signs of leaks or unusual noises around the water heater. Pay attention to the area around the connections, valves, and the tank itself.
- Turn on a hot water faucet in your home and let the water run for a few minutes. Observe whether the water is heating up to the desired temperature.
- While the hot water is running, check the temperature at the faucet using a thermometer. This will help ensure that the water temperature matches your set thermostat temperature.
- If you notice any issues during the testing process, such as inadequate hot water or inconsistent temperature, double-check the previous steps to ensure that everything was done correctly. If the problem persists, it may indicate a more significant issue that requires professional inspection.
- If everything appears to be working properly, congratulations! You have successfully repaired and tested your hot water heater. Enjoy the comfort of hot water in your home once again.
It’s important to regularly monitor your hot water heater after any repairs or maintenance to ensure continued efficiency and functionality. If you notice any recurring issues or concerns, it’s advisable to seek professional assistance to prevent further problems.
By reconnecting the power and testing the heater, you can rest assured that your hot water system is back in working order, providing you with the comfort and convenience of hot water whenever you need it.
Conclusion
Repairing a hot water heater may seem daunting, but with the right knowledge and guidance, it is often a manageable task. By following the step-by-step process outlined in this article, you can tackle common issues and restore hot water to your home.
Remember to always prioritize safety when working on your hot water heater. Shut off the power supply and familiarize yourself with the specific instructions provided by the manufacturer for your model.
Identifying the issue and gathering the necessary tools and materials are crucial initial steps. Checking the pilot light, inspecting the thermocouple, replacing a faulty heating element, draining and flushing the tank, and adjusting the temperature settings will help address common problems and optimize the performance of your hot water heater.
Once the repairs are complete, reconnecting the power and testing the heater ensures that everything is functioning as it should. Regular monitoring and maintenance can help prevent future issues and prolong the lifespan of your hot water heater.
It’s important to know your limitations. If at any point you feel uncertain or uncomfortable with the repair process, it is best to seek the assistance of a qualified professional.
By taking the time to understand your hot water heater and following the steps outlined in this article, you can save time and money by resolving issues on your own. So roll up your sleeves, grab your tools, and get ready to restore the comfort and convenience of hot water in your home!
Frequently Asked Questions about How To Repair Hot Water Heater
Was this page helpful?
At Storables.com, we guarantee accurate and reliable information. Our content, validated by Expert Board Contributors, is crafted following stringent Editorial Policies. We're committed to providing you with well-researched, expert-backed insights for all your informational needs.


0 thoughts on “How To Repair Hot Water Heater”