Articles
How To Remove Mold From Attic
Modified: August 17, 2024
Looking for articles on how to remove mold from your attic? Check out our comprehensive guide for effective tips and methods to eliminate mold and keep your attic clean and healthy.
(Many of the links in this article redirect to a specific reviewed product. Your purchase of these products through affiliate links helps to generate commission for Storables.com, at no extra cost. Learn more)
Introduction
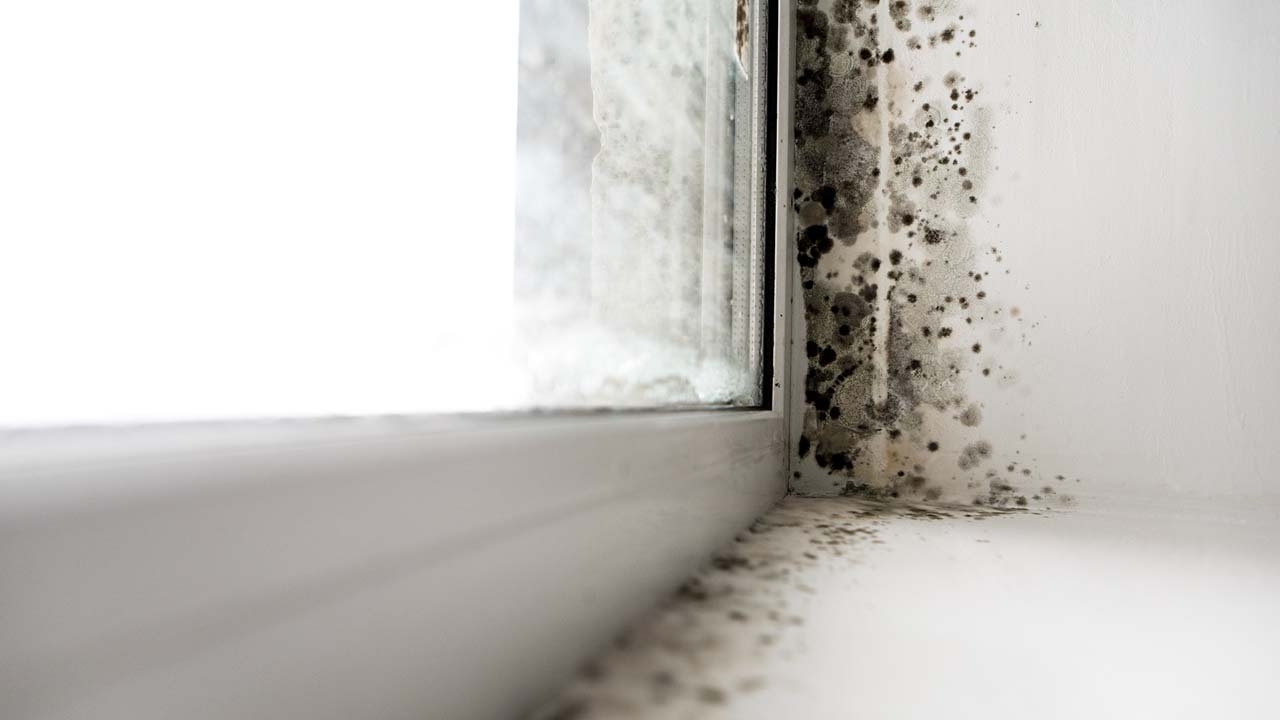
Welcome to our comprehensive guide on how to remove mold from your attic. Discovering mold growth in your attic can be alarming, as it not only poses health risks but can also cause damage to your property. Mold thrives in damp and humid environments, making the attic an ideal breeding ground if proper ventilation is not maintained.
In this article, we will walk you through the step-by-step process of safely removing mold from your attic, ensuring that you eliminate the source of the problem and prevent future growth. It’s essential to approach mold removal with caution and follow the necessary safety precautions to protect yourself and your home.
Before we dive into the details, it’s important to understand that dealing with mold can be challenging and may require professional assistance in some cases. If you have extensive mold growth or underlying structural issues, it’s always best to consult with a mold remediation specialist.
With that said, let’s explore how you can effectively remove mold from your attic and restore a clean and healthy living environment.
Key Takeaways:
- Safely remove mold from your attic by prioritizing safety, identifying mold type, ventilating the space, wearing protective gear, and thoroughly cleaning and disinfecting the area to prevent future growth.
- Prevent future mold growth in your attic by maintaining proper ventilation, controlling moisture levels, addressing water intrusion, and regularly inspecting and maintaining the space to ensure a healthy living environment for you and your family.
Read more: How To Remove Mold From Plywood In Attic
Step 1: Safety Precautions
Before you begin the mold removal process, it’s crucial to prioritize your safety. Mold can release spores into the air, which can cause respiratory issues and allergic reactions. Here are some essential safety precautions to take:
- Wear Protective Gear: Put on proper protective equipment, including a respirator mask, goggles, gloves, and disposable coveralls. This will help prevent direct contact with mold spores and minimize the risk of inhalation.
- Isolate the Area: Seal off the affected area to prevent the spread of mold spores to other parts of your home. Close all doors and windows leading to the attic, and cover any ventilation openings with plastic sheets or tape.
- Use Proper Ventilation: Ensure there is adequate ventilation in the attic by opening windows or using fans to create airflow. This will help to reduce the concentration of mold spores in the air.
- Turn Off HVAC Systems: Shut down any heating, ventilation, and air conditioning (HVAC) systems to prevent the circulation of mold spores throughout your home.
- Keep Children and Pets Away: It’s important to keep children and pets away from the area being treated to avoid their exposure to mold spores.
- Work in a Well-Lit Area: Ensure that the attic is properly illuminated with adequate lighting to help you identify and address all areas of mold growth.
By following these safety precautions, you can minimize the risk of exposure to mold spores and protect your health while conducting mold removal in your attic.
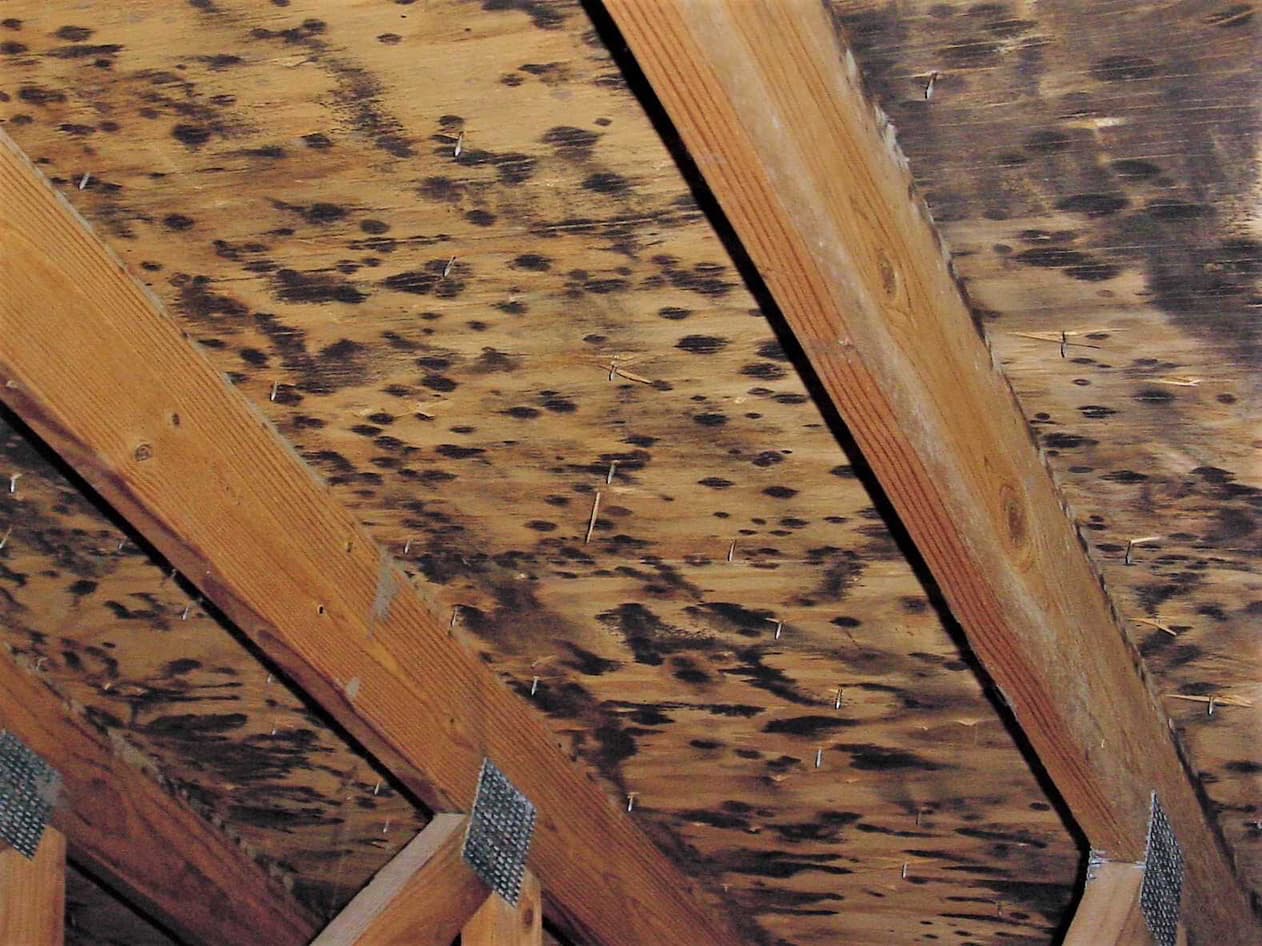
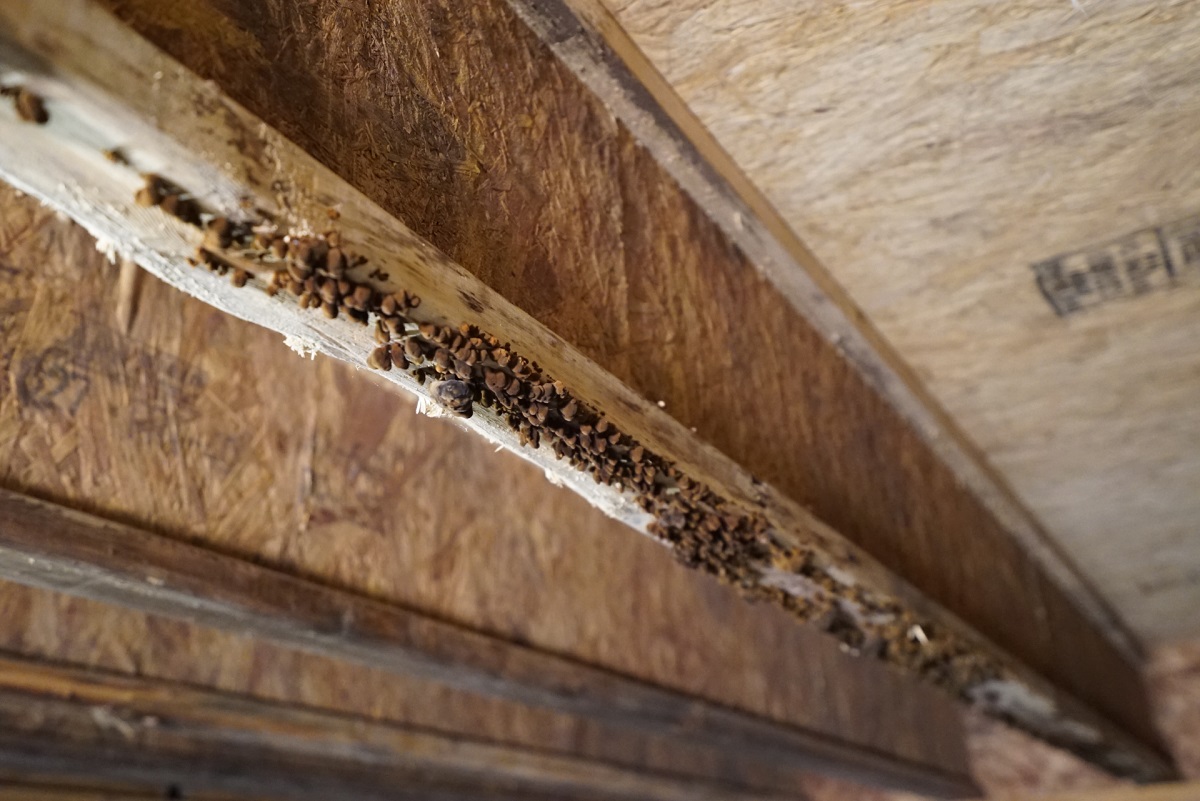
Step 2: Identify the Mold Type
Identifying the type of mold present in your attic is important for two reasons: understanding the potential health risks associated with it and determining the most effective removal method. While it’s difficult to identify mold species with the naked eye, there are a few common types that you may encounter. Here are a few indicators to help you identify the mold type:
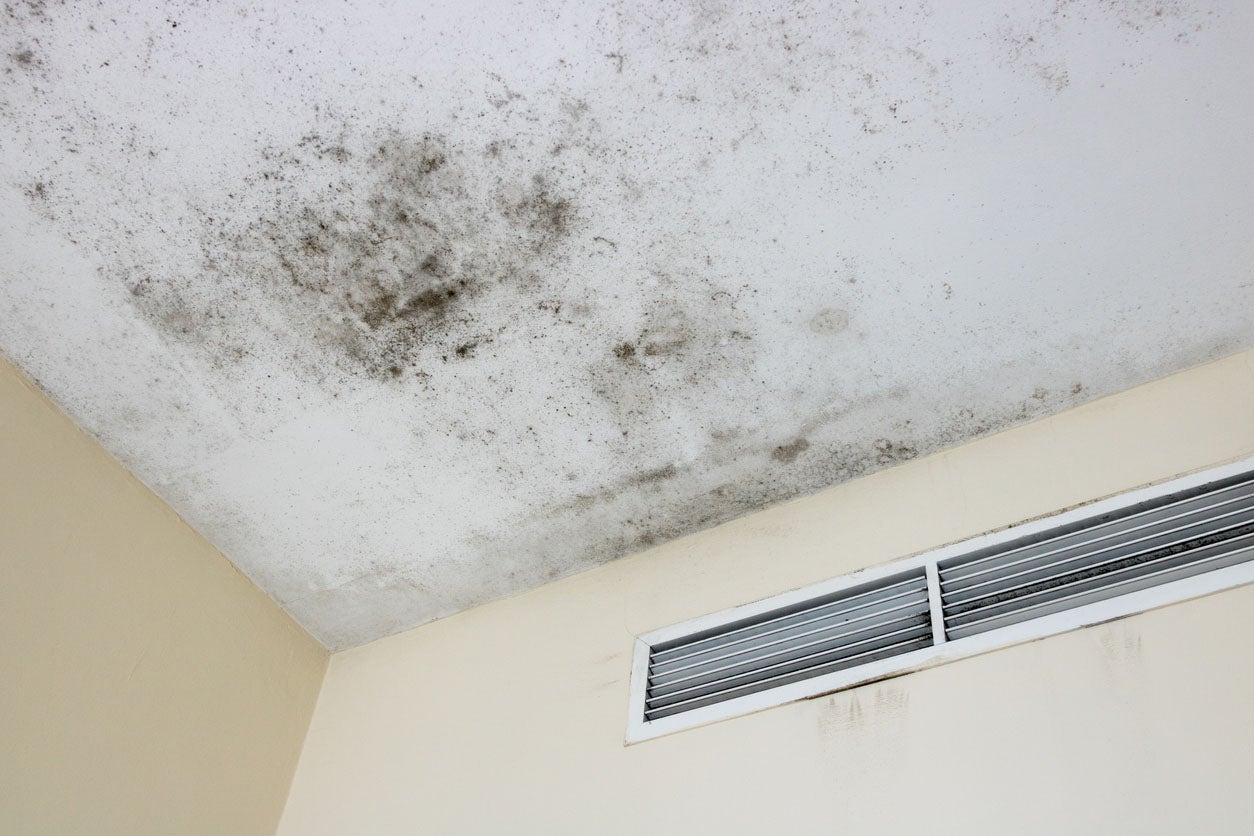
- Black Mold (Stachybotrys chartarum): Black mold appears as dark greenish-black patches and is known for its musty odor. It thrives in areas with prolonged moisture exposure and can cause severe respiratory issues.
- Green Mold (Aspergillus): Green mold is one of the most common types and can be found in various shades of green. It can cause allergic reactions and respiratory problems, especially in individuals with weakened immune systems.
- White Mold (Cladosporium): White mold may appear as a powdery substance or small patches with cotton-like texture. It can cause respiratory issues and allergies, particularly in individuals with sensitivities.
- Yellow Mold (Aspergillus flavus): Yellow mold typically grows on organic materials like wood and can produce harmful toxins called aflatoxins. Prolonged exposure to these toxins can lead to liver damage and other health problems.
Keep in mind that these are just a few examples of commonly encountered molds. If you’re unsure about the type of mold in your attic, it’s best to consult a mold testing professional who can analyze a sample and provide accurate identification.
Knowing the mold type will help you determine the severity of the problem and whether you can handle the removal process yourself or if professional assistance is needed. It’s important to note that regardless of the mold type, proper safety precautions should always be taken when dealing with mold in your attic.
Step 3: Ventilate the Attic
Proper ventilation is crucial when dealing with mold in the attic. It helps to control moisture levels and prevent the growth and spread of mold spores. Here’s how you can effectively ventilate your attic:
- Open Windows and Doors: If the weather permits, open windows and doors in the attic to allow fresh air to circulate. This will help to reduce humidity and promote airflow, aiding in the drying process.
- Use Fans: Place fans strategically in the attic to increase air circulation. Point the fans towards open windows or vents to blow out stale air and bring in fresh air from outside. The goal is to create a cross-ventilation effect.
- Install Attic Vents: Consider installing attic vents if your attic lacks proper ventilation. These vents allow hot, moist air to escape, reducing the risk of condensation and mold growth. There are various types of attic vents available, including soffit vents, ridge vents, and gable vents.
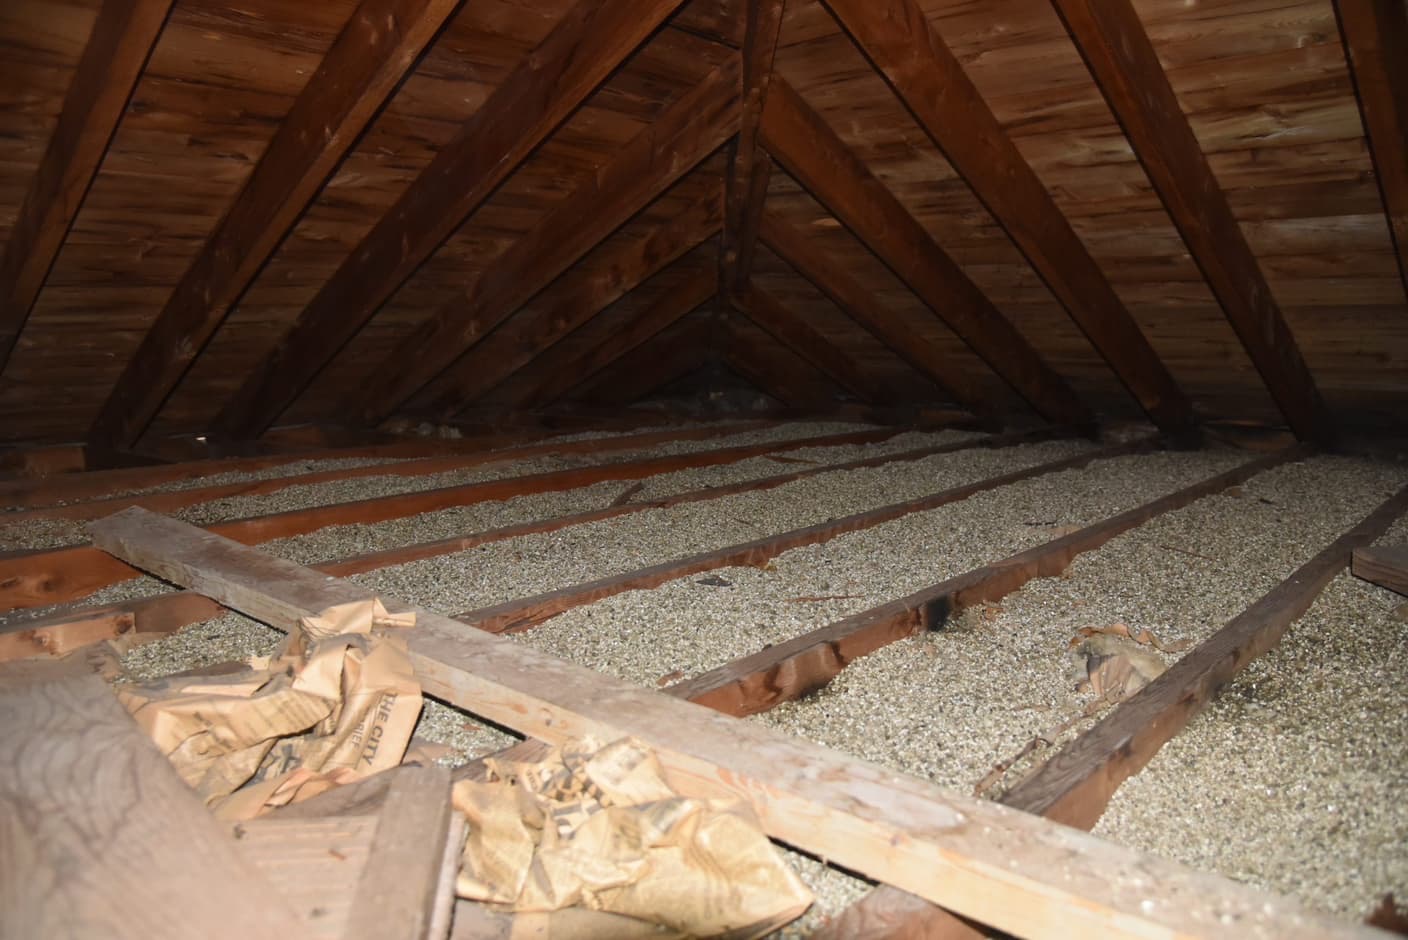
- Check Insulation: Ensure that insulation is properly installed and not blocking any vents. Improperly installed or damaged insulation can impede airflow, leading to moisture buildup and mold growth. Remove and replace any insulation that has been affected by mold.
- Inspect Roof for Leaks: Leaks in your roof can contribute to excess moisture in the attic. Regularly inspect your roof for any signs of leaks or water damage. If you identify any issues, repair them promptly to prevent further moisture intrusion.
- Consider Dehumidifiers: In areas with high humidity, utilizing dehumidifiers can help to reduce moisture levels in the attic. Set the dehumidifier to maintain a humidity level below 50% to discourage mold growth.
Proper ventilation is essential not only during the mold removal process but also as a preventive measure to deter future mold growth. By improving airflow and reducing moisture levels, you can create an environment in your attic that is less conducive to mold development.
Step 4: Protective Gear
When dealing with mold in your attic, it’s crucial to protect yourself by wearing the appropriate protective gear. Mold spores can cause allergic reactions and respiratory issues, so it’s essential to take the necessary precautions. Here’s the protective gear you should wear:
- Respirator Mask: Wear a high-quality respirator mask specifically designed for mold remediation. Look for masks labeled N95 or N100, as they provide the necessary filtration to protect against mold spores.
- Gloves: Use disposable gloves made of nitrile or latex to protect your hands from direct contact with mold and cleaning agents.
- Goggles: Wear safety goggles or glasses to shield your eyes from mold spores and prevent any irritants from coming into direct contact with your eyes.
- Disposable Coveralls: Wear disposable coveralls to protect your skin and clothing from mold spores. This reduces the risk of carrying spores to other areas of your home.
- Rubber Boots: Use rubber boots that can be easily cleaned or disposed of after working in the attic. This prevents the transfer of mold spores to other parts of your home.
It’s important to note that the proper use of protective gear is essential. Be sure to follow the manufacturer’s instructions for each piece of equipment and ensure a snug and secure fit. Remember to dispose of gloves, coveralls, and masks properly after use to avoid cross-contamination.
Additionally, make sure to wash your hands thoroughly with soap and water after removing your protective gear to eliminate any lingering mold spores.
By wearing the appropriate protective gear, you can minimize your exposure to mold spores and reduce the risk of respiratory issues and allergic reactions during the mold removal process.
Read more: How To Remove Molding From Floor
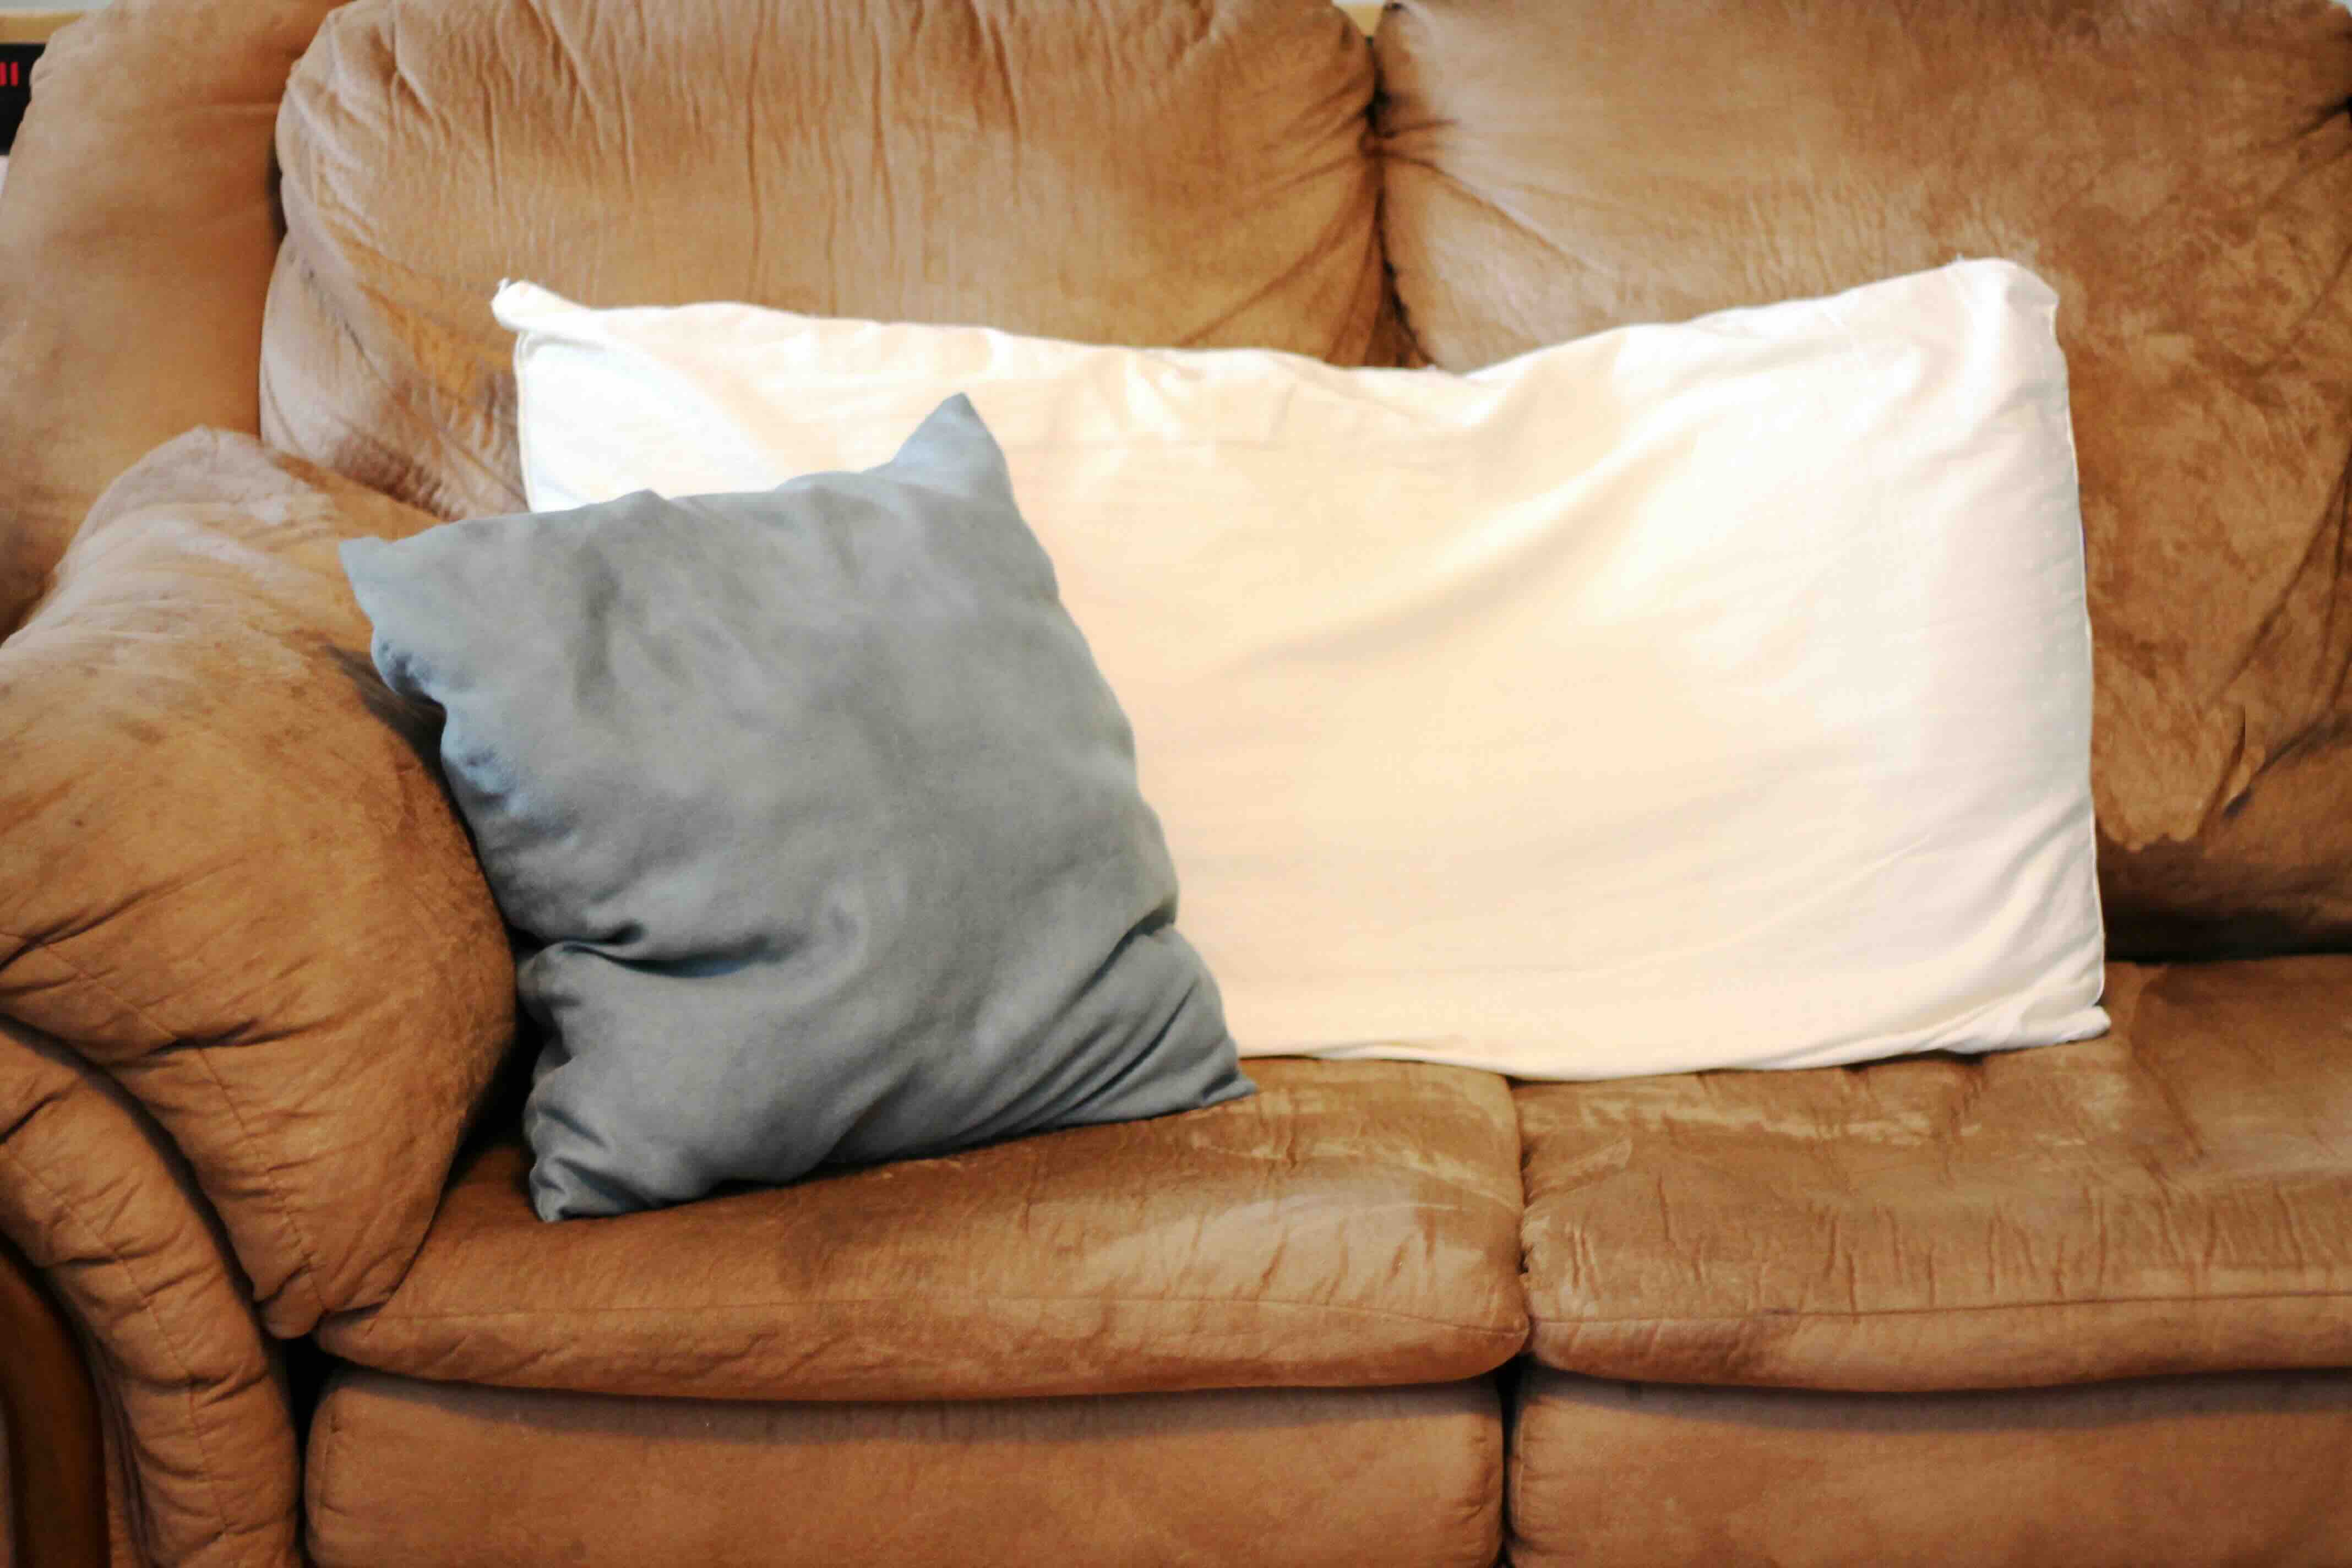
Step 5: Remove Personal Belongings
Before you begin the mold removal process in your attic, it’s important to remove any personal belongings that could be affected by mold or hinder your ability to clean effectively. Here’s how you can remove personal belongings from the attic:
- Assess the Damage: Carefully inspect your attic and identify any items that are visibly affected by mold. Look for signs of discoloration, visible growth, or a musty odor.
- Protect Valuable Items: If you have valuable items in the attic that are not affected by mold, consider covering them with plastic sheets or moving them to a safer location in your home.
- Seal Contaminated Items: If you have items that are affected by mold, seal them in plastic bags or containers to prevent the spread of mold spores. Label these containers as contaminated, and avoid opening them indoors.
- Dispose of Contaminated Items: Depending on the severity of the mold contamination, you may need to discard some items. Porous materials that cannot be thoroughly cleaned, such as cardboard boxes or upholstered furniture, are more susceptible to mold growth and should be disposed of properly.
- Clean Non-Porous Items: Non-porous items, such as glass, plastic, or metal, can typically be cleaned thoroughly to remove mold. Use a mild detergent and warm water to clean these items, and dry them thoroughly before returning them to the attic.
It’s important to remember that mold can easily spread to other areas of your home if proper precautions are not taken. Therefore, removing personal belongings from the attic helps to protect them from further damage and prevents cross-contamination.
Once the mold removal process is complete and your attic is thoroughly cleaned and dried, you can then return the non-contaminated items to their original place while taking measures to prevent future mold growth.
Use a mixture of water and white vinegar to spray and clean the affected areas. Scrub the mold with a brush and then dry the area thoroughly to prevent regrowth.
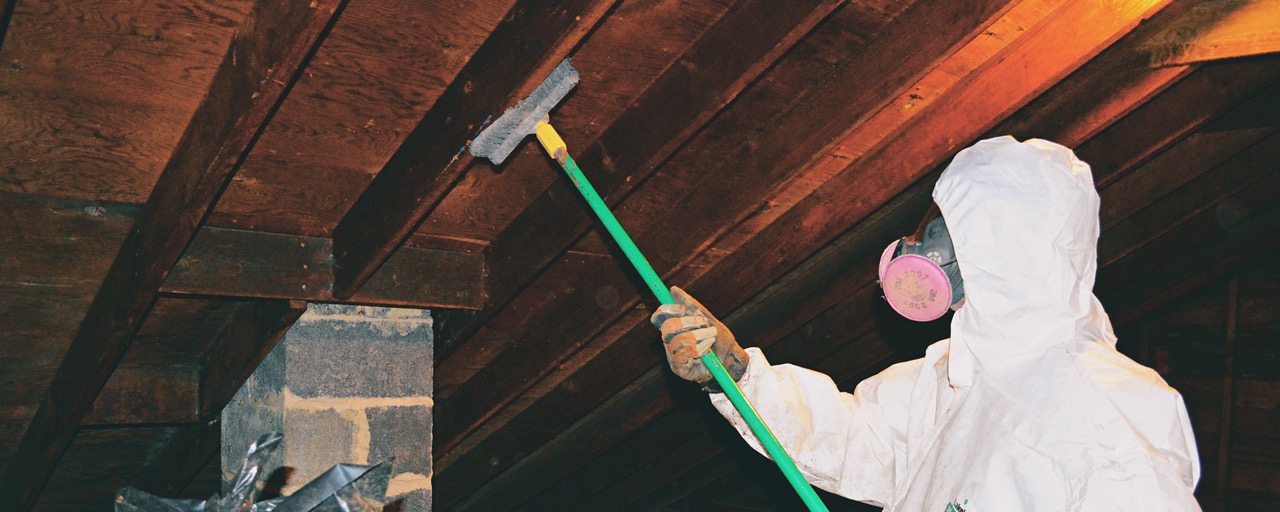
Step 6: Clean the Attic
Now that you have taken the necessary safety precautions and removed personal belongings from the attic, it’s time to clean the space thoroughly. Cleaning the attic helps to remove mold growth and spores, reducing the risk of further contamination. Here’s how you can effectively clean your attic:
- Vacuum with HEPA Filter: Start by vacuuming the attic using a vacuum cleaner equipped with a high-efficiency particulate air (HEPA) filter. This will help to capture and contain mold spores. Pay close attention to corners, crevices, and any areas with visible mold growth.
- Scrub with a Mold Cleaner: After vacuuming, prepare a mold cleaner solution by mixing water and a mild detergent or a commercial mold cleaner. Use a scrub brush or sponge to thoroughly scrub all surfaces affected by mold, including walls, ceilings, and any exposed wood or insulation. Rinse the surfaces well with clean water.
- Remove Moldy Materials: If you encounter materials in the attic that are severely damaged by mold and cannot be effectively cleaned, such as insulation or drywall, it’s best to remove and replace them. This ensures that all traces of mold are eliminated.
- Dry the Attic: After cleaning, it’s essential to thoroughly dry the attic to prevent moisture and mold from returning. Increase ventilation by using fans or opening windows to promote air circulation. If needed, use dehumidifiers to reduce humidity levels. Monitor the attic regularly to ensure it remains dry.
- Dispose of Cleaning Materials: After completing the cleaning process, properly dispose of any cleaning materials, contaminated rags, or disposable equipment used during the mold removal. Seal them in plastic bags and dispose of them according to local regulations.
It’s important to approach the cleaning process meticulously, paying attention to every surface and ensuring all areas that are affected by mold are thoroughly cleaned. This helps to eliminate the source of the mold and creates a clean foundation for the next steps of the removal process.
Remember, if the mold growth is extensive or if you are unsure about your ability to effectively clean the attic, it’s best to seek professional help to ensure thorough and safe mold removal.
Step 7: Disinfect the Area
Once the attic has been cleaned, it’s crucial to disinfect the area to kill any remaining mold spores and prevent regrowth. Disinfecting helps to ensure that the attic is free from any potential health hazards. Here’s how you can effectively disinfect your attic:
- Prepare a Disinfectant Solution: Mix a solution of water and a disinfectant specifically designed for mold remediation. Commonly used disinfectants include hydrogen peroxide, vinegar, or bleach (diluted according to manufacturer instructions).
- Apply the Disinfectant: Use a spray bottle or a cloth soaked in the disinfectant solution to apply it to all surfaces in the attic. Make sure to cover walls, floors, ceilings, and any other areas affected by mold.
- Allow Sufficient Contact Time: Follow the instructions on the disinfectant product to determine the recommended contact time. This allows the disinfectant to penetrate and kill any remaining mold spores.
- Rinse with Clean Water: After the contact time has elapsed, rinse the surfaces with clean water to remove any residue from the disinfectant. This step helps ensure that no harmful chemicals are left behind.
- Dry Thoroughly: Once the disinfection process is complete, thoroughly dry the attic. Ensure proper ventilation and use fans or dehumidifiers to speed up the drying process. Check for any signs of moisture or condensation and address them promptly.
Disinfecting is a critical step in the mold removal process, as it eliminates any remaining mold spores that may have survived the cleaning stage. It helps to create a clean and hygienic environment, reducing the risk of future mold growth in the attic.
Remember to wear suitable protective gear and follow the manufacturer’s instructions when handling disinfectants. If you are unsure about the disinfection process or need assistance, consult a mold remediation professional for guidance.
Step 8: Dry the Attic
After cleaning and disinfecting the attic, it is crucial to ensure that the space is thoroughly dried. Proper drying is essential to prevent the growth of mold and to create a healthy living environment. Here’s how you can effectively dry your attic:
- Promote Airflow: Open windows and doors to allow fresh air to circulate in the attic. This will help to remove excess moisture and speed up the drying process.
- Use Fans and Dehumidifiers: Place fans strategically in the attic to improve air circulation. Consider using dehumidifiers to help reduce humidity levels and aid in drying the space.
- Remove Wet Materials: If there are any damp or wet materials in the attic, such as insulation or carpets, remove and replace them. These materials can retain moisture and contribute to mold growth if not properly dried.
- Monitor Humidity Levels: Use a humidity meter to monitor the humidity levels in the attic. Ideally, the humidity should be kept below 50% to inhibit mold growth.
- Address Moisture Sources: Identify and address any sources of moisture in the attic, such as roof leaks or plumbing issues. Repairing these issues will help prevent future moisture problems and mold growth.
- Inspect and Maintain Ventilation: Regularly inspect and maintain attic ventilation to ensure proper airflow. Clear any obstructions in vents and consider installing additional vents if necessary.
It’s important to be patient during the drying process, as it may take some time to fully dry the attic. Monitor the progress regularly and make adjustments as needed to ensure that the space is effectively dried.
By thoroughly drying the attic, you create an environment that is inhospitable to mold. This helps to prevent future mold growth and ensures the longevity of your mold remediation efforts.
Read more: How To Remove Mold From Showerhead
Step 9: Repair Damaged Materials
After removing mold and ensuring that the attic is properly cleaned and dried, it is crucial to assess and repair any damaged materials. Repairing damaged materials helps to restore the structural integrity of the attic and prevents future mold growth. Here’s how you can effectively repair damaged materials in your attic:
- Inspect for Structural Damage: Thoroughly inspect the attic for any signs of structural damage caused by mold or moisture. Look for sagging or weakened beams, rotting wood, or deteriorated insulation. Take note of all areas that require repair.
- Replace Damaged Insulation: If the attic insulation has been severely affected by mold or moisture, it’s best to remove and replace it. Ensure that the attic is properly insulated to prevent the accumulation of moisture and the subsequent growth of mold.
- Repair or Replace Damaged Drywall: If the drywall in the attic has been compromised by mold, replace the affected sections. Repair any cracks or holes in the drywall using appropriate patching materials.
- Address Leaks or Water Intrusion: Identify and address any sources of water intrusion in the attic. This may involve repairing a leaky roof, fixing plumbing issues, or improving the attic’s waterproofing and ventilation system.
- Strengthen Structural Supports: If you noticed weakened or damaged structural supports in the attic, consult a professional contractor to reinforce or replace them. Ensuring the structural integrity of the attic is vital for long-term stability.
- Apply Mold-Resistant Coatings: Consider applying mold-resistant coatings to surfaces in the attic to add an extra layer of protection against future mold growth. These coatings can help inhibit the growth of mold and make surfaces easier to clean.
Repairing damaged materials not only helps to prevent further mold growth, but it also ensures the safety and longevity of your attic structure. If you are unsure about the extent of the damage or need assistance with repairs, it is advisable to consult professional contractors or mold remediation specialists.
By completing this step, you are taking proactive measures to fortify your attic against future mold issues and maintaining a healthy living environment.
Step 10: Prevent Future Mold Growth
After successfully removing mold from your attic and addressing any damaged materials, it’s essential to take preventative measures to avoid future mold growth. Prevention is key in maintaining a healthy and mold-free living environment. Here are some steps you can take to prevent future mold growth in your attic:
- Maintain Proper Ventilation: Ensure that your attic has proper ventilation to prevent the buildup of moisture. Install and regularly inspect vents to allow for adequate air circulation.
- Control Moisture Levels: Monitor and control the humidity levels in your home, including the attic. Use dehumidifiers in areas with high humidity to maintain levels below 50%.
- Address Water Intrusion: Regularly inspect your roof for leaks and repair them promptly. Check for any plumbing issues or condensation problems that may contribute to excess moisture in the attic.
- Properly Insulate: Ensure that your attic is properly insulated to minimize the risk of condensation and moisture buildup. Consider using moisture-resistant insulation materials.
- Monitor and Maintain: Regularly inspect your attic for any signs of water damage, leaks, or mold growth. Take immediate action if you notice any issues to prevent them from escalating.
- Keep Attic Clean and Well-Ventilated: Regularly clean your attic and remove any dust or debris that may contribute to moisture accumulation or mold growth. Maintain good airflow by periodically opening windows or using fans.
- Store Belongings Properly: When storing items in the attic, use plastic bins or containers with tight-fitting lids to protect them from potential mold contamination. Ensure that items are clean and dry before storing them.
- Regularly Clean and Maintain Gutters: Clean gutters and downspouts regularly to ensure proper water drainage from the roof. This helps prevent water from seeping into the attic and causing moisture issues.
- Consider Mold-Resistant Products: Use mold-resistant materials, such as mold-resistant drywall or paint, in areas that are prone to mold growth. These products can provide an additional layer of protection against mold.
- Seek Professional Help: If you experience recurring mold issues or have concerns about mold prevention, it’s wise to consult with mold remediation professionals. They can provide expert advice and recommendations tailored to your specific situation.
By following these preventative measures, you significantly reduce the risk of future mold growth in your attic. Regular maintenance and vigilance are key to maintaining a healthy and mold-free environment for you and your family.
Remember, mold prevention is an ongoing process. Stay proactive and address any potential issues promptly to ensure the long-term integrity and cleanliness of your attic space.
Conclusion
Dealing with mold in your attic can be a daunting task, but by following the steps outlined in this comprehensive guide, you can effectively remove mold, restore a clean living environment, and prevent future growth. It’s important to approach the mold removal process with caution and prioritize your safety by wearing protective gear.
Begin by identifying the type of mold present in your attic to better understand the risks and determine the appropriate removal method. Ventilate the attic to control moisture levels and promote airflow. Remove personal belongings to prevent cross-contamination and facilitate proper cleaning.
Thoroughly clean the attic by vacuuming, scrubbing with a mold cleaner, and addressing any damaged materials. Disinfect the area to eliminate any remaining mold spores, and ensure proper drying to inhibit future growth.
Repair any damaged materials in the attic and take preventive measures to minimize the risk of mold reoccurrence. This includes maintaining proper ventilation, controlling moisture levels, and monitoring the attic for any signs of water intrusion or mold growth.
By following these steps and staying vigilant in your maintenance efforts, you can create a mold-free attic that promotes a healthy living environment for you and your family.
Remember, if you are unsure about handling mold removal yourself or if the mold growth is extensive, it’s always best to consult with mold remediation professionals who have the expertise and tools to handle the situation safely and effectively.
With dedication and proper precautions, you can successfully remove mold from your attic and enjoy a clean and mold-free space for years to come.
Frequently Asked Questions about How To Remove Mold From Attic
Was this page helpful?
At Storables.com, we guarantee accurate and reliable information. Our content, validated by Expert Board Contributors, is crafted following stringent Editorial Policies. We're committed to providing you with well-researched, expert-backed insights for all your informational needs.
0 thoughts on “How To Remove Mold From Attic”