Articles
How To Remove Mold From Ice Maker
Modified: August 16, 2024
Learn effective methods to remove mold from your ice maker with these informative articles. Protect your health and ensure clean ice for your drinks.
(Many of the links in this article redirect to a specific reviewed product. Your purchase of these products through affiliate links helps to generate commission for Storables.com, at no extra cost. Learn more)
Introduction
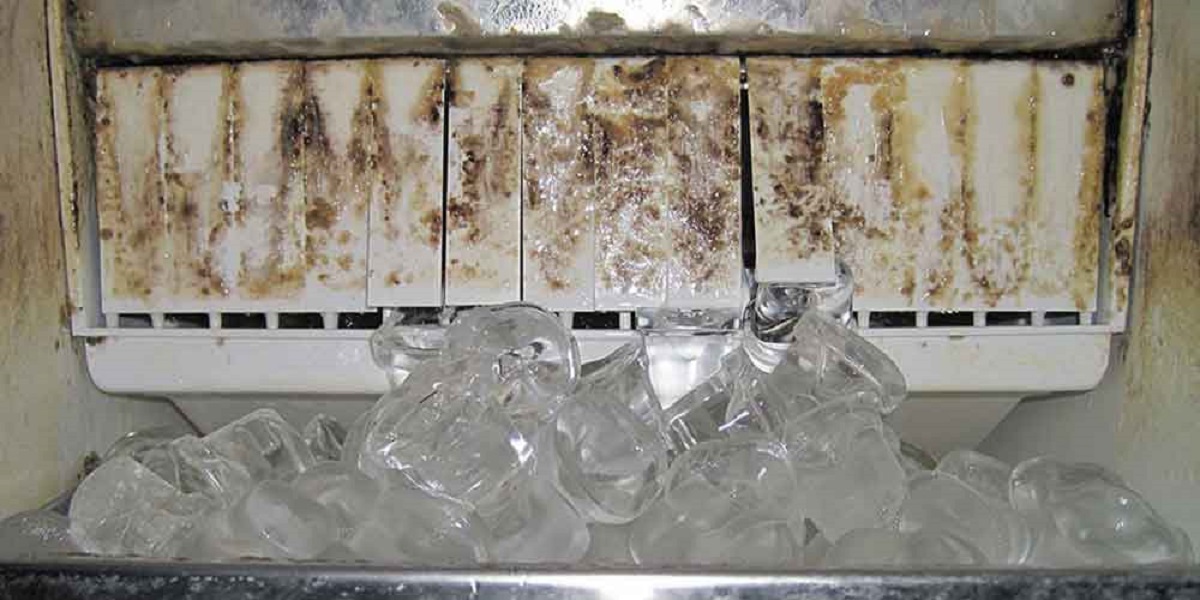
Welcome to our comprehensive guide on how to remove mold from an ice maker. If you’ve noticed a funky smell or suspicious-looking substance in your ice, chances are you’re dealing with mold. Mold growth in ice makers is a common problem that can compromise the quality and safety of your ice cubes.
But don’t worry! With the right tools and knowledge, you can effectively remove mold from your ice maker and prevent it from coming back. In this article, we’ll walk you through a step-by-step process to tackle mold growth in your ice maker, as well as provide tips on preventing future mold infestations.
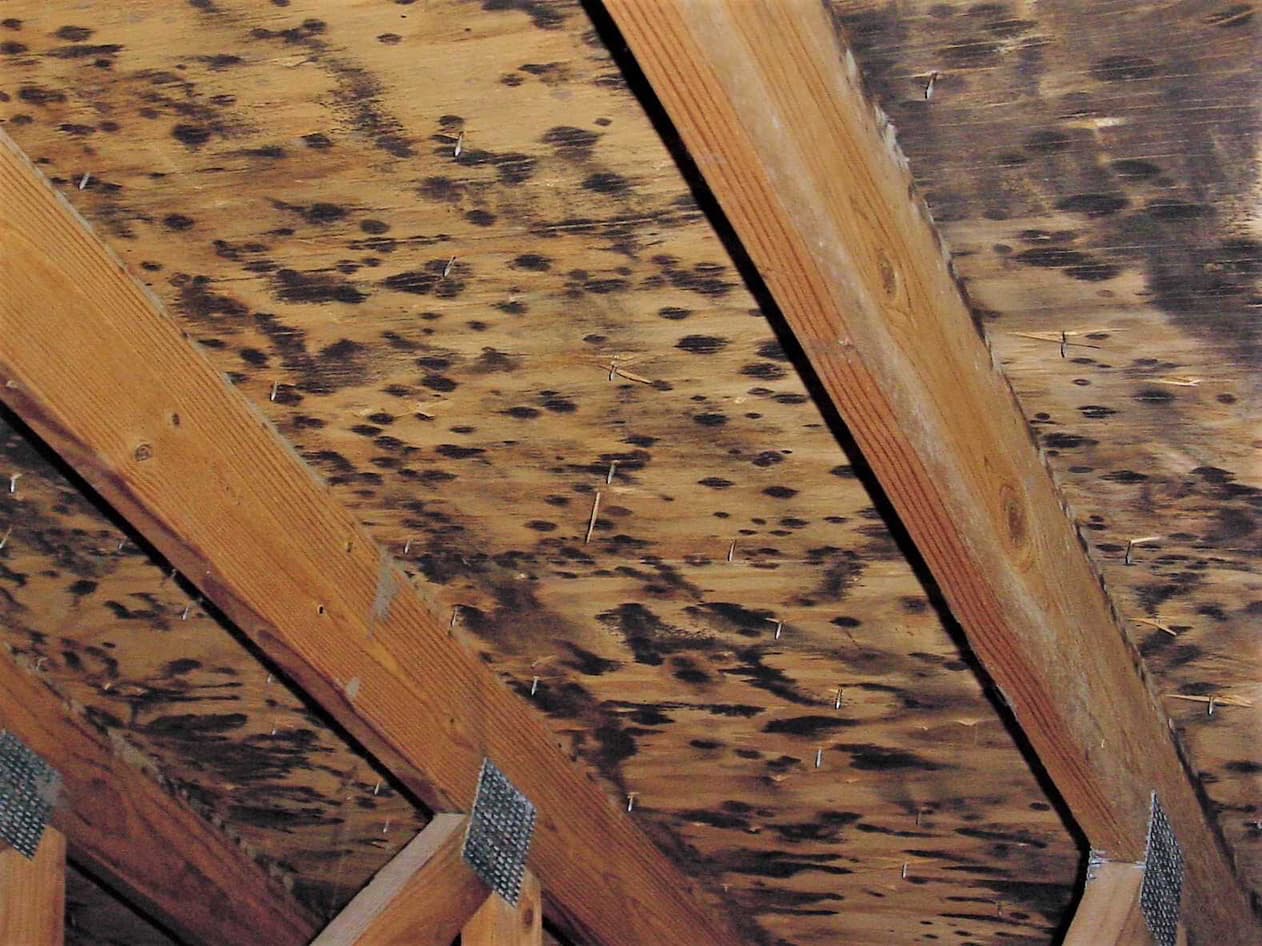
Mold thrives in dark, moist environments, making ice makers the perfect breeding ground. The combination of standing water, residual food particles, and warm temperatures can create an ideal environment for mold spores to flourish. Not only can mold make your ice taste unpleasant, but it can also pose health risks for individuals with allergies or respiratory issues.
Before we dive into the cleaning process, it’s crucial to understand the common causes of mold in ice makers. By identifying the root cause, you can take preventative measures to mitigate mold growth in the future.
Key Takeaways:
- Regular cleaning, proper ventilation, and frequent filter replacement are essential for preventing mold growth in ice makers. By following these preventive measures, you can enjoy clean and safe ice cubes.
- Removing mold from an ice maker involves thorough cleaning, using natural agents like vinegar and baking soda, and ensuring all components are properly dried. Implementing these steps will keep your ice maker mold-free.
Read more: How To Remove Ice Maker From Fridge?
Common Causes of Mold in Ice Makers
Understanding the underlying causes of mold growth in ice makers is essential to effectively combat the problem. Here are some common culprits:
- Poor cleaning and maintenance: Neglecting regular cleaning and maintenance of your ice maker can create an environment conducive to mold growth. Food particles, mineral deposits, and stagnant water can accumulate over time, providing the perfect conditions for mold to thrive.
- High humidity: If the surrounding environment where your ice maker is located has high humidity levels, it can promote mold growth. The excess moisture in the air can find its way into the ice maker, causing mold to develop.
- Water contamination: Mold can enter your ice maker through the water supply if it is contaminated. Issues with the water source, such as a malfunctioning filter or impurities in the water, can introduce mold spores into the ice-making process.
- Inadequate ventilation: Poor air circulation in the area where the ice maker is installed can contribute to mold growth. Without proper ventilation, moisture can become trapped, creating a favorable environment for mold to colonize.
These factors make it crucial to maintain regular cleaning and proper hygiene practices when it comes to your ice maker. By addressing these causes, you can prevent mold from developing and ensure the production of clean, fresh ice.
Now that we understand the common causes, let’s move on to the tools and materials you’ll need to effectively remove mold from your ice maker.
Tools and Materials Needed
Before you begin the process of removing mold from your ice maker, gather the following tools and materials to ensure a smooth and efficient cleaning process:
- Gloves: Disposable gloves will protect your hands from any harsh cleaning agents and prevent the spread of mold.
- Face mask: A face mask or respirator will help filter out mold spores and prevent inhalation during the cleaning process.
- Vinegar: White distilled vinegar is an excellent natural cleaning agent that effectively kills mold and mildew. It is also safe to use on food-related appliances like ice makers.
- Baking soda: Baking soda is another natural and safe cleaning agent that can help remove stubborn mold stains and odors.
- Water: You’ll need clean water for rinsing various components of the ice maker.
- Soft cloth or sponge: These are essential for wiping down and scrubbing the ice maker surfaces.
- Toothbrush or small brush: A toothbrush or small brush will help you reach and clean hard-to-reach areas, such as crevices and corners.
- Bucket or basin: You’ll need a bucket or basin to hold water and cleaning solution for soaking and rinsing removable ice maker parts.
- Microfiber cloth or towel: Use a microfiber cloth or towel to dry the ice maker components thoroughly.
- Mold-killing solution: In case vinegar and baking soda aren’t effective, consider using a commercially available mold-killing solution. Make sure to follow the manufacturer’s instructions for proper usage.
Having these tools and materials ready before you start will make the cleaning process much more convenient and efficient. With everything prepared, you’re now ready to dive into the step-by-step process of removing mold from your ice maker.
Step 1: Turn Off and Unplug the Ice Maker
Before you begin the cleaning process, it’s crucial to ensure your safety by turning off and unplugging the ice maker. This step will prevent any accidents or electrical hazards during the cleaning process.
Locate the power switch or cord for your ice maker and switch it off or unplug it from the electrical outlet. This will ensure that the ice maker is completely disconnected from the power source.
Turning off and unplugging the ice maker is essential for two main reasons:
- Safety: Cleaning electrical appliances while they are still powered can be dangerous. Water and cleaning solutions can cause electrical shocks or damage to the appliance if it is not disconnected from the power source.
- Easier cleaning: By turning off the ice maker, it will prevent water flow and ice production during the cleaning process. This allows you to focus on thorough cleaning without any interference.
Once the ice maker is turned off and unplugged, you can proceed to the next step of removing the ice maker tray and bin for cleaning.
Remember, safety should always be a priority when handling electrical appliances. Take the necessary precautions to ensure a safe and successful cleaning process.
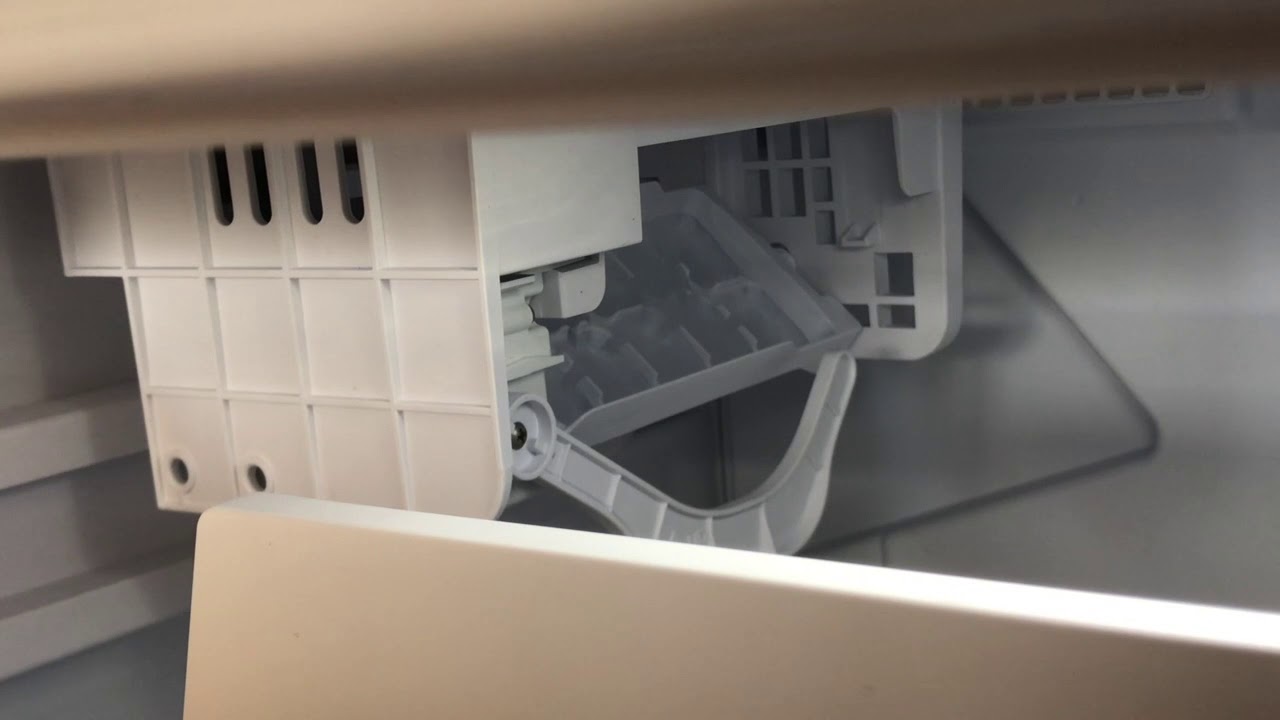
Step 2: Remove the Ice Maker Tray and Bin
With the ice maker turned off and unplugged, it’s time to remove the ice maker tray and bin for thorough cleaning. These components are often the main areas where mold growth occurs and can contribute to the contamination of your ice.
Follow these steps to remove the ice maker tray and bin:
- Locate the release mechanism or levers that hold the ice maker tray and bin in place. These can vary depending on the make and model of your ice maker.
- Slide or lift the release mechanism to detach the ice maker tray from the ice maker. Gently lift the tray out of the ice maker and set it aside.
- If your ice maker has a separate bin, remove it by sliding it out or lifting it up. Place it alongside the ice maker tray.
- Inspect the ice maker tray and bin for any visible signs of mold or mildew. Pay close attention to the corners, crevices, and underside of the components, as these areas are prone to mold growth.
- If you notice any mold or residue, proceed to the next step to clean the ice maker components thoroughly.
By removing the ice maker tray and bin, you will have better access to these components for effective cleaning. This step will help eliminate any trapped mold spores and ensure that your ice maker is free from contamination.
Once you have removed the ice maker tray and bin, you’re ready to move on to the next step: cleaning the ice maker components.
Read more: How To Remove Odor From Ice Maker
Step 3: Clean the Ice Maker Components
Now that you have removed the ice maker tray and bin, it’s time to clean the individual components to eliminate any mold or residue. By thoroughly cleaning these parts, you’ll ensure that your ice maker produces clean and safe ice cubes.
Follow these steps to clean the ice maker components:
- Fill a bucket or basin with a mixture of warm water and a small amount of dish soap or vinegar. This solution will help break down any grime or mold on the components.
- Place the ice maker tray and bin into the bucket or basin, ensuring they are fully submerged in the cleaning solution. Let them soak for about 15-20 minutes to loosen any stubborn residue.
- After soaking, use a soft cloth or sponge to scrub the surfaces of the ice maker tray and bin. Pay special attention to the corners, crevices, and underside of the components, as these areas are prone to mold growth.
- Rinse the ice maker tray and bin thoroughly with clean water to remove any soap or vinegar residue.
- Inspect the components to ensure there are no remaining traces of mold or residue. If needed, repeat the cleaning process or move on to the next step for stubborn mold removal.
It’s important to note that some ice maker components may be dishwasher-safe. If your ice maker tray or bin is labeled as dishwasher-safe, you can choose to clean them in the dishwasher for added convenience. Check the manufacturer’s instructions for specific cleaning guidelines.
By cleaning the ice maker components, you’ll remove any mold, residue, or bacteria that can contaminate your ice cubes. Once the components are clean, you can proceed to the next step: cleaning the water lines and filters.
To remove mold from an ice maker, mix equal parts of white vinegar and water and use a soft cloth to wipe down all surfaces. Be sure to thoroughly dry the ice maker before using it again.
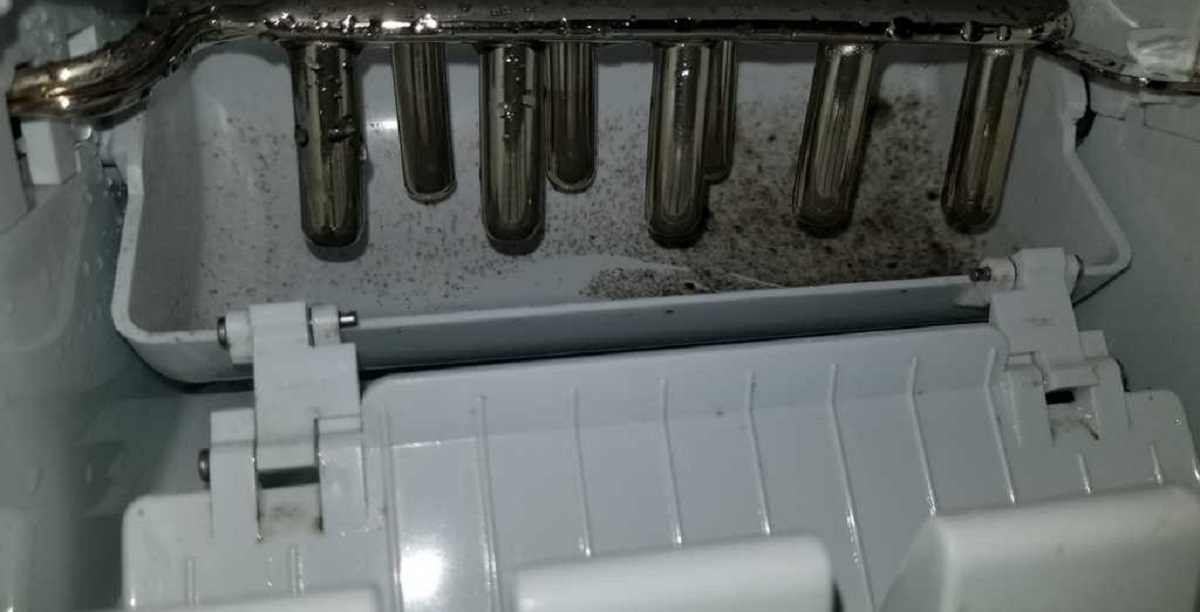
Step 4: Clean the Water Lines and Filters
After cleaning the ice maker tray and bin, it’s important to clean the water lines and filters to ensure that your ice is produced with clean and uncontaminated water. Mold can easily grow in these areas, so it’s crucial to give them proper attention during the cleaning process.
Follow these steps to clean the water lines and filters of your ice maker:
- Locate the water supply valve for your ice maker. This is usually found behind or beneath the unit.
- If your ice maker has a water filter, check the manufacturer’s instructions for proper removal and cleaning. In some cases, it may be necessary to replace the filter if it is heavily contaminated or expired.
- Run clean, warm water through the water lines to flush out any debris or mold. You can do this by either using a turkey baster or disconnecting the water line and running water through it directly into a bucket or sink.
- If you notice any signs of mold or residue in the water lines, create a cleaning solution using a mixture of equal parts water and vinegar. Use a turkey baster or similar tool to inject the cleaning solution into the water lines, allowing it to sit for a few minutes to dissolve any mold or buildup.
- After the cleaning solution has had time to work, flush the water lines by running clean water through them again. This will help remove any remaining residue and cleaning solution.
- Reinstall or replace the water filter according to the manufacturer’s instructions. This will ensure that your ice maker continues to receive filtered and clean water.
By cleaning the water lines and filters, you’ll prevent any mold or debris from contaminating your ice. Cleaning these components will also help improve the overall performance and efficiency of your ice maker.
Once you have completed cleaning the water lines and filters, you can proceed to the next step for stubborn mold removal, if necessary.
Step 5: Use Mold-Killing Solution for Stubborn Mold
If you’ve encountered stubborn mold growth in your ice maker components or are dealing with particularly persistent mold stains, using a mold-killing solution can be an effective way to eliminate the problem.
Follow these steps to use a mold-killing solution for stubborn mold:
- Prepare a mold-killing solution by following the instructions provided on the product label. Typically, these solutions are diluted with water according to specific ratios.
- Apply the mold-killing solution to the affected areas of the ice maker components, focusing on moldy spots, stains, or hard-to-reach corners. Use a soft cloth or a brush to gently scrub the solution into the mold-infested areas.
- Allow the mold-killing solution to sit for the recommended amount of time as indicated on the product label. This will allow the solution to penetrate and kill the mold spores.
- After the specified time has passed, rinse the ice maker components thoroughly with clean water to remove any residue from the mold-killing solution.
- Inspect the components to ensure that the stubborn mold has been adequately treated and removed. If necessary, repeat the process or use a different cleaning method for persistent mold stains.
It’s important to note that when using a mold-killing solution, always follow the manufacturer’s instructions for proper usage and safety precautions. Wear gloves and a face mask to protect your skin and respiratory system from any potentially harmful chemicals.
Using a mold-killing solution can be particularly useful for severe mold infestations or deep-seated stains. However, for less severe cases, vinegar or baking soda solutions mentioned earlier may be sufficient. Always choose the cleaning method that is appropriate for the level of mold growth in your ice maker.
Once you have treated any stubborn mold, it’s time to move on to the next step: rinsing and drying the ice maker components.
Step 6: Rinse and Dry the Ice Maker
After cleaning and treating the ice maker components, it’s crucial to properly rinse and dry them to ensure that no residue or moisture remains. This step will help prevent any remaining mold spores from reoccurring and maintain the cleanliness of your ice maker.
Follow these steps to rinse and dry the ice maker components:
- Thoroughly rinse the ice maker tray, bin, and any other cleaned components with clean water. Ensure that all traces of cleaning solutions, mold-killing agents, or debris are completely removed.
- Inspect the components to make sure there are no visible signs of mold or residue. If any spots persist, repeat the cleaning process or use a different cleaning method until the components are thoroughly clean.
- Once the components are rinsed, use a microfiber cloth or towel to dry them completely. Pay attention to any hard-to-reach areas or corners to ensure they are properly dried.
- Avoid leaving any moisture behind, as it can create a favorable environment for mold growth. Ensure that all components are completely dry before reassembling and reusing the ice maker.
- Set aside some time for the components to air dry if needed. Placing them in a well-ventilated area can help speed up the drying process.
Remember, keeping the ice maker components dry is essential in preventing mold growth. Moisture is the enemy when it comes to mold, so take your time to ensure that everything is thoroughly dried before moving on to the next step.
Once the ice maker components are dry, it’s time to reassemble and test your ice maker to ensure it is functioning properly.
Step 7: Reassemble and Test the Ice Maker
Now that you have cleaned, treated, rinsed, and dried all the ice maker components, it’s time to reassemble the ice maker and test its functionality. This final step ensures that your ice maker is ready to produce clean and mold-free ice cubes.
Follow these steps to reassemble and test your ice maker:
- Place the cleaned and dried ice maker tray back into its designated position within the ice maker. Ensure that it fits securely and locks into place.
- If your ice maker has a separate bin, slide it back into position beneath the ice maker. Make sure it is properly aligned and fits snugly.
- Double-check that all the connections, such as water lines and filters, are reconnected properly according to the manufacturer’s instructions.
- Before turning on the ice maker, give it a final wipe-down with a clean, dry cloth to remove any dust or fingerprints that may have accumulated during the cleaning process.
- Once everything is reassembled, plug the ice maker back into the power source and turn it on. Allow the ice maker to begin its ice-making cycle.
- Monitor the ice maker for a complete ice-making cycle to ensure that it is functioning properly. Pay attention to any unusual noises, leaks, or malfunctions that may indicate a problem.
- Discard the first batch of ice produced after cleaning to ensure that any remaining traces of cleaning agents or debris are flushed out.
By following these steps, you will have successfully reassembled and tested your ice maker. You can now enjoy clean, mold-free ice cubes without any concerns about contamination.
Remember, regular maintenance and cleaning are key to preventing mold growth in your ice maker. Implementing good hygiene practices and keeping the ice maker clean will ensure the production of fresh and safe ice cubes.
In the next section, we will provide some tips for preventing mold growth in ice makers to help you maintain a mold-free environment moving forward.
Preventing Mold Growth in Ice Makers
Preventing mold growth in your ice maker is essential to maintain a clean and healthy environment. By implementing a few preventive measures, you can significantly reduce the chances of mold returning. Here are some tips to keep in mind:
- Regular cleaning: Make it a habit to regularly clean your ice maker. Follow a cleaning schedule based on the manufacturer’s recommendations or at least every few months. This will help prevent the buildup of mold, bacteria, and other contaminants.
- Frequent filter replacement: If your ice maker has a water filter, make sure to replace it according to the manufacturer’s instructions. Regular filter replacement ensures that your ice maker receives clean, filtered water free from impurities that can contribute to mold growth.
- Proper ventilation: Ensure that your ice maker is installed in a properly ventilated area. Good air circulation helps prevent moisture buildup and minimizes the chances of mold growth. If necessary, consider using a fan or opening a window to improve airflow around the ice maker.
- Regular maintenance: Follow the manufacturer’s guidelines for regular maintenance tasks, such as descaling or sanitizing the ice maker. These maintenance procedures help keep the ice maker in optimal condition and reduce the risk of mold growth.
- Empty and dry the ice maker: If you’re planning to be away for an extended period or not using the ice maker, empty the ice bin and let it dry thoroughly. Standing water provides a breeding ground for mold, so it’s important to remove any water to prevent mold growth.
- Use clean water: Ensure that the water supply to your ice maker is clean and free from contaminants. If your tap water has impurities, consider using filtered or distilled water for ice making.
- Regularly inspect for leaks: Check for any leaks or drips in the water lines or connections. Addressing leaks promptly can prevent water accumulation and minimize the risk of mold growth.
- Keep the ice maker dry: After each use or cleaning, ensure that the ice maker components are thoroughly dried before reassembling or using them. Moisture promotes mold growth, so proper drying is crucial.
By following these preventive measures, you can maintain a mold-free ice maker and enjoy clean and safe ice cubes. Regular cleaning, proper maintenance, and attention to hygiene practices will help keep your ice maker in excellent condition while minimizing the risk of mold growth.
Now that you have a clear understanding of how to prevent mold growth, let’s wrap up this guide on removing mold from ice makers.
Conclusion
Dealing with mold in an ice maker can be a frustrating and concerning issue. However, by following the steps outlined in this comprehensive guide, you can effectively remove mold from your ice maker and prevent its return. Remember these key points:
First, identify the common causes of mold in ice makers, such as poor cleaning practices, high humidity, water contamination, and inadequate ventilation.
Next, gather the necessary tools and materials, including gloves, vinegar, baking soda, water, and cleaning cloths, to safely and effectively clean your ice maker.
Begin the cleaning process by turning off and unplugging the ice maker, followed by the removal of the ice maker tray and bin.
Clean the ice maker components thoroughly using a mixture of warm water and dish soap or vinegar. For stubborn mold, consider using a mold-killing solution.
Additionally, clean the water lines and filters to ensure that your ice maker is supplied with clean water, and rinse and dry all the components to prevent mold growth.
After reassembling the ice maker, test its functionality and discard the first batch of ice to ensure that any remaining residue or debris is flushed out.
To maintain a mold-free ice maker, implement preventive measures, such as regular cleaning and maintenance, proper ventilation, frequent filter replacement, and using clean water.
By following these steps and taking preventive measures, you can enjoy clean, fresh, and mold-free ice cubes from your ice maker.
Remember, mold growth in ice makers is a common issue, but with careful maintenance and regular cleaning, you can keep your ice maker in optimal condition and ensure the production of safe and refreshing ice cubes for your beverages.
So, go ahead and give your ice maker the attention it deserves to keep it clean, mold-free, and ready to provide you with ice whenever you need it!
Keeping your home free from mold doesn't stop at kitchen appliances. If wooden furniture has fallen victim to mold, learning effective mold removal strategies can rejuvenate your cherished pieces. For those who've tackled the ice maker and want to ensure it remains pristine, regular ice maker cleaning is key to maintaining its hygiene and functionality. Both guides offer practical advice to enhance your home maintenance routine seamlessly.
Frequently Asked Questions about How To Remove Mold From Ice Maker
Was this page helpful?
At Storables.com, we guarantee accurate and reliable information. Our content, validated by Expert Board Contributors, is crafted following stringent Editorial Policies. We're committed to providing you with well-researched, expert-backed insights for all your informational needs.


0 thoughts on “How To Remove Mold From Ice Maker”