Articles
How To Remove Mold From Plywood In Attic
Modified: August 17, 2024
Learn effective methods to remove mold from plywood in the attic with these informative articles. Protect your home from mold growth and improve indoor air quality.
(Many of the links in this article redirect to a specific reviewed product. Your purchase of these products through affiliate links helps to generate commission for Storables.com, at no extra cost. Learn more)
Introduction
Welcome to our comprehensive guide on how to remove mold from plywood in attics. Mold is a common problem in many homes, and if left untreated, it can pose serious health risks and cause damage to the structure of your attic. Plywood, being a porous material, is prone to mold growth when exposed to moisture and humidity.
In this article, we will explain the steps you need to take to effectively remove mold from plywood in your attic. We will also provide essential safety precautions to ensure your well-being during the process. So, let’s get started on maintaining a clean and healthy attic!
Key Takeaways:
- Safety First!
Protect yourself with proper gear, ventilate the area, and avoid agitating the mold. Dispose of contaminated materials carefully and seek professional help if needed for a safe and effective mold removal process. - Prevent and Protect
Address moisture sources, improve ventilation, and monitor humidity levels to prevent future mold growth. Regular inspections and proactive measures will help maintain a healthy, mold-free attic environment.
Read more: How To Remove Mold From Attic
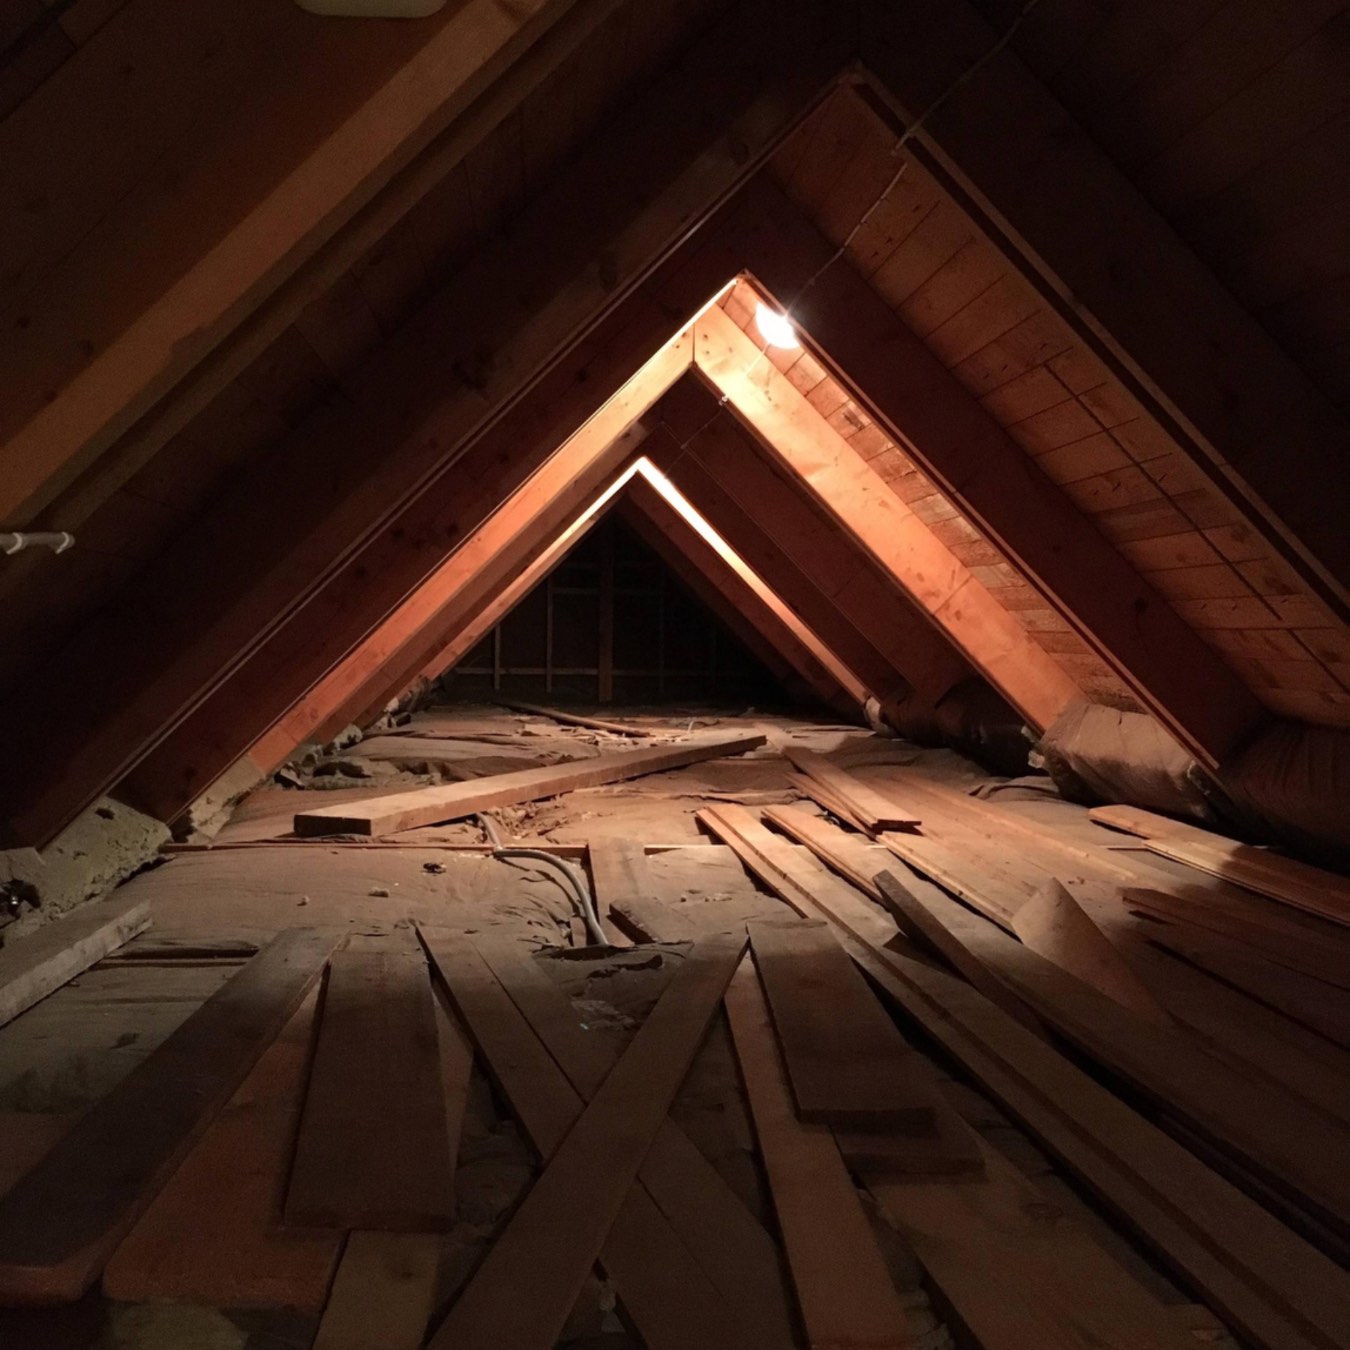
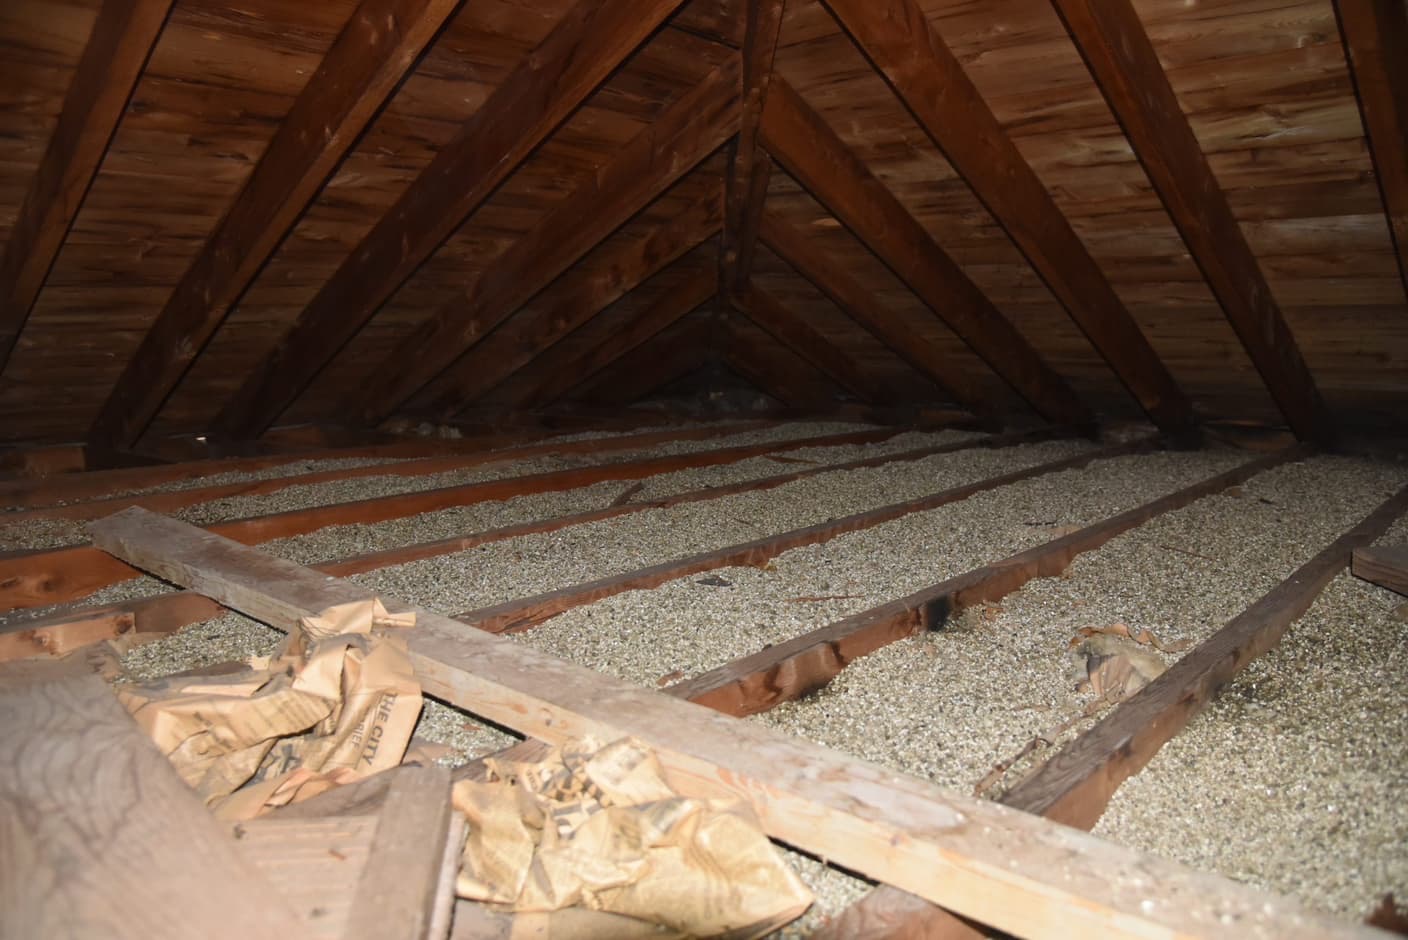
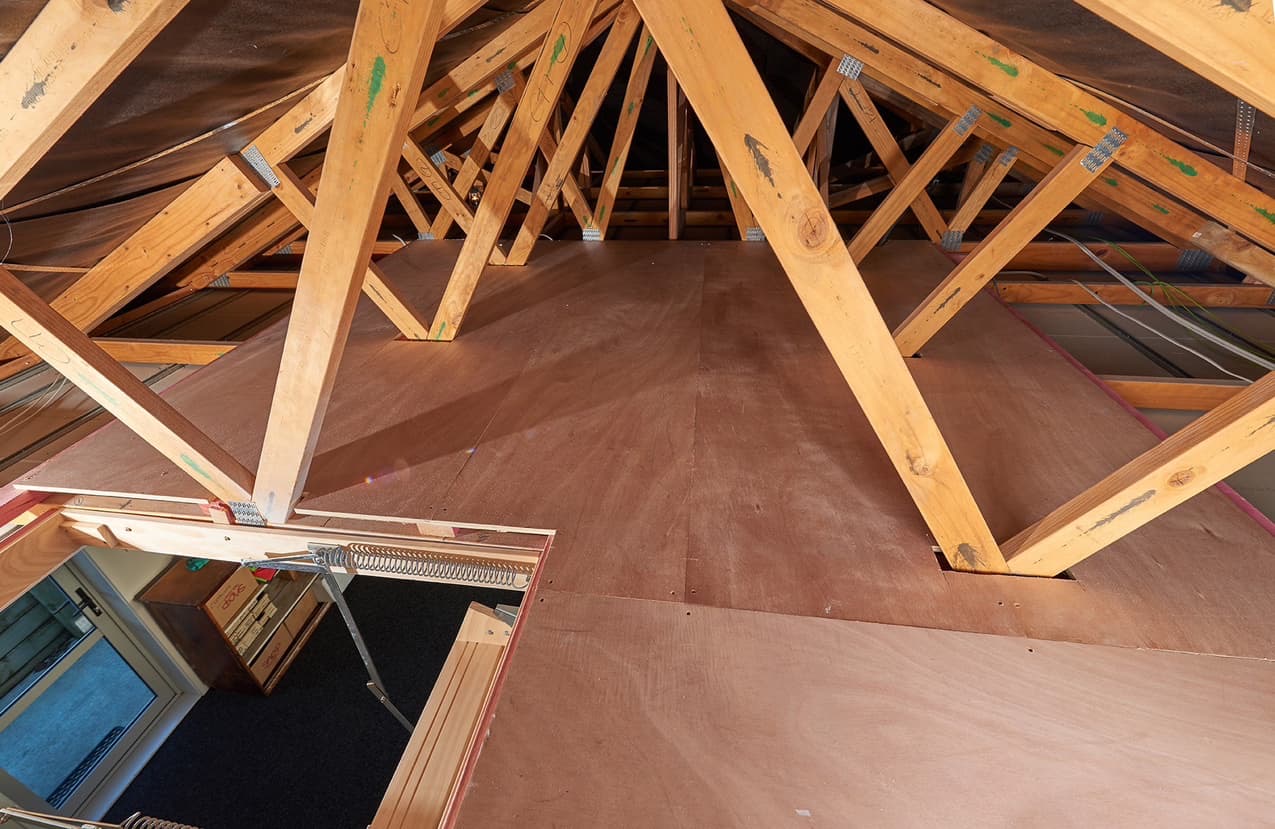
Understanding Mold in Attics
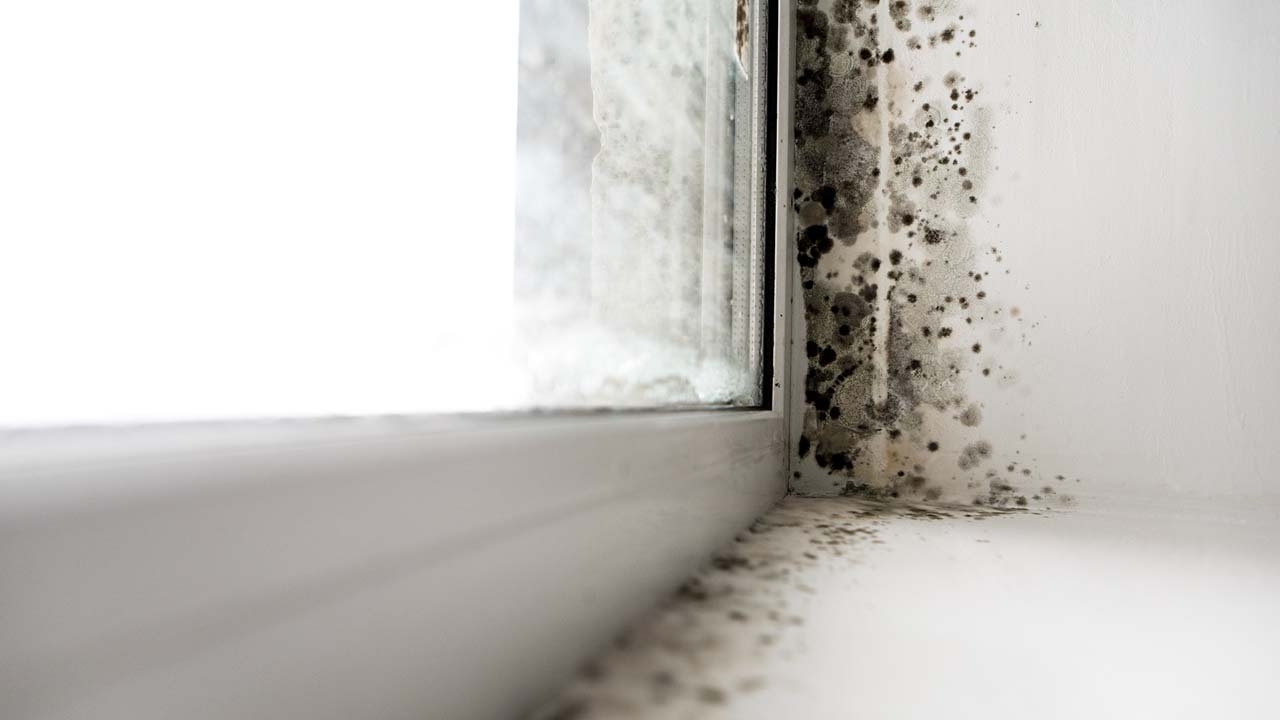
Mold is a type of fungi that thrives in damp and humid environments. Attics, being an enclosed space with limited ventilation, can easily become a breeding ground for mold. Moisture can seep into the attic through various sources such as roof leaks, condensation, or poor insulation.
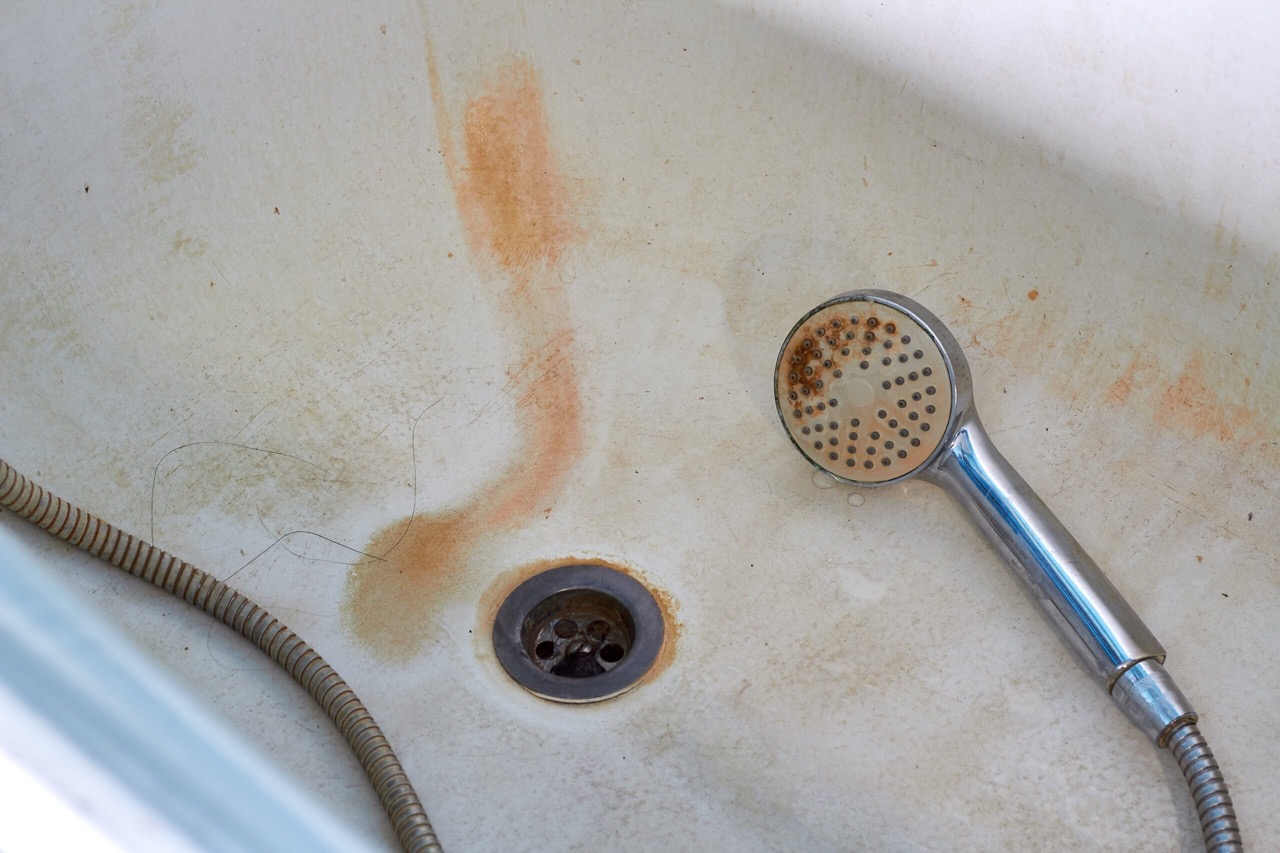
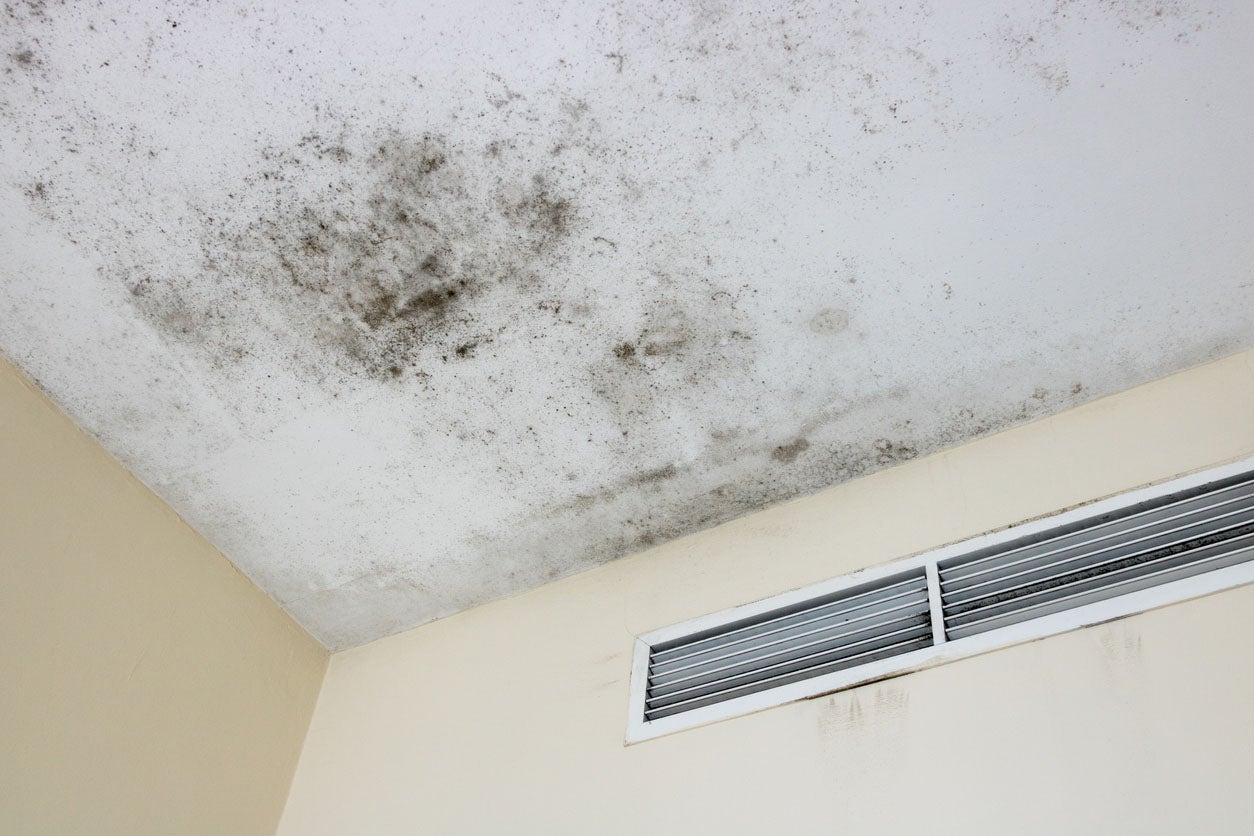
Once the moisture accumulates in the attic, it creates an ideal environment for mold to grow and spread. Mold spores are tiny and can float in the air, making it easy for them to settle on surfaces like plywood. Over time, the mold can cause discoloration, a musty odor, and even structural damage to the plywood.
It is crucial to address the mold issue as soon as possible, as prolonged exposure to mold can lead to respiratory problems, allergies, and other health issues. Additionally, mold growth can weaken the structure of the attic and compromise its integrity.
To effectively remove mold from plywood in the attic, it is important to understand the causes and signs of mold growth. Keep an eye out for any visible signs of mold, such as black or green patches, or a musty odor in the attic. Also, be vigilant for any signs of water damage or leaks in the roof, as these are common culprits for mold growth.
By understanding how mold develops in attics, you can take the necessary steps to prevent its growth and ensure a healthier living environment for you and your family.
Safety Precautions
Ensuring your safety and well-being should be the utmost priority when dealing with mold in attics. Mold spores can be harmful when inhaled or come into contact with the skin and eyes. Therefore, it is crucial to take proper precautions to protect yourself during the mold removal process. Here are some important safety measures to consider:
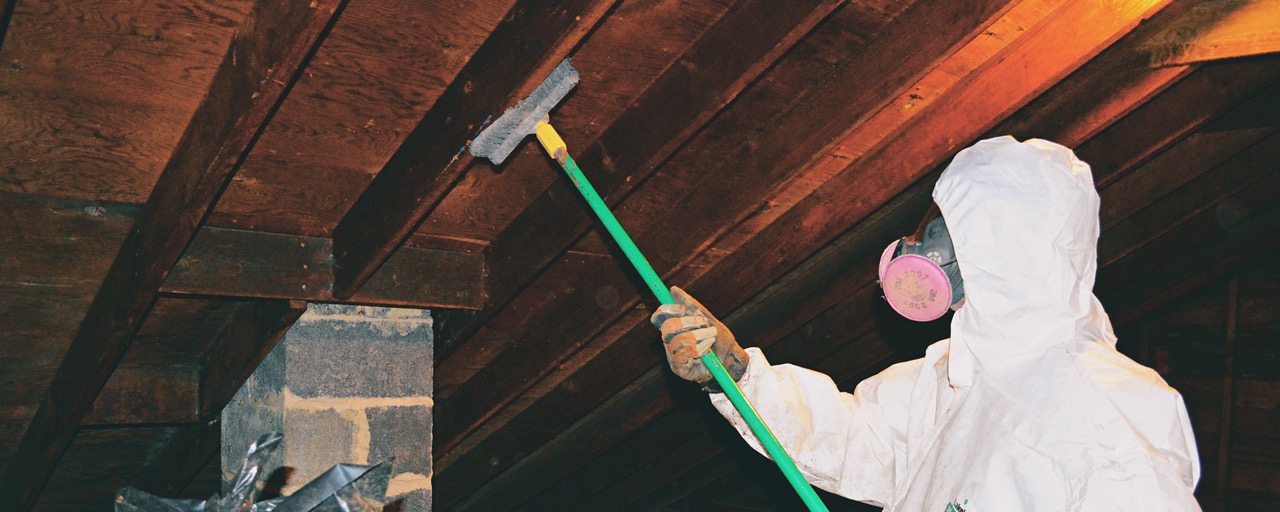
- Wear Protective Gear: Before starting the mold removal process, make sure to wear the appropriate protective gear. This includes goggles, a respirator or mask, gloves, and disposable coveralls. These items will prevent any direct contact with mold spores and help minimize the risk of exposure.
- Ventilate the Area: Proper ventilation is essential to prevent the accumulation of mold spores in the air. Open windows and use fans to improve airflow in the attic. It is also advisable to block off the area being cleaned to avoid the spread of mold to other parts of the house.
- Use Mold-Fighting Products: Choose mold-fighting products that are specifically designed for attic use. These products are formulated to effectively kill and remove mold spores. Be sure to follow the manufacturer’s instructions for proper usage and ventilation requirements.
- Avoid Agitating the Mold: When removing mold from plywood, avoid actions that can disturb the mold and release more spores into the air. This includes brushing or scrubbing the mold-infested surface vigorously. Instead, use a gentle approach to minimize the dispersal of spores.
- Proper Disposal of Contaminated Materials: When removing mold-infested plywood, it is important to dispose of it properly. Seal the contaminated materials in heavy-duty trash bags and discard them according to local guidelines for hazardous waste disposal.
- Seek Professional Help if Needed: If the mold infestation is extensive or you are unsure about handling the removal process yourself, it is best to seek the assistance of a professional mold remediation service. They have the expertise and equipment to safely and effectively remove mold from your attic.
By following these safety precautions, you can minimize the risks associated with mold exposure and ensure a safer environment during the mold removal process.
Assessing the Mold Infestation
Before diving into the mold removal process, it is important to assess the extent of the mold infestation in your attic. This will help you determine the appropriate course of action and the level of effort required. Here are the steps to assess the mold infestation:
- Visual Inspection: Carefully examine the plywood surfaces in your attic for any visible signs of mold growth. Look out for black, green, or brown patches, as well as any discoloration or fuzzy texture.
- Check for Moisture Sources: Identify the source of moisture that is causing the mold growth. This could be a leaky roof, improper ventilation, condensation, or other water-related issues. Addressing the source of moisture is essential to prevent future mold growth.
- Assess the Spread: Determine the extent of the mold growth. Is it limited to a specific area or has it spread across multiple plywood surfaces? This information will help you plan the mold removal process more effectively.
- Document the Damage: Take photographs or make notes of the affected areas to track the progress of the mold removal process. This documentation can also be useful when filing insurance claims or seeking professional assistance.
- Identify Potential Safety Hazards: Assess any structural damage or compromised areas that may pose safety risks. It is vital to address these issues promptly to ensure the stability of your attic.
By thoroughly assessing the mold infestation, you will have a better understanding of the problem at hand and be able to approach the mold removal process more effectively. Remember to take the necessary safety precautions and seek professional help if needed, especially for extensive mold growth or if you are unsure about handling the removal yourself.
Gather Necessary Materials
Before you begin the mold removal process, it is essential to gather all the necessary materials and tools. Having everything on hand will ensure a smooth and efficient cleanup. Here are the materials you will need:
- Protective Gear: As mentioned earlier, it is crucial to prioritize your safety. Gather goggles, a respirator or mask, gloves, and disposable coveralls to protect yourself from mold spores and cleaning agents.
- Cleaning Agents: Choose mold-fighting cleaning agents that are safe to use on plywood surfaces. There are various commercial mold cleaners available, or you can opt for natural alternatives like vinegar or hydrogen peroxide.
- Scrubbing Tools: You will need scrubbing brushes or sponges to physically remove the mold from the plywood surfaces. Use brushes with bristles that are stiff enough to effectively clean, but gentle enough not to damage the plywood.
- Plastic Sheets or Tarps: To protect the surrounding area from any potential mold spore dispersion, cover the floor and other objects with plastic sheets or tarps.
- Heavy-Duty Trash Bags: As you remove the mold-infested plywood, it is important to seal and dispose of it properly. You will need heavy-duty trash bags to safely contain the contaminated materials.
- Water and Bucket: Have a supply of clean water and a bucket available for rinsing the cleaning tools and for general cleaning purposes.
- Dehumidifier and Fans: After the mold removal process, it is important to dry out the attic and maintain proper airflow. Consider using a dehumidifier and fans to help prevent future mold growth.
- Personal Air Purifier (Optional): If you are particularly sensitive to mold spores or have respiratory issues, consider using a personal air purifier to further reduce your exposure during the cleanup process.
Make sure to gather these materials before starting the mold removal process to ensure efficiency and safety. Having everything prepared will save you time and allow for a more controlled and effective cleanup.
Use a mixture of water and white vinegar to scrub the mold off the plywood. Let it dry completely and then apply a mold-resistant primer or paint to prevent future growth.
Read more: How To Lay Plywood In Attic
Preparing the Workspace
Before you begin the mold removal process, it is important to properly prepare the workspace in your attic. Creating a conducive environment will help facilitate the cleanup and minimize the risk of cross-contamination. Follow these steps to prepare the workspace:
- Clear the Area: Remove any items that may obstruct your access to the mold-infested plywood. This includes furniture, stored belongings, boxes, and any other objects that are in close proximity.
- Contain the Work Area: To prevent the spread of mold spores, set up plastic barriers or create a makeshift containment area using plastic sheets or tarps. This will isolate the workspace from the rest of the attic or house, minimizing the risk of cross-contamination.
- Seal Off Air Vents: Close and seal off any air vents or ducts in the attic. This will prevent mold spores and debris from being circulated throughout the house during the cleanup process.
- Cover Exposed Surfaces: If there are any exposed surfaces or objects that cannot be removed from the workspace, cover them with plastic sheets or tarps to protect them from any potential mold spore dispersal or cleaning agents.
- Ensure Adequate Lighting: Attics are often dimly lit areas. Make sure to bring sufficient lighting equipment or portable lamps to ensure proper visibility during the mold removal process. This will help you identify and effectively clean all mold-infested areas.
- Set Up Proper Ventilation: Enhance airflow in the attic by placing fans near open windows or doorways. This will help ventilate the workspace and assist in drying out the area after the cleanup.
- Follow Safety Precautions: Ensure that you are wearing the appropriate protective gear, as mentioned in the previous section. Double-check that you have a properly fitted respirator or mask, gloves, goggles, and disposable coveralls.
By taking the time to properly prepare the workspace, you will create a controlled and safe environment for the mold removal process. Remember to be diligent in following safety precautions and maintaining a clean and contained workspace to minimize the risk of mold spore dispersal and cross-contamination.
Removing Mold from Plywood
Now that you have prepared the workspace and gathered the necessary materials, it’s time to tackle the task of removing mold from plywood in your attic. Follow these steps to effectively clean and remove mold:
- Put on Protective Gear: Before you begin, make sure you are wearing the appropriate protective gear, including goggles, a respirator or mask, gloves, and disposable coveralls. This will safeguard you from mold spores and cleaning agents.
- Dampen the Surface: Before applying any cleaning agents, lightly dampen the mold-infested plywood surface with water. This helps to prevent the spread of mold spores during the cleaning process.
- Apply Cleaning Solution: Use a mold-fighting cleaning agent, such as a commercial mold cleaner or a mixture of vinegar and water, to treat the affected plywood. Follow the instructions on the product label or use a 1:1 ratio of vinegar and water for a natural solution.
- Scrub the Surface: Using a scrubbing brush or sponge, gently scrub the mold-infested plywood. Be thorough in your cleaning, making sure to reach all corners and crevices. Apply more cleaning solution as needed and continue scrubbing until the mold is visibly removed.
- Rinse with Clean Water: After scrubbing, rinse the plywood surface with clean water to remove any residue from the cleaning solution. Use a bucket of water or a spray bottle to carefully rinse the area. Avoid excessively wetting the plywood, as it can create more moisture and potentially worsen the mold problem.
- Dry the Plywood: Once the plywood is rinsed, use fans or natural airflow to aid in drying the surface. Proper drying is crucial to prevent further mold growth. Consider using a dehumidifier to maintain optimal humidity levels in the attic.
- Inspect for Remaining Mold: After the plywood has dried, carefully inspect the surface for any remaining mold. If any mold spots persist, repeat the cleaning process until the plywood is completely mold-free.
- Dispose of Contaminated Materials: Seal and dispose of any contaminated cleaning tools, gloves, or other materials used during the mold removal process in heavy-duty trash bags. Follow local guidelines for proper disposal.
Remember to work in sections and take breaks as needed to prevent overexertion. Take caution while working on ladders or in confined spaces, ensuring your safety at all times. If the mold infestation is extensive or you are unsure about handling the cleanup yourself, it is wise to seek professional help for thorough mold remediation.
Cleaning Up and Disposing of Materials
Once you have successfully removed mold from the plywood in your attic, it is crucial to properly clean up and dispose of any materials used during the process. This will help prevent the spread of mold spores and maintain a clean and safe environment. Follow these steps for the final cleanup:
- Clean the Workspace: Thoroughly clean the work area, removing any debris, dust, or mold residue that may have accumulated during the mold removal process. Use a damp cloth or vacuum with a HEPA filter to trap any lingering mold spores.
- Wipe Down Surfaces: Use a damp cloth or sponge to wipe down any surfaces that may have come into contact with mold or cleaning agents. This includes walls, beams, and other non-porous materials in the attic. Remember to use separate cloths for different areas to avoid cross-contamination.
- Dispose of Contaminated Materials: Seal and dispose of any plastic sheets, tarps, gloves, or other materials that were in direct contact with mold spores or cleaning agents. Place them in heavy-duty trash bags and follow local guidelines for proper disposal.
- Clean Tools and Equipment: Rinse your scrubbing brushes, sponges, and other cleaning tools with clean water. Remove any debris or mold residue and sanitize them with a mild bleach solution or antimicrobial cleaner. Allow them to dry thoroughly before storing for future use.
- Wash Your Protective Gear: Clean your goggles, respirator or mask, gloves, and coveralls as per their specific care instructions. Properly disinfect and dry them before stowing them away for future use or disposal.
- Dispose of Trash Properly: Double-bag all the trash bags containing mold-infested materials and tie them securely. If possible, label the bags as “Mold Contaminated” to alert waste management personnel. Dispose of the bags according to local guidelines for hazardous waste disposal.
- Final Cleaning: After disposing of the contaminated materials, give the entire attic a final cleaning. Use a damp cloth or mop to wipe down any remaining surfaces to ensure all traces of mold and debris are eliminated.
By following these cleaning and disposal steps, you will minimize the risk of mold spores spreading to other areas of your home and maintain a clean and safe attic environment. Remember to always prioritize safety and proper disposal procedures during the cleanup process.
Preventing Future Mold Growth
After successfully removing mold from the plywood in your attic, it is important to take preventative measures to avoid future mold growth. By addressing the underlying causes and implementing preventive actions, you can maintain a mold-free environment. Here are some strategies to consider:
- Fix any water leaks: Identify and repair any sources of water intrusion, such as roof leaks or plumbing issues. Addressing these problems promptly will prevent moisture buildup, which is a prime breeding ground for mold.
- Improve ventilation: Ensure adequate ventilation in your attic by installing vents or fans. Proper airflow helps to reduce moisture levels and prevent condensation, which can lead to mold growth. Consider using a dehumidifier to regulate humidity levels.
- Insulate properly: Insulate your attic properly to prevent the formation of condensation on the plywood. This reduces the chances of mold growth by minimizing moisture buildup. Consult with an insulation professional if needed.
- Monitor humidity levels: Use a hygrometer to monitor the humidity levels in your attic. Ideally, humidity should be maintained below 60%. If humidity levels are consistently high, consider using a dehumidifier to regulate moisture.
- Keep the attic clean and dry: Regularly inspect and clean your attic, removing any dust or debris that could contribute to mold growth. Ensure that any spills or leaks are cleaned and dried promptly.
- Use mold-resistant materials: If you are renovating or replacing plywood in your attic, consider using mold-resistant materials. Mold-resistant plywood or drywall can help prevent the growth of mold if moisture is present.
- Monitor the attic regularly: Schedule regular inspections of your attic to check for signs of water damage or mold growth. Proactive monitoring allows you to identify and address potential issues before they escalate.
- Promote sunlight and airflow: Whenever possible, allow natural sunlight into your attic and promote airflow by opening windows or using fans. Mold thrives in dark and stagnant environments, so increasing sunlight and airflow can deter its growth.
- Consider professional mold prevention services: If you have had persistent mold issues or a severe mold infestation in the past, it may be worthwhile to consult with professional mold prevention companies. They can provide expert advice and implement effective mold prevention strategies for your attic.
By implementing these preventive measures, you can significantly reduce the risk of future mold growth in your attic. A clean and well-maintained attic is the key to a healthy and mold-free living environment for you and your family.
Read more: How To Remove Molding From Floor
Conclusion
Mold growth on plywood in attics is a common problem that can pose health risks and lead to structural damage. However, by following the steps outlined in this comprehensive guide, you can effectively remove mold from plywood in your attic and prevent its reoccurrence.
Understanding the nature of mold, taking appropriate safety precautions, and properly assessing the extent of the mold infestation are crucial first steps. Gathering the necessary materials and preparing the workspace will ensure a smooth and efficient cleanup process.
Removing mold from plywood requires careful scrubbing with cleaning agents and proper rinsing. Once the mold is successfully removed, it is important to clean up the workspace and dispose of materials safely to minimize the risk of cross-contamination.
Preventing future mold growth is equally important. Addressing moisture sources, improving ventilation, monitoring humidity levels, and keeping the attic clean and dry are key preventive measures. Using mold-resistant materials and conducting regular inspections can further reduce the chances of mold reoccurrence.
Remember, if the mold infestation is extensive or you are unsure about handling the cleanup yourself, it is advisable to seek professional assistance. Professional mold remediation services have the expertise and equipment to ensure a thorough and effective cleanup.
By following the guidelines in this guide and being proactive in preventing mold, you can create a healthy and mold-free environment in your attic. Regular maintenance and vigilance will help you enjoy a clean and safe home for years to come.
Frequently Asked Questions about How To Remove Mold From Plywood In Attic
Was this page helpful?
At Storables.com, we guarantee accurate and reliable information. Our content, validated by Expert Board Contributors, is crafted following stringent Editorial Policies. We're committed to providing you with well-researched, expert-backed insights for all your informational needs.
0 thoughts on “How To Remove Mold From Plywood In Attic”