Articles
How To Remove Mold From Popcorn Ceiling
Modified: August 22, 2024
Learn effective methods to remove mold from popcorn ceilings in this informative article. Protect your home and loved ones by following these expert tips.
(Many of the links in this article redirect to a specific reviewed product. Your purchase of these products through affiliate links helps to generate commission for Storables.com, at no extra cost. Learn more)
Introduction
Welcome to the comprehensive guide on how to remove mold from popcorn ceilings. Popcorn ceilings, also known as cottage cheese or textured ceilings, were popular in the mid-20th century for their unique appearance and noise reduction properties. However, over time, these textured surfaces can become a breeding ground for mold, which not only affects the aesthetic appeal of your home but also poses health risks to you and your family.
Mold is a type of fungus that thrives in moist environments. It can grow on various surfaces, including ceilings, walls, and floors, especially in areas with high humidity levels or water damage. Popcorn ceilings, with their rough texture and ability to trap moisture, provide an ideal environment for mold to flourish.
Removing mold from popcorn ceilings requires careful planning, the use of specific tools and materials, and adherence to safety precautions. In this guide, we will walk you through the necessary steps to effectively remove mold from your popcorn ceiling, ensuring a safe and clean living environment for you and your loved ones.
Before we dive into the process, it is crucial to note that severe mold infestations or extensive damage to your popcorn ceiling may require professional assistance. In such cases, it is recommended to consult a licensed mold remediation specialist to ensure proper handling and remediation of the mold problem.
Now, let’s equip ourselves with the knowledge and tools needed to tackle mold growth on popcorn ceilings.
Key Takeaways:
- Prioritize safety and thorough preparation when removing mold from popcorn ceilings. Wear protective gear, properly ventilate the area, and gather essential tools and materials for a successful and safe mold removal process.
- Address the underlying causes of mold growth, such as water leaks and poor ventilation, to prevent future infestations. Regular maintenance, proper cleaning, and vigilant monitoring are crucial in maintaining a mold-free living environment.
Understand the Problem: What is Mold?
Before diving into the process of removing mold from your popcorn ceiling, it is essential to understand what mold is and why it poses a threat to your home and health.
Mold is a type of fungus that grows in the form of multicellular filaments called hyphae. It reproduces through the release of spores into the air, which can easily spread and colonize new areas if not properly addressed. Mold spores are present both indoors and outdoors, and they can enter your home through open windows, doorways, or on the clothing or shoes of people coming inside.
Popcorn ceilings, with their textured surface, can trap moisture from humidity or water leaks, providing an ideal breeding ground for mold. This moist environment, combined with the organic materials present in the popcorn texture, such as paper fibers and dust, creates a perfect habitat for mold to thrive.
The presence of mold in your home can lead to various health issues. Mold releases tiny spores into the air, which can be inhaled and cause allergic reactions or respiratory problems, particularly in individuals with asthma or allergies. Common symptoms of mold exposure include coughing, sneezing, nasal congestion, itching, and skin irritation.
In addition to the health risks, mold can also cause significant damage to your home’s structure. It can weaken the integrity of the ceiling surface, leading to crumbling or sagging. If left untreated, mold can spread to other areas of your home, resulting in costly repairs and remediation.
Now that we understand the problem at hand, it’s time to move on to the necessary safety precautions and preparation before starting the mold removal process.
Safety Precautions and Preparation
When dealing with mold removal, it is crucial to prioritize safety to protect yourself from potential health risks. Here are some essential safety precautions to keep in mind:
- Proper Ventilation: Before starting the mold removal process, ensure that the area is well-ventilated. Open windows and use fans to circulate fresh air in the room. This will help minimize the inhalation of mold spores.
- Protective Gear: Wear appropriate protective gear to shield yourself from mold exposure. This includes gloves, goggles, an N95 respirator mask, and disposable coveralls or old clothing that can be easily discarded after the cleanup.
- Mold Testing: If you suspect that the mold infestation is extensive or you are dealing with toxic mold, it is advisable to conduct mold testing before proceeding. This will help determine the type and severity of the mold, enabling you to take appropriate precautions.
- Isolation: Prior to starting the removal process, isolate the affected area to prevent the spread of mold spores. Close off adjacent rooms and cover entrances with plastic sheeting to create a containment area. Additionally, turn off any HVAC systems to prevent the circulation of mold spores.
- Cleaning Solutions: Prepare a mold cleaning solution by mixing one part bleach with four parts water or using a commercial mold cleaner. This solution will help kill the mold and prevent future growth.
Now that we have established the necessary safety precautions, let’s move on to gathering the tools and materials needed for mold removal from your popcorn ceiling.
Step 1: Gather the Required Tools and Materials
Before you start the process of removing mold from your popcorn ceiling, it is important to gather all the necessary tools and materials. Having everything on hand will make the process more efficient and ensure that you have everything you need to effectively remove the mold. Here are the essential tools and materials you will need:
Tools:
- Adhesive-backed plastic sheeting or drop cloths: These will be used to protect the floor and furniture in the work area.
- Ladder or step stool: Depending on the height of your ceiling, you may need a ladder or step stool to reach the affected area.
- Scraping tool: A putty knife or scraper will be used to remove the mold-infested popcorn texture.
- Spray bottle: Fill a spray bottle with your chosen mold cleaning solution for easy application.
- Disposable bags: You will need disposable bags to dispose of the scraped-off mold-infested popcorn texture.
- Plastic sheeting and painter’s tape: These will be used to create a containment area to prevent the spread of mold spores.
- Plastic spray bottle: Fill another spray bottle with clean water for rinsing purposes.
- HEPA vacuum cleaner: A vacuum with a HEPA filter will help remove any loose mold spores and debris from the ceiling.
- Fan or dehumidifier (optional): These devices can help speed up the drying process after cleaning.
Read more: How To Remove Mold From Attic
Materials:
- Mold cleaning solution: Use a solution of one part bleach to four parts water, or choose a commercial mold cleaner from your local hardware store.
- Protective gear: Gloves, goggles, an N95 respirator mask, and disposable coveralls or old clothing that can be discarded after use.
- Plastic sheeting: Use plastic sheeting to cover the walls and create a containment area.
- Painter’s tape: Painter’s tape will secure the plastic sheeting in place.
- Rags or towels: These will be used for cleaning and drying the ceiling surface.
- Trash bags: Use sturdy trash bags to dispose of the mold-infested popcorn texture.
By gathering these tools and materials beforehand, you will be well-prepared to tackle the mold removal process on your popcorn ceiling. Next, we will move on to preparing the work area before you start removing the mold.
Step 2: Prepare the Work Area
Before you begin removing mold from your popcorn ceiling, it’s essential to properly prepare the work area. This will help minimize the spread of mold spores and protect the rest of your home from contamination. Here are the steps to prepare the work area:
1. Clear the Space:
Remove any furniture, decorations, or other items from the room, or cover them with plastic sheeting to protect them from dust and mold spores. This will give you ample space to work and prevent any damage to your belongings.
2. Seal Off the Area:
Seal off the work area by covering the walls with plastic sheeting. Attach the plastic sheeting to the walls using painter’s tape to create a containment area. This will prevent mold spores from spreading to other parts of your home during the removal process.
Read more: How To Remove Molding From Floor
3. Protect the Floor:
Place adhesive-backed plastic sheeting or drop cloths on the floor beneath the work area. This will catch any falling debris or mold-infested popcorn texture, making cleanup easier afterward.
4. Turn Off HVAC Systems:
Turn off any heating, ventilation, and air conditioning (HVAC) systems in the affected area. This will prevent the circulation of mold spores throughout your home during the removal process.
5. Cover Air Vents:
Cover air vents and ducts in the work area with plastic sheeting and tape. This will prevent mold spores from entering the HVAC system and spreading to other areas of your home.
6. Set Up Proper Lighting:
Ensure you have adequate lighting in the work area to effectively see the mold-infested areas on the popcorn ceiling. Position portable lights or use work lamps to illuminate the space.
By properly preparing the work area, you will create a controlled environment that minimizes the risk of spreading mold spores and enhances the efficiency of the removal process. Once the work area is ready, you can proceed with the next step of wearing appropriate protective gear before tackling the mold on your popcorn ceiling.
Read more: How To Remove Mold From Showerhead
Step 3: Wear Protective Gear
When removing mold from your popcorn ceiling, it is crucial to prioritize your safety by wearing the appropriate protective gear. This will help minimize your exposure to mold spores and prevent any potential health risks. Here are the essential protective gear items you should wear:
1. Gloves:
Wear disposable gloves made of nitrile or latex to protect your hands from direct contact with mold and cleaning solutions. Gloves will also prevent any skin irritation or allergic reactions that may occur.
2. Goggles:
Protect your eyes by wearing safety goggles or protective glasses. This will prevent mold spores, debris, or cleaning solutions from coming into contact with your eyes, reducing the risk of irritation or injury.
3. N95 Respirator Mask:
Wear an N95 respirator mask or a respirator rated for mold spores to protect your respiratory system. Mold spores can be easily inhaled and may cause respiratory problems or allergic reactions. The respirator mask will filter out airborne particles, ensuring you breathe in clean air while working.
Read more: How To Scrape Popcorn Ceiling
4. Disposable Coveralls or Old Clothing:
Wear disposable coveralls or old clothing that can be easily discarded after the mold removal process. This will prevent cross-contamination of mold spores to your regular clothing and reduce the risk of you spreading mold to other areas of your home.
It is important to note that when wearing protective gear, ensure proper fitting and follow the manufacturer’s instructions for each item. Additionally, be cautious when removing and disposing of your protective gear after the process. Avoid touching the contaminated side of gloves or masks and dispose of them properly in sealed bags.
By wearing the appropriate protective gear, you will create a barrier between yourself and the mold, reducing the risk of exposure and potential health issues. With your protective gear in place, you are now ready to assess the extent of the mold infestation on your popcorn ceiling, which will be covered in the next step.
Step 4: Identify the Extent of Mold Infestation
Before you proceed with removing mold from your popcorn ceiling, it is important to assess the extent of the mold infestation. Understanding the size and scope of the problem will help you determine the best course of action and ensure that you can effectively remove all traces of mold. Here’s how to identify the extent of the mold infestation:
Visual Inspection:
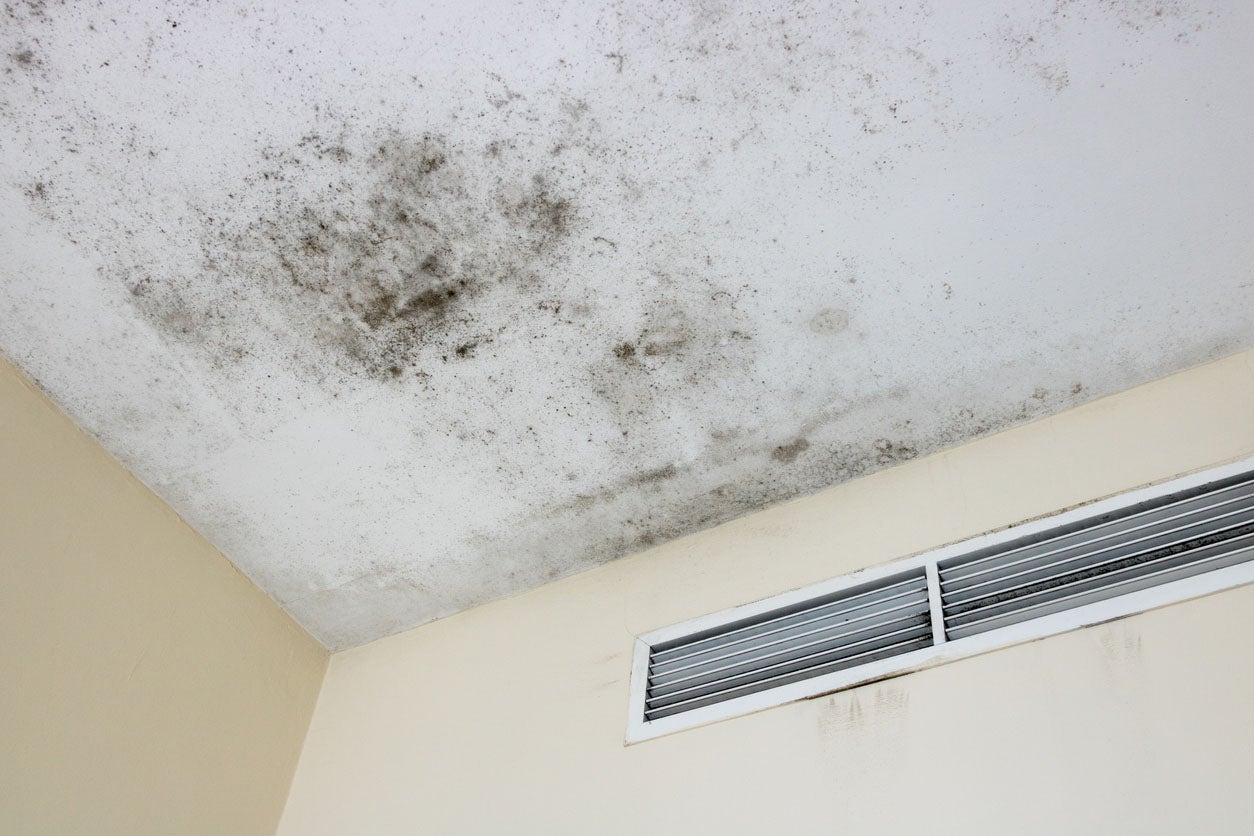
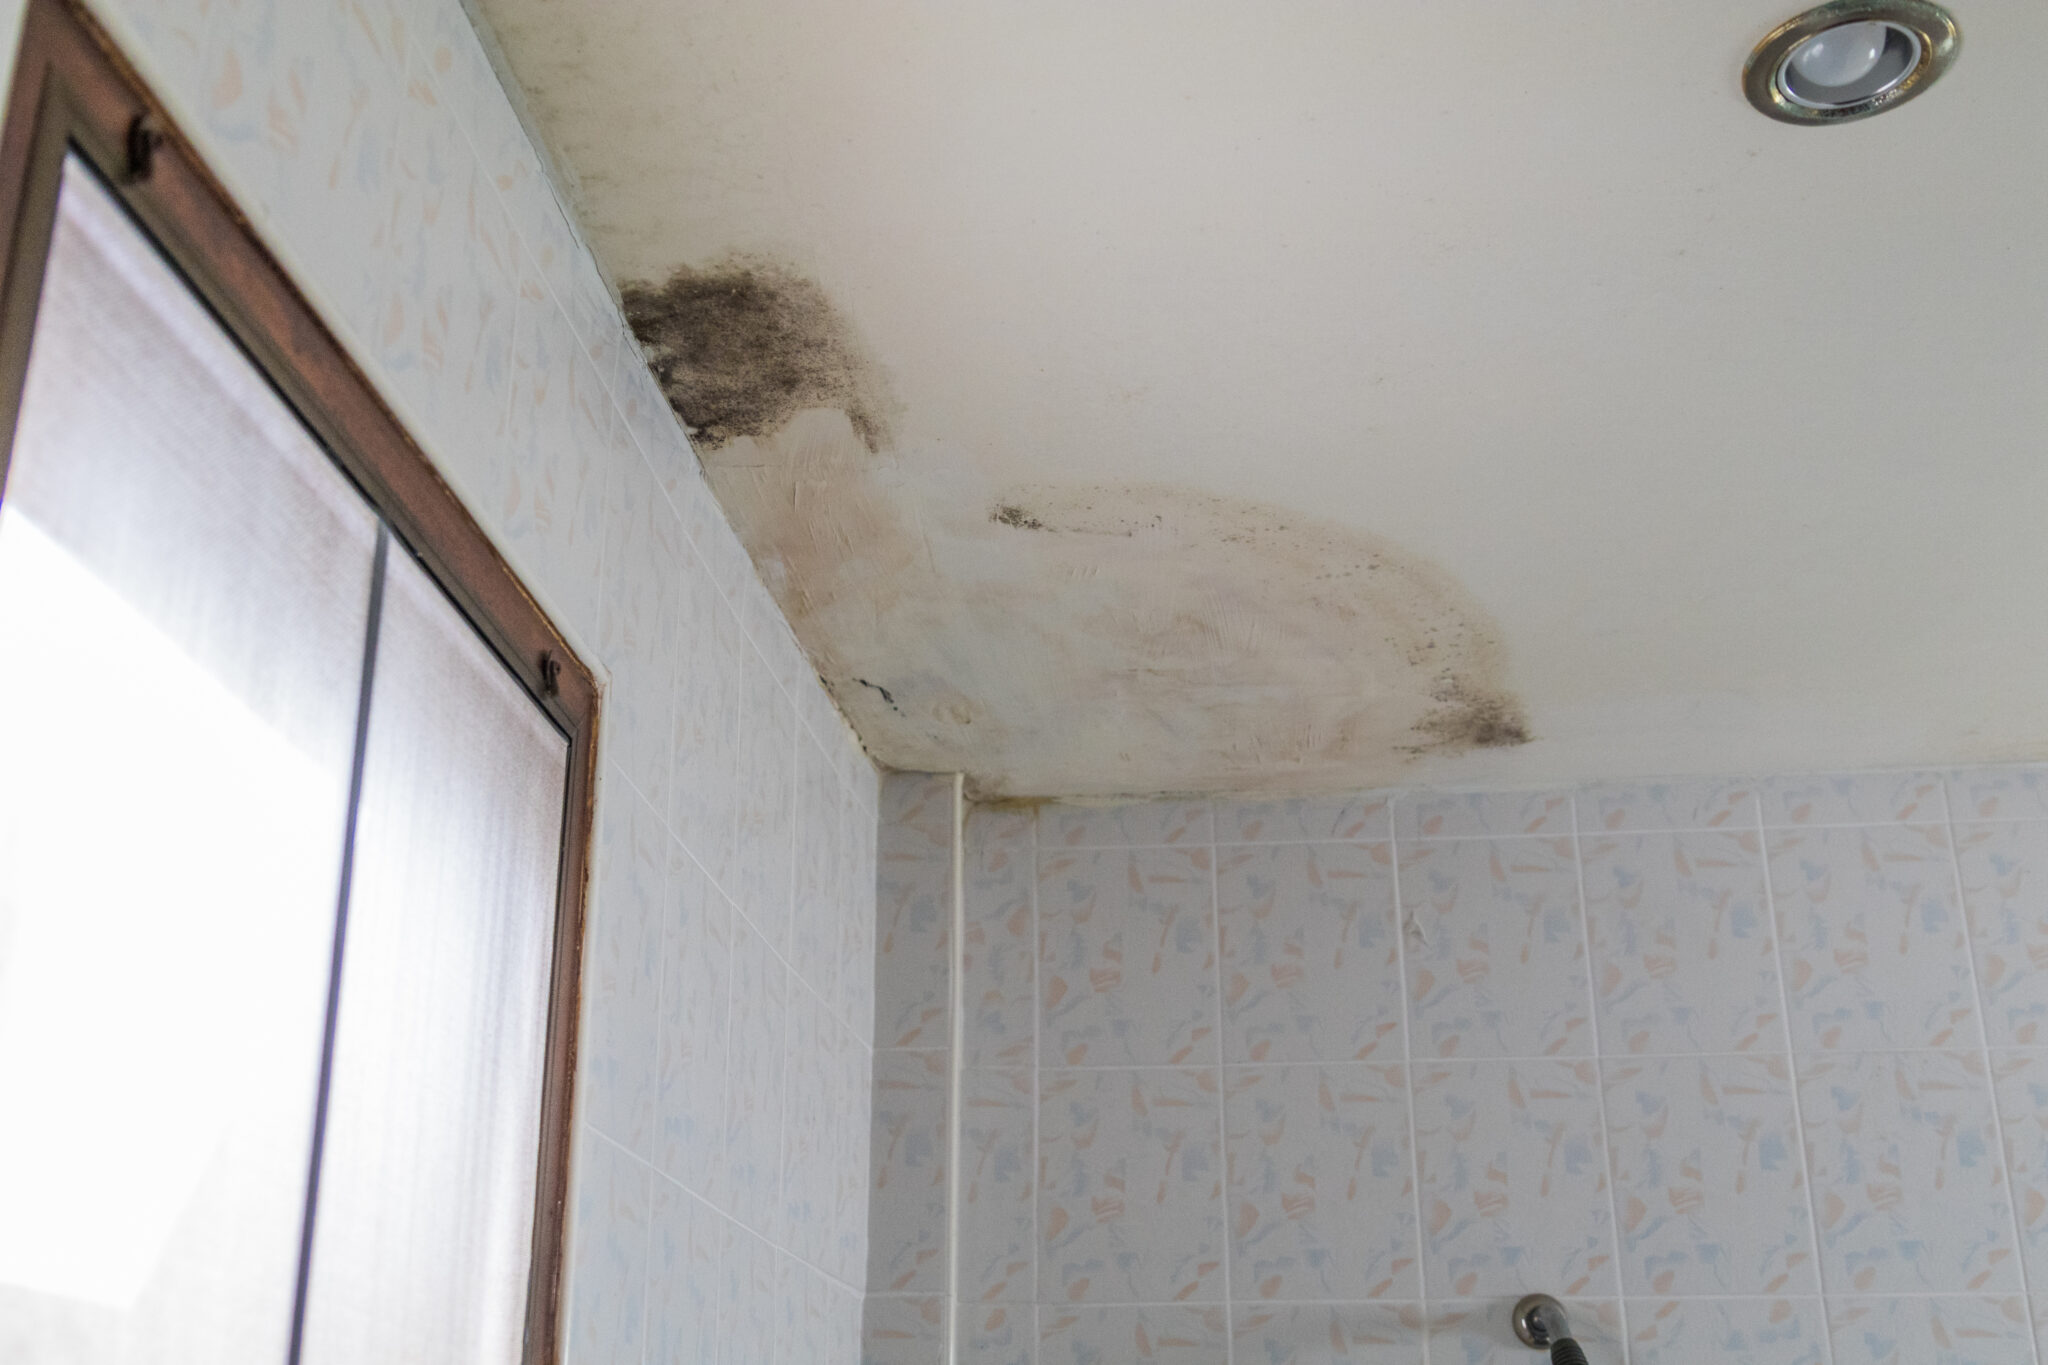
Start by visually inspecting the popcorn ceiling for any visible signs of mold growth. Look for discoloration, dark spots, or fuzzy patches on the ceiling surface. Pay attention to areas near windows, vents, and areas that are prone to moisture or water damage, as mold tends to thrive in these locations.
Odor Detection:
Mold often emits a musty and unpleasant odor. If you notice a distinct smell in the affected area, it can be an indication of mold growth. Mold odor can be particularly strong in enclosed spaces or areas with high humidity.
Read more: How To Remove Mold From Pillows
Testing:
If you suspect that the mold infestation is extensive or you are dealing with toxic mold, consider conducting mold testing. This involves taking air or surface samples and sending them to a certified laboratory for analysis. The lab results will provide detailed information about the type and concentration of mold present, helping you make informed decisions regarding the remediation process.
Professional Assessment:
If you’re unsure about the extent of the mold infestation or if you’re dealing with a large-scale mold problem, it may be beneficial to consult with a professional mold remediation specialist. They have the expertise and equipment to assess the mold infestation accurately and provide guidance on the best approach for removal.
By identifying the extent of the mold infestation, you can determine the appropriate actions required for mold removal. Whether you proceed with the removal process yourself or seek professional assistance, it’s crucial to address the underlying issue that led to mold growth in the first place. In the next step, we will explore how to determine the cause of mold growth on your popcorn ceiling.
Step 5: Determine the Cause of Mold Growth
Once you have identified the extent of the mold infestation on your popcorn ceiling, it is important to determine the underlying cause of the mold growth. Addressing the root cause is crucial to prevent future mold issues and ensure a long-lasting solution. Here are some common causes of mold growth on popcorn ceilings:
High Humidity:
Excess moisture in the air can create a damp environment that is conducive to mold growth. High humidity can be caused by inadequate ventilation, water leaks, or living in a humid climate. Addressing ventilation issues and using dehumidifiers can help reduce humidity levels and inhibit mold growth.
Read more: How To Cover A Popcorn Ceiling
Water Leaks:
Water leaks from plumbing fixtures, roof leaks, or even condensation can introduce moisture into your ceiling, providing a perfect environment for mold to thrive. It’s important to locate and fix any sources of water intrusion to prevent further mold growth. Repairing leaks and improving insulation can help prevent future water-related issues.
Poor Ventilation:
Inadequate airflow and ventilation in the room can contribute to moisture buildup and mold growth. Ensure that your ventilation systems, such as fans and air vents, are in proper working condition and provide sufficient airflow. Consider installing exhaust fans or opening windows during activities that generate moisture, such as showering or cooking.
Poorly Maintained Popcorn Ceiling:
If your popcorn ceiling has not been properly maintained, it can become more susceptible to mold growth. Dust and debris accumulate in the textured surface, providing a food source for mold. Regular cleaning and maintenance of your popcorn ceiling can help prevent mold from taking hold.
Condensation:
Condensation occurs when warm air comes into contact with a cold surface, causing moisture to accumulate. If your popcorn ceiling is near a cold area, such as an unheated attic or uninsulated walls, condensation can occur and promote mold growth. Adding insulation, improving ventilation, or using insulation vapor barriers can help mitigate condensation issues.
By determining the cause of mold growth on your popcorn ceiling, you can take the necessary steps to address the underlying issue and prevent future mold infestations. Once the cause has been identified and rectified, you are ready to move on to fixing the underlying issue in the next step.
Step 6: Fix the Underlying Issue
Now that you have determined the cause of mold growth on your popcorn ceiling, it is crucial to fix the underlying issue to prevent future mold infestations. Addressing the root cause will ensure a long-lasting solution and minimize the risk of mold returning. Here are some common steps to fix the underlying issue:
Repair Water Leaks:
If water leaks were identified as the cause of mold growth, it is important to locate and repair the source of the leak. This may involve fixing plumbing issues, repairing roof leaks, or addressing condensation problems. Engage the services of a qualified professional if needed to ensure proper repair and prevention of future water intrusion.
Improve Ventilation:
If poor ventilation was identified as a factor contributing to mold growth, take steps to improve airflow in the affected area. Install or repair ventilation fans in bathrooms, kitchens, and other areas prone to moisture. Open windows regularly to allow fresh air circulation, and consider using dehumidifiers in particularly humid spaces.
Maintain Popcorn Ceiling:
Proper maintenance and cleaning of your popcorn ceiling can help prevent mold growth. Regularly dust and vacuum the ceiling to remove debris and reduce the accumulation of organic material that can support mold growth. If the popcorn texture is severely damaged or has extensive mold growth, it may be necessary to consider removing it altogether and replacing it with a different ceiling finish.
Read more: How To Remove Mold From Ice Maker
Add Insulation and Vapor Barriers:
If condensation was identified as the cause of mold growth, consider adding insulation to cold areas or walls near the popcorn ceiling. This will help reduce the temperature differential and prevent condensation from forming. Additionally, installing vapor barriers between the ceiling and the wall cavity can help control moisture and prevent mold growth.
By addressing the underlying issue, you are taking proactive steps to prevent future mold infestations on your popcorn ceiling. Once the underlying issue has been resolved, you can move on to the actual process of removing mold from your popcorn ceiling, which will be covered in the next step.
Step 7: Removing Mold from Popcorn Ceiling
Now that you have prepared the work area, gathered the necessary tools and materials, and taken appropriate safety precautions, it’s time to proceed with removing the mold from your popcorn ceiling. Follow these steps to effectively remove the mold:
1. Mist the Ceiling:
Using a spray bottle filled with clean water, lightly mist a small section of the ceiling. This will help prevent the mold spores from becoming airborne during the removal process.
2. Scrape Off the Mold-Infested Popcorn Texture:
Using a scraper or putty knife, gently scrape off the mold-infested popcorn texture. Work in small sections, starting from one corner and moving methodically across the ceiling. Be careful not to apply excessive pressure, as it can damage the underlying surface.
Read more: How To Remove Mold From Plywood In Attic
3. Dispose of the Scraped-Off Material:
Collect the scraped-off mold-infested popcorn texture in disposable bags. Seal the bags tightly to prevent the spread of mold spores. Properly dispose of the bags as directed by your local waste management guidelines.
4. Repeat the Process:
Continue misting, scraping, and collecting the mold-infested popcorn texture section by section until the entire affected area has been addressed. Remember to frequently mist the ceiling to minimize the release of mold spores into the air.
5. Vacuum the Ceiling and Surrounding Area:
Once the mold-infested popcorn texture has been removed, use a vacuum cleaner with a HEPA filter to carefully vacuum the ceiling and surrounding area. This will help remove any residual mold spores and debris that may have settled during the removal process.
6. Clean the Ceiling:
Wipe down the ceiling surface with a damp cloth or sponge to remove any remaining mold spores or residue. Dispose of the cloth or sponge immediately after use to prevent the spread of mold. Avoid oversaturating the ceiling to minimize the risk of moisture damage.
Read more: How To Remove Mold From Furniture Fabric
7. Allow the Ceiling to Dry:
Allow the ceiling to fully dry before proceeding with any further steps. Use fans or dehumidifiers to expedite the drying process, taking care to ensure proper ventilation to prevent the accumulation of moisture.
By following these steps, you will be able to effectively remove the mold from your popcorn ceiling. However, remember to exercise caution and take breaks when necessary, especially if you are dealing with a large area or if the work becomes physically demanding.
Step 8: Cleaning Up After Mold Removal
After successfully removing the mold from your popcorn ceiling, it is important to thoroughly clean up the area to ensure that all traces of mold spores and debris are eliminated. Follow these steps to effectively clean up after mold removal:
1. Dispose of Protective Gear:
Dispose of your gloves, goggles, respirator mask, and disposable coveralls in sealed bags. This will prevent the spread of any remaining mold spores.
2. Vacuum the Area:
Use a vacuum cleaner with a HEPA filter to vacuum the entire work area, including the floor, walls, and any nearby surfaces. This will help remove any loose mold spores and ensure a thorough clean-up.
Read more: How To Remove Mold From Toilet Seat
3. Wipe Down Surfaces:
Wipe down all surfaces in the work area, including walls, windowsills, and furniture, with a damp cloth or sponge. This will help remove any remaining dust or mold spores that may have settled during the removal process.
4. Dispose of Waste Materials:
Properly dispose of all waste materials, including the bags containing the scraped-off mold-infested popcorn texture and any used cleaning cloths or sponges. Follow local waste management guidelines for safe disposal.
5. Launder Contaminated Clothing:
If any clothing or linens came into contact with mold spores, wash them separately in hot water and detergent. Use the highest heat setting appropriate for the fabric to ensure thorough cleaning.
6. Clean and Disinfect Tools:
Thoroughly clean and disinfect all tools used during the mold removal process. Use a mixture of bleach and water or an appropriate disinfectant to sanitize the tools and prevent any potential cross-contamination.
Read more: How To Remove Mold From Interior Walls
7. Monitor the Area:
After cleaning up, keep an eye on the area to ensure that no new mold growth occurs. Monitor for any signs of moisture or water damage and promptly address any issues to prevent future mold problems.
By following these steps, you can effectively clean up the area after mold removal, minimizing the risk of recontamination and ensuring a safe and mold-free environment. However, it’s important to keep in mind that proper mold prevention measures, such as controlling humidity levels and addressing any moisture issues, are crucial in maintaining a mold-free home.
Step 9: Inspection and Preventive Measures
After completing the mold removal and cleanup process on your popcorn ceiling, it is important to conduct a thorough inspection of the area to ensure that all traces of mold have been effectively eliminated. Additionally, implementing preventive measures will help minimize the risk of future mold growth. Here’s what you need to do:
1. Visual Inspection:
Carefully examine the treated area to ensure that no signs of mold growth remain. Check for any discoloration or unusual spots on the ceiling surface. Use a flashlight to thoroughly inspect corners, edges, and any other potential hiding spots.
2. Check for Moisture Sources:
Inspect the surrounding area for any signs of water leaks, condensation, or high humidity. Look for any visible damage to pipes, roofs, or windows that may be causing moisture intrusion. Addressing these issues promptly will help prevent future mold growth.
Read more: How To Remove Mold From Carpet In A Car
3. Improve Ventilation:
If ventilation was determined to be a contributing factor to the mold growth, take steps to improve airflow in the area. Install or repair ventilation fans and ensure that they are used during activities that generate moisture, such as showering or cooking. Open windows regularly to allow fresh air circulation.
4. Maintain Proper Humidity Levels:
Keep an eye on humidity levels in the room to prevent excessive moisture. Use dehumidifiers in areas prone to high humidity, and ensure that they are regularly maintained and emptied. Aim to keep the humidity level between 30% and 50% to inhibit mold growth.
5. Regular Cleaning and Maintenance:
Implement a regular cleaning routine for your popcorn ceiling and the surrounding area. Dust and vacuum the ceiling surface to prevent debris buildup. Promptly address any water leaks, condensation issues, or other potential sources of moisture to prevent mold from returning.
6. Monitor for Signs of Mold:
Continuously monitor the treated area and your home for any signs of renewed mold growth. Keep an eye out for musty odors, discoloration, and any new mold-like spots. If you notice any suspicious signs, address them promptly to prevent the mold from spreading.
By conducting regular inspections and implementing preventive measures, you can reduce the risk of future mold growth on your popcorn ceiling. Remember, early detection and prompt action are key to maintaining a healthy and mold-free living environment.
Read more: How To Remove Mold From Lunch Box
Conclusion
Removing mold from your popcorn ceiling is crucial not only for the aesthetic appeal of your home but also for the health and well-being of you and your family. By following the steps outlined in this comprehensive guide, you can effectively remove mold from your popcorn ceiling and create a safe and clean living environment.
Throughout the process, it is important to prioritize safety by wearing appropriate protective gear, properly preparing the work area, and taking necessary precautions to minimize exposure to mold spores. Additionally, addressing the underlying cause of mold growth, such as water leaks or poor ventilation, is vital to prevent future mold problems.
Remember to go through each step diligently, from gathering the required tools and materials to conducting a thorough inspection and implementing preventive measures. Take the time to properly clean up after mold removal and dispose of any waste materials responsibly.
Regular maintenance, such as cleaning and dusting your popcorn ceiling, monitoring humidity levels, and addressing any moisture sources promptly, will help prevent future mold growth and maintain a healthy living environment.
If you are unsure about the extent of the mold infestation or encounter toxic mold, it is advisable to consult with a professional mold remediation specialist for expert guidance and assistance in handling the situation.
By proactively addressing mold issues on your popcorn ceiling and implementing preventive measures, you can ensure a mold-free and comfortable space in your home. Remember, early detection and swift action are key to preventing mold from spreading and minimizing potential health risks. Take the necessary steps to safeguard your home and the health of your loved ones from mold infestations.
Now that you've tackled mold on your popcorn ceiling, why stop there? If you've noticed similar issues on other surfaces, learning effective mold removal from wood furniture could save your cherished pieces. Also, if your ceiling needs a refresh or you're considering adding texture, mastering how to do a popcorn ceiling could be your next project. And don't forget, regular home maintenance is key to preventing these issues from arising again. Stay ahead with timely upkeep tips that ensure your living space remains safe and appealing.
Frequently Asked Questions about How To Remove Mold From Popcorn Ceiling
Was this page helpful?
At Storables.com, we guarantee accurate and reliable information. Our content, validated by Expert Board Contributors, is crafted following stringent Editorial Policies. We're committed to providing you with well-researched, expert-backed insights for all your informational needs.
0 thoughts on “How To Remove Mold From Popcorn Ceiling”