
Articles
How To Restore Old Steamer Trunks
Modified: January 23, 2024
Learn the step-by-step process of restoring old steamer trunks with our informative articles. Revive cherished heirlooms and unleash their true beauty!
(Many of the links in this article redirect to a specific reviewed product. Your purchase of these products through affiliate links helps to generate commission for Storables.com, at no extra cost. Learn more)
Introduction
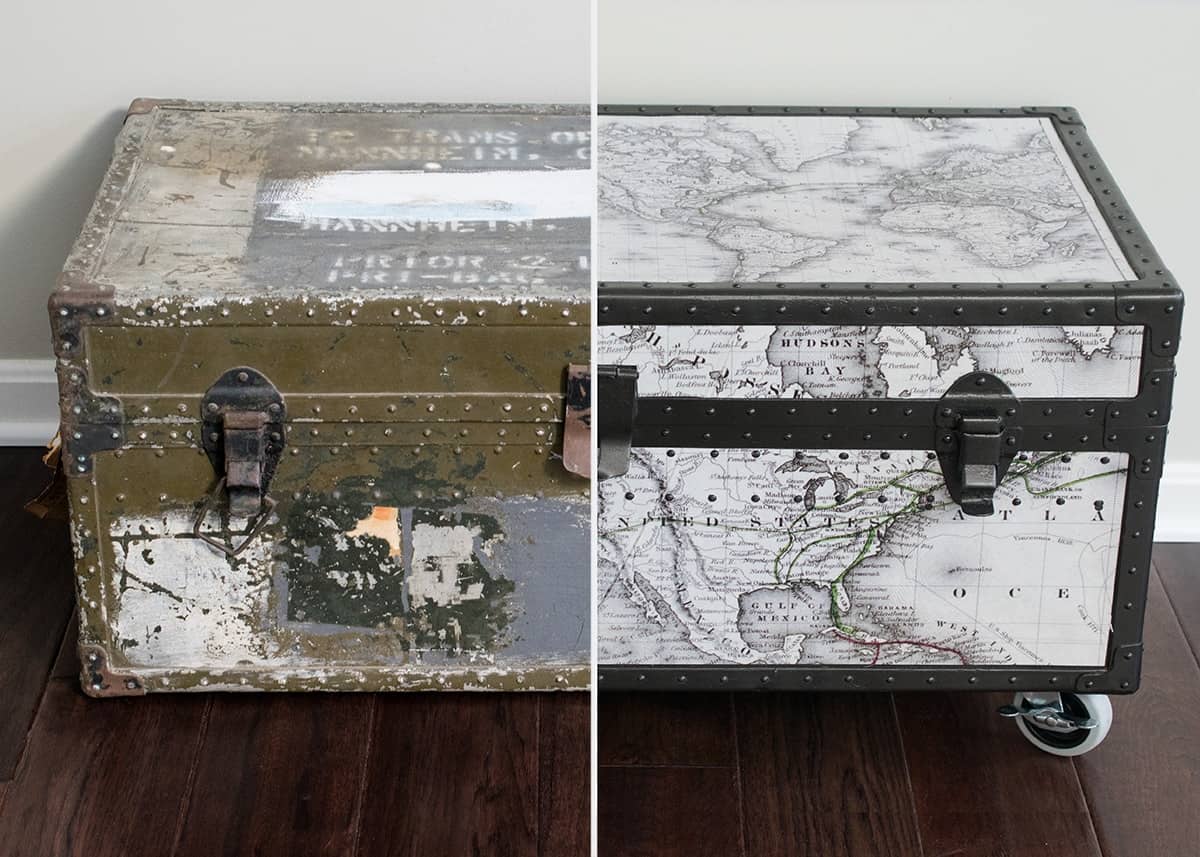
Steamer trunks, with their vintage charm and historical significance, have become increasingly popular for collectors and antique enthusiasts. These timeless pieces of luggage were commonly used in the early 20th century for long-distance travel by steamship or train. Over time, however, these trunks can become worn, damaged, or covered in layers of old paint or varnish.
Restoring an old steamer trunk can be a rewarding project that not only brings new life to a cherished heirloom but also allows you to connect with history. Whether you plan to showcase the trunk in your home or preserve its value for future generations, this article will guide you through the step-by-step process of restoring an old steamer trunk.
Before starting your restoration project, it is essential to gather the necessary tools and materials. This may include cleaning supplies, sandpaper, paint or varnish remover, paint or varnish, replacement hardware, leather or metal restoration products, and fabric for the trunk’s interior. Additionally, ensure you have a well-ventilated workspace and appropriate safety gear, such as gloves, goggles, and a mask.
Let’s dive into the steps required to restore an old steamer trunk and breathe new life into this vintage treasure.
Key Takeaways:
- Revive history and showcase timeless charm by restoring old steamer trunks. From cleaning to adding finishing touches, this DIY project preserves authenticity and brings new life to cherished heirlooms.
- Patience and attention to detail are key in restoring old steamer trunks. Each step, from repairing damaged parts to adding personalized touches, contributes to reviving history and preserving a piece of the past.
Read more: How To Clean Old Steamer Trunk
Step 1: Cleaning the Trunk
The first step in restoring an old steamer trunk is to thoroughly clean it. Over time, trunks can accumulate dirt, dust, and grime, which can obscure their original beauty. Here are the essential steps for cleaning your trunk:
- Remove loose debris: Begin by removing any loose debris or items from the trunk, such as old papers, cobwebs, or loose fabric. Use a soft brush or vacuum cleaner with a brush attachment to carefully remove dust and dirt from all surfaces.
- Clean the exterior: Depending on the condition of your trunk, you can use a mild solution of warm water and a gentle soap to clean the exterior. Avoid using harsh chemicals or abrasive cleaners, as they can damage the trunk’s finish. Gently scrub the trunk with a soft cloth or sponge, paying particular attention to any areas with stubborn stains or grime.
- Address stains: If you encounter stubborn stains or discoloration on the trunk’s exterior, you can try using a specialized stain remover or a gentle solvent recommended for the trunk’s material. Always test the solution on a small, inconspicuous area first to ensure it does not cause any damage.
- Clean the interior: Remove the trunk’s interior lining, if possible, and gently clean it using a mild detergent or fabric cleaner. If the lining is beyond repair, consider replacing it with a new fabric that matches the trunk’s original style. For wooden interior surfaces, use a fine-grit sandpaper to remove any dirt or stains gently.
- Dry thoroughly: After cleaning, ensure that both the trunk’s exterior and interior are completely dry before proceeding to the next step. Excess moisture can cause the wood to swell or lead to mold and musty smells.
By following these cleaning steps, you will remove dirt, grime, and stains, revealing the true beauty of your old steamer trunk. With a clean slate, you can now move on to repairing any damaged parts of the trunk.
Step 2: Repairing Damaged Parts
Restoring an old steamer trunk often involves addressing various types of damage that may have occurred over the years. Whether it’s broken hardware, damaged wood, or torn leather, repairing these elements is crucial to restore the trunk to its former glory. Here are the steps to repair the damaged parts of your steamer trunk:
- Assess the damage: Carefully examine the trunk and identify any areas that require repair. This may include broken or missing hardware, cracked or split wood, torn leather, or loose fittings. Make a list of the necessary repairs and gather the appropriate materials.
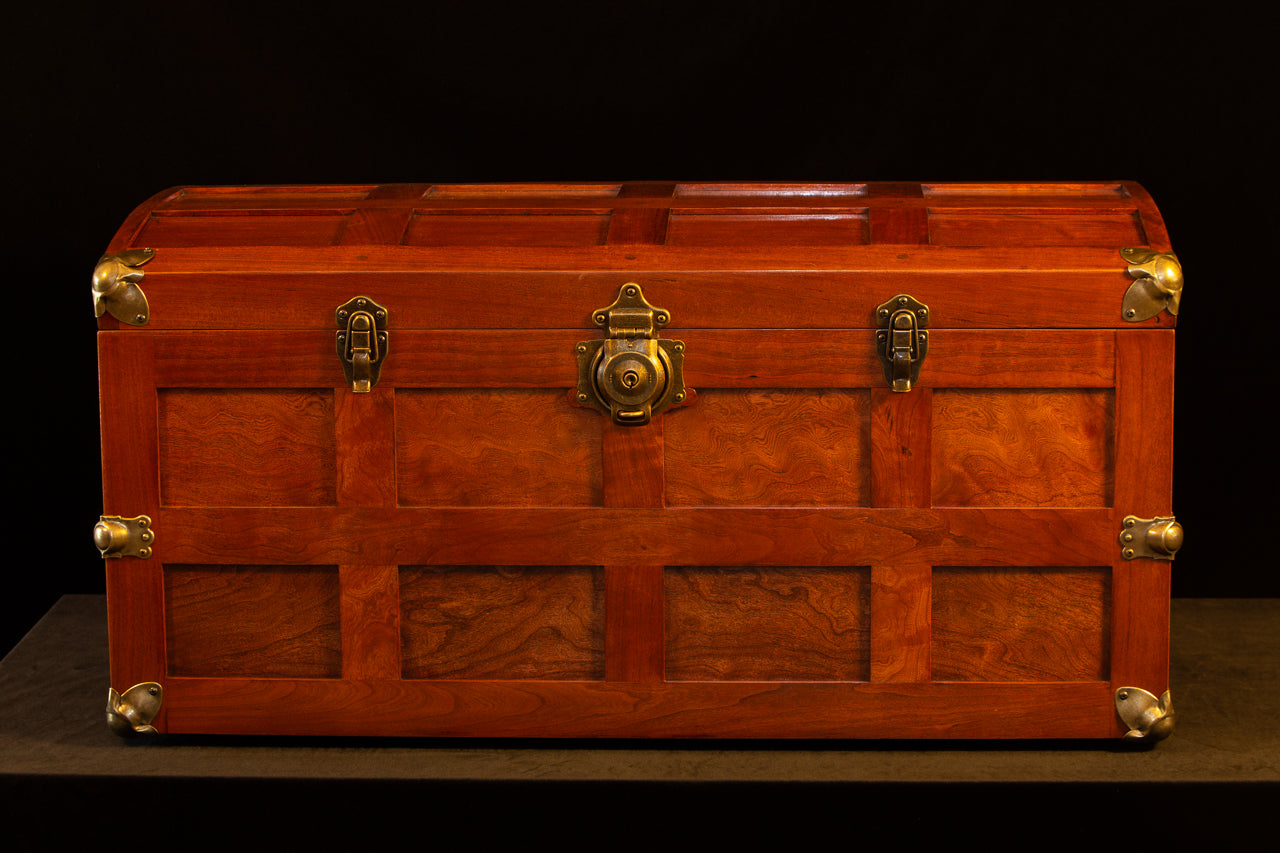
- Replace hardware: If your trunk’s hardware, such as latches, handles, or corner protectors, is damaged or missing, consider replacing them with authentic reproductions or antique hardware. Remove the old hardware using a screwdriver or pliers, and attach the new pieces according to the manufacturer’s instructions. This step will not only restore functionality but also enhance the trunk’s aesthetic appeal.
- Repair wood damage: For damaged or cracked wooden parts, you can use wood glue or epoxy to reattach loose pieces and fill in any cracks. Apply the adhesive to the damaged area, align the pieces, and use clamps or heavy objects to hold them in place until the glue dries. Once the wood is secure, sand the repaired area gently to create a smooth surface.
- Restore leather: If your trunk features leather accents or straps that are torn or worn, you can restore them using leather restoration products. Clean the leather with a mild leather cleaner, and use a leather repair kit or conditioner to mend any tears or cracks. Follow the manufacturer’s instructions to achieve the best results.
- Secure loose fittings: Check for any loose or wobbly fittings on the trunk, such as metal trim or decorative elements. Use a suitable adhesive or screws to secure them in place. Ensure that the repaired fittings are aligned and flush with the trunk’s surface.
By repairing the damaged parts of your steamer trunk, you are not only enhancing its structural integrity but also preserving its authenticity. Once the necessary repairs are complete, you can move on to stripping off old paint or varnish from the trunk’s surface.
Step 3: Stripping Old Paint or Varnish
Many old steamer trunks have been painted or coated with varnish over the years, often obscuring the natural beauty of the wood. To restore the trunk to its original state, it may be necessary to strip off the old paint or varnish. Here’s how you can do it:
- Prepare the workspace: Find a well-ventilated area for the stripping process. Lay down a drop cloth or old newspaper to catch any drips or spills. Put on protective gloves, goggles, and a mask to safeguard yourself during the process.
- Choose a stripping method: There are various methods to strip off paint or varnish from wood, including chemical paint removers, heat guns, or sanding. Research and select the method that best suits your preferences and the condition of the trunk.
- Apply the stripping agent: If you opt for a chemical paint remover, follow the manufacturer’s instructions for application. Apply the stripping agent evenly over the trunk’s surface, ensuring complete coverage. Allow it to sit for the recommended time to loosen the old finish.
- Remove the old paint or varnish: Once the stripping agent has had sufficient time to work, use a scraper or putty knife to gently scrape off the softened paint or varnish. Work in the direction of the wood grain to prevent any damage. Repeat this process as necessary until all of the old finish has been removed.
- Clean the wood: After removing the old paint or varnish, wipe down the wood with a clean and damp cloth to remove any residue or stripper. Allow the trunk to dry completely before proceeding.
- Sand the surfaces: To achieve a smooth and even finish, lightly sand the stripped surfaces using fine-grit sandpaper. This will help remove any remaining traces of old finish and prepare the wood for the next step in the restoration process.
Stripping off the old paint or varnish is a crucial step in restoring the beauty of your steamer trunk. Once the stripping process is complete and the wood is smooth, you can move on to the next step: sanding and preparing the trunk for painting or varnishing.
Step 4: Sanding and Preparing for Painting
After stripping off the old paint or varnish, the next step in restoring an old steamer trunk is to sand and prepare the surfaces for painting or varnishing. Sanding helps smooth out any imperfections, evens out the wood, and provides a clean canvas for the new finish. Here’s how to properly sand and prepare your trunk:
- Gather the necessary materials: You will need medium to fine-grit sandpaper (such as 120-220 grit), sanding blocks or tools, a soft cloth, and a tack cloth (a special cloth to remove dust and debris).
- Sand the surfaces: Begin by sanding the entire surface of the trunk using smooth and even strokes. Make sure to follow the direction of the wood grain to avoid leaving visible scratches. Pay extra attention to any rough or uneven areas, and continue sanding until the wood feels smooth to the touch.
- Remove dust: After sanding, use a soft cloth or a tack cloth to remove any dust or debris from the trunk. This step is crucial to ensure a clean and smooth finish.
- Fill in imperfections (optional): If there are any visible cracks, dents, or holes in the wood, you can use a wood filler or putty to fill them in. Apply the filler, following the manufacturer’s instructions, and allow it to dry completely. Once dry, sand the filled areas lightly to ensure a seamless appearance.
- Final sanding: For a truly polished look, do a final sanding using a fine-grit sandpaper. This step helps further smooth the surfaces and prepares the trunk for painting or varnishing.
- Remove dust again: After the final sanding, use a tack cloth to remove any remaining dust particles from the trunk. Thoroughly clean and wipe down all surfaces to ensure they are free from debris.
By sanding and preparing the surfaces of your steamer trunk, you are creating the ideal foundation for the new finish. Whether you choose to paint or varnish, the next step will guide you through the process of applying the new coat to rejuvenate your trunk’s appearance.
When restoring old steamer trunks, start by cleaning the surface with a mild soap and water solution to remove dirt and grime. Then, use a wood cleaner and conditioner to restore the wood’s natural shine and protect it from future damage.
Read more: How To Restore Old Mirrors
Step 5: Applying the New Paint or Varnish
Once you have sanded and prepared the surfaces of your steamer trunk, it’s time to apply the new paint or varnish. This step will give your trunk a fresh and polished look, while also providing protection for the wood. Follow these steps for a successful application:
- Choose the right finish: Decide whether you want to paint the trunk with a color of your choice or apply a clear varnish to showcase the natural beauty of the wood. Consider the overall aesthetic you want to achieve and select the appropriate finish accordingly.
- Prepare the area: Find a well-ventilated workspace to ensure proper air circulation during the painting or varnishing process. Lay down a drop cloth or newspaper to protect the surrounding surfaces from any accidental spills or splatters.
- Apply the paint or varnish: Using a brush or a foam applicator, apply thin and even coats of paint or varnish to the surfaces of the trunk. Start with the top and work your way to the sides, ensuring complete coverage. Allow each layer to dry according to the manufacturer’s instructions before applying the next coat.
- Sand between coats (optional): If you desire an extra smooth finish, you can lightly sand the surfaces between coats using a fine-grit sandpaper. This step helps remove any imperfections and provides a better surface for subsequent coats.
- Apply multiple coats: Depending on the desired finish and the type of paint or varnish you’re using, you may need to apply multiple coats to achieve the desired depth and richness. Always allow each layer to dry completely before applying the next one.
- Let it cure: Once you have applied all the necessary coats, allow the paint or varnish to cure fully according to the manufacturer’s instructions. This ensures that the finish is durable and long-lasting.
By applying a fresh coat of paint or varnish to your steamer trunk, you are revitalizing its appearance and protecting the wood from further damage. This step brings you one step closer to completing the restoration process. The next step will guide you through restoring the leather or metal hardware of the trunk.
Step 6: Restoring Leather or Metal Hardware
Restoring the leather or metal hardware of your steamer trunk is an essential part of the restoration process. These elements add charm and authenticity to the trunk, and with proper care, they can regain their original beauty. Follow these steps to restore the leather or metal hardware:
- Clean the hardware: Start by cleaning the leather or metal hardware using a mild soap or specialized cleaner. Gently scrub the hardware with a soft brush or cloth to remove dirt, grime, and tarnish. Rinse with clean water and pat dry.
- Remove tarnish (for metal hardware): If the metal hardware is tarnished, you can restore its shine by using a metal polish or a mixture of vinegar and salt. Apply the polish or vinegar-salt paste to the hardware, then gently rub with a soft cloth or a toothbrush. Rinse thoroughly and dry.
- Condition the leather: If your trunk features leather accents or straps, it’s important to condition them to prevent drying and cracking. Apply a leather conditioner or cream on a soft cloth and massage it into the leather surfaces. Allow the conditioner to absorb and wipe off any excess product.
- Repair torn or worn leather: If the leather is torn or worn, consider using a leather repair kit to mend the damage. Following the instructions provided with the kit, apply the repair compound and smooth it out with a spatula or your fingers. Let it dry completely, then gently sand and buff the repaired area to blend it with the surrounding leather.
- Replace missing hardware (if necessary): If some of the hardware is missing or beyond repair, consider purchasing authentic replacement hardware to maintain the trunk’s original appearance. Ensure that the new hardware matches the style and size of the original pieces.
- Install the restored or new hardware: Carefully attach the restored or replacement hardware to the trunk using screws, nails, or rivets. Ensure that the hardware is securely fastened and aligned properly.
By restoring the leather or metal hardware, you are preserving the authenticity and historical charm of your steamer trunk. These elements, once revitalized, will beautifully complement the rest of the restored trunk. The next step will guide you through replacing or repairing the trunk’s interior.
Step 7: Replacing or Repairing the Trunk’s Interior
The interior of a steamer trunk plays a significant role in both its functionality and aesthetics. Over time, the interior lining, compartments, or padding may become worn-out, torn, or damaged. Restoring or replacing the trunk’s interior will not only enhance its appearance but also ensure that it remains usable and functional. Follow these steps to replace or repair the trunk’s interior:
- Assess the interior condition: Carefully examine the interior lining, trays, and compartments to determine the extent of damage or wear. Look for any torn fabric, broken hinges, or damaged padding that needs attention.
- Remove the old interior: If the current interior is beyond repair or you wish to completely change the design, carefully remove the old fabric, padding, or compartments. Use a seam ripper or a small pair of scissors to detach the fabric and be cautious not to damage the trunk’s structure.
- Clean the interior: Once the old interior is removed, clean the trunk’s interior surfaces with a mild detergent and warm water. Use a sponge or cloth to gently wipe away any dirt, stains, or residue. Allow the interior to dry completely before proceeding.
- Replace or repair the lining: Measure the dimensions of the interior space and cut a new fabric lining to fit. Choose a durable and aesthetically pleasing fabric that suits the trunk’s style. Attach the new fabric using adhesive, staples, or upholstery tacks, ensuring it is secure and smooth. If the original lining is salvageable, repair any tears or loose areas using fabric glue or hand stitching.
- Address padding and compartments: If the trunk originally had padding or compartments, recreate them using appropriate materials. Cut foam or batting to size and attach it to the designated areas using adhesive or fabric glue. Create or repair the compartments using thin wood panels or cardboard, adhering them securely in place.
- Add decorative elements: To enhance the interior’s aesthetics, consider adding decorative elements such as trims, ribbons, or buttons. Attach them to the fabric or lining using fabric glue or small stitches for a personalized touch.
- Reinstall hardware and fittings: Once the new or repaired interior is in place, reattach any hardware or fittings that were removed. Secure them tightly but ensure they don’t damage the fabric or lining.
By replacing or repairing the trunk’s interior, you are restoring its functionality and preserving its original charm. Take your time in selecting materials and designing the interior, as it greatly contributes to the overall appeal of the restored steamer trunk. The final step will guide you through adding the finishing touches to complete the restoration process.
Step 8: Adding Finishing Touches
Adding the finishing touches to your restored steamer trunk will not only enhance its appearance but also give it a personalized touch. These final touches help bring the entire restoration project together and make the trunk truly shine. Follow these steps to add the finishing touches:
- Clean and polish: Give the entire trunk a final cleaning, ensuring that every surface is free from dust, debris, and fingerprints. Use a gentle cleaner appropriate for the trunk’s material, and polish any metal hardware for a brilliant shine.
- Apply protective coatings: Consider applying a protective coat of wax or sealant to the exterior surfaces of the trunk. This helps protect the paint, varnish, or wood from scratches, moisture, and fading. Follow the manufacturer’s instructions for application.
- Accessorize with trunk corners and straps: Add decorative metal trunk corners or leather straps to enhance the vintage appeal of the trunk. These accessories not only protect the corners from wear but also add a touch of authenticity.
- Label or personalize: Consider adding a personalized label or nameplate to the trunk, showcasing its history or your name. This adds a unique touch and makes the trunk even more special.
- Line the compartments: If your trunk has interior compartments, consider lining them with fabric or velvet. This adds a luxurious feel and protects the items stored inside.
- Final inspection: Take a moment to inspect the trunk and ensure that all the hardware is secure, the paint or varnish is smooth and even, and the interior is well-fitted and clean.
- Showcase your restored trunk: Finally, find a prominent place in your home to display your restored steamer trunk. Whether it’s in the living room as a unique centerpiece or in a bedroom as a functional and charming storage solution, let your restored trunk take center stage.
Adding the finishing touches completes the restoration process and allows you to truly appreciate the beauty and craftsmanship of your steamer trunk. Take pride in the work you’ve done and enjoy the admiration it will receive from others.
Remember, the restoration process requires time, patience, and attention to detail. With proper care and maintenance, your restored steamer trunk will continue to be a cherished heirloom for years to come.
Read more: How To Make A Steamer Trunk
Conclusion
Restoring an old steamer trunk is a labor of love that allows you to revive a piece of history and bring it back to its former glory. By following the step-by-step process outlined in this article, you can successfully restore your steamer trunk and showcase its timeless charm.
Your journey began with cleaning the trunk to remove years of dirt and grime. Repairing damaged parts ensured its structural integrity, allowing you to move on to stripping off old paint or varnish. With a clean canvas, you sanded and prepared the surfaces for painting or varnishing, giving the trunk a fresh and polished look.
Restoration wouldn’t be complete without addressing the leather or metal hardware, as they add authenticity and visual appeal to the trunk. Moreover, replacing or repairing the trunk’s interior provides functionality and enhances its overall aesthetic.
Finally, the finishing touches give your restored trunk that personalized and unique touch, making it a standout piece in any space. Whether it’s the addition of decorative elements, labels, or protective coatings, these details bring the entire restoration process together.
Remember, patience and attention to detail are key throughout the restoration journey. Take your time, enjoy the process, and don’t be afraid to showcase your restored steamer trunk with pride once it’s completed.
Restoring an old steamer trunk is not only a fulfilling DIY project but also a way to connect with history and preserve a piece of the past. So go ahead, embark on this restoration adventure, and give new life to your beloved steamer trunk.
Frequently Asked Questions about How To Restore Old Steamer Trunks
Was this page helpful?
At Storables.com, we guarantee accurate and reliable information. Our content, validated by Expert Board Contributors, is crafted following stringent Editorial Policies. We're committed to providing you with well-researched, expert-backed insights for all your informational needs.






0 thoughts on “How To Restore Old Steamer Trunks”