Articles
How To Spray Foam Insulation In Attic
Modified: August 28, 2024
Learn how to spray foam insulation in your attic with these informative articles. Increase energy efficiency and save on heating and cooling bills.
(Many of the links in this article redirect to a specific reviewed product. Your purchase of these products through affiliate links helps to generate commission for Storables.com, at no extra cost. Learn more)
Introduction
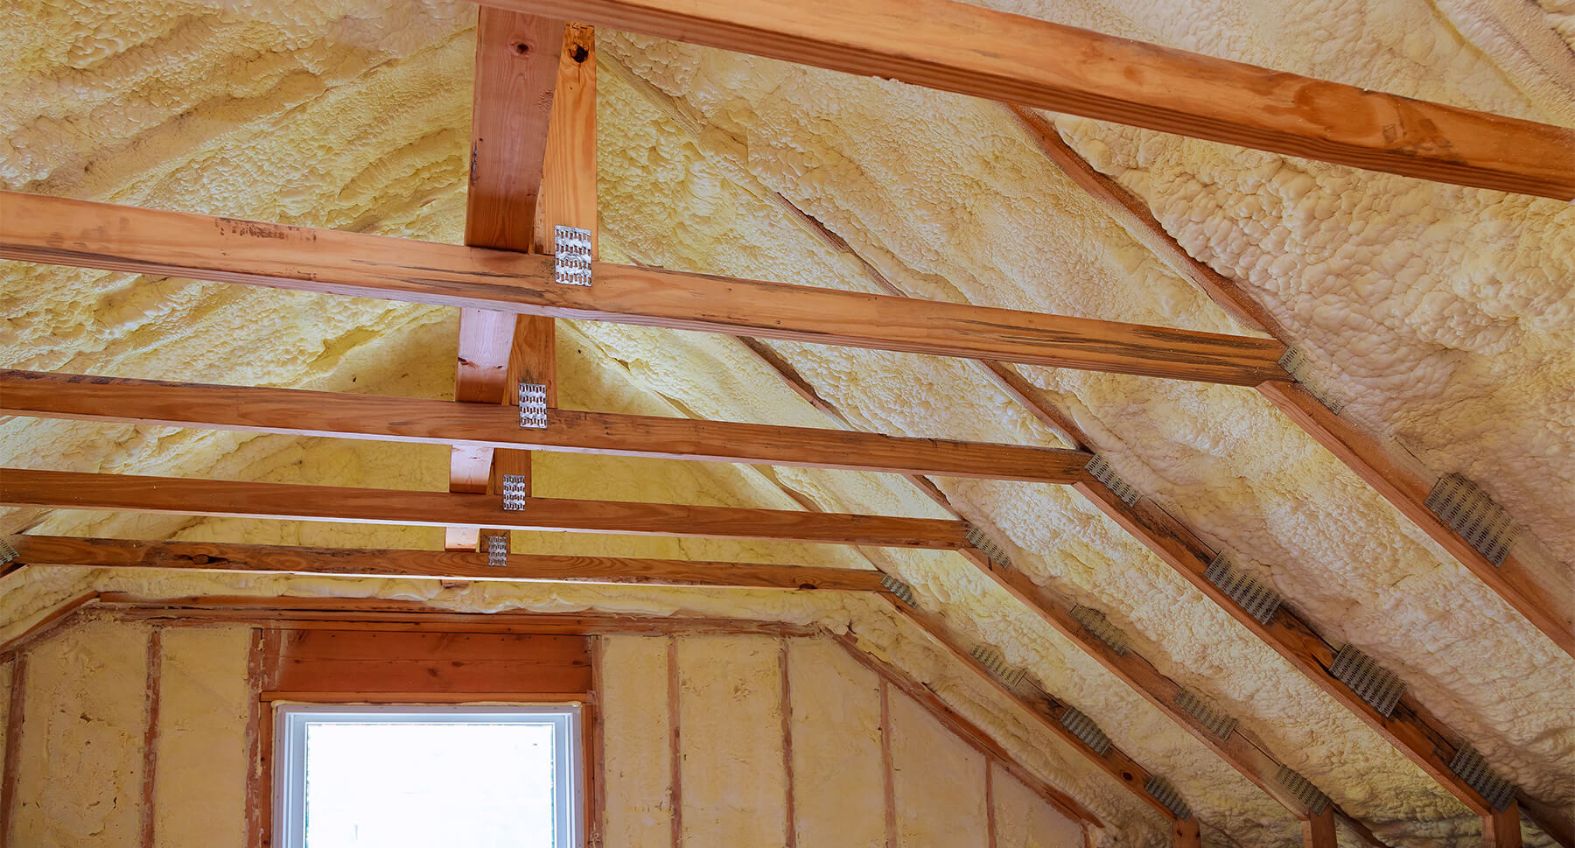
Welcome to our comprehensive guide on how to spray foam insulation in the attic. If you’re looking to improve the energy efficiency of your home and create a more comfortable living space, adding insulation to your attic is a great place to start. Spray foam insulation is a popular choice due to its ability to provide excellent thermal insulation and air sealing properties.
In this article, we will walk you through the step-by-step process of spraying foam insulation in the attic. We will cover the necessary safety precautions, materials and tools required, as well as provide detailed instructions on preparing the attic and planning the insulation project. We will also discuss how to mix the spray foam insulation correctly and provide tips on applying it to ensure proper coverage and effectiveness.
Adding insulation to your attic can help prevent heat loss during the winter and reduce heat gain during the summer, leading to lower energy bills and a more comfortable indoor environment. By sealing air leaks and improving thermal insulation, you can also reduce the strain on your heating and cooling systems, extending their lifespan and lowering maintenance costs.
Before you start the project, it’s important to familiarize yourself with the safety precautions to ensure a smooth and accident-free insulation process. Safety should always be a top priority, and following the proper guidelines will help protect you and anyone else involved in the project.
Now, let’s dive into the details of how to spray foam insulation in the attic and transform it into a well-insulated, energy-efficient space.
Key Takeaways:
- Prioritize safety by wearing protective gear, ventilating the area, and following manufacturer guidelines when applying spray foam insulation in the attic. Proper preparation, planning, and application are crucial for a successful and effective insulation project.
- Ensure thorough coverage, address hard-to-reach areas, and maintain proper thickness when applying spray foam insulation. Regular maintenance, monitoring of moisture levels, and seeking professional assistance contribute to long-term energy efficiency and comfort in your home.
Read more: How To Clean Spray Foam Insulation
Safety Precautions
When it comes to working with spray foam insulation, safety should be your utmost priority. Here are some important safety precautions to follow before and during the insulation process:
- Wear protective gear: Before you begin, make sure to wear long sleeves, pants, gloves, safety goggles, and a respirator mask to protect yourself from any potential skin or respiratory irritation caused by the chemicals in the spray foam.
- Ventilate the area: Proper ventilation is crucial when using spray foam insulation. Open windows and use fans to ensure fresh air circulation throughout the attic. This will help reduce the concentration of fumes and minimize the risk of inhalation.
- Turn off pilot lights: If your attic contains any gas appliances or pilot lights, be sure to turn them off before starting the insulation process. Spray foam insulation is highly flammable, so eliminating any potential ignition sources is essential for your safety.
- Isolate the work area: Seal off the attic from the rest of your home by putting up temporary barriers or plastic sheets. This prevents the spray foam insulation and fumes from spreading to other areas of the house.
- Protect nearby surfaces: Cover any surfaces, fixtures, or objects in the attic that you don’t want the insulation to come into contact with. Spray foam can be difficult to remove once it hardens, so taking precautions to protect surrounding areas is essential.
- Work in teams: It’s always recommended to have someone else present when working with spray foam insulation. They can assist in ensuring your safety and provide help in case of an emergency.
- Read and follow product instructions: Each spray foam insulation product may have specific safety guidelines and application instructions. Make sure to carefully read and follow the manufacturer’s instructions to ensure safe and effective use.
Remember, safety is not something to be taken lightly. Taking these precautions will help minimize the risk of accidents and ensure a successful insulation project. Now that we have covered the safety measures, let’s move on to the materials and tools you will need for the job.
Materials and Tools Required
Before you begin the insulation process, gather all the necessary materials and tools to ensure a smooth and efficient workflow. Here’s a list of items you will need:
Materials:
- Spray foam insulation: Choose either a two-component closed-cell or open-cell spray foam insulation, depending on your specific needs and budget.
- Plastic sheeting: Use plastic sheeting to cover any surfaces or objects in the attic that you want to protect from overspray.
- Painter’s tape: This will be used to secure the plastic sheeting and create airtight barriers.
- Foam adhesive: If your attic has any gaps or cracks that need to be filled before applying the spray foam, foam adhesive will help with the sealing process.
- Backer rods: Backer rods are a flexible cylindrical foam material used to fill larger gaps or cavities in the attic before applying the spray foam insulation.
- Protective clothing and gear: Wear long sleeves, pants, gloves, safety goggles, and a respirator mask to protect yourself from the chemicals and fumes.
Tools:
- Spray foam insulation kit: This includes the spray gun, hoses, and nozzles needed to apply the spray foam insulation.
- Utility knife: Use a sharp utility knife to trim excess foam and cut plastic sheeting or backer rods to size.
- Painter’s tape dispenser: A tape dispenser will make it easier to secure the plastic sheeting in the attic.
- Measuring tape: Use a measuring tape to measure the area of the attic that needs insulation and calculate the amount of spray foam required.
- Drop cloths or tarps: Lay down drop cloths or tarps to protect the floor and make cleanup easier.
- Extension cord and power source: If your spray foam insulation kit requires electricity, make sure you have an extension cord and access to a power source.
Having all the necessary materials and tools ready before you begin the insulation process will help streamline your work and ensure you have everything you need to complete the job efficiently. Now that you’re prepared, let’s move on to preparing the attic for insulation.
Read more: What Is The Best Spray Foam Insulation
Preparing the Attic
Before you start the insulation process, it’s important to properly prepare the attic to ensure optimal results and a smooth workflow. Follow these steps to prepare your attic for spray foam insulation:
Clean the Attic:
Begin by removing any debris, dust, or insulation remnants from the attic. Clean the surfaces thoroughly to create a clean and smooth workspace. This will help the spray foam adhere better and ensure proper insulation coverage.
Seal Air Leaks:
Inspect the attic for any gaps, cracks, or air leaks. Use foam adhesive or backer rods to seal these openings. Pay close attention to areas around pipes, vents, electrical wires, and any other potential sources of air leakage. Sealing air leaks before applying the spray foam will improve the insulation’s effectiveness and energy efficiency.
Protect Surrounding Areas:
Cover any objects, fixtures, or surfaces that you don’t want the spray foam insulation to come into contact with. Use plastic sheeting and secure it in place with painter’s tape. This will help prevent any overspray and make cleanup easier after the insulation process is complete.
Create Ventilation:
Ensure proper ventilation in the attic before starting the insulation process. Open windows and use fans to improve air circulation and reduce the concentration of fumes. Good ventilation is crucial for your safety and will help dissipate any lingering odors after the insulation is applied.
Measure and Plan:
Take accurate measurements of the attic’s dimensions to calculate the amount of spray foam insulation you’ll need. Consider the thickness of the insulation required for your desired R-value, as well as any specific areas that may require extra attention due to insulation gaps or weak spots.
By properly preparing your attic, you’ll create a suitable environment for applying the spray foam insulation. This will help ensure better adhesion, coverage, and overall insulation performance. Now that the attic is ready, let’s move on to planning the insulation process in the next section.
Planning the Insulation
Proper planning is key to a successful insulation project. By carefully considering the layout and specific requirements of your attic, you can ensure that the spray foam insulation is applied effectively and efficiently. Follow these steps to plan your insulation project:
Understand Your Attic’s Layout:
Take some time to familiarize yourself with the layout of your attic. Identify any obstacles such as pipes, ductwork, or electrical wiring that may need to be worked around or sealed before applying the spray foam insulation. This will help you create a plan for a smooth and uninterrupted insulation process.
Read more: Why Is Spray Foam Insulation Bad
Determine Insulation Thickness:
The thickness of your insulation will depend on your desired R-value, which measures the insulation’s effectiveness. Research the recommended R-value for your region and climate to determine the appropriate thickness for your attic. This information will help you calculate the amount of spray foam insulation needed for the project.
Create an Insulation Map:
Before you begin spraying the foam, it’s helpful to create an insulation map of your attic. This map will outline the areas where the insulation should be applied and serve as a guide during the application process. Identify any specific areas that may require extra attention, such as corners, eaves, or sloped ceilings.
Consider Dead Spaces:
Take into account any dead spaces or confined areas in your attic, such as crawlspaces or gaps behind walls. These areas may require additional insulation to ensure complete coverage. Plan ahead to access these spaces and properly seal and insulate them during the process.
Account for Electrical and HVAC Components:
Pay special attention to electrical components and HVAC equipment in your attic. Make sure they are properly sealed or insulated as needed. Consult with a professional if you are unsure about safety requirements or how to work around these components during the insulation process.
Taking the time to plan your insulation project will help you achieve better results and avoid any potential issues or oversights. By understanding your attic’s layout, determining the appropriate insulation thickness, creating an insulation map, and accounting for electrical and HVAC components, you can ensure a smooth and efficient insulation process. Now, let’s move on to the next step: mixing the spray foam insulation.
Read more: How Much Spray Foam Insulation Cost
Mixing the Spray Foam Insulation
Before you begin spraying the foam insulation in your attic, it’s important to properly mix the spray foam components to ensure optimal performance. Follow these steps to mix the spray foam insulation:
Read the Instructions:
Start by carefully reading and following the manufacturer’s instructions that accompany your spray foam insulation kit. Each product may have specific mixing ratios and instructions, so it’s essential to follow them precisely for the best results.
Prepare the Equipment:
Set up the spray foam insulation kit according to the manufacturer’s instructions. Make sure the spray gun, hoses, and nozzles are properly connected and in good working condition. Also, ensure that the power source, if required, is ready and accessible.
Shake the Cans:
If you are using a two-component spray foam insulation, such as closed-cell or open-cell foam, you’ll typically have two separate containers. Before mixing, shake both components vigorously to ensure they are well-mixed and have a consistent texture.
Read more: How To Do Spray Foam Insulation Yourself
Attach the Nozzles:
Attach the appropriate nozzle to the spray gun according to the instructions provided. Different nozzles can create different spray patterns, so choose the one that will best suit your insulation needs.
Mix the Components:
When ready to mix, follow the specific instructions provided with your spray foam insulation kit. This may involve pouring one component into a designated container and slowly adding the other component while stirring the mixture. Be sure to maintain the correct mixing ratio to ensure the foam cures properly.
Stir and Prime the System:
Once the components are mixed, stir the mixture gently with a stick or paddle provided with the kit. This ensures that the components are thoroughly combined. Then, prime the spray foam system by purging a small amount of mixed foam onto a disposable surface. This step helps ensure a smooth flow of insulation during the application process.
It’s crucial to mix the spray foam insulation properly to achieve the desired results. By carefully following the manufacturer’s instructions, preparing the equipment, shaking the cans, attaching the nozzles, mixing the components, and priming the system, you’ll be ready to start applying the insulation in the next step.
Starting the Application
Now that you have properly mixed the spray foam insulation, it’s time to start the application process. Follow these steps to begin spraying foam insulation in your attic:
Read more: Where Can I Buy Spray Foam Insulation
Test the Spray Pattern:
Before you start spraying in the attic, it’s a good idea to test the spray pattern on a disposable surface or scrap material. This will allow you to adjust the nozzle and make any necessary changes to achieve the desired coverage and consistency.
Begin in an Accessible Corner:
Start spraying the foam insulation in a corner of the attic that is easily accessible. This makes it easier to navigate and move around as you work your way through the space. Begin with a thin layer to ensure even coverage and avoid oversaturation.
Hold the Spray Gun at a 45-degree Angle:
Hold the spray gun at a 45-degree angle to the surface you are insulating. This allows for better control and coverage. Apply the foam insulation in a smooth and consistent motion, slightly overlapping each pass to ensure that there are no gaps or missed areas.
Maintain a Consistent Distance:
Keep a consistent distance between the spray gun nozzle and the surface you are insulating. This helps ensure an even distribution of foam and prevents excessive buildup in certain areas. Typically, a distance of 12 to 18 inches is recommended, but refer to the manufacturer’s instructions for specific guidelines.
Work in Small Sections:
Divide your attic into manageable sections and work on one section at a time. This allows you to maintain focus and ensure proper coverage without rushing through the process. Take breaks as needed to rest and refuel the spray foam insulation system.
Cover the Entire Area:
Continue spraying the foam insulation, moving systematically across the attic, until you have covered the entire area. Pay special attention to corners, edges, and hard-to-reach areas to ensure complete coverage and insulation effectiveness.
Inspect and Adjust as Needed:
Periodically inspect your work to ensure the foam insulation is being applied evenly and without any gaps or inconsistencies. Adjust the spray pattern or nozzle settings if necessary to achieve the desired results. Take your time to ensure a thorough and properly applied insulation layer.
Remember to work in a well-ventilated space and wear protective gear throughout the application process. Once you have completed the foam insulation application, it’s crucial to ensure proper coverage to maximize its effectiveness and energy efficiency. The next step will cover how to ensure proper coverage in your attic.
Applying the Insulation
Now that you have started the application process of spray foam insulation in your attic, it’s important to ensure proper coverage for maximum effectiveness. Follow these steps to ensure that the insulation is applied correctly:
Read more: How Thick Spray Foam Insulation Do I Need
Work in Layers:
When applying spray foam insulation, it’s best to work in thin layers rather than trying to apply a thick layer all at once. Start with a thin initial layer and gradually build up the thickness as needed. This allows the foam to expand and cure properly, ensuring better adhesion and coverage.
Control the Expansion:
As you spray the foam insulation, it will expand in volume. To control the expansion and prevent oversaturation, apply the foam in controlled amounts and avoid spraying too much in one area. This will help maintain consistent coverage and prevent the foam from overflowing or leaking into unwanted spaces.
Pay Attention to Hard-to-Reach Areas:
Take extra care to insulate hard-to-reach areas, such as corners, eaves, and tight spaces. These areas are often prone to air leaks and heat transfer, so ensure thorough coverage to maximize the insulation’s effectiveness. Use a smaller nozzle or adjust the spray pattern to reach into these difficult spots.
Ensure Consistent Thickness:
Maintain a consistent thickness of the foam insulation throughout the attic. This is important to achieve the desired R-value and ensure even thermal insulation. Regularly check the thickness of the foam as you work and make adjustments as needed to maintain uniform coverage.
Read more: How Long Does Spray Foam Insulation Off Gas
Overlap Each Pass:
To avoid gaps in the insulation, overlap each pass of the spray foam insulation. This ensures that there are no missed areas or weak spots in the attic. Overlapping each pass by a few inches will help create a continuous layer of insulation and prevent thermal bridging.
Take Breaks and Rest:
As you work on applying the foam insulation in your attic, it’s important to take breaks and rest when needed. Spray foam insulation can be physically demanding, and fatigue can lead to mistakes or uneven coverage. Listen to your body and take breaks to maintain consistent application quality.
Follow Manufacturer’s Guidelines:
Refer to the manufacturer’s guidelines and instructions for specific recommendations on applying their particular spray foam insulation product. They may provide additional tips and techniques to ensure the best results. Following their guidelines will help you achieve optimal coverage and insulation performance.
By following these steps, you can ensure that the spray foam insulation is properly applied in your attic, resulting in maximum energy efficiency and comfort. The next section will cover how to ensure proper coverage in your attic to reap the full benefits of your insulation project.
Ensuring Proper Coverage
Proper coverage is essential for the effectiveness of spray foam insulation in your attic. Ensuring that every nook and cranny is adequately insulated will help maximize energy efficiency and create a comfortable living space. Follow these steps to ensure proper coverage:
Check for Gaps and Missed Areas:
After applying the spray foam insulation, carefully inspect the attic to identify any gaps or missed areas. Look for spots where the foam may not have expanded fully or where it appears thinner than others. These areas may require additional insulation to ensure complete coverage.
Fill Gaps and Small Holes:
If you spot any small gaps or holes in the insulation, use a foam adhesive or additional foam insulation to fill them. This will help prevent air leaks and improve the thermal insulation properties of your attic. Pay close attention to areas around pipes, electrical wiring, and other potential entry points for air.
Address Hard-to-Reach Areas:
Pay special attention to hard-to-reach areas, such as corners, sloped ceilings, and junctions between walls and the attic floor. These areas can often be overlooked during the initial application process. Use a smaller nozzle or extendable wand to reach into these tight spaces and ensure complete coverage.
Apply Multiple Passes:
To achieve consistent and thorough coverage, consider applying multiple passes of spray foam insulation. This helps build up the thickness and ensures that every part of the attic is adequately insulated. Overlapping each pass by a few inches will prevent any gaps or weak spots in the insulation layer.
Verify Proper Thickness:
Check the thickness of the spray foam insulation to ensure it meets the recommended R-value for your region. Use a measuring tape to measure the depth of the insulation in different areas of the attic. Make adjustments if needed to achieve the desired thickness and ensure optimal insulation performance.
Consult a Professional:
If you’re unsure about the coverage or insulation quality in your attic, it’s always best to consult a professional. An experienced insulation contractor can assess your attic, identify any areas of concern, and provide recommendations for improving coverage. They have the expertise to ensure that your attic is properly insulated for optimal energy efficiency.
Ensuring proper coverage of spray foam insulation is crucial for maximizing its thermal insulation properties. By checking for gaps, filling small holes, addressing hard-to-reach areas, applying multiple passes, verifying thickness, and consulting a professional if needed, you can ensure that your attic is well-insulated and energy efficient.
Cleaning Up and Removing Excess Insulation
Once you have completed the application of spray foam insulation in your attic, it’s important to clean up and remove any excess insulation to ensure a neat and tidy workspace. Follow these steps to effectively clean up and remove excess insulation:
Allow the Foam to Cure:
Before attempting to clean up the excess insulation, allow the foam to cure and harden completely. The curing time can vary depending on the specific product and environmental conditions, so refer to the manufacturer’s instructions for guidance. Avoid disturbing the foam during this curing period.
Trim Excess Foam:
Once the foam has cured, use a sharp utility knife to carefully trim any excess foam that protrudes beyond the desired insulation level. Trim it flush with the surrounding surfaces, such as the ceiling or walls. Be cautious not to damage any underlying structures or electrical wiring while trimming.
Vacuum or Sweep Loose Particles:
If there are any loose foam particles or debris in the attic, use a vacuum cleaner with a brush attachment or a broom to sweep them up. Be gentle to avoid dislodging or damaging the cured insulation. Ensure that all loose particles are removed for a clean and safe environment.
Inspect for Overspray or Spillage:
Check for any overspray or spillage on surfaces or objects in the attic that were not meant to be insulated. If you find any, use a cloth dampened with a suitable solvent recommended by the foam manufacturer to clean it off. Avoid using excessive amounts of solvent, as it may damage sensitive surfaces.
Dispose of Waste Properly:
Dispose of the waste insulation materials following your local regulations and guidelines. Contact your local waste management facility to determine the proper disposal method. Some foam insulation products can be recycled, so inquire if this option is available in your area.
Read more: What Is Spray Insulation
Clean Up Personal Protective Equipment (PPE):
If you used any personal protective equipment (PPE) during the insulation process, such as safety goggles or gloves, clean them according to the manufacturer’s instructions. Properly cleaned PPE can be reused for other projects or stored safely for future use.
Take Safety Precautions:
Throughout the cleanup process, remember to wear proper protective gear, including gloves and safety goggles, to ensure your safety. Insulation debris can be irritating to the skin and eyes, so take precautions to protect yourself.
By following these steps, you can effectively clean up and remove excess spray foam insulation from your attic. This will leave you with a clean and well-insulated space that promotes energy efficiency and comfort. The next section will provide some final tips and considerations to keep in mind for your insulation project.
Final Tips and Considerations
As you wrap up your spray foam insulation project in the attic, here are some final tips and considerations to keep in mind:
Proper Maintenance:
Regularly inspect your attic to ensure that the spray foam insulation remains intact and that no damage or deterioration has occurred. Attend to any repairs or touch-ups promptly to maintain the insulation’s effectiveness.
Read more: How To Paint Insulation Foam
Monitoring Moisture Levels:
Keep an eye on the moisture levels in your attic. While spray foam insulation provides an effective air barrier, it’s essential to address any moisture issues that may arise. Ensure proper ventilation and address any leaks or excess humidity promptly to prevent damage.
Consider Professional Installation:
If you feel unsure about tackling spray foam insulation on your own or have a particularly complex attic, consider hiring a professional insulation contractor. They have the expertise and experience to ensure a successful insulation project and can help address any specific needs or challenges.
Energy Efficiency Assessment:
Consider scheduling an energy efficiency assessment for your home. A professional energy auditor can evaluate your insulation, identify areas of improvement, and provide recommendations for energy-saving measures. This can help optimize the overall energy efficiency of your home.
Maintain Safety Precautions:
Even after the insulation project is completed, continue to prioritize safety when accessing the attic. Use proper safety equipment, such as a sturdy ladder, when entering the space, and be mindful of any potential hazards or obstacles.
Read more: How Important Is Attic Insulation
Check Building Codes and Regulations:
Ensure that your insulation project meets all local building codes and regulations. Familiarize yourself with the specific requirements in your area, including the recommended R-values and any permits or inspections that may be necessary.
Monitor Energy Savings:
Keep track of your energy consumption and utility bills after the insulation project. The improved energy efficiency provided by spray foam insulation can result in noticeable savings over time. Monitor your energy usage to assess the impact of the insulation and make any adjustments if needed.
By considering these final tips and recommendations, you can successfully complete your spray foam insulation project and enjoy the benefits of an energy-efficient and comfortable home. Remember to adhere to safety protocols, perform regular maintenance, and consult professionals when necessary. With proper planning and execution, your insulated attic will contribute to a more sustainable living space.
Conclusion
Adding spray foam insulation to your attic is a wise investment that can significantly improve the energy efficiency and comfort of your home. By following the steps outlined in this comprehensive guide, you can successfully complete the insulation process and enjoy the benefits for years to come.
Remember to prioritize safety throughout the project by wearing protective gear, properly ventilating the area, and following manufacturer guidelines. Taking the time to prepare the attic, plan the insulation, and mix the spray foam correctly will help ensure a successful application.
Proper coverage is essential for effective insulation, so be thorough in your application, addressing hard-to-reach areas and overlapping each pass. Take the necessary steps to clean up any excess foam and dispose of waste properly for a neat and tidy outcome.
Regular maintenance and monitoring of moisture levels in the attic are crucial to preserving the insulation’s effectiveness. Consider scheduling an energy efficiency assessment and consult professionals when needed to optimize your home’s energy efficiency.
Spray foam insulation not only helps reduce energy consumption and lower utility bills but also contributes to a more sustainable living environment. By creating a well-insulated attic, you can enjoy enhanced comfort, improved indoor air quality, and an overall more eco-friendly home.
Remember to adhere to local building codes and regulations and seek professional assistance if needed. With proper planning, execution, and ongoing maintenance, your attic insulation project will provide long-lasting benefits for you and your home.
So, go ahead and transform your attic into a well-insulated haven, reducing energy waste, and creating a more comfortable living space. Start the process today and enjoy the multitude of benefits that come with spray foam insulation in your attic.
Frequently Asked Questions about How To Spray Foam Insulation In Attic
Was this page helpful?
At Storables.com, we guarantee accurate and reliable information. Our content, validated by Expert Board Contributors, is crafted following stringent Editorial Policies. We're committed to providing you with well-researched, expert-backed insights for all your informational needs.
0 thoughts on “How To Spray Foam Insulation In Attic”