Articles
How To Add Insulation In Attic
Modified: October 28, 2024
Learn how to add insulation in your attic with our informative articles. Increase energy efficiency and save money on your utility bills.
(Many of the links in this article redirect to a specific reviewed product. Your purchase of these products through affiliate links helps to generate commission for Storables.com, at no extra cost. Learn more)
Introduction
Welcome to our comprehensive guide on how to add insulation in the attic. Insulating your attic is a crucial step in creating a comfortable and energy-efficient home. It helps regulate the temperature, prevents heat loss in the winter, and keeps your house cool in the summer. In addition, proper attic insulation can significantly reduce your energy bills by minimizing the reliance on heating and cooling systems.
Whether you are building a new home or updating an existing one, understanding the importance of attic insulation and how to install it correctly is essential. In this article, we will walk you through the process of adding insulation in your attic, step by step. We will also cover common mistakes to avoid and share additional tips to maximize the effectiveness of your attic insulation.
Before diving into the installation process, let’s take a closer look at why attic insulation is so important.
Key Takeaways:
- Proper attic insulation is essential for energy efficiency, comfort, and environmental impact. Understanding the importance, choosing the right materials, and avoiding common mistakes are crucial for a successful insulation installation.
- In addition to adding insulation, sealing air leaks, maintaining ventilation, and considering professional audits can further enhance attic insulation. These measures contribute to greater energy savings and home comfort.
Read more: How To Add Stairs To Attic
Why is attic insulation important?
Attic insulation plays a crucial role in maintaining the overall energy efficiency of your home. Here are a few reasons why it is important:
- Energy savings: A properly insulated attic helps in reducing energy consumption by preventing heat loss during the winter and heat gain during the summer. This means that your heating and cooling systems don’t have to work as hard to maintain a comfortable temperature, resulting in lower energy bills.
- Comfort: Adding insulation in the attic improves the comfort level of your home by keeping the interior temperature more stable. It prevents drafts and cold spots in the winter and helps keep your home cooler in the summer.
- Noise reduction: Insulation helps to dampen the noise from outside, making your home quieter and more peaceful.
- Environmental impact: By reducing energy consumption, attic insulation can contribute to a greener environment by lowering greenhouse gas emissions and reducing your carbon footprint.
Furthermore, having proper insulation in your attic can help preserve the integrity of your roof. Insulation acts as a protective barrier, preventing heat and moisture from damaging the roofing materials. It can also help prevent ice dams from forming, which can cause significant damage to the roof.
Now that we understand the significance of attic insulation, let’s explore the different types of insulation materials that you can choose from.
Types of insulation materials
When it comes to choosing insulation materials for your attic, there are several options available. Each type of insulation has its own advantages and considerations. Here are the most common types:
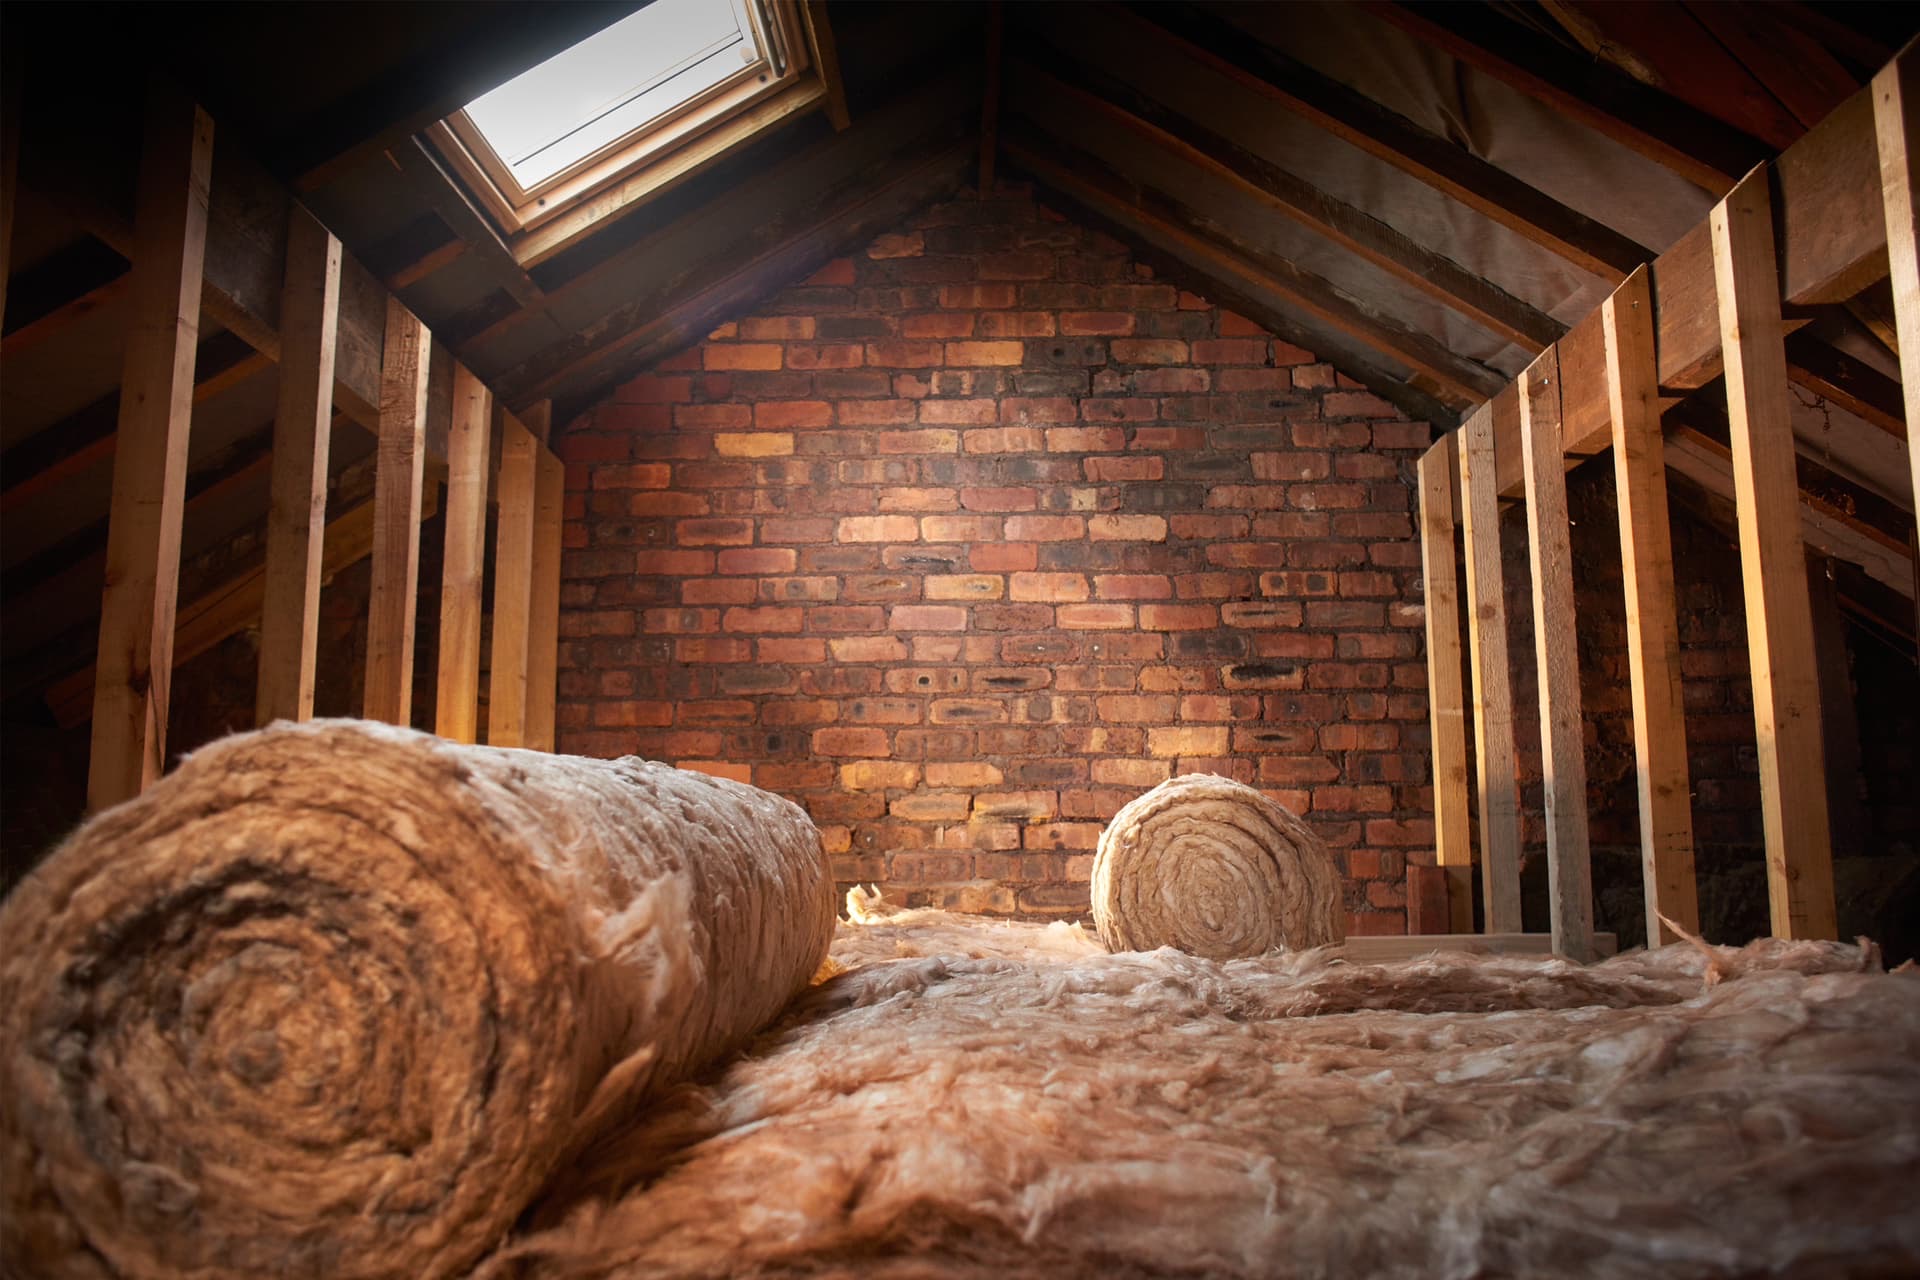
- Fiberglass insulation: Fiberglass insulation is one of the most popular choices for attic insulation. It is made up of tiny strands of fiberglass that are woven together. It is affordable, easy to install, and provides good thermal performance.
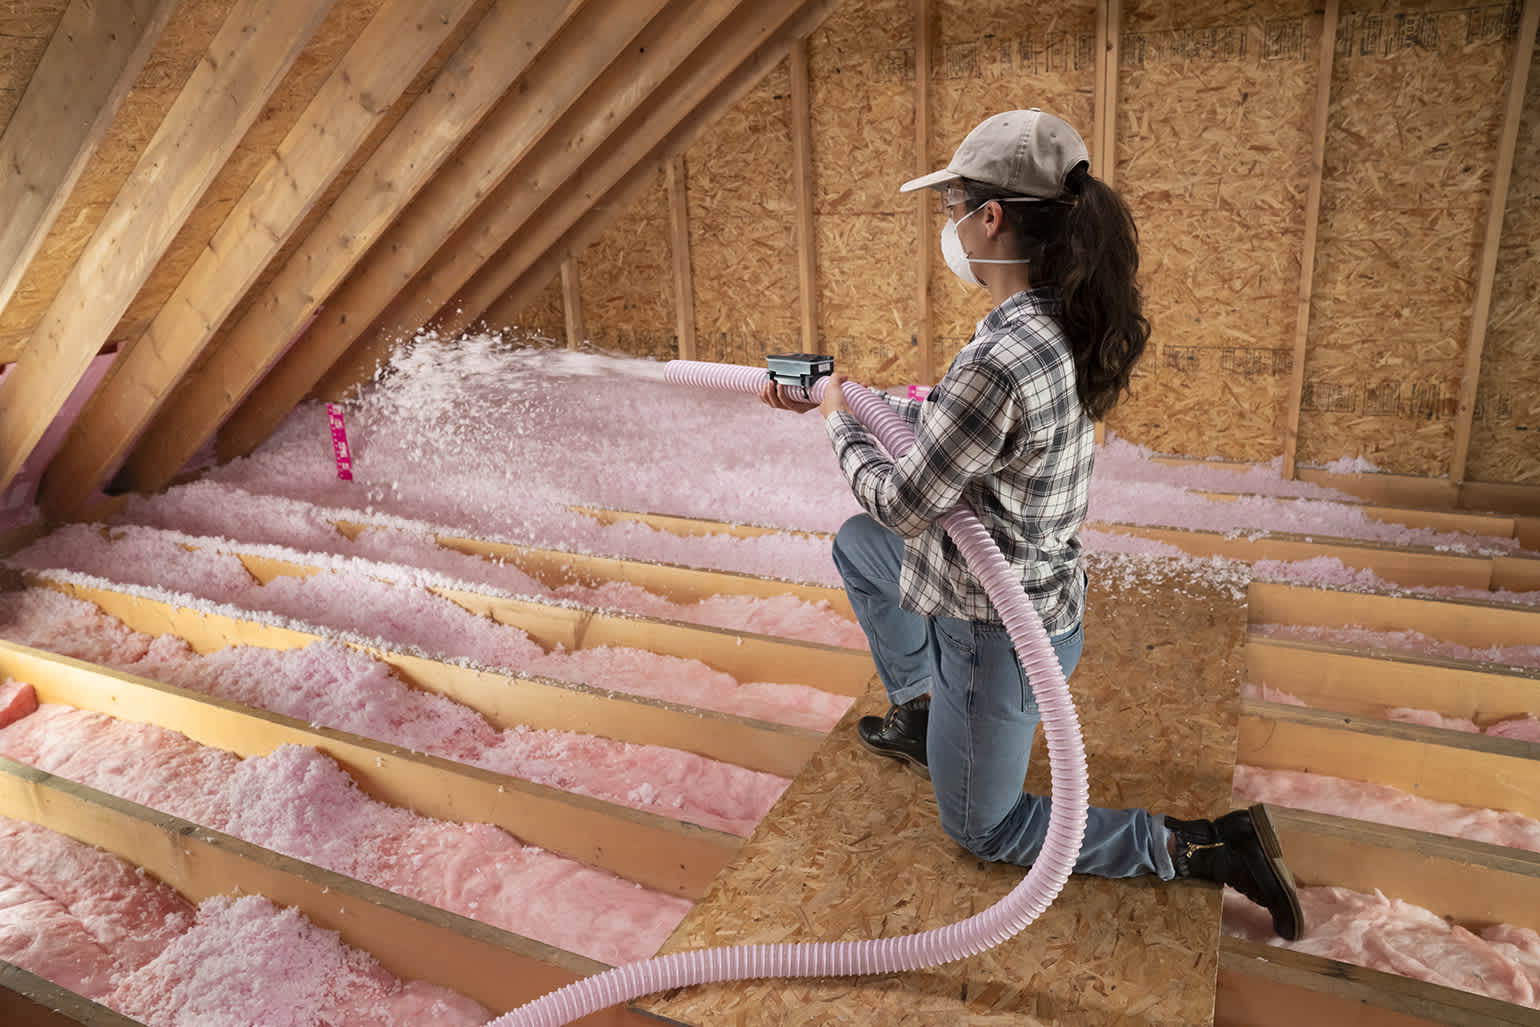
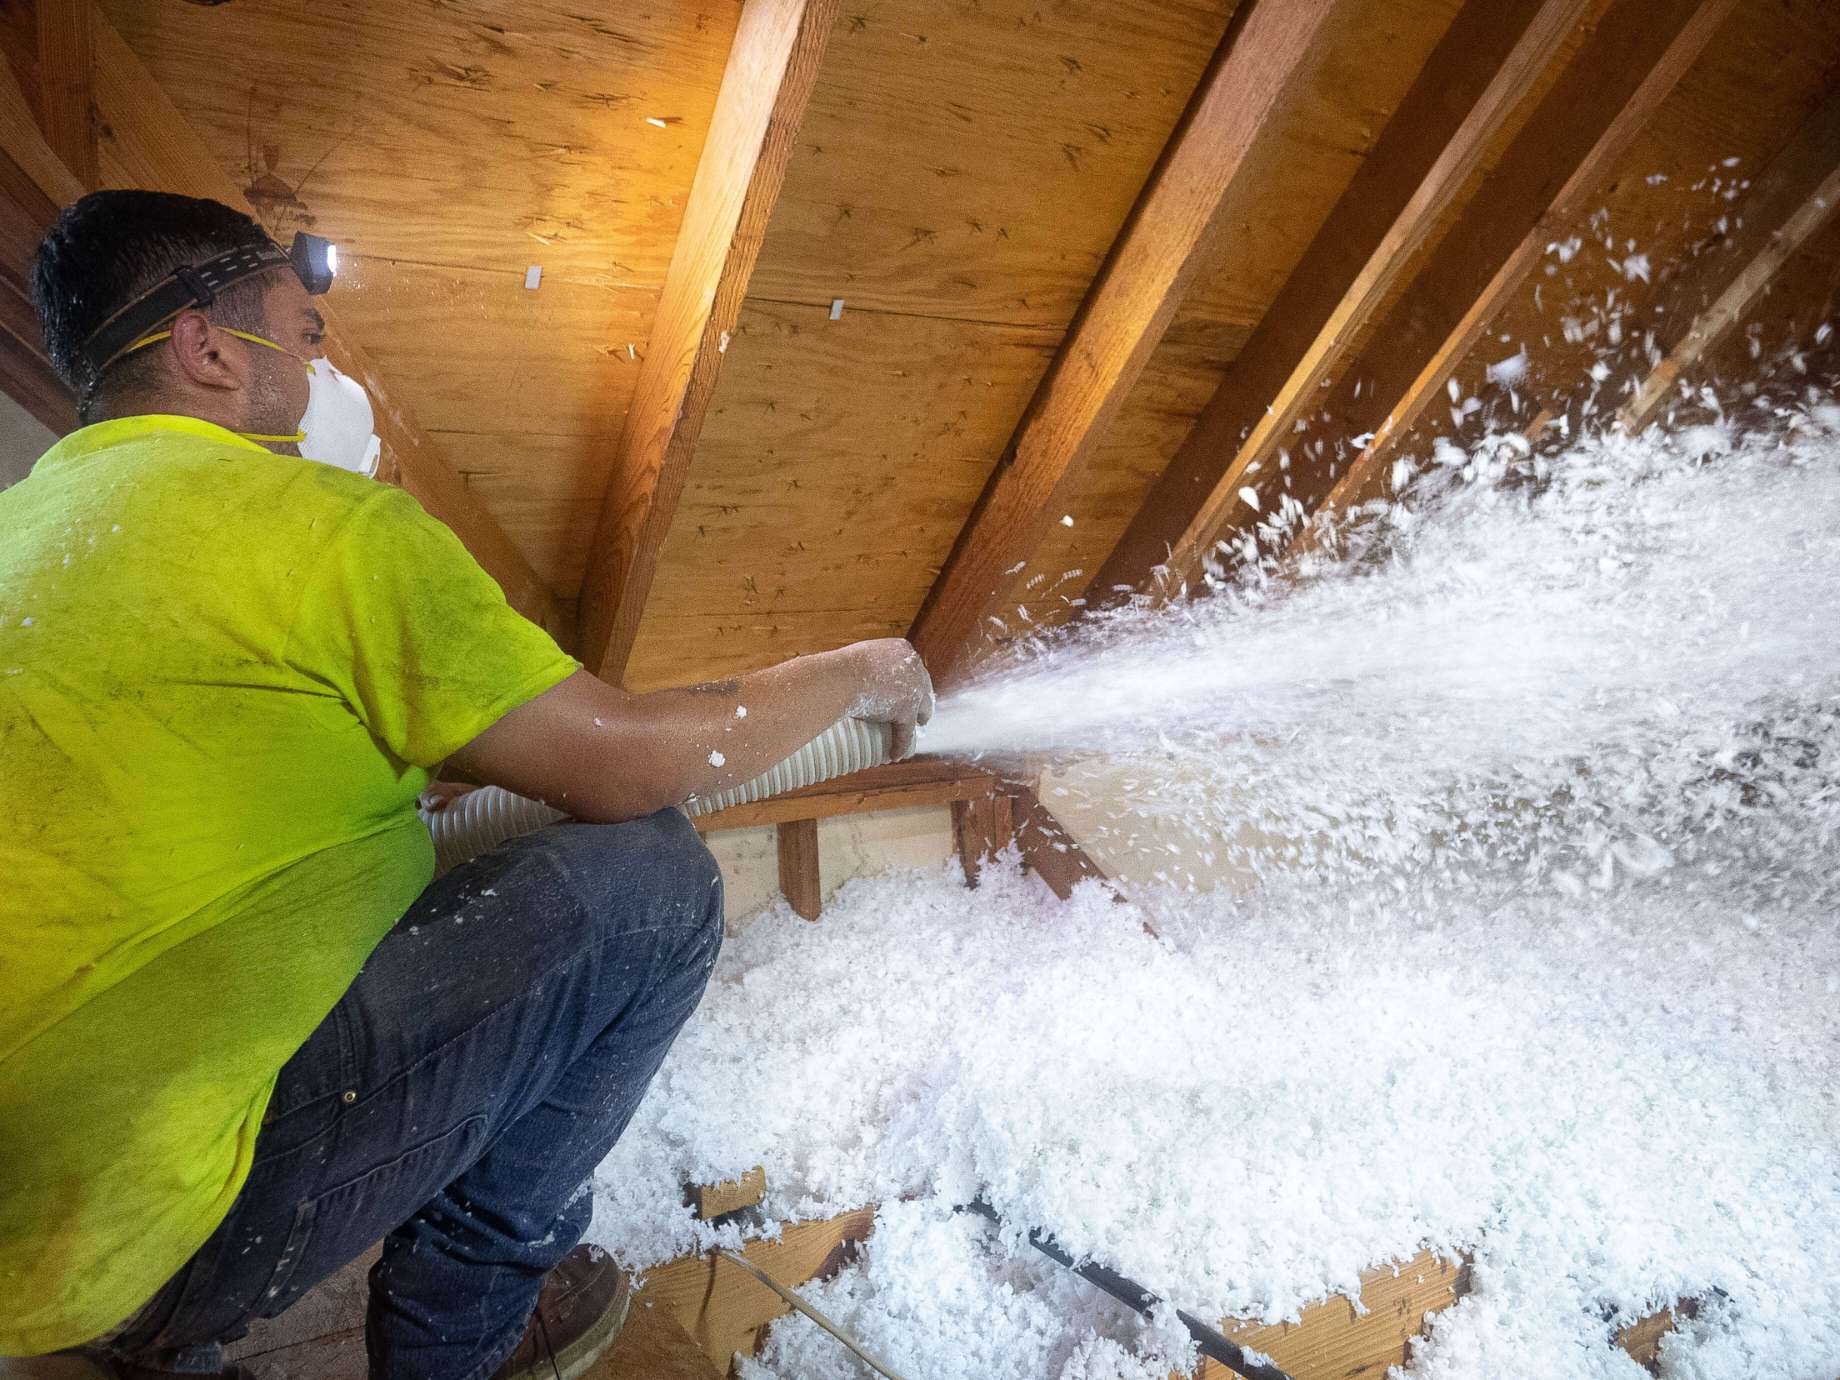
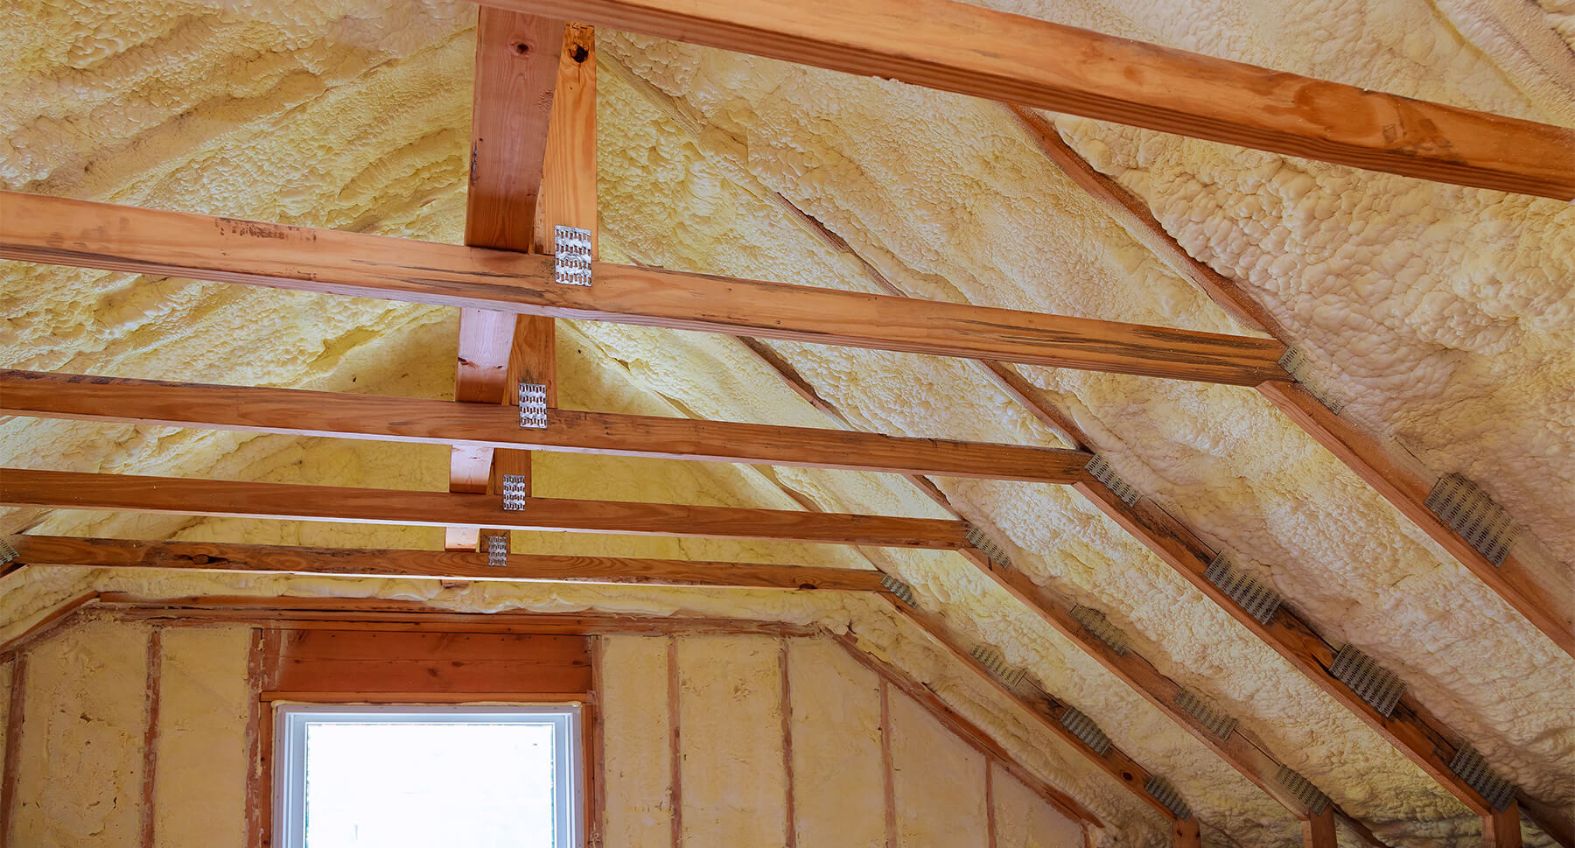
- Spray foam insulation: Spray foam insulation is a versatile option that expands upon application, creating an airtight seal. It provides excellent insulation and helps to block out air infiltration. However, it requires professional installation and may be more expensive than other options.
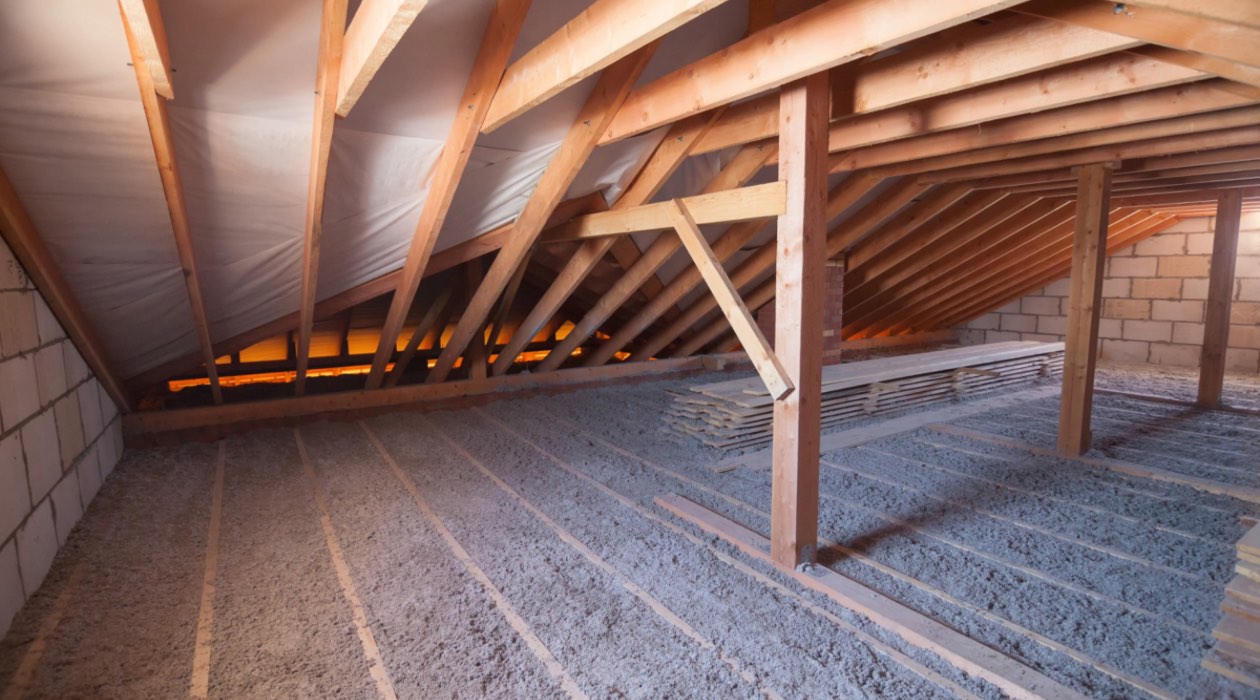
- Cellulose insulation: Cellulose insulation is made from recycled paper products and treated with fire-resistant chemicals. It is an eco-friendly option that can be blown or sprayed into the attic. It has good thermal performance and is relatively affordable.
- Rigid foam insulation: Rigid foam insulation consists of foam boards that are installed directly onto the attic surfaces. It offers high thermal resistance and is effective at reducing heat transfer. However, it can be more expensive and may require additional protection against moisture.
- Radiant barrier insulation: Radiant barrier insulation is a reflective material that helps to redirect radiant heat away from the attic. It is typically installed on the underside of the roof rafters. While it is not meant to be the primary insulation, it can complement other insulation materials and improve energy efficiency.
When choosing the right insulation material for your attic, consider factors such as your budget, climate conditions, and any specific requirements or limitations of your home. It is also important to ensure that the insulation material you select meets the necessary fire safety codes and regulations.
Now that we’ve covered the different insulation materials, let’s move on to assessing your current insulation in the attic.
Assessing the current insulation in your attic
Before you begin adding insulation to your attic, it’s important to assess the existing insulation to determine if it needs to be replaced or supplemented. Here are steps to assess the current insulation in your attic:
- Access the attic: Carefully climb up to your attic using a sturdy ladder and ensure you have proper lighting to see clearly.
- Check for existing insulation: Look for insulation materials already present in your attic. Common types of insulation include fiberglass batts, loose-fill cellulose, or spray foam insulation. Take note of the thickness and condition of the insulation.
- Measure the insulation depth: Use a ruler or measuring tape to measure the depth of the insulation. Most optimal insulation levels require a minimum depth of 12-16 inches, depending on the insulation type. If the current insulation is below these recommended levels, it may be necessary to add more insulation.
- Inspect for signs of damage or wear: Look for any signs of damage, moisture, or pest infestation in the existing insulation. Damaged or deteriorated insulation may need to be replaced to ensure its effectiveness.
- Check for air leaks: Look for gaps, cracks, or holes in the attic floor, as well as around penetrations such as pipes, ducts, and electrical wiring. These spaces can allow air to escape or enter the living areas of your home, reducing the efficiency of the insulation.
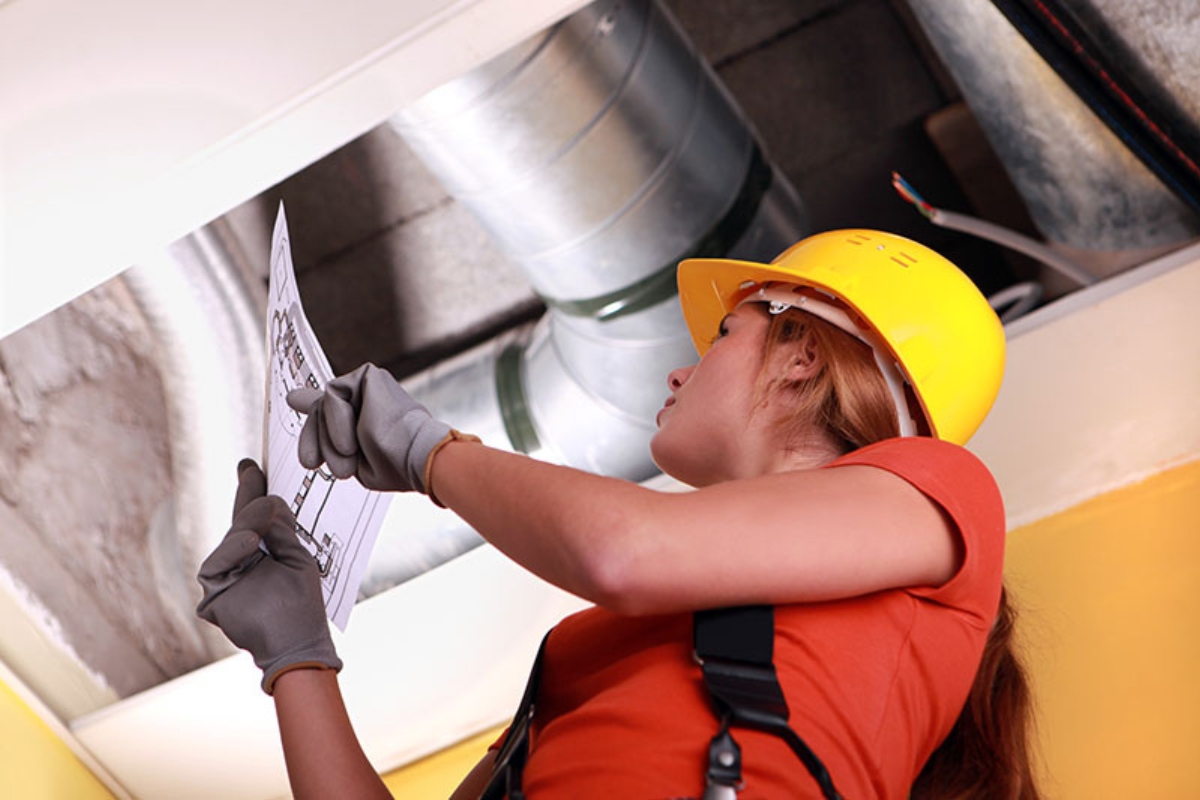
- Assess the attic ventilation: Adequate attic ventilation is essential to prevent moisture buildup and maintain the overall health of your attic. Ensure that the vents are clear of obstructions and functioning properly.
By assessing the current condition of your attic insulation, you can determine the necessary steps to improve or supplement the insulation. If the existing insulation is in good condition and meets the recommended levels, you may only need to add additional insulation to boost its effectiveness. However, if the insulation is damaged, moldy, or inadequate, it may be necessary to remove and replace it before adding new insulation.
Now that we’ve assessed the current insulation, let’s move on to preparing for insulation installation.
Preparing for insulation installation
Proper preparation is key to a successful insulation installation in your attic. Taking the time to prepare the space and gather the necessary tools and materials will make the process smoother and more efficient. Here are the steps to prepare for insulation installation:
- Clean and declutter: Clear out any unnecessary items or debris from your attic. This will create a clean and safe workspace for the insulation installation.
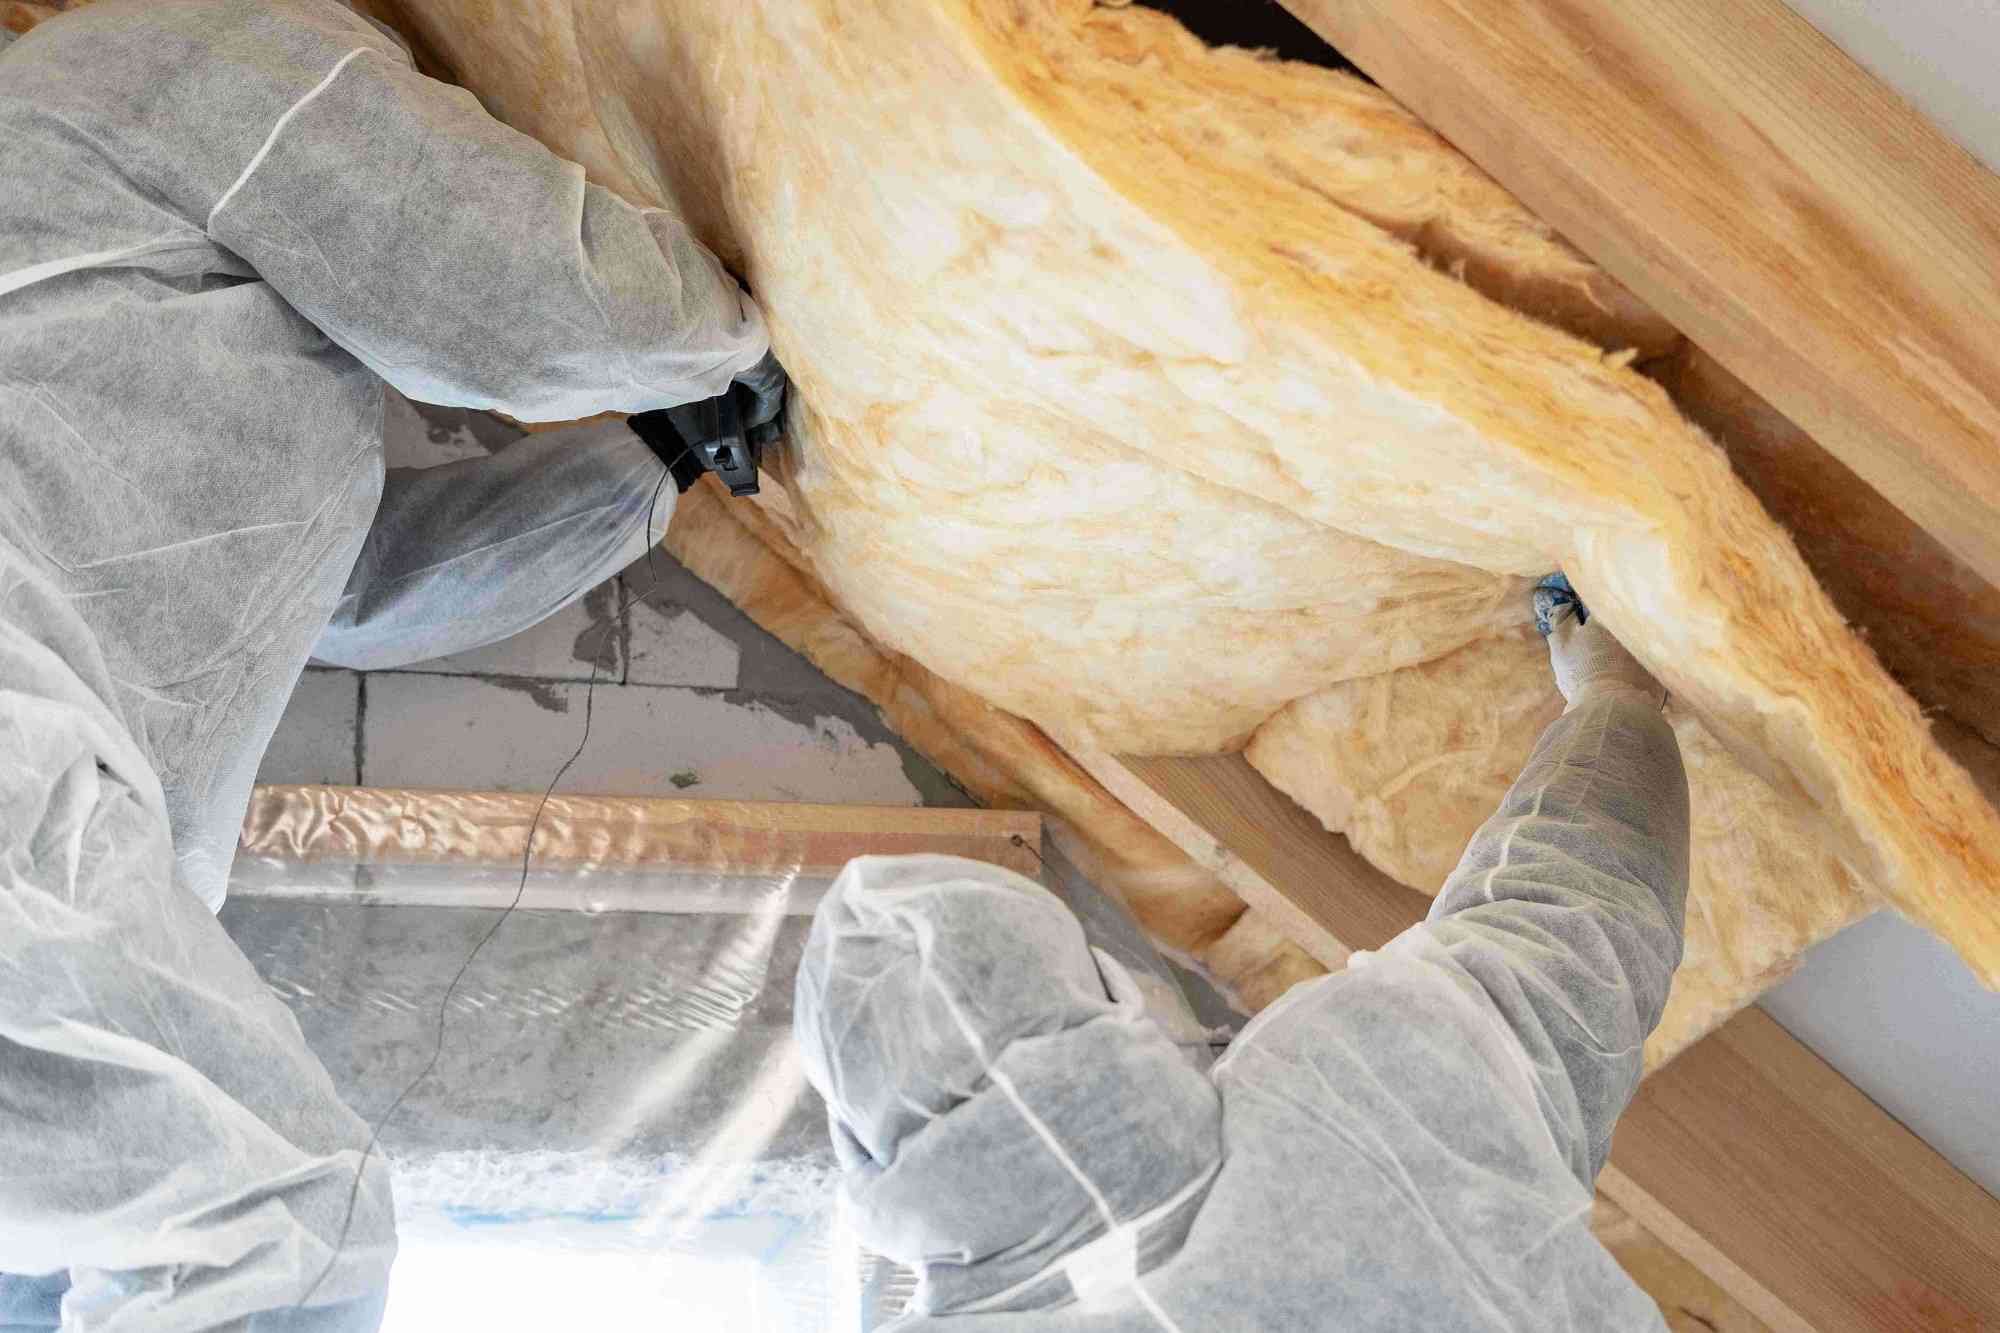
- Protection and safety: Put on the appropriate safety gear, including gloves, safety glasses, and a dust mask, to protect yourself from insulation fibers and dust.
- Seal air leaks: Prior to adding insulation, it’s important to seal any air leaks in the attic. Use a caulk or weatherstripping to seal cracks, gaps, and holes in the attic floor, as well as around pipes, ducts, and electrical fixtures. This will prevent air leakage and maximize the effectiveness of the insulation.
- Provide access: Ensure that you have a clear and safe pathway to access different areas of the attic. Use sturdy boards or planks to create a stable walking surface and avoid stepping directly on the ceiling below.
- Check attic ventilation: Verify that your attic ventilation is functioning properly. Ensure that vents are unobstructed and allow for proper airflow. If you notice any issues, such as blockages or damaged vents, address them before proceeding with the installation.
- Measure insulation area: Calculate the square footage of the attic area that requires insulation. This measurement will help you determine the amount of insulation material needed.
- Prepare insulation materials: Depending on the type of insulation you’ve chosen, make sure you have enough material to cover the desired area. Insulation materials can be purchased in rolls, batts, or loose-fill form.
- Arrange for proper ventilation: Before starting the installation, ensure that the attic has proper ventilation. It’s essential to have fresh air circulating to prevent moisture buildup and maintain a healthy environment.
By following these preparation steps, you’ll create an environment that is ready for insulation installation. Taking the time to clean, seal air leaks, and ensure proper ventilation will lay the foundation for an effective and efficient insulation system in your attic.
Next, let’s discuss the safety precautions and tools you’ll need during the insulation installation process.
Read more: How Important Is Attic Insulation
Safety precautions and tools needed
When it comes to installing insulation in your attic, it’s important to prioritize safety. Insulation materials can be hazardous if not handled properly, and working in the attic can present certain risks. Here are some safety precautions to keep in mind and the tools you’ll need for a successful insulation installation:
Safety Precautions:
- Protective gear: Wear safety goggles, gloves, and a dust mask to protect yourself from insulation fibers and dust.
- Proper ventilation: Ensure the attic has adequate ventilation during the installation process to minimize exposure to airborne particles.
- Sturdy footwear: Wear footwear with good traction to prevent slips and falls on the attic floor.
- Avoid electrical hazards: Be cautious of electrical wiring and fixtures in the attic. Ensure the power is turned off or use appropriate precautions when working near electrical components.
- Mind your posture: Be mindful of your posture and body mechanics to avoid strains and injuries. Take breaks as needed to rest and stretch.
Tools Needed:
- Utility knife: Use a utility knife to cut insulation materials to the appropriate size and shape.
- Tape measure: Measure the dimensions of the attic space and the insulation materials to ensure a proper fit.
- Staple gun or insulation supports: These tools are used to secure insulation to the rafters or joists.
- Straightedge or ruler: Use a straightedge or ruler to ensure straight and precise cuts.
- Flashlight or headlamp: Proper lighting is essential in the attic to see where you are working.
- Ladder or scaffolding: Depending on the height of your attic, you may need a ladder or scaffolding to access and move around the space safely.
- Personal protective equipment (PPE): In addition to gloves, safety glasses, and a dust mask, consider wearing long sleeves and pants to protect your skin from potential irritants.
Ensure you have these safety precautions in mind and the necessary tools readily available before you start the insulation installation process. Taking these precautions and using the right tools will help keep you safe and ensure a smooth installation experience.
Now that we’ve covered the safety precautions and tools needed, let’s move on to the step-by-step guide for adding insulation in the attic.
When adding insulation to your attic, be sure to wear protective gear such as gloves, a mask, and goggles to prevent irritation from the insulation materials. Also, be mindful of any electrical wiring and fixtures to avoid potential hazards.
Step-by-step guide to adding insulation in the attic
Now that you have prepared your attic and gathered the necessary tools, it’s time to begin the process of adding insulation. Follow this step-by-step guide to ensure a successful insulation installation:
- Start at the farthest corner: Begin at the farthest corner of the attic and work your way towards the attic entrance. This will minimize the need to step on newly installed insulation.
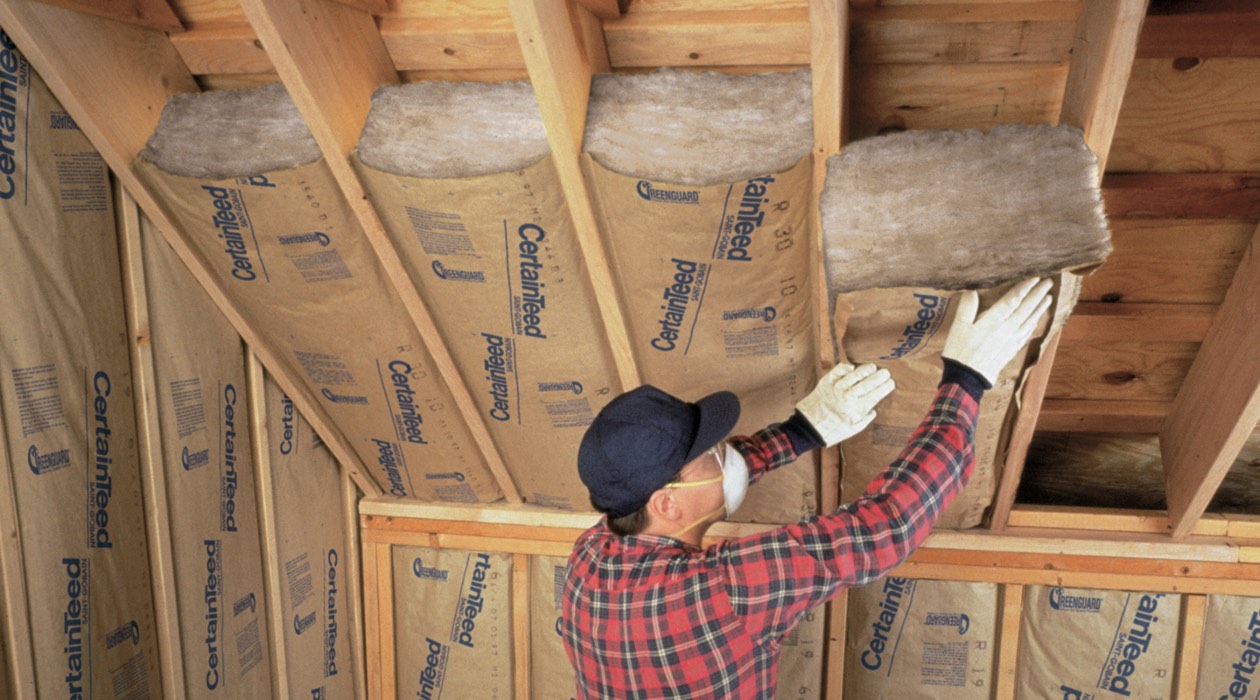
- Unroll or cut insulation: Unroll fiberglass batts or cut insulation to fit the length and width of the desired area. Ensure a snug fit by avoiding gaps or overlaps.
- Place insulation between joists or rafters: Insert the insulation between the joists or rafters, allowing it to rest evenly and snugly. Avoid compressing the insulation, as that reduces its effectiveness.
- Use insulation supports or staple gun: Secure the insulation in place using insulation supports or a staple gun. Ensure that the insulation is held firmly but not excessively compressed.
- Add layers if necessary: If your insulation is not thick enough to reach the recommended depth, you may need to add additional layers. Lay them perpendicular to the previous layer for better coverage.
- Avoid blocking soffit vents: Be cautious not to block any soffit vents with insulation. These vents allow for proper air circulation in the attic and should remain clear.
- Insulate around obstacles: When you encounter obstacles such as wiring or piping, carefully cut and fit the insulation around them, maintaining proper clearances as recommended by building codes.
- Insulate attic access points: Don’t forget to insulate the attic access points such as the attic hatch or door. Use weatherstripping or insulation materials to create an airtight seal.
- Ensure even coverage: As you progress, regularly check to ensure even coverage throughout the attic. Make adjustments as needed to fill any gaps or areas that may have been missed.
- Inspect the overall insulation: Once you have installed the insulation, take a step back and inspect the overall insulation coverage. Make any necessary adjustments or additions to ensure a consistent and complete installation.
Remember, each attic may have unique considerations, such as different joist sizes or obstructions. Adapt the steps accordingly to suit your specific attic’s configuration and requirements.
Now that you have completed the insulation installation, let’s discuss some common insulation mistakes to avoid.
Read more: How To Insulate A Garage Attic
Common insulation mistakes to avoid
When adding insulation to your attic, it’s important to be aware of common mistakes that can compromise the effectiveness and efficiency of the insulation. Avoiding these mistakes will help ensure optimal insulation performance. Here are some common insulation mistakes to avoid:
- Insufficient insulation: One of the most common mistakes is not adding enough insulation. It’s crucial to achieve the recommended insulation depth for maximum energy efficiency. Make sure you measure the insulation properly and add additional layers if needed.
- Compression of insulation: Avoid compressing the insulation material by not stepping on it or overstuffing it into tight spaces. Compressed insulation reduces its ability to trap air and effectively insulate your attic.
- Blockage of ventilation: Blocking soffit vents or other ventilation openings with insulation can hinder proper airflow in your attic, leading to moisture buildup and potential damage. Ensure that vents remain clear and unobstructed.
- Ignoring air leaks: Insulation alone cannot address air leaks in your attic. Prioritize sealing any gaps, cracks, or openings in the attic floor, walls, or around fixtures to prevent the escape or entry of air.
- Neglecting safety precautions: Do not overlook safety precautions when installing insulation. Properly wear protective gear, secure your footing, and be cautious around electrical components to minimize potential hazards.
- Improper insulation around obstructions: When encountering wiring, piping, or other obstacles, ensure that insulation is carefully cut and fitted around them, maintaining clearances as specified by building codes. Improper insulation around obstructions can lead to safety hazards and compromised insulation performance.
- Neglecting attic access points: Many homeowners forget to insulate the access points to their attic, such as the attic hatch or door. These areas can be significant sources of air leakage if left uninsulated. Use weatherstripping or insulation materials to create an airtight seal.
- Not addressing existing insulation issues: If you notice any signs of damage or wear on existing insulation, it’s essential to address those issues before adding new insulation. Insulation that is damaged, moldy, or deteriorated should be replaced to ensure an effective insulation system.
- Disregarding proper installation techniques: It’s important to follow proper installation techniques for the chosen insulation material. Read and understand manufacturer instructions or consult with a professional to ensure correct installation for optimal performance.
- Skipping professional assistance when needed: While adding insulation to your attic can be a DIY project, certain situations may require professional expertise. If you’re unsure or facing complex insulation challenges, it’s best to seek professional assistance to ensure proper installation.
By avoiding these common insulation mistakes, you can maximize the energy efficiency, comfort, and longevity of your attic insulation.
Next, let’s explore some additional tips for maximizing attic insulation.
Additional tips for maximizing attic insulation
To get the most out of your attic insulation and improve energy efficiency even further, consider implementing these additional tips:
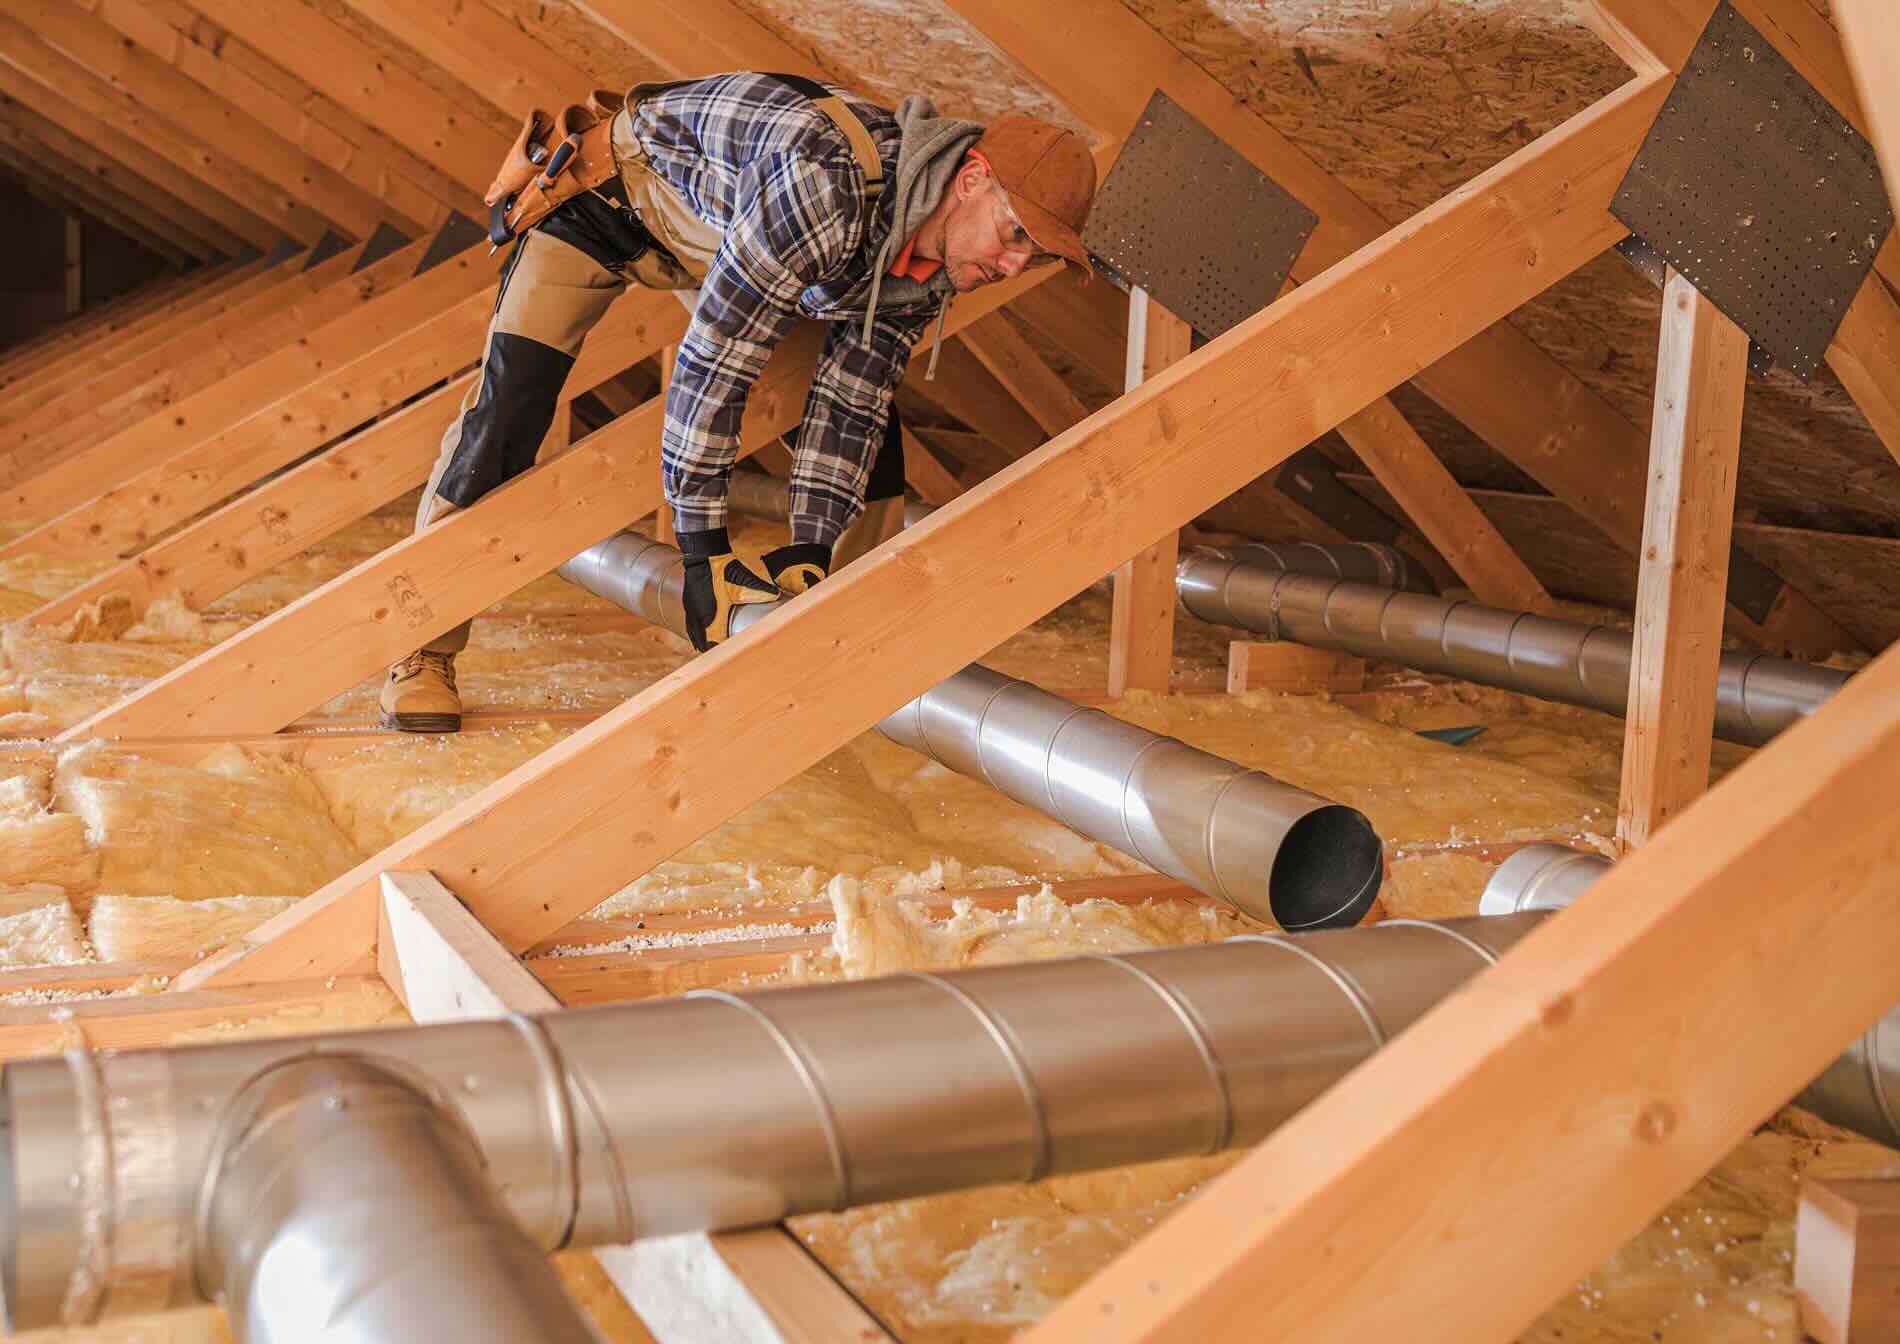
- Seal ductwork: Insulate and seal the HVAC ductwork in your attic to prevent air leakage and loss of conditioned air. Ensure that all joints and connections are properly sealed with appropriate duct tape or mastic sealant.
- Insulate attic access points: In addition to insulating the attic hatch or door, consider adding an insulated cover or box to provide an extra layer of insulation and prevent air leakage from this critical access point.
- Install attic insulation baffles: Attic insulation baffles, also known as ventilation chutes, help maintain proper ventilation while keeping insulation from blocking soffit vents. Install baffles along the eaves to ensure airflow and reduce the risk of moisture problems.
- Consider radiant barriers: If you live in a hot climate, installing a radiant barrier directly under the roof can help reflect radiant heat away from your attic, keeping it cooler and reducing the workload on your cooling system.
- Add weatherstripping: Check windows, doors, and other openings in the attic and seal them with weatherstripping to minimize drafts and air leakage. This can further improve energy efficiency and insulation performance.
- Regularly inspect insulation: Over time, insulation can settle or be displaced. Regularly inspect your attic insulation to ensure it remains properly distributed and hasn’t been compressed or damaged. Make any necessary adjustments or additions as needed.
- Consider professional insulation audit: If you want to ensure the highest level of insulation performance, consider hiring a professional to conduct an insulation audit. They can evaluate the existing insulation, identify any deficiencies, and recommend the best strategies for improving energy efficiency in your attic.
- Maintain attic ventilation: Proper attic ventilation is key to preventing moisture buildup and maintaining a healthy attic environment. Ensure that vents are clear and unobstructed, and consider adding additional ventilation if necessary.
- Insulate pipes and ductwork: Insulate any exposed pipes or ductwork in your attic to prevent heat loss or gain. This will help maintain consistent temperatures throughout your home and improve the overall energy efficiency of your HVAC system.
- Consider attic insulation upgrades: If your current insulation is outdated or doesn’t meet the recommended guidelines for energy efficiency, consider upgrading to a more effective and modern insulation material. Consult with professionals to explore your options.
By implementing these additional tips, you can enhance the effectiveness and performance of your attic insulation, leading to greater energy savings and comfort in your home.
Now that we have covered additional tips, it’s time to wrap up our comprehensive guide to adding insulation in the attic.
Conclusion
Adding insulation to your attic is a crucial step in creating an energy-efficient and comfortable home. Properly insulating your attic helps regulate temperature, reduce energy consumption, and lower your utility bills. By following the steps outlined in this comprehensive guide, you can successfully install insulation in your attic and maximize its effectiveness.
We started by understanding the importance of attic insulation and the various types of insulation materials available. Assessing your current insulation and preparing the space for installation are vital steps that shouldn’t be overlooked. Safety precautions and the right tools are essential for a smooth and safe installation process.
We then provided a step-by-step guide to adding insulation in the attic, emphasizing the importance of even coverage and avoiding common mistakes such as insufficient insulation or blocking ventilation. Additionally, we shared additional tips to further enhance attic insulation, such as sealing ductwork, insulating attic access points, and considering radiant barriers.
Remember to regularly inspect your insulation, maintain attic ventilation, and consider professional advice when needed. These measures will ensure that your attic insulation remains optimized and continues to provide maximum energy efficiency and comfort.
In conclusion, by following the guidelines outlined in this article and implementing proper insulation practices, you can create a well-insulated attic that contributes to a more sustainable and comfortable living environment. Enjoy the benefits of reduced energy consumption, lower utility bills, and a cozy home throughout the seasons.
Frequently Asked Questions about How To Add Insulation In Attic
Was this page helpful?
At Storables.com, we guarantee accurate and reliable information. Our content, validated by Expert Board Contributors, is crafted following stringent Editorial Policies. We're committed to providing you with well-researched, expert-backed insights for all your informational needs.


0 thoughts on “How To Add Insulation In Attic”