Articles
How To Start Ryobi Generator
Modified: February 23, 2024
Learn how to start your Ryobi generator with our step-by-step articles. Find all the information you need to get your generator up and running quickly.
(Many of the links in this article redirect to a specific reviewed product. Your purchase of these products through affiliate links helps to generate commission for Storables.com, at no extra cost. Learn more)
Introduction
Welcome to this comprehensive guide on how to start a Ryobi generator. Whether you’ve recently purchased a Ryobi generator for emergency power backup or outdoor activities, or you’re considering buying one, it’s important to know how to properly set it up and get it running.
Ryobi generators are known for their reliability and durability, making them a popular choice among homeowners and professionals alike. However, if you’re new to using generators, the process of starting one up can be a bit intimidating. But fear not! This article will walk you through the step-by-step process, ensuring that you can confidently start your Ryobi generator and power your devices whenever and wherever you need them.
Before we begin, it’s important to note that each model of Ryobi generator may have some specific instructions or features, so always consult your user manual for any model-specific guidelines. This guide will provide you with a general overview of the steps involved in starting a Ryobi generator, but be sure to follow the instructions that came with your specific model for the best results.
Now, let’s dive in and get started on our journey to become Ryobi generator experts!
Key Takeaways:
- Master the art of starting and maintaining your Ryobi generator with confidence. From unboxing to testing the output, this guide equips you to power up your world safely and effectively.
- Proper storage and maintenance are crucial for ensuring the longevity and reliability of your Ryobi generator. Follow the steps to shut down, store, and maintain your generator for consistent performance.
Read more: Who Makes Ryobi Generators
Step 1: Unboxing the Ryobi Generator
The first step in starting your Ryobi generator is to unbox it. Carefully remove the generator from its packaging, taking care not to damage any of the components. It’s a good idea to have a clear and spacious area to work in, ensuring that you have enough room to maneuver the generator and its accessories.
Once the generator is unboxed, take a moment to inspect it for any visible damage. Check for any dents, scratches, or loose parts. If you notice any issues, contact the retailer or Ryobi customer service for assistance.
Next, locate the user manual and other documentation that came with your generator. It’s crucial to familiarize yourself with the information provided in the manual, as it will contain important safety instructions, operating procedures, and maintenance guidelines specific to your model of Ryobi generator.
In addition to the manual, you may also find other accessories and components included in the box. These can include wheels, a handle, oil fill bottle, battery, and other items necessary for the generator’s operation. Ensure that all the components are present and in good condition.
Now that you have unboxed your Ryobi generator and familiarized yourself with the user manual and accessories, you are ready to move on to the next step: familiarizing yourself with the generator’s features.
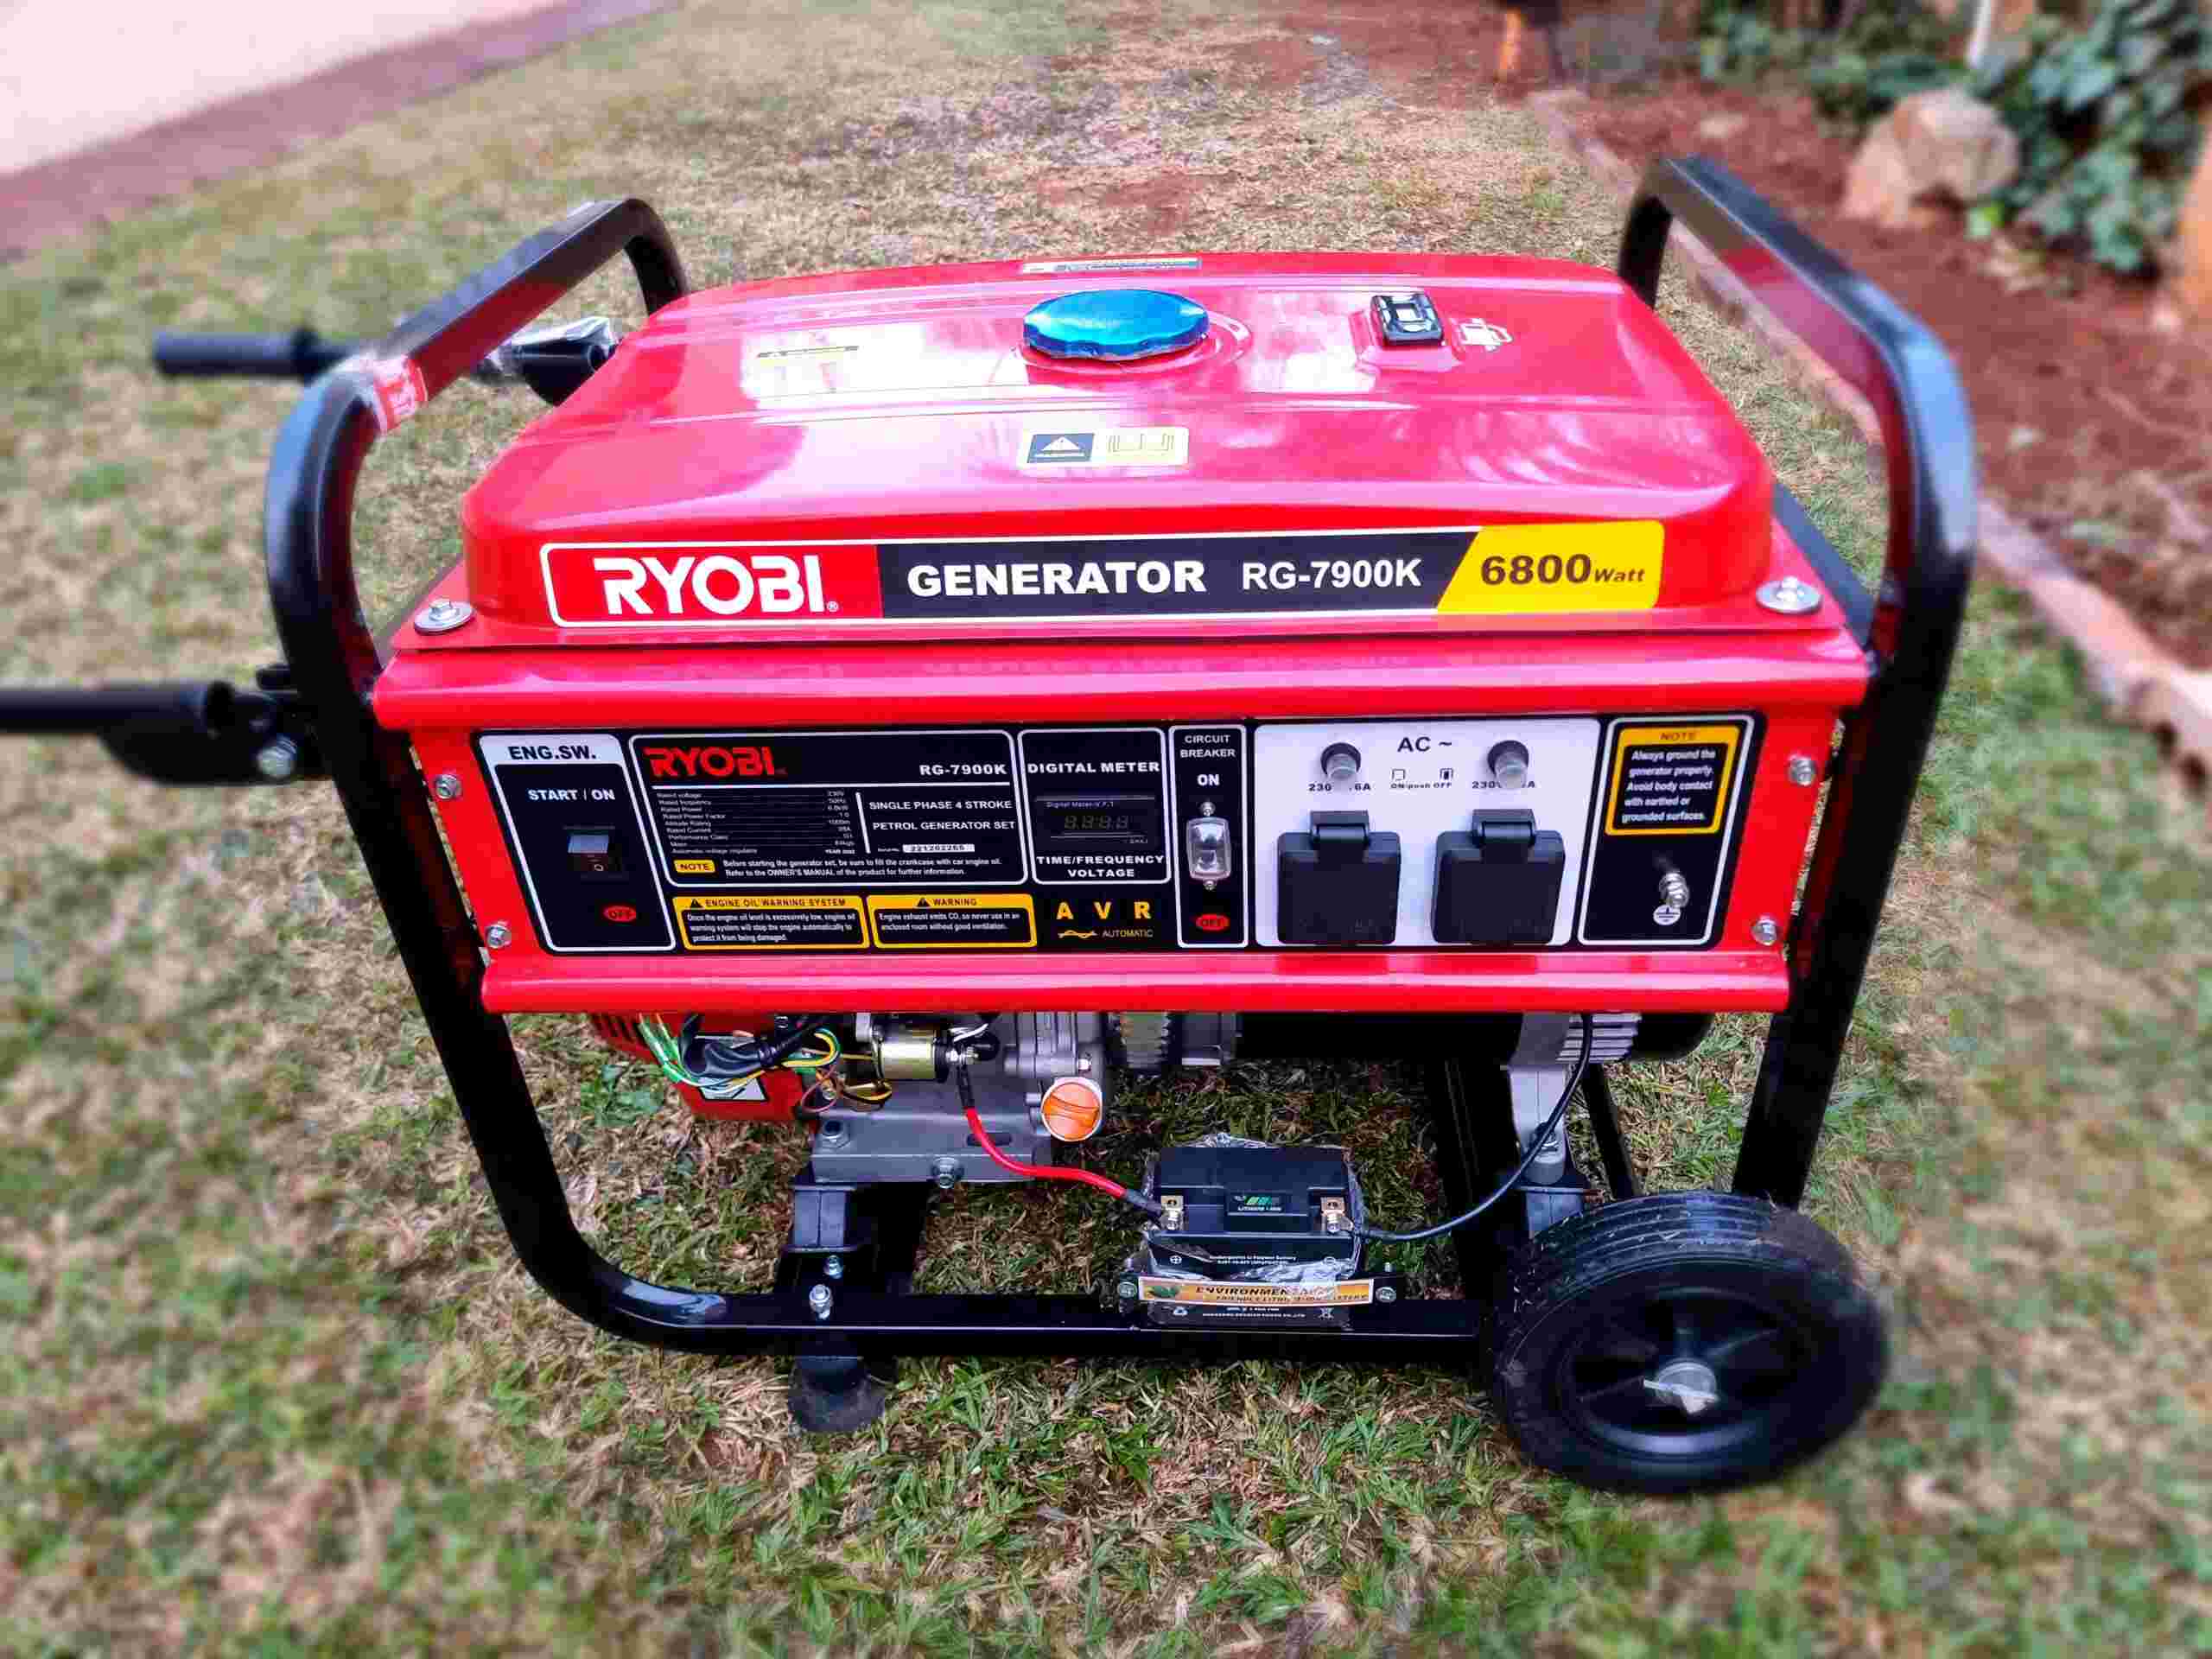
Step 2: Familiarizing Yourself with the Generator’s Features
Once you have unboxed your Ryobi generator, it’s important to take some time to familiarize yourself with its various features. This step will help you understand how the generator functions and how to operate it safely and efficiently.
Begin by examining the control panel of the generator. It will typically have several key components, including a starter switch, fuel valve, choke lever, power outlets, and a voltage selector switch. Take note of the labels and markings on each of these components as they will guide you in using the generator correctly.
Next, locate the fuel tank. It is usually situated on the side of the generator and has a fuel cap or vent. Take a moment to familiarize yourself with how to open and close the fuel cap, as well as the proper type of fuel needed for the generator.
Additionally, some Ryobi generators come with a built-in fuel gauge that allows you to easily monitor the remaining fuel level. Familiarize yourself with the location and operation of this gauge, if applicable.
Another important feature to be aware of is the oil fill port. The generator’s engine requires oil for proper lubrication and cooling. Find the oil fill port, typically marked with a “Oil” label, and make a mental note of its location. Understanding where to add oil when necessary is vital for maintaining the generator’s performance and longevity.
In addition to these main features, your specific model of Ryobi generator may have other unique components or functions. Refer to the user manual to understand these features and their purpose.
By taking the time to familiarize yourself with the generator’s features, you’ll be better equipped to operate it safely and effectively. Now that you’ve become acquainted with the generator, it’s time to move on to the next step: installing the wheels and handle.
Step 3: Installing the Wheels and Handle
Before you can start using your Ryobi generator, you’ll need to install the wheels and handle. This step is essential for ease of transportation and maneuverability of the generator.
Begin by locating the wheel kit that came with your generator. It typically includes two wheels and a support leg. Carefully unpack the wheel kit and ensure that all the necessary components are present.
Next, flip the generator on its side, with the bottom facing up. This will allow you to access the designated wheel mounting locations. Align the holes in the wheels with the corresponding holes on the generator, and insert the axle through the holes.
Once the wheels are in position, secure them using the provided nuts or clips. Tighten the nuts or clips with the appropriate tools to ensure that the wheels are securely attached to the generator.
After attaching the wheels, locate the handle that came with your generator. The handle is typically designed to be adjustable, allowing you to adjust its height for comfortable maneuvering. Adjust the handle to your desired height and insert it into the designated handle slot on the generator.
Make sure the handle is securely locked into place by tightening any screws or levers provided. Give the handle a gentle shake to ensure stability and proper installation.
Now that the wheels and handle are properly installed, your Ryobi generator is ready to be moved around with ease. However, always remember to exercise caution when transporting the generator, especially on uneven or rough terrain.
With the wheels and handle in place, you’re now ready to move on to the next step: adding oil to the generator.
Step 4: Adding Oil to the Generator
Adding oil to your Ryobi generator is a crucial step to ensure proper lubrication of the engine. Without sufficient oil, the generator may experience performance issues or even damage. Therefore, it’s important to follow the recommended oil specifications and proper procedure for adding oil.
Start by locating the oil fill port, typically marked with a “Oil” label or symbol. It is usually positioned near the bottom of the generator’s engine. Check the user manual or the label on the generator for the specific type of oil recommended for your model.
Once you have the correct type of oil, remove the oil fill cap or dipstick from the oil fill port. Carefully pour the recommended amount of oil into the port. Be mindful not to overfill, as this can lead to engine damage. It’s always better to add a little less oil and then top it up if needed.
While adding oil, it’s recommended to use a funnel to avoid any spillage or drips. Clean any excess oil around the fill port to prevent oil contamination or debris buildup.
After adding the oil, insert the oil fill cap or dipstick back into the port and securely tighten it. Make sure the cap or dipstick is seated properly to prevent any oil leaks during generator operation.
Before starting the generator, allow the oil to settle for a few minutes. This will ensure that the oil is properly distributed throughout the engine before it is put under load.
Always check the oil level before every use of the generator. Maintaining the proper oil level will promote the longevity and smooth operation of your Ryobi generator.
Now that you have added oil to your generator, it’s time to move on to the next step: connecting the battery.
Read more: How To Start Ryobi Chain Saw
Step 5: Connecting the Battery
Connecting the battery of your Ryobi generator is an important step to ensure reliable starting and operation. The battery provides the necessary power to ignite the generator’s engine and also helps in maintaining a steady flow of electricity during use.
Start by locating the battery compartment on your Ryobi generator. It is usually situated near the control panel or on the side of the generator. Open the battery compartment cover, if applicable, using the designated latch or screws.
Inside the battery compartment, you will find the battery terminals and the connector cables. The terminal connections are typically labeled as “+” (positive) and “-” (negative). Before connecting the battery, make sure the generator is turned off to prevent any electrical mishaps.
Take note of the polarity markings on the battery and the connector cables. The positive (+) cable should be connected to the positive terminal, and the negative (-) cable should be connected to the negative terminal.
Align the connectors carefully with the respective terminals and firmly push them together until they are securely connected. Ensure that the connectors are properly seated and there is a solid electrical connection.
Once the battery is connected, close the battery compartment cover and ensure that it is securely fastened. This will protect the battery from any external elements and prevent any accidental disconnection.
It is recommended to periodically check the battery connection to ensure they are clean and free from corrosion. If you notice any corrosion buildup, clean it off using a wire brush or a battery cleaner to maintain proper electrical contact.
With the battery connected, your Ryobi generator is now ready to power up. However, before starting the generator, make sure to follow the proper fueling procedure, which will be covered in the next step.
Let’s move on to step 6: fueling the generator.
Before starting your Ryobi generator, make sure to check the oil level and add fuel. Then, turn the fuel valve to the on position, pull the choke knob out, and pull the recoil starter cord to start the generator.
Step 6: Fueling the Generator
Properly fueling your Ryobi generator is essential for its smooth and efficient operation. Before starting the generator, you’ll need to ensure that it has enough fuel to sustain the desired runtime. Here’s how to effectively fuel your generator:
Start by locating the fuel tank on your Ryobi generator. The fuel tank is typically located on the side or top of the generator, and it is equipped with a fuel cap or vent.
Before fueling, it’s important to check the user manual or the label on the generator to determine the type of fuel required. Most Ryobi generators run on gasoline, but some models may have specific fuel requirements, such as ethanol-free fuel.
Once you have the correct type of fuel, open the fuel cap or vent and carefully insert the fuel nozzle or funnel into the tank opening. Slowly pour the fuel into the tank, taking care not to spill or overfill it. It’s advisable to use a funnel to prevent any fuel spills.
While fueling, make sure you maintain a steady hand and avoid distractions to avoid any accidental spills or fuel contamination. Also, be mindful of any open flames or ignition sources in the vicinity, as fuel is highly flammable.
Once the fuel tank is full, securely tighten the fuel cap or close the vent. Ensure that the cap or vent is properly sealed to prevent any fuel leaks during generator operation.
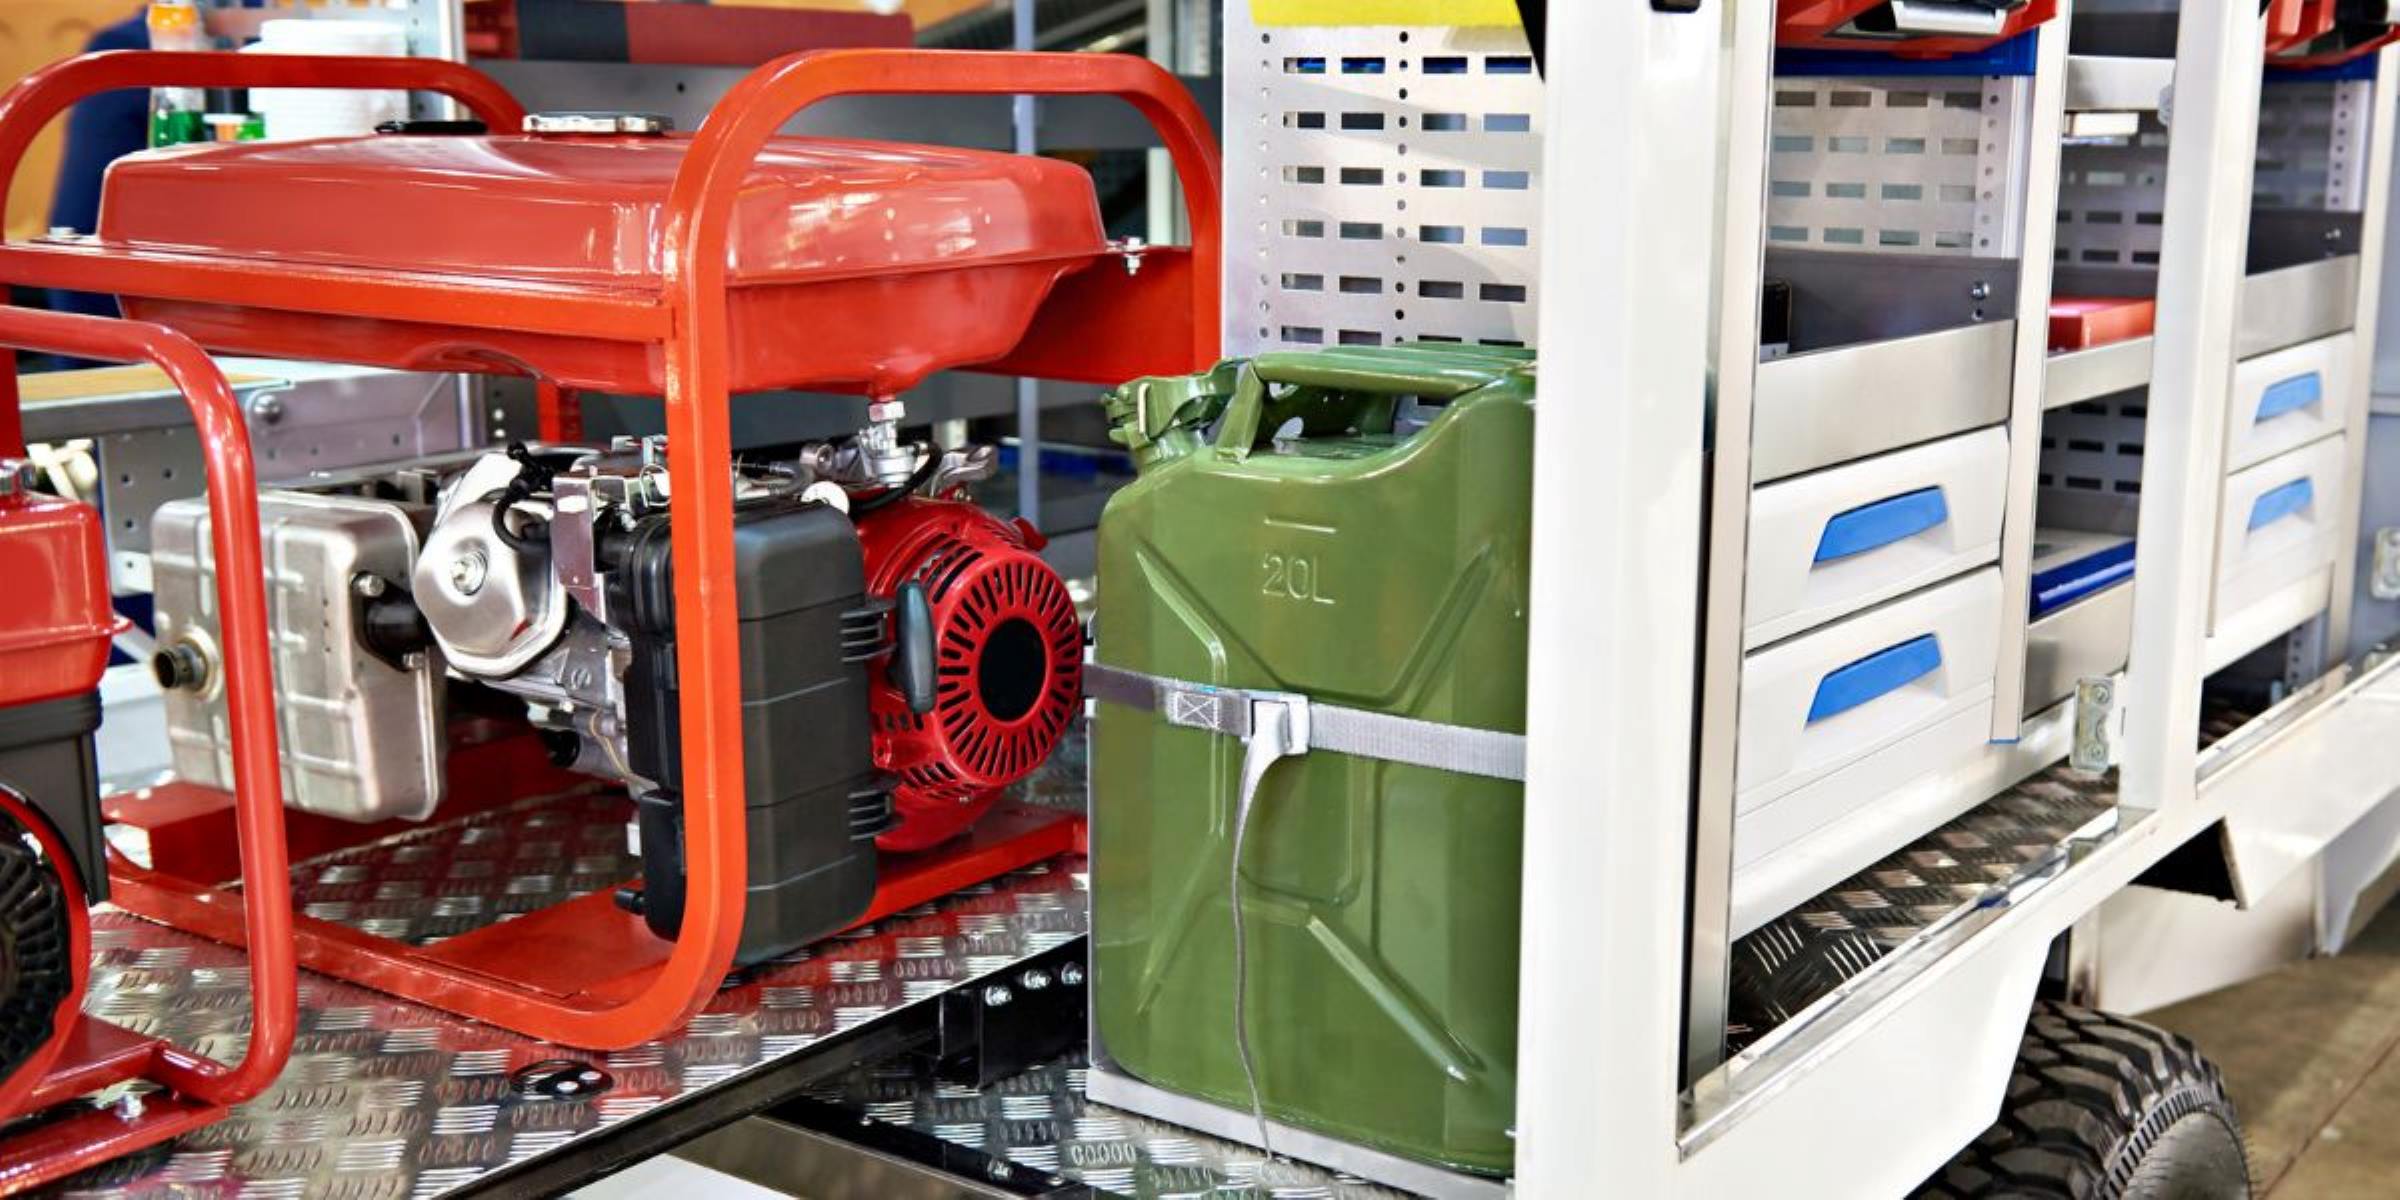
It’s important to note that fuel should be stored separately in approved containers and away from any heat sources or open flames. Always follow proper fuel storage and handling guidelines to ensure safety.
With your generator properly fueled, you’re now ready to move on to the next step: starting the Ryobi generator.
Let’s proceed to step 7: starting the Ryobi generator.
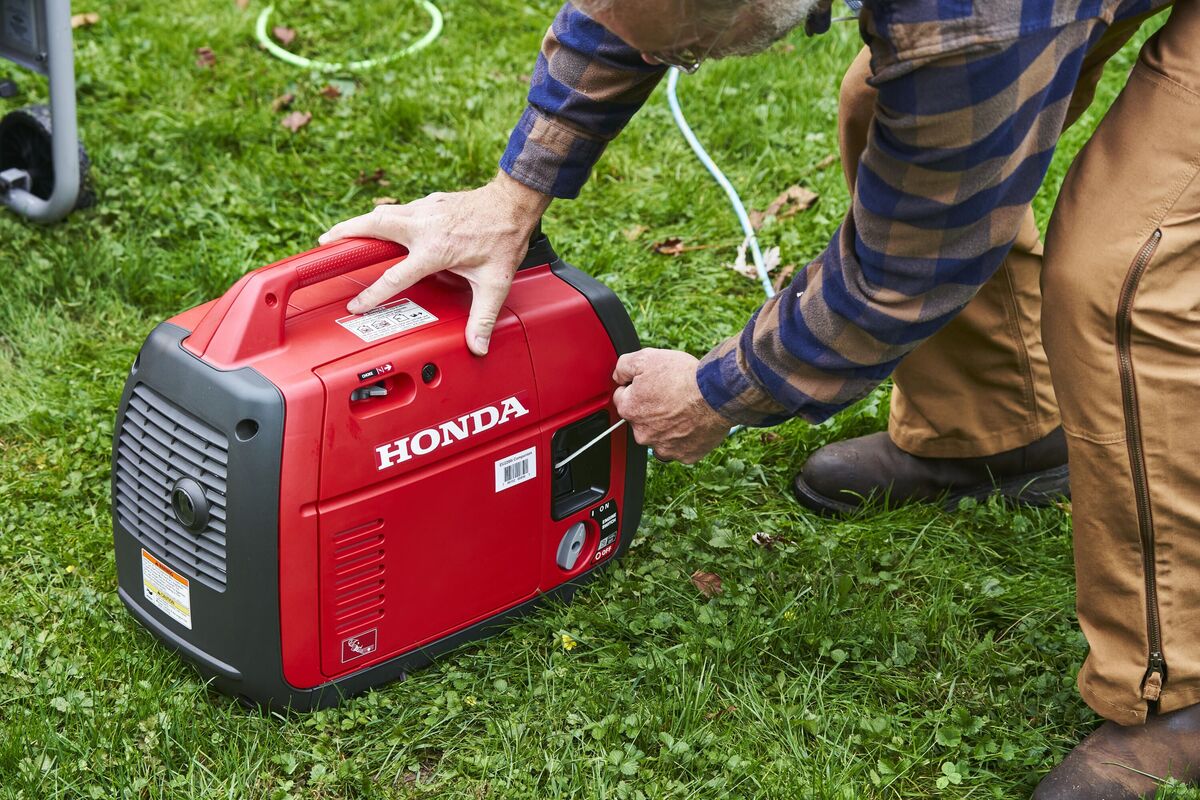
Step 7: Starting the Ryobi Generator
Now that your Ryobi generator is fueled up and ready to go, it’s time to start it up and bring it to life. Following the correct starting procedure will ensure a smooth and successful startup of your generator. Here’s how to start your Ryobi generator:
Start by ensuring that all appliances or devices that will be connected to the generator are turned off. This will prevent any sudden power surges or issues when the generator starts up.
Next, locate the starter switch on the control panel of your Ryobi generator. The starter switch is typically labeled with the “On/Off” symbol or the word “Start.” Make sure the switch is in the “Off” position before proceeding.
Now, if your generator has a choke lever, locate it on the control panel. The choke is used to enrich the fuel-air mixture during startup when the engine is cold. If the engine is warm, you may not need to engage the choke. Check the user manual for guidance on when to use the choke.
If your generator has a primer bulb, you may need to press it a few times to prime the fuel system. This helps ensure that fuel reaches the engine quickly and facilitates easier starting.
Once you have primed if necessary, turn the fuel valve to the “On” position. The fuel valve controls the flow of fuel from the tank to the engine.
If your generator is equipped with an automatic voltage regulator (AVR), which helps stabilize the generated power, make sure it is switched on as well. Refer to the user manual for the location of the AVR switch.
With all the necessary preparations completed, it’s time to start the generator. Move the starter switch to the “Start” position. Depending on the model, you may need to hold the switch in the “Start” position for a few moments until the engine starts.
As the engine starts, you may hear a few initial sputters or a rough idle. This is normal and should subside as the engine warms up. If the engine fails to start after a few attempts, check the fuel level, connections, and consult the troubleshooting section of the user manual.
Once the engine is running smoothly, monitor the generator for any unusual sounds or vibrations. It should run quietly and steadily. If you notice any abnormalities, consult the user manual or contact Ryobi customer service for assistance.
Congratulations! You have successfully started your Ryobi generator, providing you with reliable power when you need it. Now, let’s move on to the next step: testing the generator’s output.
Step 8: Testing the Generator’s Output
After successfully starting your Ryobi generator, it’s important to test its output to ensure that it is generating the expected power. Testing the generator’s output will help you verify that it is functioning correctly and that it can effectively power your devices and appliances. Here’s how to test the generator’s output:
Start by identifying the power outlets on your Ryobi generator. They are typically located on the control panel and may have different types of outlets, such as 120V AC outlets and possibly a 240V outlet for larger appliances or RVs.
With the generator running and producing power, connect a small electrical device to one of the outlets. This can be a lamp, a small fan, or any other device with a power rating within the generator’s capacity. Avoid connecting devices that exceed the generator’s wattage rating to prevent any overload or damage.
Turn on the connected device and verify that it is receiving power from the generator. Check that the device functions as expected and operates normally. If the device doesn’t turn on or experiences any issues, double-check the connection and ensure that the generator is producing power.
If your Ryobi generator is equipped with a voltage selector switch, ensure that it is set to the appropriate voltage for your devices. Some appliances or equipment may require 240V power, so make sure the switch is set accordingly.
During the testing phase, keep an eye on the generator to monitor its performance. Pay attention to any fluctuations in power, strange noises, or overheating. If you notice any abnormalities, immediately turn off the generator and consult the user manual or contact Ryobi customer service for further assistance.
It’s also a good idea to test the generator’s output with different devices of varying power requirements. This will help you determine the generator’s capability to handle different loads and ensure that it can power your essential devices during use.
By thoroughly testing the generator’s output, you can have peace of mind knowing that it is producing the power you need. With a successful output test, you’re almost done. Let’s move on to the final step: shutting down and storing the generator.
Read more: How To Start Ryobi Weed Wacker
Step 9: Shutting Down and Storing the Generator
Properly shutting down and storing your Ryobi generator is essential for its longevity and safekeeping. Following the correct procedure will ensure that the generator is turned off safely and stored in a suitable location. Here’s how to shut down and store your generator:
Start by disconnecting any devices or appliances from the generator’s power outlets. This prevents any potential damage to the equipment or devices and ensures a safe shutdown process.
Next, turn off all switches and controls on the generator’s control panel. This includes the starter switch, fuel valve, and any other switches that may be present. Check the user manual for specific instructions on shutting down your model of Ryobi generator.
Allow the generator to run for a few minutes without any load. This will help cool down the engine and stabilize the internal components before shutting it off completely.
Once the generator has run for a few minutes, move the starter switch to the “Off” position. This will shut down the engine and stop the generator from producing power.
After turning off the generator, it’s important to let it cool down completely before attempting any further maintenance or storage activities. Touch the generator’s exterior to ensure that it has cooled down enough to be safely handled.
Now that the generator is shut down and cooled, it’s time to prepare it for storage. Start by cleaning the exterior of the generator with a damp cloth to remove any dirt or debris. Pay special attention to areas around the fuel and oil fill ports to prevent any contaminants from entering the engine.
If you anticipate long-term storage or seasonal non-use, it’s recommended to add a fuel stabilizer to the fuel tank. This will help prevent fuel degradation and ensure that the generator starts up smoothly when needed again. Refer to the user manual or the fuel stabilizer’s instructions for the proper dosage amount.
Store the generator in a well-ventilated, dry area that is protected from extreme temperatures, moisture, and dust. Make sure the generator is kept in an upright position to prevent any fuel or oil leaks. Cover the generator with a waterproof and breathable cover to provide additional protection from the elements.
Lastly, remember to periodically inspect and maintain the generator during storage. This includes checking the fuel level, inspecting the spark plug, and ensuring all connections are secure. Following the manufacturer’s guidelines for maintenance during storage will help ensure that the generator stays in good condition and is ready for use when needed.
By properly shutting down and storing your Ryobi generator, you will not only extend its lifespan but also ensure that it is always ready to provide reliable power when you need it the most.
Congratulations! You have successfully completed all the steps to start, use, and store your Ryobi generator. With this knowledge, you can confidently utilize your generator for various applications, from powering essential devices during blackouts to energizing outdoor events or job sites. Remember to always refer to the user manual for specific instructions and safety guidelines pertaining to your particular model of Ryobi generator.
Thank you for following this comprehensive guide. Enjoy the convenience and peace of mind that your Ryobi generator brings!
Conclusion
Congratulations! You’ve reached the end of this comprehensive guide on how to start and use your Ryobi generator. By following the step-by-step instructions provided, you are now equipped with the knowledge and confidence to properly set up, start, and operate your generator for a variety of applications.
Starting with unboxing the generator and familiarizing yourself with its features, you’ve learned how to install the wheels and handle, add oil, connect the battery, and fuel the generator. You’ve also learned how to start the generator, test its output, and shut it down safely. Finally, you learned how to properly store the generator for long-term or seasonal non-use.
Throughout the process, it’s important to remember to refer to the user manual that came with your specific model of Ryobi generator. The manual contains valuable information regarding model-specific features, maintenance guidelines, and safety precautions that are essential for safe and efficient operation.
By maintaining your Ryobi generator properly and following the recommended maintenance schedule outlined in the user manual, you can ensure its longevity and consistent performance. Regular inspection, cleaning, and servicing of the generator’s components will help prevent issues and keep it ready for use at any time.
Whether you use your Ryobi generator for emergency backup power during blackouts, camping trips, outdoor events, or on job sites, it’s a reliable companion that provides the convenience of portable power. With proper care and maintenance, your Ryobi generator will continue to serve you well for years to come.
We hope that this guide has been informative and helpful in allowing you to become familiar with your Ryobi generator and its features. Now, go out there and confidently power up your world with your trusty Ryobi generator!
Thank you for choosing Ryobi, and happy generator adventures!
Now that you're all set with starting and maintaining your Ryobi generator, why not enhance your toolkit even further? For those keen on optimizing their workshop or home maintenance routine, our next article sheds light on selecting top-quality power tools. Whether you’re a seasoned handyperson or just getting into DIY projects, understanding which tools offer the best performance and value is key to tackling any task efficiently.
Frequently Asked Questions about How To Start Ryobi Generator
Was this page helpful?
At Storables.com, we guarantee accurate and reliable information. Our content, validated by Expert Board Contributors, is crafted following stringent Editorial Policies. We're committed to providing you with well-researched, expert-backed insights for all your informational needs.


0 thoughts on “How To Start Ryobi Generator”