Home>Articles>How To Fix Water Coming Through Basement Floor
Articles
How To Fix Water Coming Through Basement Floor
Modified: February 24, 2024
Learn effective ways to fix water coming through your basement floor with our informative articles. Discover expert tips and solutions for a dry and secure basement.
(Many of the links in this article redirect to a specific reviewed product. Your purchase of these products through affiliate links helps to generate commission for Storables.com, at no extra cost. Learn more)
Introduction
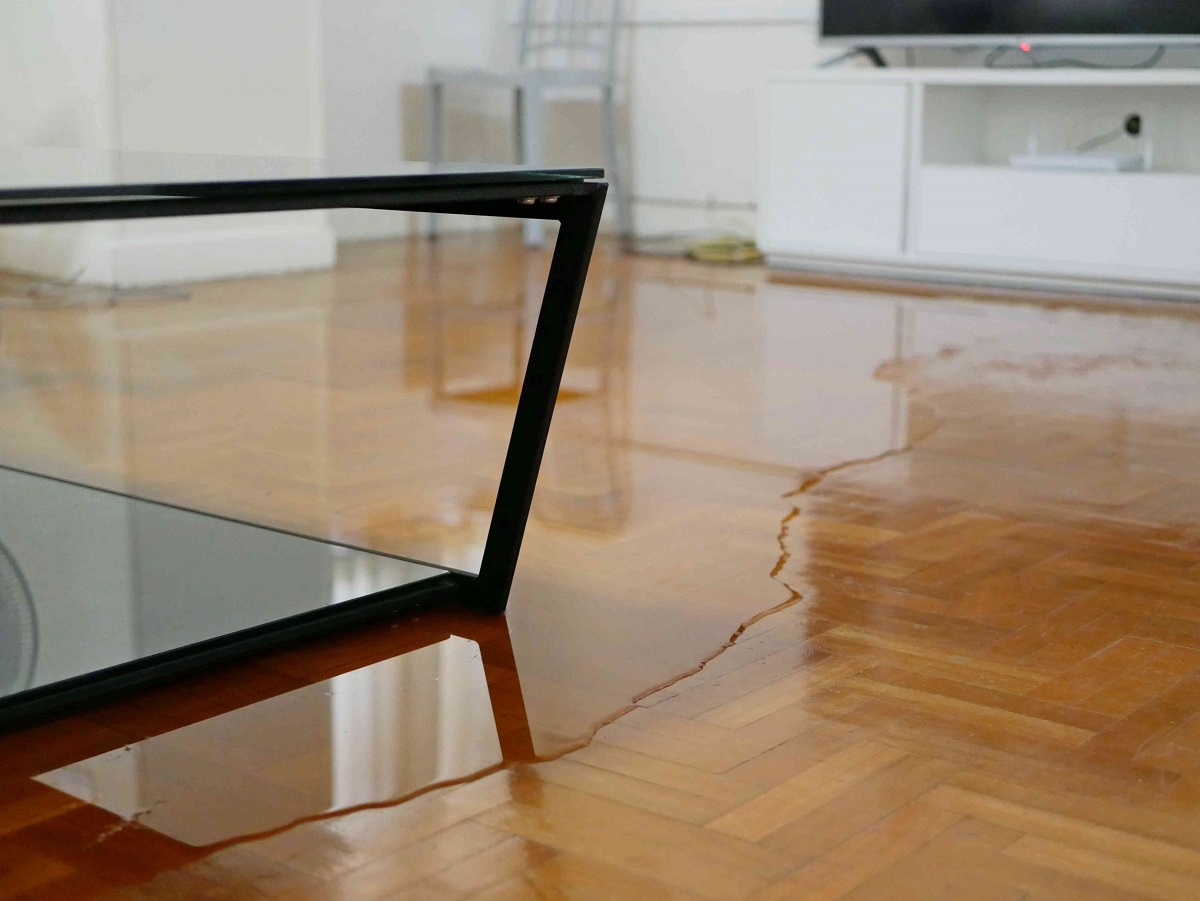
Water coming through the basement floor is a common problem that many homeowners face. It can be a frustrating and potentially damaging issue, leading to mold growth, damaged belongings, and a decrease in indoor air quality. Understanding the causes of water seepage and how to fix it is crucial for maintaining a dry and stable basement.
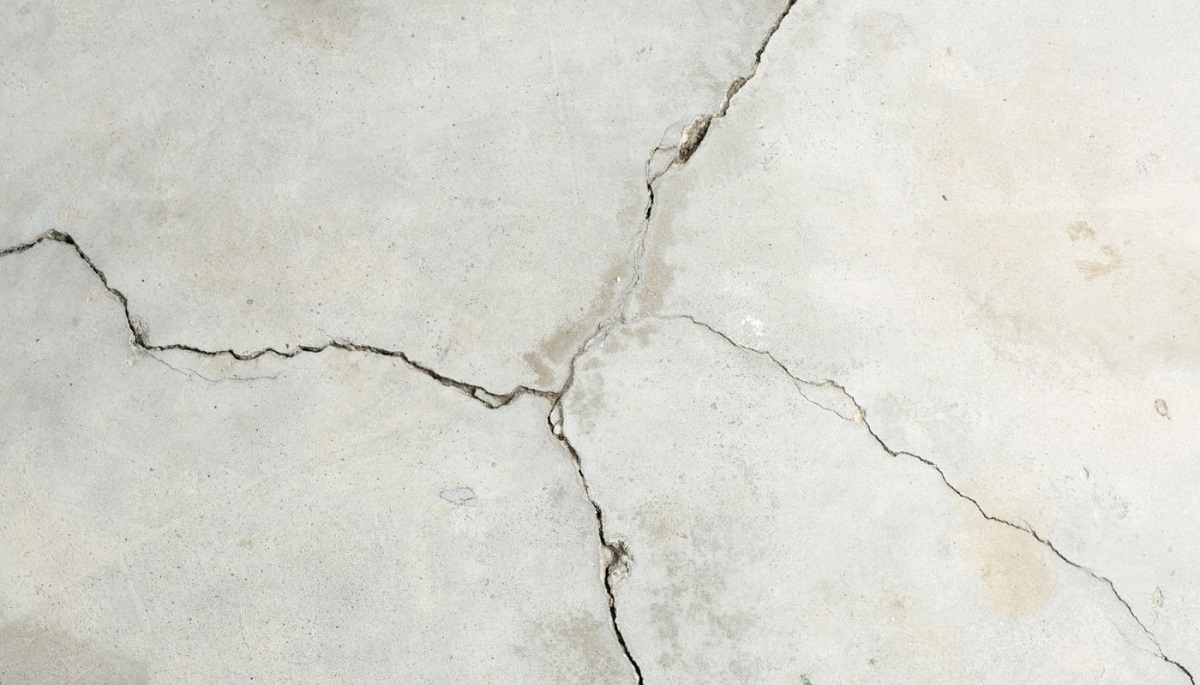
There are several common causes of water coming through the basement floor, including cracks in the foundation, faulty waterproofing, poor drainage, or high water table. Identifying the root cause is essential in order to implement the appropriate solution.
In this article, we will discuss step-by-step guidelines on how to fix water coming through the basement floor. We will provide you with the necessary tools and materials, as well as explain each repair method in detail. By following these instructions, you can effectively address this issue and prevent further damage to your basement.
Key Takeaways:
- Identifying the root cause of water seepage, preparing the area, repairing cracks, applying waterproofing sealant, installing a sump pump system, and ensuring proper drainage are crucial steps to effectively fix water coming through the basement floor and maintain a dry and stable living space.
- By following the step-by-step guidelines, gathering necessary tools and materials, and prioritizing safety, homeowners can eliminate water seepage, protect their basement from damage, and enjoy a dry and comfortable living space.
Common Causes of Water Coming Through Basement Floor
Before we delve into the solution, it’s important to understand the common causes of water seepage through the basement floor:
- Cracks in the foundation: Over time, the foundation of your home may develop cracks, allowing water to enter your basement. These cracks can be a result of settling or shifting of the house, frost heaves, or hydrostatic pressure from the surrounding soil.
- Faulty waterproofing: If the waterproofing system installed during the construction of your home was not done properly or has deteriorated over time, it can lead to water seepage through the basement floor.
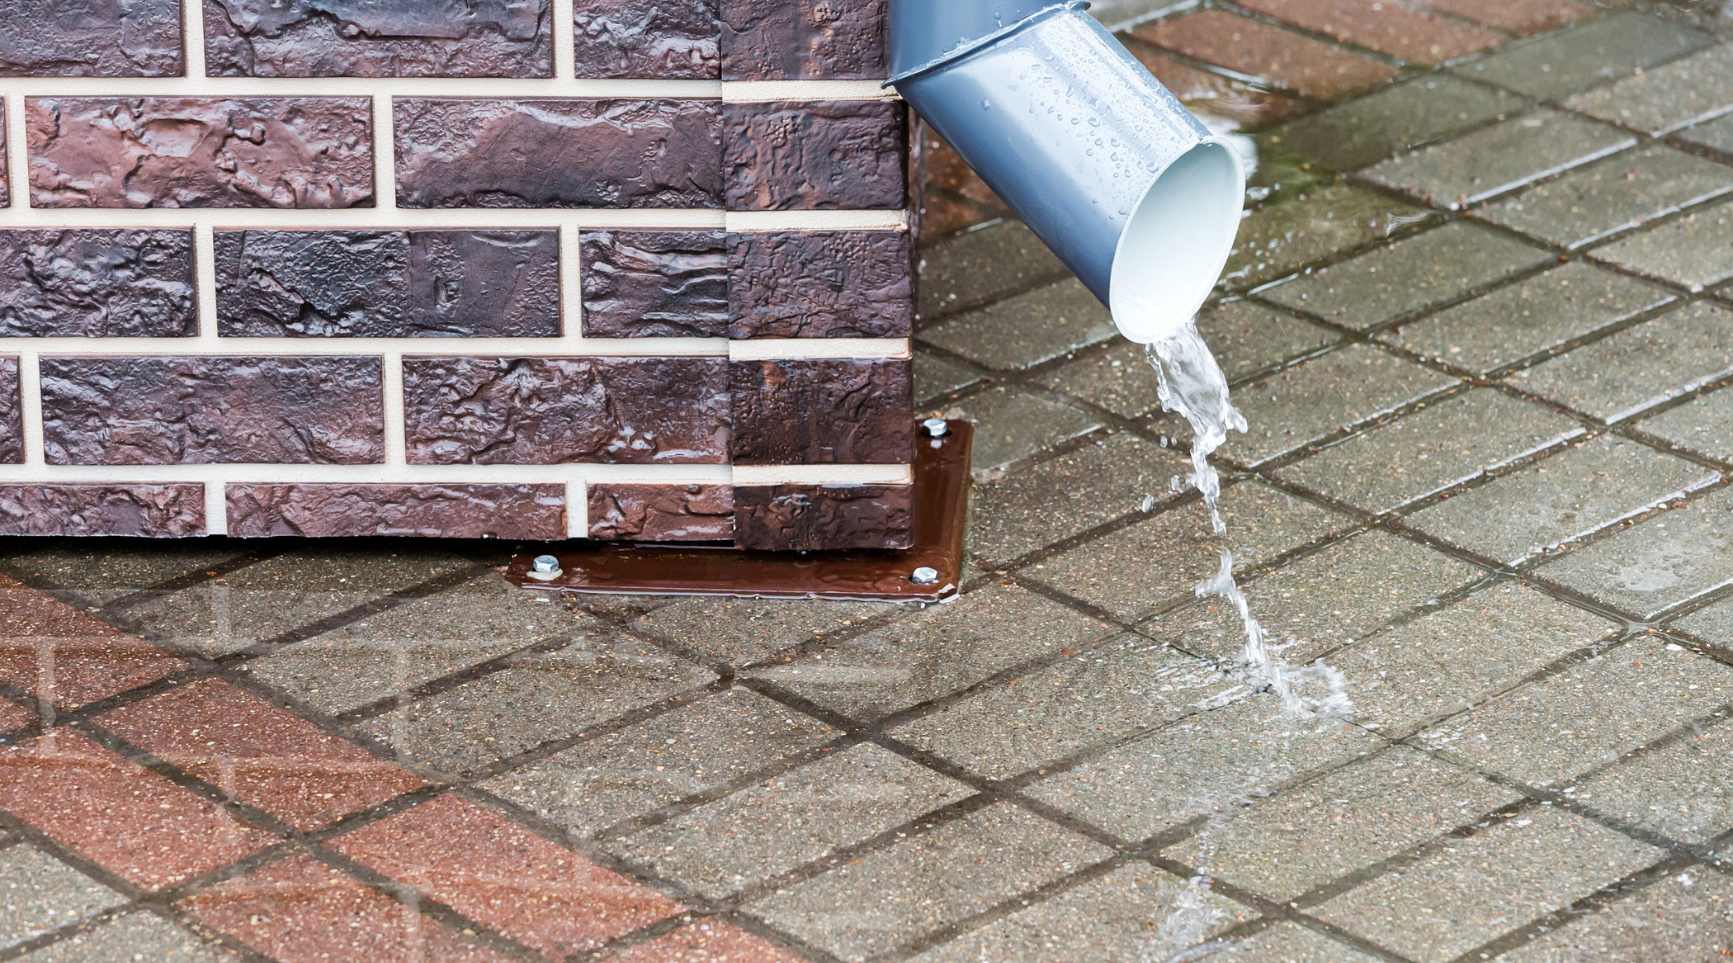
- Poor drainage: If your property does not have proper grading or the downspouts and gutters are not directing water away from the foundation, it can result in water pooling around the basement, leading to water intrusion.
- High water table: A high water table, which refers to the level of groundwater beneath the surface, can exert pressure on the basement floor, causing water to infiltrate through cracks or gaps.
Identifying the specific cause of water seeping through your basement floor will assist you in implementing the appropriate solution and preventing further water damage.
Key Takeaways:
- Identifying the root cause of water seepage, preparing the area, repairing cracks, applying waterproofing sealant, installing a sump pump system, and ensuring proper drainage are crucial steps to effectively fix water coming through the basement floor and maintain a dry and stable living space.
- By following the step-by-step guidelines, gathering necessary tools and materials, and prioritizing safety, homeowners can eliminate water seepage, protect their basement from damage, and enjoy a dry and comfortable living space.
Common Causes of Water Coming Through Basement Floor
Water coming through the basement floor is a frustrating issue that many homeowners experience. Understanding the common causes of this problem is essential in order to effectively address and prevent further damage. Here are some of the most common causes of water seepage through the basement floor:
- Cracks in the foundation: Over time, the foundation of a home can develop cracks due to a variety of factors such as settling, shifting soil, or freeze-thaw cycles. These cracks can provide an entry point for water to seep through the basement floor.
- Faulty waterproofing: If the waterproofing system installed during the construction of the home was not done properly or has deteriorated over time, it can result in water infiltration through the basement floor. This can occur if there are gaps or weaknesses in the waterproofing barrier.
- Poor drainage: Improper grading around the home or faulty gutters and downspouts can cause water to pool near the foundation. This excess water can exert pressure on the basement floor, leading to seepage through cracks or gaps.
- High water table: The water table refers to the level of groundwater beneath the surface. If the water table is high, it can put pressure on the basement floor, forcing water through any openings or weak points in the structure.
- Ineffective sealants: Sometimes, the sealants used on the basement floor may not be sufficient to prevent water seepage. Over time, these sealants can deteriorate or become ineffective, allowing water to enter through the basement floor.
- Hydrostatic pressure: Hydrostatic pressure occurs when water accumulates around the foundation and exerts pressure against the basement walls and floor. If the pressure becomes too great, water can find its way through cracks and joints in the basement floor.
Identifying the specific cause of water seepage through the basement floor is crucial in order to implement the appropriate solution. By addressing the root cause, you can effectively fix the issue and prevent further water damage to your basement.
Necessary Tools and Materials
Before you start fixing water coming through the basement floor, it’s important to gather the necessary tools and materials. Having the right equipment will help you carry out the repairs effectively and efficiently. Here are the tools and materials you will need:
Tools:
- Protective gear (gloves, safety goggles, dust mask)
- Hammer
- Chisel
- Wire brush
- Putty knife
- Concrete grinder or sander
- Utility knife
- Caulking gun
- Paintbrush
- Trowel
- Drill
- Injection kit (for crack repairs)
- Sump pump
- Wet/dry vacuum
Materials:
- Concrete patching compound
- Waterproofing sealant
- Hydraulic cement
- Epoxy resin
- Crack injection filler
- Damp-proofing paint
- Plastic sheeting
- Gravel
- PVC pipe
- Check valve
- Drainage pipe
- Pipe fittings
- Grading soil
- Landscaping fabric
These tools and materials are essential for different stages of the repair process, from preparing the basement floor to applying waterproofing sealant and installing a sump pump system. Make sure to gather everything you need before you begin the repair work to avoid any unnecessary delays or interruptions.
Keep in mind that the specific tools and materials required may vary depending on the extent of the water seepage problem and the repair method you choose to implement. Follow the manufacturer’s instructions and safety guidelines when using any tools or materials.
Now that you have all the necessary tools and materials, you’re ready to move on to the step-by-step guide to fixing water coming through the basement floor.
Step-by-Step Guide to Fixing Water Coming Through Basement Floor
Fixing water coming through the basement floor requires a systematic approach to effectively address the issue and prevent further water damage. Follow this step-by-step guide to tackle the problem:
Step 1: Prepare the Basement Floor
- Ensure proper ventilation by opening windows and using fans.
- Remove any furniture or belongings from the affected area.
- Clean the basement floor thoroughly, removing any dirt, debris, or old sealants.
- Allow the floor to dry completely before proceeding with repairs.
Step 2: Repair Cracks and Joints
- Inspect the floor for cracks and joints that may be causing water seepage.
- Use a wire brush to remove any loose debris or old sealant from the cracks.
- Apply hydraulic cement or epoxy resin into the cracks, ensuring a tight seal.
- Smooth out the surface using a putty knife or trowel and allow it to cure according to the product instructions.
Step 3: Apply Waterproofing Sealant
- Choose a high-quality waterproofing sealant suitable for your basement floor.
- Apply the sealant to the entire basement floor using a paintbrush or roller, following the manufacturer’s instructions.
- Ensure that you cover all areas, paying close attention to cracks, joints, and areas prone to water seepage.
- Allow the sealant to dry completely before moving on to the next step.
Step 4: Install a Sump Pump System
- If water continues to infiltrate your basement, consider installing a sump pump system.
- Choose an appropriate location for the sump pit, preferably in a low-lying area of the basement.
- Dig a hole for the sump pit and line it with plastic sheeting to prevent water damage.
- Install the sump pump and connect it to a discharge pipe that directs water away from your foundation.
- Test the sump pump to ensure it is functioning properly.
Step 5: Ensure Proper Drainage
- Check the grading around your home and make sure it slopes away from the foundation.
- Clear any debris from gutters and downspouts, ensuring that they are effectively directing water away from the house.
- Consider installing a French drain or exterior drainage system to manage excess groundwater.
- Ensure that all drainage pipes are free of blockages and functioning properly.
By following these step-by-step instructions, you can effectively fix water coming through the basement floor and prevent future water damage. Remember to always prioritize safety and take necessary precautions when carrying out repair work in your basement.
With the repairs completed, you can now enjoy a dry and protected basement, free from the frustration of water seepage.
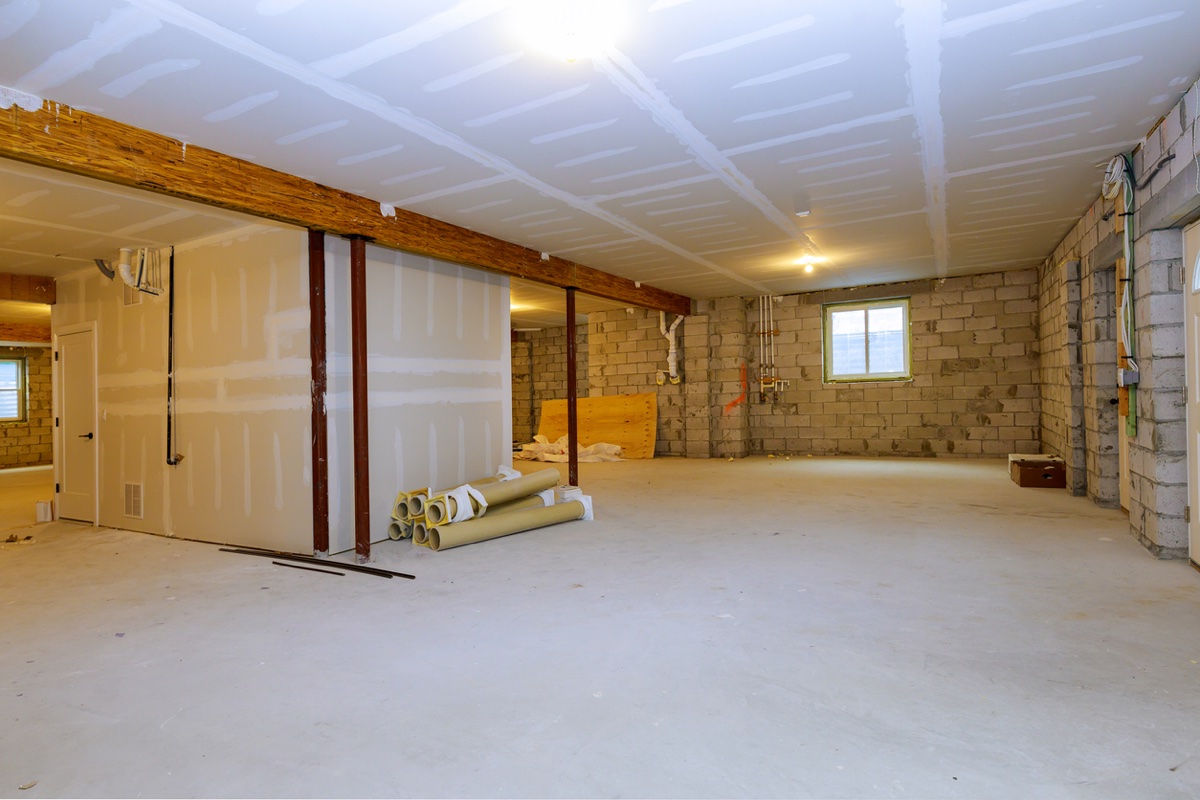
Preparing the Basement Floor
Before you can start repairing water coming through the basement floor, it’s crucial to properly prepare the area. Preparing the basement floor ensures that you have a clean, dry, and stable surface to work with. Follow these steps to prepare the basement floor for repairs:
Step 1: Remove any furniture or belongings: Clear the area of any furniture, belongings, or obstacles that may impede your work. This will give you adequate space to navigate and access the affected areas of the basement floor.
Step 2: Protect yourself: Put on protective gear, such as gloves, safety goggles, and a dust mask, to safeguard yourself from dust, debris, and any chemicals you may be using during the repair process.
Step 3: Ensure proper ventilation: Open windows in the basement and use fans to improve ventilation. This will help to accelerate the drying process and prevent the buildup of fumes from any chemicals you may use.
Step 4: Clean the floor: Start by sweeping the floor to remove loose dirt and debris. Use a vacuum cleaner or a wet/dry vacuum to thoroughly clean the floor and remove any remaining dust and contaminants.
Step 5: Identify and mark the affected areas: Inspect the basement floor for any visible signs of water seepage, such as damp spots, stains, or discoloration. Use chalk or masking tape to mark these areas for targeted repairs.
Step 6: Allow the floor to dry: It is essential to ensure that the basement floor is completely dry before proceeding with any repairs. Use a dehumidifier or fans to facilitate the drying process, if necessary. Check the moisture level with a moisture meter to ensure it is within an acceptable range.
Step 7: Check for additional areas of concern: While inspecting the basement floor for signs of water seepage, pay attention to other potential issues like cracks, gaps, or areas of weakened concrete. Addressing these issues along with the water seepage problem will help to prevent future water damage.
By properly preparing the basement floor, you create an ideal foundation for the repair work. Taking the time to clean, assess, and dry the area ensures that the subsequent repairs will be more effective and longer-lasting. Adequate preparation is crucial for the success of your efforts to fix water coming through the basement floor.
Ensure that your gutters and downspouts are clear and directing water away from the foundation. Consider installing a sump pump or waterproofing the basement floor to prevent water from seeping through.
Repairing Cracks and Joints
Cracks and joints in the basement floor are common causes of water seepage. Repairing these cracks and joints is an essential step in fixing water coming through the basement floor. Here’s a step-by-step guide on how to repair cracks and joints:
Step 1: Inspect the cracks and joints: Carefully examine the basement floor for any cracks or gaps where water may be entering. Look for both horizontal and vertical cracks, as well as gaps around pipes or between concrete slabs.
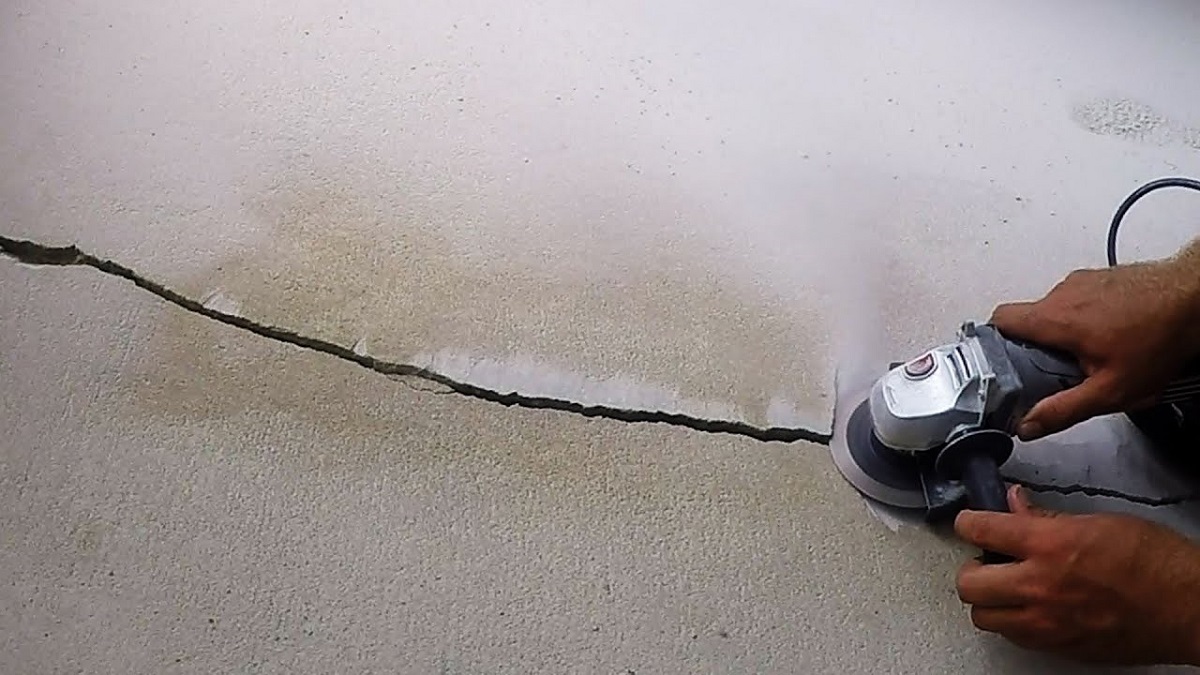
Step 2: Clean the cracks and joints: Use a wire brush to remove any loose debris, dust, or old sealants from the cracks and joints. This will ensure better adhesion of the repair materials.
Step 3: Prepare the cracks and joints: Use a hammer and chisel to widen the cracks slightly. This will create a better surface for the repair material to adhere to. Make sure to remove any loose concrete or debris from the cracks and joints.
Step 4: Fill the cracks and joints: Depending on the size and severity of the cracks and joints, choose an appropriate repair material. For small cracks, use a crack injection filler or hydraulic cement. For larger cracks or gaps, consider using epoxy resin or concrete patching compound.
Step 5: Apply the repair material: Following the manufacturer’s instructions, mix the repair material as required. Apply it to the cracks and joints using a putty knife or a trowel, ensuring that the material fully fills the gaps. Smooth out the surface, making it level with the surrounding floor.
Step 6: Allow the repair material to cure: Give the repair material sufficient time to cure and harden according to the manufacturer’s instructions. This may involve waiting for a specific period or providing optimal curing conditions, such as maintaining proper temperature and humidity levels.
Step 7: Check for additional cracks or gaps: After the initial repair, inspect the floor again for any missed cracks or gaps. Repeat the cleaning and filling process for any additional areas that require attention.
Step 8: Consider applying a sealant: Once the repairs are complete and the floor has fully cured, consider applying a waterproof sealant over the entire basement floor. This will provide an added layer of protection against future water seepage.
Repairing cracks and joints in the basement floor plays a crucial role in preventing water seepage. By taking the time to properly clean, prepare, and fill these areas, you can effectively address the source of the problem and ensure a dry and stable basement environment.
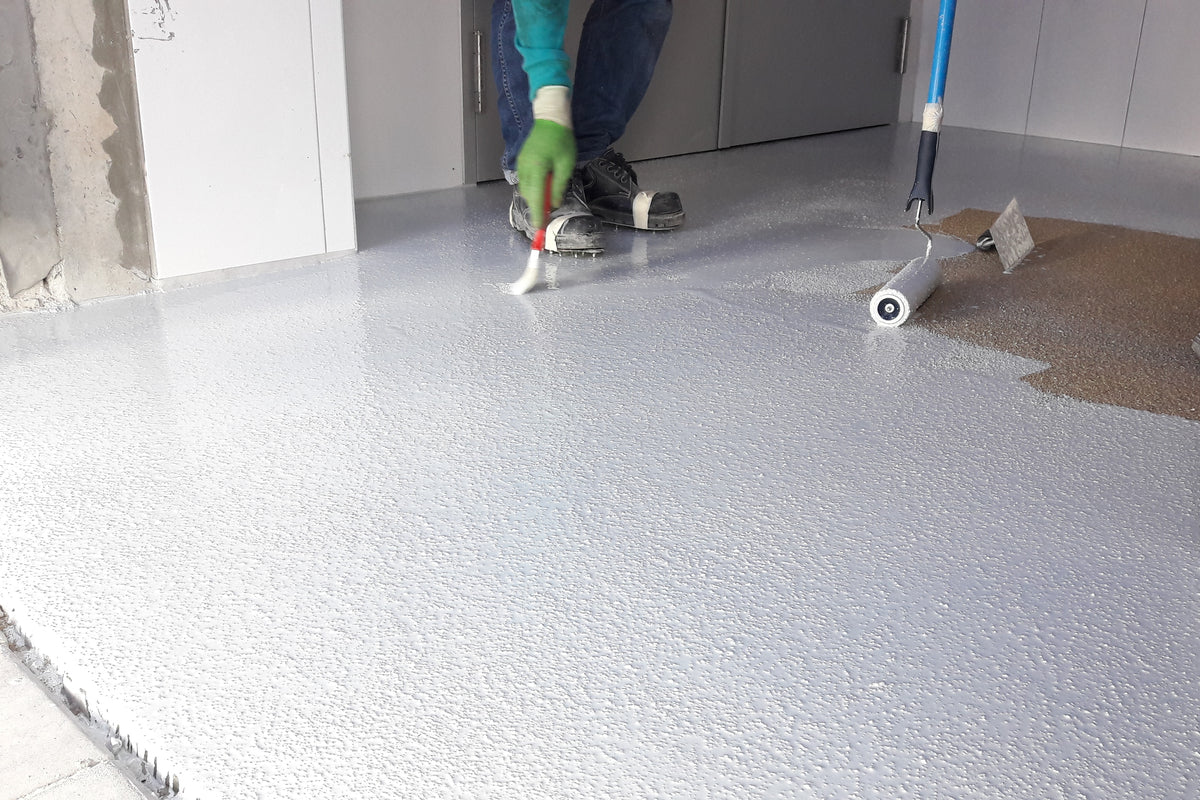
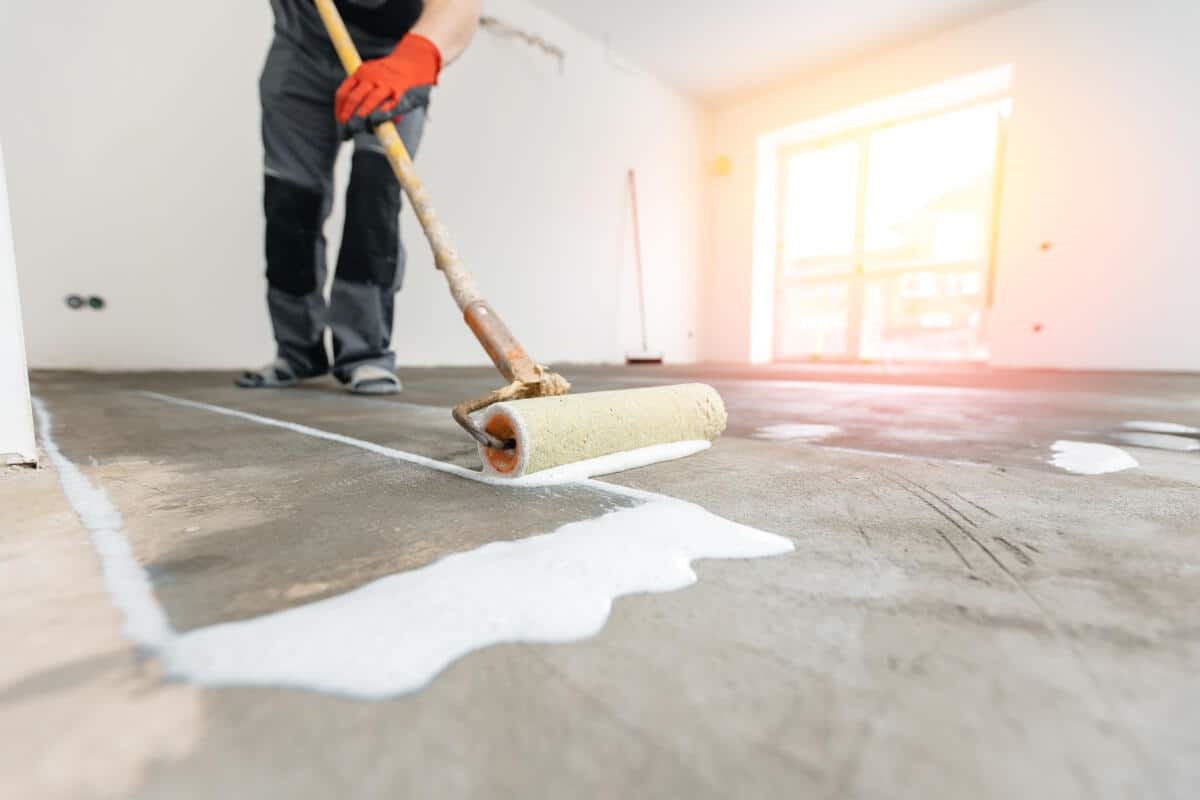
Applying Waterproofing Sealant
Applying a waterproofing sealant is an important step in fixing water coming through the basement floor. A waterproof sealant creates a protective barrier that prevents water from seeping into the basement. Follow these steps to effectively apply a waterproofing sealant to your basement floor:
Step 1: Choose the right sealant: Select a high-quality waterproofing sealant that is suitable for basement applications. Consider factors such as the type of sealant, compatibility with the basement floor material, and the level of waterproofing protection it offers. Read the manufacturer’s instructions and product labels carefully.
Step 2: Prepare the basement floor: Ensure that the basement floor is clean, dry, and free from any dirt or debris. Sweep and vacuum the floor to remove loose particles. If necessary, clean the floor with a mild detergent and warm water, scrubbing stubborn stains or residue. Allow the floor to dry completely before applying the sealant.
Step 3: Test the sealant in a small area: Before applying the sealant to the entire basement floor, perform a test application in a small, inconspicuous area. This will allow you to assess the adhesion, appearance, and drying time of the sealant. Confirm that you are satisfied with the results before proceeding.
Step 4: Apply the sealant: Begin applying the waterproofing sealant to the basement floor, starting from one corner and working your way towards the exit. Use a paintbrush or roller to apply an even coat of the sealant, following the manufacturer’s recommended thickness and coverage guidelines. Ensure that you cover all areas, including cracks, joints, and other vulnerable spots.
Step 5: Pay special attention to problem areas: Give extra attention to areas that are prone to water seepage, such as around pipes, floor drains, and baseboards. Apply a thicker layer of sealant in these areas to provide additional protection against water penetration.
Step 6: Allow the sealant to dry: Follow the manufacturer’s instructions regarding drying time. It is crucial to allow the sealant to dry fully before allowing any foot traffic or moving furniture back into the basement. This will ensure that the sealant forms a strong and effective barrier against water seepage.
Step 7: Apply additional coats if necessary: Depending on the type of sealant and the desired level of protection, you may need to apply multiple coats. Follow the product’s instructions regarding the recommended number of coats and waiting time between applications.
Step 8: Maintain the sealant: Once the sealant has dried and cured, it is important to maintain its effectiveness. Regularly inspect the basement floor for any signs of wear or damage to the sealant. Touch-up or reapply the sealant as needed to ensure ongoing protection against water seepage.
Applying a waterproofing sealant to your basement floor is a proactive step in preventing water seepage. By following these steps and selecting a high-quality sealant, you can create a durable and reliable barrier that keeps your basement dry and protected.
Installing a Sump Pump System
If you’re experiencing significant water seepage in your basement, installing a sump pump system can be an effective solution. A sump pump helps to remove excess water and prevent it from accumulating in your basement. Here’s a step-by-step guide on how to install a sump pump system:
Step 1: Determine the sump pump location: Choose an appropriate location for the sump pump and sump pit in your basement. Ideally, it should be in a low-lying area where water tends to accumulate. Make sure the pit is at least 18 inches in diameter and deep enough to accommodate the pump.
Step 2: Excavate and prepare the pit: Dig a hole in the selected location for the sump pit. The size of the pit will depend on the size and specifications of the sump pump system you are installing. Line the pit with a layer of gravel to facilitate proper drainage and prevent the pump from sitting directly on soil.
Step 3: Install the sump pump: Place the sump pump inside the pit, ensuring that it is level and secure. Connect the pump’s discharge pipe, making sure it extends away from the foundation and directs water to a suitable drainage area. Attach a check valve to the discharge pipe to prevent backflow into the pit.
Step 4: Connect the power supply: Run a dedicated electrical circuit for the sump pump and connect it to a Ground Fault Circuit Interrupter (GFCI) outlet. Ensure that the electrical connections are properly grounded and comply with local electrical codes and regulations.
Step 5: Install a sump pump cover: Place a cover over the sump pit to prevent debris, odors, and moisture from escaping. The cover should have a vent hole to allow for proper airflow and easy access for maintenance and repairs.
Step 6: Test the sump pump: Fill the sump pit with water to activate the sump pump. Ensure that the pump is functioning correctly, pumping water out of the pit and away from the foundation. Adjust the float switch or control settings, if necessary, to achieve optimal performance.
Step 7: Create a backup plan: Consider installing a battery backup system for your sump pump to ensure it continues to operate during power outages. This will provide peace of mind and prevent basement flooding in case of electrical failures.
Step 8: Regularly maintain the sump pump: Regular maintenance is essential to keep the sump pump in optimum condition. Test the pump periodically, clean the intake screen, and remove any debris from the pit. It’s also important to inspect and replace any worn or damaged parts as needed.
Installing a sump pump system can effectively manage water seepage in your basement and protect it from potential flooding. By following these steps and ensuring proper maintenance, you can safeguard your basement and maintain a dry and functional space.
Read more: How To Stop Water Coming Into Basement
Ensuring Proper Drainage
Proper drainage is crucial in preventing water from seeping into your basement. Without proper drainage, water can accumulate around the foundation and contribute to water seepage issues. Here’s a step-by-step guide on how to ensure proper drainage to protect your basement:
Step 1: Assess the grading around your home: Check the slope of the ground surrounding your home’s foundation. It should slope away from the house, directing water away from the basement. If the grading is inadequate, water can pool near the foundation and increase the risk of water seepage.
Step 2: Adjust the grading: If the ground around your home is not properly sloped, you may need to re-grade the area. Use topsoil to fill in low spots and create an appropriate slope away from the foundation. Aim for a slope of at least 6 inches over the first 10 feet from the foundation.
Step 3: Clean and maintain gutters: Clogged gutters can lead to water overflow, causing water to pool near the foundation. Regularly clean your gutters and downspouts to remove leaves, debris, and any other obstructions. Ensure that downspouts extend at least 6 feet away from the foundation and direct water away from your home.
Step 4: Install gutter extensions: Consider installing gutter extensions or downspout extensions to further redirect water away from the foundation. These extensions can be attached to the existing downspouts to ensure that water is discharged a safe distance away from the house.
Step 5: Install a French drain or exterior drainage system: If your property experiences excessive groundwater or has recurring drainage issues, installing a French drain or an exterior drainage system can help manage water effectively. These systems collect and redirect water away from the foundation, minimizing the risk of water seepage.
Step 6: Maintain your drainage system: Regularly inspect your drainage system for any signs of clogs or blockages. Remove debris from drain covers and ensure that the drainage pipes are clear and functioning properly. In addition, check that the slope of any drainage trenches or channels is sufficient for water flow.
Step 7: Consider waterproofing the exterior foundation walls: If you have ongoing water seepage issues, you may want to consider waterproofing the exterior foundation walls. This involves applying a waterproofing membrane or coating to create an additional layer of protection against groundwater infiltration.
Step 8: Install a basement window well: If you have windows or window wells in your basement, ensure they are properly sealed and drain away from the foundation. Installing a window well cover can help prevent water and debris from entering the window well area.
Step 9: Maintain moisture control: Manage the moisture levels inside your basement by using a dehumidifier and ensuring proper ventilation. Keeping the basement environment dry and well-ventilated helps to prevent condensation and reduces the risk of water-related issues.
By following these steps and ensuring proper drainage, you can effectively minimize the risk of water seepage in your basement. Implementing appropriate drainage measures will help to protect your home’s foundation and maintain a dry and healthy basement space.
Conclusion
Water coming through the basement floor is a common issue that can lead to significant damage and inconvenience for homeowners. However, by understanding the common causes of water seepage and following the necessary steps for repair, you can effectively fix and prevent this problem. Through careful preparation, crack and joint repair, application of waterproofing sealant, installation of a sump pump system, and ensuring proper drainage, you can create a dry and stable basement environment.
Start by identifying the root cause of water seepage, such as cracks in the foundation, faulty waterproofing, poor drainage, or high water table. Once the cause is determined, gather the necessary tools and materials to carry out the repairs effectively. Preparing the basement floor by removing furniture, cleaning, and allowing proper ventilation is crucial.
Repairing cracks and joints is an important step in fixing water coming through the basement floor. Clean the cracks, widen them if necessary, and fill them with appropriate repair materials like hydraulic cement or epoxy resin. Applying a waterproofing sealant to the entire basement floor provides an additional layer of protection against water seepage.
Installing a sump pump system helps remove excess water from your basement. Dig a pit and place the sump pump correctly, ensuring it is connected to a discharge pipe that directs water away from your foundation. Regular maintenance of the sump pump is necessary to ensure its proper functioning.
Proper drainage is essential to prevent water from accumulating around the foundation. Assess the grading around your home and adjust it if necessary. Keep gutters and downspouts clean and consider installing gutter extensions. French drains or exterior drainage systems can be installed to manage excess water effectively.
In conclusion, addressing water coming through the basement floor requires a comprehensive approach that includes identifying the cause, properly preparing the area, repairing cracks and joints, applying a waterproofing sealant, installing a sump pump system, and ensuring proper drainage. By following these steps and taking the necessary precautions, you can eliminate water seepage, protect your basement from damage, and maintain a dry and comfortable living space. Remember, if you’re unsure or need assistance, it’s always best to consult with a professional to ensure the job is done safely and effectively.
Frequently Asked Questions about How To Fix Water Coming Through Basement Floor
Was this page helpful?
At Storables.com, we guarantee accurate and reliable information. Our content, validated by Expert Board Contributors, is crafted following stringent Editorial Policies. We're committed to providing you with well-researched, expert-backed insights for all your informational needs.
0 thoughts on “How To Fix Water Coming Through Basement Floor”