Articles
How To Store A Pop Up Camper
Modified: August 30, 2024
Learn the best tips for storing a pop-up camper in this comprehensive articles. Ensure that your camper is protected and ready for your next adventure!
(Many of the links in this article redirect to a specific reviewed product. Your purchase of these products through affiliate links helps to generate commission for Storables.com, at no extra cost. Learn more)
Introduction
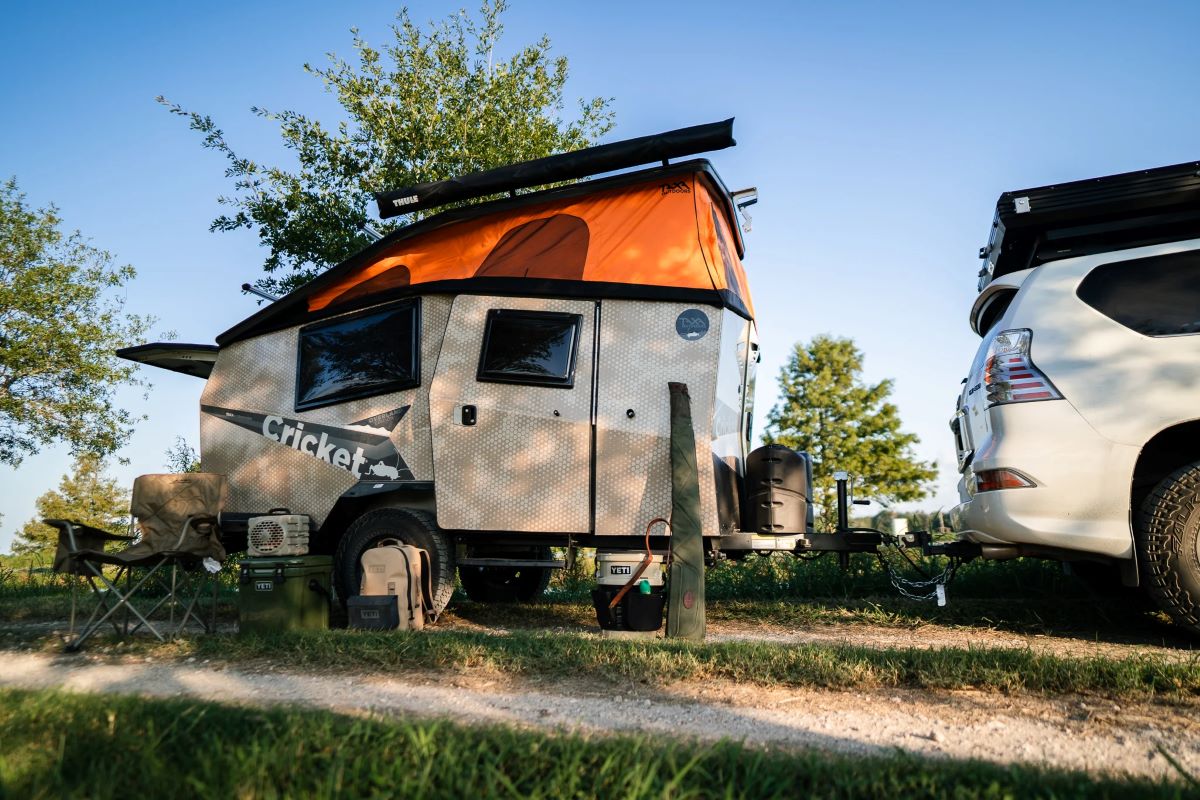
Welcome to a comprehensive guide on how to store a pop-up camper. Whether you are preparing for the end of the camping season or simply need a safe place to store your camper temporarily, proper storage is essential to keep your pop-up camper in great condition. By following a few key steps, you can ensure that your camper remains protected from the elements and is ready for your next outdoor adventure.
Storing a pop-up camper involves more than just finding a space to park it. You’ll need to properly clean and prepare the interior and exterior of the camper, secure any water or holding tanks, disconnect electricity, and take necessary precautions to prevent damage during storage. Additionally, periodic check-ups and maintenance are important to ensure that your camper stays in optimal condition while not in use.
In this guide, we will walk you through the step-by-step process of storing a pop-up camper to help maintain its longevity and functionality. Whether you are a seasoned camper or new to pop-up campers, this guide will provide you with all the information you need. So let’s get started with step one: finding the right storage space.
Key Takeaways:
- Proper storage of a pop-up camper involves finding the right storage space, cleaning and preparing the camper, emptying and securing water tanks, protecting the exterior, removing batteries, stabilizing the camper, covering and securing it, and performing periodic maintenance.
- By following these comprehensive steps, pop-up camper owners can ensure their camper remains in optimal condition, ready for future camping adventures. Remember to consult the camper’s manual for specific storage and maintenance guidelines.
Read more: How To Hang Curtains In A Pop Up Camper
Step 1: Finding the Right Storage Space
When it comes to storing your pop-up camper, the first step is to find the right storage space. This is crucial to ensure that your camper remains safe and protected during its time in storage. Here are some factors to consider when choosing a storage location:
1. Indoor vs. Outdoor Storage
Indoor storage is typically the best option for protecting your pop-up camper from the elements. It provides a controlled environment that helps to prevent damage from rain, snow, UV rays, and pests. If indoor storage is not available or not within your budget, outdoor storage can still be a viable option. Look for a storage facility that offers covered parking or consider investing in a high-quality camper cover.
2. Security
Make sure the storage facility has adequate security measures in place to protect your camper from theft or vandalism. Look for features like gated access, surveillance cameras, and well-lit areas. Additionally, consider the overall safety of the neighborhood where the facility is located.
3. Accessibility
Consider how easily accessible the storage facility is. Ideally, you should be able to easily visit and retrieve your camper when needed. Check the facility’s operating hours and make sure they align with your schedule. It’s also worth considering proximity to your home or desired camping destinations for convenience.
Read more: How To Make An Awning For A Pop-Up Camper
4. Size and Space Availability
Ensure that the storage space is large enough to accommodate your pop-up camper comfortably. Measure the dimensions of your camper and compare them to the available storage spaces. Also, inquire about the availability of designated spots for pop-up campers to ensure that there is ample room for maneuvering and parking.
By considering these factors, you can find a suitable storage space that meets your needs and protects your pop-up camper. Once you have found the right storage location, it’s time to move on to step two: cleaning and preparing the pop-up camper.
Step 2: Cleaning and Preparing the Pop Up Camper
Before storing your pop-up camper, it is crucial to clean and prepare it properly. This ensures that the camper is in good condition and ready for use when you take it out of storage. Follow these steps to clean and prepare your pop-up camper:
1. Remove all personal belongings
Start by removing all personal belongings from the camper. This includes clothing, food, kitchen utensils, and any other items that you may have used during your camping trips. Clean out all the storage areas and make sure everything is emptied.
2. Sweep and vacuum the interior
Next, sweep and vacuum the interior of the camper to remove any dirt or debris. Pay attention to the corners, under the seats, and other hard-to-reach areas. Use a handheld vacuum or a small brush to get into tight spaces.
Read more: How To Store Popped Popcorn
3. Clean and disinfect surfaces
Wipe down all surfaces inside the camper using a mild cleaner. This includes countertops, tables, and seating areas. For hard-to-remove stains or dirt, use a gentle scrub brush. After cleaning, disinfect all surfaces to ensure a hygienic environment.
4. Check and clean the appliances
If your pop-up camper has appliances such as a stove, refrigerator, or microwave, check and clean them thoroughly. Remove any food remnants, wipe down the surfaces, and ensure they are in good working condition. Follow the manufacturer’s instructions for cleaning and maintenance.
5. Clean the canvas and windows
If your pop-up camper has canvas walls, take the time to clean them properly. Use a mild soap and water solution or a specialized canvas cleaner. Gently scrub the canvas and rinse it thoroughly. For the windows, use a glass cleaner to remove any dirt or smudges.
6. Check for any damages
Inspect the interior and exterior of the camper for any damages. Look for tears in the canvas, loose fittings, or any signs of water damage. Address any issues before storing the camper to prevent further damage during storage.
By thoroughly cleaning and preparing your pop-up camper, you are ensuring that it remains in good condition during its time in storage. Once the camper is clean and ready, you can move on to step three: emptying and securing all water and holding tanks.
Read more: How To Install Pop-Up Garden Drainage
Step 3: Emptying and Securing all Water and Holding Tanks
Properly emptying and securing all water and holding tanks is an essential step in preparing your pop-up camper for storage. This helps prevent any potential leaks or damage while the camper is not in use. Follow these steps to empty and secure the water and holding tanks:
1. Drain the freshwater tank
Start by draining the freshwater tank completely. Locate the drain valve or plug, usually located underneath the camper or near the water pump. Open the valve or remove the plug to allow the water to drain out. Once completely drained, leave the valve or plug open to ensure that any remaining water can evaporate.
2. Empty the gray and black water holding tanks
If your pop-up camper has gray and black water holding tanks, they need to be emptied before storage. Connect a sewer hose to the drain outlet and direct it into a designated wastewater disposal area or a sanitary dump station. Open the valve to empty the tanks completely, flushing them with water if necessary.
3. Flush and clean the tanks
After emptying the holding tanks, it’s a good idea to flush and clean them to remove any residue or buildup. Use a designated tank cleaning solution or a mixture of water and bleach to thoroughly clean the tanks. Allow the solution to sit for a few minutes, then drain and rinse the tanks until the water runs clear.
Read more: How To Roll Up A Camper Awning
4. Close all tank valves and fittings
Once the tanks are emptied and cleaned, close all the valves and fittings tightly to prevent any leaks. Make sure the drain valve for the freshwater tank and the valves for the holding tanks are securely closed. Inspect the fittings for any signs of wear or damage and replace if necessary.
5. Add RV antifreeze (optional)
In colder climates, it is recommended to add RV antifreeze to the plumbing system to prevent any freezing and subsequent damage. Follow the manufacturer’s instructions on how to properly add antifreeze to the system, ensuring that all faucets and water lines are protected.
By properly emptying and securing all water and holding tanks, you are taking important precautions to protect your pop-up camper from potential leaks and damage during storage. With the tanks taken care of, you can move on to step four: protecting the exterior of the pop-up camper.
Step 4: Protecting the Exterior of the Pop Up Camper
Protecting the exterior of your pop-up camper is crucial to ensure its longevity and appearance. By taking proactive measures, you can prevent damage from various elements such as sun, rain, snow, and debris. Follow these steps to effectively protect the exterior of your pop-up camper:
1. Clean the exterior
Before applying any protective measures, thoroughly clean the exterior of your pop-up camper. Use a mild detergent and water solution to remove dirt, grime, and any other debris. Pay special attention to areas where dirt and stains are more prominent, such as the roof, awning, and corners.
Read more: How To Store A Camper Trailer
2. Wax or apply a protective coating
Once the exterior is clean and dry, consider applying a coat of wax or a protective coating. This will provide an additional layer of protection against UV rays and other environmental elements. Make sure to use a product that is specifically formulated for the material of your camper, whether it’s fiberglass, aluminum, or another type. Follow the manufacturer’s instructions for application.
3. Remove and clean the awning
If your pop-up camper has an awning, carefully remove it and clean it separately. Use a mild detergent and water solution to remove any dirt or stains. Allow the awning to dry completely before reattaching it. If necessary, you can also apply a protective spray specifically designed for awnings to maintain its condition.
4. Cover the tires
Consider investing in tire covers to protect the tires from sun damage and potential cracking. This is especially important if your pop-up camper will be stored outdoors for an extended period. Tire covers are relatively inexpensive and are available in various sizes to fit your camper’s tires properly.
5. Install vent covers
To prevent moisture buildup and allow for proper ventilation, install vent covers on all roof vents. These covers will protect the vents from rain and debris while still allowing air to circulate inside the camper. Vent covers are easy to install and will help prolong the life of your camper’s interior components.
Read more: How To Store Funko Pop Boxes
6. Park the camper on a level surface
When storing your pop-up camper, park it on a level surface to prevent any potential water pooling or damage. This also helps maintain the integrity of the camper’s structure. Use leveling blocks or pads if necessary to ensure proper stability and balance.
By following these steps, you can effectively protect the exterior of your pop-up camper and ensure its longevity. With the exterior protected, it’s time to move on to step five: removing batteries and disconnecting electricity.
Step 5: Removing Batteries and Disconnecting Electricity
Before storing your pop-up camper, it is important to remove batteries and disconnect the electricity to prevent any potential electrical issues and battery drainage. This step ensures the safety of your camper and prolongs the life of your batteries. Follow these steps to properly remove batteries and disconnect electricity:
1. Locate the battery
First, locate the battery compartment in your pop-up camper. It is usually located on the tongue of the camper or in an exterior storage compartment. Refer to your camper’s manual if you are unsure of its location.
2. Turn off all electrical systems
Before disconnecting the battery, make sure to turn off all electrical systems in your pop-up camper. This includes lights, appliances, water pump, and any other electrical components that may be powered by the battery.
Read more: How To Store Cake Pop Dough
3. Disconnect the battery cables
Using a wrench or a battery disconnect tool, disconnect the battery cables from the battery terminals. Start by removing the negative (-) cable first, followed by the positive (+) cable. Ensure that the cables are secure and won’t accidentally come in contact with the battery terminals.
4. Remove the battery
Carefully remove the battery from its compartment. If the battery is heavy, use proper lifting techniques or ask for assistance to avoid injury. Place the battery in a cool, dry, and well-ventilated area away from any flammable materials.
5. Store the battery properly
To maintain the life of your battery, it is important to store it properly. Clean any dirt or corrosion from the battery terminals before storing. If storing for an extended period, consider using a battery maintainer or charger to keep the battery charged. Make sure to follow the manufacturer’s instructions for battery maintenance and storage.
6. Disconnect electricity from the camper
In addition to removing the battery, it is recommended to disconnect electricity from the camper’s electrical system. This can be done by turning off the main breaker in the camper’s electrical panel. This step further prevents any potential electrical issues during storage.
By removing batteries and disconnecting electricity, you are taking necessary precautions to ensure the safety of your pop-up camper and prolong the life of your batteries. Now that the batteries are properly stored, you can move on to step six: stabilizing and leveling the pop-up camper.
Read more: How To Store Funko Pops
Step 6: Stabilizing and Leveling the Pop Up Camper
Properly stabilizing and leveling your pop-up camper is essential for its stability, structural integrity, and the overall comfort inside. This step ensures that the camper remains secure and balanced while in storage. Follow these steps to effectively stabilize and level your pop-up camper:
1. Find a level surface
Park your pop-up camper on a level surface to ensure proper stability. This can be a concrete pad, asphalt, or even leveled ground. Using a bubble level or an RV leveling app, check the camper’s levelness from side to side and front to back.
2. Use leveling blocks or stabilizer jacks
If the camper is not level, use leveling blocks to raise the side(s) that need adjustment. These blocks can be placed under the wheels or stabilizer jacks to achieve a level position. Slowly drive the camper onto the blocks until it becomes level.
Stabilizer jacks are also essential for securing and stabilizing the camper. Lower the jacks on each corner of the camper until they firmly touch the ground. Avoid overextending the stabilizer jacks, as it could lead to instability.
3. Check for stability and rockiness
Once the camper is leveled and stabilized, check for any signs of instability or rockiness. Gently push and shake the camper from various angles to ensure it remains sturdy and secure. If there’s excessive movement, re-adjust the leveling blocks or stabilizer jacks as needed.
Read also: 8 Best Pop Up Sprinklers For Lawns For 2025
4. Install wheel chocks
To further enhance stability and prevent the camper from rolling, install wheel chocks on both sides of the wheels. These chocks can be placed in front and behind each wheel to prevent any unintended movement when parked on an incline or uneven surface.
5. Check the levelness periodically
It is a good idea to check the levelness of the camper periodically, especially if it will be stored for an extended period. Changes in ground conditions, settling, or movement can affect the camper’s levelness over time. Make necessary adjustments as needed to maintain balance and stability.
By properly stabilizing and leveling your pop-up camper, you ensure its stability and structural integrity during storage. With the camper securely balanced, you can move on to step seven: covering and securing the pop-up camper.
Step 7: Covering and Securing the Pop Up Camper
Covering and securing your pop-up camper is essential to protect it from the elements, dust, and other potential hazards while in storage. A quality cover will help maintain the condition of your camper and extend its lifespan. Follow these steps to effectively cover and secure your pop-up camper:
1. Choose the right cover
When selecting a cover for your pop-up camper, choose one that is specifically designed for your camper’s size and shape. Look for a cover that is made from durable, weather-resistant material and offers UV protection. Ensure that the cover has appropriate straps or tie-downs for a secure fit.
2. Clean and dry the camper
Before covering the camper, make sure it is clean and dry. This will prevent any dirt or moisture from getting trapped between the camper and the cover. Thoroughly clean the exterior, including the roof, and let it dry completely before proceeding.
3. Cover the camper
Begin by draping the cover over the top of the camper, ensuring that it fits snugly. Carefully pull the cover down over the sides and secure it in place. Use the provided straps or tie-downs to secure the cover tightly, preventing it from flapping or coming loose in strong winds.
4. Use additional measures for protection
In addition to the cover, you can take extra measures to protect your pop-up camper. This may include adding vent covers or breathable covers to allow for proper airflow and prevent mold or mildew growth. You can also apply a protective wax or coating to the exterior surfaces for added protection.
5. Check and adjust periodically
Periodically check the cover to ensure it remains securely in place. Adjust any tie-downs or straps as needed, especially after heavy winds or storms. This will help maintain the cover’s effectiveness in protecting your pop-up camper.
Read more: How To Clean Camper Cushions
6. Secure the doors and windows
Before leaving the camper in storage, make sure all doors and windows are securely closed and locked. This prevents any potential entry of pests or unwanted guests while the camper is covered and unattended.
By properly covering and securing your pop-up camper, you are giving it an extra layer of protection against the elements and potential damage. With the camper covered and secured, you can move on to step eight: periodic check-ups and maintenance.
Step 8: Periodic Check-ups and Maintenance
Even though your pop-up camper is in storage, it’s important to periodically check on it and perform maintenance tasks to ensure its optimal condition. Regular maintenance will help prevent any potential issues, minimize damage, and ensure that your camper is ready for your next camping adventure. Follow these steps for periodic check-ups and maintenance:
1. Check for moisture and mold
Periodically inspect the interior of your pop-up camper for any signs of moisture or mold. Look for any musty smells, dampness, or visible mold growth. If you find any issues, address them immediately to prevent further damage.
2. Inspect for pests
Check for any signs of pests, such as insects or rodents, that may have gained access to your camper. Look for droppings, chewed wires, or nests. Take appropriate measures to eliminate any pests and prevent future infestations.
Read more: How To Replace Floor In Camper
3. Examine the exterior
Inspect the exterior of your pop-up camper for any damage or signs of wear. Look for cracks, delamination, or any loose seals. Ensure that the cover is still securely in place and that there are no tears or holes that may allow water or pests to enter.
4. Check the tires and wheels
Periodically inspect the tires for any signs of damage, wear, or low pressure. Check the tread depth to ensure they are still in good condition. Rotate the tires if necessary to prevent uneven wearing. If the camper has been sitting for an extended period, consider adding air to the tires if needed.
5. Check the battery
If your battery is stored separately, periodically check its charge level and condition. Follow the manufacturer’s instructions for maintenance and recharging as needed. Ensure that the battery is stored in a cool and dry location.
6. Perform maintenance tasks
Perform routine maintenance tasks on your pop-up camper, such as lubricating hinges, cleaning and resealing the roof, and checking and replacing filters if applicable. Refer to your camper’s manual for specific maintenance recommendations for your model.
Read more: How Much Is An Awning For A Camper
7. Test electrical systems
Periodically test the electrical systems in your pop-up camper to ensure they are functioning properly. This includes lights, appliances, and any other electrical components. Replace any burnt out bulbs or malfunctioning parts as necessary.
By regularly performing check-ups and maintenance tasks, you are ensuring that your pop-up camper remains in optimal condition while in storage. This will save you time and effort when it’s time to take it out for your next camping adventure. With these periodic check-ups and maintenance steps covered, you can now confidently conclude the storage process for your pop-up camper.
Conclusion
Storing a pop-up camper requires careful planning and execution to ensure its longevity and readiness for future camping trips. By following the comprehensive steps outlined in this guide, you can effectively store your pop-up camper and protect it from the elements, pests, and potential damage. Here’s a quick recap of the steps involved:
1. Finding the right storage space
Choose an indoor or outdoor storage facility that offers security, accessibility, and appropriate space for your pop-up camper.
2. Cleaning and preparing the pop-up camper
Thoroughly clean the interior and exterior of your camper, remove personal belongings, and ensure all appliances are in good condition.
Read more: How To Store Cake Pops After Dipping
3. Emptying and securing all water and holding tanks
Drain and clean the freshwater tank and empty and clean the gray and black water holding tanks. Secure all tank valves and fittings.
4. Protecting the exterior of the pop-up camper
Clean the exterior, apply wax or a protective coating, clean and store the awning, cover the tires, and install vent covers for proper airflow.
5. Removing batteries and disconnecting electricity
Remove the batteries and store them properly. Disconnect the electricity by turning off the main breaker in the electrical panel.
6. Stabilizing and leveling the pop-up camper
Level the camper using leveling blocks or stabilizer jacks to ensure stability and balance. Install wheel chocks to prevent rolling.
7. Covering and securing the pop-up camper
Cover the camper with a suitable cover and secure it tightly to protect it from the elements. Ensure doors and windows are closed and locked.
8. Periodic check-ups and maintenance
Regularly inspect the camper for moisture, pests, and exterior damage. Check and maintain the tires, battery, perform routine maintenance tasks, and test electrical systems periodically.
By following these steps and incorporating regular maintenance into your storage routine, you can keep your pop-up camper in excellent condition and enjoy many more memorable camping trips in the future.
Remember, each pop-up camper is unique, so consult your camper’s manual and follow manufacturer guidelines for storage and maintenance specific to your model. Happy camping!
Frequently Asked Questions about How To Store A Pop Up Camper
Was this page helpful?
At Storables.com, we guarantee accurate and reliable information. Our content, validated by Expert Board Contributors, is crafted following stringent Editorial Policies. We're committed to providing you with well-researched, expert-backed insights for all your informational needs.
0 thoughts on “How To Store A Pop Up Camper”