Articles
How To Replace Floor In Camper
Modified: August 28, 2024
Learn how to replace the floor in your camper with our informative articles. Get step-by-step instructions and expert tips.
(Many of the links in this article redirect to a specific reviewed product. Your purchase of these products through affiliate links helps to generate commission for Storables.com, at no extra cost. Learn more)
Introduction
Replacing the floor in a camper is a rewarding project that can greatly improve the appearance and functionality of your recreational vehicle. A worn-out or damaged floor not only detracts from the overall aesthetic of your camper, but it can also compromise the structural integrity and lead to further issues down the line. By taking the time to replace the floor, you can ensure a solid foundation for your adventures.
Before diving into the project, it’s important to gather the necessary materials and tools to ensure a smooth and successful installation. Additionally, having a step-by-step plan will make the process more manageable and give you confidence as you tackle each phase of the project.
In this article, we will guide you through each step of replacing the floor in a camper. From removing the old flooring to installing and finishing the new surface, we’ll provide you with valuable tips and insights to help you achieve a professional-looking result.
Whether you have a motorhome, travel trailer, or camper van, the steps outlined here can be applied to most types of recreational vehicles. So, let’s gather our supplies and get started on this exciting journey towards a brand new camper floor!
Key Takeaways:
- Replacing the floor in a camper is a rewarding project that can greatly enhance the appearance and functionality of your recreational vehicle. By following a step-by-step process, you can achieve a professional result and elevate your camping experience.
- Proper preparation, meticulous installation, and regular maintenance are essential for ensuring the longevity and beauty of your new camper floor. With attention to detail and care, you can enjoy a stylish and comfortable space for your adventures.
Read more: How To Replace A Shed Floor
Materials and Tools Needed
Before you begin the process of replacing the floor in your camper, it’s important to gather all the necessary materials and tools. Having everything on hand will save you time and ensure a smooth installation process. Here’s a list of what you’ll need:
Materials:
- New flooring material (such as vinyl planks, laminate, or hardwood)
- Underlayment (if required)
- Adhesive or flooring tape
- Trim pieces and moldings
- Screws or nails
- Caulk or sealant
- Subfloor repair materials (if needed)
Tools:
- Utility knife
- Hammer or nail gun
- Screwdriver
- Tape measure
- Chalk line
- Pry bar or crowbar
- Circular saw or jigsaw
- Drill
- Sanding block
- Level
- Paint roller or brush
- Vacuum cleaner or broom
- Carpenter’s pencil
These are the basic materials and tools you’ll need for the floor replacement project. Depending on the specific requirements of your camper and the type of flooring you choose, you may need additional materials such as adhesives, underlayment, or specific trim pieces. Be sure to check the manufacturer’s instructions for any additional items or tools that may be recommended.
Once you have gathered all the necessary materials and tools, you’re ready to move on to the next step: removing the existing flooring from your camper.
Step 1: Remove Existing Flooring
The first step in replacing the floor in your camper is to remove the existing flooring. This can be a bit labor-intensive, but with the right tools and a systematic approach, it can be done effectively. Here’s how to do it:
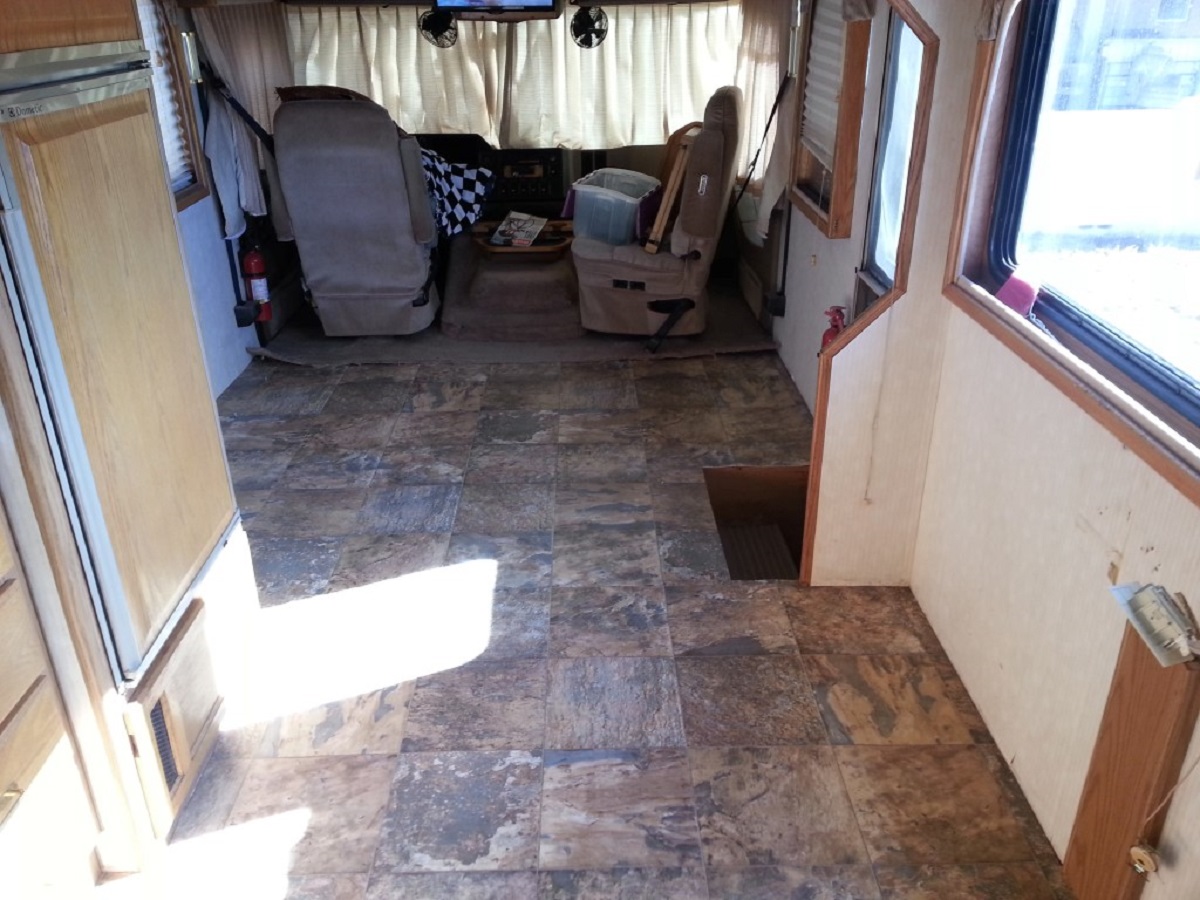
- Clear the space: Remove any furniture, appliances, or fixtures that may obstruct your work area. This will give you a clear and unobstructed space to work in.
- Start from the edges: Use a pry bar or crowbar to gently lift the edges of the flooring. Work your way around the perimeter of the camper, gradually lifting and removing the flooring as you go. Be careful not to damage the subfloor in the process.
- Remove the flooring: Once you have lifted the edges, you can start removing the flooring material. Depending on the type of flooring in your camper, this may involve pulling up tiles, rolling up vinyl or carpet, or prying off laminate boards. Take your time and be mindful of any adhesive or fasteners that may be holding the flooring down. Use a utility knife to cut through any stubborn seams or edges.
- Dispose of the old flooring: As you remove the old flooring, have a designated area to dispose of it. You may need to check local regulations regarding the disposal of certain materials. If the flooring is still in good condition, you could consider donating or repurposing it.
- Clean the subfloor: With the old flooring removed, now is the perfect time to thoroughly clean the subfloor. Use a broom or vacuum cleaner to remove any dirt, dust, or debris. This will ensure a clean and smooth surface for the installation of the new flooring.
By following these steps, you will successfully remove the existing flooring from your camper. Remember to work carefully and be mindful of any delicate or fragile areas. Once the old flooring is removed, you’re ready to move on to the next step: inspecting the subfloor for damage.
Step 2: Inspect Subfloor for Damage
After removing the existing flooring from your camper, it’s important to inspect the subfloor for any signs of damage. This step is crucial as it will help you identify and address any underlying issues that could affect the stability and longevity of the new flooring. Follow these steps to inspect the subfloor:
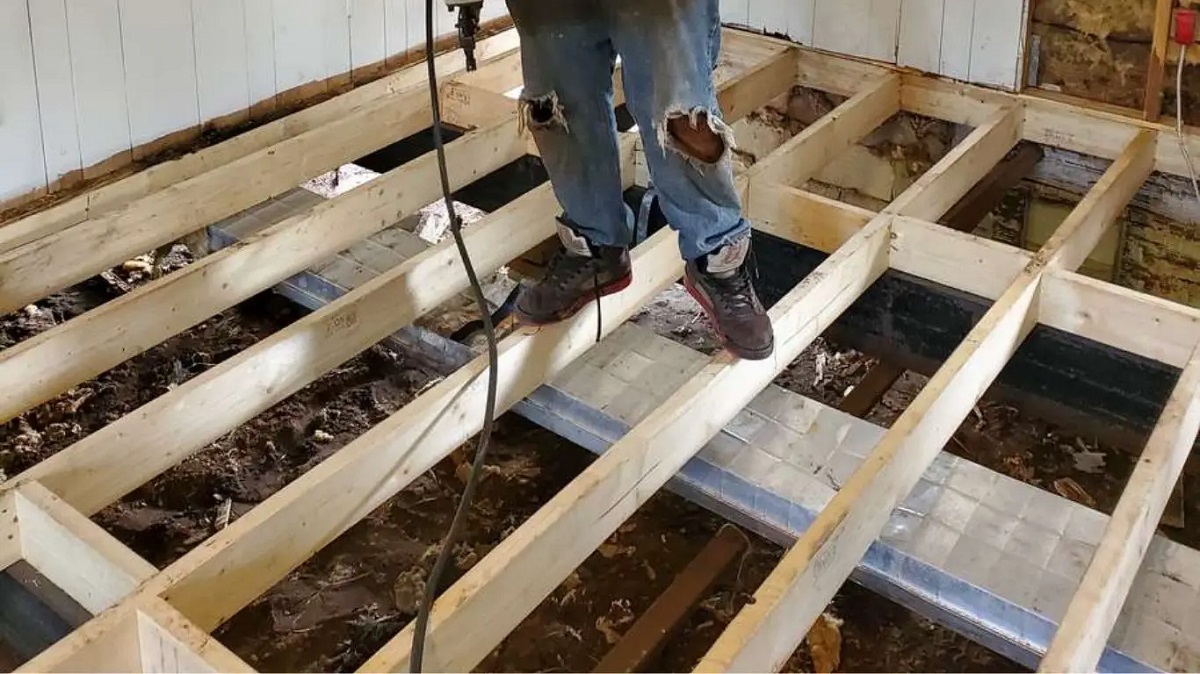
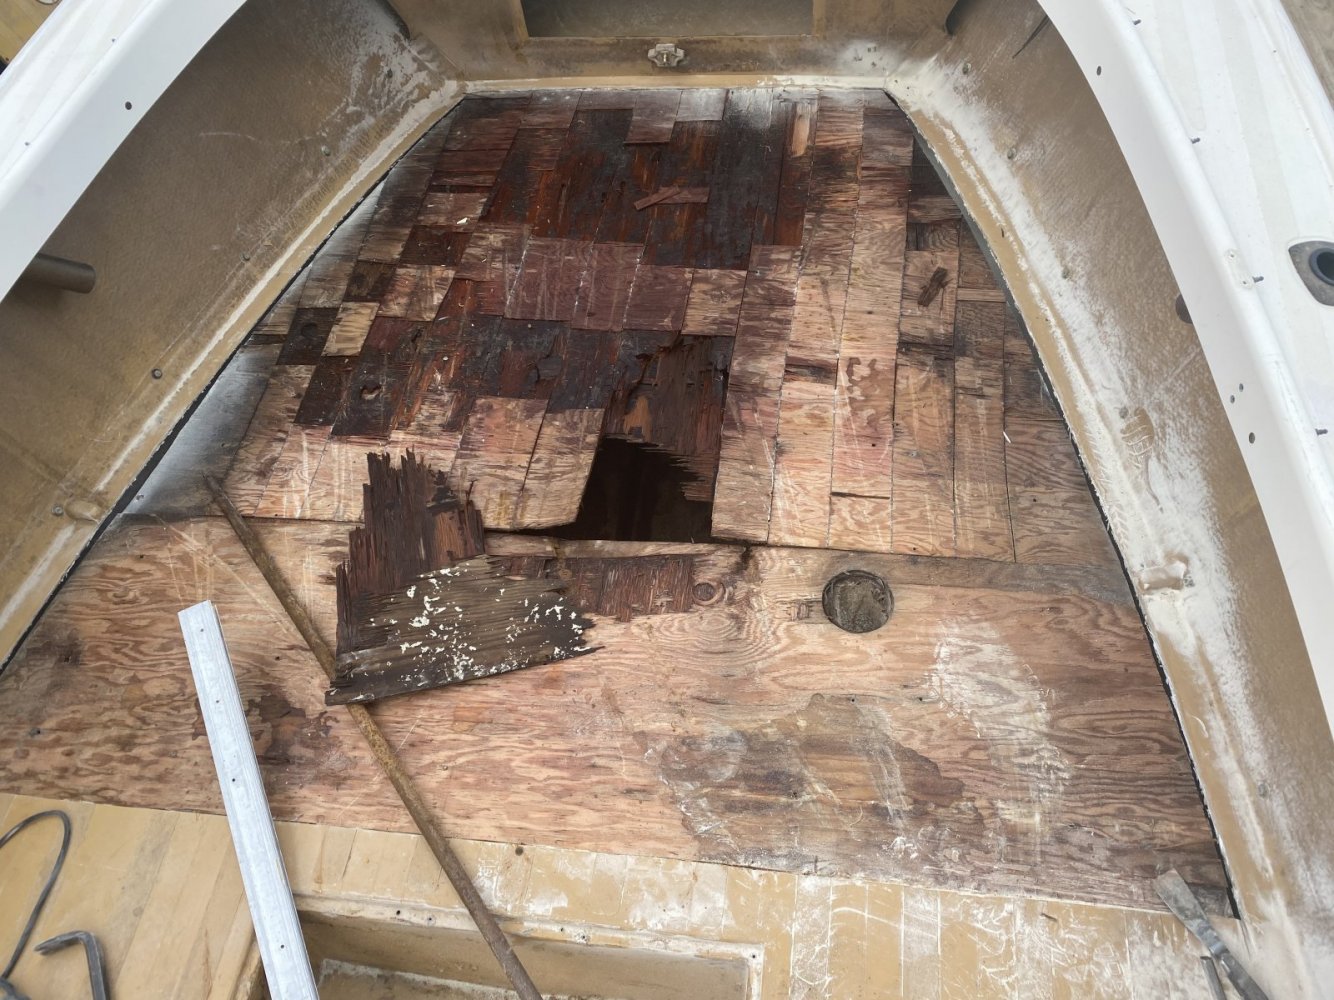
- Visually examine the subfloor: Take a close look at the subfloor to check for any visible signs of damage. Look for soft spots, water stains, rot, or warping. Pay special attention to areas near windows, doors, and plumbing fixtures as they are more prone to water damage.
- Probe the subfloor: Use a screwdriver or a similar tool to gently probe the subfloor. Press down on areas that appear suspicious or weak. If the screwdriver easily penetrates the wood or there is significant give, it indicates rot or structural damage. Make note of these areas for repair or replacement.
- Address any water leaks: If you discover water damage or suspect ongoing leaks, it’s essential to fix the source of the problem before proceeding with the floor replacement. Repair any leaks and ensure that the subfloor is fully dry before moving forward. This will help prevent further damage and ensure the longevity of your new flooring.
- Replace damaged subfloor: If you identify areas of severe damage or rot, it’s necessary to replace the affected sections of the subfloor. Cut out the damaged portion using a circular saw or jigsaw, making sure to be precise and follow the existing floor framing. Install new pieces of plywood or other suitable subfloor material to create a solid and stable base for your new flooring.
- Level the subfloor: Use a level to check the overall evenness of the subfloor. Uneven spots can cause problems with the installation and performance of the new flooring. If you find any uneven areas, use a leveling compound or shims to correct them and ensure a smooth surface.
By thoroughly inspecting the subfloor and addressing any damage or issues, you’ll lay the foundation for a successful flooring replacement. Take the time to properly evaluate the subfloor to ensure a stable and long-lasting result. Once you’ve completed the inspection and any necessary repairs or replacements, you can move on to the next step: purchasing the new flooring material.
Step 3: Purchase New Flooring Material
Now that you have assessed and prepared the subfloor in your camper, it’s time to select and purchase the new flooring material. There are various options available, including vinyl planks, laminate, hardwood, or even carpet. Consider the specific needs of your camper and personal preferences to choose the most suitable flooring. Follow these steps to ensure a successful purchase:
- Measure the floor area: Use a tape measure to determine the dimensions of the floor area you will be covering. Measure both the length and width of the space, and multiply them to determine the total square footage. This will help you estimate the amount of flooring material you need to purchase.
- Research different flooring options: Take the time to research and explore different types of flooring materials available. Consider factors such as durability, ease of installation, maintenance requirements, and visual appeal. Look for materials that are suitable for the specific conditions and usage of a camper, such as being waterproof or resistant to temperature changes.
- Compare prices and quality: Once you have narrowed down your choices, compare prices and quality among different suppliers or retailers. Check online marketplaces, home improvement stores, and specialty RV suppliers to find the best deals. Read reviews and gather information about the durability and performance of the flooring options you are considering.
- Purchase the necessary amount: Based on your measurements, calculate the amount of flooring material you will need to cover the entire floor area. It’s a good idea to add a little extra to account for any mistakes or future repairs. Consult with the supplier or retailer to ensure you purchase the correct amount of flooring material.
- Consider additional materials: Depending on the type of flooring material you choose, you may need additional materials such as underlayment, adhesive, or trim pieces. Make a list of these materials and add them to your shopping list to ensure you have everything you need for the installation process.
By following these steps, you can select and purchase the most suitable flooring material for your camper. Take the time to compare options and gather all the necessary materials to ensure a successful and efficient installation process. Once you have obtained the new flooring material, you can proceed to Step 4: preparing the subfloor for installation.
When replacing the floor in a camper, be sure to properly support the structure before removing the old floor. Use materials that are lightweight and durable, such as marine-grade plywood or vinyl flooring. Make sure to seal all seams and edges to prevent water damage.
Step 4: Prepare Subfloor for Installation
With the new flooring material in hand, it’s time to prepare the subfloor in your camper for installation. Proper preparation is important to ensure a smooth and long-lasting result. Follow these steps to get your subfloor ready for the installation of the new flooring:
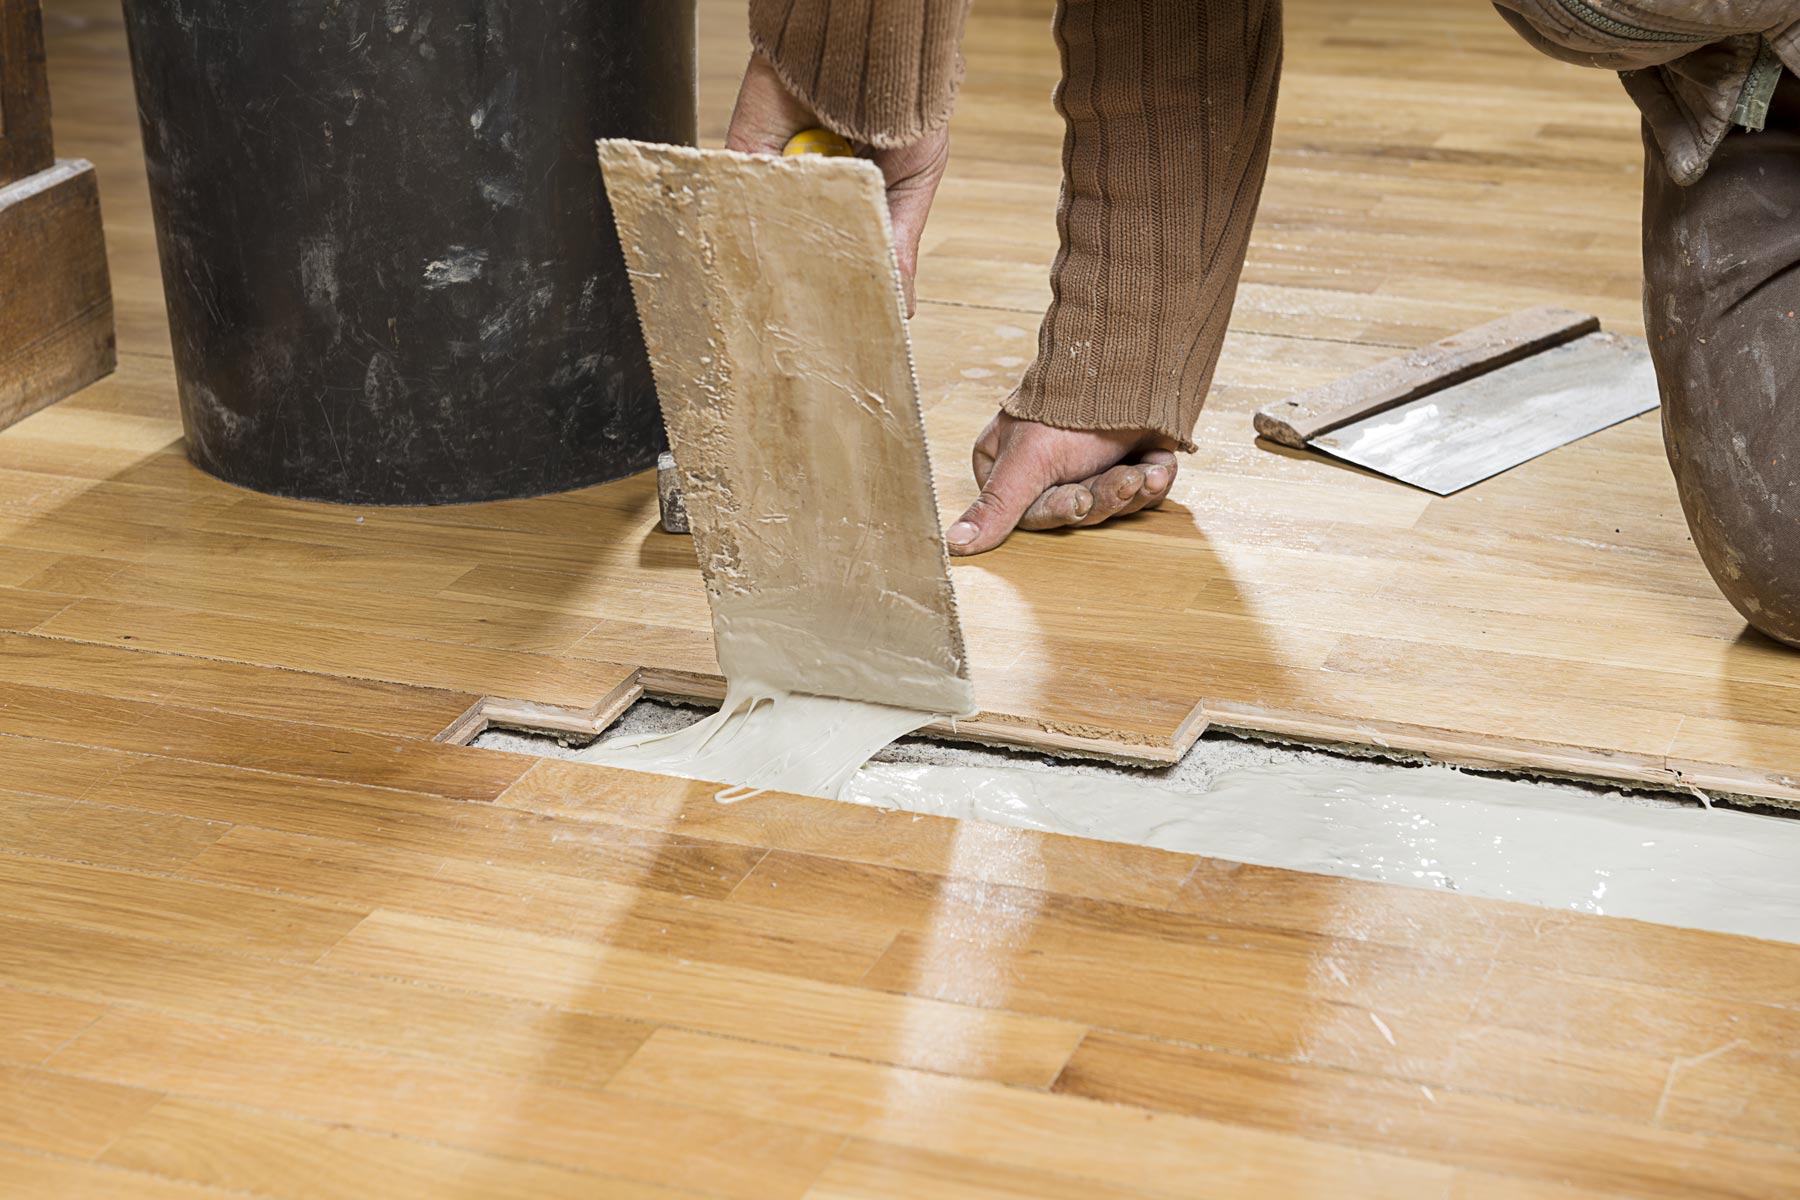
- Clean the subfloor: Before you begin, clean the subfloor thoroughly to remove any remaining dirt, dust, or debris. Use a broom, vacuum cleaner, or damp cloth to ensure a clean surface. This will help the new flooring adhere properly and provide a smooth installation.
- Install underlayment (if necessary): Depending on the type of flooring material you chose, you may need to install an underlayment. This additional layer provides extra insulation, moisture barrier, or cushioning. Follow the manufacturer’s instructions to install the underlayment properly.
- Check for smoothness and levelness: Use a level to check the overall smoothness and levelness of the subfloor. If you notice any high or low spots, sand them down or use a leveling compound to even out the surface. A smooth and level subfloor will ensure that your new flooring sits properly and looks professional.
- Acclimate the new flooring material: If necessary, acclimate the new flooring material to the environment of your camper. Follow the manufacturer’s instructions regarding the recommended acclimation period. This step is particularly important for materials such as hardwood, which need time to adjust to the temperature and humidity of the space.
- Create a layout plan: Before you start installing the new flooring, create a layout plan. Consider the direction of the planks or tiles, the positioning of seams, and any specific design patterns you want to achieve. This will help you visualize the final result and avoid mistakes during the installation process.
By following these steps, you will adequately prepare the subfloor for the installation of the new flooring material. Take your time to clean, level, and acclimate the subfloor, as these steps are crucial for a successful installation. Once you have completed the preparation, you are ready to move on to Step 5: installing the new flooring in your camper.
Step 5: Install New Flooring
Now that you have prepared the subfloor, it’s time to install the new flooring in your camper. This step requires precision and attention to detail to achieve a professional-looking result. Follow these steps to install the new flooring material:
- Start from a corner: Begin the installation process by starting in a corner of the camper. Lay the first plank or tile, making sure it is snugly fitted against the wall or edge. This will serve as your starting point.
- Follow the layout plan: Refer to the layout plan you created during the preparation phase. As you proceed with the installation, lay each subsequent piece of flooring according to your plan, aligning the edges and seams as necessary.
- Use adhesive or flooring tape: Depending on the type of flooring material you have chosen, you may need to apply adhesive to the back of each plank or tile. Make sure to follow the manufacturer’s instructions on the correct adhesive and application method. Alternatively, if you have opted for a floating floor, use flooring tape to secure the planks or tiles together.
- Ensure proper spacing: Maintain a consistent spacing between each piece of flooring to ensure a uniform and visually appealing result. Use spacers or guidelines to help you achieve the desired spacing.
- Trim pieces as needed: Along the edges or around obstacles such as cabinets, walls, or fixtures, you may need to trim the flooring to fit. Use a circular saw or jigsaw to make precise cuts, ensuring a seamless and professional finish.
- Work methodically: As you install each piece of flooring, work methodically and gradually across the entire floor area. Take your time to ensure a proper fit and alignment, making any necessary adjustments as you go along.
- Check for any gaps or imperfections: Once the flooring installation is complete, carefully inspect the entire surface for any gaps, loose pieces, or imperfections. Address any issues immediately to ensure a flawless final result.
By following these steps, you can successfully install the new flooring in your camper. Take your time and work with precision to achieve a professional-looking finish. Once the installation is complete, you are ready to move on to Step 6: trimming and finishing the edges.
Step 6: Trim and Finish the Edges
With the new flooring installed in your camper, it’s time to focus on trimming and finishing the edges. This step will give your project a polished and professional appearance. Follow these steps to trim and finish the edges of your new flooring:
- Measure and mark: Use a tape measure to measure the length of each edge that needs to be trimmed. Mark the measurements on the flooring material, ensuring accuracy and precision.
- Trim the flooring: Use a circular saw, jigsaw, or other appropriate cutting tool to carefully trim the excess flooring material along the marked lines. Take your time to make clean and accurate cuts.
- Check the fit: After each trim, check the fit of the trimmed piece against the edge. Make any necessary adjustments to ensure a seamless and snug fit. Always trim a little at a time and test the fit frequently to avoid removing too much material.
- Install trim pieces: Depending on the type of flooring and the design of your camper, you may want to install trim pieces along the edges. This can add a finishing touch and cover any gaps or rough edges. Use appropriate trim pieces for your specific flooring material, such as baseboards or molding strips.
- Secure trim pieces: Secure the trim pieces in place using nails, screws, or adhesive, following the manufacturer’s instructions. Ensure that they sit flush against the flooring and the walls, creating a clean and professional appearance.
- Fill gaps or seams: If there are any small gaps or seams between the flooring and the walls or other surfaces, use caulk or sealant to fill them. This will create a seamless and finished look while also providing a barrier against moisture and debris.
- Inspect for any touch-ups: Take a final inspection of the trimmed edges and the overall appearance of the flooring. Look for any areas that may need touch-ups, such as uneven edges or visible seams. Make the necessary adjustments to achieve a flawless finish.
By following these steps, you can effectively trim and finish the edges of your new flooring, giving your camper a polished and professional look. Take your time and pay attention to detail to ensure a high-quality result. Once the trim and finishing touches are complete, you can move on to the final step: cleaning and enjoying your new camper floor.
Step 7: Clean and Enjoy Your New Floor
Congratulations! You have successfully installed and finished the new flooring in your camper. Now it’s time to clean up and start enjoying your refreshed space. Follow these final steps to clean and maintain your new floor:
- Remove any debris: Use a broom or vacuum cleaner to remove any dust, dirt, or debris from the surface of your new floor. Pay extra attention to corners and hard-to-reach areas.
- Mop or wipe the floor: Depending on the type of flooring material you have chosen, follow the manufacturer’s recommendations for cleaning. Use a mop, damp cloth, or appropriate cleaning solution to gently clean the surface of the floor. Avoid using abrasive cleaners or excessive water, as they may damage certain types of flooring.
- Protect the floor: To maintain the beauty and longevity of your new floor, consider using protective measures. Place rugs or mats in high-traffic areas to prevent excessive wear and tear. Use furniture pads or coasters to protect the floor from scratches caused by moving furniture. Clean up spills promptly to prevent staining or damage.
- Establish a cleaning routine: Develop a regular cleaning routine to keep your new floor looking its best. Sweep or vacuum the floor regularly to remove loose dirt and debris. Depending on the material, you may need to mop or wipe the floor periodically to maintain its shine and cleanliness.
- Address maintenance issues promptly: If you notice any maintenance issues, such as loose tiles, damaged planks, or signs of wear, address them promptly. Repair or replace any damaged areas to prevent further damage and to keep your floor in optimal condition.
- Enjoy your new floor: With your new floor installed and properly maintained, it’s time to enjoy the fresh look and improved functionality of your camper space. Whether you’re embarking on new adventures or simply enjoying moments of relaxation, your new floor will enhance the overall experience.
By following these steps and maintaining a regular cleaning routine, you can ensure that your new floor stays in excellent condition for years to come. A well-maintained floor will not only enhance the aesthetics of your camper but also contribute to a comfortable and enjoyable camping experience.
So, sit back, relax, and revel in the joy of your newly transformed camper with its beautiful and pristine floor!
Read more: How To Replace Bathroom Floor
Conclusion
Replacing the floor in your camper is a significant project that can greatly enhance the overall look and functionality of your recreational vehicle. By following the step-by-step process outlined in this article, you can successfully replace the old, worn-out flooring with a fresh and appealing new surface.
From removing the existing flooring to inspecting the subfloor, purchasing the new flooring material, preparing the subfloor, installing the new flooring, and finishing the edges, each step plays a crucial role in achieving a professional result. Paying attention to detail, working methodically, and using the appropriate tools and materials will ensure a successful installation.
Once your new floor is installed, it’s important to care for and maintain it properly. Establish a regular cleaning routine, address maintenance issues promptly, and take preventative measures to protect your new floor from damage. This will help the floor maintain its beauty and longevity, ensuring it withstands the demands of your camper adventures.
With a refreshed and stylish floor, you can enjoy your camper even more. The visually appealing and functional upgrade will create a conducive environment for relaxation, socializing, and memorable experiences. Whether you’re embarking on a cross-country road trip or simply retreating to nature for a weekend getaway, your new floor will enhance the overall enjoyment of your camping experience.
So, gather the necessary materials and tools, follow the step-by-step process outlined in this article, and embark on the journey of transforming your camper’s floor. Take pride in your accomplishments and relish in the satisfaction of a job well done. Your new floor will not only make your camper look fantastic, but it will also elevate your camping adventures to a whole new level of comfort and style.
Frequently Asked Questions about How To Replace Floor In Camper
Was this page helpful?
At Storables.com, we guarantee accurate and reliable information. Our content, validated by Expert Board Contributors, is crafted following stringent Editorial Policies. We're committed to providing you with well-researched, expert-backed insights for all your informational needs.

0 thoughts on “How To Replace Floor In Camper”