Articles
How To Store Finished Compost
Modified: January 6, 2024
Learn the best ways to store finished compost with our informative articles. Find practical tips and expert advice to keep your compost fresh and ready for use.
(Many of the links in this article redirect to a specific reviewed product. Your purchase of these products through affiliate links helps to generate commission for Storables.com, at no extra cost. Learn more)
Introduction
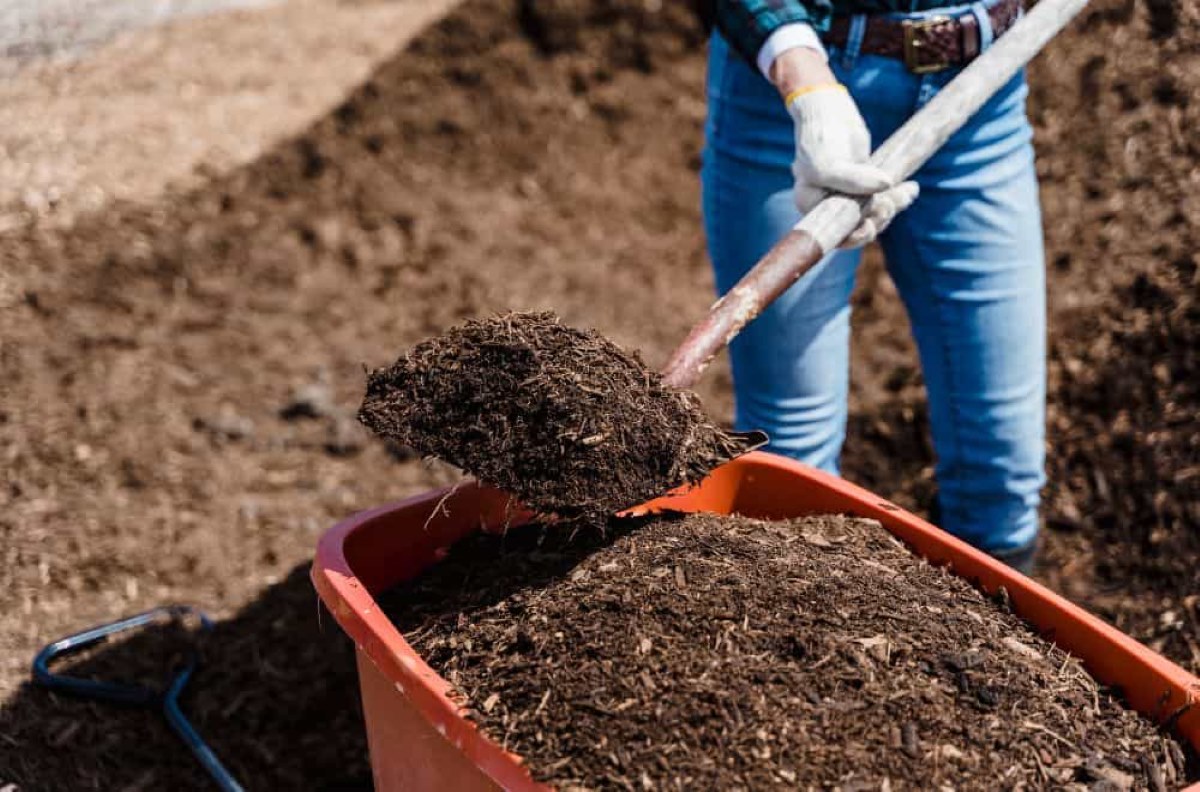
Composting is a fantastic way to reduce waste and create nutrient-rich soil for your garden. Whether you are an experienced gardener or just starting out, proper storage of finished compost is crucial to maintaining its quality. Storing your compost correctly not only helps to preserve its nutrients but also prevents it from generating unpleasant odors or attracting pests. In this article, we will explore the importance of proper compost storage and guide you through the various methods and considerations to ensure your compost remains in optimal condition until it’s time to use it.
Key Takeaways:
- Proper storage of finished compost is crucial for preserving nutrients, preventing odors, deterring pests, and maintaining optimal moisture and aeration. Choosing the right storage method and location is essential for successful composting.
- Regular monitoring, turning, mixing, and protecting against pests and animals are key to maintaining high-quality compost. Harvesting and utilizing the stored compost completes the composting cycle, providing a valuable resource for improving soil health and garden productivity.
Read more: How To Store Compost In Kitchen
Why is Proper Storage Important?
Proper storage of finished compost is essential for several reasons. Firstly, it preserves the valuable nutrients that the compost contains. Compost is rich in organic matter, essential minerals, and beneficial microorganisms that contribute to the overall health of your soil. When exposed to the elements or improper storage methods, these nutrients can leach away or break down prematurely, diminishing the compost’s effectiveness.
Furthermore, storing your compost correctly helps to prevent unpleasant odors from developing. Composting is a natural process that involves the decomposition of organic matter. While this process is beneficial, it can also produce strong odors if not managed properly. By storing your compost in a suitable manner, you can minimize the potential for odors, making it more pleasant to handle and reducing the risk of neighbor complaints.
Proper storage also plays a vital role in deterring pests and animals. Compost can be attractive to rodents, insects, and other critters looking for food or nesting materials. If not stored properly, your compost pile or container can become a breeding ground for unwanted visitors. This can lead to infestations in your garden or even your home. By implementing appropriate storage methods, you can help keep pests and animals at bay, ensuring that your compost remains undisturbed.
Lastly, proper storage allows you to manage and control the composting process more effectively. Different composting methods require specific conditions, such as moisture levels, aeration, and temperature. By storing your compost correctly, you can regulate these factors more easily, ensuring that the compost continues to decompose at an optimal rate. This allows you to have a steady supply of high-quality compost whenever you need it for your garden.
Overall, proper storage of finished compost helps to preserve its nutrients, prevent odors, deter pests and animals, and enable better management of the composting process. By following the right storage practices, you can enjoy the full benefits of your compost and create a healthier and more productive garden.
Choosing the Right Storage Method
When it comes to storing finished compost, there are a few different methods to consider. The best storage method for you will depend on factors such as the amount of compost you have, available space, and personal preferences. Here are three common storage methods to choose from:
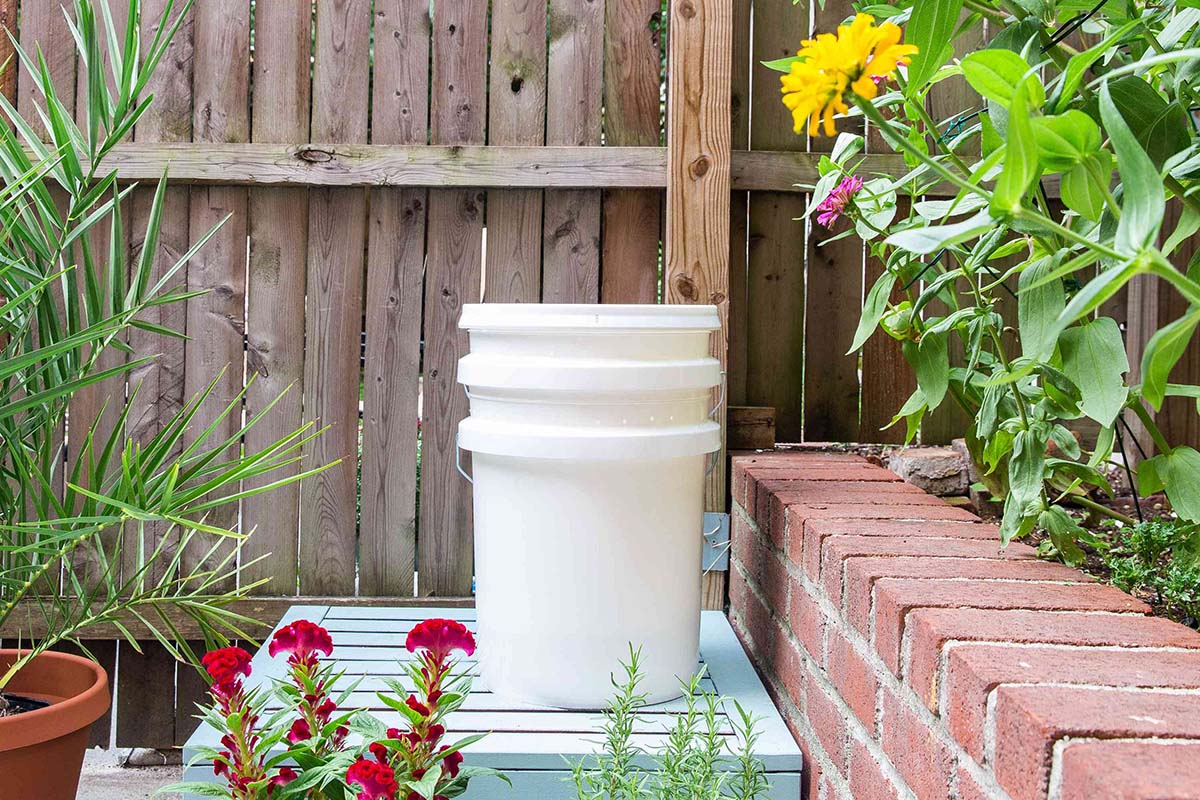
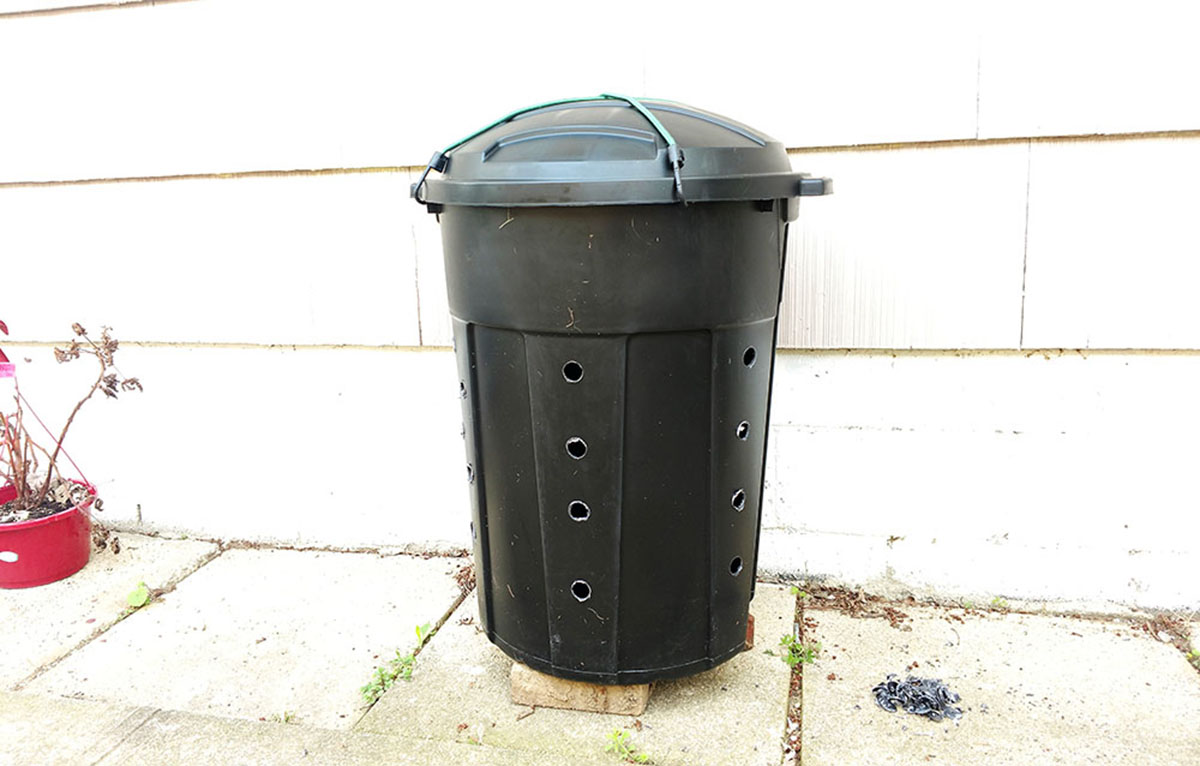
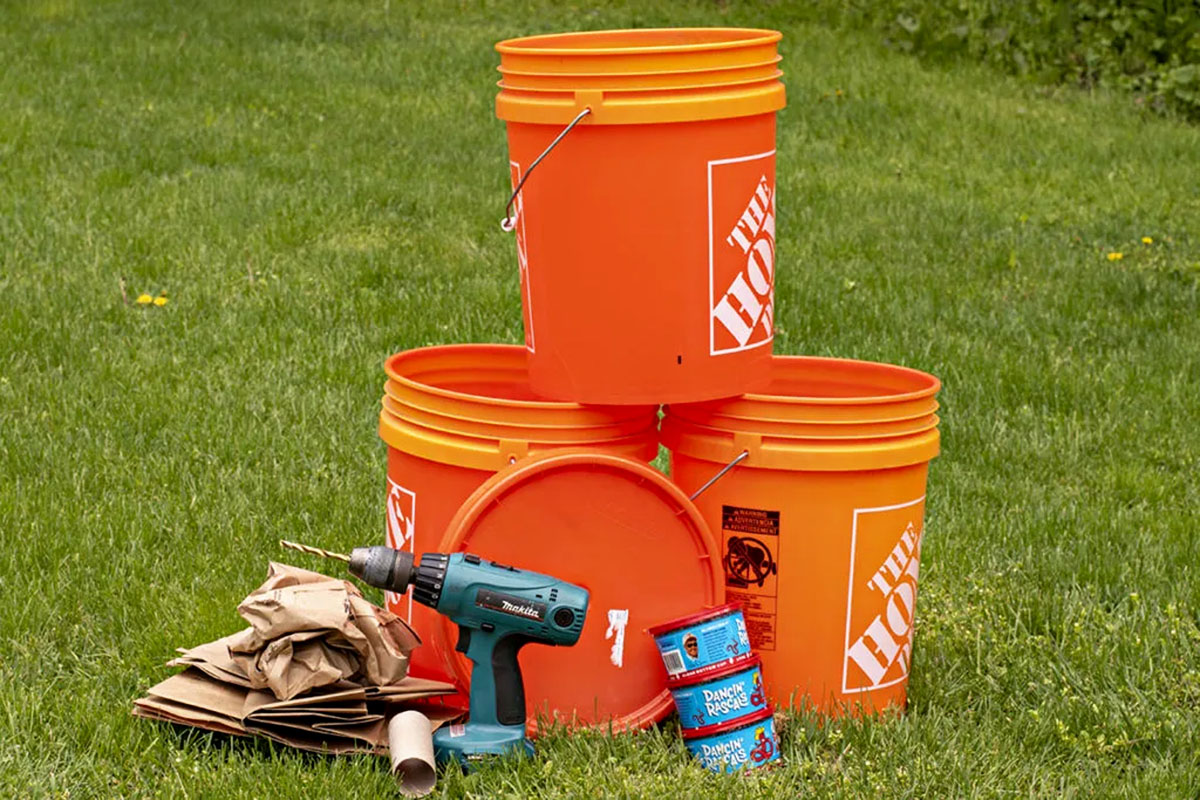
- Plastic Containers: Plastic containers are a popular choice for storing compost, particularly for those with limited space. Look for containers that have a tight-fitting lid to keep out moisture and pests. You can use plastic bins, buckets, or even repurpose large food-grade containers. Ensure that the container has proper drainage to prevent water from pooling and causing the compost to become waterlogged. Plastic containers are also portable, making it easier to move your compost around if needed.
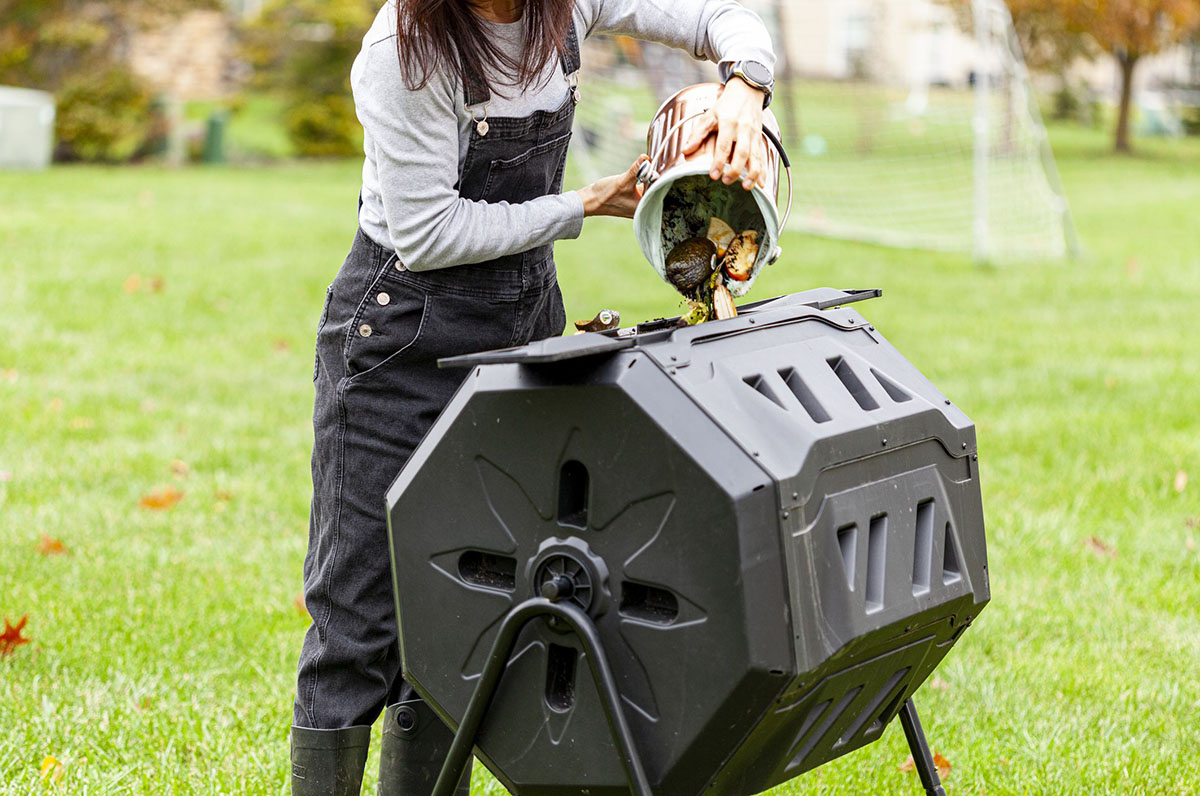
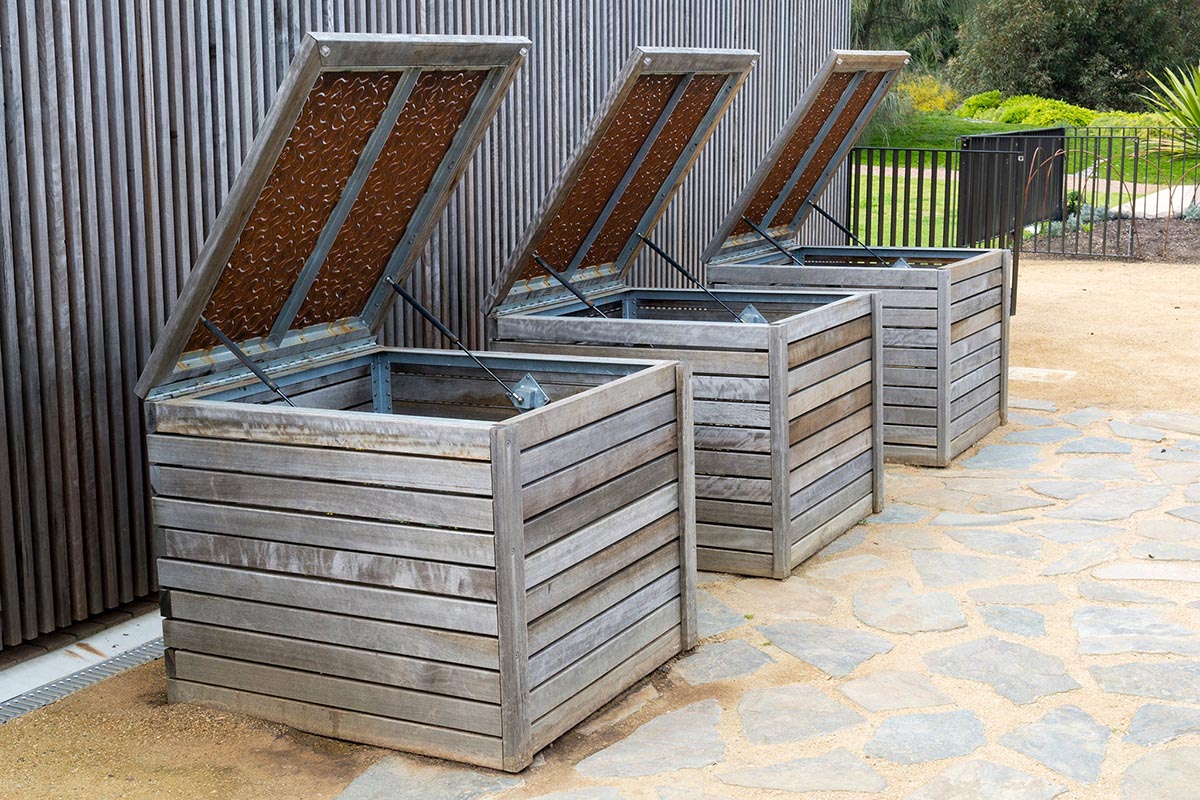
- Compost Bins: Compost bins are another effective option for storing compost. These bins are specifically designed for composting and typically come with features like ventilation, access doors, and secure lids. There are various types of compost bins available, including tumblers, stationary bins, and vermiculture bins. Consider factors such as your available space, desired composting method, and budget when choosing a compost bin. The bin should be made of sturdy materials such as plastic, wood, or metal and be able to withstand weather conditions.
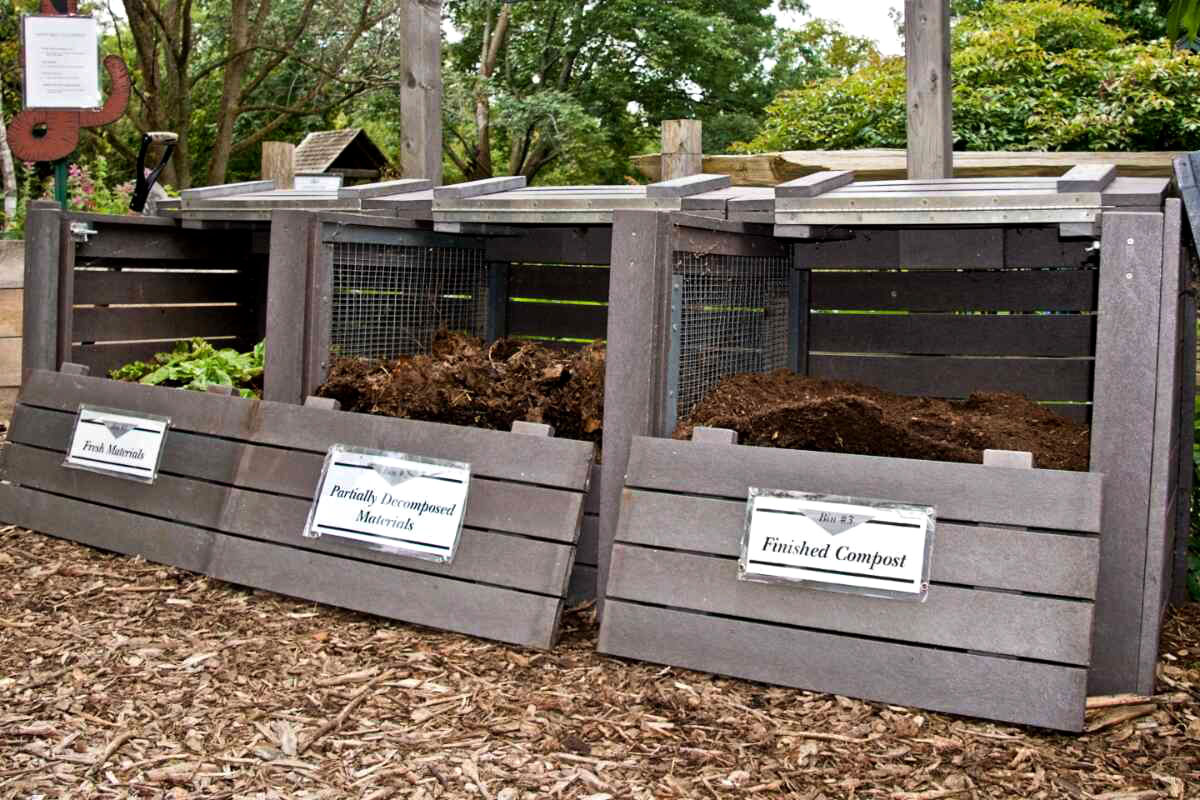
- Compost Piles: If you have a larger area at your disposal, compost piles can be a cost-effective and practical choice. Compost piles can be constructed on the ground or built using materials such as wire mesh or wooden pallets. The advantage of compost piles is that they allow for greater airflow and a larger volume of compost. It is important to ensure that the compost pile is turned regularly to promote decomposition and prevent it from becoming compacted. Consider covering the pile with a tarp or similar material to protect it from excessive moisture and to regulate temperature.
Before deciding on a storage method, evaluate your specific needs and circumstances. Consider factors such as the amount of compost you generate, available space, climate, and desired level of convenience. Remember, the goal is to choose a storage method that will effectively protect your compost from the elements, pests, and excessive moisture while still being practical for your gardening needs.
Plastic Containers
Plastic containers are a popular choice for storing finished compost, especially for gardeners with limited space or those living in urban areas. These containers offer convenience, durability, and the ability to keep pests and excess moisture out. Here are some key considerations when using plastic containers to store your compost:
- Container Selection: Choose a plastic container that is large enough to accommodate your compost volume. Consider using food-grade containers or repurpose old bins or buckets. Ensure that the container has a tight-fitting lid to prevent moisture from entering and to keep pests out. Look for containers with proper drainage holes to allow excess water to escape and prevent waterlogging.
- Location: Place the plastic container in a location that is convenient for easy access. Consider factors such as proximity to the garden or composting area. It should be situated on a flat, level surface that can support the weight of the compost. Avoid placing the container in direct sunlight, as excessive heat can negatively affect the composting process. If possible, choose a shaded or partially shaded spot.
- Aeration: Adequate airflow is essential for compost decomposition. To promote airflow within the plastic container, you can drill several small holes or create ventilation slots along the sides or lid. These openings will allow oxygen to enter and carbon dioxide to escape, preventing anaerobic conditions and foul odors. It is important to strike a balance between ensuring proper aeration and preventing pests from entering through these holes.
- Moisture Control: Maintaining appropriate moisture levels is crucial for composting. Plastic containers are effective at preventing excessive moisture from entering, but they can also retain moisture if not properly managed. Monitor the moisture content of your compost regularly, and adjust as needed. If the compost feels overly dry, sprinkle it with water to moisten it. Conversely, if it becomes too wet, add dry material like leaves or shredded paper to absorb excess moisture.
- Compost Maintenance: Even in a plastic container, regular maintenance is important to ensure proper composting. Turn the compost using a garden fork or shovel every few weeks to promote decomposition and prevent compaction. This will help distribute oxygen and heat evenly throughout the compost, accelerating the breakdown process. If you notice any clumps or matted material, break them up to improve aeration.
- Harvesting: When it’s time to use your compost, you can easily harvest it from the plastic container. Simply remove the lid and scoop out the desired amount of finished compost. If there are any undecomposed or larger materials, you can set them aside and return them to the compost for further decomposition. Close the container securely after harvesting to maintain the integrity of the remaining compost.
Plastic containers provide a practical and space-saving option for storing finished compost. By following these guidelines, you can maintain the quality of your compost and ensure a steady supply of nutrient-rich soil amendments for your garden.
Compost Bins
Compost bins are purpose-built containers designed specifically for composting. They offer numerous advantages, including better airflow, easier maintenance, and enhanced aesthetic appeal. Here’s what you need to know about using compost bins to store your finished compost:
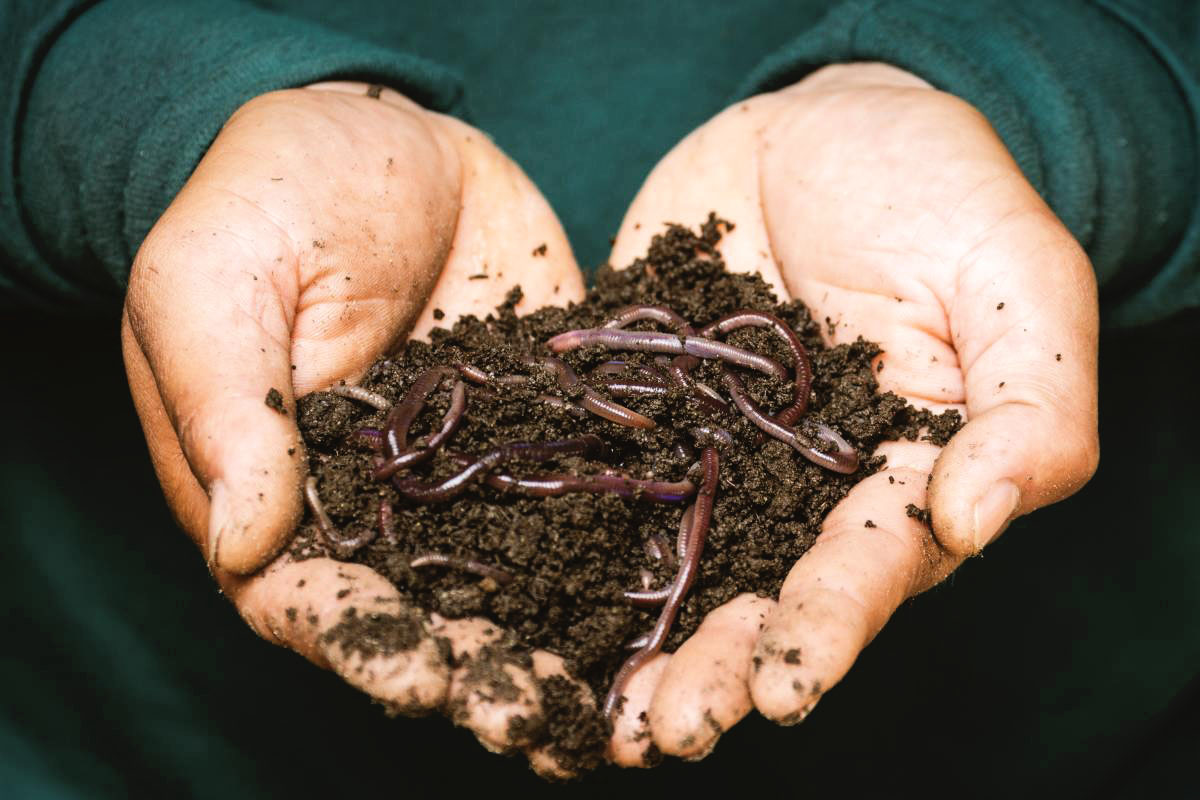
- Bin Selection: There are various types of compost bins available, each with its own set of features and benefits. Tumblers, for instance, consist of a rotating drum that allows for easy turning of the compost, promoting faster decomposition. Stationary bins, on the other hand, are solid structures that provide a larger volume of composting space. Vermiculture bins are designed to accommodate the needs of worm composting systems. Consider your specific composting needs, available space, and budget when selecting a compost bin.
- Location: Choose a suitable location for your compost bin. Ideally, it should be placed on a level surface that is easily accessible. Ensure that the location is relatively close to your garden or planting area for convenient use of the compost. Additionally, consider the aesthetics of the bin, as it will likely be a visible feature in your outdoor space.
- Aeration and Moisture: Compost bins are designed to facilitate better airflow, which is crucial for the composting process. Many models have ventilation holes or slots to allow oxygen to enter and excess moisture to escape. This helps prevent anaerobic conditions and foul odors. Monitor the moisture levels in your compost regularly and adjust as necessary, ensuring it remains damp but not overly wet.
- Turning and Mixing: One of the advantages of compost bins is that they make it easier to turn and mix the compost. Turning the compost helps to distribute oxygen, heat, and microorganisms evenly, promoting faster decomposition. Bin designs may vary, but most feature access doors or lids that can be opened to facilitate mixing and turning. Aim to turn the compost every few weeks to enhance the decomposition process.
- Pest Prevention: Compost bins, when properly maintained, can deter pests and animals from accessing the compost. The closed design of the bin helps keep out rodents, raccoons, and other critters that may be attracted to the organic materials. It is important to secure the lids or doors tightly to prevent pests from gaining entry. Regularly monitor the area around the bin for any signs of pest activity.
- Harvesting: Harvesting compost from a compost bin is straightforward. Many models have access doors or removable sections that allow you to retrieve the finished compost without disturbing the remaining material. Scoop out the desired amount of compost, ensuring that any undecomposed material is returned to the bin for further processing. Once you have harvested the compost, securely close the bin to maintain optimal conditions for ongoing composting.
Compost bins provide a convenient and efficient method for storing finished compost. Consider your specific composting needs, available space, and preferred composting method when selecting a bin. With proper maintenance and care, a compost bin can help you produce nutrient-rich compost to enhance the health and productivity of your garden.
Read more: How To Store Compost Tea
Compost Piles
Compost piles offer a versatile and cost-effective method for storing finished compost. They are particularly suitable for gardeners with larger areas and a significant volume of organic material to compost. Here are important considerations when using compost piles to store your finished compost:
- Pile Construction: Start by selecting an appropriate location for your compost pile. Choose a spot that is level and well-drained, as excessive moisture can hinder the composting process. Consider using materials such as wire mesh, wooden pallets, or even a simple heap on the ground to contain the compost pile. The size of the pile will depend on the amount of compost you have, but aim for a pile that is at least 3 feet wide, 3 feet high, and as long as needed.
- Aeration: Proper airflow is crucial for the composting process. To ensure adequate aeration, periodically turn the compost pile using a garden fork or shovel. This allows oxygen to enter the pile, facilitating the decomposition of organic material. Turning the pile every few weeks helps to mix the compost, distribute beneficial microorganisms, and prevent the material from becoming compacted.
- Moisture Control: It’s important to maintain the right moisture levels in your compost pile. While composting requires some moisture, excessive wetness can lead to anaerobic conditions and unpleasant odors. Monitor the moisture content regularly and adjust as needed. Water the pile if it feels dry, and add dry materials like leaves or shredded paper if it becomes too wet. Aim for a moisture level similar to that of a wrung-out sponge.
- Protecting the Pile: Compost piles can be vulnerable to pests, animals, and excessive rainfall. To protect your compost, consider covering the pile with a tarp or a layer of straw. This helps to prevent excess moisture from entering and helps regulate temperature. Ensure that the cover is secured tightly to prevent pests from gaining access to the compost pile.
- Monitoring: Regular monitoring of the compost pile is essential to ensure proper decomposition. Check the temperature inside the pile, as a high temperature indicates that the composting process is active. Use a compost thermometer to periodically measure the temperature at the center of the pile. Additionally, visually inspect the compost pile for signs of excessive dryness or moisture, odor issues, or any pests or infestations.
- Harvesting: Harvesting compost from a compost pile is a simple process. As the compost nears completion, you will notice that the materials have broken down into a dark, crumbly texture. To harvest the compost, use a shovel or garden fork to scoop out the mature compost from the outer edges of the pile. Leave any undecomposed materials or unfinished compost in the center of the pile for further processing.
Compost piles are a traditional and effective method for storing finished compost. With proper maintenance and care, a compost pile can provide you with a continuous supply of nutrient-rich soil amendment for your garden.
Location Considerations
Choosing the right location for storing your finished compost is an important aspect of maintaining its quality. The location should provide optimal conditions for composting and consider factors such as accessibility, sunlight exposure, and proximity to your garden. Here are some key considerations when selecting the location for storing your compost:
- Accessibility: Consider the convenience of accessing your stored compost. The location should be easily accessible for adding new materials, turning the compost, and harvesting the finished compost when needed. If possible, choose a spot that is in close proximity to your garden or planting area, as this will save you time and effort when using the compost in your gardening endeavors.
- Sunlight Exposure: While direct sunlight is not necessary for compost storage, it is beneficial to place your compost in a partially shaded area. Excessive exposure to sunlight can lead to the compost drying out too quickly. By positioning the compost in a partially shaded spot, you can help maintain the right moisture levels and prevent the compost from overheating.
- Drainage: Ensure that the chosen location has proper drainage to prevent waterlogging. Excess moisture can negatively impact the composting process and can lead to foul odors. Avoid placing your compost storage in low-lying areas or areas prone to flooding. Consider elevating your compost container or constructing the compost pile on a slightly raised platform to enhance drainage.
- Proximity to Water Source: It’s always helpful to have a water source nearby when storing compost. This allows for easy access to water when it’s necessary to adjust moisture levels in the compost. If your chosen location does not have easy access to water, make sure you have a plan in place to transport water to the storage area.
- Neighboring Structures: Take into consideration any neighboring structures, such as your home, outbuildings, or fences, when selecting the location. You want to ensure that the compost storage area is not too close to these structures as the composting process can generate heat and odors. Additionally, it’s important to consider your neighbors and choose a location that minimizes the impact of composting on their property.
- Aesthetics: Although not directly related to the composting process, the aesthetics of the chosen location can play a role in the overall appeal of your outdoor space. Consider how the compost storage area will blend with your existing garden design or outdoor surroundings. If the storage method you choose is visible, you may want to incorporate it into a garden bed or use decorative screens to ensure it is visually pleasing.
By carefully considering these location considerations, you can ensure that your stored compost remains in optimal condition and is easily accessible for your gardening needs. Remember to regularly monitor the compost and make adjustments as necessary to maintain the ideal moisture and nutrient levels.
Store finished compost in a covered bin or pile to protect it from rain and excessive drying. Keep it in a cool, shaded area to maintain its moisture content and nutrient levels. Turn the pile occasionally to ensure even decomposition.
Maintaining Proper Moisture Levels
Maintaining proper moisture levels is essential for the success of your composting efforts. The right moisture content allows beneficial microorganisms to thrive and break down organic matter efficiently. Too much or too little moisture can hinder the composting process and impact the quality of the finished compost. Here are some guidelines for maintaining proper moisture levels in your compost:
- Monitor Moisture Regularly: Keep an eye on the moisture level of your compost by visually inspecting it and occasionally squeezing a handful of the material. The ideal moisture level should resemble that of a damp sponge. It should not be too dry, where it crumbles easily, or too wet, where water can be squeezed out. Regular monitoring will help you identify any moisture-related issues promptly.
- Watering: If your compost appears dry, add water to moisten it. Use a watering can or a hose with a gentle spray to evenly distribute water throughout the compost. Avoid using high-pressure sprays that could disrupt the compost pile. Watering should be done gradually to prevent over-saturation.
- Turning and Mixing: Turning and mixing the compost helps distribute moisture evenly. When you turn the compost pile, check the moisture level at the same time. If you notice dry areas, sprinkle water as you turn to ensure the moisture is evenly distributed. This ensures that the entire compost batch receives adequate moisture for decomposition.
- Dry or Brown Materials: Incorporate dry or brown materials, such as dried leaves, shredded paper, or straw, into your compost. These materials help absorb excess moisture and prevent the compost from becoming too wet. Add them in layers or mix them with wet or green materials to balance the moisture levels.
- Avoid Excessive Wetness: Excessive moisture can lead to anaerobic conditions, where the compost lacks oxygen and produces foul odors. To prevent excessive wetness, cover your compost pile or use a bin with a lid to protect it from heavy rainfall. If you live in a rainy climate, consider siting your composting area under cover or using a waterproof tarp as a rain shield.
- Proper Aeration: Adequate airflow is crucial for maintaining proper moisture levels in compost. Good aeration reduces the risk of excessive moisture and helps prevent anaerobic conditions. Regularly turning the compost pile or using a compost bin with proper ventilation promotes a healthy balance of moisture and airflow.
By maintaining proper moisture levels, you create an optimal environment for the composting process. This allows microorganisms to thrive, organic matter to decompose efficiently, and the overall quality of the finished compost to be preserved. Remember that composting is a dynamic process, and moisture levels may vary depending on the weather, materials used, and other factors. Regular monitoring and adjustment will help you achieve and maintain the ideal moisture balance for successful composting.
Turning and Mixing the Compost
Turning and mixing the compost is an essential maintenance task that promotes decomposition and ensures the successful breakdown of organic materials. By providing oxygen, distributing heat, and blending different ingredients, turning and mixing the compost helps create the ideal environment for beneficial microorganisms to thrive. Here’s why turning and mixing are important and how to do it effectively:
- Aeration: Turning the compost introduces fresh oxygen into the pile. Oxygen is crucial for the aerobic decomposition process, where microorganisms break down organic matter efficiently. Adequate aeration prevents the development of anaerobic conditions, which can lead to foul odors. By turning the compost pile, you expose the materials to oxygen and encourage aerobic microorganisms to flourish.
- Distribution of Heat: The decomposition process generates heat as microorganisms break down organic matter. By turning and mixing the compost, you help distribute this heat evenly throughout the pile. This promotes uniform decomposition and ensures that all parts of the compost reach optimal temperatures for effective breakdown.
- Blending Ingredients: Turning and mixing the compost helps homogenize the mixture and ensure that all ingredients are evenly distributed. This allows for better integration of carbon-rich, or “brown,” materials like leaves or shredded paper, and nitrogen-rich, or “green,” materials like fruit scraps or grass clippings. Mixing these materials together creates an optimal carbon-to-nitrogen ratio, enhancing the composting process.
- Incorporating Microorganisms: Turning the compost introduces microorganisms from the outer layers of the pile to the inner portions, ensuring uniform colonization. These microorganisms, including bacteria, fungi, and earthworms, play a vital role in breaking down organic matter and transforming it into nutrient-rich compost. Turning the compost helps distribute these beneficial microorganisms throughout the pile.
When it comes to turning and mixing your compost, here are some best practices to follow:
- Frequency: Aim to turn or mix the compost every 2-4 weeks. However, the frequency may vary depending on factors such as the composition of your compost, the ambient temperature, and the desired speed of decomposition. Regularly monitor the moisture, temperature, and overall progress of the compost to determine the appropriate turning schedule.
- Tools: Use a garden fork, shovel, or compost turning tool to carefully lift and turn the compost. Avoid using tools that are too heavy or sharp, as they may damage the beneficial microorganisms in the compost.
- Layering: When turning the compost pile, break up any clumps or compacted areas to promote better airflow and even decomposition. As you turn the pile, alternate the layers and mix the outer materials with those from the center. This ensures that all portions of the compost are exposed to air and moisture.
- Moisture Adjustment: Assess the moisture content of the compost during turning. If the compost feels too dry, sprinkle water to moisten it. Conversely, if it feels too wet, add dry materials like leaves or shredded paper to absorb excess moisture and restore the balance.
- Layering Amendments: If your compost pile requires additional amendments, such as lime or specific organic materials, incorporate them during the turning process. Mixing these amendments evenly throughout the compost will help balance pH levels and enhance nutrient availability.
Regular turning and mixing of your compost ensures optimal conditions for decomposition and accelerates the breakdown of organic materials. By following these techniques, you can produce nutrient-rich compost efficiently and effectively for your gardening needs.
Read more: How To Store Compost In The Winter
Protecting Against Pests and Animals
When storing your compost, it’s essential to protect it against pests and animals that may be attracted to the organic materials. Unwanted visitors like rodents, raccoons, or insects can disrupt the composting process, create a mess, and even spread diseases. Here are some strategies to safeguard your compost against pests and animals:
- Secure Containers: If you are storing your compost in plastic containers or bins, ensure they have tight-fitting lids that are resistant to pests. This helps prevent animals from accessing the compost and protects it from being scattered or contaminated. Double-check that all edges and openings are properly sealed to foil any attempts for pests to gain entry.
- Elevate or Protect Compost Piles: If you are using a compost pile, consider elevating it on a sturdy base or platform made of wire mesh or wooden pallets. This adds an extra layer of protection against burrowing pests. Additionally, you can surround the pile with a wire mesh or hardware cloth to create a physical barrier against crawling or digging animals.
- Use Compost Bins with Secure Lids: Compost bins with secure lids and latches are an effective way to deter pests. Look for bins specifically designed to keep animals out. Many compost bins have locking mechanisms or weighted lids that can keep larger pests at bay.
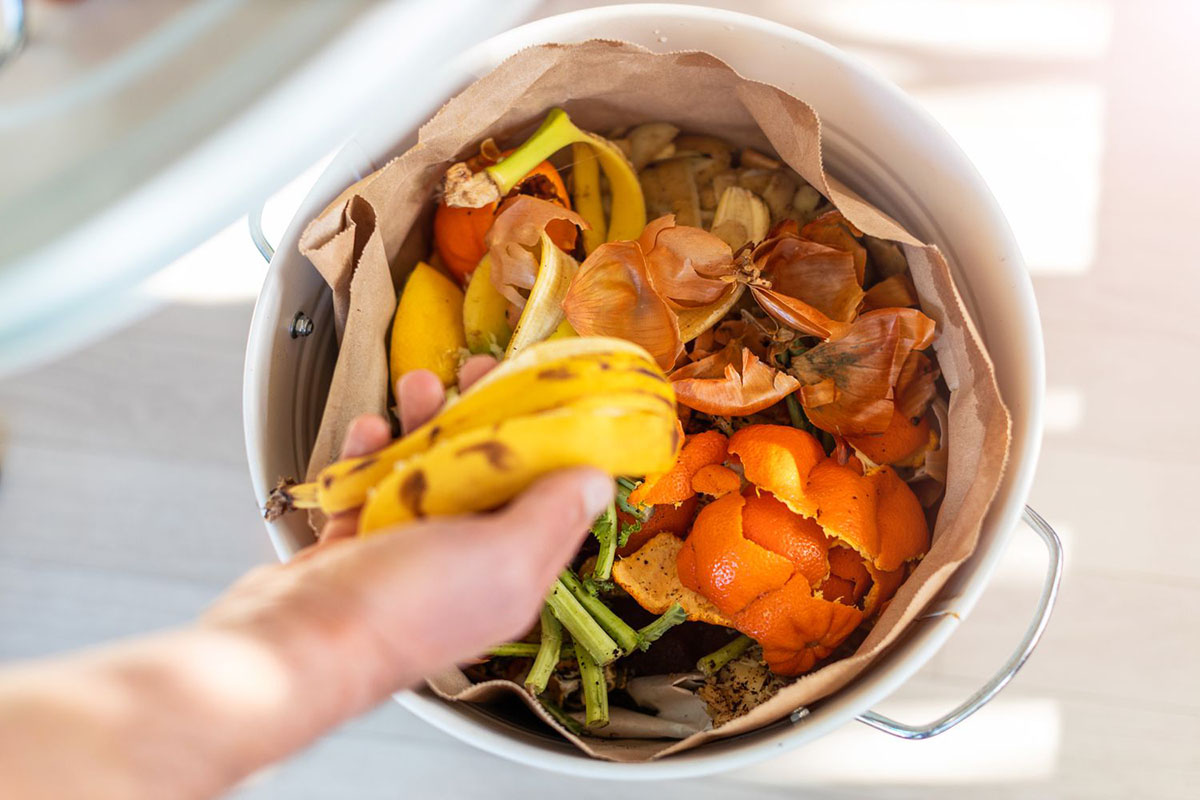
- No Food Waste: Avoid adding food waste to your compost pile or bin, as this can attract pests and animals. Vegetable and fruit scraps, cooked food, and meat products are particularly enticing to critters. Stick to composting garden waste, yard trimmings, and other organic materials that are less likely to attract pests.
- Avoid Dairy or Oily Materials: Dairy products and fatty, greasy, or oily materials should not be included in your compost. These materials can produce strong odors that can attract pests. Dairy products can also promote the growth of harmful bacteria in your compost pile.
- Turn the Compost Regularly: Regularly turning and mixing the compost helps deter pests as it disrupts their habitats and makes the pile less appealing for nesting or foraging. Turning the compost also exposes any pests or eggs to the elements, reducing their chances of survival.
- Remove Attracted Pests: If you spot pests or animals attracted to your compost, promptly remove them or discourage their presence. This can be done by using humane traps or deterrent methods specific to the type of pest. Ensure that captured pests are released safely and humanely away from your composting area.
- Maintain Cleanliness: Keep the area surrounding your compost clean and tidy. Remove any spilled or fallen organic matter promptly, as it can attract pests. Regularly sweep or rake the area to minimize any food debris or materials that may entice animals to approach.
By implementing these strategies, you can ensure that your compost remains protected from pests and animals. By doing so, you can maintain the integrity of the composting process and enjoy the benefits of high-quality compost for your garden.
Covering the Compost
Covering your compost is an important step in maintaining its quality and optimizing the composting process. A cover serves multiple purposes, including regulating moisture levels, preventing excess rainwater, retaining heat, and deterring pests. Here’s why covering your compost is beneficial and some effective methods for doing so:
- Moisture Regulation: By covering your compost, you can control the moisture levels more effectively. A cover helps prevent excessive moisture accumulation during rainy periods, which can lead to waterlogging and anaerobic conditions. It also shields the compost from direct sunlight, reducing evaporation and helping to maintain an optimal moisture balance.
- Rainwater Protection: Excessive rainwater can saturate the compost, causing it to become waterlogged and lose valuable nutrients. By covering the compost, you create a barrier that prevents direct rainfall from entering the pile or bin, reducing the risk of overhydration.
- Heat Retention: A cover helps retain heat generated by the composting process. This is particularly beneficial in cooler climates or during colder months when maintaining the ideal temperature for decomposition can be challenging. Heat retention speeds up the breakdown of organic materials and promotes the growth of beneficial microorganisms.
- Pest Deterrence: A cover serves as a physical barrier, deterring pests and animals from accessing the compost. This is particularly important if you are storing the compost in an open pile or using a bin without a secure lid. By preventing pests from entering the compost, you reduce the risk of infestations and minimize disturbances to the composting process.
Here are some effective methods for covering your compost:
- Tarp or Plastic Cover: One of the simplest ways to cover your compost is by using a tarp or plastic cover. Choose a cover that is large enough to fully encompass the compost pile or bin. Secure the cover by weighting the corners or using straps or ropes to anchor it in place. Ensure that the cover is pulled taut to prevent water from pooling and to discourage pests from entering.
- Hinged or Latched Lid: If you are using a compost bin or container, consider investing in a model with a hinged or latched lid. These types of lids provide a secure closure, keeping the compost protected from rain and pests. Opt for a bin with a lid that fits snugly and has a mechanism to keep it securely fastened.
- Wire Mesh or Hardware Cloth: For open compost piles, consider using wire mesh or hardware cloth to create a cover. This allows for airflow while still providing some protection against larger pests. Secure the mesh or cloth around the perimeter of the pile using stakes or fasteners to ensure it remains in place.
- Natural Covers: If you prefer a more natural approach, you can use organic materials as a cover. Lay a thick layer of straw, leaves, or wood chips on top of the compost pile or within a bin. This acts as a protective barrier while still allowing for airflow and moisture regulation.
Be sure to regularly check the cover and make adjustments as needed. If the cover becomes damaged or loose, repair or replace it promptly to maintain the compost’s optimal conditions.
By covering your compost, you can ensure that moisture levels are controlled, rainwater is prevented from saturating the compost, heat is retained, and pests are deterred. These measures contribute to a healthy composting environment and result in high-quality compost for your gardening needs.
Monitoring and Checking on the Compost
Monitoring and checking on your compost regularly is crucial to ensure that it is progressing well and to address any issues that may arise. By actively monitoring your compost, you can maintain optimal conditions for decomposition, address imbalances, and make necessary adjustments. Here are some key aspects to consider when monitoring and checking on your compost:
- Temperature: Monitoring the temperature of your compost provides valuable insights into its progress. Use a compost thermometer to measure the internal temperature regularly. The ideal temperature range for composting is between 120°F (49°C) and 160°F (71°C). Temperatures below this range may indicate slow decomposition, while temperatures above may indicate excessive heat or potential fire risk. Adjust the compost pile by turning it if the temperature remains consistently low or high.
- Moisture Levels: Regularly check the moisture content of your compost by squeezing a handful of material. The compost should be moist but not overly wet or dry. If it feels too dry, sprinkle water over the pile or add moist materials like fresh grass clippings. If it feels too wet, mix in dry materials such as leaves or shredded paper to absorb excess moisture. Maintaining proper moisture levels is essential for efficient decomposing.
- Odor: Take note of any unusual or foul odors emanating from your compost. A healthy compost pile should have an earthy, pleasant aroma. Foul odors can indicate anaerobic conditions or an imbalance in the compost. If foul odors persist, it may be necessary to adjust the compost by turning it more frequently or adding dry materials to improve aeration.
- Appearance: Regularly visually inspect your compost pile or bin for any signs of progress or issues. Look for a dark, crumbly texture, which indicates that the organic materials are breaking down effectively. Pay attention to the presence of any large, undecomposed materials, as they may require further processing or removal from the compost pile.
- Pest Activity: Monitor your compost for any signs of pests or unwanted critters. Keep an eye out for indications such as burrows, nests, or chewed materials. If pests are present, take necessary measures to deter them and prevent infestations. This can include securing the compost bin or pile with tight-fitting lids, removing attractants, or using natural pest deterrents.
- Frequency of Turning: Assess whether your compost pile requires more frequent turning or mixing. Regular turning promotes better aeration, mixes the materials for more efficient decomposition, and helps maintain optimal conditions. If the compost is not decomposing at the desired rate, increase the frequency of turning to stimulate microbial activity and enhance decomposition.
- Record-Keeping: Maintain a composting log or record to track important information such as the frequency of turning, additions to the compost pile, any issues encountered, and the overall progress. This record will provide valuable insight into your composting practices and enable you to fine-tune your process for future batches.
By regularly monitoring and checking on your compost, you can address any issues promptly, maintain optimal conditions, and ensure the successful decomposition of organic materials. Adjustments and interventions based on your observations will help you produce high-quality compost for your garden and create a sustainable composting system.
Harvesting and Using the Stored Compost
After diligently composting and properly storing your organic waste, it’s time to harvest the finished compost and put it to good use in your garden. Harvesting your compost involves separating the fully decomposed material from any remaining organic matter that requires further processing. Here are some steps to effectively harvest and utilize your stored compost:
- Prepare for Harvest: Before starting the harvest process, ensure you have the necessary tools and materials ready. This may include a shovel or garden fork, a wheelbarrow or buckets for transporting the compost, and gloves to protect your hands.
- Selective Harvesting: Begin by selectively harvesting the fully decomposed compost. This is typically located at the bottom or center of your compost pile or container. Using a shovel or garden fork, carefully remove the mature compost, leaving any partially decomposed or larger materials behind for further processing.
- Sieve or Separate Undecomposed Material: If you notice any undecomposed material or larger pieces in the harvested compost, set them aside in a separate pile. These materials can be returned to the compost pile or bin for further decomposition. Alternatively, you can use a compost sieve or screen to separate the fine compost particles from the remaining organic matter.
- Application Methods: Determine how you plan to use the harvested compost in your garden. It can be applied as a top dressing around established plants, mixed into potting soil for container gardening, or incorporated into the soil during bed preparation. Apply compost generously but avoid smothering plant roots or crowning the stems.
- Mulching: Mulching is an effective way to utilize your compost in the garden. Apply a layer of compost around the base of plants, leaving a gap around the stems to prevent stem rot. This mulch helps conserve moisture, suppress weeds, and gradually releases nutrients into the soil as it breaks down.
- Compost Tea: Another valuable use of compost is to create compost tea. Steep a portion of your harvested compost in water for a few days to extract the beneficial microorganisms and nutrients. Use this nutrient-rich liquid as a natural fertilizer by applying it directly to the plant’s roots or foliage.
- Store Excess Compost: If you have more compost than you can use immediately, store it in a covered container or bin. Ensure that the stored compost remains dry and protected from excess moisture or pests until you are ready to use it.
Remember, compost is a valuable resource for improving soil health and fertility. By regularly replenishing your garden beds with compost, you enrich the soil with essential nutrients, enhance water retention, improve root development, and increase overall plant productivity. Repeat the composting process with new organic waste, and continue to harvest and use the compost as an ongoing cycle.
Through effective harvesting and utilization, your stored compost will become a powerful asset for cultivating a vibrant and thriving garden, creating a sustainable and eco-friendly environment.
Read more: How To Store Finished Puzzles
Conclusion
Proper storage of finished compost is essential to maintain its quality and maximize its benefits for your garden. Choosing the right storage method, such as plastic containers, compost bins, or compost piles, is crucial for preserving nutrients, preventing odors, deterring pests, and maintaining optimal moisture and aeration. Location considerations, such as accessibility, sunlight exposure, and proximity to water sources, play a significant role in creating an ideal environment for composting success. Regular monitoring of temperature, moisture levels, appearance, and pest activity allows you to make necessary adjustments and ensure the composting process is on track. By turning and mixing the compost, you enhance decomposition, promote aeration, and blend ingredients for even breakdown. Protecting against pests and animals helps safeguard your compost and prevent unwanted infestations. Covering the compost serves to regulate moisture, protect against rainwater, retain heat, and discourage pests. Finally, harvesting and utilizing the stored compost completes the composting cycle, providing you with a valuable resource for improving soil health, mulching, and creating compost tea.
By implementing proper storage techniques and following the guidelines outlined in this article, you can achieve successful compost storage and utilization. This not only reduces waste and improves sustainability but also enhances the health and productivity of your garden. So, continue your composting journey, monitoring and caring for your stored compost, and reap the rewards of nutrient-rich, humus-filled soil for years to come.
Frequently Asked Questions about How To Store Finished Compost
Was this page helpful?
At Storables.com, we guarantee accurate and reliable information. Our content, validated by Expert Board Contributors, is crafted following stringent Editorial Policies. We're committed to providing you with well-researched, expert-backed insights for all your informational needs.

0 thoughts on “How To Store Finished Compost”