Articles
DIY: How To Finish A Basement
Modified: October 19, 2024
Looking for articles on how to finish a basement? Check out our DIY guide for step-by-step instructions and expert tips on transforming your basement into a functional living space.
(Many of the links in this article redirect to a specific reviewed product. Your purchase of these products through affiliate links helps to generate commission for Storables.com, at no extra cost. Learn more)
Introduction
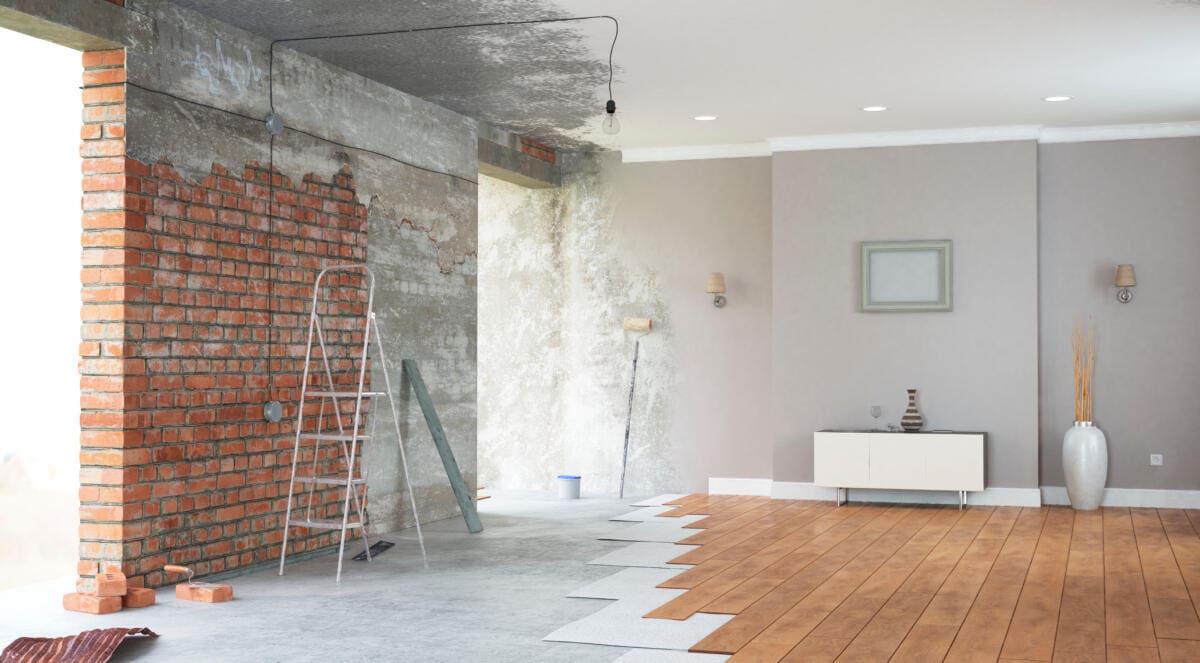
Finishing a basement is a great way to maximize your living space and add value to your home. Whether you’re looking to create a cozy family room, a home office, or even a guest suite, a finished basement can provide the extra space you need. While hiring professionals to finish your basement can be expensive, a DIY approach can be a cost-effective alternative. In this article, we will guide you through the steps of finishing your basement on your own.
Before you get started, it’s important to note that finishing a basement requires careful planning, preparation, and adherence to building codes. It’s always a good idea to check with your local municipality to ensure you have the necessary permits and that your plans comply with regulations. Safety should be a top priority, so make sure you have the right tools and equipment, and take all necessary precautions.
In this comprehensive guide, we will break down the process of finishing a basement into ten manageable steps. From planning and preparation to the final touches, we’ll cover everything you need to know to successfully complete your basement project.
So, if you’re ready to roll up your sleeves and transform your basement into a functional and inviting space, let’s dive right in!
Key Takeaways:
- Transform your basement into a functional and inviting space by following the comprehensive DIY guide. From planning and preparation to furnishing and final touches, create a valuable addition to your home with your personal touch.
- Maximize your living space and add value to your home by finishing your basement on your own. With careful planning, safety considerations, and attention to detail, enjoy the rewarding process of creating a comfortable and durable living area.
Read more: How To Finish A Basement Window
Step 1: Planning and Preparation
The first and most crucial step in finishing your basement is proper planning and preparation. This stage sets the foundation for the entire project, ensuring that you have a clear vision of what you want to achieve and the necessary resources to make it happen.
Start by assessing the space and determining its potential use. Consider factors like natural light, ceiling height, and existing plumbing and electrical systems. This will help you decide how to best utilize the space and allocate areas for different functions.
Next, create a detailed layout and design plan for your finished basement. This should include measurements, placement of walls, doors, and windows, as well as any specific features or amenities you want to incorporate. You can use online design tools or consult with an architect or interior designer to bring your vision to life.
Once you have a solid plan in place, it’s time to obtain any necessary permits and consult with professionals, such as plumbers and electricians, if needed. Keep in mind that certain structural modifications and installations may require the expertise of licensed tradespeople.
In addition to permits and professional assistance, consider your budget and timeline for the project. Factor in the cost of materials, tools, and any potential unexpected expenses. It’s always wise to set aside some extra funds as a contingency.
Lastly, gather all the necessary tools and materials for the project. This can include items such as power tools, safety equipment, building materials, insulation, drywall, and paint. Having everything on hand before you begin will save you time and minimize disruptions during the construction process.
By thoroughly planning and preparing for your basement finishing project, you’ll have a clear roadmap and the necessary resources to tackle each step with confidence. With the groundwork laid, you’re ready to move on to the next step: clearing and cleaning the space.
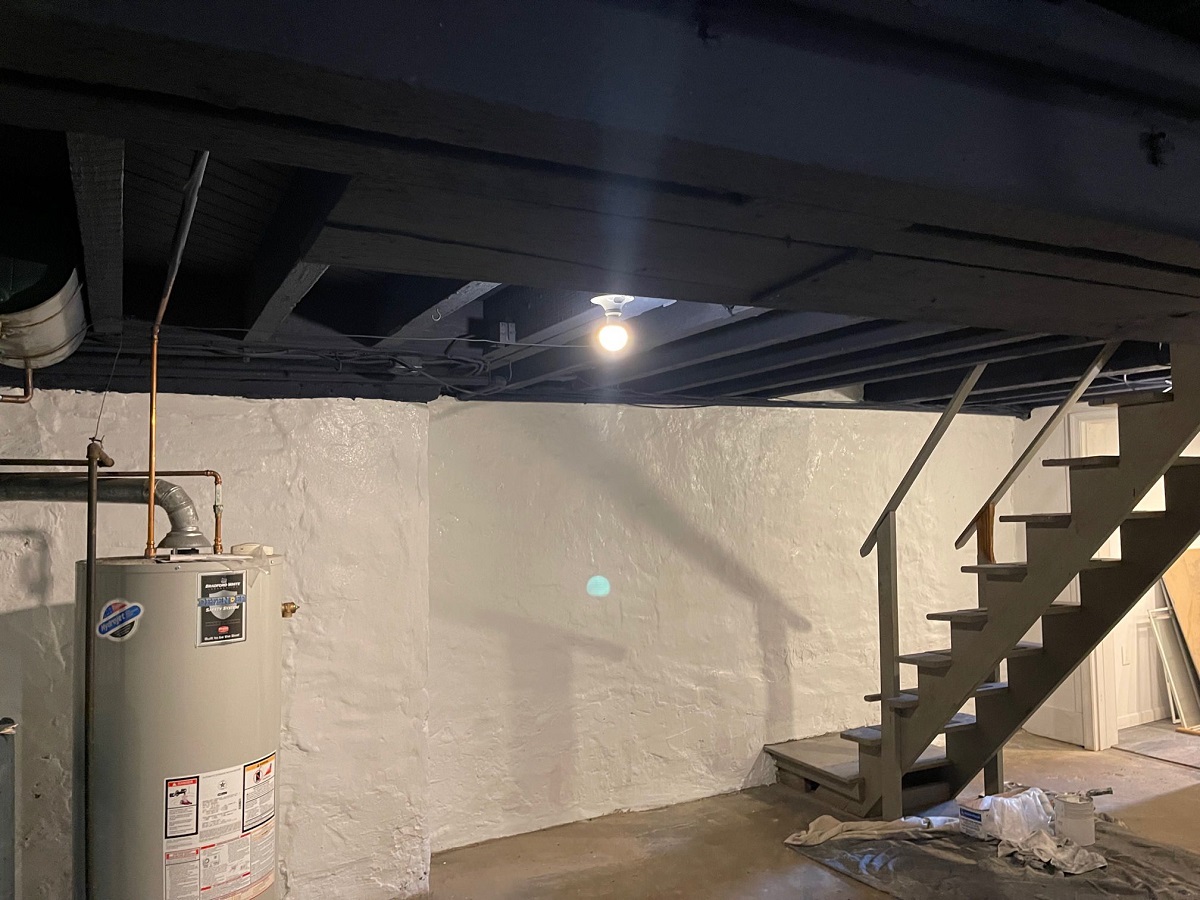
Step 2: Clearing and Cleaning
Before you can begin the actual construction phase of finishing your basement, you’ll need to clear out any existing clutter and clean the space thoroughly. This step is essential for creating a blank canvas and ensuring a clean and safe environment for the rest of the project.
Start by removing any furniture, boxes, or other items that are currently stored in the basement. Sort through these items and determine what can be donated, sold, or discarded. This will help you declutter and create more space for your finished basement.
Once the space is cleared, it’s time to deep clean. Sweep or vacuum the floor to remove any dust or debris. Use a damp cloth or mop to clean the walls and remove any cobwebs or stains. Pay special attention to areas that may have accumulated moisture or mold, as they should be thoroughly cleaned and treated before proceeding.
If you encounter any mold or water damage during the cleaning process, it’s essential to address these issues before moving forward. Mold can be hazardous to your health and can also cause damage to your new basement finishes. Consult with professionals if necessary, and make sure the area is properly treated and restored.
As part of the cleaning process, inspect the basement for any potential issues with the foundation, walls, or plumbing. Look for cracks, leaks, or signs of damage that may need to be addressed before proceeding with the construction phase. It’s important to ensure the structural integrity of the space and address any underlying issues that may impact the success of your project.
Once the cleaning and inspection are complete, it’s time to evaluate the basement’s moisture level. Use a moisture meter or check for signs of moisture, such as water stains or dampness on the walls or floor. If you notice any excessive moisture, it’s crucial to address the issue before proceeding further.
In some cases, you may need to install a dehumidifier or apply a waterproofing sealant to prevent future moisture problems. Consult with professionals if necessary to ensure that your basement is properly protected against water damage.
By clearing out the space and thoroughly cleaning your basement, you create a fresh canvas for your construction project. With a clean and safe environment, you’re now ready to move on to the next step: waterproofing and insulation.
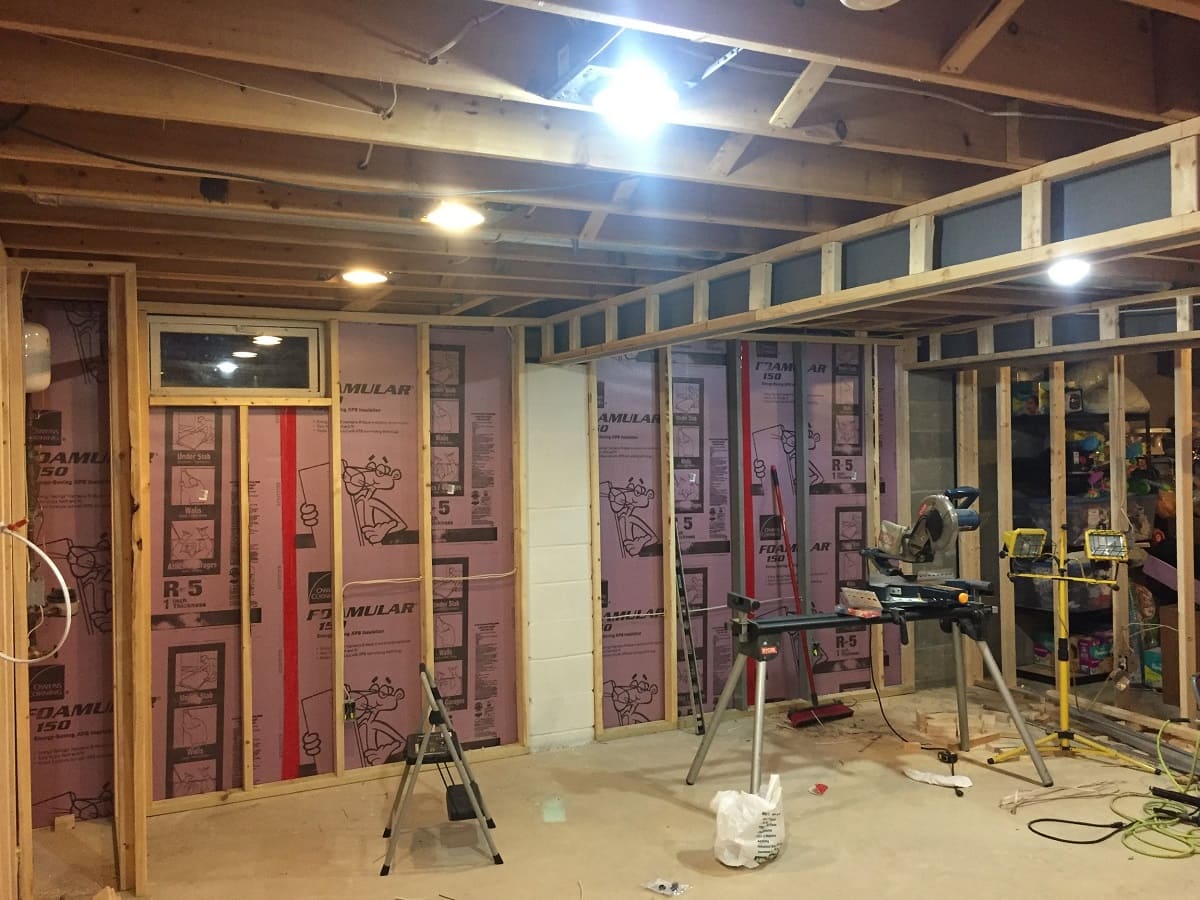
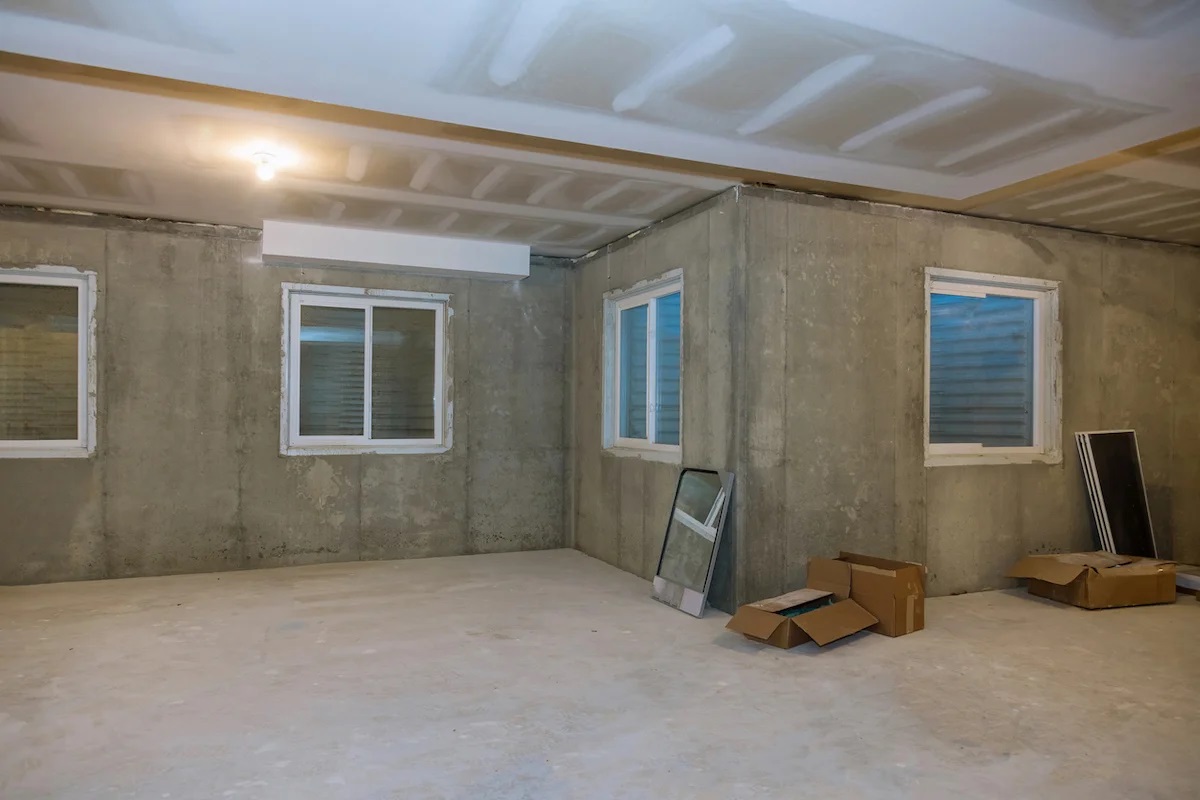
Step 3: Waterproofing and Insulation
Proper waterproofing and insulation are crucial for creating a comfortable and durable finished basement. These steps help protect against moisture intrusion, regulate temperature, and enhance energy efficiency. Taking the time to waterproof and insulate your basement will ensure that your new space remains dry, comfortable, and well-insulated.
Begin by addressing any existing moisture issues in your basement. Look for signs of water leaks, such as damp spots, efflorescence, or water stains on the walls or floor. If you notice any areas of concern, it’s important to address them before proceeding further.
Depending on the severity of the water issue, you may need to consult with professionals to determine the best course of action. This may involve installing a drainage system, repairing cracks in the foundation, or applying a waterproofing sealant to prevent future leaks.
Once the waterproofing measures are in place, it’s time to insulate your basement. Insulation plays a vital role in maintaining a comfortable and energy-efficient space. It helps regulate temperature, reduce noise transmission, and prevent heat loss or gain.
Choose an insulation material that suits the specific needs and requirements of your basement. Common options include fiberglass batts, foam board insulation, or spray foam insulation. Consult with professionals or do thorough research to determine the best insulation method for your project.
Start by insulating the basement walls. Measure the wall height and cut the insulation panels to fit. Use adhesives or fasteners to secure the insulation in place. Pay attention to corners, edges, and any areas near windows or doors to ensure a tight seal.
In addition to insulating the walls, consider insulating the basement ceiling as well. This can help minimize noise from above and improve overall energy efficiency. Insulation materials can be installed between the floor joists or attached to the basement ceiling directly.
Don’t forget to insulate any exposed pipes, HVAC ducts, or other areas that may require insulation. This will help prevent condensation, reduce energy loss, and maintain a consistent temperature in your finished basement.
By taking the time to waterproof and insulate your basement, you’re creating a solid foundation for a comfortable and energy-efficient living space. With these steps complete, you’re ready to move on to the next stage: framing and electrical work.
Step 4: Framing and Electrical Work
Once you have completed the waterproofing and insulation of your basement, it’s time to move on to the framing and electrical work. This step involves creating the framework for your new space and installing the necessary electrical components.
Framing is the process of building the walls, partitions, and any other structural elements that will define the layout of your finished basement. Start by measuring and marking the locations for the walls according to your design plan.
Using treated lumber or metal studs, begin constructing the wall frames. Secure them to the basement floor and ceiling, ensuring they are straight and level. Install any additional structural elements, such as support beams or columns, as needed.
Don’t forget to leave space for doors, windows, and other openings in the walls. Install framing around these areas accordingly, following proper measurements and building codes. This will allow for easier installation of doors and windows later on.
Once the framing is complete, it’s time to tackle the electrical work. This step involves installing wiring, outlets, switches, and lighting fixtures in your finished basement. It’s essential to follow electrical codes and hire a licensed electrician if you’re not confident in your electrical skills.
Start by running electrical wires through the wall frames and ceilings, ensuring they are properly secured and protected. Install electrical boxes in the designated locations for outlets and switches. Connect the wiring to the electrical panel and make sure it is grounded properly.
Plan the placement of electrical outlets and switches according to your needs and the layout of your finished basement. Install them at appropriate heights and distances, following electrical codes and safety guidelines.
In addition to outlets and switches, consider the lighting requirements for your basement. Install recessed lights, track lighting, or other fixtures according to your design plan. Ensure that the lighting is evenly distributed throughout the space, providing adequate illumination for each area.
Remember to label the electrical circuits in your electrical panel to easily identify them later on. This will make it more convenient for troubleshooting and electrical maintenance in the future.
Once the framing and electrical work is complete, you have laid the groundwork for the functional aspects of your finished basement. With this step finished, you can now move on to the next stage: HVAC installation.
Read more: How Much To Finish A Basement
Step 5: HVAC Installation
Proper heating, ventilation, and air conditioning (HVAC) are essential for creating a comfortable and climate-controlled living space in your finished basement. This step involves installing or extending the necessary HVAC components to ensure optimal temperature regulation and air quality.
Start by assessing your existing HVAC system to determine if it can handle the additional load of your finished basement. Depending on the size of the space and its intended use, you may need to upgrade your HVAC system or install a separate system for the basement.
If your existing system can accommodate the additional load, you may need to extend the ductwork to reach the basement. Consult with a licensed HVAC professional to determine the best approach and ensure that the system meets all building codes and regulations.
If you’re installing a new HVAC system specifically for the basement, consider the different options available. This can include traditional forced-air heating and cooling systems, ductless mini-split systems, or radiant heating systems, depending on your preferences and budget.
Once you have determined the HVAC system for your finished basement, it’s time to start the installation process. This may involve extending or installing new ductwork, connecting the system to the existing HVAC unit, or installing separate heating and cooling units specifically for the basement.
Ensure that the installation is carried out by a qualified HVAC technician to guarantee proper functioning and adherence to all safety standards. They will properly size and position the HVAC components to ensure sufficient heating and cooling throughout the basement space.
In addition to the heating and cooling components, don’t forget to install any necessary ventilation systems. Proper ventilation is crucial for maintaining air quality, preventing condensation, and reducing the risk of mold and mildew growth in your finished basement.
Consider installing vents or exhaust fans in areas like bathrooms or laundry rooms to remove excess moisture and odors. This will help keep the air fresh and prevent any potential issues caused by humidity buildup.
By addressing the HVAC needs of your finished basement, you’re ensuring a comfortable and well-regulated environment. With the HVAC installation complete, you can now move on to the next step: drywall and finishing.
When finishing a basement, make sure to address any moisture issues before starting the project. Install proper insulation and consider using moisture-resistant materials to prevent future problems.
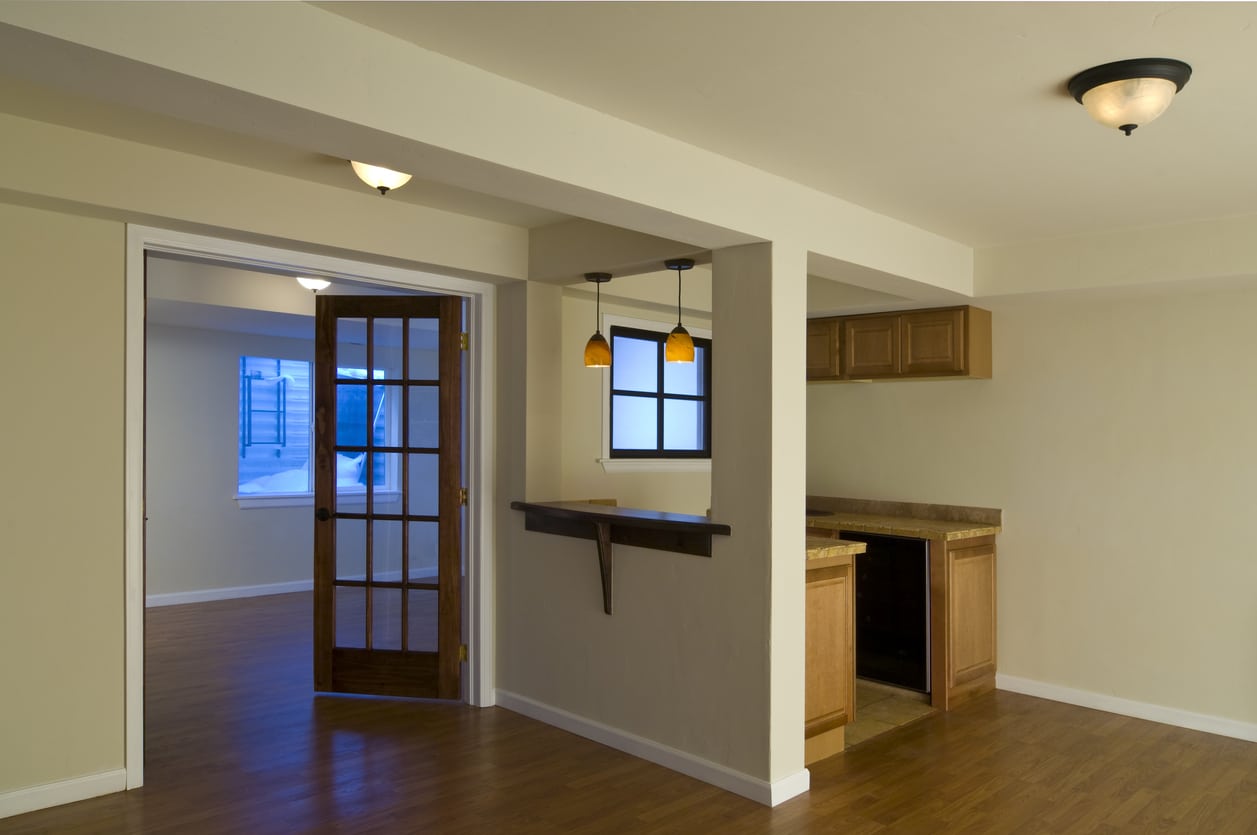
Step 6: Drywall and Finishing
The drywall and finishing stage is where your finished basement begins to take shape and transform into a livable space. This step involves the installation of drywall, followed by the finishing touches to create smooth and polished walls and ceilings.
Start by measuring the walls and ceilings of your basement to determine the amount of drywall needed. Purchase the necessary materials, including drywall sheets, screws, joint compound, and tape.
Before installing the drywall, consider adding insulation or soundproofing materials between the wall studs to enhance energy efficiency and reduce sound transmission between rooms.
Begin the installation process by attaching the drywall sheets to the wall frames. Use a drill to secure the drywall sheets with screws, making sure to space them evenly. Cut the drywall to fit around windows, doors, and other openings as needed.
Repeat the process for the ceilings, ensuring the drywall sheets are securely fastened to the ceiling joists. Take care to stagger the drywall seams between the sheets for added strength and stability.
Once the drywall is installed, it’s time to finish the seams and create a smooth surface. Apply joint compound to the seams and corners using a trowel, making sure to fill any gaps or depressions. Place drywall tape over the seams and press it into the wet compound, smoothing out any bubbles or wrinkles.
Continue applying joint compound over the tape, feathering the edges to create a seamless transition. Allow the compound to dry completely before sanding it down to create a smooth and even surface. Repeat the process for any remaining layers of compound until the seams are no longer visible.
After the seams are finished, sand the entire surface of the drywall to achieve a uniform texture. This will create a smooth and polished look before moving on to the painting and decorating stage.
Prior to painting, it’s important to prepare the surface by priming it. Apply a coat of primer to seal the drywall and promote better adhesion of the paint. Allow the primer to dry before applying your desired paint color.
With the drywall installed and finished, your basement space is starting to take shape. The next step is to move on to flooring installation, where you’ll choose and install the perfect flooring to complement your design.
Step 7: Flooring Installation
The choice of flooring plays a significant role in the overall aesthetics and functionality of your finished basement. This step involves selecting and installing the right flooring material to suit your style, budget, and the specific needs of your basement space.
Start by evaluating the condition of your basement floor. Ensure that it is clean, level, and free from any moisture or damage. Any necessary repairs or leveling should be done before proceeding with the flooring installation.
Consider the purpose of your basement and the level of foot traffic it will receive. Common flooring options for basements include laminate, vinyl, carpet tiles, and engineered wood. Each option has its advantages and considerations, so research the pros and cons of each material to make an informed decision.
Prioritize flooring options that are moisture-resistant, as basements are prone to humidity and moisture issues. This will help prevent any potential damage or mold growth in the future. Additionally, consider the installation method and ease of maintenance for the chosen flooring material.
Follow the manufacturer’s instructions for installing the chosen flooring material. This may involve laying down an underlayment for added cushioning or moisture protection. Ensure that the flooring is properly acclimated to the basement’s environment before installation.
For laminate or vinyl flooring, interlock the planks or tiles and create a floating floor installation method. This allows for flexibility and easy replacement if needed. Carpet tiles can be laid down and secured using adhesive or interlocking mechanisms.
If you opt for engineered wood or hardwood flooring, follow the appropriate installation technique, which may involve nailing or gluing the boards to the subfloor. Take the necessary precautions to maintain a proper moisture barrier and ensure sufficient subfloor insulation.
Once the flooring is installed, trim the edges and transitions between different flooring materials for a polished look. Install baseboards or trim along the walls to cover any gaps or imperfections and provide a finished appearance.
Remember to follow any necessary maintenance and care instructions for your chosen flooring material to ensure its longevity and preserve its appearance.
With the flooring installed, your finished basement is beginning to come together. The next step is to move on to painting and decorating, where you’ll add the perfect colors and personal touches to make the space truly yours.
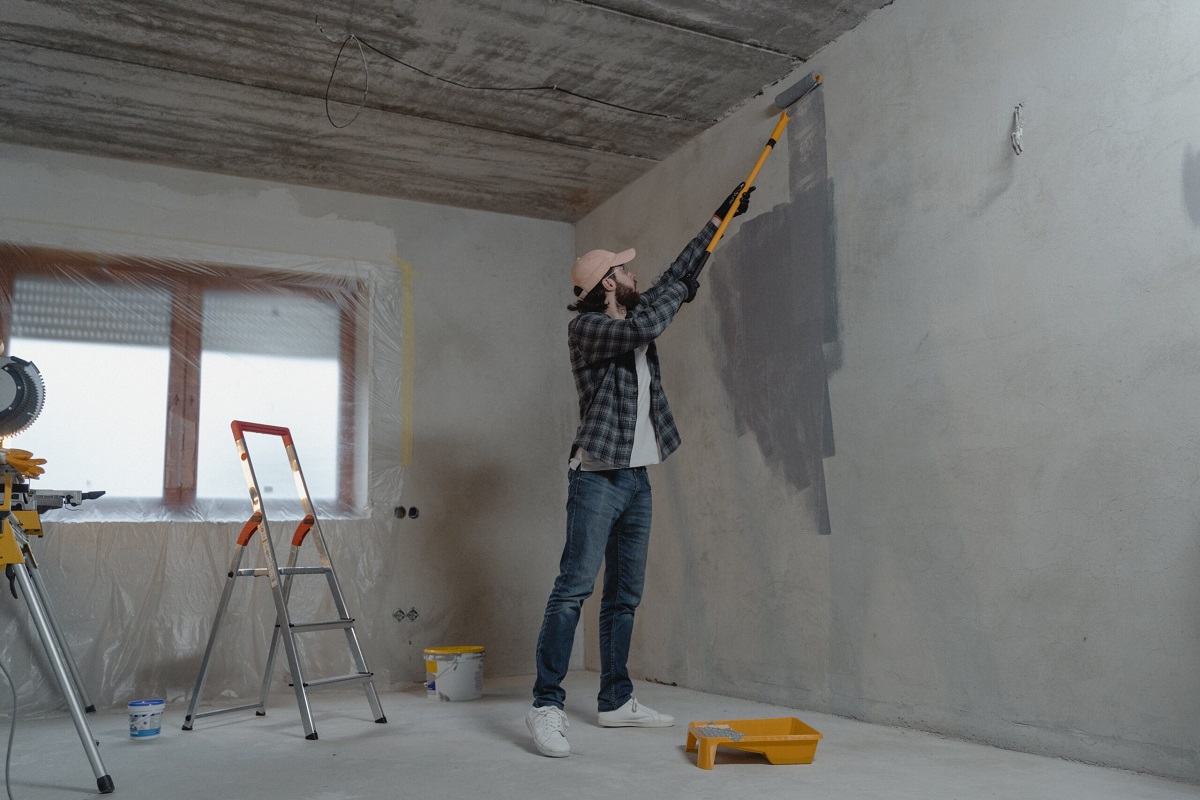
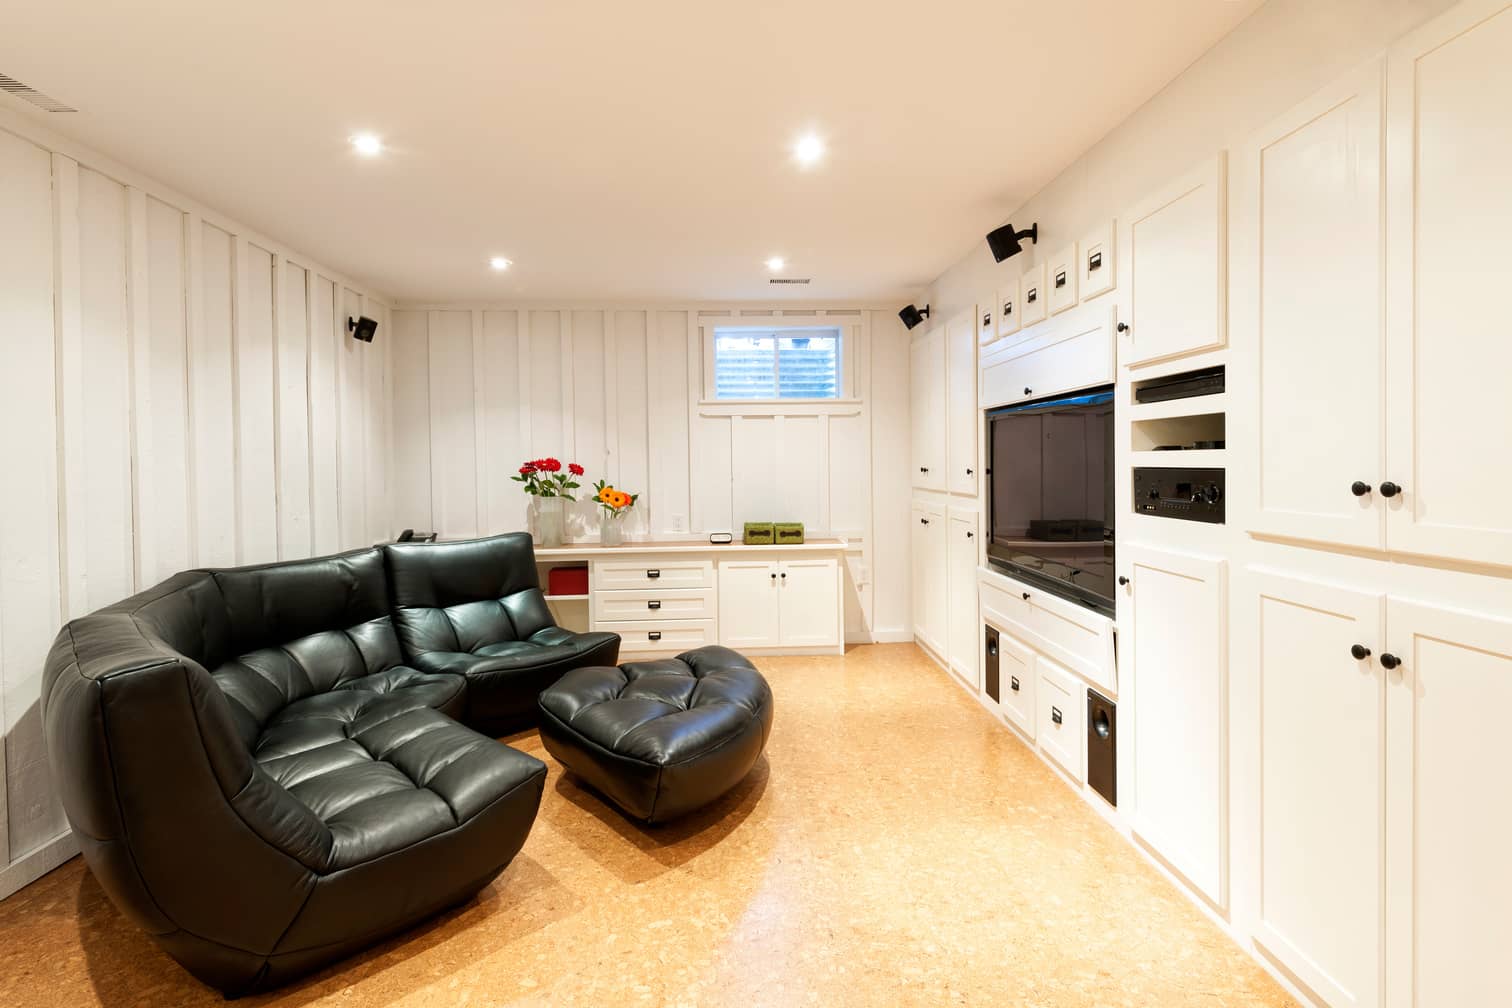
Step 8: Painting and Decor
Painting and decor are the icing on the cake of your finished basement project. This step involves adding color, personality, and style to your space, transforming it into a warm and inviting area that reflects your personal taste and enhances the overall ambiance.
Start by selecting a color palette that complements your desired theme and style. Consider the overall mood you want to create in your basement, whether it’s a cozy retreat, a vibrant entertainment area, or a tranquil home office.
When painting the walls and ceilings, use a high-quality paint that is suitable for the specific conditions of your basement. Consider using light or neutral colors to visually open up the space and make it feel larger. Darker colors can create a more intimate and cozy atmosphere.
Before applying the paint, ensure that the drywall surface is clean and free of any dust or debris. Repair any imperfections or cracks, and prime the walls if necessary. Start by cutting in the edges with a brush and then use a roller to cover larger areas. Allow the paint to dry completely between coats.
Once the walls are painted, it’s time to add decorative elements that reflect your personal style. Consider incorporating artwork, mirrors, or photographs to create focal points and add visual interest. Install shelves or wall-mounted storage for both practicality and decor purposes.
Select furniture that suits the function of your basement space. Whether it’s comfortable seating for a family room, a desk and chair for a home office, or a dining table for an entertainment area, choose pieces that are both functional and aesthetically pleasing.
Don’t forget about lighting! Proper lighting is essential for creating the right atmosphere in your finished basement. Install a combination of ambient, task, and accent lighting to provide adequate illumination throughout the space. Consider using dimmer switches to adjust the lighting levels according to your needs and preferences.
Add warmth and coziness to your basement by incorporating soft furnishings such as rugs, curtains, and throw pillows. These not only provide comfort but also add texture and color to the space. Consider using soundproofing materials in strategic areas to enhance acoustics and reduce noise transmission.
Lastly, personalize your basement space with accessories, such as artwork, plants, and decorative items that reflect your personal style and interests. These finishing touches will give your finished basement a sense of character and make it feel like a true extension of your home.
With painting and decor complete, your finished basement is ready to be enjoyed. The final steps involve adding lighting fixtures and fixtures that will enhance both the functionality and aesthetics of the space.
Read more: How To Finish A Basement Ceiling
Step 9: Lighting and Fixtures
Lighting and fixtures play a crucial role in enhancing the functionality, ambiance, and overall design of your finished basement. This step involves carefully selecting and installing the right lighting fixtures to illuminate your space and adding fixtures to enhance its functionality.
Start by considering the different areas and activities within your basement space. Each area may require a different type and level of lighting. For example, a home office may need task lighting for the desk area, while a media room may benefit from dimmable ambient lighting.
Consider the placement of windows and natural light sources in your basement. Maximize natural lighting by keeping windows clear of obstructions and using light-colored window treatments, if necessary.
To supplement natural light, install a combination of lighting fixtures, including recessed lighting, track lighting, pendant lights, or wall sconces. Each type of lighting fixture provides a specific purpose and adds to the overall ambiance of the space.
Task lighting is essential in areas where specific activities take place, such as a workbench, reading nook, or kitchenette. Install focused task lighting, such as adjustable desk lamps or under-cabinet lights, to provide ample illumination for these activities.
Ambient lighting sets the overall mood and provides general illumination throughout the space. This can be achieved through recessed lighting fixtures, ceiling-mounted lights, or even floor lamps strategically placed around the room.
Accent lighting is used to showcase specific areas or architectural features in your basement. This can be achieved through spotlights, wall-mounted lights, or the use of LED strips to highlight artwork, shelves, or architectural details.
Consider installing dimmer switches for your lighting fixtures to give you control over the intensity and ambiance of your space. This allows you to adjust the lighting to suit different activities or moods.
In addition to lighting, fixtures such as ventilation fans, bathroom fixtures, and kitchen appliances may need to be installed, depending on the functionality of your finished basement. Make sure to follow proper installation procedures and consult with professionals if necessary.
By carefully selecting and installing the right lighting fixtures and fixtures, you can create a well-illuminated and functional space in your finished basement. With this step complete, you’re now ready for the final stage: furnishing and adding the finishing touches to your new space.
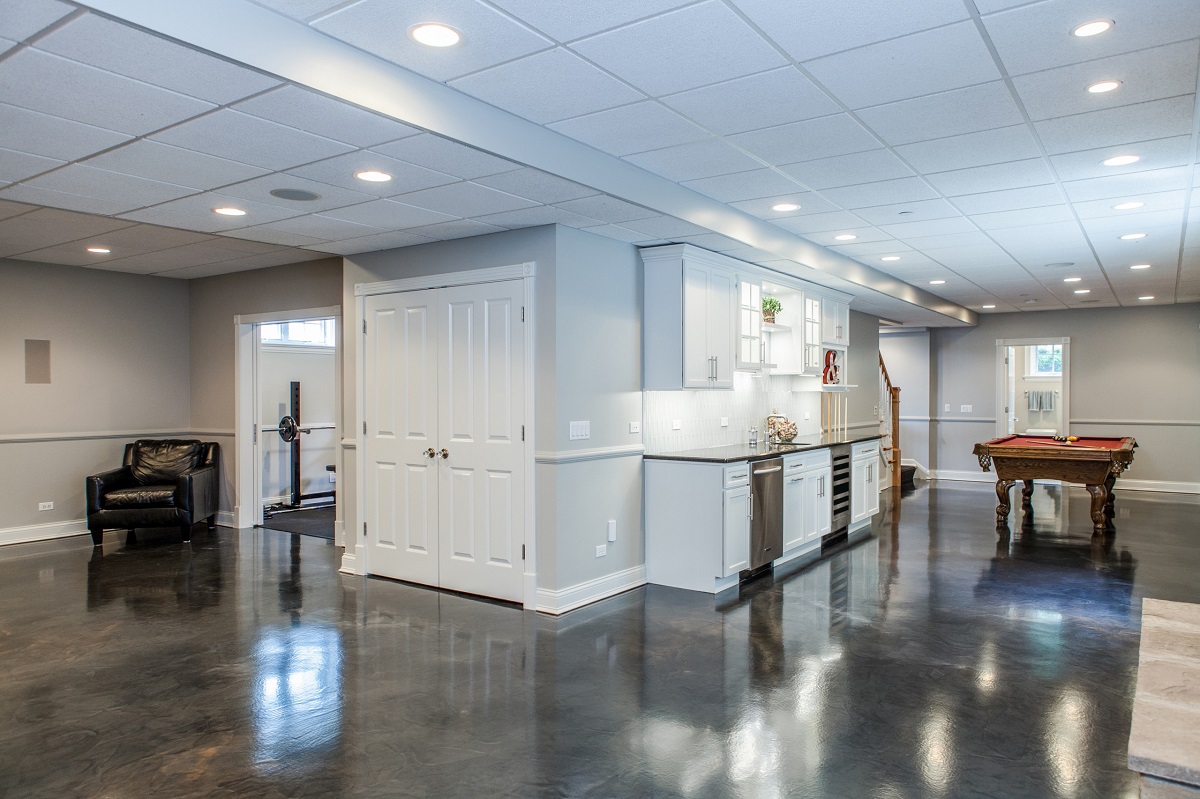
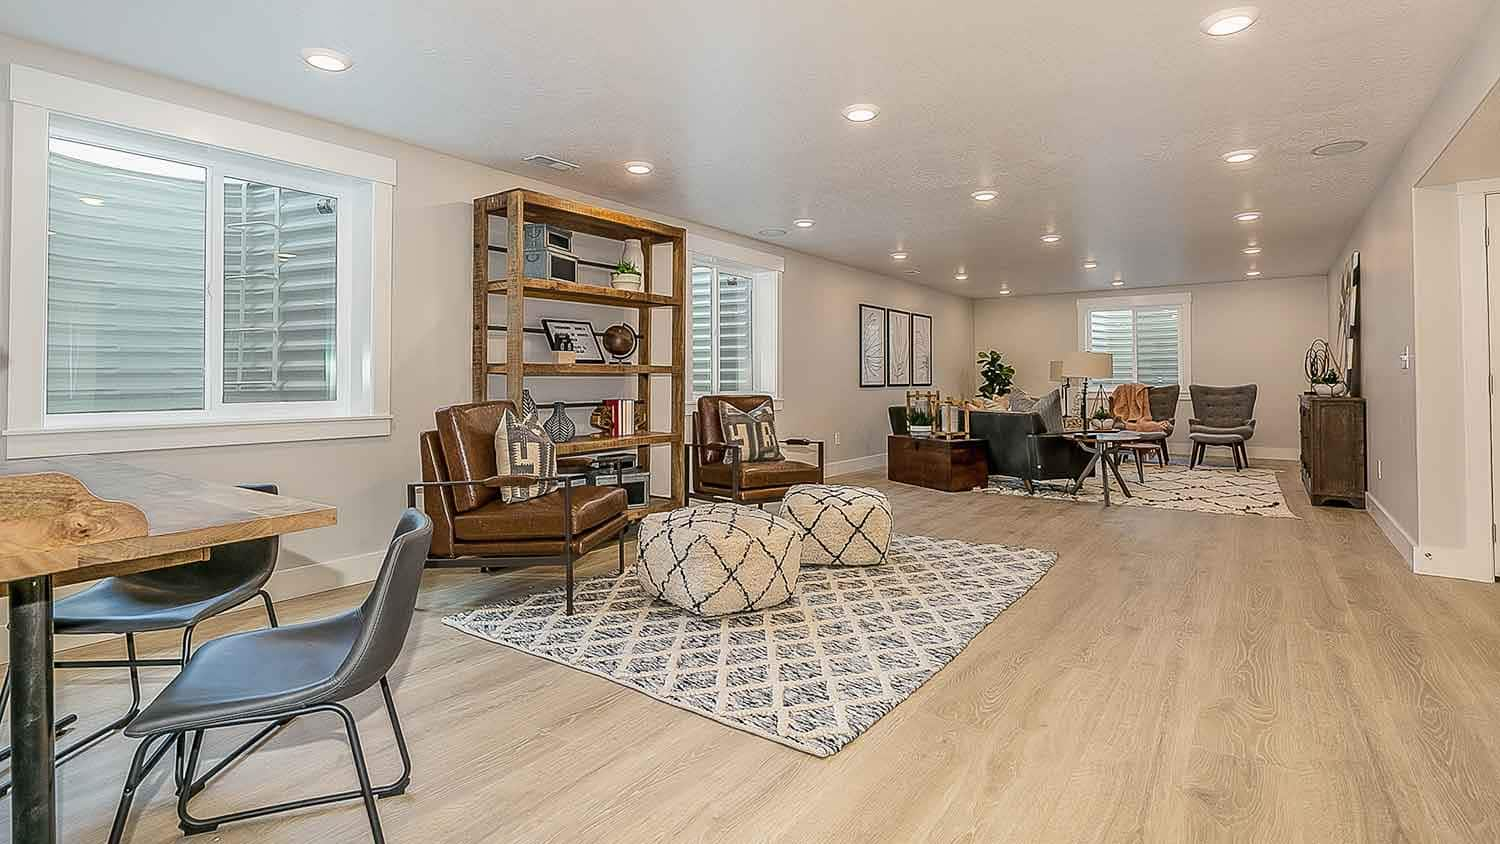
Step 10: Furnishing and Final Touches
Step 10: Furnishing and Final Touches
The final step of finishing your basement is furnishing and adding the final touches to create a comfortable and inviting living space. This step involves selecting furniture, accessories, and decor items that reflect your personal style and make the space functional and aesthetically pleasing.
Start by considering the purpose of your finished basement and how you plan to use the space. Whether it’s a family room, home office, entertainment area, or a combination of functions, choose furniture that fits the purpose and size of the room.
Measure the space and choose appropriately sized furniture that allows for ease of movement and comfortable seating. Consider sectional sofas, recliners, coffee tables, shelving units, and storage options that maximize both style and functionality.
Add comfort and style to your basement by incorporating rugs, curtains, and throw pillows that complement the overall color scheme and design. These soft furnishings not only enhance the visual appeal but also create a cozy atmosphere.
Include tables or desks that are suitable for your intended use. Whether it’s a gaming table, a study desk, or a dining table, make sure it fits the space and provides ample work or gathering surface.
Personalize the space by adding artwork, framed photos, or wall decor that reflects your taste and interests. Consider adding mirrors to enhance the sense of space and reflect light. Install shelves or bookcases to display books, collectibles, or decorative items.
Enhance the functionality of your finished basement by adding storage solutions. This can include built-in cabinets, open shelving, or modular storage units to keep the space organized and clutter-free.
Pay attention to the lighting in the room and incorporate task lighting where needed. Add table lamps, floor lamps, or desk lamps to provide focused illumination for specific areas or activities.
Lastly, add your personal touch with accessories and decor items that reflect your personality. This can include plants, candles, vases, or other decorative elements that add warmth and character to the space.
Remember to consider comfort, functionality, and personal style when furnishing and adding the final touches to your finished basement. With careful selection and placement of furniture, thoughtful decor choices, and attention to detail, you can create a space that truly feels like an extension of your home.
With Step 10 complete, you have successfully finished your basement and transformed it into a functional and inviting space. Take a moment to appreciate your hard work and enjoy the new living area you’ve created!
Conclusion
Finishing your basement is a rewarding project that allows you to maximize your living space, add value to your home, and create a functional and inviting area for your family and guests to enjoy. By following the ten comprehensive steps outlined in this guide, you can successfully complete the process of finishing your basement on your own.
Starting with proper planning and preparation, you laid the foundation for a successful project. Clearing out the space, waterproofing, insulating, and addressing any existing issues set the stage for a comfortable and durable finished basement.
From there, you moved on to framing and electrical work, ensuring that the structural elements and electrical systems were in place and up to code. The installation of HVAC systems provided climate control and ventilation, while drywall and finishing created a polished and smooth surface for painting and decor.
With a fresh coat of paint and careful selection of lighting and fixtures, your basement came to life. Furnishing and adding the final touches allowed you to personalize the space and create a functional area that reflects your personal style and meets your specific needs.
Throughout the process, it’s important to remember safety considerations and adhere to local building codes. If unsure about any aspect of the project, consult with professionals to ensure the best results.
By following this comprehensive guide and infusing your own creativity and personal touch, you have successfully transformed your basement into a valuable addition to your home. Enjoy your new living space and the countless memories you will create in your beautifully finished basement.
Remember to maintain your finished basement by regularly inspecting for any signs of damage, addressing any issues promptly, and keeping it clean and organized. This will help to preserve its functionality, aesthetics, and value for years to come.
Congratulations on completing your basement finishing project!
Frequently Asked Questions about DIY: How To Finish A Basement
Was this page helpful?
At Storables.com, we guarantee accurate and reliable information. Our content, validated by Expert Board Contributors, is crafted following stringent Editorial Policies. We're committed to providing you with well-researched, expert-backed insights for all your informational needs.

0 thoughts on “DIY: How To Finish A Basement”