
Articles
How To Store Homemade Granola Bars
Modified: October 18, 2024
Learn how to properly store your homemade granola bars to keep them fresh and delicious for longer. Our informative articles provide expert tips and tricks to maximize the shelf life of your healthy snacks.
(Many of the links in this article redirect to a specific reviewed product. Your purchase of these products through affiliate links helps to generate commission for Storables.com, at no extra cost. Learn more)
Introduction
When it comes to quick and wholesome snacks, homemade granola bars are an excellent choice. Not only are they delicious, but they also provide a great source of energy and nutrients. The best part is that you can customize them to your liking and control the ingredients used, making them a healthier alternative to store-bought options.
In this article, we will guide you through the process of making homemade granola bars from scratch and provide tips on how to store them properly to maintain their freshness and flavor. So, let’s roll up our sleeves and get ready to whip up some tasty granola bars!
Key Takeaways:
- Homemade granola bars are a customizable, nutritious snack option that can be stored for up to two weeks at room temperature or frozen for up to three months, providing a convenient and wholesome grab-and-go option.
- By following simple steps to prepare, bake, and store homemade granola bars, you can enjoy a delicious and energy-boosting snack that caters to your taste preferences and dietary needs, making snacking a delightful and satisfying experience.
Read more: How To Store Homemade Boba
Ingredients
Making homemade granola bars requires a handful of simple and nutritious ingredients. Here’s what you’ll need:
- 2 cups old-fashioned rolled oats
- 1 cup nuts (such as almonds, walnuts, or peanuts), chopped
- 1/2 cup honey or maple syrup
- 1/2 cup nut butter (such as almond butter or peanut butter)
- 1/4 cup dried fruits (such as raisins, cranberries, or apricots), chopped
- 1/4 cup seeds (such as chia seeds, flaxseeds, or sunflower seeds)
- 1/4 teaspoon salt
- 1 teaspoon vanilla extract
These ingredients can be easily found at your local grocery store or health food store. Feel free to adjust the quantities and types of nuts, dried fruits, and seeds to suit your preferences. You can also add extras like chocolate chips, coconut flakes, or spices like cinnamon or nutmeg for additional flavor.
Equipment Needed
To make homemade granola bars, you’ll need a few essential kitchen tools that you likely already have. Here’s what you’ll need:
- Mixing Bowl: Use a large mixing bowl to combine all the ingredients.
- Measuring Cups and Spoons: Accurate measurements are crucial, so have a set of measuring cups and spoons on hand.
- Baking Pan: A rectangular baking pan, typically around 9×13 inches, will be used to mold and bake the granola bars.
- Parchment Paper: To prevent sticking, line the baking pan with parchment paper.
- Knife: You’ll need a sharp knife to cut the granola bars into individual servings once they have cooled.
- Airtight Container: To store the granola bars, you’ll need an airtight container or sealable bags.
These basic kitchen tools will make the process of preparing and storing the homemade granola bars a breeze. Ensure that all the equipment is clean and ready to use before you begin.
Step 1: Preparing the Dry Ingredients
The first step in making homemade granola bars is to gather and prepare the dry ingredients. This includes oats, nuts, dried fruits, seeds, and salt.
- In a large mixing bowl, add 2 cups of old-fashioned rolled oats.
- Next, add 1 cup of chopped nuts of your choice. Almonds, walnuts, or peanuts work well in granola bars.
- Include 1/4 cup of dried fruits, such as raisins, cranberries, or apricots, that have been chopped into smaller pieces.
- Add 1/4 cup of seeds, such as chia seeds, flaxseeds, or sunflower seeds. These not only add crunch but also provide extra nutrition.
- Sprinkle in 1/4 teaspoon of salt to enhance the flavors and balance the sweetness.
Using a spoon or clean hands, mix all the dry ingredients together until well combined. This step ensures that all the ingredients are evenly distributed throughout the granola bars for a consistent taste.
Now that the dry ingredients are prepared, you can move on to the next step, which involves preparing the wet ingredients.
Step 2: Preparing the Wet Ingredients
In this step, you’ll gather and prepare the wet ingredients that will bind the granola bars together and give them a chewy texture.
- In a separate microwave-safe bowl or small saucepan, combine 1/2 cup of honey or maple syrup with 1/2 cup of nut butter, such as almond butter or peanut butter.
- If your honey or nut butter is thick or solid, heat it slightly in the microwave or on the stovetop to make it easier to mix.
- Add 1 teaspoon of vanilla extract to the mixture for flavor enhancement. The vanilla extract will add a subtle sweet and aromatic note to the granola bars.
Stir the wet ingredients until they are well combined and form a smooth mixture. The combination of honey or maple syrup with nut butter acts as a binding agent for the granola bars, allowing them to hold their shape.
Once the wet ingredients are mixed, it’s time to move on to the next step, where you’ll combine the wet and dry ingredients to form the base of the granola bars.
Store homemade granola bars in an airtight container at room temperature for up to 1 week, or in the refrigerator for up to 2 weeks. For longer storage, freeze them in a freezer-safe container for up to 3 months.
Read more: How To Store Homemade Pies
Step 3: Combining the Ingredients
Now that you have prepared both the dry and wet ingredients, it’s time to combine them to create the base of the homemade granola bars. This step is crucial for achieving a cohesive and tasty final product.
- Pour the wet ingredient mixture into the bowl of dry ingredients.
- Using a spoon or clean hands, thoroughly mix the wet and dry ingredients together until they are evenly combined.
- Make sure all the oats, nuts, fruits, and seeds are coated with the sticky wet mixture.
- If the mixture seems too dry, you can add a small amount of honey or nut butter to achieve a stickier consistency. Conversely, if it feels too wet, you can add a few more oats to balance it out.
Mixing everything together ensures that each granola bar will have all the flavors and ingredients in every bite. Be careful not to overmix, as this can lead to a dense and tough texture.
With the ingredients fully combined, it’s time to move on to the next step: shaping the granola bars!
Step 4: Shaping the Granola Bars
Now that the granola bar mixture is well combined, it’s time to shape them into individual bars. This step will give the bars their distinctive shape and size.
- Prepare a rectangular baking pan by lining it with parchment paper. This will prevent the granola bars from sticking to the pan.
- Spoon the mixture into the prepared baking pan, spreading it evenly and pressing it down firmly with the back of a spoon or clean hands.
- Ensure that the mixture is tightly packed and evenly distributed across the entire pan. This will help the bars hold their shape and provide a consistent texture.
- If desired, you can sprinkle additional seeds or dried fruits on top of the mixture for added visual appeal and texture.
Once you have evenly shaped the granola bars in the pan, place it in the refrigerator for at least 1-2 hours or until the mixture is firm and has set. Chilling the bars will help them hold their shape when you cut them into individual servings later.
Now that the granola bars are shaped, it’s time to move on to the next step: baking!
Step 5: Baking the Granola Bars
After the granola bar mixture has been shaped and chilled, it’s time to bake them to perfection. Baking the bars will not only help them set further but also add a nice crunch to the texture.
- Preheat your oven to 350°F (175°C) to ensure it’s at the right temperature when the bars go in.
- Remove the baking pan from the refrigerator and place it in the preheated oven.
- Bake the granola bars for about 15-20 minutes or until they turn golden brown on top.
- Keep a close eye on them while baking to prevent burning. The exact baking time may vary depending on your oven.
As the bars bake, your kitchen will be filled with a delightful aroma. This is a sign that the ingredients are melding together and the bars are taking on a delicious flavor.
Once the granola bars have turned golden brown, remove them from the oven and allow them to cool completely in the baking pan. Cooling is an important step as it allows the bars to firm up further and become crispy.
With the bars baked to perfection, it’s time to move on to the final step: cooling and storing them!
Step 6: Cooling and Storing the Granola Bars
Once the granola bars have been baked to a golden brown and have cooled in the pan, it’s time to remove them and prepare them for storage. Proper cooling and storage are essential for maintaining the freshness and flavor of the homemade granola bars.
- Using a sharp knife, carefully cut the cooled granola bars into individual servings. You can cut them into your desired shape and size, such as squares or rectangles.
- Gently remove the bars from the baking pan, ensuring they remain intact.
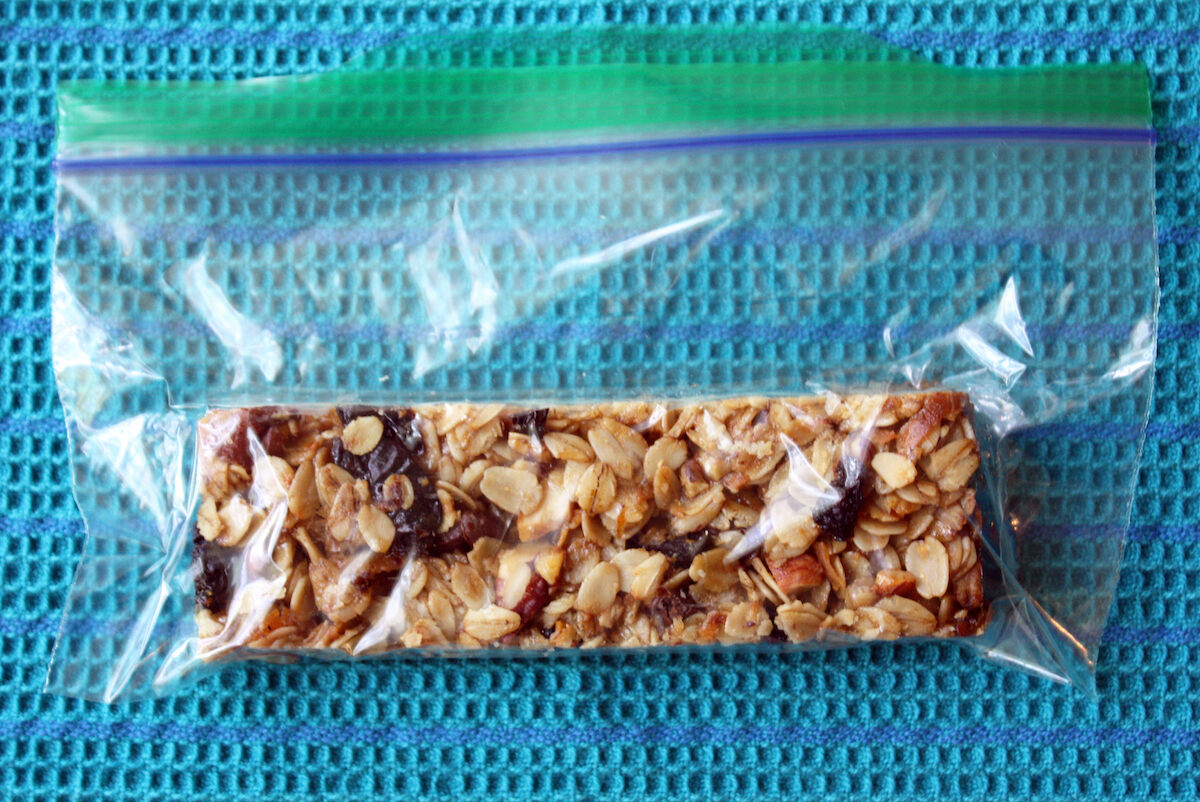
- Place the cut granola bars in an airtight container or sealable bags for optimal freshness.
- Store the granola bars at room temperature in a cool, dry place away from direct sunlight and heat sources.
The homemade granola bars can typically be stored for up to two weeks. However, they are likely to be enjoyed long before then!
For extended storage, you can also freeze the granola bars. Wrap them individually in parchment paper or place them in individual freezer bags. Frozen granola bars can be stored for up to three months. Before enjoying, simply thaw them at room temperature for a few minutes.
Remember to label the container or bags with the date of preparation to ensure you know when to consume them by.
Now that you know how to cool and store the granola bars properly, you can enjoy them as a satisfying snack or grab-and-go breakfast whenever the cravings strike!
Read more: How To Store Homemade Soup
Conclusion
Congratulations! You have successfully learned how to create delicious and nutritious homemade granola bars from scratch. By following these simple steps, you can customize your granola bars to suit your taste preferences and dietary needs.
From preparing the dry and wet ingredients to shaping, baking, and finally storing the granola bars, each step is crucial in ensuring a delightful homemade snack. By controlling the ingredients, you have the power to create a healthier alternative to store-bought granola bars.
Remember, experimentation is key! Feel free to add your favorite nuts, seeds, dried fruits, or even a drizzle of melted chocolate to take your granola bars to the next level. With a variety of flavors and textures, you can create a snack that satisfies your cravings and keeps you fueled throughout the day.
Now, grab a homemade granola bar, sit back, and enjoy the tasty fruits of your labor. Whether you’re on-the-go, at work, or in need of a quick pick-me-up, these homemade granola bars will be perfect companions to keep you energized and satisfied.
So go ahead, take pride in your homemade creation, and share your delicious granola bars with family and friends. They’ll be sure to appreciate the effort and enjoy the wholesome goodness in every bite!
Happy snacking!
Frequently Asked Questions about How To Store Homemade Granola Bars
Was this page helpful?
At Storables.com, we guarantee accurate and reliable information. Our content, validated by Expert Board Contributors, is crafted following stringent Editorial Policies. We're committed to providing you with well-researched, expert-backed insights for all your informational needs.

0 thoughts on “How To Store Homemade Granola Bars”