Articles
How To Store Homemade Jerky
Modified: August 27, 2024
Learn the best methods for storing homemade jerky with these helpful articles. Keep your jerky fresh and flavorful for longer periods of time.
(Many of the links in this article redirect to a specific reviewed product. Your purchase of these products through affiliate links helps to generate commission for Storables.com, at no extra cost. Learn more)
Introduction
Welcome to the world of homemade jerky! Whether you’re a jerky enthusiast or a newcomer looking to try your hand at making this delicious snack, one thing is certain: you’re in for a treat. Homemade jerky not only allows you to customize the flavors and spices to your liking but also guarantees a fresher and healthier alternative to store-bought varieties.
In this comprehensive guide, we will walk you through the process of making homemade jerky and provide tips on how to store it properly to maintain its flavor and quality. So, grab your apron and let’s get started!
But first, let’s take a step back and understand what jerky actually is. Jerky is a type of dried meat that has been enjoyed by various cultures for centuries. It was initially created as a way to preserve meat and make it more portable for long journeys and survival. Today, jerky is not only a convenient and delicious snack but also a popular protein-packed option for hiking, camping, or simply satisfying those mid-day cravings.
Now that we know the history and popularity of jerky, let’s dive into the process of making your very own homemade batch. To start, you’ll need to choose and prepare the right cut of meat, season it with a flavorful marinade, and then dry it to perfection. But before we get into the specifics, let’s discuss how to select and prepare the meat for your jerky.
Key Takeaways:
- Properly storing homemade jerky is essential for maintaining its freshness and flavor. From airtight containers to vacuum sealing and freezing, there are various methods to ensure your delicious jerky lasts for weeks or even months.
- Experimenting with different meats, marinades, and drying methods allows you to create a personalized and flavorful homemade jerky. With the right knowledge and techniques, you can enjoy a protein-packed snack tailored to your preferences.
Read more: How To Store Deer Jerky
Choosing and Preparing the Meat
The first step in making homemade jerky is selecting the right type of meat. While traditionally, lean cuts of beef like flank steak or sirloin are used, you can also experiment with other meats such as turkey, chicken, or even game meats like venison. Whatever meat you choose, ensure that it is lean, as fat can spoil and decrease the shelf life of your jerky.
Here are a few popular choices for making homemade jerky:
- Beef: Choose lean cuts like eye of round, top round, or bottom round.
- Turkey: Skinless turkey breasts are a healthy and delicious option.
- Chicken: Boneless, skinless chicken breasts work well for making chicken jerky.
- Game meats: Venison, elk, or bison can be used for a unique and flavorful twist.
Once you have chosen your meat, it’s time to prep it for marinating. Start by partially freezing the meat for about 1-2 hours. This will make it easier to slice thinly and evenly. Thin slices are important for jerky as they ensure quicker and more uniform drying.
Next, using a sharp knife or a meat slicer, slice the partially frozen meat across the grain into thin strips. Aim for around 1/8 to 1/4 inch thickness for the best results. Slicing against the grain (perpendicular to the natural muscle fibers) will make the jerky more tender and easier to chew.
After you’ve sliced the meat, it’s time to marinate it and enhance its flavor profiles. Let’s move on to the next section to learn about marinades and seasonings for your homemade jerky.
Marinade and Seasonings
The marinade is the key to infusing your homemade jerky with delicious flavors and aromas. It not only enhances the taste but also helps tenderize the meat. You can choose from a wide variety of marinade recipes or create your own by experimenting with different combinations of ingredients. Here are some popular marinade ingredients and seasonings to consider:
- Liquid Ingredients:
- Soy sauce: Provides a savory umami flavor.
- Worcestershire sauce: Adds depth and richness.
- Tamari or coconut aminos (gluten-free options): Suitable alternatives to soy sauce.
- Teriyaki sauce: Gives a sweet and tangy taste.
- Acidic Ingredients:
- Lemon juice: Adds a refreshing citrusy tang.
- Apple cider vinegar: Provides a slightly tart flavor.
- Pineapple juice: Adds a touch of sweetness and tenderizes the meat due to its natural enzymes.
- Aromatics and Spices:
- Garlic powder: Offers a robust and savory flavor.
- Onion powder: Adds a subtly sweet and savory taste.
- Black pepper: Adds a mild heat and depth of flavor.
- Cayenne pepper: Provides a spicier kick if desired.
- Paprika: Adds a smoky and slightly sweet flavor.
- Dried herbs (thyme, oregano, rosemary): Enhances the overall aroma.
- Sweeteners and Enhancers:
- Maple syrup or honey: Adds a touch of sweetness.
- Brown sugar: Provides a caramelized flavor and helps with the browning of the jerky.
- Pineapple or apple juice concentrate: Concentrated sweetness to balance the flavors.
Combine your chosen ingredients in a bowl and whisk them together to create your marinade. Place the sliced meat into a resealable bag or a glass dish and pour the marinade over it, making sure to coat each piece evenly. Seal the bag or cover the dish, and refrigerate it for at least 4 hours or overnight to allow the flavors to develop.
Now that your meat is marinating, it’s time to move on to the next step and prepare the jerky for drying.
Preparing the Jerky
Once your meat has marinated and absorbed the flavors of the marinade, it’s time to prepare it for the drying process. Before you start, make sure you have all the necessary equipment and tools:
- Dehydrator: This is the most common method for drying jerky, providing consistent and controlled airflow.
- Oven: If you don’t have a dehydrator, you can use your oven on its lowest setting with the door cracked open to allow airflow.
- Rack or Baking Sheet: This is used to lay out the marinated meat strips evenly.
- Parchment Paper or Aluminum Foil: Helps prevent the meat from sticking to the rack or baking sheet.
- Meat Thermometer: Ensures that the jerky reaches the appropriate internal temperature for safe consumption.
To prepare the jerky for drying, follow these simple steps:
- Remove the marinated meat from the refrigerator and let it come to room temperature.
- Preheat your dehydrator or oven to the recommended temperature for making jerky (usually around 160°F/70°C).
- If using an oven, line a baking sheet with parchment paper or aluminum foil.
- Remove the meat strips from the marinade and pat them dry with paper towels to remove excess moisture.
- Place the meat strips on the rack or prepared baking sheet, leaving space between each piece for air circulation.
- If using an oven, place the rack or baking sheet on the middle rack of the oven.
- For a dehydrator, follow the manufacturer’s instructions on how to load the meat onto the drying trays.
- Insert a meat thermometer into one of the thicker pieces to monitor the internal temperature.
- Dry the meat at the recommended temperature for the specific type of meat and thickness. It usually takes around 4-6 hours, but the drying time can vary.
- Throughout the drying process, periodically check the progress and rotate or rearrange the meat if necessary.
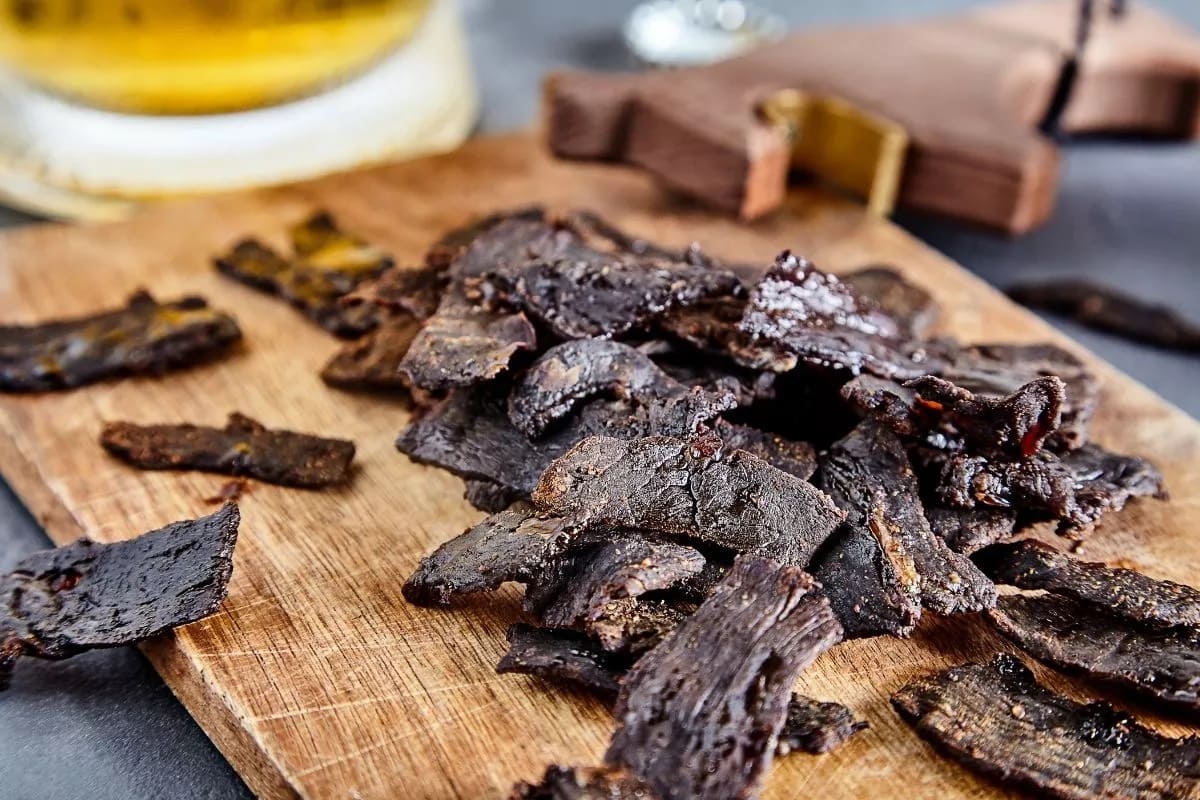
- The jerky is ready when it is firm, dry, and breaks apart easily when bent. The internal temperature should reach about 160°F/70°C to ensure it is fully cooked and safe to eat.
Once your homemade jerky is dried to perfection, it’s time to move on to the next step and learn how to store it properly to maintain its freshness and flavor.
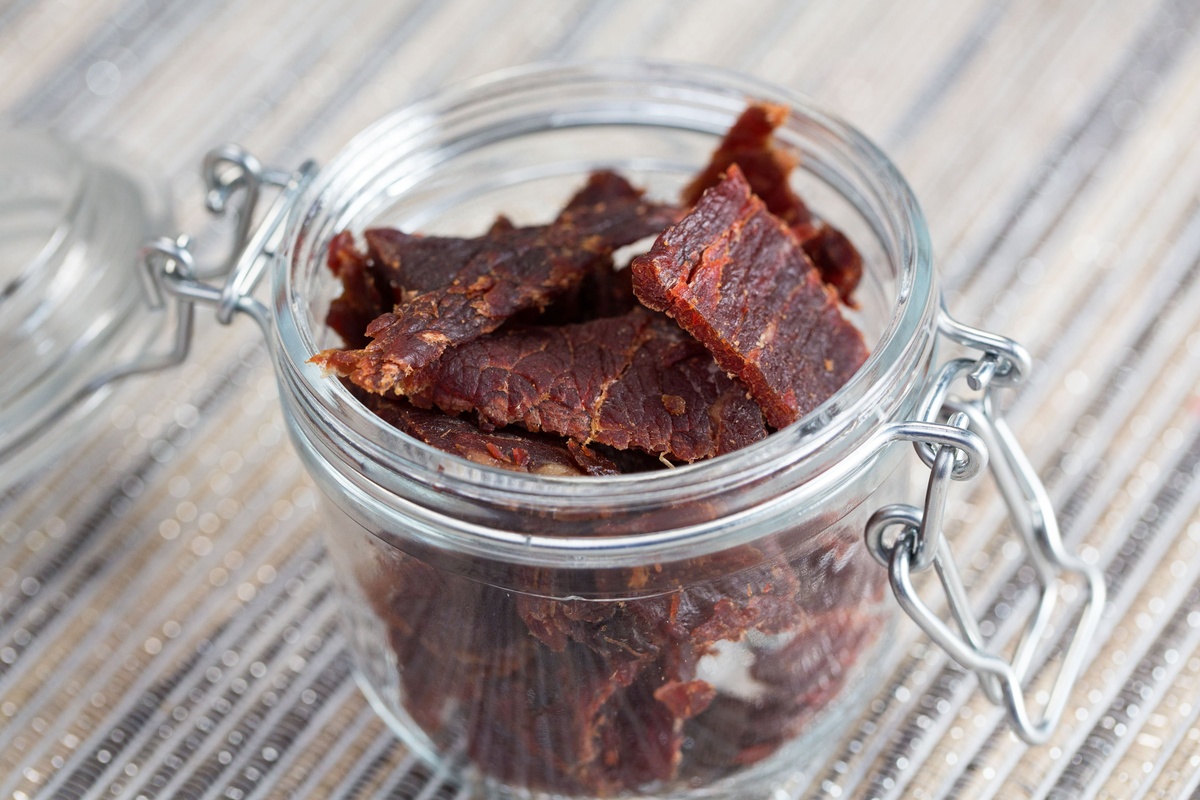
Store homemade jerky in an airtight container or resealable plastic bag to keep it fresh. You can also use a vacuum sealer to remove air and prolong its shelf life. Keep it in a cool, dry place or in the refrigerator for longer storage.
Drying the Jerky
The drying process is crucial for transforming the marinated meat into delicious, shelf-stable jerky. Proper drying ensures that the meat is completely dehydrated, removing any moisture that could lead to spoilage. There are a few methods you can use to dry your jerky, each with its own benefits:
- Dehydrator: This is the most popular and convenient method for drying jerky. Dehydrators provide consistent airflow and temperature control, ensuring even drying. Simply place the marinated meat strips on the dehydrator trays, leaving space between them for air circulation, and set the temperature to the recommended level (usually around 160°F/70°C).
- Oven: If you don’t have a dehydrator, you can use your oven on its lowest setting. Place the marinated meat strips on a baking rack or directly on a baking sheet lined with parchment paper or aluminum foil. Prop the oven door open slightly to allow airflow. Monitor the jerky closely to prevent over-drying.
- Air-Drying: This traditional method might take longer but can be done without any special equipment. Hang the marinated meat strips on clean metal skewers or toothpicks, and place them in a well-ventilated area. Ensure that the area is dry, cool, and away from direct sunlight. This method can take up to 24 hours or more, depending on the thickness of the meat.
Regardless of the method you choose, there are some key tips to follow for successful drying:
- Ensure that the meat strips are evenly spaced and not overlapping to allow proper airflow.
- Rotate or rearrange the trays or racks during the drying process for even drying and to prevent any hot spots.
- Keep an eye on the jerky and check for dryness periodically by bending a piece. It should be firm with just a slight give.
- If using a dehydrator or oven, follow the manufacturer’s instructions for the recommended drying time and temperature.
- After the jerky is dried, remove it from the dehydrator or oven and let it cool completely before storing.
Now that your jerky is perfectly dried, let’s move on to the next step and learn about the best methods for storing your homemade jerky.
Read more: How To Store Venison Jerky
Storing Homemade Jerky
Proper storage is essential to maintain the freshness, flavor, and texture of your homemade jerky. When stored correctly, homemade jerky can last for several weeks or even months, allowing you to enjoy your delicious creation over time. Here are some tips on how to store your homemade jerky:
- Allow the jerky to cool completely before storing. This ensures that any residual heat or moisture evaporates, preventing the growth of bacteria or mold.
- Store the jerky in airtight containers or resealable bags to prevent exposure to air, which can cause the jerky to become stale or lose its texture.
- For convenience, you can separate the jerky into smaller portions or individually wrap them. This makes it easier to grab a single serving and helps retain freshness.
- Label the containers or bags with the date of preparation to keep track of the freshness and rotation of your jerky.
- Store the jerky in a cool, dark, and dry place to maintain its quality. Avoid exposing it to direct sunlight or high temperatures, as this can cause the oils in the jerky to spoil.
- Consider using oxygen absorbers or desiccant packets to help absorb any residual moisture and prolong the shelf life of the jerky.
It’s also important to note that different meats and seasonings may have different storage requirements. Here are some general guidelines:
- Beef jerky tends to have a longer shelf life compared to poultry or game meat jerky.
- Jerky with higher fat content may have a shorter shelf life due to the potential for rancidity.
- If you added perishable ingredients to your marinade, such as fresh herbs or fruits, the jerky may have a shorter shelf life and should be consumed within a few days.
Now that you know how to store your homemade jerky, let’s move on to some additional tips and tricks for long-term storage.
Tips and Tricks for Long-Term Storage
If you want to extend the shelf life of your homemade jerky even further, here are some additional tips and tricks for long-term storage:
- Vacuum sealing: Consider investing in a vacuum sealer, which removes air from the packaging and creates a tight seal. This helps to prevent oxidation and maintains the freshness of the jerky for a longer period.
- Freezing: If you want to store your jerky for an extended period, freezing is a viable option. Divide the jerky into portion-sized packs, place them in airtight freezer bags or vacuum-sealed packages, and store them in the freezer. Frozen jerky can last up to 6 months or longer.
- Thawing frozen jerky: When you’re ready to enjoy your frozen jerky, thaw it in the refrigerator overnight or at room temperature for a few hours. Avoid thawing jerky in the microwave, as it can affect the texture and flavor.
- Rotate your stock: To ensure that you consume your jerky before it goes bad, adopt the first-in, first-out (FIFO) method. Place newer batches at the back of your storage area, pushing older ones forward for easy access.
- Check for signs of spoilage: Periodically inspect your stored jerky for any signs of mold, unusual odors, or changes in texture. If you notice any of these signs, discard the jerky immediately.
- Consider using preservatives: If you’re concerned about the shelf life of your homemade jerky, you can use natural preservatives such as curing salts or commercial preservatives. These can help inhibit bacterial growth and extend the jerky’s freshness.
Remember, while properly stored jerky can last for a significant amount of time, it’s always recommended to consume it within a reasonable timeframe to enjoy the best flavor and quality.
Now that you’re equipped with knowledge on how to store your homemade jerky, it’s time to put it to practice and enjoy your delicious, protein-packed snack whenever and wherever you desire!
Happy jerky-making and happy snacking!
Conclusion
Congratulations! You’ve now learned how to make homemade jerky from start to finish, including choosing the right meat, preparing the marinade, drying the jerky, and storing it for long-term enjoyment. By making your own jerky, you have the freedom to tailor the flavors and ingredients to your liking, creating a truly personalized snack.
Remember, the key to delicious homemade jerky lies in the quality of the ingredients, the proper marinating process, and the careful drying and storage. Take the time to experiment with different flavors and seasonings, and don’t be afraid to get creative!
Whether you’re planning a hiking trip, need a protein boost during your workday, or simply want a nutritious and flavorful snack, homemade jerky is a fantastic option. With the knowledge and tips you’ve gained, you’ll be able to make jerky that rivals even the best store-bought brands.
Keep in mind that jerky-making is a continuous learning process. As you become more experienced, you may discover new techniques or flavors that suit your preferences. Don’t hesitate to experiment, innovate, and share your delicious creations with friends and family.
Now it’s time to put your newfound skills to use, gather your ingredients, and embark on your jerky-making adventure. Enjoy the process, embrace your creativity, and savor the satisfaction of biting into a homemade jerky that you can be proud of.
Happy jerky-making and happy snacking!
Frequently Asked Questions about How To Store Homemade Jerky
Was this page helpful?
At Storables.com, we guarantee accurate and reliable information. Our content, validated by Expert Board Contributors, is crafted following stringent Editorial Policies. We're committed to providing you with well-researched, expert-backed insights for all your informational needs.


0 thoughts on “How To Store Homemade Jerky”