Articles
How To Store Homemade Mozzarella
Modified: August 25, 2024
Learn the best way to store your homemade mozzarella with these helpful articles. Find out how to keep it fresh and flavorful for longer.
(Many of the links in this article redirect to a specific reviewed product. Your purchase of these products through affiliate links helps to generate commission for Storables.com, at no extra cost. Learn more)
Introduction
Welcome to the wonderful world of homemade mozzarella cheese! There’s nothing quite like the creamy, melt-in-your-mouth goodness of freshly made mozzarella. Whether you’re a cheese lover or just someone looking to try their hand at a fun kitchen experiment, making your own mozzarella at home is not only delicious but also rewarding.
In this article, we’ll walk you through the step-by-step process of how to store homemade mozzarella. Once you’ve mastered the art of making this delectable cheese, it’s important to know how to properly store it to maintain its freshness and flavor. So, let’s dive in and discover the best practices for preserving your homemade mozzarella.
Before we get started, it’s essential to have the proper equipment and ingredients on hand. Let’s go over what you’ll need for the process:
Key Takeaways:
- Master the art of homemade mozzarella with proper storage techniques. From preparing the milk to shaping and stretching, each step contributes to preserving the cheese’s freshness and flavor.
- Airtight containers, brine solutions, and proper chilling are key to storing homemade mozzarella. Enjoy the satisfaction of crafting and savoring your very own delicious cheese creation.
Read more: How To Store Mozzarella Ball
Equipment Needed
To store homemade mozzarella, you’ll need a few essential tools to ensure proper storage and preservation. Here’s a list of the equipment you’ll need:
- Cheese storage container: Airtight containers are essential for keeping homemade mozzarella fresh. Look for containers specifically designed for cheese storage, with tight-sealing lids to prevent moisture and air from entering.
- Cheesecloth: Cheesecloth is a thin, breathable fabric used for straining curds and shaping cheese. It’s essential for making homemade mozzarella and wrapping it for storage.
- Colander: A colander or strainer is necessary for draining the excess whey from the mozzarella during the cheese making process.
- Cheese knife: A sharp cheese knife or a regular paring knife will come in handy for cutting and portioning your mozzarella.
- Parchment paper: Parchment paper can be used to separate individual portions of mozzarella for easy storage and retrieval.
Make sure to have these items readily available before starting the cheese making process. Having the right equipment will significantly contribute to the successful storage of your homemade mozzarella.
Ingredients
To make and store homemade mozzarella, you’ll need a few key ingredients. Here’s what you’ll need:
- Fresh milk: Opt for high-quality, whole milk for the best results. Avoid using ultra-pasteurized milk, as it may affect the curd formation.
- Rennet: This is a coagulating agent that helps the milk form into curds. Vegetable rennet is recommended for vegetarians, while animal rennet can be used for those who consume animal products.
- Citric acid: Citric acid helps to acidify the milk and promote curd formation. It can be purchased in powder form from specialty stores or online.
- Non-iodized salt: Salt adds flavor to the mozzarella and helps to preserve it. Choose non-iodized salt to avoid any off-flavors.
- Cold, chlorine-free water: You’ll need cold water to dissolve the citric acid and rennet.
These ingredients are readily available in most grocery stores or can be ordered online. It’s important to use fresh, high-quality ingredients for the best-tasting mozzarella.
Step 1: Preparing the Milk
The first step in making and storing homemade mozzarella is to prepare the milk. Follow these steps to ensure the milk is ready for the cheese making process:
- Pour the fresh milk into a large pot, ensuring it’s clean and sterilized. Use a pot with a heavy-bottomed design to prevent scorching.
- Heat the milk slowly over medium-low heat, stirring occasionally to prevent burning. Use a thermometer to monitor the milk’s temperature.
- Once the milk reaches around 55-60°C (131-140°F), add the citric acid dissolved in ¼ cup of cold water. Stir gently to fully incorporate the citric acid into the milk.
- Continue heating the milk and gradually raising the temperature to around 88°C (190°F).
- Once the milk reaches the desired temperature, remove it from the heat.
By following these steps, you’ll ensure that the milk is properly prepared for the next phase of the cheese making process. The citric acid helps to acidify the milk, allowing it to coagulate and form curds.
Step 2: Creating the Curds
Now that the milk is prepared, it’s time to create the curds, an essential step in making homemade mozzarella. Follow these steps to create the curds:
- Dissolve the rennet in ¼ cup of cold, chlorine-free water. Stir gently until the rennet is fully dissolved.
- Add the rennet mixture to the heated milk, stirring gently for about 30 seconds to evenly distribute it.
- Cover the pot and let it sit undisturbed for about 30-45 minutes. During this time, the rennet will coagulate the milk, forming solid curds.
- After the appropriate time has elapsed, check for a clean break. Insert a long knife or spatula into the curds and lift them gently. If the curds break cleanly, with clear whey separating from the curds, proceed to the next step. If not, let it sit for a few more minutes before checking again.
- Cut the curds into 1-inch cubes with a long knife. Make sure to cut all the way to the bottom of the pot to ensure even-sized curds.
- Gently stir the curds for about 5 minutes to release more whey and promote even heating.
Creating the curds is a crucial step in the cheese making process. The rennet helps the milk coagulate, and cutting the curds allows for even heating and whey release. This sets the stage for the next step: heating and stretching the curds to form mozzarella.
After making homemade mozzarella, store it in a container filled with cold water and a pinch of salt. Change the water every day to keep the cheese fresh.
Read more: How To Store Mozzarella Pearls
Step 3: Heating the Curds
Once the curds have been created, it’s time to heat them to achieve the desired texture for the mozzarella. Follow these steps to properly heat the curds:
- Place the pot of curds back on the stove over low heat.
- Slowly heat the curds while gently stirring them with a slotted spoon or ladle. The goal is to raise the temperature of the curds to around 52-54°C (125-130°F).
- Continue stirring and heating until the curds reach the desired temperature. Take care not to overheat or scorch the curds.
- Once the curds reach the desired temperature, remove them from the heat.
Heating the curds allows them to become elastic and stretchy, key characteristics of mozzarella cheese. The gentle heating process ensures that the curds retain their moisture and shape, ready for the next step of shaping and stretching.
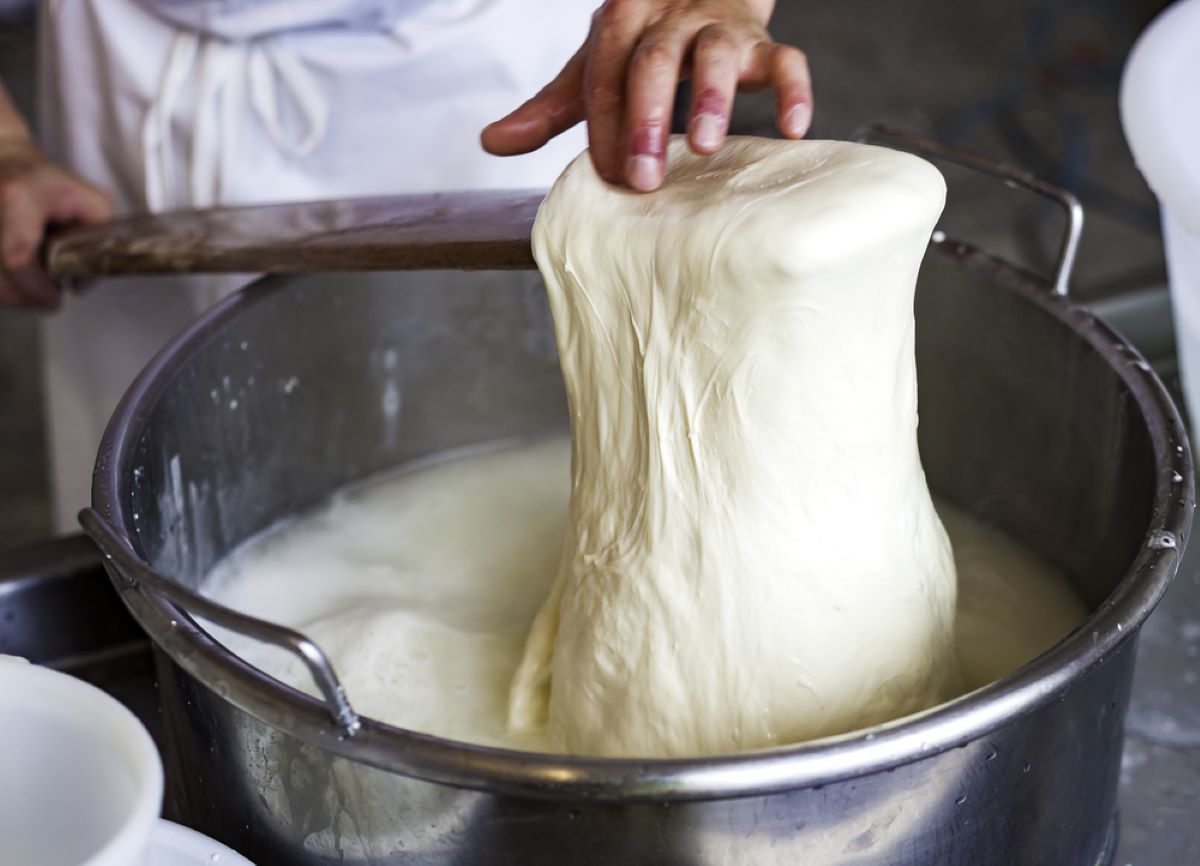
Step 4: Shaping and Stretching the Mozzarella
With the curds properly heated, it’s time to shape and stretch them to create beautiful, homemade mozzarella. Follow these steps to shape and stretch your mozzarella:
- Using a slotted spoon or ladle, carefully lift the curds out of the pot and transfer them to a colander set over a bowl. This allows any excess whey to drain off.
- Once the curds have drained for a few minutes, transfer them to a microwave-safe bowl. Be cautious as the curds will still be hot.
- Place the bowl of curds in the microwave and microwave them on high for about 30 seconds.
- Using heat-resistant gloves or kitchen towels, carefully remove the bowl from the microwave and gently stretch the curds. Fold and knead them to encourage the stretching process.
- Return the curds to the microwave and microwave them for another 30 seconds.
- Repeat the process of stretching and microwaving the curds until you achieve a smooth, stretchy texture.
- Once the curds have reached the desired texture, shape them into a ball or any other desired shape.
Shaping and stretching the mozzarella is a crucial step in achieving that characteristic pull and smoothness. The heat helps the curds become stretchy, allowing you to shape them into the familiar form of mozzarella cheese. Don’t be discouraged if it takes a few tries to master the stretching process!
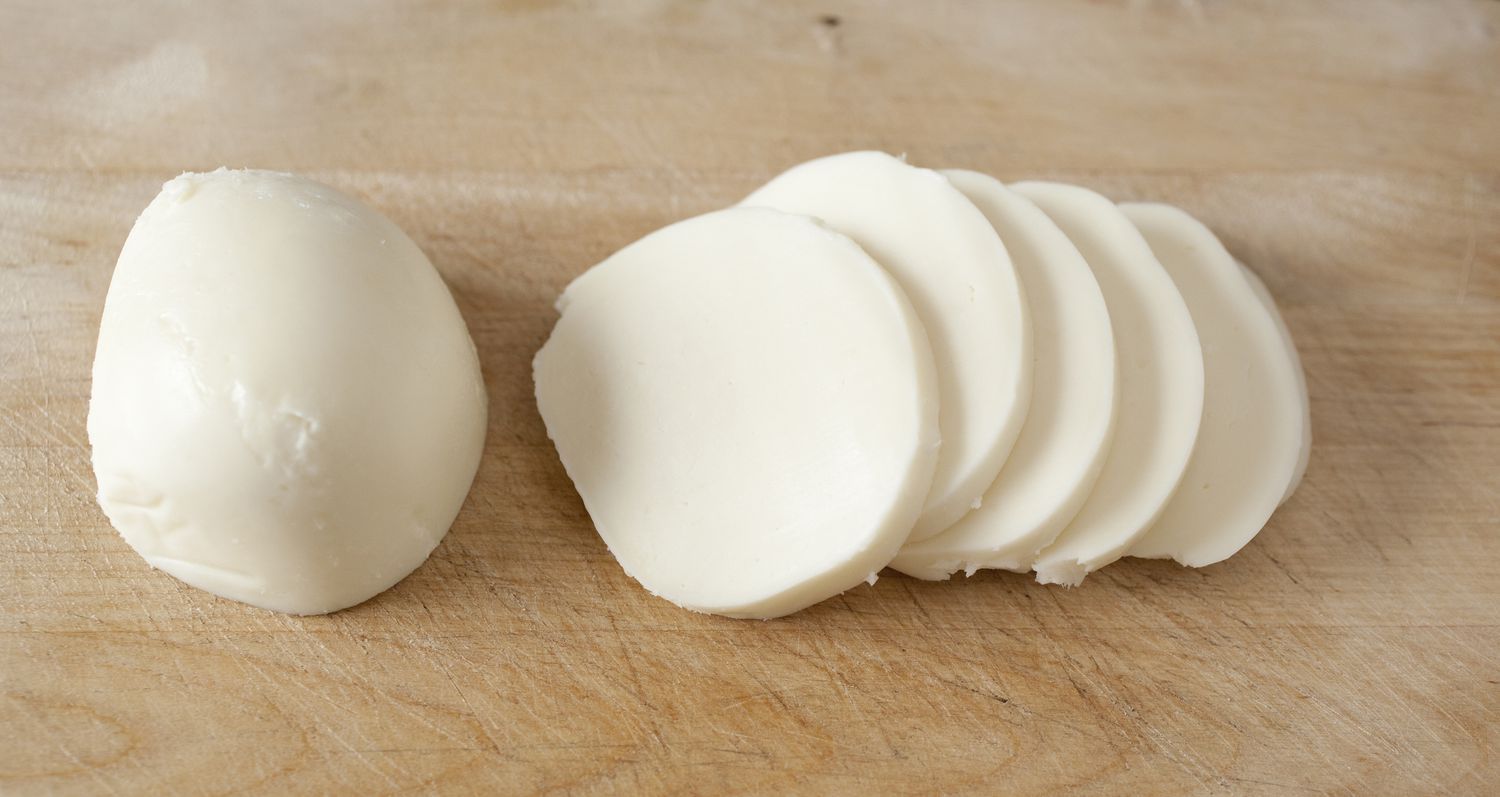
Step 5: Cooling and Storing the Mozzarella
After shaping your homemade mozzarella, it’s time to cool it down and store it properly to maintain its freshness. Follow these steps to cool and store your mozzarella:
- Fill a large bowl with ice water and add some salt to create a brine solution.
- Carefully submerge the shaped mozzarella into the ice water. Allow it to cool for about 15-20 minutes.
- Once cooled, remove the mozzarella from the brine solution and gently pat it dry with a clean kitchen towel or paper towels.
- Transfer the mozzarella to a cheese storage container. Ensure the container is clean and airtight to maintain the freshness of the cheese.
- Place the container in the refrigerator and allow the mozzarella to chill for at least 4-6 hours before consuming. This allows the flavors to develop and the texture to set.
- When storing the mozzarella in the refrigerator, it’s important to consume it within 3-5 days for the best taste and quality.
By cooling and storing your homemade mozzarella properly, you can enjoy its freshness and flavor for several days. The brine solution helps preserve the mozzarella and adds a touch of seasoning. Remember to keep the container airtight and enjoy your homemade mozzarella within the recommended timeframe.
Conclusion
Congratulations! You’ve successfully learned how to store homemade mozzarella. Making your own mozzarella cheese is a rewarding and delicious experience, and knowing how to store it properly ensures that you can enjoy it for longer.
From preparing the milk to creating the curds, heating and stretching, and finally cooling and storing, each step plays a vital role in the overall process. By following these steps with care and using the right equipment and ingredients, you can produce high-quality homemade mozzarella that rivals any store-bought version.
Remember to use airtight containers to store your mozzarella, as this helps maintain its freshness and prevents it from absorbing unwanted odors from the refrigerator. Additionally, labeling and dating your containers can be helpful in keeping track of when the mozzarella was made and when it should be consumed.
Whether you use your homemade mozzarella in salads, sandwiches, pasta dishes, or simply enjoy it on its own, take pride in the fact that you made it from scratch. Experiment with different flavors and techniques to create a variety of mozzarella cheeses that suit your taste preferences.
Now that you have the knowledge and skills to make and store homemade mozzarella, it’s time to get into the kitchen and start crafting this beloved cheese. Enjoy the process and savor the satisfaction of indulging in your very own homemade mozzarella!
Frequently Asked Questions about How To Store Homemade Mozzarella
Was this page helpful?
At Storables.com, we guarantee accurate and reliable information. Our content, validated by Expert Board Contributors, is crafted following stringent Editorial Policies. We're committed to providing you with well-researched, expert-backed insights for all your informational needs.


0 thoughts on “How To Store Homemade Mozzarella”