Articles
How To Store Homemade Scones
Modified: February 23, 2024
Learn the best methods for storing your homemade scones to keep them fresh and delicious for longer. Check out our helpful articles for expert tips and tricks.
(Many of the links in this article redirect to a specific reviewed product. Your purchase of these products through affiliate links helps to generate commission for Storables.com, at no extra cost. Learn more)
Introduction
Homemade scones are a delightful treat that can be enjoyed at any time of the day. Whether you’re serving them for breakfast, as a snack, or as part of an afternoon tea, freshly baked scones are incredibly delicious. But what do you do when you have more scones than you can eat in one sitting?
In this article, we’ll explore the best ways to store homemade scones to keep them fresh and tasty for longer. We’ll guide you through the steps, from preparing the dough to cooling and storing the scones properly. With our expert tips, you’ll be able to enjoy warm and scrumptious scones even days after they are baked.
Key Takeaways:
- Enjoy homemade scones for days by storing them in an airtight container or freezing them individually. Proper cooling and reheating techniques ensure deliciousness even after days of baking.
- Follow expert tips to maintain the freshness of homemade scones, from proper cooling and storage to reheating with care. Savor the delightful taste of warm, flaky scones anytime you desire.
Read more: How To Store Scones
Ingredients
Before we dive into storing homemade scones, let’s quickly go over the basic ingredients you’ll need to make these delectable treats:
- 2 cups of all-purpose flour
- 2 teaspoons of baking powder
- ¼ teaspoon of salt
- ½ cup of cold unsalted butter, cut into small pieces
- ½ cup of cold milk or buttermilk
- 2 tablespoons of granulated sugar
- Optional additions (such as dried fruits, chocolate chips, or nuts)
Now that we have our ingredients ready, let’s move on to the process of making and storing homemade scones.
Key Takeaways:
- Enjoy homemade scones for days by storing them in an airtight container or freezing them individually. Proper cooling and reheating techniques ensure deliciousness even after days of baking.
- Follow expert tips to maintain the freshness of homemade scones, from proper cooling and storage to reheating with care. Savor the delightful taste of warm, flaky scones anytime you desire.
Read more: How To Store Scones
Ingredients
Before we dive into storing homemade scones, let’s quickly go over the basic ingredients you’ll need to make these delectable treats:
- 2 cups of all-purpose flour
- 2 teaspoons of baking powder
- ¼ teaspoon of salt
- ½ cup of cold unsalted butter, cut into small pieces
- ½ cup of cold milk or buttermilk
- 2 tablespoons of granulated sugar
- Optional additions (such as dried fruits, chocolate chips, or nuts)
Making homemade scones is a straightforward process, and having high-quality ingredients is essential to achieve the best results. All-purpose flour provides the structure and texture of the scones, while baking powder acts as the leavening agent that helps them rise. The small amount of salt enhances the flavor of the scones, balancing the sweetness of the sugar.
Cold unsalted butter is crucial for creating flaky and tender scones. By cutting the butter into small pieces, you ensure that it is distributed evenly throughout the dough, resulting in pockets of butter that melt during baking and create those desirable layers.
The choice between cold milk or buttermilk depends on the texture and flavor you prefer. Using buttermilk adds a tangy taste to the scones, while regular milk gives them a milder flavor. Either way, make sure the liquid is cold, as this helps keep the butter cold and maintains the scone’s texture.
Granulated sugar adds sweetness to the scones, but you can adjust the amount based on your taste preference. If you like your scones with a touch of decadence, you can also add optional ingredients like dried fruits, chocolate chips, or nuts to the dough. These additions provide extra bursts of flavor and texture, making each bite even more enjoyable.
Now that we have our ingredients ready, let’s move on to the process of making and storing homemade scones.
Step 1: Preparing the Dough
The first step in making homemade scones is preparing the dough. This process involves mixing the dry ingredients, cutting in the cold butter, and gradually adding the liquid to form a cohesive dough.
To start, sift 2 cups of all-purpose flour into a large mixing bowl. This helps aerate the flour and remove any lumps. Add 2 teaspoons of baking powder and ¼ teaspoon of salt to the bowl and whisk the dry ingredients together until well combined.
Next, add ½ cup of cold unsalted butter, cut into small pieces, to the dry ingredients. Incorporating cold butter into the dough is crucial because it creates those flaky layers we all love in scones. Use a pastry cutter or your fingertips to cut the butter into the flour mixture until it resembles coarse crumbs.
Once the butter is evenly distributed, make a well in the center of the mixture and pour in ½ cup of cold milk or buttermilk. Add 2 tablespoons of granulated sugar for a touch of sweetness. Gently mix the ingredients together with a fork or your hands until a shaggy dough forms. Be careful not to overmix, as this can result in dense scones.
If you’d like to add any optional ingredients, such as dried fruits, chocolate chips, or nuts, now is the time to fold them into the dough. This step allows the additional ingredients to be evenly incorporated, adding flavor and texture to the scones.
Once the dough is well mixed, turn it out onto a lightly floured surface. Knead the dough gently a few times to bring it together, ensuring that all the ingredients are fully incorporated. Shape the dough into a rough circle or rectangle, about 1 to 1.5 inches thick.
Now that our dough is prepared, move on to the next step: shaping the scones.
Step 2: Shaping the Scones
Once the scone dough is prepared, it’s time to shape it into individual scones. The shaping process determines the size and appearance of the scones, and there are a few different methods you can choose from.
To begin, lightly flour a clean surface to prevent the dough from sticking. Transfer the dough onto the floured surface and gently pat it down to form a circle or rectangle, about 1 to 1.5 inches thick. If you prefer uniform scones, you can use a round cutter or a sharp knife to cut out individual scones from the dough.
Another popular shaping method is to divide the dough into equal portions and shape them into triangular scones. Start by cutting the dough into halves, then into quarters, and continue until you have the desired number of scones. Each portion can be rolled into a ball and then gently pressed down into a triangular shape.
For a rustic and homemade look, you can also simply shape the dough into rustic free-form scones. Take a portion of the dough and shape it into a rough triangular or circular shape, without worrying about uniformity. The imperfections add character to the scones and make them visually appealing.
Regardless of the shaping method you choose, place the shaped scones onto a baking sheet lined with parchment paper or a silicone baking mat. Make sure to leave some space between the scones to allow for even baking and expansion.
Now that the scones are shaped and ready, it’s time to move on to the next step: baking!
Store homemade scones in an airtight container at room temperature for up to 2 days, or in the refrigerator for up to 1 week. To freeze, wrap them tightly in plastic wrap and store in an airtight container for up to 3 months.
Read more: How To Store Scones Overnight
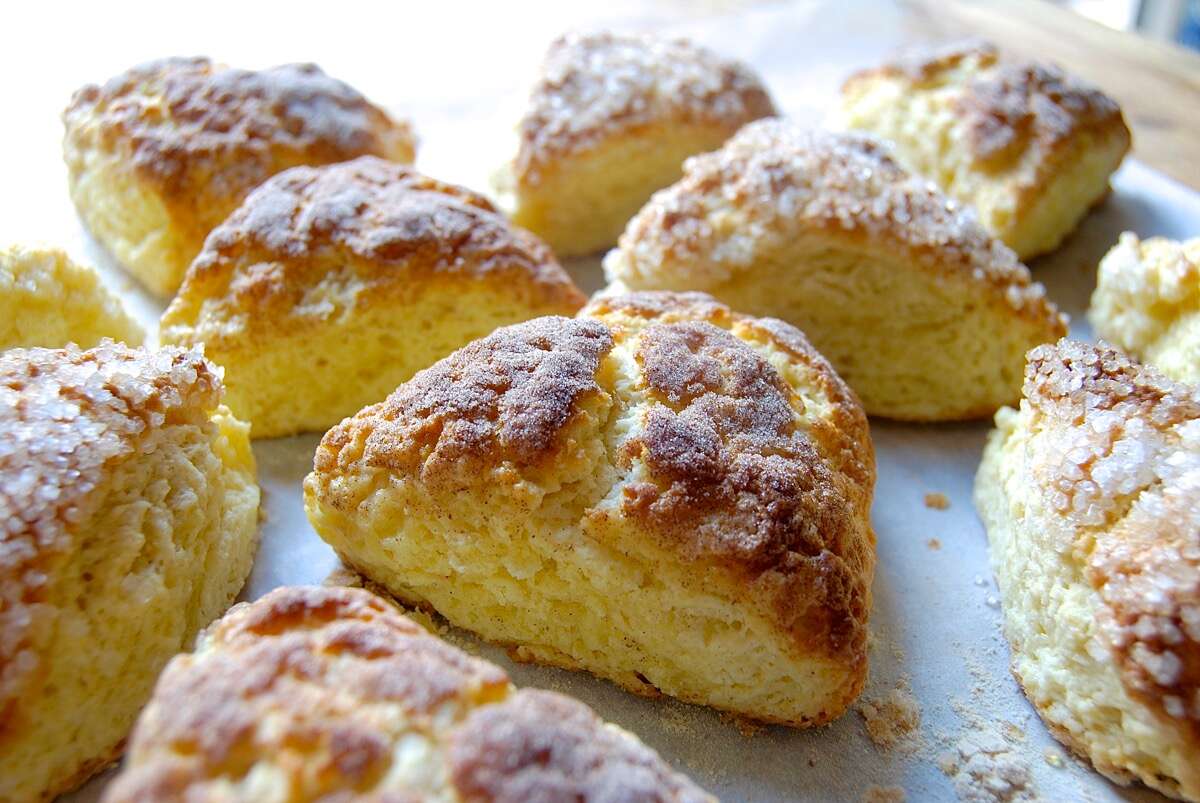
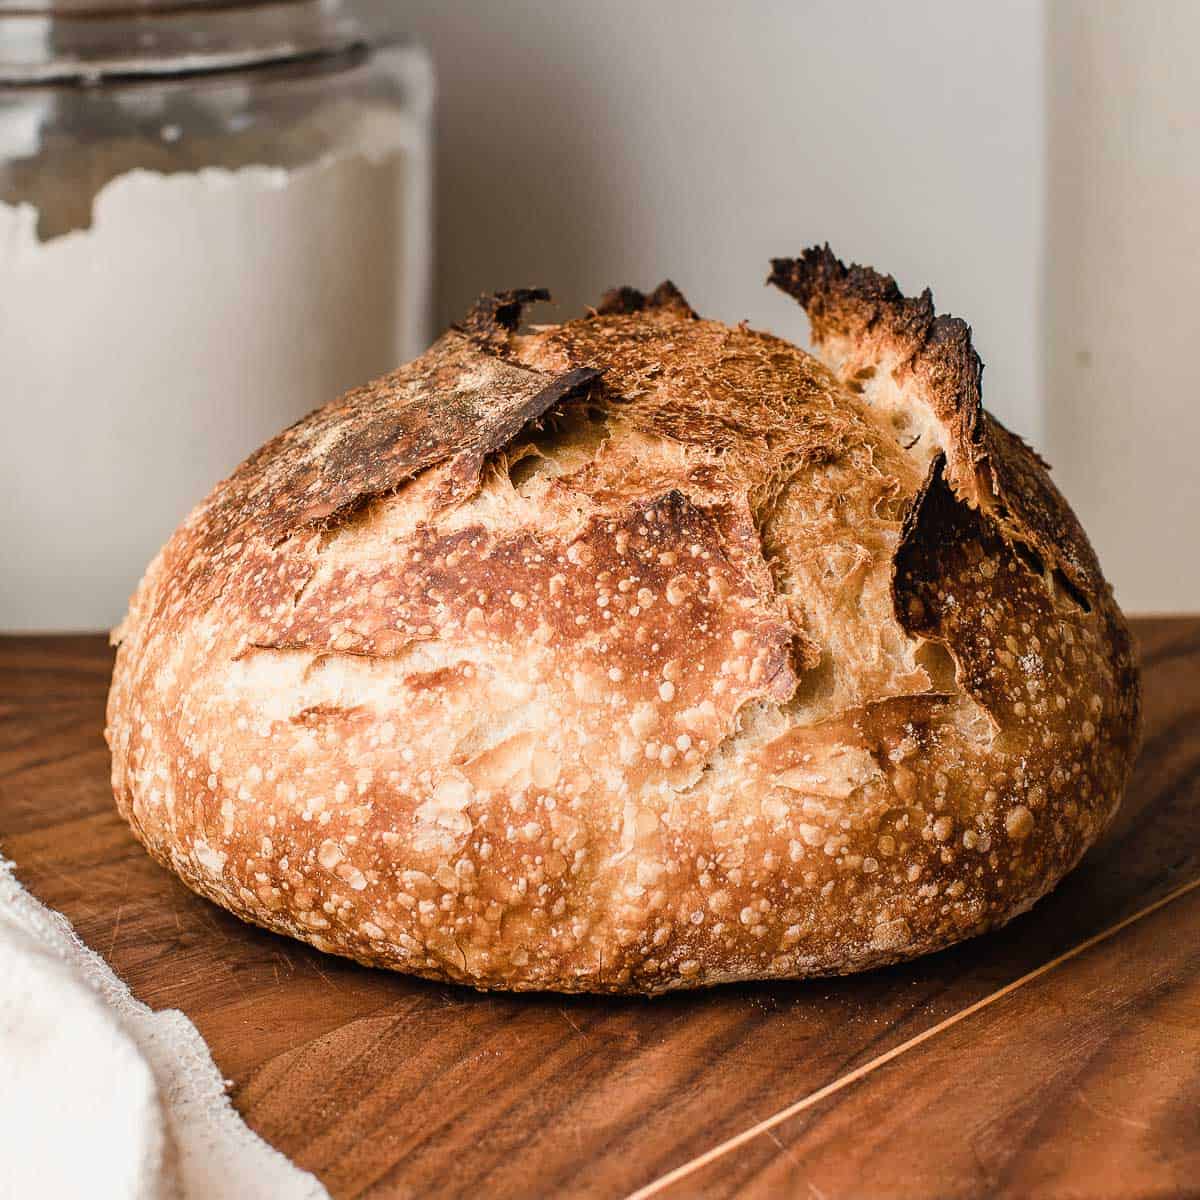
Step 3: Baking the Scones
Now that the scones are shaped and ready to go, it’s time to bake them to golden perfection. Proper baking is key to achieving light and fluffy scones with a crisp exterior. Follow these steps to ensure your scones turn out just right.
Start by preheating your oven to 425°F (220°C). The high heat helps create the beautiful rise and golden brown color on the scones.
Place the baking sheet with the shaped scones in the preheated oven and bake them for about 12-15 minutes, or until the scones are puffed up and golden brown. The baking time may vary depending on the size and thickness of your scones, so keep a close eye on them and adjust the baking time accordingly.
While the scones are baking, resist the temptation to open the oven door too often. Keeping the oven door closed allows for consistent heat circulation and prevents the scones from deflating.
Once the scones are baked to perfection, remove them from the oven and transfer them to a wire rack to cool. Letting the scones cool completely is essential before storing them to maintain their texture and prevent sogginess.
Now that the scones are baked and cooling, let’s move on to the next step: cooling and storing.
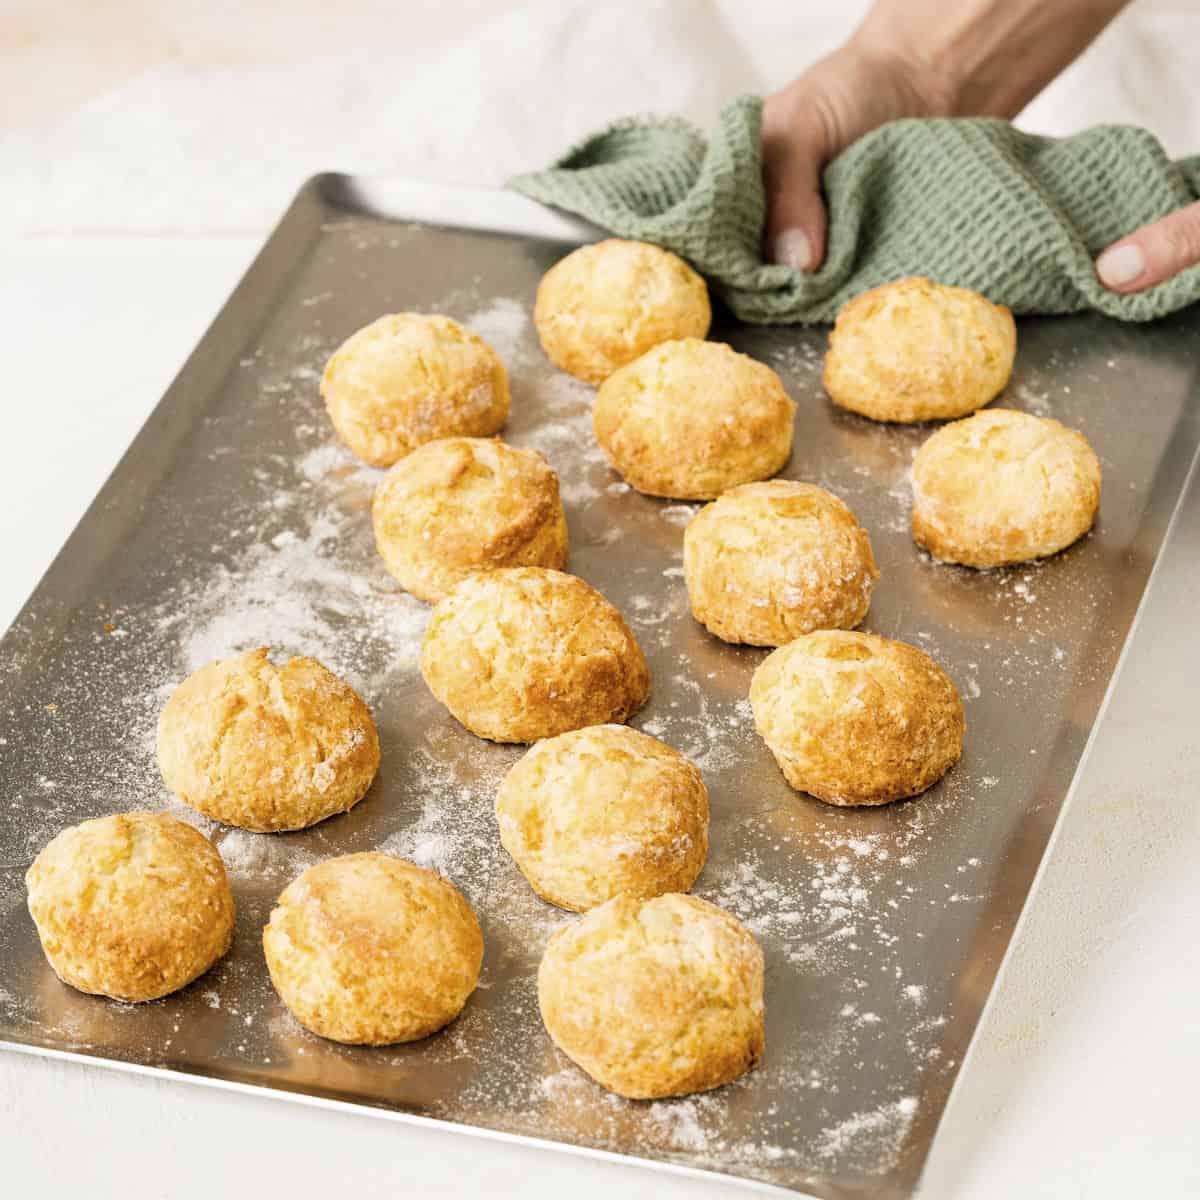
Step 4: Cooling and Storing
After the scones have finished baking, it’s important to let them cool completely before storing them. This allows them to firm up and maintain their structure. Follow these simple steps to cool and store your homemade scones.
Transfer the baked scones from the baking sheet to a wire rack. Make sure to space them out so they can cool evenly on all sides. Let the scones cool at room temperature for about one hour or until they reach room temperature.
Once the scones have cooled completely, it’s time to store them to maintain their freshness. The key is to protect them from excess moisture and air exposure, as this can lead to sogginess and loss of flavor.
One of the best ways to store homemade scones is to place them in an airtight container. You can use a plastic food storage container or a resealable plastic bag. Make sure the container is the right size to avoid overcrowding the scones, which can cause them to become squished or lose their shape.
If you prefer to freeze your scones for longer storage, wrap them individually in plastic wrap or place them in a freeze-safe bag. Properly wrapped, the scones can be stored in the freezer for up to three months. To thaw, simply remove them from the freezer and let them come to room temperature.
For shorter storage periods, such as a day or two, you can also store the scones at room temperature. Avoid leaving them out in direct sunlight or in a humid environment as this can cause them to become stale quicker.
When you’re ready to enjoy the stored scones, you can either reheat them slightly in the oven or microwave for a few seconds to restore their freshness. A few seconds in the microwave or a quick warm-up in a 350°F (175°C) oven will do the trick.
Now that your homemade scones are properly cooled and stored, you can enjoy them whenever you please. Whether you’re savoring them for breakfast, as a snack, or as part of a delightful afternoon tea, your stored scones will still be full of flavor and deliciousness.
With these simple steps and expert tips, you can confidently store your homemade scones and savor their delightful taste for days to come.
Tips for Storing Homemade Scones
To ensure that your homemade scones stay fresh and delicious for as long as possible, here are some helpful tips for storing them:
- Properly cool the scones: Allow your scones to cool completely before storing them. This helps them maintain their texture and prevents sogginess when stored.
- Use an airtight container: Store your scones in an airtight container to protect them from moisture and air exposure. This helps to retain their freshness and flavor.
- Wrap individually for freezing: If you plan to freeze your scones, wrap them individually in plastic wrap or place them in separate freezer-safe bags. This makes it easier to thaw and reheat them whenever desired.
- Avoid overcrowding: When storing your scones, make sure not to overcrowd them in the container. Overcrowding can cause them to become squished or lose their shape. Give them enough space to breathe and maintain their form.
- Label and date: If you’re freezing your scones, remember to label them with the date of storage. This helps you keep track of their freshness and ensures you consume the oldest ones first.
- Reheat with care: When reheating stored scones, be mindful not to overheat them, as this can make them dry or tough. Use low heat settings in the oven or microwave, and check them frequently to prevent overheating.
- Store separately from toppings: If you plan to serve your scones with toppings such as jam or cream, it’s best to store them separately. This prevents the scones from becoming soggy due to the moisture from the toppings.
- Enjoy within a few days: While homemade scones can stay fresh for a few days if stored properly, it’s recommended to consume them within a short period for the best taste and texture.
- Consider portioning: If you tend to bake a large batch of scones, consider portioning them before storing. This way, you can take out and thaw only the number of scones you plan to enjoy, minimizing waste and maintaining freshness.
By following these tips, you can ensure that your homemade scones stay delicious and enjoyable even after they have been stored.
Conclusion
Homemade scones are a delightful treat that can be enjoyed any time of day, but storing them properly is essential to maintain their freshness and flavor. By following the steps provided in this article, you can ensure that your homemade scones stay delicious and enjoyable for longer.
From preparing the dough to shaping and baking the scones, each step plays a crucial role in creating the perfect scone. Once the scones are baked to golden perfection, allowing them to cool completely is important before storing them.
Proper storage techniques, such as using an airtight container or wrapping individually for freezing, help to protect the scones from moisture and air exposure. This preserves their texture and taste, allowing you to enjoy them even days after baking.
Remember to label and date your frozen scones, and adhere to proper reheating techniques to maintain their freshness. Avoiding overcrowding and storing separately from toppings are also important considerations to keep in mind.
Ultimately, homemade scones are a delicious treat that can be enjoyed fresh or stored for later. With the tips and techniques provided in this article, you can savor the delightful taste of homemade scones whenever you please.
So go ahead and make a batch of homemade scones, knowing that you can enjoy their scrumptiousness even days after baking. With a little bit of planning and proper storage, you can indulge in the delight of warm, flaky scones anytime you desire.
Frequently Asked Questions about How To Store Homemade Scones
Was this page helpful?
At Storables.com, we guarantee accurate and reliable information. Our content, validated by Expert Board Contributors, is crafted following stringent Editorial Policies. We're committed to providing you with well-researched, expert-backed insights for all your informational needs.


0 thoughts on “How To Store Homemade Scones”