Articles
How To Store Night Guard
Modified: December 7, 2023
Learn how to store your night guard properly with these helpful articles. Keep your night guard clean and hygienic for longer-lasting use.
(Many of the links in this article redirect to a specific reviewed product. Your purchase of these products through affiliate links helps to generate commission for Storables.com, at no extra cost. Learn more)
Introduction
When it comes to protecting your teeth from the harmful effects of teeth grinding or clenching, a night guard can be a valuable tool. Whether you’ve just purchased a new night guard or you’re looking for the best way to store your current one, proper storage is crucial to maintain its effectiveness and prolong its lifespan.
A night guard is a specially designed dental appliance that is worn during sleep to protect the teeth and jaws from the damaging forces of bruxism. Bruxism, or teeth grinding, is a common condition that affects many individuals, often without them even realizing it. Over time, this repetitive grinding motion can lead to tooth damage, jaw pain, headaches, and other oral health problems.
To ensure that your night guard remains clean, intact, and ready for use, it’s important to follow proper storage techniques. In this article, we will guide you through the steps to effectively store your night guard, keeping it safe and hygienic.
Key Takeaways:
- Properly storing your night guard is crucial for maintaining its cleanliness, effectiveness, and longevity. Follow the steps outlined in this article to ensure your night guard remains in optimal condition, providing necessary protection for your teeth and jaws.
- Regularly checking your night guard for wear and tear is essential in maintaining its effectiveness. By addressing any issues promptly and consulting with your dentist, you can ensure that your night guard continues to provide optimal protection and fits comfortably.
Read more: How To Store Mouth Guard
Step 1: Clean and Dry
Before storing your night guard, it’s essential to clean it thoroughly to remove any bacteria, plaque, or debris that may have accumulated. Start by rinsing it under warm water to remove any loose particles. Avoid using hot water, as it can damage the night guard or cause it to lose its shape.
Next, use a soft toothbrush and some mild soap or toothpaste to gently scrub the night guard. Be sure to clean both the inside and outside surfaces, as well as the crevices and grooves. This will help remove any remaining stains or buildup.
After cleaning, rinse the night guard thoroughly again to remove any soap residue. Ensure that it is completely dry before storing it, as moisture can promote the growth of bacteria or cause the night guard to develop an unpleasant odor.
Place the night guard on a clean paper towel or cloth and allow it to air dry for a few hours. Avoid using a hairdryer or placing it on a heat source, as this can warp or damage the night guard.
Once the night guard is completely dry, you can move on to the next step of proper storage.
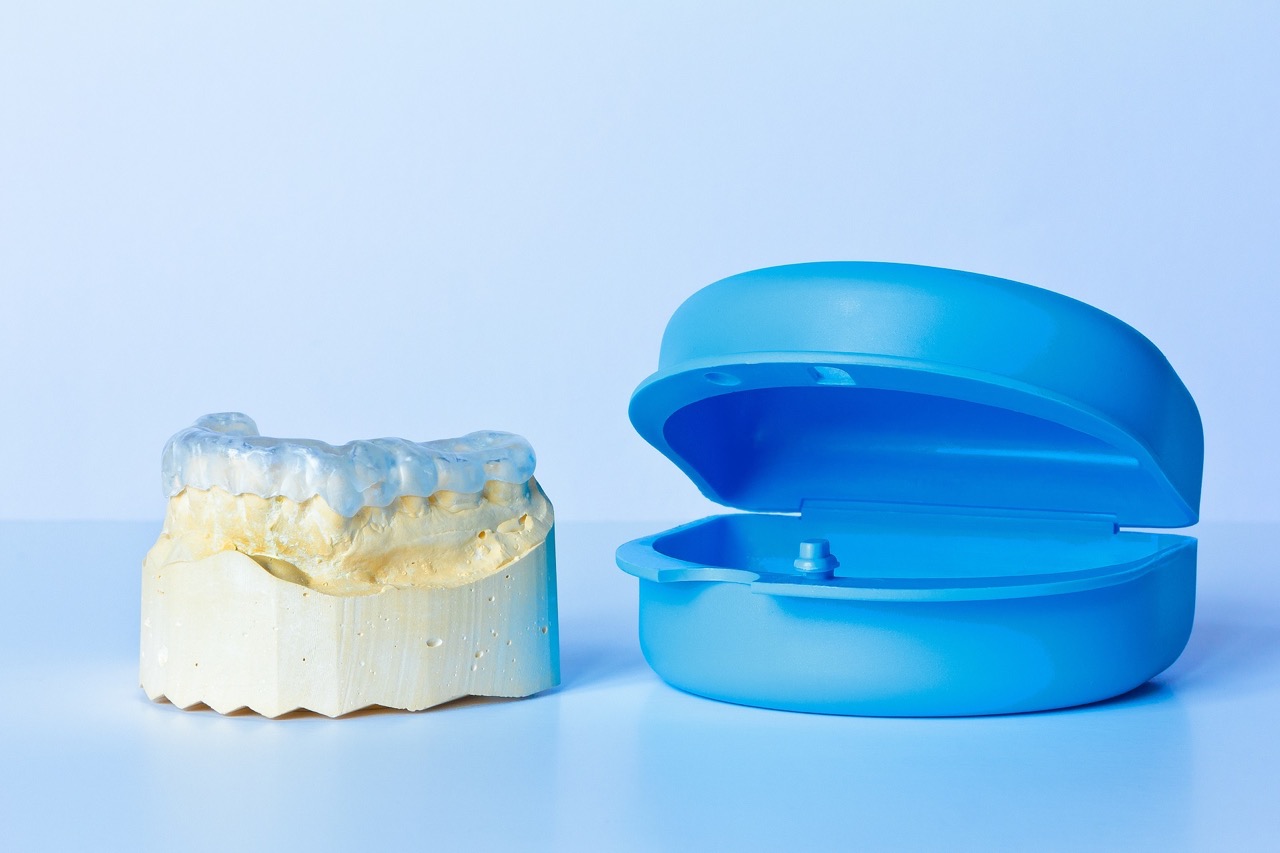
Step 2: Use a Storage Case
Using a storage case is an essential part of properly storing your night guard. It not only keeps your night guard protected but also prevents it from being misplaced or accidentally damaged.
When choosing a storage case, opt for one that is specifically designed for night guards. These cases are typically made of sturdy materials, such as plastic or hard-shell cases, which provide adequate protection against impact and crushing.
Before placing your night guard in the storage case, ensure that it is completely dry. Moisture trapped in the case can create a breeding ground for bacteria and unpleasant odors. It’s also a good idea to give the storage case a quick wipe with a clean cloth or a disinfectant wipe to ensure cleanliness.
Once your night guard is dry and the storage case is clean, carefully place the night guard in the case. Ensure that it fits snugly and is not bent or forced into the case, as this can cause damage to the night guard.
It’s important to note that if your night guard has specific instructions for storage, such as using a specific type of case or method, be sure to follow those instructions. Different materials and types of night guards may require specific storage conditions to ensure optimal longevity and effectiveness.
Step 3: Keep Away from Children
When storing your night guard, it’s crucial to keep it out of reach of children. Night guards are specifically designed for the individual wearer and may not be suitable for children. Additionally, night guards can pose a choking hazard if they are mistakenly put in the mouth by young children.
To ensure the safety of your children, store your night guard in a location that is inaccessible to them. Consider using a high shelf or a locked drawer to keep it out of sight and reach. If your night guard is small and easily portable, be mindful not to leave it where children can easily access it, such as on a bathroom counter or bedside table.
If you have older children who are using night guards, it’s important to teach them about the proper storage and handling of their night guards. Emphasize the importance of keeping it clean, dry, and stored in its designated case. Supervise younger children to ensure they are not handling or playing with their siblings’ night guards.
By being proactive and taking precautions to keep your night guard away from children, you can ensure their safety and prevent any accidental damage or ingestion.
Store your night guard in a clean, dry container to prevent bacteria growth. Avoid leaving it in direct sunlight or hot temperatures to maintain its shape and effectiveness.
Step 4: Avoid Extreme Temperatures
Extreme temperatures can have a detrimental effect on the material and shape of your night guard. It’s important to store your night guard away from direct sunlight, heat sources, and extreme cold to maintain its integrity and effectiveness.
Exposing your night guard to high temperatures, such as leaving it in a hot car or near a heater, can cause it to distort, warp, or even melt. This can result in an ill-fitting night guard that may not provide the required protection or comfort.
Similarly, exposing your night guard to extreme cold temperatures, such as leaving it in the freezer or outside in freezing weather, can also cause damage. The abrupt temperature change can make the material brittle, leading to cracks or breakage.
When storing your night guard, choose a location that is at a moderate temperature and away from direct sunlight. A cool, dry place, like a bathroom cabinet or a dedicated night guard storage box, is ideal.
If you are traveling or have to store your night guard in a less controlled environment, make sure to pack it in a protective case and avoid leaving it in extreme temperatures for an extended period.
By being mindful of temperature fluctuations and storing your night guard in a suitable environment, you can maintain its shape and durability over time.
Read more: How To Store Engagement Ring At Night
Step 5: Regular Cleaning
In addition to cleaning your night guard before storage, it’s essential to incorporate regular cleaning into your routine. Regular cleaning helps to keep your night guard free from bacteria, plaque, and stains, ensuring its hygienic and effective use.
After each use, rinse your night guard thoroughly with warm water to remove any saliva or debris. Avoid using hot water, as it can potentially damage the night guard.
At least once a week, give your night guard a deeper clean using a gentle cleanser or a specialized cleaning solution specifically designed for night guards. Following the manufacturer’s instructions, soak your night guard in the cleaning solution for the recommended time. This will help to disinfect the night guard and remove stubborn stains or buildup.
After soaking, gently brush the night guard with a soft toothbrush to further clean and remove any remaining residue. Rinse it thoroughly with water to remove any cleaning solution before storing.
It’s important to note that using toothpaste to clean your night guard is not recommended, as it can be abrasive and potentially damage the surface of the night guard. Stick to gentle cleansers or specialized cleaning solutions specifically formulated for night guards.
By maintaining a regular cleaning routine, you can ensure that your night guard remains fresh, clean, and comfortable to wear.
Step 6: Check for Wear and Tear
Regularly inspecting your night guard for any signs of wear and tear is an essential step in maintaining its effectiveness and longevity. Over time, night guards can become worn down, which can compromise their ability to provide proper protection and comfort.
Examine your night guard for any visible signs of damage, such as cracks, chips, or worn down areas. Check the edges and surfaces thoroughly to ensure that they are intact and free from any sharp or jagged edges.
If you notice any damage or significant wear, it’s important to consult with your dentist or night guard provider. They will be able to assess the extent of the damage and recommend whether repair or replacement is necessary.
Furthermore, pay attention to the fit and comfort of your night guard. If you experience any changes in how it fits or feels when worn, such as slipping or discomfort, it may be an indication of wear or an issue with the fit. Consult with your dentist to address any concerns and ensure that your night guard is properly adjusted or replaced if needed.
Even if there are no visible signs of wear and tear, it’s generally recommended to replace your night guard every 6-12 months or as recommended by your dentist. Regular replacement helps to ensure that the night guard continues to provide optimal protection and fits comfortably.
By regularly checking your night guard for wear and tear, you can address any issues promptly and maintain its effectiveness in protecting your teeth and jaw.
Conclusion
Proper storage of your night guard is essential for maintaining its cleanliness, effectiveness, and longevity. By following the steps outlined in this article, you can ensure that your night guard remains in optimal condition, providing the necessary protection for your teeth and jaws.
Remember to clean and dry your night guard thoroughly before storing it in a designated case. Keep it out of reach of children to prevent any accidents or damage. Avoid exposing your night guard to extreme temperatures that can distort or damage it. Incorporate regular cleaning into your routine to keep it hygienic and fresh. Finally, regularly check for wear and tear and consult with your dentist if any issues arise.
Taking the time to properly store your night guard will not only protect your investment but also contribute to your oral health. A well-maintained night guard can effectively alleviate the symptoms of bruxism, such as jaw pain, headaches, and tooth damage.
If you have any specific instructions from your dentist or night guard provider, be sure to follow them for proper storage techniques. They may provide additional guidance or specific recommendations based on the type of night guard you have.
By implementing these storage practices, you can ensure that your night guard remains clean, comfortable, and effective for a long time to come, providing you with the necessary protection against the harmful effects of teeth grinding and clenching.
Frequently Asked Questions about How To Store Night Guard
Was this page helpful?
At Storables.com, we guarantee accurate and reliable information. Our content, validated by Expert Board Contributors, is crafted following stringent Editorial Policies. We're committed to providing you with well-researched, expert-backed insights for all your informational needs.


0 thoughts on “How To Store Night Guard”