Articles
How To Store Rock Salt
Modified: February 28, 2024
Learn how to properly store rock salt in this informative article. Discover the best methods for preserving its quality and effectiveness.
(Many of the links in this article redirect to a specific reviewed product. Your purchase of these products through affiliate links helps to generate commission for Storables.com, at no extra cost. Learn more)
Introduction
Welcome to the comprehensive guide on how to store rock salt properly. Whether you’re using it for de-icing your driveway or preserving food, it’s essential to store rock salt in the right way to maintain its effectiveness and quality over time.
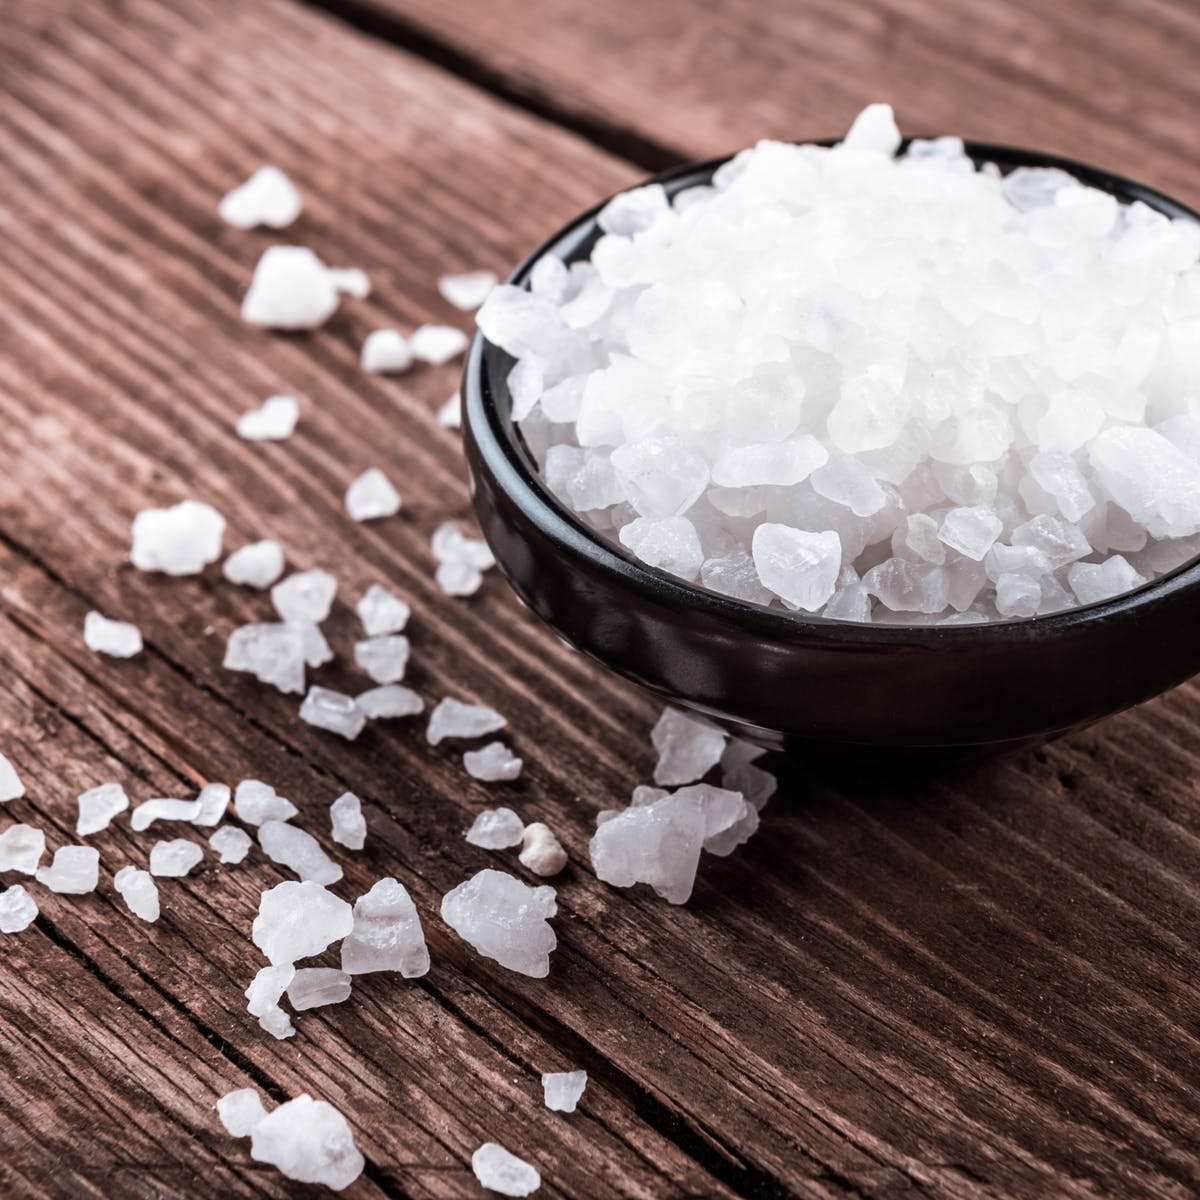
Rock salt, also known as halite, is a crystalline mineral composed primarily of sodium chloride. It is commonly used as a de-icing agent during winter to melt ice and snow on roads and sidewalks. Additionally, rock salt is often used in cooking and food preservation due to its ability to draw out moisture and extend the shelf life of certain foods.
While rock salt is relatively stable and has a long shelf life, proper storage is key to ensuring its effectiveness and avoiding unnecessary waste. Improperly stored rock salt can absorb moisture, clump together, and lose its de-icing or preservation properties. It can also become contaminated or deteriorate if exposed to extreme temperatures or harsh environmental conditions.
In this guide, we will explore the importance of storing rock salt properly and provide step-by-step instructions for both indoor and outdoor storage options. Whether you have a small container for your kitchen or need to store larger quantities for winter maintenance, this guide will help you make the most out of your rock salt.
So, let’s get started on learning the best practices for storing rock salt to ensure it remains effective and ready for use whenever you need it.
Key Takeaways:
- Properly storing rock salt is crucial for maintaining its quality, effectiveness, and longevity. Whether indoors or outdoors, using airtight containers and protecting it from moisture and extreme temperatures are key steps to ensure its optimal condition.
- By following the correct storage guidelines for rock salt, you can prolong its shelf life, maintain its effectiveness, save money, ensure safety, and minimize its environmental impact. Proper storage practices help maximize its use and avoid unnecessary waste and potential accidents.
Read more: How To Store Rocks
Why it’s Important to Store Rock Salt Properly
Proper storage of rock salt is crucial for several reasons. By storing rock salt correctly, you can:
- Prolong shelf life: Rock salt is a valuable resource, and by storing it properly, you can extend its shelf life. When exposed to moisture, rock salt can dissolve and clump together, making it less effective for de-icing or food preservation purposes.
- Maintain effectiveness: Whether you’re using rock salt for de-icing your driveway or preserving food, its effectiveness depends on its ability to absorb moisture and lower freezing temperatures. Improperly stored rock salt can lose its moisture-absorbing properties, making it less effective in melting ice or preserving food.
- Save money: By storing rock salt properly, you can avoid unnecessary waste and save money in the long run. Clumpy or spoiled rock salt will not perform as well as fresh and dry salt, leading to the need for higher quantities or frequent replacements.
- Ensure safety: Proper storage of rock salt helps prevent accidents or injuries. Clumps of wet rock salt can be heavy and challenging to handle, increasing the risk of strain or injury. Dry and freshly stored rock salt is easier to manage and spread evenly on icy surfaces.
- Minimize environmental impact: By storing rock salt properly, you can minimize its impact on the environment. When rock salt comes into contact with water or melts, the resulting saltwater runoff can harm plants, damage concrete, and contaminate local water sources. Proper storage reduces the likelihood of accidental spills or exposure to moisture.
In summary, storing rock salt properly ensures its shelf life, maintains its effectiveness, saves money, promotes safety, and minimizes its environmental impact. Now that we understand the importance of proper storage, let’s delve into the steps for storing rock salt both indoors and outdoors.
Choosing the Right Storage Container
When it comes to storing rock salt, choosing the right storage container is essential to maintain its quality and effectiveness. Here are some factors to consider when selecting a storage container:
- Material: Look for containers made from sturdy and durable materials that are resistant to moisture and temperature changes. Plastic, polyethylene, or stainless steel containers are excellent choices for storing rock salt.
- Size: Consider the quantity of rock salt you plan to store. Choose a container that can comfortably accommodate the amount while allowing sufficient airflow to prevent moisture buildup and clumping.
- Sealability: Opt for a container with a tight-fitting lid or seal to keep out moisture, pests, and contaminants. This will help preserve the quality and effectiveness of the rock salt over time.
- Transparency: If you prefer to see the condition and quantity of the rock salt without opening the container, choose a transparent or translucent container. It allows you to monitor any changes in moisture content or clumping without exposing the salt to unnecessary air and moisture.
- Accessibility: Consider how easy it is to access the rock salt when needed. Look for containers with wide openings or spouts that allow for convenient scooping or pouring, especially if you frequently use rock salt for de-icing purposes.
Furthermore, it’s important to label the storage container with the contents, especially if you store different types of salts or mixtures. Clear labeling ensures that you can easily identify the rock salt and avoid any confusion with other stored substances.
By choosing the right storage container, you can ensure that your rock salt remains dry, free from contaminants, and easily accessible whenever you need it. Now let’s move on to learn the specific steps for indoor and outdoor storage of rock salt.
For Indoor Storage:
When it comes to storing rock salt indoors, it’s important to create a controlled environment to prevent moisture absorption and clumping. Here are the steps to follow:
- Step 1: Clean the storage area: Before storing rock salt, ensure that the storage area is clean and free from any moisture or contaminants. Sweep or vacuum the area to remove any dirt or debris that could potentially mix with the salt.
- Step 2: Use airtight containers: Choose airtight containers made of plastic, polyethylene, or stainless steel to store the rock salt. These containers will help maintain a dry environment, preventing the salt from absorbing moisture. Remember to label the containers with the contents.
- Step 3: Keep away from moisture: Store the containers in a cool, dry place away from any sources of moisture, such as windows, faucets, or leaking pipes. Consider using a dehumidifier or moisture-absorbing products like silica gel packets to further minimize moisture in the storage area.
By following these steps, you can ensure that your rock salt remains dry, free-flowing, and ready for use whenever you need it. Now, let’s explore the steps for outdoor storage of rock salt.
For Indoor Storage:
When it comes to storing rock salt indoors, it’s important to create a controlled environment to prevent moisture absorption and clumping. Here are the steps to follow:
- Step 1: Clean the storage area: Before storing rock salt, ensure that the storage area is clean and free from any moisture or contaminants. Sweep or vacuum the area to remove any dirt or debris that could potentially mix with the salt.
The first step in indoor rock salt storage is to clean the designated storage area. This will help create a clean and dry environment for the salt. Start by removing any debris, dirt, or dust from the area. Use a broom or vacuum cleaner to sweep or suck up any loose particles. Pay attention to corners, cracks, and crevices where dust and dirt may accumulate.
If the storage area has moisture or spills, it’s crucial to address them before storing the rock salt. Use a mop, cloth, or absorbent material to clean up any liquid or damp patches. Make sure the area is completely dry before proceeding with storing the salt.
In addition to cleaning, consider the overall condition of the storage area. Ensure that the space is free from any leaky pipes, cracks in the walls, or other sources of moisture. Repair any issues if necessary to maintain a dry environment.
By starting with a clean and dry storage area, you create a solid foundation for properly storing rock salt indoors. This step sets the stage for the following steps and helps ensure the integrity of the stored rock salt. Now, let’s move on to the next step of indoor rock salt storage – using airtight containers.
For Indoor Storage:
When it comes to storing rock salt indoors, it’s important to create a controlled environment to prevent moisture absorption and clumping. Here are the steps to follow:
- Step 1: Clean the storage area: Before storing rock salt, ensure that the storage area is clean and free from any moisture or contaminants. Sweep or vacuum the area to remove any dirt or debris that could potentially mix with the salt.
- Step 2: Use airtight containers: Choose airtight containers made of plastic, polyethylene, or stainless steel to store the rock salt. These containers will help maintain a dry environment, preventing the salt from absorbing moisture. Remember to label the containers with the contents.
Once you have a clean storage area, the next step is to choose suitable storage containers for your rock salt. Airtight containers are the best choice for preventing moisture and humidity from reaching the salt. Look for containers that have a secure lid or seal to ensure a tight closure.
Plastic, polyethylene, or stainless steel containers are recommended due to their resistance to moisture and durability. These materials are less likely to react with the salt and can withstand different environmental conditions. Avoid using containers made of materials that can rust or corrode when exposed to salt, as this can compromise the quality of the stored rock salt.
When selecting airtight containers, consider the size based on the quantity of rock salt you intend to store. It’s essential to have enough space in the containers to allow airflow and prevent clumping. If you have large quantities of rock salt, consider using multiple containers to ensure proper storage.
Don’t forget to label the containers with the contents, especially if you store different types of salts or mixtures. Clear labeling makes it easy to identify the rock salt and prevents any confusion when retrieving it for use.
By using airtight containers, you can create a protective environment for your rock salt, keeping it dry and free from clumps. Now, let’s move on to the next step of indoor rock salt storage – keeping it away from moisture.
For Indoor Storage:
When it comes to storing rock salt indoors, it’s important to create a controlled environment to prevent moisture absorption and clumping. Here are the steps to follow:
- Step 1: Clean the storage area: Before storing rock salt, ensure that the storage area is clean and free from any moisture or contaminants. Sweep or vacuum the area to remove any dirt or debris that could potentially mix with the salt.
- Step 2: Use airtight containers: Choose airtight containers made of plastic, polyethylene, or stainless steel to store the rock salt. These containers will help maintain a dry environment, preventing the salt from absorbing moisture. Remember to label the containers with the contents.
- Step 3: Keep away from moisture: Store the containers in a cool, dry place away from any sources of moisture, such as windows, faucets, or leaking pipes. Consider using a dehumidifier or moisture-absorbing products like silica gel packets to further minimize moisture in the storage area.
After cleaning the storage area and using airtight containers, the next crucial step is to keep the rock salt away from moisture. Even though airtight containers provide a barrier against external moisture, it’s important to store them in a suitable environment to maintain their effectiveness.
Find a cool and dry place in your home to store the rock salt. Avoid areas with high humidity, such as basements or laundry rooms, as they can promote moisture absorption. Moisture can cause the rock salt to clump together and lose its effectiveness. Instead, choose a storage location away from sources of moisture, such as windows, faucets, or leaking pipes.
If the storage area tends to have higher humidity, consider using a dehumidifier to reduce moisture levels. A dehumidifier helps maintain a dry environment, preventing the rock salt from absorbing excess moisture and clumping together.
You can also use moisture-absorbing products like silica gel packets to further minimize moisture in the storage area. Place them near the containers or in the storage space to absorb any excess moisture that might be present.
By following these steps and keeping the rock salt away from moisture, you can ensure that it remains dry and ready for use whenever you need it. Now that we’ve covered the steps for indoor storage, let’s move on to exploring the steps for outdoor rock salt storage.
For Outdoor Storage:
When it comes to storing rock salt outdoors, it’s crucial to protect it from the elements and ensure its longevity. Follow these steps to properly store rock salt outdoors:
- Step 1: Find a proper storage area: Choose a location that is sheltered from direct sunlight, rain, and snow. Look for a covered area such as a garage, shed, or storage bin to protect the rock salt from the elements.
- Step 2: Use waterproof containers: Opt for waterproof containers or bins to store the rock salt. These containers should be made of sturdy materials such as plastic or polyethylene, which can withstand outdoor conditions without deteriorating or allowing water to seep in.
- Step 3: Protect from extreme temperatures: Extreme temperatures can affect the integrity and effectiveness of rock salt. Shield the containers from direct exposure to high heat or freezing temperatures. Keep them away from radiators, vents, or areas where they may be subject to extreme temperature fluctuations.
When storing rock salt outdoors, finding a suitable storage area is essential. Select a location that provides protection from the elements, including direct sunlight, rain, and snow. Ideally, a covered area such as a garage, shed, or storage bin will help shield the rock salt from moisture and extreme temperatures.
Next, choose waterproof containers or bins to store the rock salt. These containers should be able to withstand outdoor conditions without degrading or allowing water to seep inside, which can cause clumping and decrease effectiveness. Plastic or polyethylene containers are commonly used for outdoor rock salt storage due to their durability and waterproof properties.
It’s also important to protect the rock salt from extreme temperatures. High heat can cause the salt to melt or fuse together, while freezing temperatures may affect its ability to effectively melt ice. Avoid placing the rock salt containers in direct sunlight or near sources of heat, such as radiators or vents. Additionally, keep them away from areas that experience rapid temperature changes, as this can affect the salt’s quality and performance.
By following these steps for outdoor rock salt storage, you can ensure that your rock salt remains protected, dry, and ready to tackle icy conditions. Now, let’s conclude our guide with a recap of the important points.
For Outdoor Storage:
When it comes to storing rock salt outdoors, it’s crucial to protect it from the elements and ensure its longevity. Follow these steps to properly store rock salt outdoors:
- Step 1: Find a proper storage area: Choose a location that is sheltered from direct sunlight, rain, and snow. Look for a covered area such as a garage, shed, or storage bin to protect the rock salt from the elements.
The first step in outdoor rock salt storage is to find a suitable storage area that provides adequate protection. The storage area should be sheltered from direct sunlight, rain, and snow to prevent moisture from reaching the rock salt.
An ideal location for outdoor rock salt storage is a covered area such as a garage, shed, or storage bin. These structures provide protection against the elements and help maintain a dry environment for the rock salt. If possible, choose a storage area with good ventilation to prevent condensation and humidity buildup.
When selecting a storage area, consider the accessibility as well. You’ll want a location that allows for easy retrieval of the rock salt when needed, especially during winter maintenance activities.
If you don’t have access to a covered storage area, consider using a waterproof tarp or heavy-duty plastic sheeting to cover the rock salt and protect it from rain and snow. Ensure that the covering is secured and properly sealed to prevent water from getting in.
By finding a proper storage area for outdoor rock salt storage, you can protect the salt from moisture and ensure its effectiveness when it’s needed for de-icing purposes. Now, let’s move on to the next step – using waterproof containers to store the rock salt.
For Outdoor Storage:
When it comes to storing rock salt outdoors, it’s crucial to protect it from the elements and ensure its longevity. Follow these steps to properly store rock salt outdoors:
- Step 1: Find a proper storage area: Choose a location that is sheltered from direct sunlight, rain, and snow. Look for a covered area such as a garage, shed, or storage bin to protect the rock salt from the elements.
- Step 2: Use waterproof containers: Opt for waterproof containers or bins to store the rock salt. These containers should be made of sturdy materials such as plastic or polyethylene, which can withstand outdoor conditions without deteriorating or allowing water to seep in.
After finding a proper storage area for outdoor rock salt storage, the next step is to select suitable containers that will keep the salt dry and protected from moisture. Waterproof containers are essential to prevent water from seeping in and causing the rock salt to clump together or dissolve.
When choosing containers for outdoor rock salt storage, opt for those made of sturdy and waterproof materials such as plastic or polyethylene. These materials can withstand outdoor conditions without deteriorating or allowing water to penetrate. Ensure that the lids of the containers fit tightly and provide a secure seal to prevent any moisture from entering.
Consider the size of the containers based on the quantity of rock salt you need to store. It’s important to have enough space in the containers to prevent clumping and allow for easy removal of the salt when needed. If you have a large amount of rock salt, you may need multiple containers to accommodate it all.
Label the containers with the contents to easily identify the rock salt and avoid confusion with other stored materials. Clear labeling ensures that you can quickly access the rock salt when required without having to open multiple containers.
By using waterproof containers for outdoor rock salt storage, you can protect the salt from moisture and ensure its long-term effectiveness. Now, let’s move on to the final step – protecting the rock salt from extreme temperatures.
For Outdoor Storage:
When it comes to storing rock salt outdoors, it’s crucial to protect it from the elements and ensure its longevity. Follow these steps to properly store rock salt outdoors:
- Step 1: Find a proper storage area: Choose a location that is sheltered from direct sunlight, rain, and snow. Look for a covered area such as a garage, shed, or storage bin to protect the rock salt from the elements.
- Step 2: Use waterproof containers: Opt for waterproof containers or bins to store the rock salt. These containers should be made of sturdy materials such as plastic or polyethylene, which can withstand outdoor conditions without deteriorating or allowing water to seep in.
- Step 3: Protect from extreme temperatures: Shield the containers from direct exposure to high heat or freezing temperatures. Keep them away from radiators, vents, or areas where they may be subject to extreme temperature fluctuations.
The final step in outdoor rock salt storage is to protect the salt from extreme temperatures. Extreme heat and freezing temperatures can affect the quality and effectiveness of the rock salt.
Ensure that the containers are shielded from direct exposure to high heat, such as from the sun or nearby heat sources. Prolonged exposure to heat can cause the salt to melt or clump together, rendering it less effective for its intended purposes. Avoid placing the containers near radiators, vents, or other sources of heat that can cause temperature fluctuations.
Additionally, protect the containers from freezing temperatures. While rock salt is used for de-icing purposes, prolonged exposure to extreme cold can affect its performance. Avoid placing the containers in areas where they are directly exposed to freezing temperatures or rapid temperature fluctuations.
If necessary, you can insulate the containers by surrounding them with insulating materials such as styrofoam or blankets. This can provide an extra layer of protection against extreme temperatures and help maintain a more stable environment for the rock salt.
By protecting the rock salt containers from extreme temperatures, you can ensure that the salt remains in optimal condition for its intended uses. Now that you’ve completed the steps for outdoor rock salt storage, you’re ready to keep your rock salt safe and effective for when it’s needed.
Conclusion
Properly storing rock salt is essential to maintain its quality, effectiveness, and longevity. Whether you’re storing it indoors or outdoors, following the correct storage steps can help ensure that your rock salt remains dry, free-flowing, and ready for use whenever needed.
For indoor storage, start by cleaning the storage area to create a clean and dry environment. Use airtight containers made of plastic, polyethylene, or stainless steel to prevent moisture absorption. Keep the containers away from moisture sources and consider using moisture-absorbing products like silica gel packets.
For outdoor storage, find a proper storage area that is sheltered from direct sunlight, rain, and snow. Use waterproof containers made of sturdy materials to keep the rock salt protected from moisture. Shield the containers from extreme temperatures by keeping them away from heat sources and insulating them if necessary.
By following these storage guidelines, you can prolong the shelf life, maintain the effectiveness, save money, ensure safety, and minimize the environmental impact of your rock salt. Proper storage not only helps you maximize its use but also avoids unnecessary waste and potential accidents.
Remember to regularly check the stored rock salt for any signs of moisture, clumping, or degradation. If any issues are detected, take the necessary steps to address them promptly to ensure the quality of the salt.
Whether you’re using rock salt for de-icing your driveway or preserving food, proper storage is key to harnessing its benefits. By taking the time to clean the storage area, use suitable containers, and protect the salt from moisture and extreme temperatures, you set yourself up for success in utilizing rock salt effectively.
Now that you’re equipped with the knowledge of how to store rock salt properly, go ahead and implement these storage practices to keep your rock salt in optimal condition for its intended uses.
Frequently Asked Questions about How To Store Rock Salt
Was this page helpful?
At Storables.com, we guarantee accurate and reliable information. Our content, validated by Expert Board Contributors, is crafted following stringent Editorial Policies. We're committed to providing you with well-researched, expert-backed insights for all your informational needs.


0 thoughts on “How To Store Rock Salt”