Articles
How To Store Plant Seeds
Modified: September 1, 2024
Learn how to properly store plant seeds in this informative collection of articles. Discover the best practices to ensure the longevity and viability of your seeds.
(Many of the links in this article redirect to a specific reviewed product. Your purchase of these products through affiliate links helps to generate commission for Storables.com, at no extra cost. Learn more)
Introduction
When it comes to gardening, one of the most rewarding aspects is the ability to harvest and store plant seeds. This allows gardeners to continue growing their favorite plants year after year, and even share seeds with others. However, proper seed storage is essential to ensure the longevity and viability of the seeds.
Choosing the right containers, harvesting and preparing the seeds, cleaning and drying them, and organizing and labeling them are all crucial steps in the seed storage process. Additionally, selecting a suitable storage location and utilizing different storage methods can further enhance the longevity of the seeds.
In this article, we will explore the various aspects of storing plant seeds effectively. Whether you are a seasoned gardener or just starting out, these tips will help you preserve the quality of your seeds and ensure successful future germination.
Key Takeaways:
- Preserve the longevity and viability of your plant seeds by choosing the right containers, harvesting and preparing seeds properly, and utilizing different storage methods. Proper organization and monitoring of seed viability are key to successful future germination.
- Ensure the longevity and successful germination of your plant seeds by following proper storage techniques, maintaining optimal storage conditions, and regularly monitoring seed viability. With the right knowledge and practices, you can enjoy a bountiful garden for years to come.
Read more: How To Germinate A Plant
Choosing the Right Containers
When it comes to storing plant seeds, choosing the right containers is essential to maintain the seeds’ quality and viability. The containers should be durable, airtight, and light-blocking to protect the seeds from moisture, light, and air exposure.
There are various options available for seed storage containers, and each has its advantages and considerations. Here are a few popular choices:
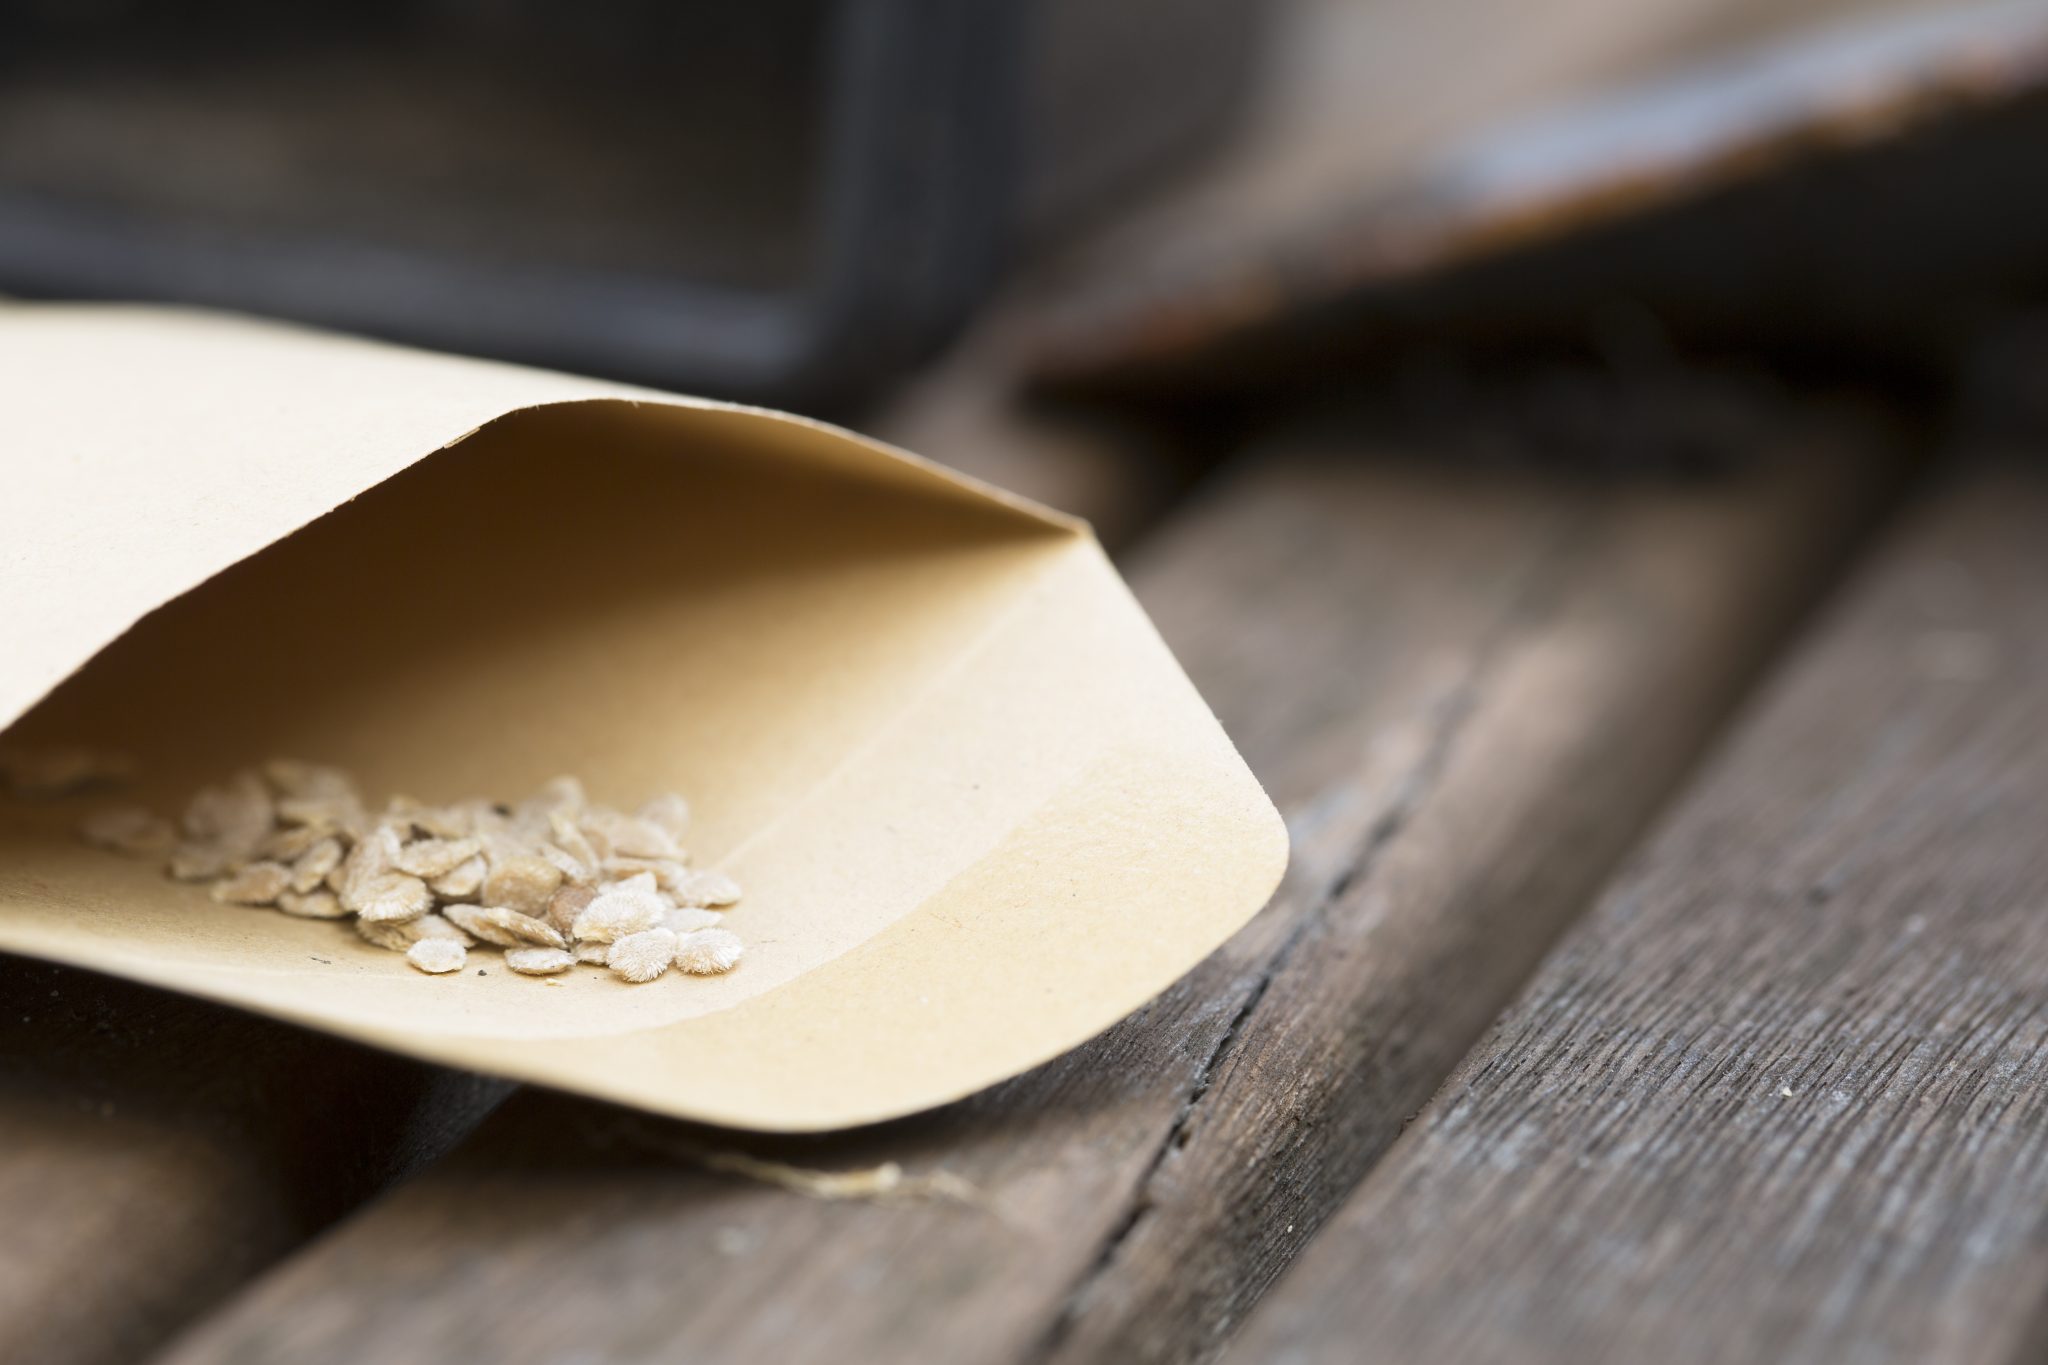
- Envelopes or Paper Bags: Envelopes and paper bags are a cost-effective and easily accessible option for storing seeds. They allow for proper air circulation, preventing seed damage from excess moisture. Make sure to choose envelopes made of acid-free, lignin-free paper to ensure longevity and minimize degradation.
- Glass Jars or Plastic Containers: Glass jars and plastic containers are popular choices for seed storage due to their ability to provide airtight protection. Glass jars with rubber gaskets and metal clamps can create an excellent seal, while plastic containers with tight-fitting lids can also offer adequate protection against moisture and air. Choose containers made of food-grade materials to avoid any potential contamination.
It’s important to consider the size of the containers as well. Opt for containers that are appropriate for the quantity of seeds you plan to store. Using larger containers for a small amount of seeds can lead to increased exposure to air and moisture, reducing seed viability.
Additionally, labeling the containers is crucial to keep track of the seeds. Use a waterproof marker or labels to indicate the plant name, variety, and the date of storage. This will help prevent confusion and ensure you can easily locate the desired seeds when needed.
Remember, the key is to choose containers that are sturdy, airtight, and able to protect the seeds from moisture, light, and air exposure. By selecting the right containers, you can enhance the longevity and viability of your stored plant seeds.
Harvesting and Preparing Seeds
Harvesting and preparing seeds properly is crucial for ensuring the quality and viability of the seeds you plan to store. Here are some essential steps to follow:
1. Timing: Harvest seeds when they are fully mature. Each plant species has different indicators of maturity, such as the color change of the fruit or the drying of the seed heads. Consult gardening resources or seed packets for specific guidance.
2. Selecting Healthy Seeds: Choose seeds from healthy, disease-free, and high-performing plants. Avoid using seeds from plants that showed signs of disease, pest infestation, or poor growth.
3. Extraction: Extract the seeds carefully to avoid damage. For fruiting plants, such as tomatoes or peppers, scoop out the seeds and pulp. For flowers or herbs, wait until the seed heads have dried out, then gently tap or shake them to release the seeds.
4. Cleaning: Rinse the extracted seeds under running water to remove any debris, pulp, or remaining parts of the plant. Use a sieve or fine mesh strainer to ensure proper cleaning without losing any seeds.
5. Drying: Properly drying the seeds is crucial to prevent mold or rot during storage. Spread the cleaned seeds in a single layer on a paper towel, allowing them to air dry completely. Avoid using heat sources to speed up the drying process, as high temperatures can damage the seeds.
6. Fermentation (If applicable): Some seeds, like those from tomatoes or cucumbers, benefit from a fermentation process before drying. This involves allowing the seeds to ferment in water for a few days to remove any gel coating. After fermentation, rinse the seeds and dry them thoroughly.
7. Seed Treatment (Optional): Some gardeners choose to treat seeds with fungicides or insecticides to protect them from pests or diseases. However, if using treated seeds, be sure to follow the instructions carefully and consider organic or natural alternatives.
Remember, these steps may vary depending on the plant species, so it’s important to research specific guidelines for the seeds you are harvesting. By carefully harvesting and preparing the seeds, you will ensure their quality, viability, and successful storage for future use.
Cleaning and Drying Seeds
After harvesting the seeds, the next crucial step in the seed storage process is cleaning and drying them properly. Cleaning removes any debris, excess moisture, or remaining parts of the plant, while drying ensures the seeds are free from moisture to prevent mold or rot. Follow these steps to clean and dry your seeds effectively:
1. Rinse: Rinse the harvested seeds under running water to remove any pulp, residue, or dirt. Use a sieve or fine mesh strainer to ensure thorough cleaning without losing any seeds. Be gentle to avoid damaging the seeds.
2. Soak (If necessary): Some seeds may have a hard outer coat or be covered in a gel-like substance. In such cases, you can soak the seeds in water for a few hours or overnight to soften the coat or dissolve the gel. This can make cleaning easier and optimize seed germination.
3. Remove Debris: After rinsing, carefully pick out any remaining debris or non-seed material from the mixture. This can include bits of plant matter, dried petals, or other particles. Using tweezers or your fingers, separate the seeds from the debris and discard any damaged or unhealthy seeds.
4. Cleaning Solutions (Optional): Depending on the seeds’ condition, you may choose to sanitize them by treating them with a mild cleaning solution. A diluted hydrogen peroxide solution or a weak bleach solution (one part bleach to nine parts water) can be used. This helps eliminate any potential pathogens that may be present on the seeds’ surface. Rinse the seeds thoroughly after treatment to remove any residue.
5. Drying: After cleaning, transfer the seeds onto a paper towel or a dry, clean cloth. Spread them out in a single layer, allowing air to circulate around each seed. Place them in a well-ventilated area away from direct sunlight and excessive humidity. Ensure the seeds are completely dry before storing to prevent mold or fungal growth.
6. Seed Testing: Before storing the seeds, it’s advisable to perform a germination test to check their viability. Place a small sample of the dried seeds on a damp paper towel or a moistened piece of cotton wool. Seal it in a Ziploc bag or container and wait for a few days. If a high percentage of seeds germinate, it indicates good seed viability.
By effectively cleaning and thoroughly drying your seeds, you’ll ensure their cleanliness and prevent any potential storage issues. Remember to handle the seeds with care and store them in suitable containers to maximize their longevity and successful germination in the future.
Labeling and Organizing Seeds
Proper labeling and organization of seeds are essential for easy identification and efficient seed storage management. When you have a collection of different seeds, having a systematic approach will save you time and prevent confusion. Here are some tips for effectively labeling and organizing your seeds:
1. Labeling Containers: It is crucial to label each seed storage container with relevant information. Use waterproof markers or adhesive labels that won’t fade or smudge over time. Include the plant’s name, variety, and the date of storage. This information will help you identify the seeds accurately and determine their viability when it’s time to plant or exchange them.
2. Sorting by Plant Type: Grouping seeds by plant type makes it easier to locate the desired seeds. You can create separate containers or sections for vegetables, herbs, flowers, and other categorizations based on your preferences. This way, you can quickly locate specific seeds without sifting through the entire collection.
3. Alphabetical Order: If you have an extensive seed collection, organizing seeds alphabetically can be helpful. Arrange the containers or sections in alphabetical order based on the plant names. This method allows for quick reference and easy retrieval of specific seeds.
4. Categorizing by Season: Another effective method is to organize seeds based on the planting season. Separate the seeds into containers or sections labeled “Spring,” “Summer,” “Fall,” and “Winter.” This way, you’ll have an organized collection that aligns with the appropriate planting times.
5. Utilizing Seed Envelopes or Ziplock Bags: To keep seeds separate and prevent mixing, place them in individual seed envelopes or small, resealable Ziplock bags labeled with the necessary information. This method helps maintain the integrity of the seeds and makes them easier to locate and access when needed.
6. Digital Seed Inventory: If you have a large seed collection, consider creating a digital seed inventory. This can be a spreadsheet or online tool where you record the details of each seed variety, including planting instructions, seed count, and any additional notes. This digital reference will complement your physical organization system and provide easy access to information wherever you are.
Remember, the key to effective seed organization is consistency and attention to detail. By labeling your containers accurately and using a system that suits your needs, you’ll be able to maintain an organized seed collection and make the most of your planting endeavors.
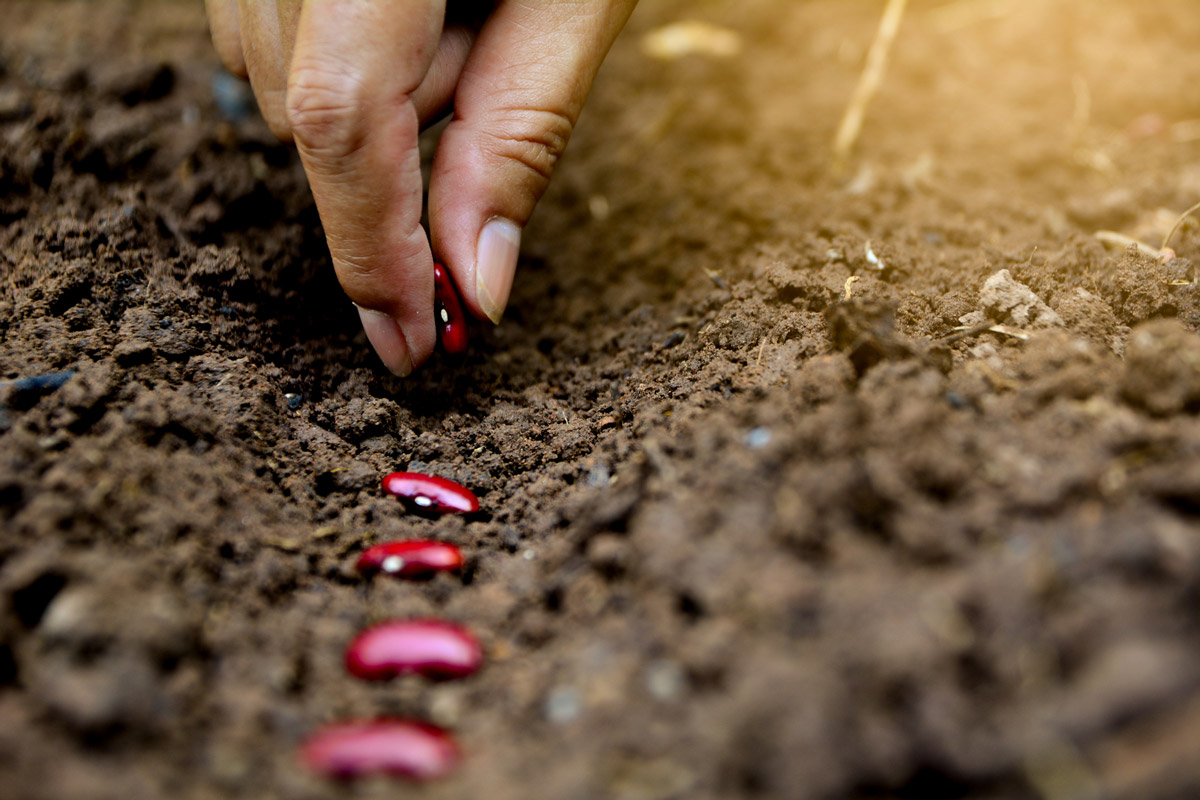
Read more: How To Plant Seed
Selecting a Suitable Storage Location
Choosing the right storage location for your seeds is crucial in preserving their quality and viability. The ideal storage location should provide the necessary conditions to protect the seeds from heat, humidity, light, and pests. Here are some factors to consider when selecting a suitable storage location for your seeds:
1. Temperature: Seeds should be stored in a cool and consistent temperature environment. Extreme temperatures can damage the seeds and reduce their viability. Aim for a storage location with a temperature range of 32-50°F (0-10°C). Basements, cellars, or cool closets are often suitable options.
2. Humidity: High humidity can cause seeds to absorb moisture, leading to mold or premature germination. Avoid storing seeds in areas with high humidity, such as bathrooms or unventilated spaces. Aim for a relative humidity level of 30-40% to maintain seed integrity.
3. Light: Exposure to light can impact seed viability. Store seeds in a dark location to prevent light degradation. Use opaque containers or place seeds in a sealed storage box to block out any potential light exposure.
4. Pest Control: Protect seeds from pests such as insects or rodents. Ensure that the storage area is free from any potential infestations. Consider using natural pest deterrents like diatomaceous earth or cedar chips to ward off pests from accessing your stored seeds.
5. Consistency: Stability is crucial for seed storage. Choose a location with a stable environment and minimal temperature fluctuations. Drastic temperature changes can impact seed viability. Avoid areas prone to extreme temperature variations, such as garages or attics.
6. Security: Ensure that the storage location is secure and inaccessible to children or pets. Seeds are small and can pose a choking hazard if accidentally ingested. Keep the seeds in a locked cabinet or in an area out of reach.
7. Accessibility: While it’s important to store seeds in an optimal environment, make sure the storage location is easily accessible to you. You’ll need to check the seeds periodically for viability and be able to retrieve them when it’s time to sow. Prioritize convenience without compromising on proper storage conditions.
By considering these factors, you can select a suitable storage location that provides the ideal conditions for preserving the integrity and viability of your seeds. Remember, proper storage is key to ensuring successful germination and a bountiful garden for seasons to come.
Different Storage Methods
When it comes to storing plant seeds, there are various methods available, each suited for different types of seeds and varying storage durations. Here are some common storage methods you can consider:
1. Using Envelopes or Paper Bags: One of the simplest and most affordable methods is storing seeds in envelopes or paper bags. Place the seeds in labeled envelopes or bags, ensuring they are completely dry. Seal them and store in a cool, dark, and dry location. This method is suitable for short-term storage of seeds with low moisture content.
2. Utilizing Glass Jars or Plastic Containers: Glass jars or plastic containers with airtight lids are effective for storing seeds with higher moisture content or for longer durations. Make sure the seeds are completely dry before placing them in the containers to prevent moisture buildup. Seal the containers tightly and store in a cool, dark, and dry location.
3. Freezing or Refrigerating Seeds: Freezing or refrigerating seeds can significantly extend their viability. Place the seeds in airtight containers or freezer bags, ensuring they are dry and well-labeled. Before using frozen seeds, allow them to reach room temperature to prevent condensation. This method is particularly useful for preserving seeds of vegetables, flowers, and herbs with short shelf lives.
4. Storing Seeds in a Seed Vault: Seed vaults are specialized containers designed to provide optimal storage conditions for seeds. These containers are typically made of durable materials like metal or plastic and are airtight, moisture-proof, and light-blocking. Seed vaults often come with humidity and temperature control features. They offer long-term storage solutions and are popular among serious seed savers.
5. Monitoring Seed Viability: Whichever storage method you choose, periodically check the viability of stored seeds. Conduct germination tests by planting a small sample of seeds under ideal conditions. If a high percentage of seeds germinate, they are still viable. Replace seeds that have low germination rates to maintain a reliable seed collection.
Remember to label all stored seeds with relevant information such as plant name, variety, and storage date. Store them in a location with stable environmental conditions, away from direct sunlight and excessive heat or moisture.
Ultimately, the choice of storage method depends on the specific seeds being stored and the desired storage duration. Experimentation and experience will guide you to find the most suitable method that ensures the longevity and viability of your valuable seed collection.
Store plant seeds in a cool, dry place to maintain their viability. Use airtight containers or sealed bags to prevent moisture and pests from damaging the seeds. Label the containers with the seed type and date of collection for easy identification.
Using Envelopes or Paper Bags
One of the simplest and cost-effective methods for storing plant seeds is using envelopes or paper bags. This method provides a convenient way to store seeds while keeping them well-organized and protected. Here are some tips on how to effectively use envelopes or paper bags for seed storage:
1. Selecting the Right Envelopes or Paper Bags: Choose envelopes or paper bags made from acid-free, lignin-free paper to ensure longevity and prevent degradation of the stored seeds. Look for envelopes or bags that are sturdy and can protect the seeds from light, moisture, and air.
2. Labeling: Label each envelope or bag with the necessary information to easily identify the stored seeds. Use a waterproof marker or adhesive labels to indicate the plant name, variety, and the date of storage. Proper labeling will help prevent confusion and ensure accurate identification when you need to retrieve the seeds.
3. Properly Cleaning the Seeds: Before placing the seeds in the envelopes or paper bags, make sure they are clean and free from debris. Rinse the seeds under running water to remove any pulp, residue, or dirt. Allow them to dry completely before storing to prevent moisture-related issues.
4. Filling the Envelopes or Paper Bags: Fill each envelope or bag with the desired quantity of seeds. It’s best to store seeds of the same type and variety in each envelope or bag to maintain organization and prevent cross-contamination. Leave some space at the top to fold over and seal the envelope or bag.
5. Sealing the Envelopes or Paper Bags: Properly seal the envelopes or bags to protect the seeds from moisture, light, and air exposure. Fold the top portion of the envelope or bag and secure it with a staple, paper clip, or adhesive tape to create a tight seal. Ensure that the seal is secure and that no moisture or air can enter.
6. Storing in the Right Environment: Place the sealed envelopes or bags in a cool, dark, and dry location. Avoid areas with high humidity or temperature fluctuations, as these can affect seed viability. Basements, cupboards, or drawers are suitable options for storing envelopes or bags of seeds.
7. Monitoring Viability: Periodically check the viability of the stored seeds by conducting germination tests. This involves planting a small sample of seeds under ideal conditions to see how many successfully germinate. Replace seeds with low germination rates to maintain a reliable seed collection.
Using envelopes or paper bags for seed storage is a simple and effective method, especially for short-term storage or when you have a small quantity of seeds. It allows for easy organization and protects the seeds from external elements. With proper labeling, sealing, and storage, you can ensure the longevity and viability of your precious seed collection.
Utilizing Glass Jars or Plastic Containers
Utilizing glass jars or plastic containers is a popular and effective method for storing plant seeds. These containers offer airtight protection, preventing moisture, light, and air exposure that can damage and decrease the viability of the seeds. Here are some tips on how to effectively use glass jars or plastic containers for seed storage:
1. Choosing the Right Containers: Select glass jars or plastic containers with airtight lids or caps to ensure a proper seal. Glass jars with rubber gaskets and metal clamps can create a tight and secure seal, while plastic containers with tight-fitting lids are also suitable for seed storage. Make sure the containers are clean and in good condition before use.
2. Prep and Dry the Seeds: Before placing the seeds in the containers, ensure they are thoroughly cleaned and dried. Remove any debris, rinse if necessary, and spread them out to air dry completely. Moisture can lead to mold or rot, so it’s important to ensure the seeds are completely dry before storage.
3. Portioning the Seeds: Divide the seeds into separate portions based on the type, variety, or planting season. This will make it easier to retrieve and use the seeds when needed without exposing the entire collection to potential damage.
4. Labeling: Properly label each glass jar or plastic container with the necessary information. Use a waterproof marker or adhesive label to indicate the plant name, variety, and the date of storage. This ensures easy identification and eliminates confusion when accessing and using the seeds later on.
5. Filling and Sealing: Fill the containers with the appropriate amount of seeds, leaving some headspace at the top. This allows for expansion if necessary. Ensure the containers are tightly sealed to create an airtight environment. Check that the lids or caps are snug and secure to prevent moisture or air from entering.
6. Storage Environment: Place the sealed glass jars or plastic containers in a cool, dark, and dry location. Avoid areas with excessive heat or moisture, as these can negatively impact seed viability. Basements, pantries, or closets are suitable storage spaces.
7. Periodic Checking: Regularly inspect the stored seeds for any signs of moisture, mold, or pests. If you notice any issues, replace or treat the affected seeds promptly to maintain the integrity of the seed collection.
8. Long-Term Storage: Glass jars or plastic containers are suitable for long-term seed storage as they provide excellent protection against external elements. Just ensure the containers are properly sealed and stored in a suitable environment.
Utilizing glass jars or plastic containers offers a reliable and convenient method for preserving the quality and viability of your plant seeds. With proper labeling, sealing, and storage, you can ensure your seed collection remains protected and ready for successful germination and gardening endeavors.
Read more: How To Plant Seeds Indoors
Freezing or Refrigerating Seeds
Freezing or refrigerating seeds is a beneficial method to extend their longevity and preserve their viability. Certain types of seeds, especially those with short shelf lives or that require stratification (a cold period to break seed dormancy), can greatly benefit from this storage method. Here are some important factors to consider when freezing or refrigerating seeds:
1. Seed Preparation: Before freezing or refrigerating seeds, ensure they are dry and clean. Remove any debris and ensure they are completely dry to prevent moisture-related issues during storage. Remember that moisture can damage seeds, so it’s crucial to dry them properly beforehand.
2. Airtight Containers: Place the seeds in airtight containers or freezer-safe bags. The containers should be sturdy, moisture-proof, and able to protect the seeds from freezer burn. Remove as much air as possible from the containers before sealing to minimize the risk of moisture condensation. Label each container with the seed name, variety, and storage date.
3. Proper Packaging: Divide the seeds into small portions based on your anticipated usage, as it’s best to avoid repeatedly exposing the seeds to temperature fluctuations. Use individual containers or separate sections within a larger container to keep the different seed varieties organized and easily accessible.
4. Ideal Temperature: When freezing seeds, aim for a temperature range of 0°F (-18°C) or lower. Most household freezers operate between -10°F to 0°F (-23°C to -18°C), which is adequate for most seeds. If using a refrigerator, set the temperature to approximately 32°F (0°C) as a consistent cool environment.
5. Thawing Seeds: When it’s time to use the frozen seeds, carefully thaw them at room temperature while still sealed. Avoid rapid temperature changes or direct exposure to heat, which can cause condensation and potentially harm the seeds. Allow the seeds to come to room temperature before opening the containers.
6. Seed Viability Testing: To ensure the effectiveness of frozen or refrigerated storage, perform germination tests on a small sample of the seeds. Sow the seeds in a controlled environment and observe the germination rate. If the seeds show good germination, it indicates that the storage method has successfully preserved their viability.
7. Tracking Storage Duration: Keep track of the storage duration for each batch of frozen or refrigerated seeds. Some seed types may have specific recommended storage durations, so it’s important to monitor and rotate your seed stock accordingly to maintain the highest viability possible.
Freezing or refrigerating seeds can significantly extend their storage life and preserve their viability when done correctly. By following these guidelines and practicing proper seed preparation and storage techniques, you can successfully use this method to store a wide variety of seeds for future use.
Storing Seeds in a Seed Vault
When it comes to long-term seed storage, utilizing a seed vault is a highly effective method. A seed vault is a specialized container designed to provide optimal conditions for seed preservation, ensuring the longevity and viability of stored seeds. Here’s what you need to know about storing seeds in a seed vault:
1. Purpose of a Seed Vault: The primary purpose of a seed vault is to protect seeds from deterioration due to light, moisture, temperature fluctuations, and pests. It provides a controlled and stable environment to extend the seed’s life and maintain their viability for many years.
2. Design and Construction: Seed vaults are typically made from durable materials such as metal or plastic. They are designed to be airtight, moisture-proof, light-blocking, and pest-resistant. Some seed vaults are equipped with additional features like humidity and temperature control. The construction ensures that the stored seeds are protected from external elements.
3. Seed Vault Location: Choose a suitable location for your seed vault, preferably in a cool, dry, and dark area. Basements, storage closets, or rooms with stable temperatures and low humidity are ideal. Avoid areas prone to temperature fluctuations, excessive moisture, or pests.
4. Proper Seed Preparation: Make sure the seeds are clean, dry, and free from debris before storing them in the seed vault. Seed cleaning and drying methods should be followed prior to placement in the vault to eliminate any potential issues that could arise during storage.
5. Organizing and Labeling: Maintain organization within the seed vault by categorizing and labeling the seeds. Use waterproof markers or labels to indicate the plant name, variety, and the date of storage on each container of seeds. This ensures easy identification and retrieval when needed.
6. Monitoring and Maintenance: Periodically check the seed vault to ensure it remains sealed and that the environmental conditions remain stable. Inspect the seeds for any signs of mold, pests, or moisture. Replace any damaged or compromised seeds promptly to maintain the integrity of your seed collection.
7. Seed Viability Testing: To determine the viability of the stored seeds, perform germination tests periodically. This involves planting a small sample of seeds in a controlled environment and observing the germination rate. If a high percentage of seeds germinate, it indicates that the seed vault is effectively preserving the seeds’ viability.
A seed vault provides an ideal solution for long-term seed storage, especially for valuable, rare, or heirloom seeds. By utilizing a seed vault, you can protect and preserve your seed collection, ensuring a reliable source for future planting and safeguarding biodiversity.
Monitoring Seed Viability
Monitoring the viability of stored seeds is essential to ensure their quality and determine their potential for successful germination. Over time, the viability of seeds can diminish, and it is important to regularly assess their ability to grow into healthy plants. Here are some key aspects to consider when monitoring seed viability:
1. Germination Tests: Conduct germination tests periodically to evaluate the percentage of seeds that successfully sprout. Choose a representative sample of seeds from each stored batch and plant them in a suitable growing medium under optimal conditions. Monitor the seeds closely and record the number of seeds that germinate. This will give you an idea of the viability of the seeds in that particular batch.
2. Germination Time: Take note of the time it takes for the tested seeds to germinate. Some seeds may require longer germination periods compared to others. If the seeds take significantly longer than expected or show no signs of germination, it may indicate low viability or improper storage conditions.
3. Seedling Vigor: Assess the health and vigor of the seedlings that emerge from the germinated seeds. Look for characteristics such as strong stem development, vibrant leaf color, and healthy root growth. Robust seedlings are more likely to thrive once planted, indicating good seed viability.
4. Seed Storage Duration: Keep track of how long each batch of seeds has been stored. Different seeds have varying shelf lives, and viability can diminish over time. Some seeds can remain viable for a few years, while others may have shorter storage durations. Generally, it is advisable to replace seeds that are more than a few years old to maintain a reliable seed collection.
5. Storage Conditions: Regularly check the storage conditions of your seeds. Ensure that the storage environment remains stable, with controlled temperature, humidity, and light exposure. Fluctuations in these factors can impact seed viability. Additionally, inspect the stored seeds for any signs of mold, pests, or moisture. Promptly remove any damaged or compromised seeds to prevent spoilage.
6. Local Conditions: Consider the conditions of your local climate when monitoring seed viability. If you live in an area with extreme temperatures or high humidity, seeds may have shorter storage lives. Understanding the local conditions can help you adapt your storage and planting practices accordingly.
7. Seed Viability Charts: Consult seed viability charts or guidance provided by reputable sources to gain insights into the expected storage life of various seeds. These charts can give you a rough estimation of how long certain seeds can remain viable under optimal storage conditions.
Regularly monitoring seed viability allows you to stay informed about the quality and potential germination rates of your stored seeds. This information enables you to make informed decisions about seed replacement and ensures that you are working with seeds that have the best chance of successful growth.
Tips for Long-Term Seed Storage
Long-term seed storage is essential for preserving the viability and quality of seeds over extended periods. Proper storage techniques can ensure that your seeds remain viable for years, allowing you to grow healthy plants whenever you choose to sow. Here are some valuable tips to consider for long-term seed storage:
1. Clean and Dry Seeds: Before storing seeds, ensure that they are clean and completely dry. Remove any debris or plant matter and allow the seeds to air dry thoroughly. Moisture can lead to mold and seed deterioration, so it’s crucial to ensure seeds are fully dry before storage.
2. Choose Suitable Containers: Select appropriate containers for seed storage. Airtight containers made of glass, metal, or high-quality plastic are preferable. Ensure the containers are clean, dry, and able to block out light and air. This helps maintain optimal storage conditions for the seeds.
3. Control Temperature: Store seeds in a cool and consistent temperature environment. Extreme temperatures can reduce seed viability. Aim for a storage temperature of 32-50°F (0-10°C) to prolong seed life. Avoid fluctuations in temperature as much as possible.
4. Manage Humidity: Keep seeds in a low-humidity environment. High humidity can cause seeds to absorb moisture and lead to mold or premature germination. Aim for a relative humidity of 30-40% to maintain seed integrity. Include a desiccant, such as silica gel packets, in the storage containers to absorb excess moisture.
5. Block Out Light: Protect seeds from exposure to light, as it can affect their viability. Use opaque containers or store seeds in a dark location to minimize light degradation. If using clear containers, keep them in a dark storage area or cover them with a light-blocking material.
6. Avoid Freezing and Thawing: While freezing seeds can extend their longevity, avoid subjecting them to repeated freeze-thaw cycles. Multiple temperature fluctuations can damage the seeds. If freezing seeds, do so in a controlled manner using airtight containers.
7. Protect from Pests: Keep seeds safe from pests like insects and rodents that can cause damage. Ensure the storage area is secure and free of any potential infestations. Consider using natural pest deterrents such as diatomaceous earth or cedar chips.
8. Regularly Monitor and Test Viability: Periodically check the seeds for signs of mold, pests, or moisture. Perform germination tests to assess seed viability. Replace seeds with low germination rates and keep track of storage duration to maintain a reliable seed collection.
9. Proper Labeling and Organization: Label seed containers accurately with the plant name, variety, and storage date. Keep seeds organized and categorized based on plant type, planting season, or any other system that suits your needs. This ensures easy identification and retrieval of seeds when needed.
10. Maintain Backup Copies: Consider storing duplicate or backup seeds in a separate location or with a trusted seed bank. This provides added security and safeguards your collection against unforeseen incidents like accidents or natural disasters.
By following these tips, you can maximize the longevity and viability of your seeds during long-term storage. Consistent attention to proper storage techniques will ensure that your seeds remain a valuable resource for future gardening endeavors.
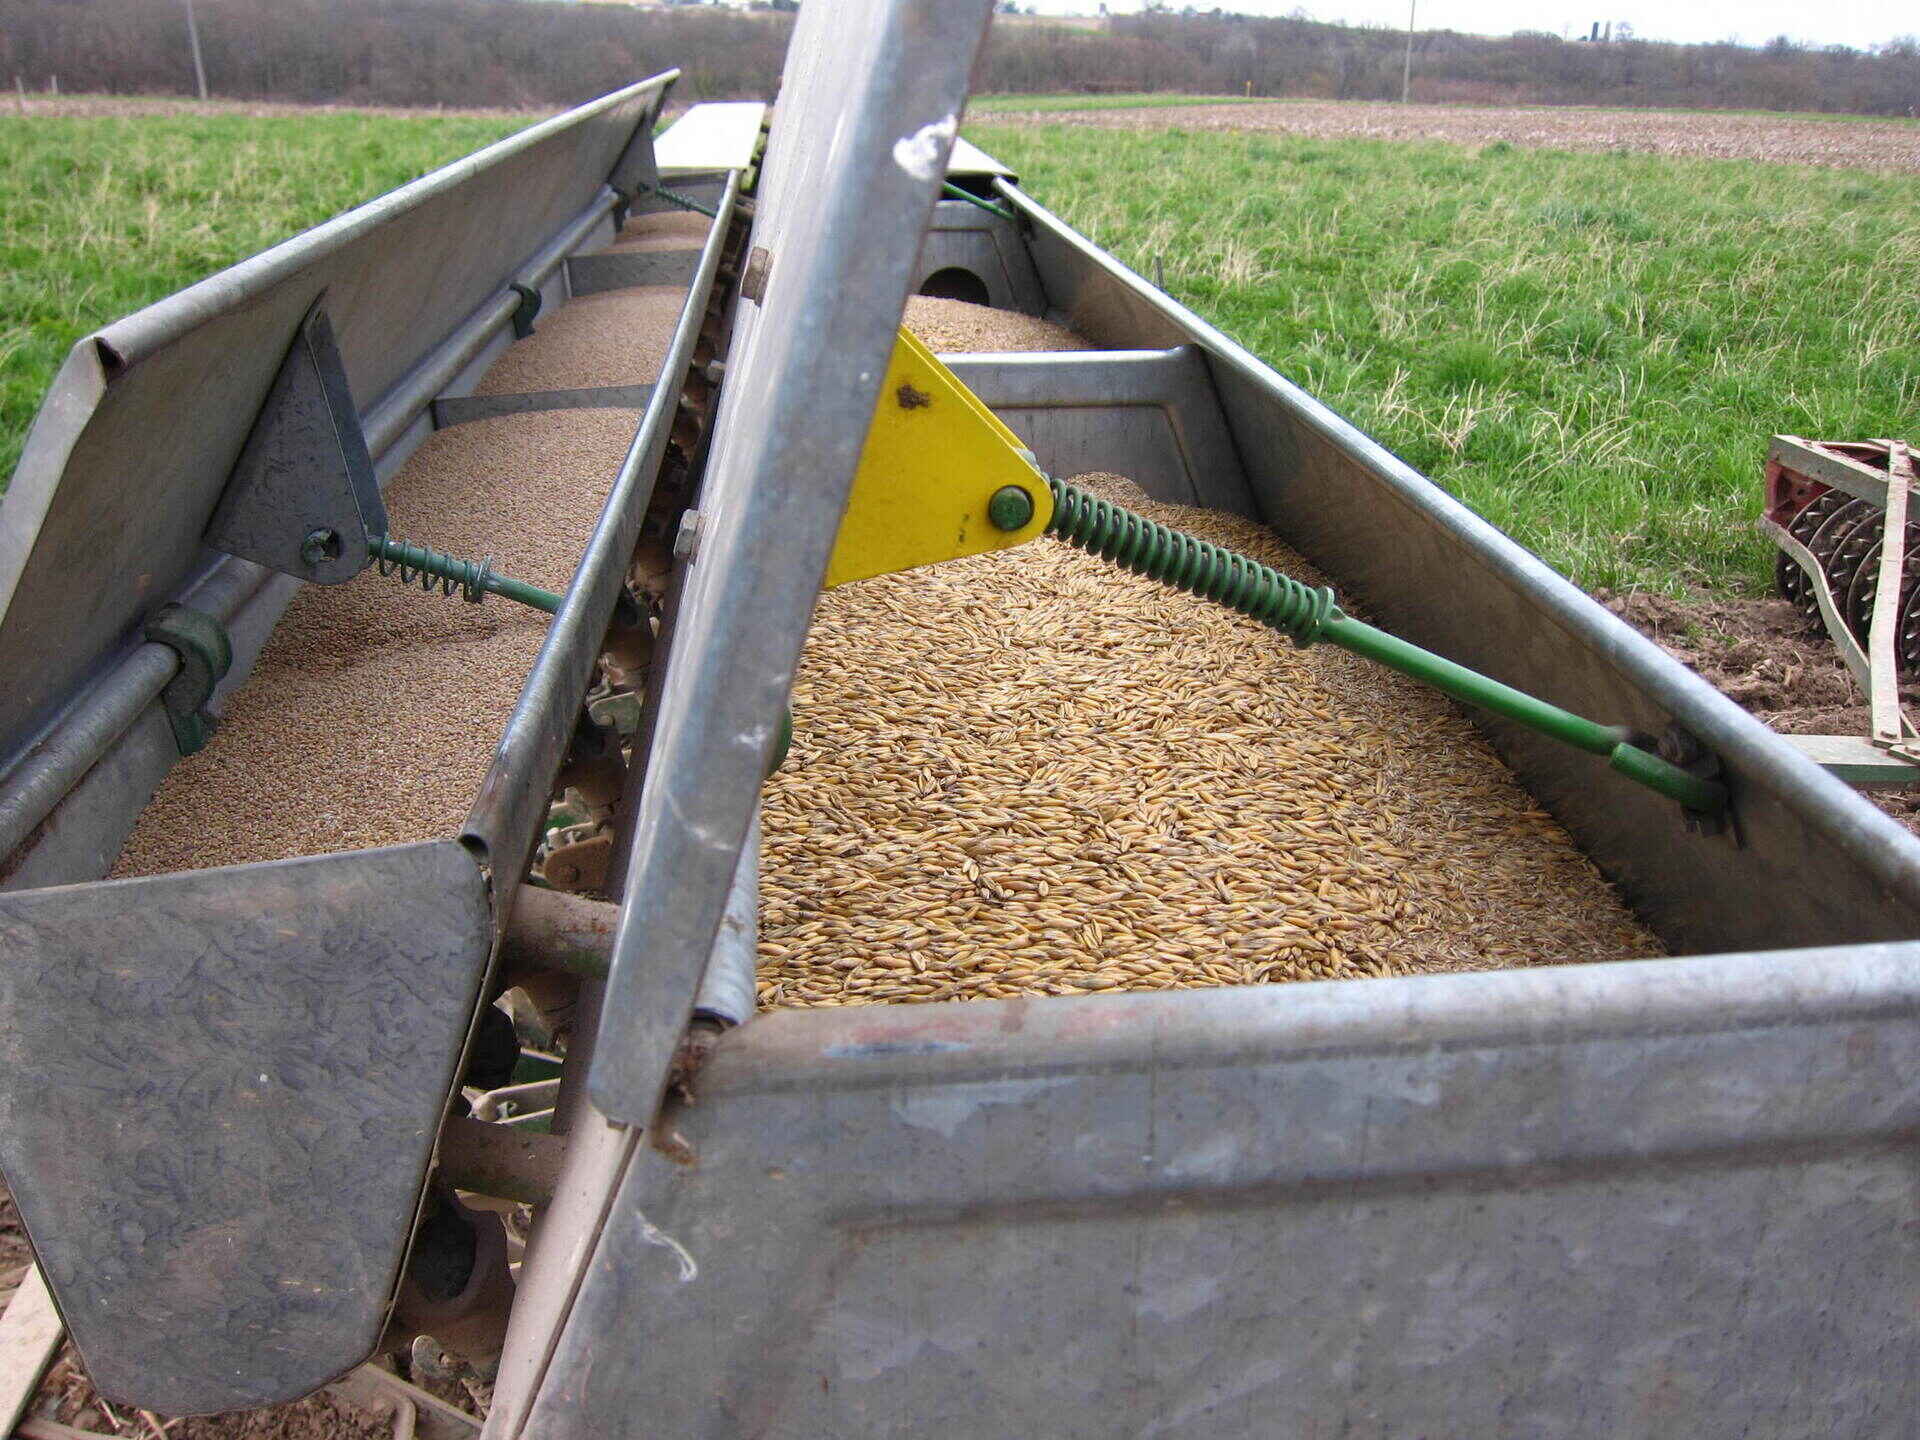
Read more: How To Plant Wheatgrass Seeds
Conclusion
Storing plant seeds properly is essential for preserving their viability and ensuring successful germination. By following the right techniques, you can extend the shelf life of your seeds, allowing you to grow healthy and vibrant plants for years to come.
Choosing the appropriate containers, such as envelopes, paper bags, glass jars, or plastic containers, is a crucial step in seed storage. These containers should be durable, airtight, and light-blocking to protect the seeds from moisture, light, and air exposure.
Harvesting and preparing seeds correctly is equally important. Harvest seeds at their peak maturity, select healthy seeds from disease-free plants, and clean and dry them thoroughly before storage. Properly labeling and organizing seeds will help you locate and identify them with ease in the future.
Depending on the type of seeds and storage duration, different storage methods can be employed. Using envelopes or paper bags is a simple and cost-effective approach, while glass jars or plastic containers provide a more secure and airtight solution. Freezing or refrigerating seeds can significantly extend their viability, and storing seeds in a specialized seed vault ensures optimal conditions for long-term storage.
Regularly checking seed viability through germination tests is essential in maintaining a reliable seed collection. Monitoring storage conditions, moisture levels, and preventing pest infestations are crucial to seed preservation. Proper labeling, organization, and record-keeping contribute to efficient seed management.
In conclusion, with the right knowledge and techniques, you can store your plant seeds effectively, ensuring they remain viable and ready for successful germination when you’re ready to sow. By implementing these practices and maintaining optimal storage conditions, you can enjoy the rewards of gardening with your cherished seed collection year after year.
Frequently Asked Questions about How To Store Plant Seeds
Was this page helpful?
At Storables.com, we guarantee accurate and reliable information. Our content, validated by Expert Board Contributors, is crafted following stringent Editorial Policies. We're committed to providing you with well-researched, expert-backed insights for all your informational needs.


0 thoughts on “How To Store Plant Seeds”