Home>Garden Essentials>How To Save Seeds For Planting Next Season
Garden Essentials
How To Save Seeds For Planting Next Season
Modified: September 1, 2024
Learn how to save garden seeds for the next planting season with our step-by-step guide. Preserve your favorite plants and ensure a bountiful garden year after year.
(Many of the links in this article redirect to a specific reviewed product. Your purchase of these products through affiliate links helps to generate commission for Storables.com, at no extra cost. Learn more)
Introduction
Welcome to the fascinating world of seed saving! Whether you are an experienced gardener or just starting out, learning how to save seeds for planting next season is a valuable skill that can not only save you money but also help preserve heirloom varieties and promote biodiversity in your garden.
Seeds are the building blocks of life, containing all the genetic material needed to grow a new plant. By carefully collecting and preserving seeds from the plants you’ve grown, you can ensure a continuous cycle of life, allowing you to grow new generations of your favorite plants year after year.
In addition to the financial benefits and the satisfaction of being self-sufficient, saving seeds also gives you the opportunity to select and develop plants that are better adapted to your local climate and soil conditions. Over time, this can lead to stronger, more resilient plants that are better suited to thrive in your specific garden environment.
Before you embark on your seed saving journey, it’s important to understand the basics of plant genetics. Plants have both male and female reproductive parts, and the process of saving seeds involves ensuring that the pollen from one plant fertilizes the flowers of another plant of the same species. This process, known as cross-pollination, can result in new and unique genetic combinations, leading to increased diversity in your garden.
It’s also important to note that not all plants are suitable for seed saving. Some plants, such as hybrids, may not produce offspring that are true to type. In these cases, it’s best to purchase new seeds each year or rely on trusted seed suppliers.
In this article, we will guide you through the process of saving seeds, from choosing the right plants to harvesting, cleaning, and storing them properly. We will also discuss how to test seed viability and troubleshoot common issues that may arise along the way. So grab your gardening gloves and let’s dive into the world of seed saving!
Key Takeaways:
- Seed saving is a valuable skill that saves money, promotes biodiversity, and empowers gardeners to control their garden’s future. It’s a continuous learning process that fosters a deeper connection with nature.
- Proper seed storage, labeling, and organization are crucial for maintaining seed viability and ensuring easy access for future planting. Regular testing and troubleshooting help overcome challenges and improve seed-saving success.
Read more: How To Save Tomato Seeds For Next Season
Why Save Seeds?
There are several compelling reasons to save seeds from your garden. Let’s explore some of the key benefits:
- Cost savings: Saving seeds allows you to bypass the need to purchase new seeds each year. This can significantly reduce your gardening expenses, especially if you have a large garden or grow a wide variety of plants.
- Preserving heirloom varieties: Seed saving is a way to preserve and promote heirloom varieties, which are traditional open-pollinated plants that have been handed down through generations. These varieties often have unique flavors, colors, and traits that make them cherished by gardeners and chefs alike.
- Promoting biodiversity: By saving seeds, you contribute to the preservation of plant diversity. In a world where commercial agriculture relies heavily on a narrow range of crops, saving seeds helps to maintain a broader gene pool and protect against the loss of valuable plant varieties.
- Environmental sustainability: Saving seeds aligns with sustainable gardening practices. By reducing reliance on commercial seed sources and promoting locally adapted plants, you minimize the carbon footprint associated with seed production and transportation.
- Adapting to local conditions: When you save seeds from plants that have performed well in your garden, you are essentially selecting for traits that are better suited to your specific climate, soil, and growing conditions. Over time, this process can help develop resilient plant varieties that thrive in your garden environment.
- Education and empowerment: Seed saving is an educational and empowering experience. It deepens your understanding of plant life cycles, genetics, and the interconnectedness of plants and their environment. It also gives you a sense of agency and self-sufficiency as you take control of the seed production process.
While there are numerous benefits to saving seeds, it’s important to note that seed saving requires time, effort, and knowledge. Not all plants are suitable for seed saving, and certain precautions must be taken to ensure genetic purity and prevent cross-pollination between different plant varieties. However, with a little practice and attention to detail, anyone can learn the art of seed saving and enjoy its many rewards.
In the next sections, we will delve into the process of selecting the right plants for seed saving, the optimal time to collect seeds, and the essential techniques for harvesting, cleaning, and storing seeds. Let’s dive in!
Choosing the Right Plants
When it comes to seed saving, not all plants are created equal. Some plants are easier to save seeds from, while others require more advanced techniques. Here are some factors to consider when choosing the right plants for seed saving:
- Open-pollinated or heirloom varieties: Start by selecting plants that are open-pollinated or heirloom varieties. These plants are more likely to produce offspring that closely resemble the parent plant, ensuring that your saved seeds will be true to type. Avoid hybrid plants, as their seeds may not produce consistent or desirable results.
- Isolation distance: Certain plants, such as lettuce, spinach, and beans, are self-pollinating. This means that they have mechanisms to prevent cross-pollination, making them easier to save seeds from. On the other hand, plants like corn, cucumbers, and squash are wind or insect pollinated, and they require specific precautions, such as isolation distances or hand pollination, to prevent cross-pollination with other varieties.
- Space requirements: Consider the space requirements of the plants you choose for seed saving. Some plants, like melons or corn, require a large area for proper pollination and seed production. Make sure you have enough space in your garden to accommodate the specific needs of each plant.
- Life cycle and seed maturity: Different plants have varying life cycles and seed maturity times. Annual plants complete their life cycle in one growing season and produce seeds within a few months. Biennial plants take two growing seasons to complete their life cycle and set seeds. Perennial plants may take several years to mature and set seeds. Choose plants that align with your gardening schedule and the time you have available for seed saving.
- Seed viability and germination rate: Some plants have seeds that remain viable for many years, while others have shorter viability periods. Research the specific viability and germination requirements of the plants you’re interested in saving seeds from. This will ensure that you can store and use the seeds effectively in the future.
- Local adaptation: Consider saving seeds from plants that have performed well in your local climate and soil conditions. These plants are more likely to be adapted to your specific environment, leading to better performance and resilience in future generations.
By taking these factors into account, you can choose plants that are well-suited for seed saving and maximize your chances of success. Remember, seed saving is a continuous learning process, and each season presents new opportunities to refine your techniques and expand your seed-saving repertoire.
Once you’ve selected the right plants for seed saving, the next step is to understand the optimal time to collect seeds. In the next section, we’ll explore the importance of timing and how to determine when seeds are ready for harvest.
When to Collect Seeds
Knowing when to collect seeds is crucial for successful seed saving. Seeds need to be fully mature and ripe before they are harvested. Here are some general guidelines to help you determine when your seeds are ready for collection:
- Observe the plant’s life cycle: Different plants have varying life cycles, and the timing for seed collection depends on whether the plant is an annual, biennial, or perennial. Annual plants, such as tomatoes or lettuce, complete their life cycle in one season and produce seeds within a few months. Biennial plants, like carrots or beets, require two growing seasons to set seeds, usually in the second year. Perennial plants, such as fruit trees or certain flowers, may take several years to mature and produce viable seeds.
- Monitor seed formation: As the plant matures, pay close attention to the development of seed pods, capsules, or fruit. Seeds are generally ready for harvest when the pod or fruit has changed color, dried out, or started to split open. For example, mature tomato seeds are found inside ripe, fully-colored tomatoes, while lettuce seeds are ready for collection when the flowers have turned into fluffy dandelion-like structures.
- Perform a seed maturity test: If you’re uncertain whether the seeds are fully mature, you can perform a seed maturity test. Select a few seeds and press them gently. If the seed feels hard and does not yield to pressure, it is likely mature and ready for harvest. If the seed is still soft and pliable, allow more time for it to mature on the plant.
- Consider climate and weather conditions: Weather conditions can impact seed maturation. If you’re dealing with a particularly rainy season or high humidity, it may take longer for seeds to dry out and become mature. Similarly, early frosts or extreme temperatures can affect seed development. Adjust your timing accordingly and take weather conditions into consideration.
- Research specific plant requirements: Each plant has unique seed collection requirements. Some plants, like beans or peas, are best harvested when the pods are dry and brittle. Others, like lettuce or herbs, are ideal for seed collection when the flowers have turned into seed heads. Research the specific requirements for the plants you’re saving seeds from to ensure optimal timing.
It’s important to note that seeds collected too early may not be viable, meaning they won’t germinate and grow into healthy plants. On the other hand, waiting too long to collect seeds can result in their dispersal or loss due to natural processes or environmental factors. Finding the right balance is key to successful seed saving.
Once you’ve determined that your seeds are ready for collection, it’s time to harvest them. In the next section, we’ll explore various techniques for harvesting seeds from different types of plants.
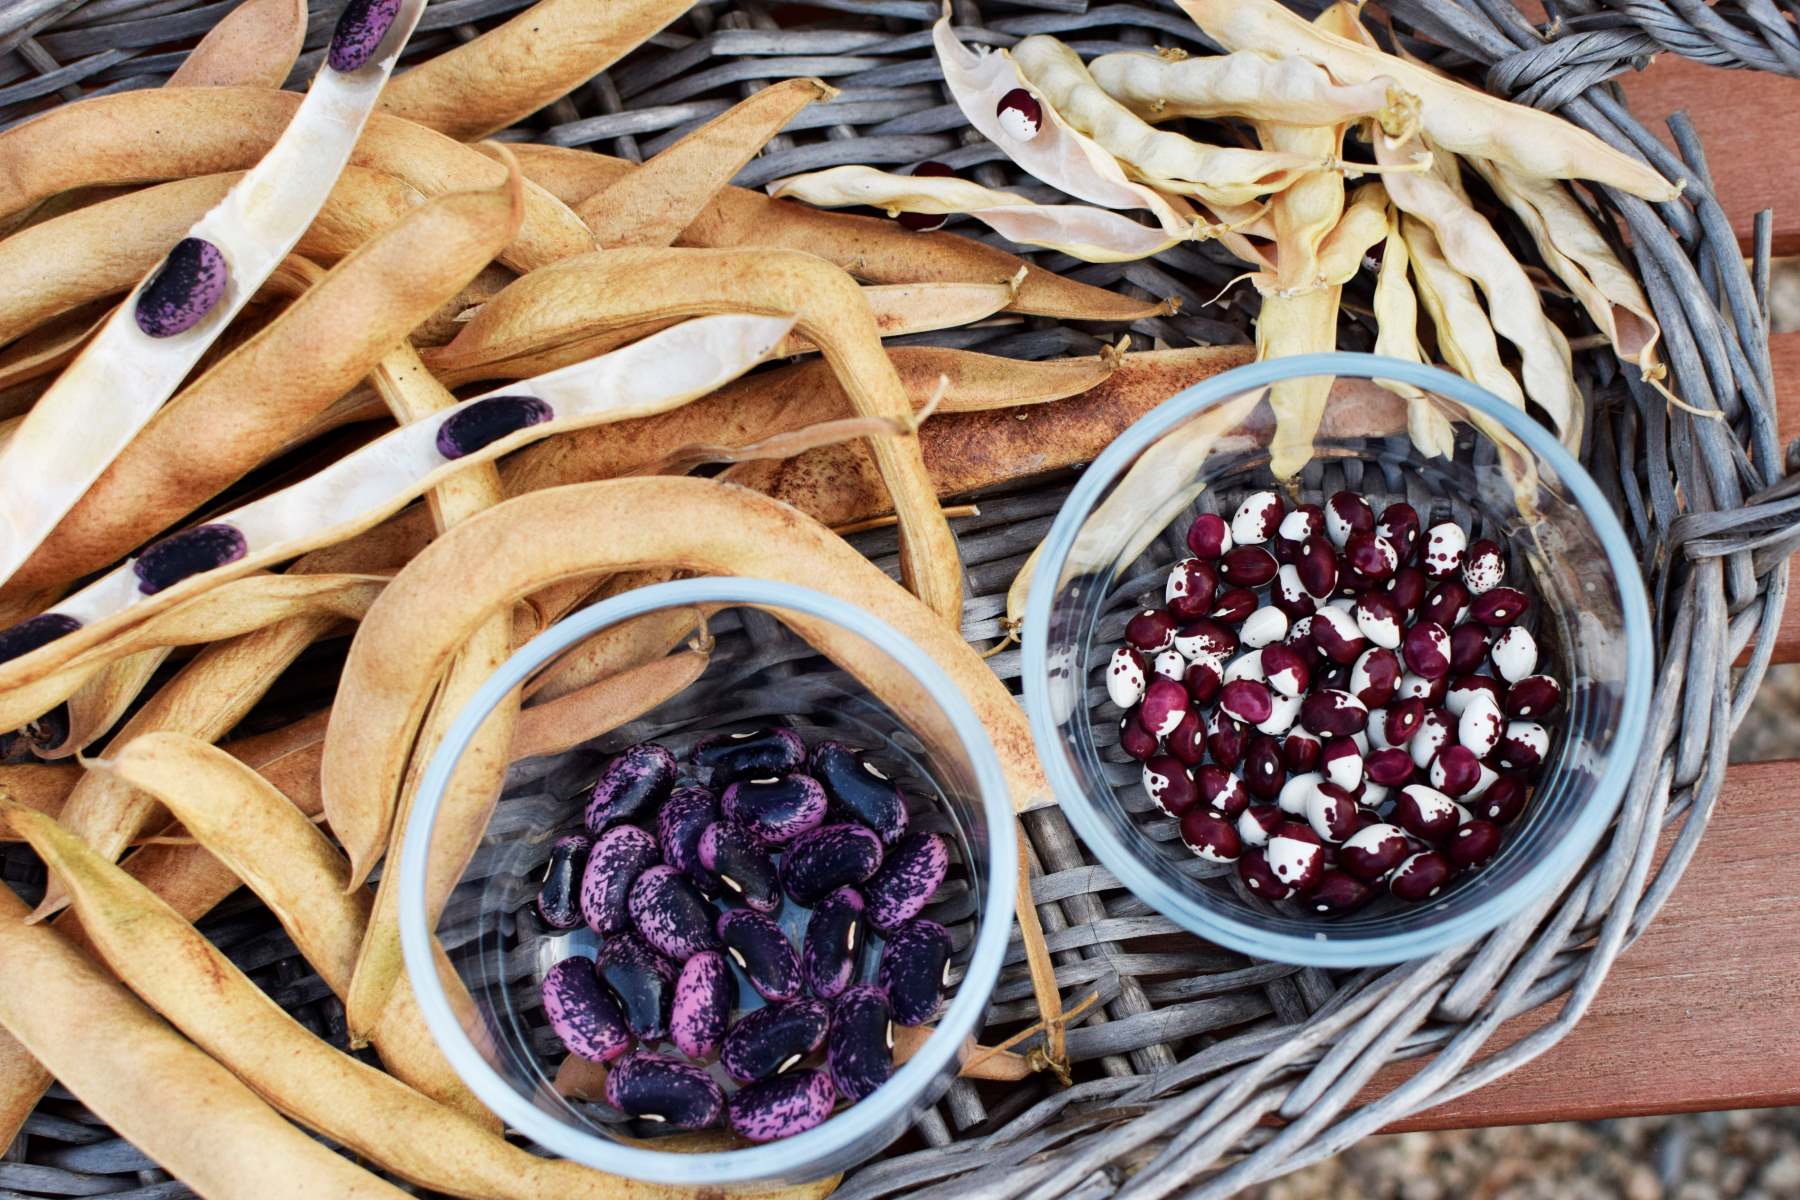
How to Harvest Seeds
Harvesting seeds properly is essential to ensure their viability and quality for future planting. The process varies depending on the type of plant and the part of the plant you’re collecting seeds from. Here are some common techniques for harvesting seeds:
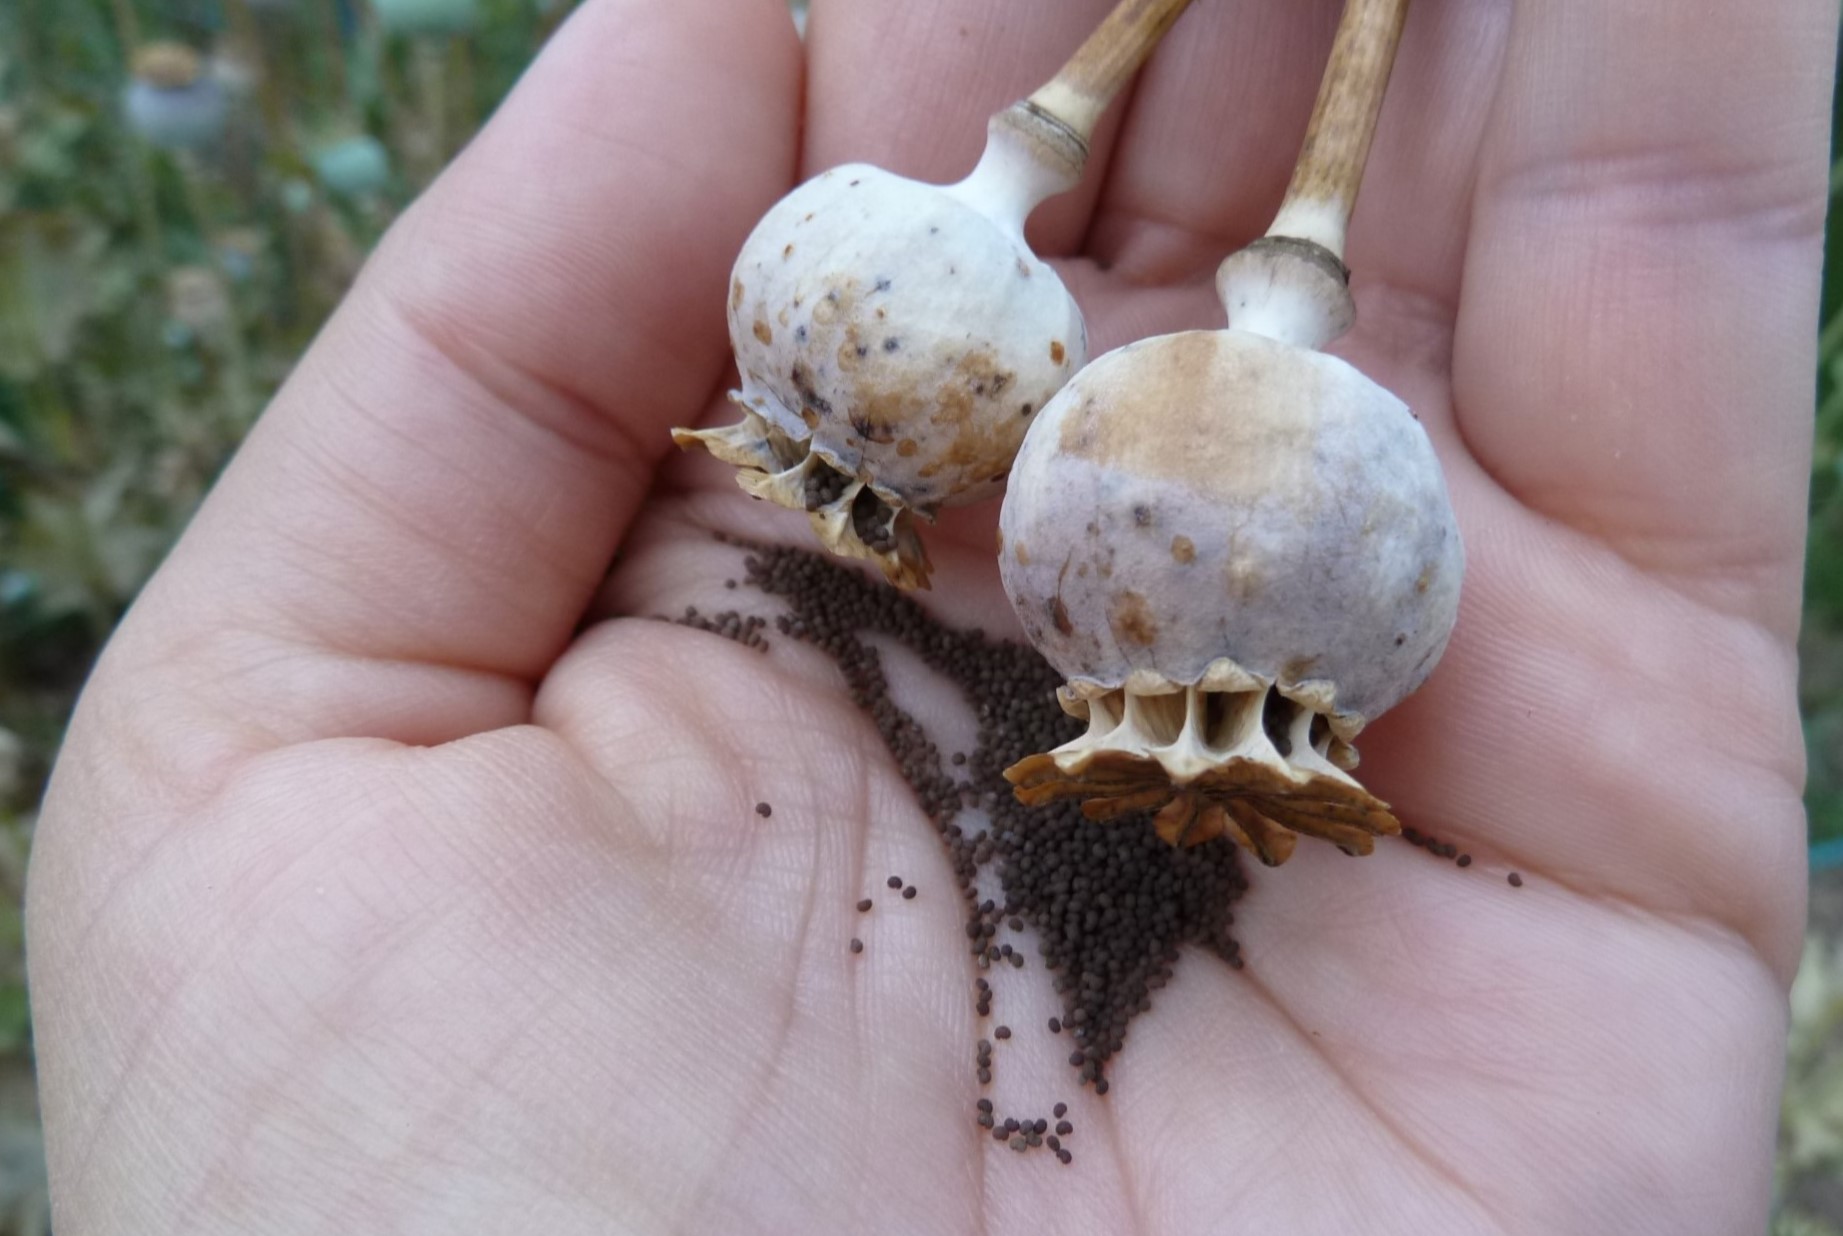
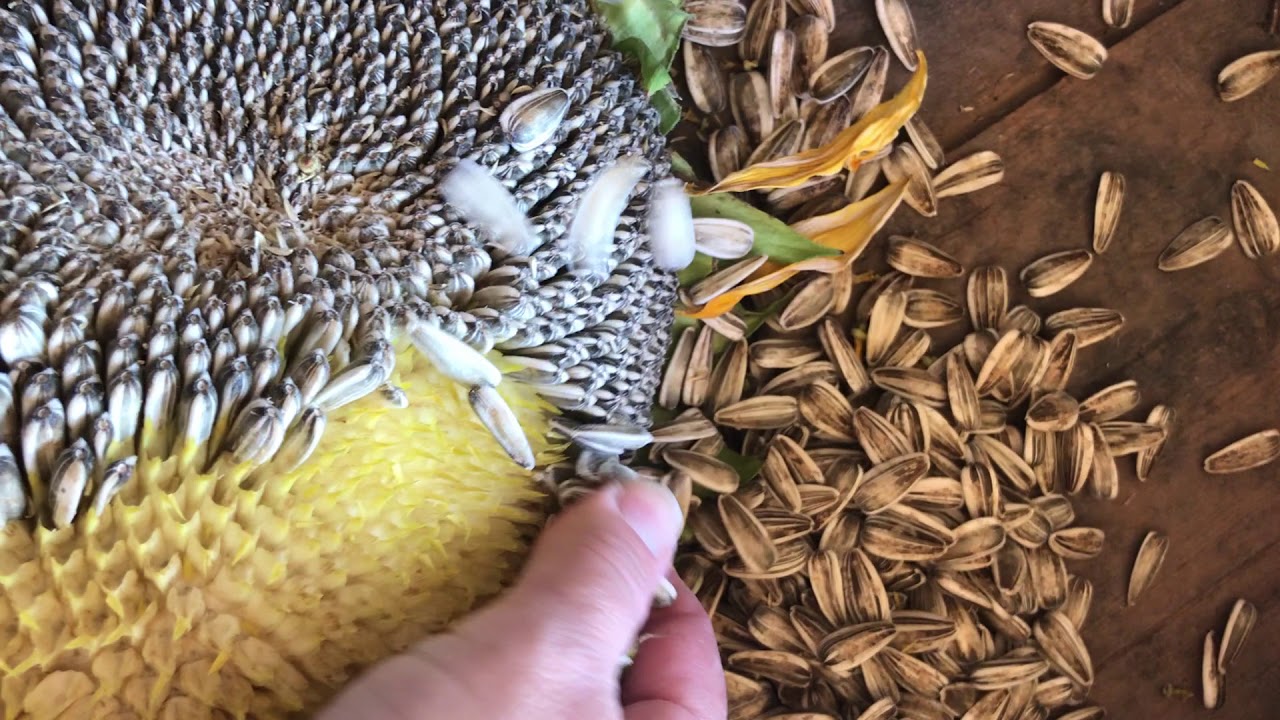
- Seed heads: When collecting seeds from plants with seed heads, such as sunflowers or dill, wait until the flowers have dried out and the seeds have turned brown or black. Cut the seed heads off the plant and place them in a paper bag or a clean, dry container. Gently shake or rub the seed heads to release the seeds.
- Seed pods: For plants with seed pods, like peas or beans, allow the pods to dry on the plant until they become dry and brittle. If the pods are not fully dried, they may contain seeds that are not mature enough for germination. Once dry, remove the pods from the plant and split them open to collect the seeds.
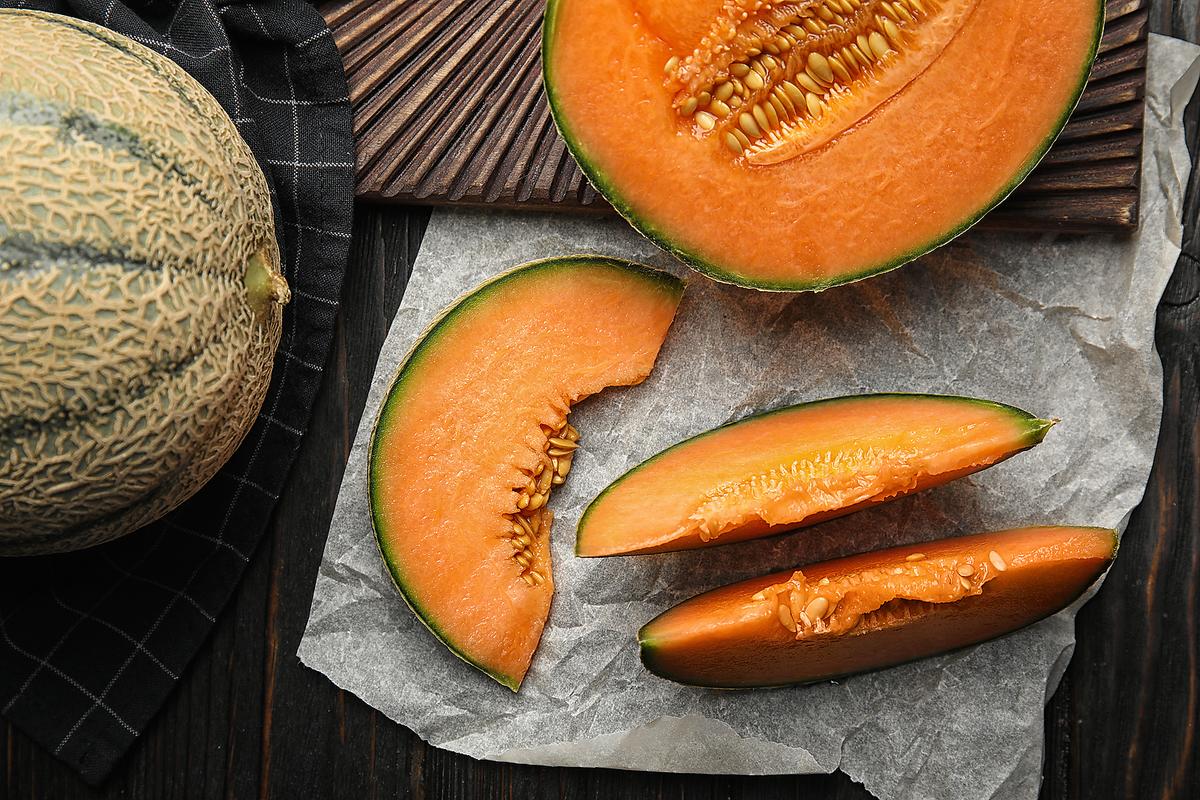
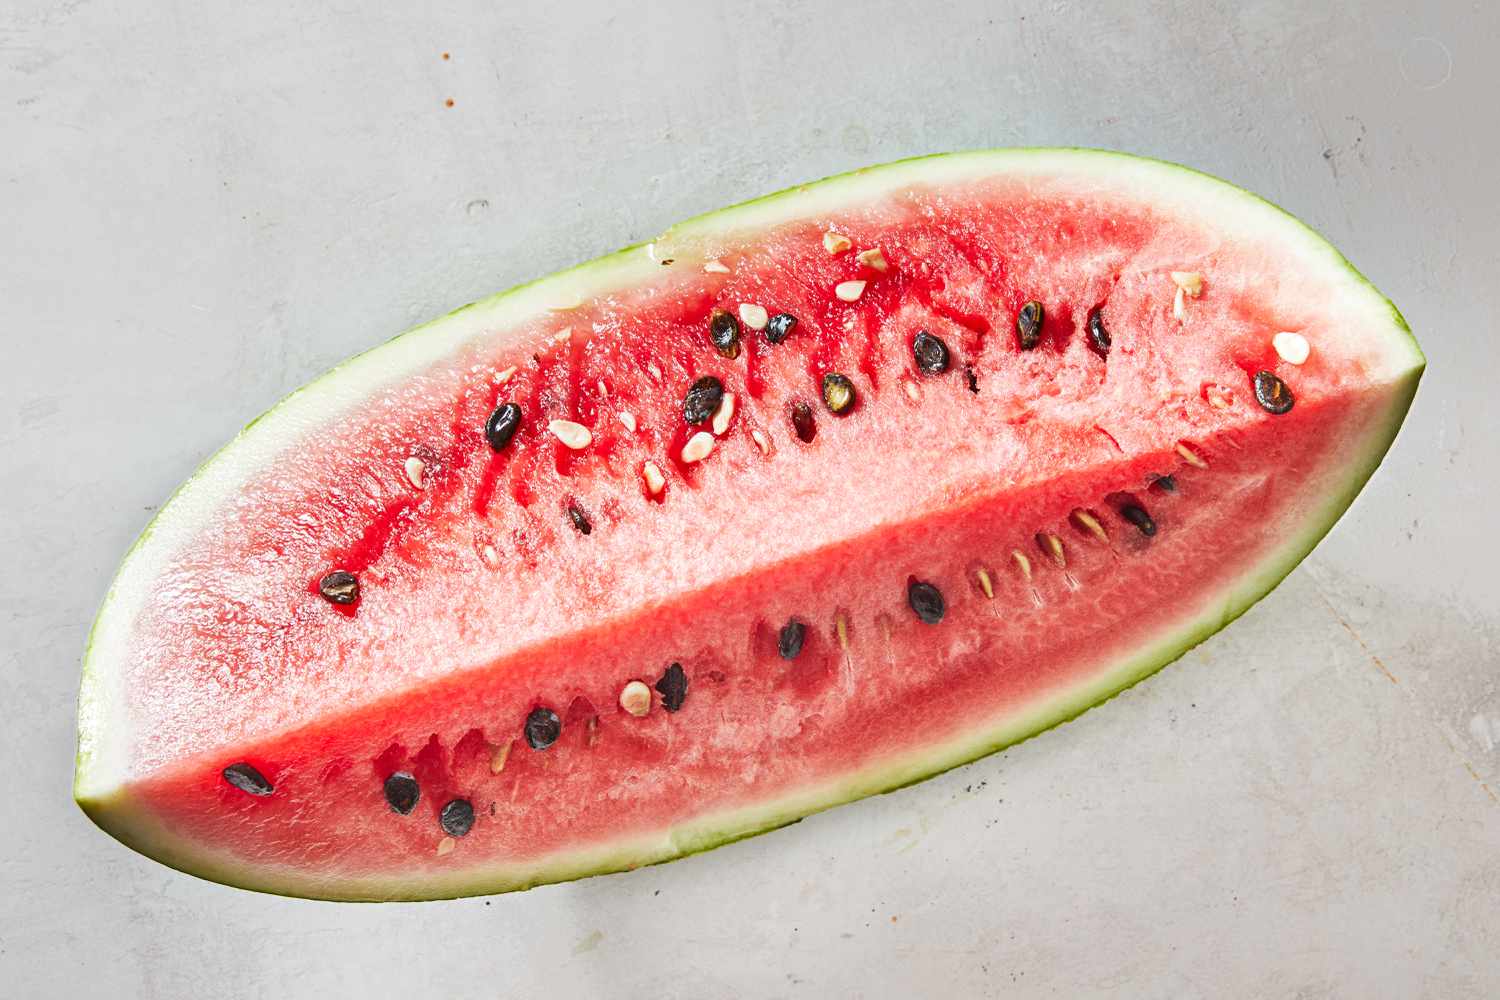
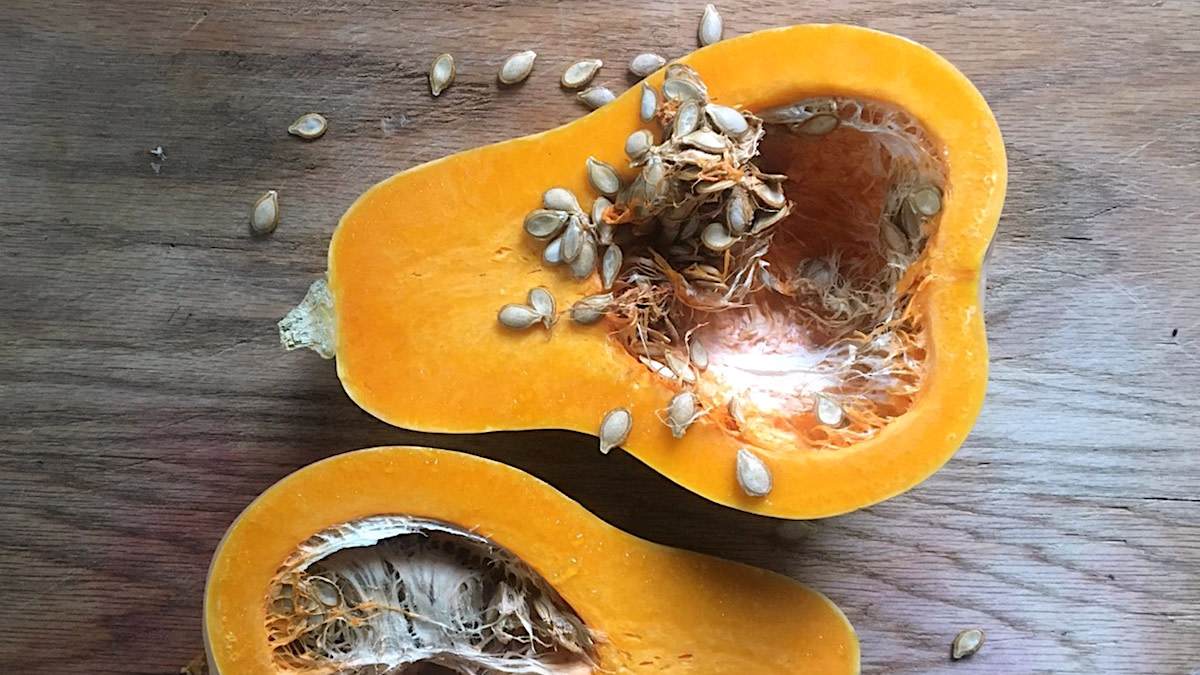
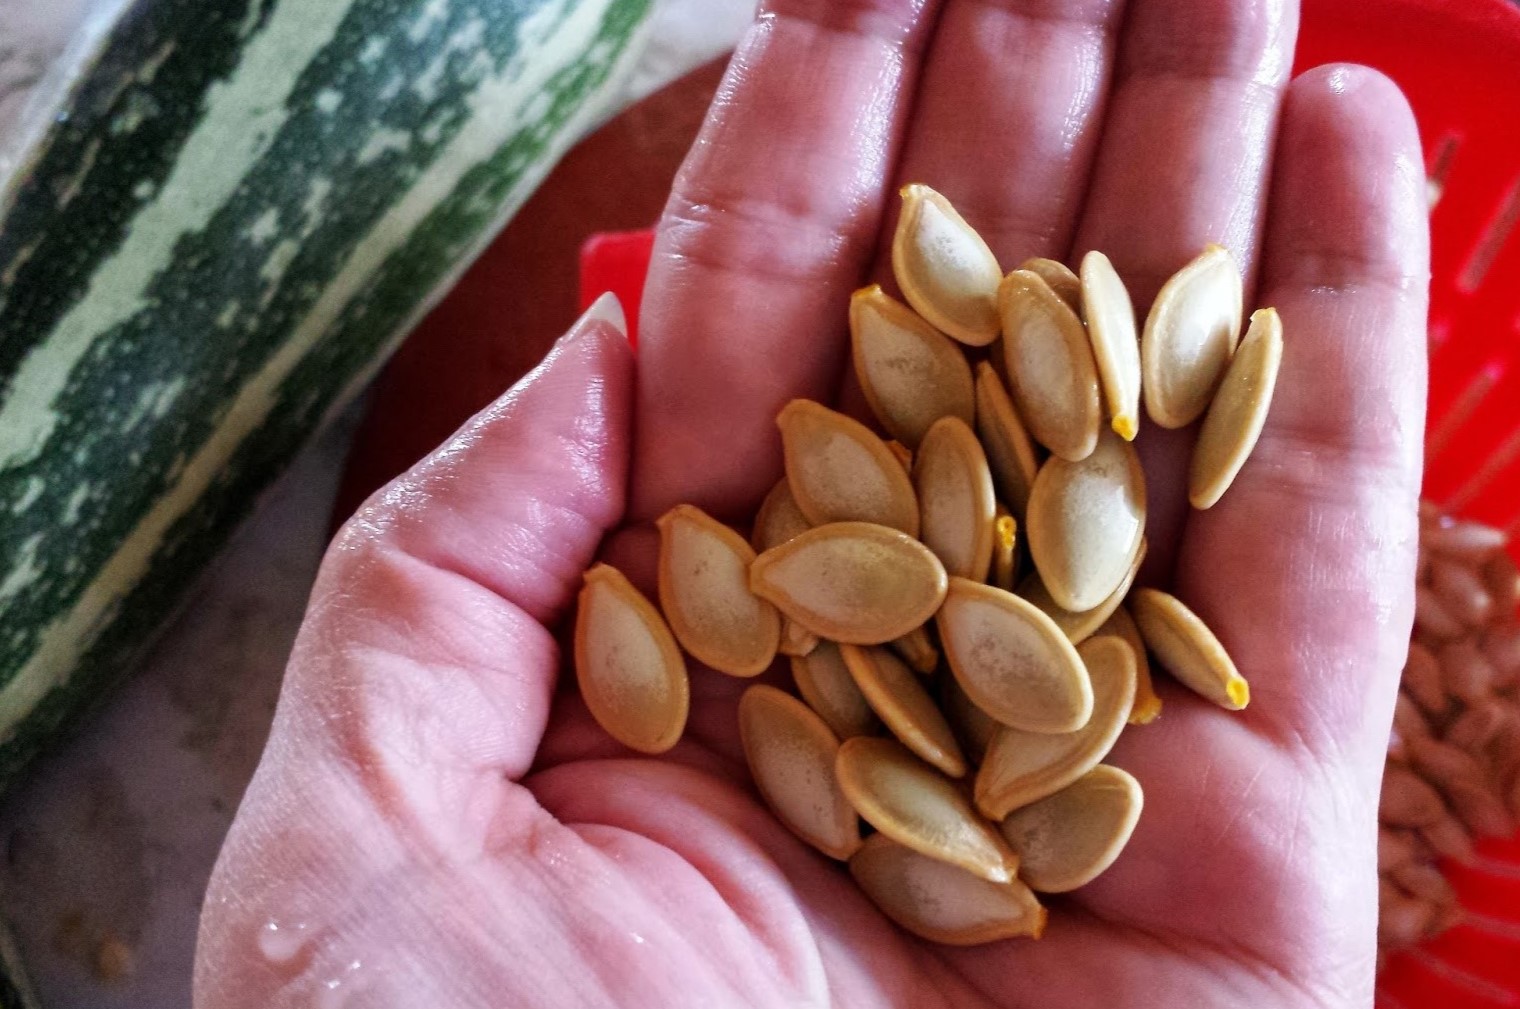
- Fruits and vegetables: Many fruits and vegetables produce seeds that can be saved for planting. Wait until the fruit or vegetable is fully ripe before collecting the seeds. Cut open the fruit or vegetable and remove the seeds. Clean off any remaining pulp or residue and allow the seeds to dry thoroughly before storing them.
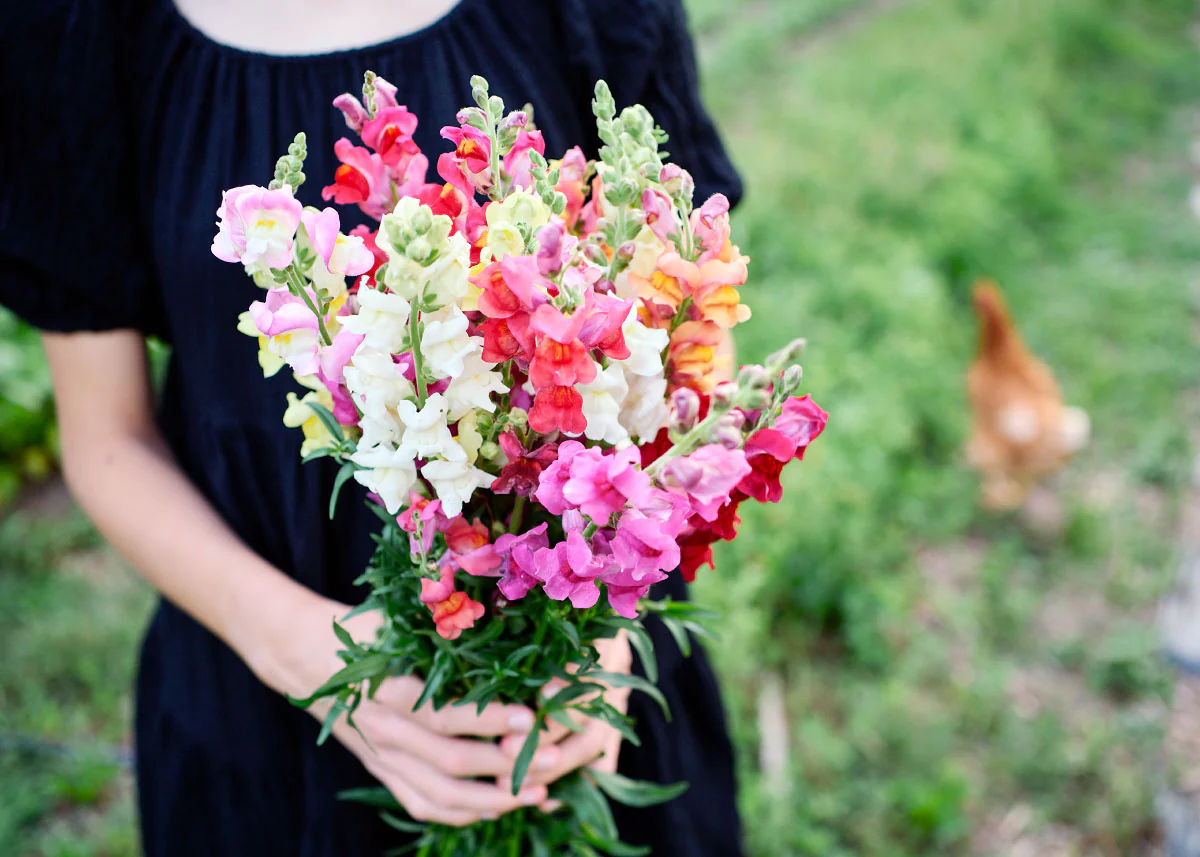
- Flowers: Some seed-saving techniques require collecting seeds from the flowers themselves. For example, plants like marigolds or zinnias produce seeds that can be saved for future planting. Allow the flowers to wither and dry completely on the plant. Once dry, carefully remove the seed heads or pods and collect the seeds.
- Root crops: For plants like carrots or beets, which are harvested for their root crops, you can allow some of the plants to overwinter and produce seed stalks in the following season. Allow the seed stalks to dry out and turn brown, then collect the seeds by cutting off the seed heads or pods.
It’s important to handle the seeds carefully during the harvesting process to avoid damage or contamination. Always use clean and dry hands or tools, and try to collect seeds on a dry day to prevent excess moisture from affecting their quality.
After collecting the seeds, it’s time to clean and prepare them for storage. In the next section, we’ll explore different techniques for cleaning seeds to ensure their longevity and vitality.
Read more: How To Store Bulbs For Next Season
Seed Cleaning Techniques
Seed cleaning is a crucial step in the seed-saving process to remove debris, chaff, and other impurities from the seeds. Properly cleaned seeds not only look better but also have a higher chance of remaining viable during storage. Here are some seed cleaning techniques you can use:
- Hand cleaning: This is the simplest method and can be used for larger seeds or those that are relatively easy to separate from the surrounding material. Start by removing any large debris or plant residue manually. Then, gently rub the seeds between your hands or use a screen to separate the seeds from any remaining chaff or small particles.
- Winnowing: This method is ideal for seeds that are lighter than the surrounding debris or chaff. Find an open area with a gentle breeze and place a clean cloth or sheet on the ground. Hold the seeds above the cloth and gently toss them into the air. The wind will carry away the lighter material, while the seeds will fall onto the cloth.
- Sifting: Sifting can be used for seeds that are mixed with fine particles or smaller debris. Use a set of screens with different mesh sizes to gradually separate the seeds from the impurities. Start with a larger mesh size to remove larger debris, then work your way to smaller mesh sizes to further refine the seed cleaning process.
- Floating: This method is useful when separating seeds from floating debris or immature seeds that do not sink. Fill a container with water and place the seeds and accompanying material into it. Stir the mixture gently, allowing the lighter or floating debris to rise to the top. Skim off the floating material, then strain the remaining seeds using a fine mesh sieve.
- Fermentation: This technique is specifically used for seeds of fleshy fruits, such as tomatoes or peppers, where the seeds are surrounded by a gel-like substance. Remove the seeds along with the pulp and place them in a container with some water. Allow the mixture to ferment for a few days, stirring it occasionally. The fermentation process will break down the gel-like substance, making it easier to separate the seeds. Rinse the seeds thoroughly and dry them before storage.
Regardless of the method you choose, ensure that the seeds are completely dry before storing them. Excess moisture can lead to mold or rot, reducing seed viability.
Now that your seeds are clean and free from impurities, it’s time to store them properly to maintain their viability. In the next section, we’ll explore the best practices for seed storage.
After harvesting seeds, dry them thoroughly before storing in a cool, dry place. Label and date the seeds for easy identification next season.
Proper Seed Storage
Proper seed storage is essential to maintain the viability and quality of the seeds over an extended period of time. Here are some key guidelines to follow for successful seed storage:
- Keep seeds dry: Moisture is the enemy of seed storage. Make sure the seeds are completely dry before storing them to prevent mold, rot, or germination. A moisture level of around 8-12% is ideal for most seeds.
- Use airtight containers: Store seeds in airtight containers, such as glass jars or sealed plastic bags, to protect them from moisture, pests, and fungal spores. Mason jars with a tight-fitting lid are an excellent choice for seed storage. Avoid using containers that allow light to penetrate, as it can degrade seed quality over time.
- Temperature control: Seeds should be stored in a cool and dry environment. Aim for a temperature range of 32-41°F (0-5°C) to ensure optimum seed longevity. Avoid storing seeds in areas prone to temperature fluctuations, such as garages or attics.
- Avoid direct sunlight: Exposure to direct sunlight can damage the seeds, degrade their viability, and reduce their germination rates. Store seeds in a dark location, such as a pantry or a cool basement, away from direct light exposure.
- Labeling: Properly label each container with the name of the plant, the variety, and the date of collection. This will help you keep track of the seeds and their viability over time. Consider using waterproof labels or permanent markers to ensure they remain legible.
- Organize seeds by type: Group seeds according to plant type or family to make it easier to find and access them when needed. This organization system will also help you plan and rotate crops effectively in future gardening seasons.
- Regularly check for moisture and viability: Periodically inspect your stored seeds for any signs of moisture, mold, or pests. Additionally, perform germination tests on a small sample of seeds to check their viability. Replace any seeds that show poor germination rates to ensure you always have high-quality seeds on hand.
By following these seed storage practices, you can extend the shelf life of your seeds and ensure their viability for future planting seasons. Remember, it’s important to refresh your seed stock periodically by collecting new seeds to maintain genetic diversity.
In the next section, we’ll explore how to test seed viability to determine if the seeds are still capable of germinating.
Testing Seed Viability
Testing seed viability is an important step in seed saving to ensure that the seeds you’ve stored are still capable of germinating and producing healthy plants. Here are a few methods to help you assess seed viability:
- Germination test: The germination test is the most common method to determine seed viability. Take a representative sample of seeds from your stored collection and place them on a damp paper towel or in a seed tray with moist soil. Keep the seeds in a warm and well-lit area and monitor their progress. After a designated time period, typically 5-10 days, check how many seeds have successfully germinated. Calculate the germination rate by dividing the number of germinated seeds by the total number of seeds tested.
- Float test: This test is particularly useful for larger seeds, such as beans or peas. Fill a container with water and place the seeds in it. Allow the seeds to soak for a few hours. Healthy, viable seeds will sink to the bottom, while non-viable seeds or debris will float to the top.
- Tetrazolium test: The tetrazolium test is a more advanced method that provides a visual indication of seed viability. Take a small sample of seeds and soak them in a solution of tetrazolium, a red dye that stains living tissues. After a specified time, examine the seeds. Viable seeds will show a red or pink color, while non-viable seeds will remain white or pale.
- Professional seed testing: For more accurate and comprehensive results, you can send a sample of your seeds to a professional seed testing laboratory. These laboratories provide detailed information on seed viability, germination rates, and any potential seed-borne diseases or abnormalities. This option is particularly useful for larger-scale seed savers or for crops where accurate viability information is critical.
Regularly testing seed viability allows you to assess the quality of your stored seeds and determine if they need replacement or if they are still viable for planting. It’s good practice to perform these tests at least every few years, as seed viability can decline over time.
Remember, it’s important to follow proper storage practices to maintain seed viability. Cool temperatures, low humidity, and protected storage containers can significantly extend the lifespan of your saved seeds.
In the next section, we’ll discuss the importance of labeling and organizing your saved seeds for easy access and future planting.
Labeling and Organizing Seeds
Labeling and organizing your saved seeds is essential for staying organized, keeping track of seed varieties, and ensuring easy access when it’s time to plant. Here are some tips on how to label and organize your seeds:
- Labeling: Properly label each seed packet or container with important information, such as the plant name, variety, and the date of collection. Additional details, such as growth habit, days to maturity, or specific growing requirements, can also be included. Clear and legible labels will prevent confusion and help you make informed decisions when planning your garden.
- Seed packets or envelopes: Use seed packets or envelopes to store and organize your seeds. These can be easily made using small paper bags, folded paper, or commercially available seed envelopes. Make sure to write the necessary information on each packet, including the plant name and variety.
- Organizing by type: Group your seeds by plant type or family to make them easier to locate and utilize. Categorize them into separate containers or use dividers within a storage box to keep different varieties organized. This organization system will help you plan your garden, rotate crops, and quickly find the seeds you need.
- Separate annual and perennial seeds: If you save both annual and perennial seeds, consider keeping them in separate containers or sections. This distinction will allow you to easily identify which seeds need to be replanted each year and which can be kept and stored for multiple seasons.
- Record-keeping: Keeping a gardening journal or spreadsheet is a valuable practice to track the seeds you’ve saved, including the success rates, germination information, and any observations or notes related to each variety. This record-keeping will help you learn from past experiences, identify trends, and make informed decisions in your future gardening endeavors.
- Location for storage: Find a designated location to store your labeled seed packets or envelopes. Choose a cool, dry, and dark place that is easily accessible. Common storage options include a seed box, airtight containers, or a filing cabinet. Consistency in storage location will help you maintain organization and minimize the chances of misplacing or losing seeds.
By implementing these labeling and organizing strategies, you can keep your saved seeds well-organized and easily accessible for future planting seasons. Additionally, recording and tracking information about your saved seeds will provide valuable insights and help you become a more knowledgeable and successful seed saver.
In the final section, we’ll discuss common troubleshooting tips for common issues that may arise during the seed saving process.
Read more: How To Store Zinnia Seeds For Next Season
Troubleshooting Common Issues
While seed saving can be a rewarding endeavor, it’s not without its challenges. Here are some common issues that may arise during the seed-saving process and tips to troubleshoot them:
- Cross-pollination: Cross-pollination can occur when different varieties of the same plant species pollinate each other, resulting in seeds that may not be true to type. To minimize cross-pollination, consider spacing different varieties apart, isolating plants with physical barriers, or hand-pollinating flowers. Research the pollination habits of the plants you’re saving seeds from to prevent unwanted cross-pollination.
- Incomplete drying: Seeds should be thoroughly dried before storage to prevent mold or degradation. If you notice any signs of moisture or dampness, spread the seeds out in a single layer and allow them to air dry for a few more days. Alternatively, use a dehydrator or a low-temperature oven to gently dry the seeds without causing damage.
- Improper storage conditions: If stored in unfavorable conditions, seeds may lose their viability or become susceptible to pests or diseases. Make sure the storage area is cool, dry, dark, and well-ventilated. Regularly check for signs of moisture, pests, or mold and take necessary actions to maintain optimal storage conditions.
- Seed-borne diseases: Seeds can carry diseases or pathogens that can affect their viability or infect subsequent plantings. Disinfecting seeds before storage can help reduce the risk. Treat seeds with a dilute bleach or hydrogen peroxide solution, following recommended guidelines, and allow them to dry thoroughly before storing.
- Improper labeling: Accurate labeling is crucial for proper organization and identification. If you encounter unlabeled or poorly labeled seeds, try to identify them based on their physical characteristics, such as size, shape, or color. If in doubt, it may be best to err on the side of caution and discard unlabeled seeds.
- Low germination rates: If you observe low germination rates during seed testing, it may indicate a decline in seed viability. To overcome this, consider collecting fresh seeds, adjusting storage conditions, or seeking seeds from a different source. Regularly monitoring and testing seed viability will help identify potential issues early on.
Remember that seed saving is a continual learning process, and some trial and error is to be expected. By practicing troubleshooting techniques and adapting your methods, you’ll become more adept at saving seeds and increasing your success rate over time.
Congratulations on embarking on your seed-saving journey! By following these guidelines, you’ll be able to save and store seeds effectively, preserving the diversity and resilience of your garden for seasons to come.
Happy seed saving!
Conclusion
Congratulations on completing your journey into the fascinating world of seed saving! By learning how to save seeds for planting next season, you have acquired a valuable skill that not only saves you money but also promotes biodiversity, preserves heirloom varieties, and empowers you to take control of your garden’s future.
Throughout this article, we’ve covered the importance of saving seeds, choosing the right plants for seed saving, when to collect seeds, proper seed harvesting techniques, seed cleaning methods, and the critical aspects of seed storage and viability testing. By implementing these practices, you can become a proficient seed saver and ensure a continuous cycle of life in your garden.
As you embark on your seed-saving journey, remember to select open-pollinated or heirloom varieties, consider isolation distances and life cycle requirements, and pay attention to the timing of seed collection. Harvest seeds when they are fully mature and use proper seed cleaning techniques to remove debris and impurities.
Store your cleaned seeds in airtight containers, in a cool and dark environment, with consistent temperature and humidity levels. Regularly test seed viability to ensure the quality of your saved seeds, and label and organize them properly for easy access and future planning.
Keep in mind that seed saving is an ongoing process of learning, experimentation, and adaptation. Each year brings new opportunities to refine your techniques and expand your knowledge as you develop stronger, more resilient plants that are adapted to your specific garden environment.
By saving seeds, you contribute to the preservation of plant diversity, foster sustainability in your garden, and cultivate a deeper connection with nature. Enjoy the satisfaction of growing your own plants from seed and the excitement of discovering new generations of your favorite varieties.
So, put on your gardening gloves, grab your seed-saving tools, and embrace the joy and power of seed saving. Your garden will thrive, and you’ll have the satisfaction of knowing that you’re carrying on the legacy of these remarkable plants for generations to come.
Happy seed saving and happy gardening!
Frequently Asked Questions about How To Save Seeds For Planting Next Season
Was this page helpful?
At Storables.com, we guarantee accurate and reliable information. Our content, validated by Expert Board Contributors, is crafted following stringent Editorial Policies. We're committed to providing you with well-researched, expert-backed insights for all your informational needs.


0 thoughts on “How To Save Seeds For Planting Next Season”