Home>Garden Essentials>How To Save Tomato Seeds For Next Season

Garden Essentials
How To Save Tomato Seeds For Next Season
Modified: March 16, 2024
Learn how to save tomato seeds in your garden for the next season and ensure a bountiful harvest. Follow our step-by-step guide now!
(Many of the links in this article redirect to a specific reviewed product. Your purchase of these products through affiliate links helps to generate commission for Storables.com, at no extra cost. Learn more)
Introduction
Welcome to the wonderful world of gardening! Growing your own tomatoes is not only a rewarding experience but also a great way to ensure you have delicious, homegrown tomatoes straight from your garden. However, if you want to take your gardening journey to the next level, learning how to save tomato seeds for next season is a skill that will come in handy. By saving tomato seeds, you can continue the cycle of growth, nurture heirloom varieties, and ultimately save money on purchasing new seeds each year.
Not only does saving tomato seeds offer financial benefits, but it also allows you to preserve and share unique tomato varieties that may not be readily available in seed catalogs or nurseries. Additionally, it’s a way to develop your gardening skills and deepen your understanding of plants’ lifecycle.
In this comprehensive guide, we will walk you through the process of saving tomato seeds step by step. From selecting the right tomatoes for seed saving to properly storing your seeds, you’ll learn everything you need to know to get started.
Key Takeaways:
- Save tomato seeds to preserve unique varieties, save money, and deepen your connection to nature. Follow the steps to harvest, ferment, and store seeds for a bountiful garden.
- Label and organize saved tomato seeds for easy access and efficient management. Utilize the saved seeds to continue the cycle of growth and contribute to the gardening community.
Read more: How To Save Seeds For Planting Next Season
Why Save Tomato Seeds
Before we dive into the nitty-gritty of saving tomato seeds, let’s explore why it’s worth your time and effort to do so.
1. Cost Savings: One of the primary reasons to save tomato seeds is the potential cost savings. Instead of purchasing new seeds each year, you can simply save seeds from the tomatoes you grow and use them for the next season. This can add up to significant savings, especially if you grow a variety of tomatoes.
2. Variety Preservation: Saving tomato seeds allows you to preserve and propagate heirloom varieties that may be disappearing from commercial seed sources. By cultivating and saving seeds from unique or rare tomato varieties, you contribute to the preservation of genetic diversity in tomatoes.
3. Adaptability and Resilience: Saving seeds from your best-performing tomatoes each year can help develop a strain of tomatoes that is well-adapted to your specific growing conditions. Over time, these tomatoes will become increasingly resilient, better able to combat pests, disease, and adverse weather.
4. Sharing and Community: Saving tomato seeds not only benefits your own garden but also gives you the opportunity to share seeds with friends, family, and fellow gardeners. This act of sharing builds a sense of community and encourages the diversification of tomato varieties across different gardens.
5. Connection and Education: Engaging in the process of saving tomato seeds deepens your connection to nature and the natural lifecycle of plants. It provides an educational opportunity to learn about pollination, seed formation, and the interdependence of plants and ecosystems.
Now that we understand the importance of saving tomato seeds, let’s explore the steps to take in order to successfully save and store your tomato seeds for future use.
Choosing the Right Tomatoes
When it comes to saving tomato seeds, not all tomatoes are created equal. To ensure successful seed saving, it’s important to choose the right tomatoes from which to harvest seeds.
1. Open-Pollinated Varieties: Select open-pollinated, heirloom, or non-hybrid tomato varieties for seed saving. These varieties will produce offspring that closely resemble the parent plant, ensuring consistency and preserving the unique characteristics of the tomato.
2. Disease-Free Tomatoes: Choose tomatoes that are healthy and free from any signs of disease or pests. This will help prevent the transmission of diseases or pests to the seeds and future plants.
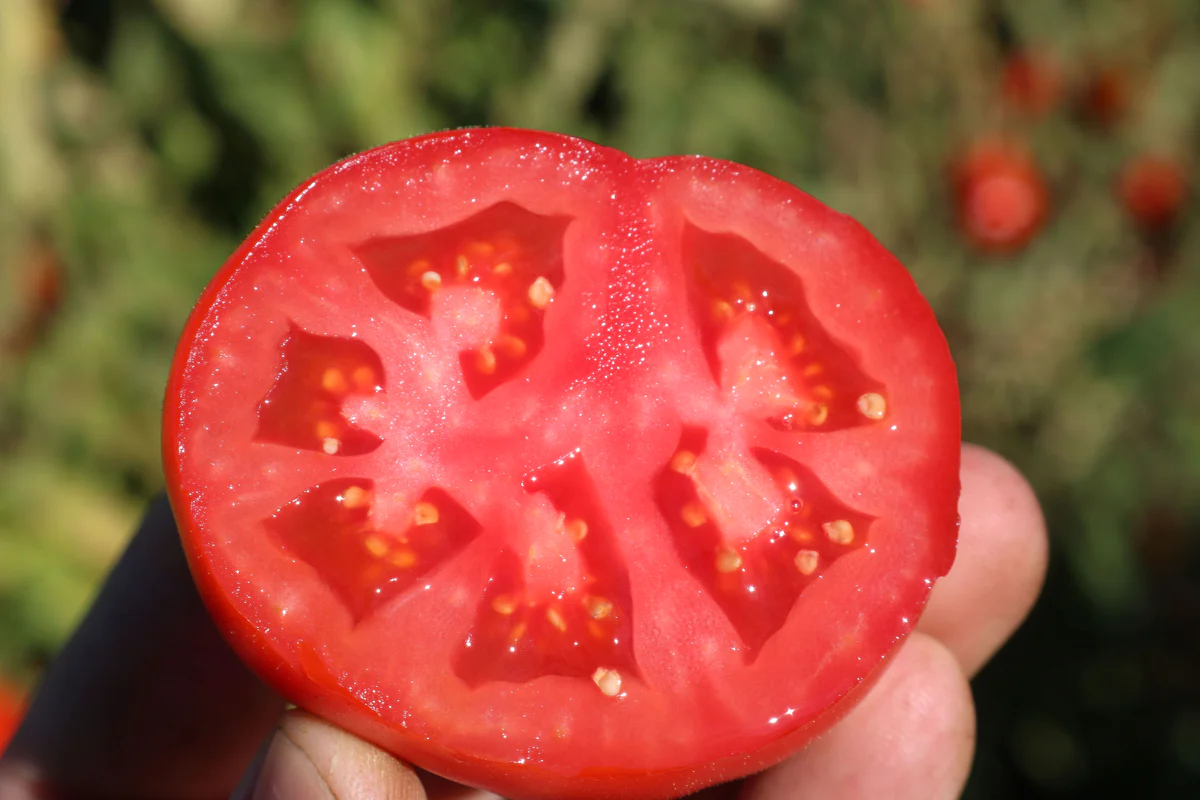
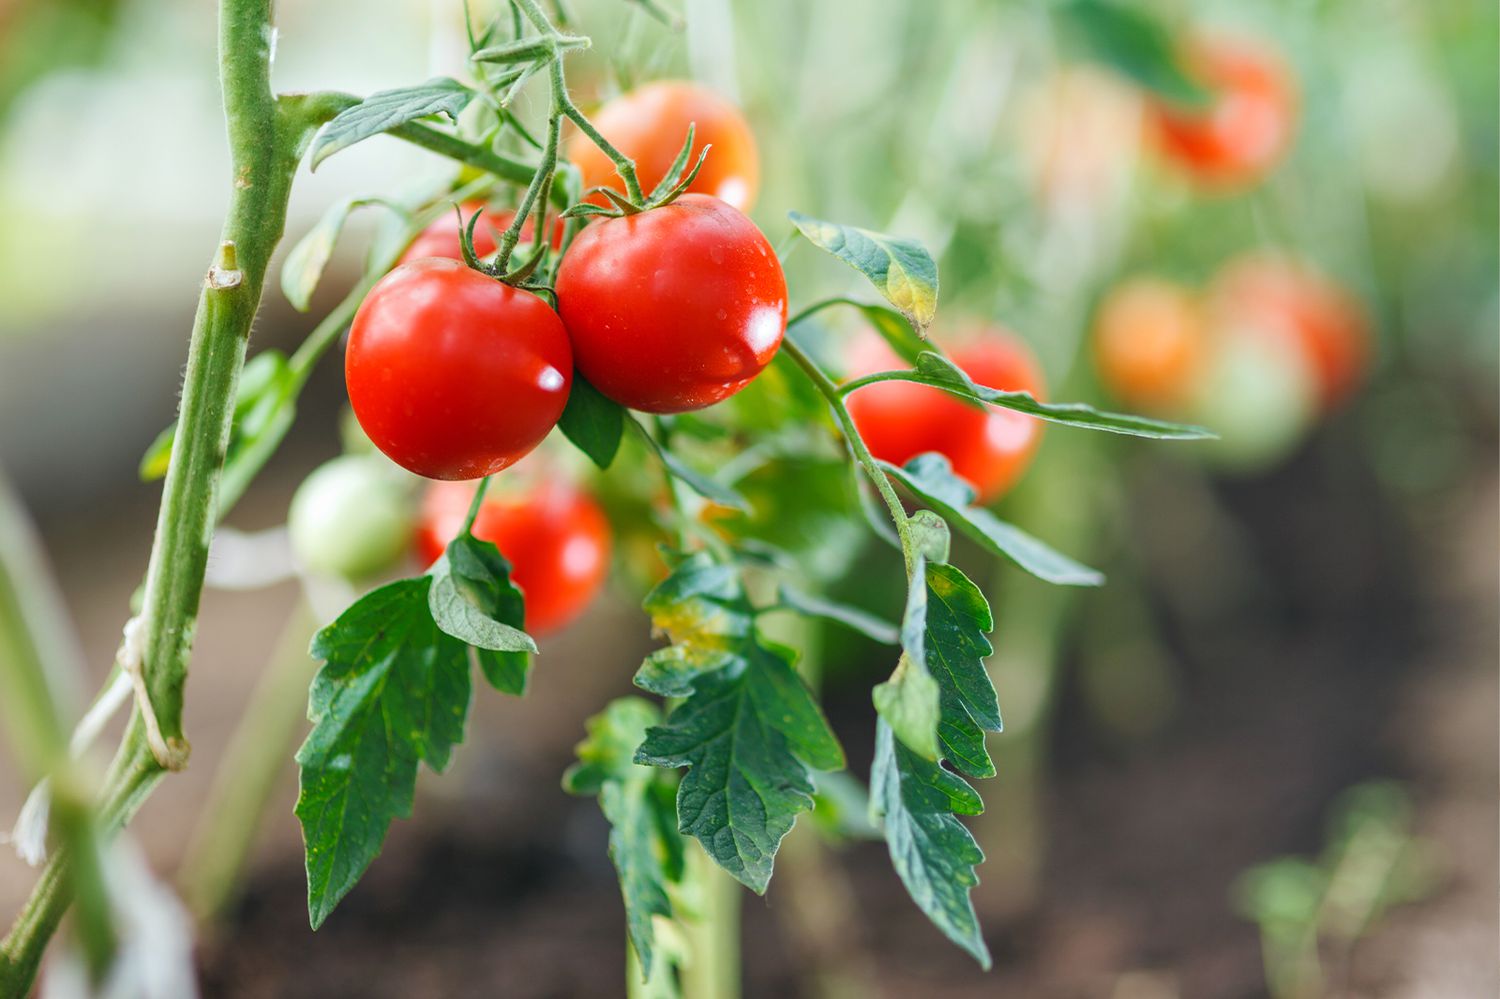
3. Ripe, Fully Mature Tomatoes: Harvest tomato seeds from ripe, fully mature tomatoes. This means the tomatoes should be fully colored and slightly soft to the touch. Avoid harvesting seeds from unripe or overripe tomatoes, as they may not produce viable seeds.
4. Delicious Flavors: Consider the taste and flavor of the tomatoes you are saving seeds from. Harvest seeds from tomatoes that have desirable flavors, so you can continue growing tomatoes with delicious taste in future seasons.
5. Different Tomato Varieties: If you want to experiment and grow a variety of tomato types, select different tomato varieties to save seeds from. This will allow you to have a diverse selection of tomatoes to choose from in the future.
Keep in mind that tomatoes belonging to the same variety but grown in different conditions may exhibit slight variations in their characteristics. It’s always a good idea to save seeds from several plants to ensure genetic diversity and increase the chances of success.
Now that you have selected the right tomatoes, let’s move on to the next step: harvesting ripe tomatoes for seed saving.
Harvesting Ripe Tomatoes
When it comes to saving tomato seeds, timing is crucial. Harvesting ripe tomatoes at the right stage ensures that the seeds inside are mature and viable for future growth. Here’s how to properly harvest ripe tomatoes for seed saving:
1. Observation: Regularly examine your tomato plants as they approach maturity. Look for signs of ripeness, such as a vibrant color, firmness, and a slight softness when gently pressed.
2. Timing: Ideally, harvest tomatoes when they are fully ripe but still on the vine. The tomatoes should be at their peak flavor and texture.
3. Quality Control: Inspect each tomato for any signs of disease, damage, or deformities. Only select healthy and blemish-free tomatoes for seed saving.
4. Careful Picking: Gently twist or cut the tomato from the vine, taking care not to damage the stem or any nearby fruit. Be cautious not to drop or mishandle the tomatoes to avoid bruising the fruit or damaging the seeds inside.
5. Allow for Ripening: If you need to harvest tomatoes that are not quite ripe, place them in a warm, well-ventilated spot, away from direct sunlight. The tomatoes will continue to ripen gradually. This is particularly useful if inclement weather or pests threaten the crop before they reach full maturity.
Remember, the quality of the tomatoes you select for seed saving will determine the quality of the seeds and the plants they will produce. So, choose the best tomatoes from your harvest to ensure the healthiest and most vibrant tomato plants in the future.
Now that you have gathered your ripe tomatoes, it’s time to prepare and extract the seeds for saving.
Preparing the Tomato Seeds
Before you can save tomato seeds, it’s important to properly prepare them. Here are the steps to follow for preparing tomato seeds:
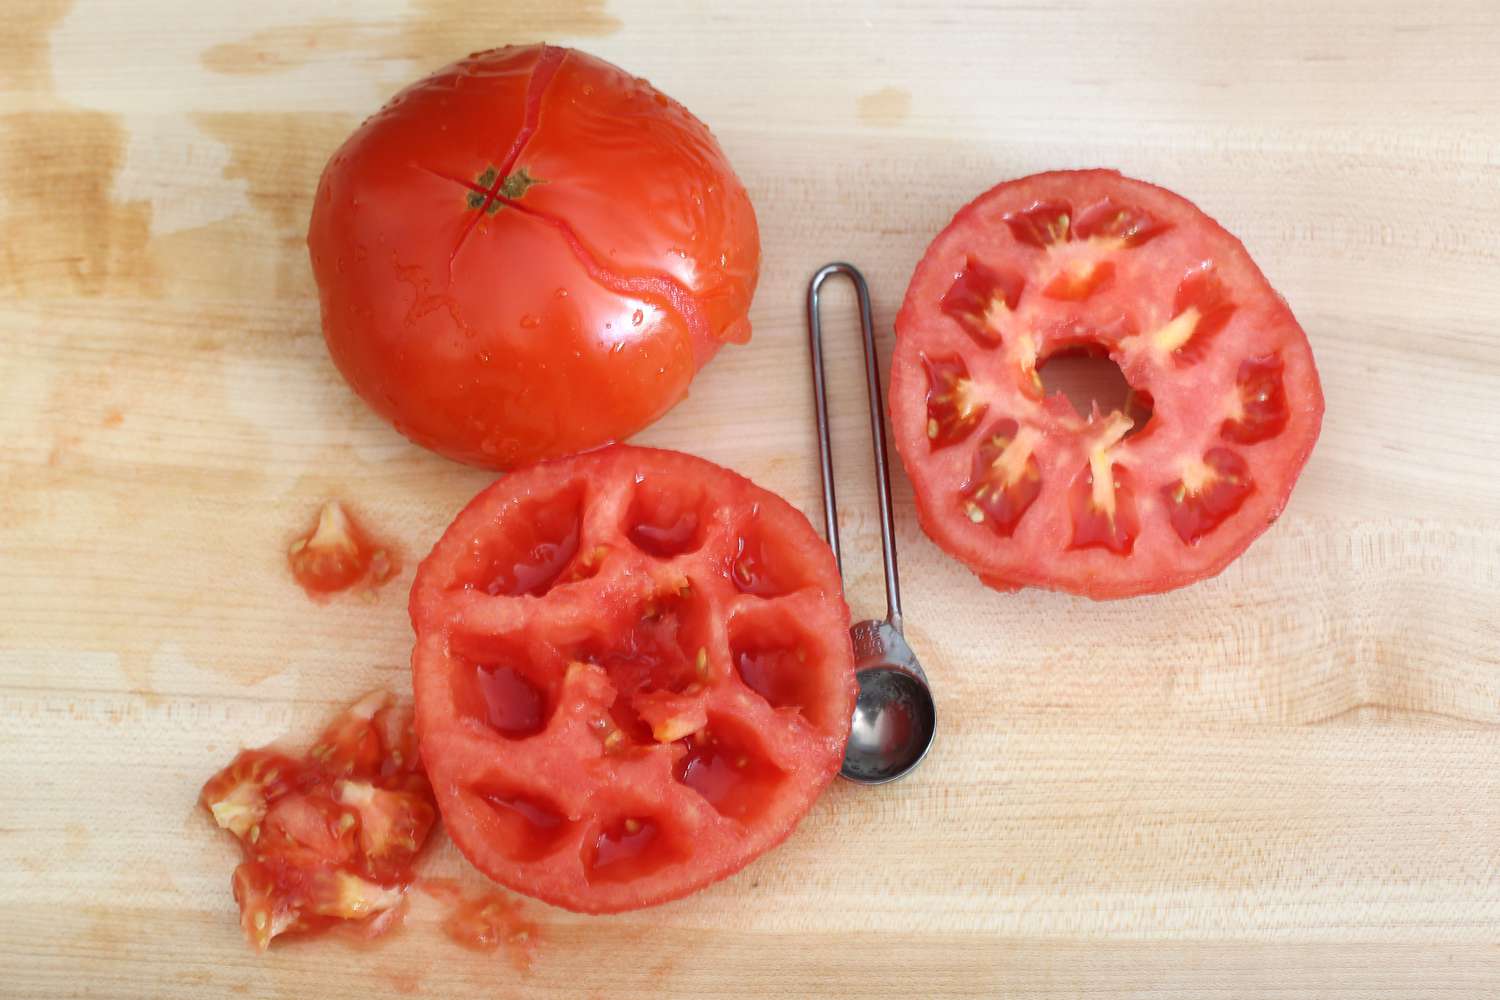
1. Cut the Tomato: Take a sharp knife and cut the tomato horizontally across the equator. This will expose the seed cavities inside.
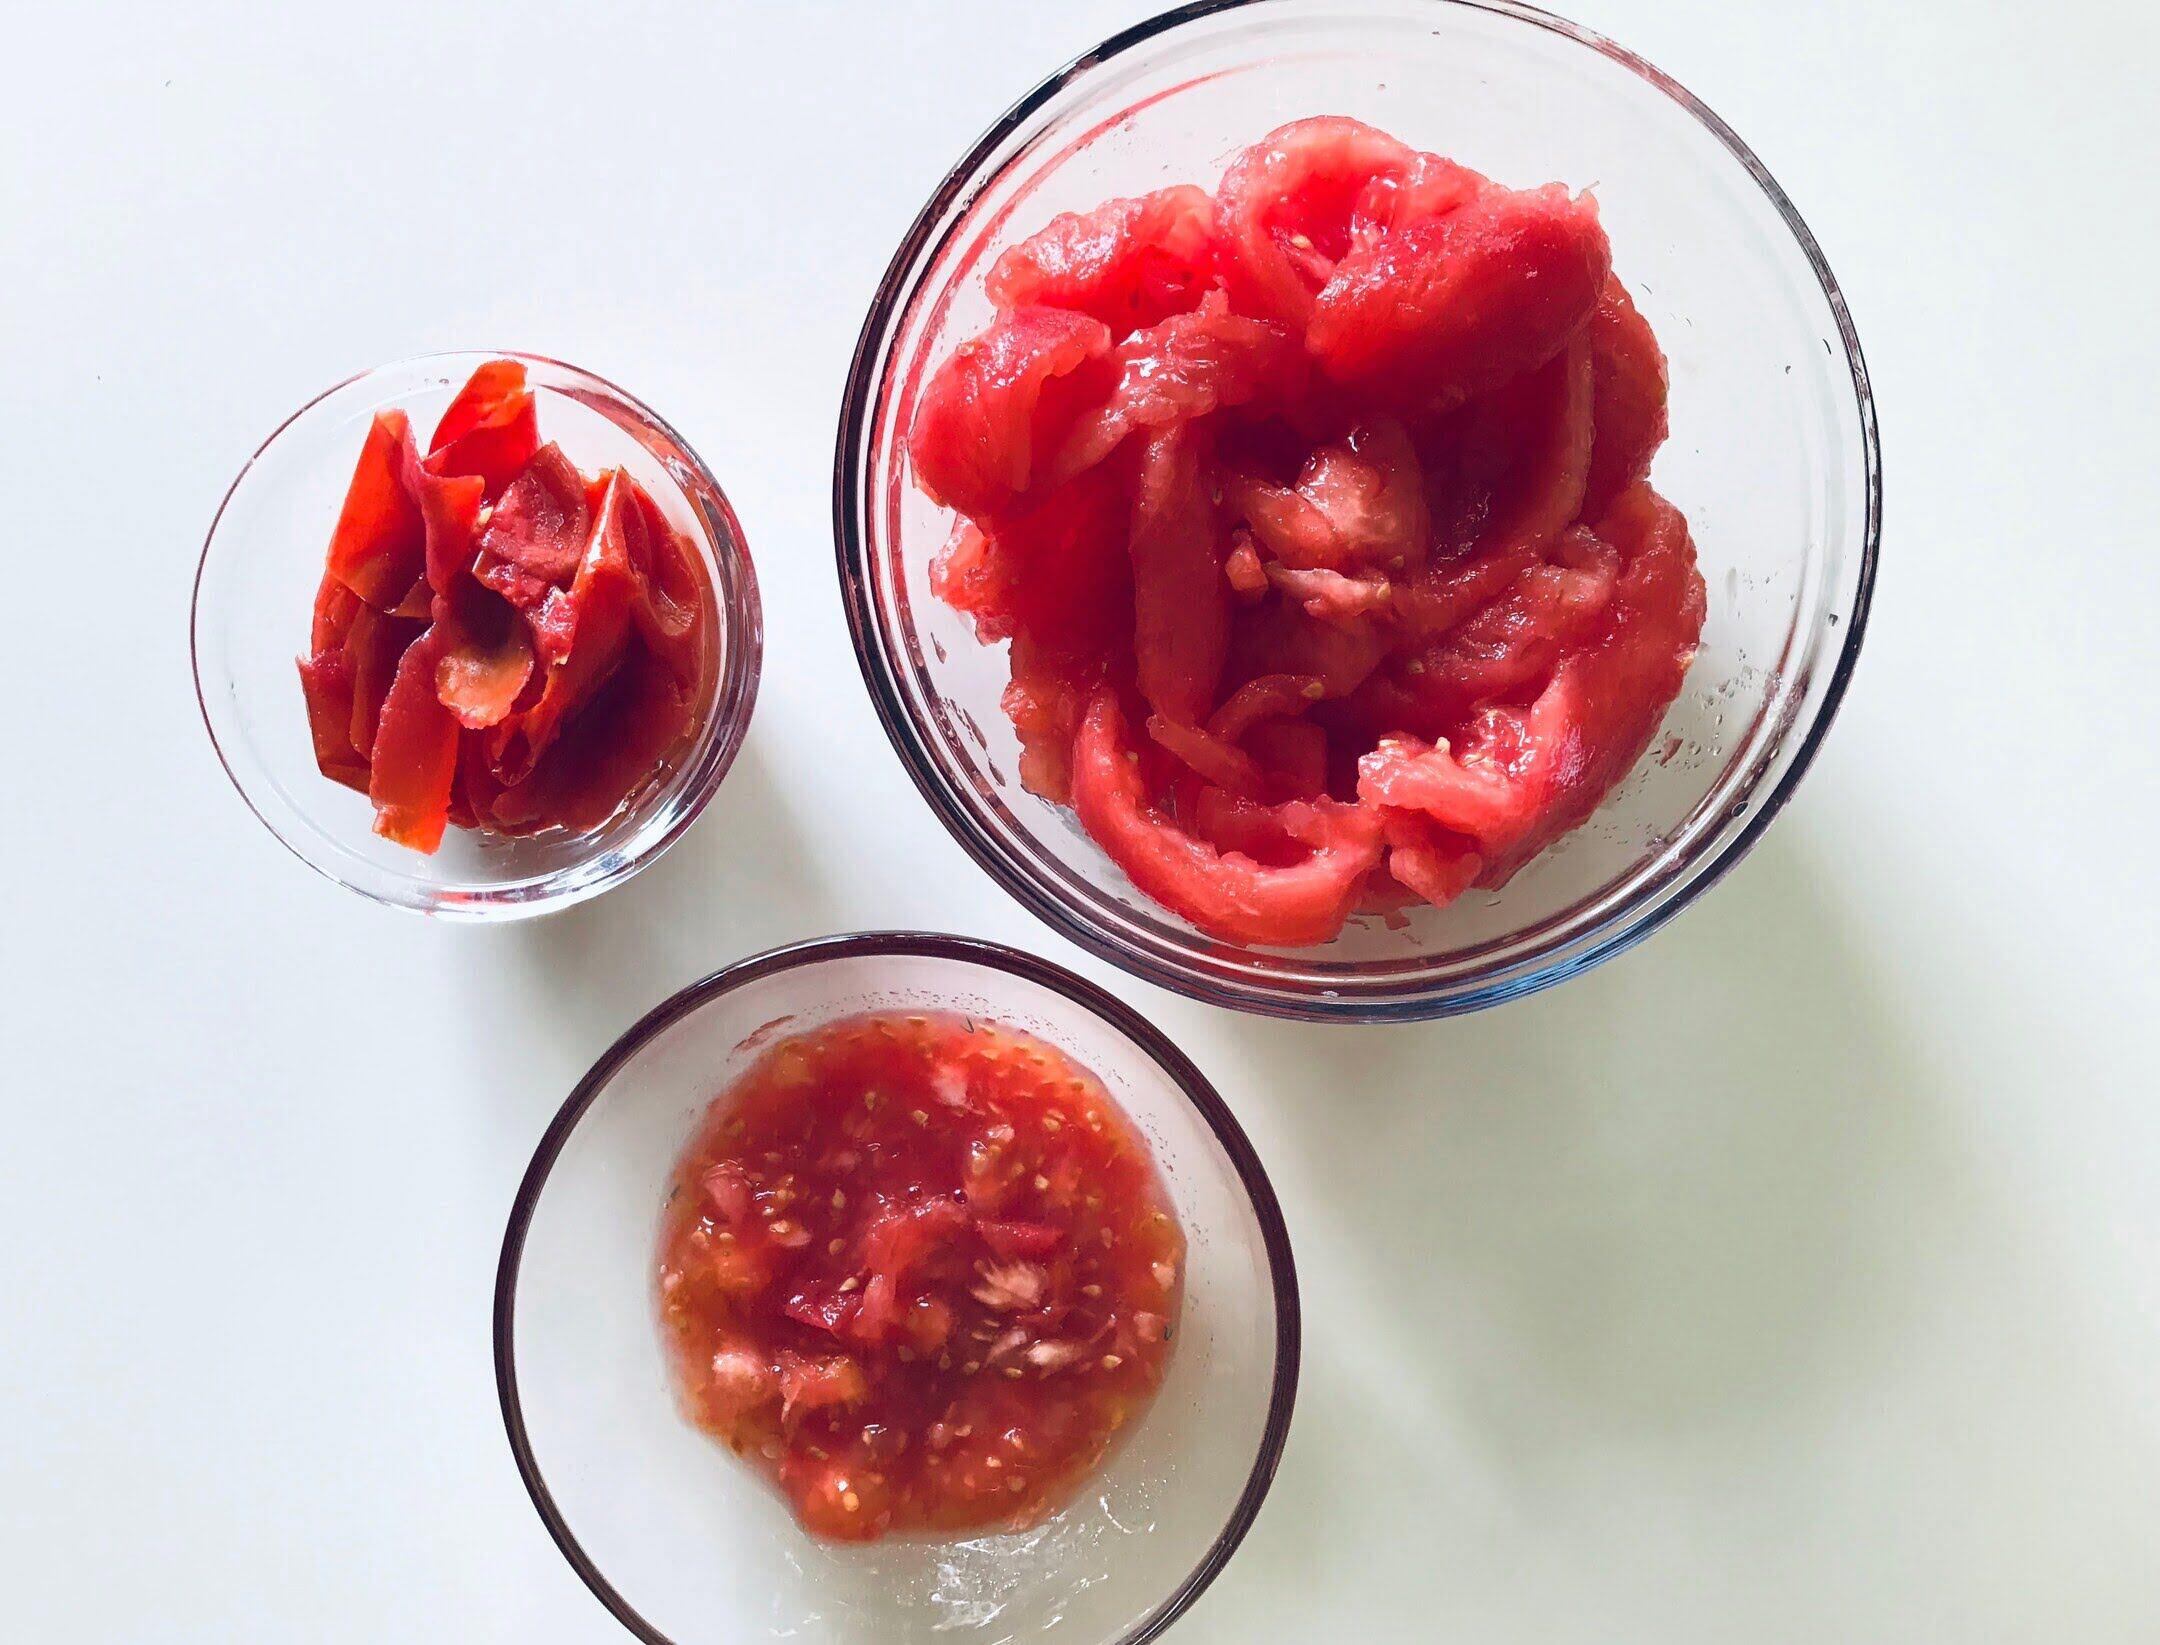
2. Scoop Out the Seeds: Use a spoon or your fingers to gently scoop out the tomato seeds and their surrounding gel into a clean container. The gel contains natural inhibitors that can hinder seed germination, so it’s important to remove it.
3. Add Water: Pour a small amount of water into the container containing the tomato seeds. Adding water will help separate the seeds from the gel and facilitate the fermentation process.
4. Fermentation: Allow the tomato seeds to ferment for a few days. During fermentation, beneficial bacteria will break down the gel and separate the seeds. This process helps remove any potential diseases or pathogens that may be present on the seeds.
5. Stir and Monitor: Stir the tomato seeds and water mixture once or twice a day during the fermentation process. Additionally, keep an eye on the mixture to ensure there is no mold growth or foul smell. If mold develops, it’s best to discard the seeds and start the process again.
6. Monitor Seed Separation: As the fermentation progresses, you will notice that the viable seeds sink to the bottom of the container, while any remaining pulp or debris floats to the top.
Now that the tomato seeds have undergone fermentation and separation, it’s time to move on to the next step: washing and drying the seeds.
Read more: How To Store Bulbs For Next Season
Fermenting the Seeds
Fermenting tomato seeds is a crucial step in the seed-saving process. It helps to separate the seeds from the gel surrounding them and removes any potential pathogens or inhibitors that may affect germination. Here is how to ferment tomato seeds:
1. Scoop Out the Seeds: Cut open the ripe tomatoes and scoop out the seeds along with their surrounding gel into a clean container.
2. Add Water: Pour a small amount of water into the container to cover the seeds and gel. Use approximately two parts water to one part seeds.
3. Cover the Container: Place a breathable cover, such as cheesecloth or a plastic wrap with holes, over the container. This allows air circulation while preventing insects or debris from entering.
4. Set Aside: Find a warm spot in your home, ideally between 70-80°F (21-26°C), and place the container there. The fermentation process works best in a warm environment.
5. Observe and Stir: For the next few days, gently stir the water, seeds, and gel mixture once or twice a day. This helps to prevent mold from forming and ensures the fermentation process is effective.
6. Fermentation Signs: As the fermentation progresses, you will notice the formation of foam on the surface of the container. You may also detect a slightly sour or fermented odor. These are indications that the fermentation process is happening.
7. Wait for Seed Separation: After approximately three to five days, viable seeds will settle to the bottom of the container, while any remaining pulp or debris will float to the top.
8. Rinse the Seeds: Carefully pour off the floating debris and rinse the settled seeds thoroughly under running water. Use a fine mesh strainer or sieve to ensure you don’t lose any seeds.
Now that the tomato seeds have undergone fermentation, it’s time to move on to the next step: washing and drying the seeds to prepare them for storage.
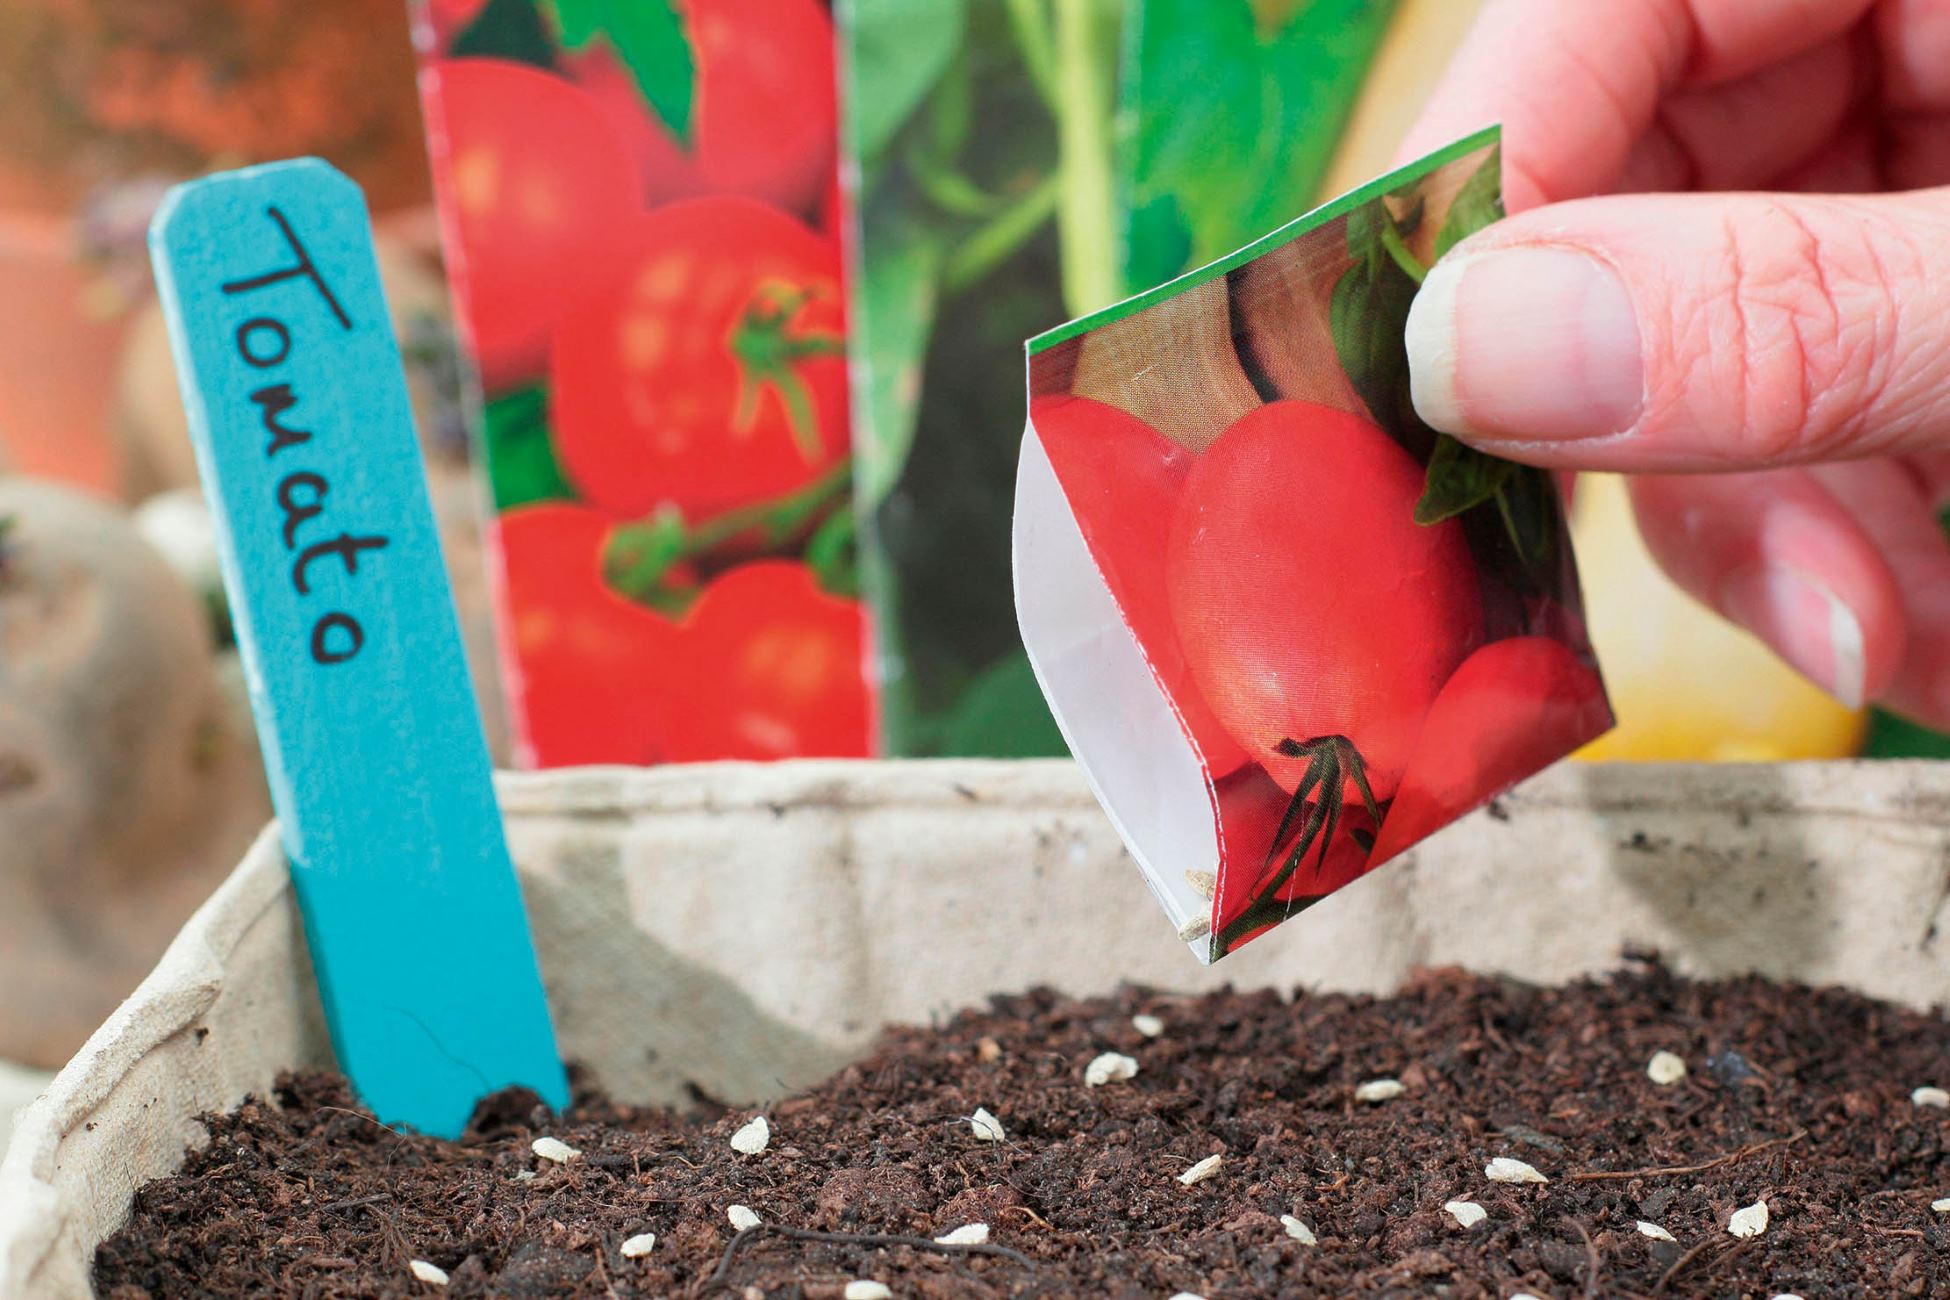
When saving tomato seeds, choose ripe, healthy tomatoes. Scoop out the seeds and pulp, then place in a jar with water. Let it ferment for a few days, then rinse and dry the seeds on a paper towel. Store in a cool, dry place for next season.
Washing and Drying the Seeds
After fermenting the tomato seeds, it’s important to wash and dry them properly. This process removes any remaining debris, residue, or potential pathogens, ensuring clean and viable seeds for future planting. Here’s how to wash and dry tomato seeds:
1. Strain the Seeds: Start by pouring the fermented tomato seed mixture through a fine-mesh strainer or sieve. This will help separate the seeds from any remaining pulp or debris.
2. Rinse Under Water: Place the strained tomato seeds under a gentle stream of running water. Use your fingers or a soft brush to gently rub the seeds, removing any remaining gel or debris.
3. Pat Dry: Once the seeds are thoroughly rinsed, transfer them to a clean paper towel or a dry, flat surface. Spread them in a single layer and gently pat them dry with another paper towel. Avoid using fabric towels, as they can hold moisture and potentially mold the seeds.
4. Air Dry: Allow the tomato seeds to air dry completely. This may take several days to a week, depending on the humidity levels in your environment. Ensure the seeds are in a well-ventilated area, away from direct sunlight, to prevent overheating or damage.
5. Test for Dryness: To check if the seeds are fully dry, give them a slight squeeze between your fingers. If the seeds break or crumble easily, they are dry enough for storage. If they are still pliable or feel moist, continue drying them until they reach the desired dryness.
6. Ensure Seed Integrity: As you handle the seeds during washing and drying, be careful not to damage or crush them. Protecting the integrity of the seeds will ensure their viability for future planting.
Now that the tomato seeds are clean and dry, it’s time to move on to the final step: storing the seeds properly to maintain their viability and longevity.
Storing Tomato Seeds
Proper storage is essential for maintaining the viability and longevity of tomato seeds. By storing them in the right conditions, you can ensure that the seeds remain viable for several years. Here’s how to store tomato seeds:
1. Dry Completely: Before storing the tomato seeds, make sure they are completely dry. Any moisture left in the seeds can lead to mold or rot during storage.
2. Select Suitable Storage Containers: Choose airtight and moisture-resistant containers for storing the tomato seeds. Ideal options include small glass jars, seed envelopes, or plastic bags specifically designed for seed storage.
3. Label the Containers: It’s crucial to label each container with the tomato variety, the date of seed saving, and any other relevant information. This ensures you can easily identify and track the seeds in the future.
4. Store in a Cool and Dry Location: Find a cool, dark, and dry place to store the seed containers. Avoid areas that are prone to temperature fluctuations, excessive humidity, or direct sunlight. A temperature range of 32-41°F (0-5°C) is ideal for long-term seed storage.
5. Consider Desiccants: To minimize moisture inside the containers, you can place a desiccant, such as silica gel packets or dry rice, alongside the seeds. Desiccants help absorb any excess moisture and maintain the seeds’ dryness.
6. Reduce Temperature Exposure: Limit the frequency of temperature changes or exposure to extremes as much as possible. Fluctuating temperatures can affect the seeds’ viability and lead to a shorter shelf life.
7. Regularly Check for Viability: Over time, it’s important to periodically check the viability of stored tomato seeds. You can perform a simple germination test by planting a small batch of seeds and observing their sprouting rate.
By following these storage guidelines, you can maximize the chances of successful germination when it’s time to plant the saved tomato seeds in future growing seasons.
Now that you know how to properly store tomato seeds, let’s explore the importance of labeling and organizing your saved seeds.
Labeling and Organizing Seeds
Properly labeling and organizing your saved tomato seeds is essential for easy identification and efficient seed management. Here are some tips to help you label and organize your seeds:
1. Clear and Legible Labels: Use waterproof and permanent markers to label your seed containers. Clearly write the tomato variety, the date of seed saving, and any other relevant information on the label. Ensure the labels are legible and won’t smudge or fade over time.
2. Alphabetical Order: Consider organizing your seed containers alphabetically by the tomato variety name. This makes it easier to locate specific seeds when you need them for future planting.
3. Seed Catalog or Notebook: Maintain a seed catalog or notebook where you can record details of the tomato varieties you save. Include information such as plant characteristics, flavor, growing requirements, and any specific notes or observations. This provides a handy reference for future gardening seasons.
4. Seed Storage Box: Use a seed storage box or cabinet to keep your seed containers organized in one place. This protects them from damage and helps you easily access and manage your collection.
5. Categorize by Type: If you have a large collection of tomato seeds or multiple seed-saving seasons, you may want to categorize them by type. For example, separate the determinate and indeterminate varieties, or group them by color (red, yellow, green, etc.).
6. Include Growing Instructions: Consider adding basic growing instructions for each variety to the seed containers or labels. This way, you’ll have quick access to the information when it’s time to sow the seeds.
7. Test Germination Periodically: To ensure the viability of your stored tomato seeds, it’s a good idea to periodically test their germination rate. This involves planting a small sample of seeds and recording the percentage that successfully sprouts. It helps you evaluate the quality and viability of the stored seeds.
By labeling and organizing your saved tomato seeds, you can efficiently manage your seed collection, easily find specific varieties, and ensure the longevity of your seeds for future planting.
Now that you know how to label and organize your seeds, let’s explore the exciting part: using the saved tomato seeds for your next growing season.
Read more: How To Store Zinnia Seeds For Next Season
Using Saved Tomato Seeds
After putting in the effort to save and properly store your tomato seeds, it’s time to reap the rewards and utilize them in your next growing season. Here’s how to make the most of your saved tomato seeds:
1. Planning for Planting: Before the planting season arrives, review your seed collection and evaluate which tomato varieties you would like to grow. Consider factors such as flavor, size, color, and disease resistance to select the best tomatoes for your garden.
2. Germination Test: If you haven’t tested the viability of your saved tomato seeds recently, it’s a good idea to perform a germination test. This helps ensure that the seeds are still viable and will yield healthy plants. Simply plant a small batch of seeds and monitor their germination rate.
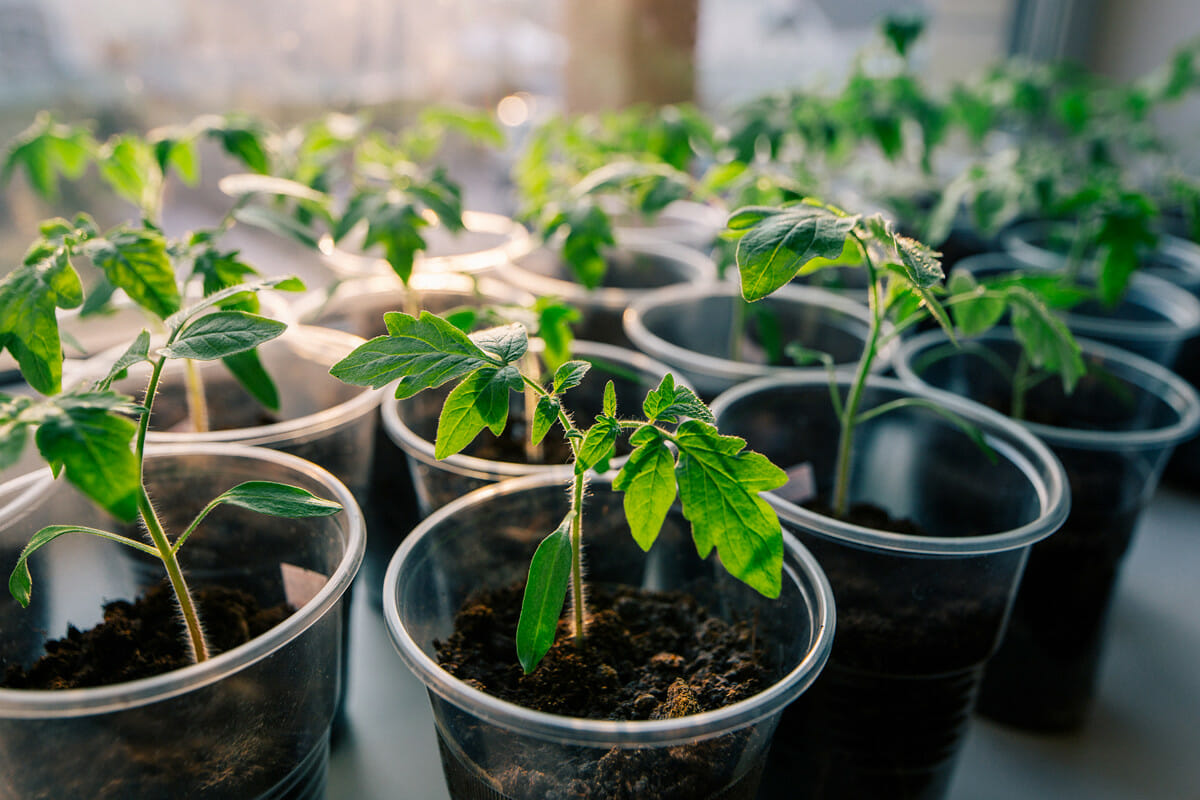
3. Seed Starting: Start your tomatoes indoors in seed trays or containers, several weeks before the last frost date in your area. Follow the recommended planting depth and spacing for each variety.
4. Transplanting: Once your tomato seedlings have developed a few sets of true leaves, they’re ready to be transplanted into larger pots or directly into the garden. Choose a sunny spot with well-draining soil to provide optimal growing conditions.
5. Watering and Care: Regularly water your tomato plants, aiming for consistent moisture without overwatering. Mulching around the base of the plants helps retain moisture and suppress weeds. Monitor for pests and diseases, taking appropriate action to protect your plants.
6. Harvesting and Saving Seeds: As your tomatoes reach maturity and are ready for harvesting, select the best fruits to save seeds from. Follow the same process of cutting, scooping, and fermenting the seeds as outlined earlier in this guide.
7. Continuing the Cycle: Repeat the process of saving and storing your tomato seeds each season to create a continuous cycle of growing and seed saving. As you gain experience, you can refine your seed-saving techniques and experiment with different tomato varieties.
Remember, each generation of saved seeds may slightly adapt to your specific growing conditions over time. This can result in the development of tomato plants that are better suited to your climate and garden environment.
By using your saved tomato seeds, you not only continue the tradition of growing your own fruits but also perpetuate the genetic diversity of tomato varieties, ultimately contributing to the preservation of heirloom and unique tomatoes.
Now that you’re armed with the knowledge of using saved tomato seeds, it’s time to embark on your gardening journey and enjoy the bountiful harvest of homegrown tomatoes.
Happy gardening!
Conclusion
Congratulations! You’ve learned how to save tomato seeds and harness the power of nature to continue the cycle of growth in your garden. By saving tomato seeds, you not only save money but also play a vital role in preserving the diversity of tomato varieties and fostering a sense of community among fellow gardeners.
Throughout this guide, we covered the essential steps to successfully save and store tomato seeds. From choosing the right tomatoes and harvesting them at the optimal stage, to fermenting, washing, and drying the seeds, each step is critical to ensure viable and healthy seeds for future planting.
We emphasized the importance of labeling and organizing your seeds, allowing for easy identification and efficient management of your collection. By maintaining a seed catalog or notebook, you’ll have valuable information at your fingertips, making each growing season more productive and enjoyable.
Remember, utilizing your saved tomato seeds is just the beginning of your journey. By fine-tuning your gardening skills, experimenting with different varieties, and sharing your knowledge and seeds with others, you contribute to the rich tapestry of the gardening community.
So, go forth with confidence and let your garden flourish with the vibrant colors, delicious flavors, and abundant harvests of your very own homegrown tomatoes. Happy growing!
Frequently Asked Questions about How To Save Tomato Seeds For Next Season
Was this page helpful?
At Storables.com, we guarantee accurate and reliable information. Our content, validated by Expert Board Contributors, is crafted following stringent Editorial Policies. We're committed to providing you with well-researched, expert-backed insights for all your informational needs.


0 thoughts on “How To Save Tomato Seeds For Next Season”