Articles
How To Stretch Carpet In A Room
Modified: October 20, 2024
Learn the step-by-step process of stretching carpet in a room with our informative articles. From preparation to completion, we've got you covered.
(Many of the links in this article redirect to a specific reviewed product. Your purchase of these products through affiliate links helps to generate commission for Storables.com, at no extra cost. Learn more)
Introduction
Welcome to our comprehensive guide on how to stretch carpet in a room. Over time, carpets can become loose and wrinkled, affecting both the appearance and functionality of your space. Stretching the carpet can help eliminate these issues, providing a smooth and snug fit that enhances the longevity and comfort of your flooring. In this article, we will walk you through the step-by-step process of stretching carpet, from preparing the room to securing the carpet in place.
Before we get started, let’s take a look at the tools and materials you will need for this project:
- Carpet stretcher
- Knee kicker
- Carpet knife
- Carpet tack strips
- Measuring tape
- Chalk line
- Hammer
- Dust mask
- Gloves
Having these tools on hand will ensure a smooth and efficient stretching process. Now, let’s move on to preparing the room before starting the carpet stretching process.
Key Takeaways:
- Revive your flooring with a professional carpet stretching project. From preparation to furniture reinstallation, follow our guide for a snug, wrinkle-free, and visually appealing room transformation.
- Ensure a successful carpet stretching project by gathering the right tools, preparing the room, and taking your time with each step. Enjoy a refreshed and comfortable living space with a well-fitted carpet.
Read more: How To Stretch A Carpet
Tools and Materials Needed
Before you begin stretching the carpet in your room, it is important to gather all the necessary tools and materials. Here is a list of what you will need:
- Carpet stretcher: This tool is crucial for pulling and stretching the carpet across the room. It consists of a long handle with a head and teeth that grip onto the carpet.
- Knee kicker: The knee kicker is used to push and tuck the edges of the carpet into place. It has a padded end and a handle that you press against with your knee.
- Carpet knife: A sharp carpet knife will come in handy for trimming excess carpet and making precise cuts.
- Carpet tack strips: These strips are installed along the perimeter of the room to hold the carpet in place. They have small nails sticking up that grip onto the carpet backing.
- Measuring tape: You’ll need a measuring tape to measure the length and width of the room, ensuring you cut the carpet to the correct size.
- Chalk line: A chalk line helps you mark straight lines on the floor for alignment and to guide your carpet cutting.
- Hammer: A hammer is necessary for securing the tack strips to the floor.
- Dust mask: It’s important to wear a dust mask to protect yourself from inhaling dust particles while working with the carpet.
- Gloves: Wearing gloves offers protection and improves your grip when handling the carpet and tools.
Having these tools and materials readily available will make the carpet stretching process much easier and more efficient. Now that you have everything you need, let’s move on to preparing the room before stretching the carpet.
Preparing the Room
Before you begin the process of stretching the carpet in your room, it is important to prepare the space properly. Taking the time to prepare will ensure a smoother and more successful carpet stretching project. Here are the steps to follow:
- Remove furniture and existing carpet: Clear the room of any furniture or objects on the floor. If there is existing carpet, carefully remove it by cutting it into manageable sections and rolling it up.
- Clean and prepare the subfloor: Depending on the condition of the subfloor, you may need to clean, repair, or replace it. Sweep or vacuum the subfloor to remove any debris or dirt. Check for any loose or damaged sections and address them before proceeding.
- Check for squeaky floors: Walk around the room and listen for any squeaky spots. If you discover squeaky areas, secure the subfloor to the floor joists using screws to minimize noise.
- Inspect the baseboards: Examine the baseboards around the perimeter of the room. If any are loose or damaged, secure or replace them to ensure a neat and secure carpet installation.
- Check for moisture issues: Before installing new carpet, it’s essential to ensure that the room is not suffering from any moisture problems. Check for signs of water damage or excessive moisture, such as mold or mildew. Address any issues before proceeding.
Taking the time to prepare the room before stretching the carpet is vital for the long-term success and durability of your flooring. By following these steps, you’ll create a clean and suitable base for the carpet installation process. Now that the room is prepared, we can move on to measuring and cutting the new carpet.
Removing Furniture and Existing Carpet
Before you can begin stretching the carpet in your room, it’s essential to remove any furniture or objects on the floor. This will provide you with a clear and unobstructed space to work with. Additionally, if there is existing carpet in the room, it will need to be carefully removed. Here’s how to go about it:
- Clear the room: Remove all furniture, decorations, and any other items from the room. Clearing the space will give you ample room to work and prevent any potential damage to your belongings.
- Prepare the furniture: If there are items that cannot be moved out of the room, such as heavy furniture pieces, you will need to prepare them for the carpet stretching process. Move them away from the walls and cover them with plastic sheets to protect them from dust and debris.
- Start removing the existing carpet: Begin by locating a corner of the room where the carpet is loose or has a seam. Use a carpet knife to cut a small section of the carpet, being careful not to damage the flooring underneath. Once you have a grip on the cut portion, slowly pull the carpet away from the tack strips.
- Roll up the carpet: As you continue pulling the carpet, roll it up tightly to make it more manageable. Continue cutting and rolling until the entire carpet has been removed from the room.
- Remove the carpet padding: If there is a carpet padding underneath the carpet, you may need to remove it as well. The padding is typically held in place by staples or adhesive. Use pliers or a scraper to remove any staples or adhesive residue from the floor.
Removing furniture and existing carpet is a crucial step in preparing the room for stretching the carpet. By following these steps, you’ll create a clean and clear workspace. Now that the room is ready, let’s move on to the next step of cleaning and preparing the subfloor.
Cleaning and Preparing the Subfloor
Once you have removed the furniture and existing carpet from the room, it’s time to clean and prepare the subfloor. The subfloor is the underlying surface that supports the carpet and plays a significant role in ensuring a smooth and secure installation. Follow these steps to clean and prepare the subfloor:
- Sweep or vacuum: Begin by thoroughly sweeping or vacuuming the subfloor to remove any dust, dirt, or debris. This step will help create a clean surface for the carpet to be stretched onto.
- Repair any damages: Inspect the subfloor for any signs of damage, such as cracks or uneven areas. If you come across any issues, take the time to repair them before proceeding. Fill in cracks or gaps with a floor patching compound and level uneven sections using a leveling compound.
- Smooth rough areas: If there are rough areas on the subfloor, it’s important to smooth them out. Use a floor sander to even out any rough spots and create a flat surface for the carpet.
- Remove adhesive residue: If there is any adhesive residue left on the subfloor from the previous carpet installation, it needs to be removed. Apply an adhesive remover and follow the manufacturer’s instructions to dissolve and remove the residue. Use a scraper or putty knife to gently scrape away the softened adhesive.
- Check for moisture: Excessive moisture can lead to problems with the carpet installation and cause mold or mildew growth. Test the subfloor for moisture by taping a plastic sheet to the floor overnight. If condensation forms between the plastic and the floor, you may have a moisture problem that needs to be addressed before proceeding.
By cleaning and preparing the subfloor properly, you ensure a stable and suitable base for the carpet stretching process. Taking the time to address any issues and create a clean surface will contribute to a successful and long-lasting carpet installation. Now that the subfloor is ready, let’s move on to measuring and cutting the new carpet.
Measuring and Cutting New Carpet
Now that you have prepared the room and the subfloor, it’s time to measure and cut the new carpet for a precise and snug fit. Properly measuring and cutting the carpet is crucial to ensure that you have the right dimensions for your room. Follow these steps:
- Measure the room: Use a measuring tape to measure the length and width of the room. Start at one corner of the room and measure to the opposite corner, accounting for any alcoves or irregularities. Take accurate measurements to avoid any unnecessary waste or shortage of carpet.
- Add extra for allowances: When cutting the carpet, it’s important to add a few inches extra on all sides. This additional length ensures that you have enough carpet to stretch and tuck into the corners and along the walls.
- Mark the dimensions: With the measurements in hand, use a chalk line or a straight edge to mark the dimensions on the backside of the carpet. Make sure the lines are straight and clear to guide your cutting process.
- Cut the carpet: Using a sharp carpet knife, carefully cut along the marked lines. Take your time to make clean and precise cuts, following the measurements accurately. Remember to always cut on the backside of the carpet to avoid fraying or damaging the front side.
- Check the fit: Once you have cut the carpet, roll it out in the room to check for proper fit and alignment. Make any necessary adjustments or trims to ensure that the carpet covers the entire floor space without any excessive overhang.
Measuring and cutting the new carpet accurately is essential to achieving a professional-looking and well-fitted result. Take your time during this step to ensure precision and avoid any wastage or rework. Now that you have the correctly sized carpet, let’s move on to applying the carpet tack strips.
Use a knee kicker and a power stretcher to stretch the carpet in the room. Start in the middle and work your way out to the edges, making sure to smooth out any wrinkles as you go.
Applying Carpet Tack Strips
Before stretching the carpet, you need to install carpet tack strips along the perimeter of the room. These strips have small nails or tacks pointing upward that will grip onto the carpet, holding it securely in place. Here’s how to apply carpet tack strips:
- Prepare the tack strips: Measure the length of each wall and cut the tack strips accordingly. Ensure that the tack strips are slightly shorter than the wall to allow room for the carpet to be tucked in.
- Place the tack strips: Position the tack strips against the wall, ensuring that the sharp tacks are facing inward and the strip is about ½ inch away from the wall. Leave a gap of approximately the thickness of the carpet between each strip.
- Nail or staple the tack strips: Use a hammer to gently tap the nails on the tack strips into the floor. Alternatively, you can use a staple gun to secure the tack strips. Ensure that the tack strips are firmly attached and that the nails or staples are securely in place.
- Repeat for all walls: Install tack strips on all sides of the room, ensuring that they are aligned and evenly spaced. Pay close attention to areas where the carpet may need extra support, such as doorways or high traffic areas.
Applying carpet tack strips is a crucial step for anchoring the carpet during the stretching process. Properly installed tack strips will help ensure a tight and secure fit. Once the tack strips are in place, we can move on to the next step: stretching the carpet.
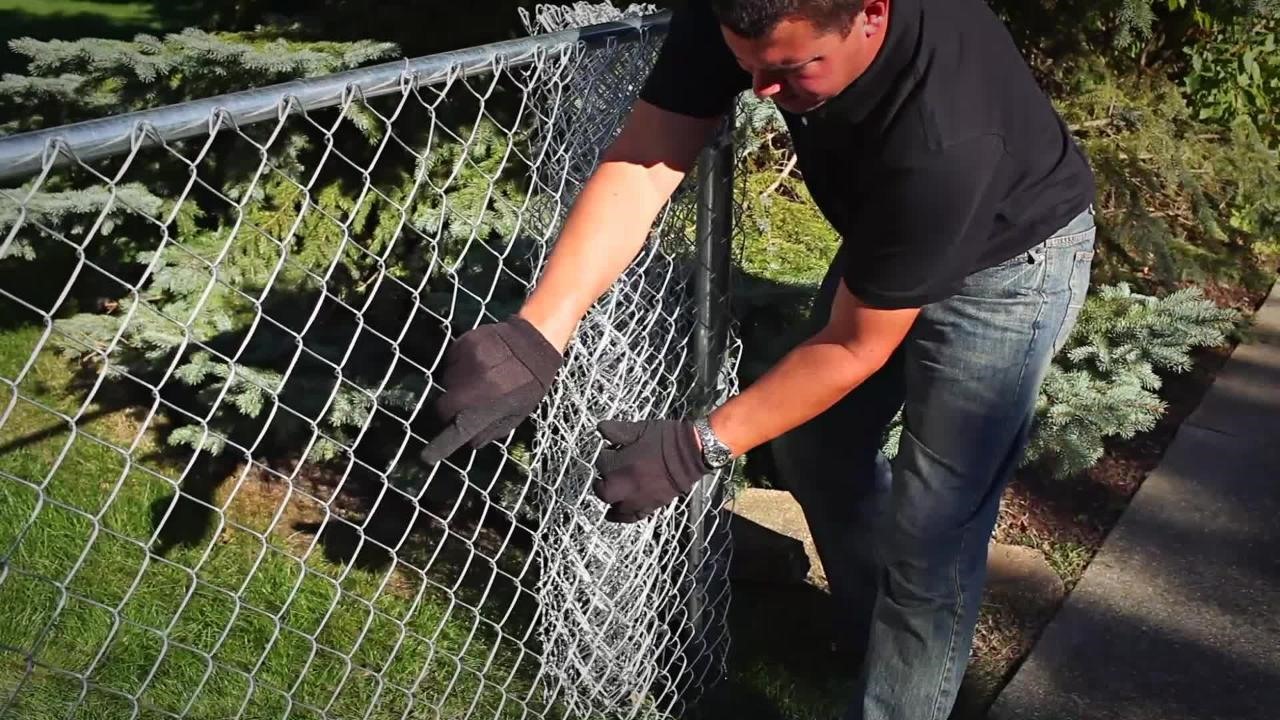
Stretching the Carpet
Now that you have prepared the room and installed the carpet tack strips, it’s time to stretch the carpet. This step is crucial in achieving a smooth and wrinkle-free installation. Here’s how to stretch the carpet:
- Start at one corner: Begin at one corner of the room, farthest away from the doorway. This will allow you to work your way towards the exit, ensuring that the carpet lays flat and taut throughout the process.
- Position the carpet stretcher: Place the carpet stretcher about six inches away from the wall, near the corner where you’re starting. Make sure the teeth of the stretcher head are pushing against the carpet’s edge.
- Push the stretcher forward: Using the handle of the carpet stretcher, push it forward to stretch the carpet as much as possible. Apply firm, steady pressure, but be careful not to overstretch or damage the carpet.
- Hook the carpet onto the tack strip: With the carpet stretched, use the knee kicker to hook the edge of the carpet onto the tack strip nearest to the wall. Position the knee kicker approximately two inches away from the wall and firmly push your knee onto the padded end to create tension.
- Kick the carpet into place: Use your knee to strike the padded end of the knee kicker, forcefully pushing the carpet edge onto the tack strip. This action should secure the carpet in place.
- Repeat the stretching process: Move on to the next section of the wall and repeat the stretching process. Place the carpet stretcher, push it forward, hook the carpet with the knee kicker, and kick it into place. Repeat this step until you have stretched and secured the entire perimeter of the room.
Stretching the carpet is a demanding task that requires precision and patience. Take your time to ensure that the carpet is evenly stretched and free from wrinkles or bulges. Once the carpet is stretched, we are ready to move on to securing it in place.
Securing the Carpet
After stretching the carpet, the next step is to secure it in place to ensure a long-lasting and stable installation. This will prevent the carpet from shifting or becoming loose over time. Here’s how to secure the carpet:
- Trim excess carpet: Using a carpet knife, carefully trim any excess carpet along the edges of the room. Make clean and straight cuts, avoiding any jagged or uneven edges.
- Tuck the carpet into the tack strips: With the excess carpet trimmed, use a putty knife or a blunt object to push the carpet edge into the gap between the wall and the tack strip. This will securely hold the carpet in place.
- Work your way around the room: Starting from the corner where you began stretching the carpet, move along the perimeter of the room, tucking the carpet into the tack strips. Use a knee kicker to firmly push the carpet into the corners and edges for a tight fit.
- Smooth out wrinkles: As you go, check for any wrinkles or bulges in the carpet. If you notice any, use the knee kicker or your hands to pull the carpet tight and smooth out any imperfections.
- Repeat the process for all sides: Continue working your way around the room, securing and smoothing the carpet along each wall. Take your time to ensure that the carpet is properly taut and free from any wrinkles.
By following these steps, you can securely fasten the carpet in place, ensuring a neat and professional-looking installation. With the carpet secured, the next step is to trim any excess carpet.
Read more: How To Stretch Artificial Grass
Trimming Excess Carpet
Once you have secured the carpet along the edges of the room, it’s time to trim any excess carpet for a clean and finished look. Trimming the excess carpet will give your installation a polished appearance. Follow these steps to trim the excess carpet:
- Inspect the edges: Take a close look at the edges of the carpet to identify any areas where it extends beyond the desired length.
- Measure and mark: Use a measuring tape to determine the desired length of the carpet. Mark it with a straight line using a chalk or a similar temporary marking tool.
- Cut the carpet: Using a sharp carpet knife or a utility knife, carefully cut along the marked line. Ensure that you make a clean and straight cut, following the guidelines you have set.
- Check the fit: After making the cut, check the fit of the carpet to ensure that it aligns with the edge of the room. Adjust as needed and make any additional trims if necessary.
Trimming excess carpet is an essential step to achieve a clean and professional appearance. Take your time during this step to ensure precision and accuracy. Once the excess carpet has been trimmed, the final step is to reinstall any furniture that was removed.
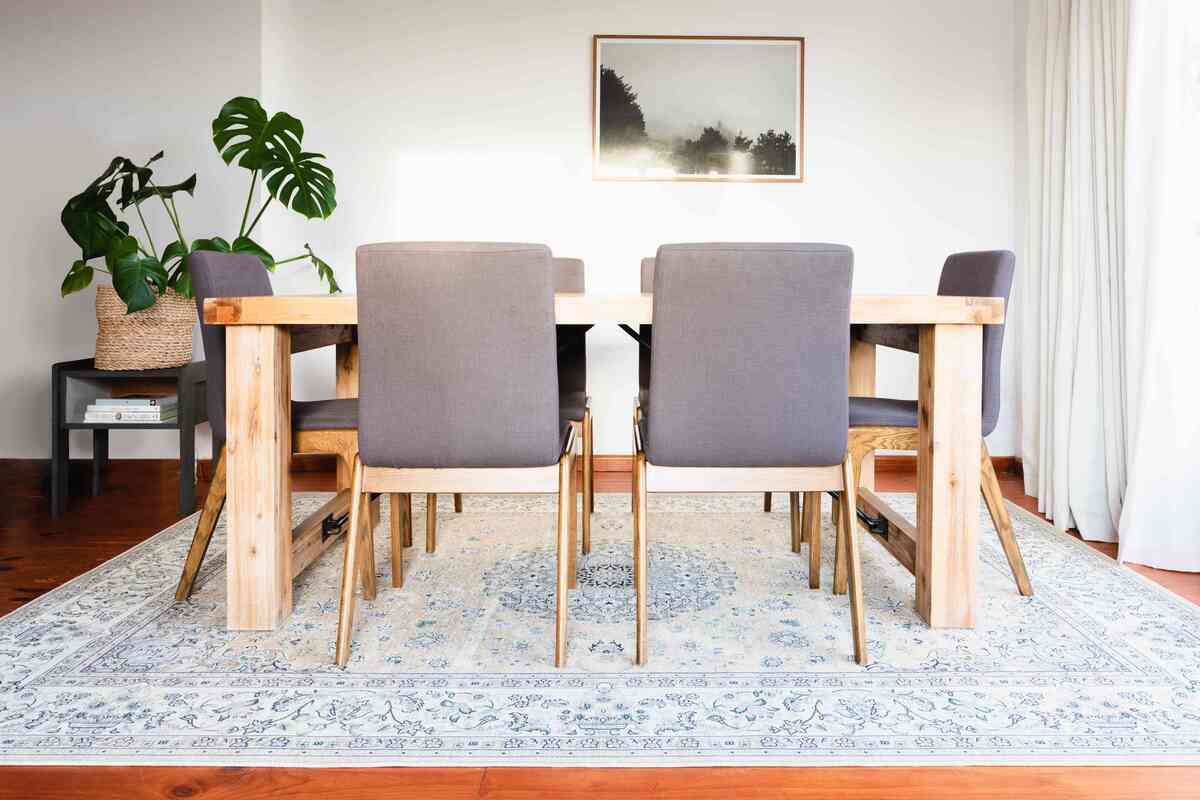
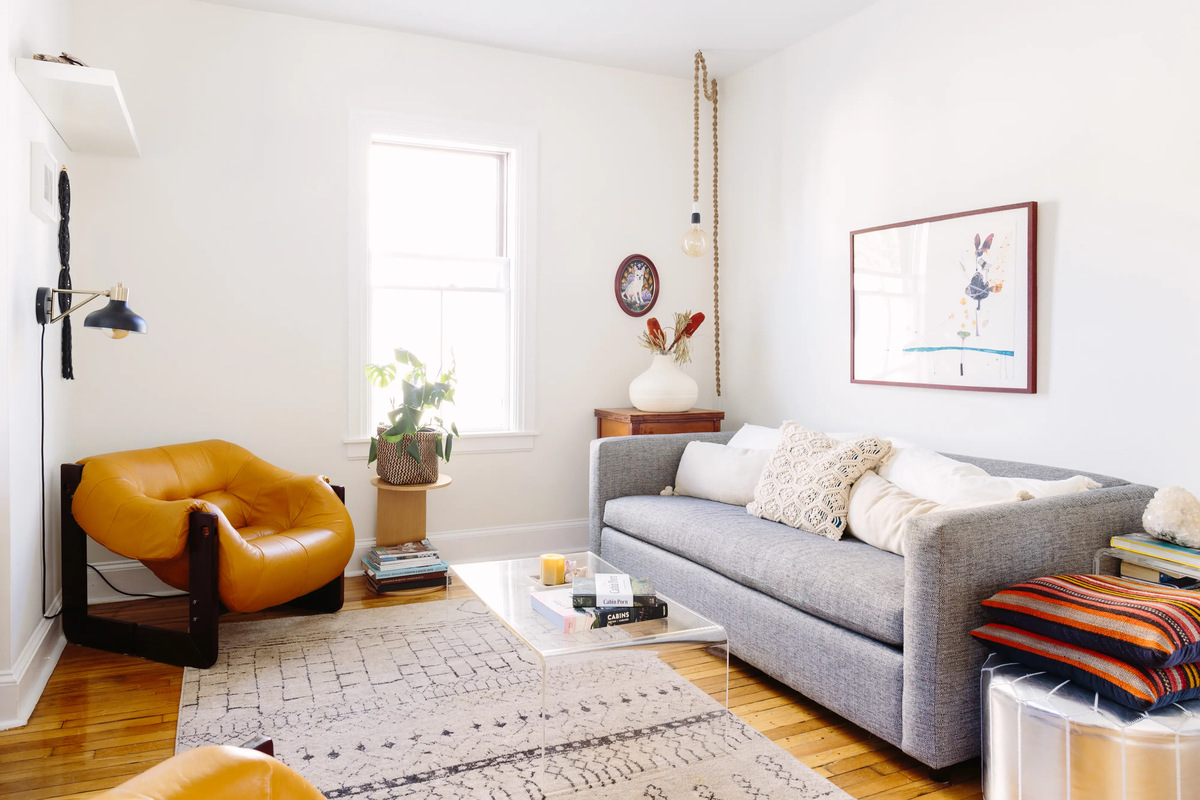
Reinstalling Furniture
With the carpet properly stretched, secured, and excess trimmed, it’s time to bring back the furniture and complete the room’s transformation. Here are the steps to follow when reinstalling your furniture:
- Clean furniture: Before moving the furniture back into the room, take the opportunity to clean each piece. Dust and polish as needed to ensure a fresh and inviting atmosphere.
- Create a plan: Determine the layout and arrangement for your furniture in the room. Consider the flow of the space and the placement of larger pieces such as sofas, tables, and cabinets.
- Start with larger items: Begin by repositioning the larger furniture items back in their designated places. Enlist the help of others if needed to safely move heavy or awkward pieces.
- Arrange smaller items: Once the larger furniture is in place, focus on arranging smaller items such as chairs, side tables, and decorative pieces. Experiment with different placements until you achieve the desired aesthetic and functionality.
- Use furniture pads: To prevent any damage to the newly stretched carpet, consider attaching furniture pads to the legs of your furniture. These pads provide cushioning and help prevent indentations in the carpet fibers.
- Take your time: Don’t rush the process of arranging the furniture. Take the time to ensure that each piece is correctly positioned and that the overall layout complements the room’s design and functionality.
Reinstalling the furniture is the final touch in completing the carpet stretching process and bringing the room back to life. By following these steps, you can create a welcoming and well-organized space that showcases your newly stretched carpet.
Congratulations! You have successfully stretched and installed your carpet, transforming your room into a comfortable and visually appealing space. Enjoy the fresh look and feel of your newly stretched carpet for years to come.
Conclusion
Stretching carpet in a room is a rewarding project that can revive the appearance and functionality of your flooring. By following the step-by-step process outlined in this guide, you can achieve a professional-looking installation that ensures a snug and wrinkle-free carpet. Let’s recap the main points covered:
First, gather all the necessary tools and materials needed for the project. These include a carpet stretcher, knee kicker, carpet knife, carpet tack strips, measuring tape, chalk line, hammer, dust mask, and gloves.
Prepare the room by removing furniture and existing carpet, cleaning and preparing the subfloor, and addressing any repairs or moisture issues. This step is crucial for creating a stable and clean foundation to work on.
Measure and cut the new carpet accurately, accounting for allowances and ensuring straight lines. This step sets the stage for a precise and well-fitted installation.
Apply carpet tack strips along the perimeter of the room to anchor the carpet in place. This provides the necessary grip to prevent shifting or movement.
Stretch the carpet using a carpet stretcher and knee kicker, starting from one corner and working your way around the room. Make sure to achieve proper tension and secure the carpet onto the tack strips.
Trim any excess carpet to achieve a clean and finished look, and then reinstall the furniture in the room, taking the time to arrange it in a way that suits your desired layout and aesthetic.
Remember to approach each step with care and attention to detail. Take your time during each phase of the carpet stretching process to ensure the best possible outcome.
By successfully stretching your carpet, you can enjoy a refreshed and comfortable living space. The smooth and properly fitting carpet will not only enhance the visual appeal of the room but also extend the lifespan and durability of your flooring.
We hope this comprehensive guide has provided you with the knowledge and confidence to tackle your carpet stretching project. Enjoy the results of your hard work and create a home environment that truly reflects your style and comfort.
Frequently Asked Questions about How To Stretch Carpet In A Room
Was this page helpful?
At Storables.com, we guarantee accurate and reliable information. Our content, validated by Expert Board Contributors, is crafted following stringent Editorial Policies. We're committed to providing you with well-researched, expert-backed insights for all your informational needs.