Articles
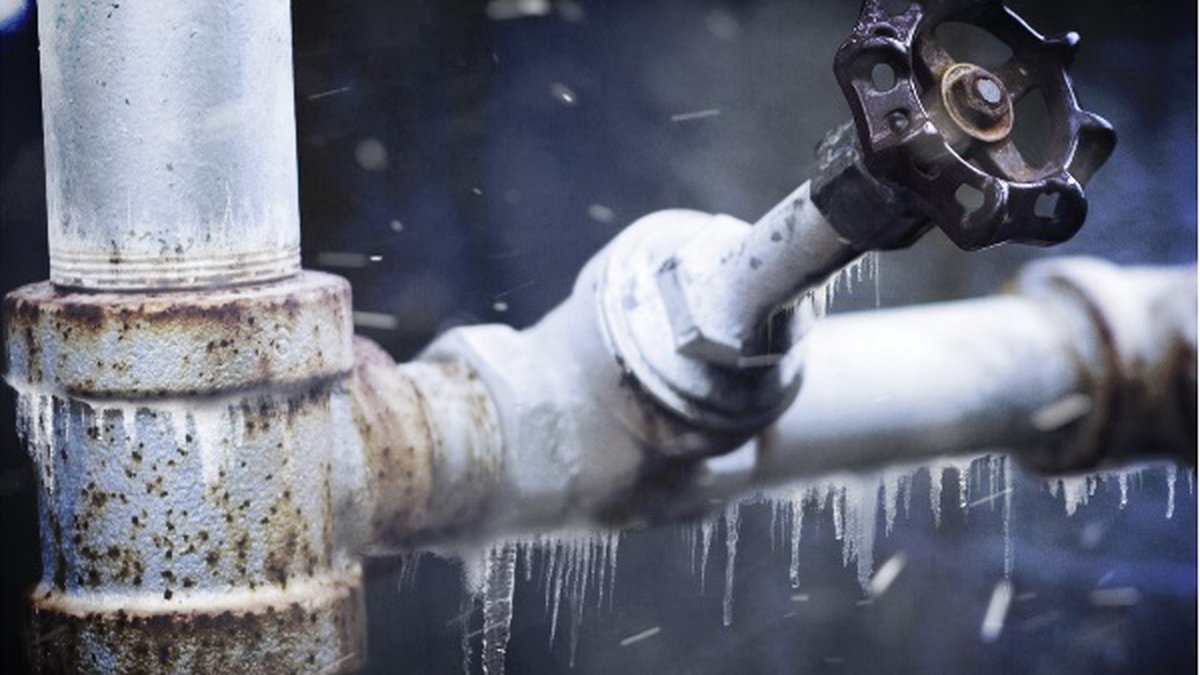
How To Thaw Frozen Plumbing Pipes
Modified: October 20, 2024
Learn the best techniques and tips for thawing frozen plumbing in this comprehensive article. Keep your pipes flowing smoothly.
(Many of the links in this article redirect to a specific reviewed product. Your purchase of these products through affiliate links helps to generate commission for Storables.com, at no extra cost. Learn more)
Introduction
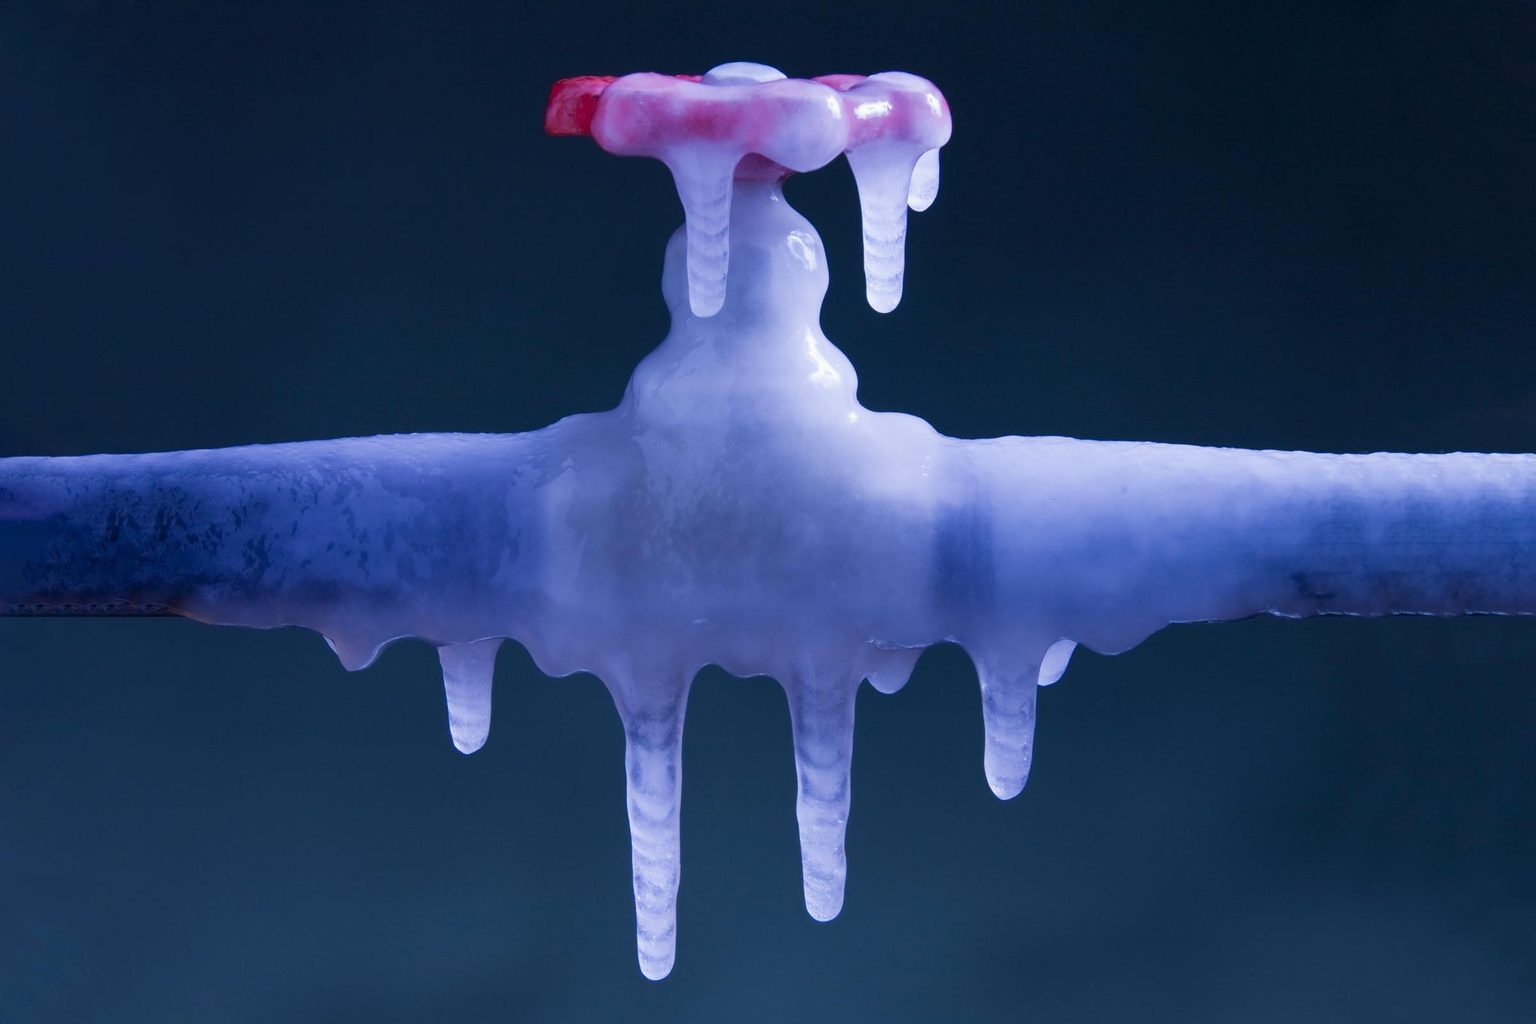
Dealing with frozen plumbing can be a real nightmare, especially during the cold winter months. Frozen pipes not only disrupt the flow of water but can also pose a risk of bursting, leading to water damage and costly repairs. Understanding the causes of frozen plumbing and knowing how to thaw it safely and effectively is essential for any homeowner or renter.
In this article, we will explore the common causes of frozen plumbing, safety precautions to take when dealing with frozen pipes, methods to identify frozen pipes, and various techniques for thawing them. Additionally, we will discuss what to do after thawing the pipes and provide tips to prevent future frozen plumbing issues.
So, grab a cup of hot cocoa and join us as we delve into the world of frozen plumbing solutions!
Key Takeaways:
- Prevent frozen plumbing by insulating exposed pipes, sealing gaps, and maintaining consistent interior temperatures. Prioritize safety when thawing pipes and consult a professional if unsure.
- Slow, gradual thawing methods are safest. Avoid open flames and use heat cautiously. After thawing, check for leaks and take preventive measures to avoid future frozen plumbing.
Read more: How To Thaw Outdoor Water Pipes
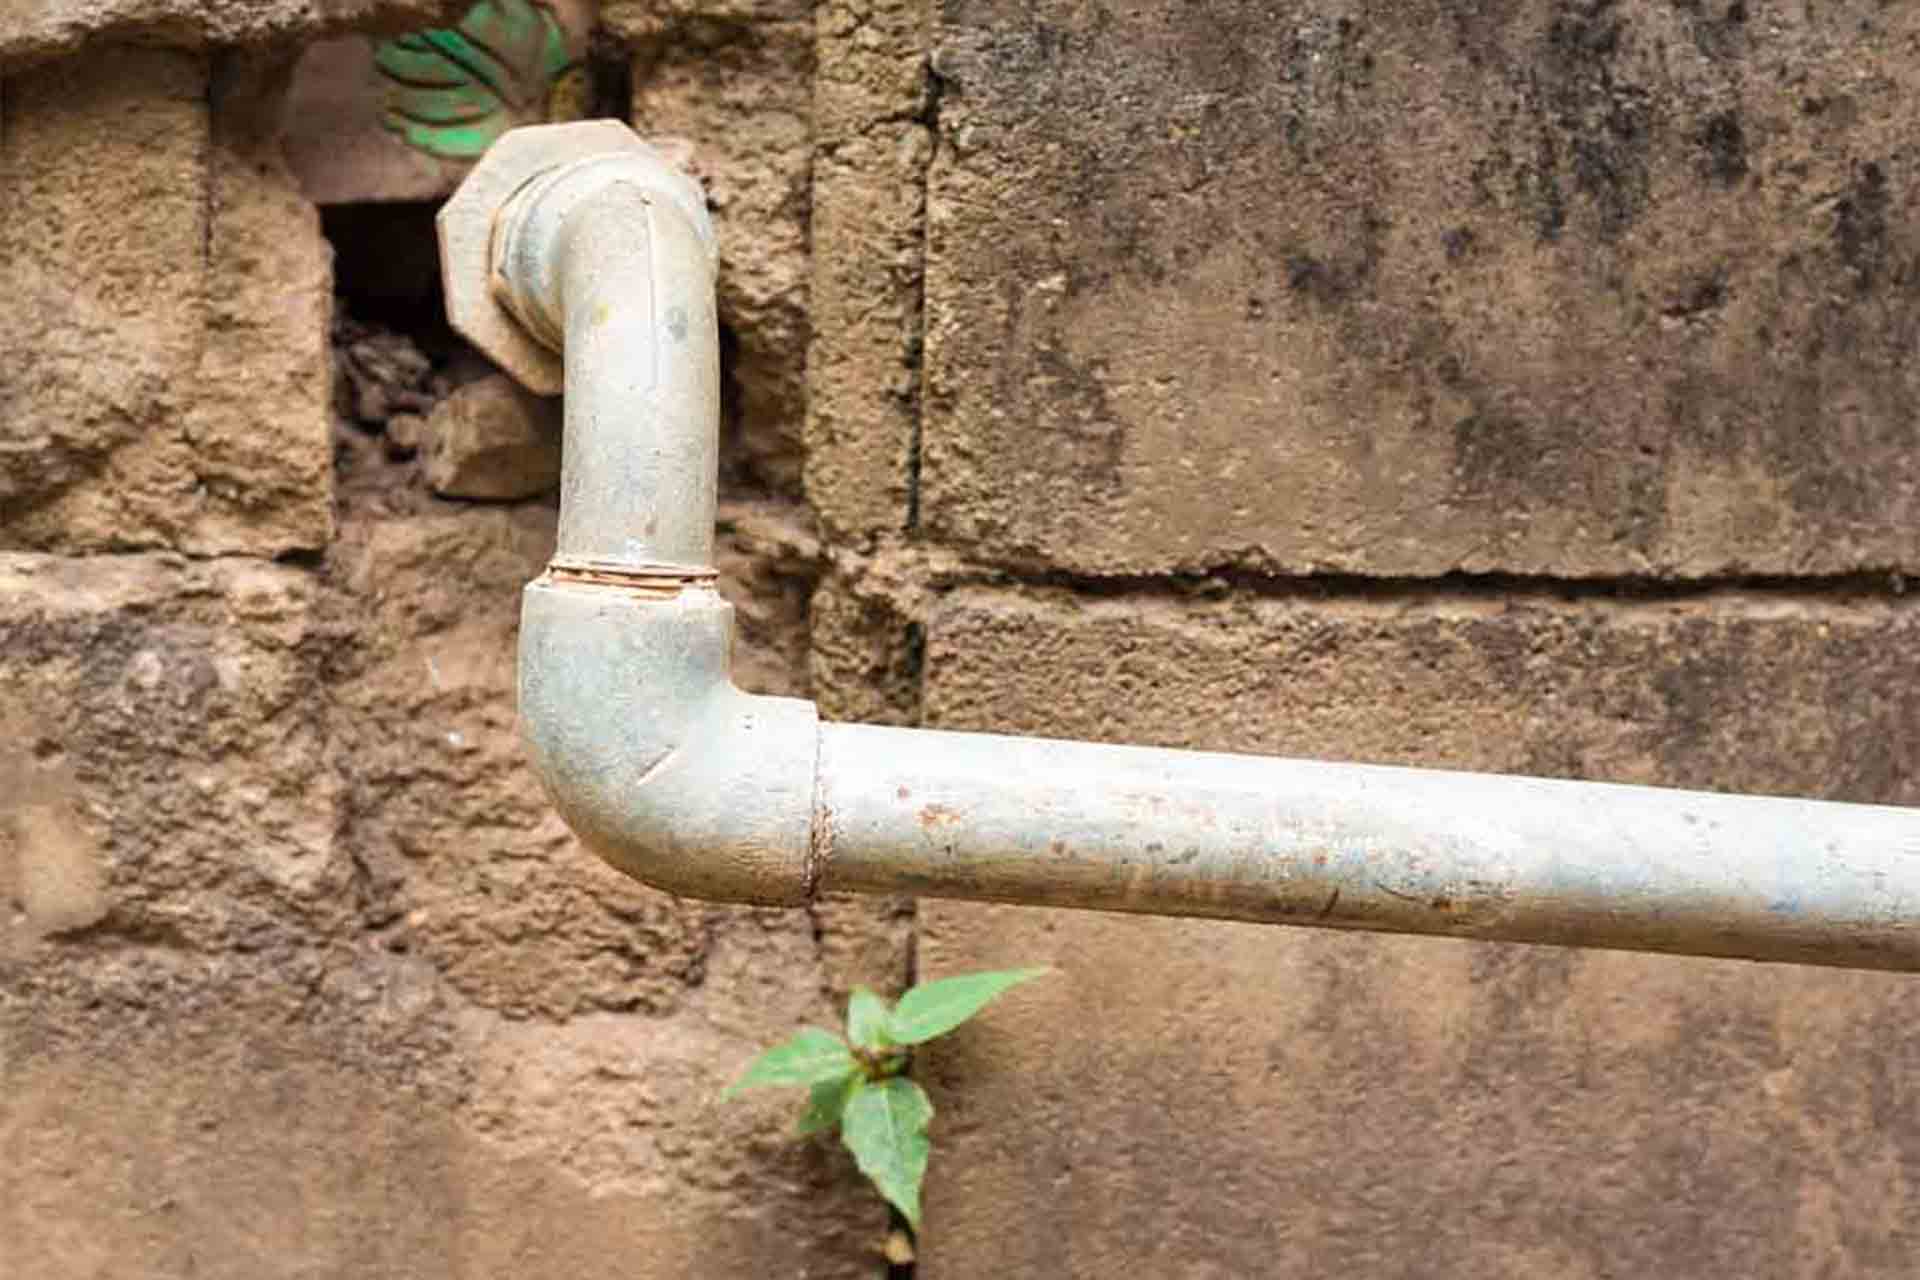
Understanding the Cause of Frozen Plumbing
Before diving into the methods of thawing frozen plumbing, it’s important to understand the root causes of this common issue. Frozen pipes occur when water in the pipes freezes due to exposure to low temperatures. There are several factors that contribute to the freezing of plumbing:
- Low temperatures: The primary cause of frozen pipes is cold weather. When temperatures drop below freezing, the water inside the pipes can freeze and expand, creating pressure that can lead to pipe bursts.
- Poor insulation: Inadequate insulation in the walls, floors, or ceilings can leave pipes exposed to the cold air, making them more vulnerable to freezing. Areas such as basements, attics, and crawl spaces are particularly susceptible to poor insulation.
- Exterior openings: Holes or cracks around the exterior of the house, especially near areas where pipes enter or exit the building, can allow cold air to seep in and directly expose the plumbing to freezing temperatures.
- Unheated spaces: Unheated areas of the house, such as garages, sheds, or outbuildings, can have pipes running through them. If these spaces are not properly heated or insulated, the pipes within them are at a high risk of freezing.
- Neglected or burst pipes: If pipes are already damaged or have existing leaks, the water within them can freeze more easily. It’s important to address any leaks or damage promptly to prevent further complications during cold weather.
By understanding these causes, you can take preventative measures to protect your plumbing system from freezing temperatures. Insulating exposed pipes, sealing any gaps or cracks, and keeping your home at a consistent temperature can help minimize the risk of frozen plumbing.
Safety Precautions
When dealing with frozen plumbing, it’s important to prioritize safety to avoid personal injury or further damage to your pipes. Here are some essential safety precautions to keep in mind:
- Turn off the water supply: Before attempting any thawing methods, locate the main water shut-off valve and turn off the water supply to prevent any accidental leaks or water damage.
- Wear protective gear: When working on frozen pipes, it’s wise to dress appropriately. Wear protective gloves, goggles, and clothing that covers your skin to avoid any injuries from sharp objects or accidental splashes.
- Avoid open flames: Never use open flames, such as candles or blowtorches, to thaw frozen pipes. This can create a fire hazard and damage the pipes further. Stick to safe, non-flammable thawing methods instead.
- Use heat sources cautiously: When using heat sources like hairdryers or heat lamps to thaw the pipes, keep them away from any flammable materials and avoid using extension cords to prevent electrical hazards.
- Turn off electrical appliances: Prior to using any electrical tools or appliances, ensure that they are turned off and unplugged. This prevents any electrical accidents or damage to the devices.
- Be cautious of water and electricity: If your frozen pipes are located near electrical outlets or appliances, exercise caution when working in those areas. Water and electricity can be a dangerous combination, so keep them separate and dry.
By following these safety precautions, you can minimize the risk of accidents or further damage when dealing with frozen plumbing. Remember to prioritize your safety and seek professional help if you’re unsure about any aspect of the process.
Identifying Frozen Pipes
Before you can effectively thaw your frozen plumbing, you need to identify which pipes are frozen. The following signs can help you determine if you have frozen pipes:
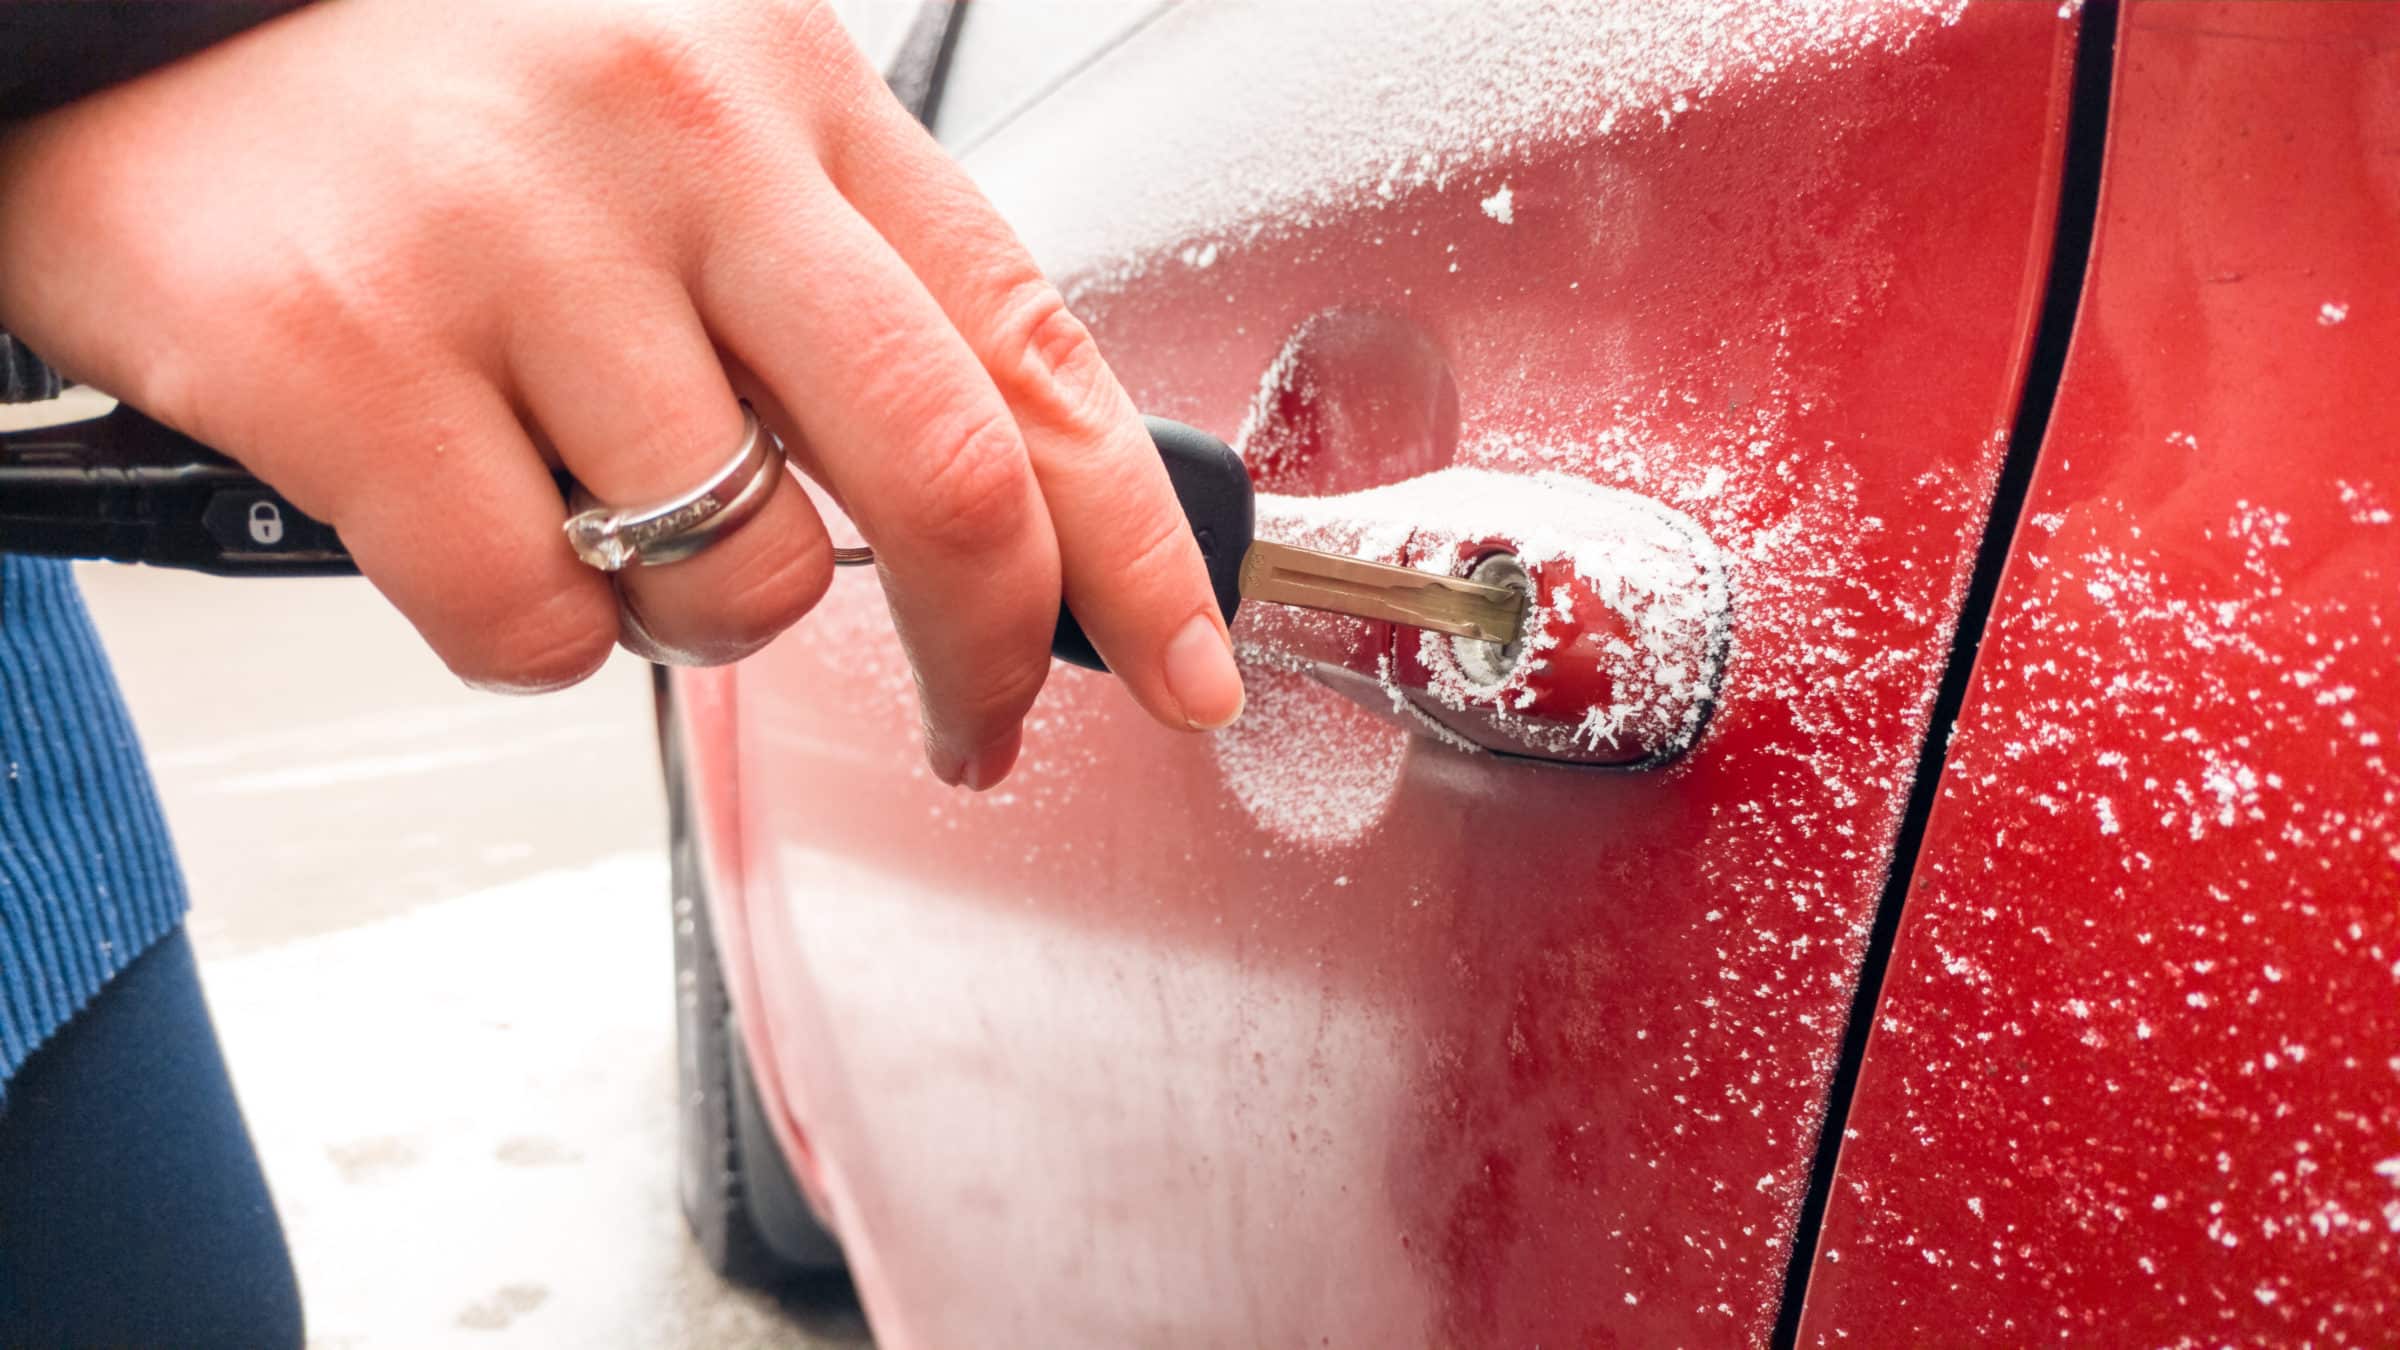
- No water flow: One of the most obvious signs of a frozen pipe is little to no water flow when you turn on a faucet or open a valve. If only one faucet is affected, it’s likely that the pipe leading to that fixture is frozen.
- Strange odors: If you detect unusual odors coming from your faucets or drains, it could be a sign of a frozen pipe. This odor may indicate that water is trapped within the pipe due to freezing, preventing it from flowing freely.
- Frost or condensation: Check the exposed pipes in your home, such as those in the basement, attic, or crawl spaces, for signs of frost or condensation. This indicates that the pipes are experiencing sub-freezing temperatures and may be frozen.
- Unusual sounds: If you hear strange noises, such as cracking or hissing sounds, when running water or using plumbing fixtures, it could indicate that the pipes are frozen or under pressure. This requires immediate attention to prevent bursting.
- Visible bulges or leaks: Frozen pipes can cause the water inside them to expand, leading to bulges or leaks in the pipe. Inspect your plumbing system for any visible signs of damage or abnormality.
- Cold spots on walls or floors: If you notice specific areas of a wall or floor that feel colder than the surrounding areas, it may indicate that there is a frozen pipe behind it. Touch the wall or floor gently to check for these cold spots.
Identifying the specific pipes that are frozen will help you target your thawing efforts more efficiently. Remember to exercise caution and avoid applying excessive force or heat directly to the frozen pipes, as this can cause further damage. If you’re unsure about the location or severity of the frozen pipes, it’s best to consult a professional plumber for assistance.
Slow Thawing Methods
When it comes to thawing frozen plumbing, slow and gradual methods are often the safest and most effective. Here are some slow thawing methods that you can try:
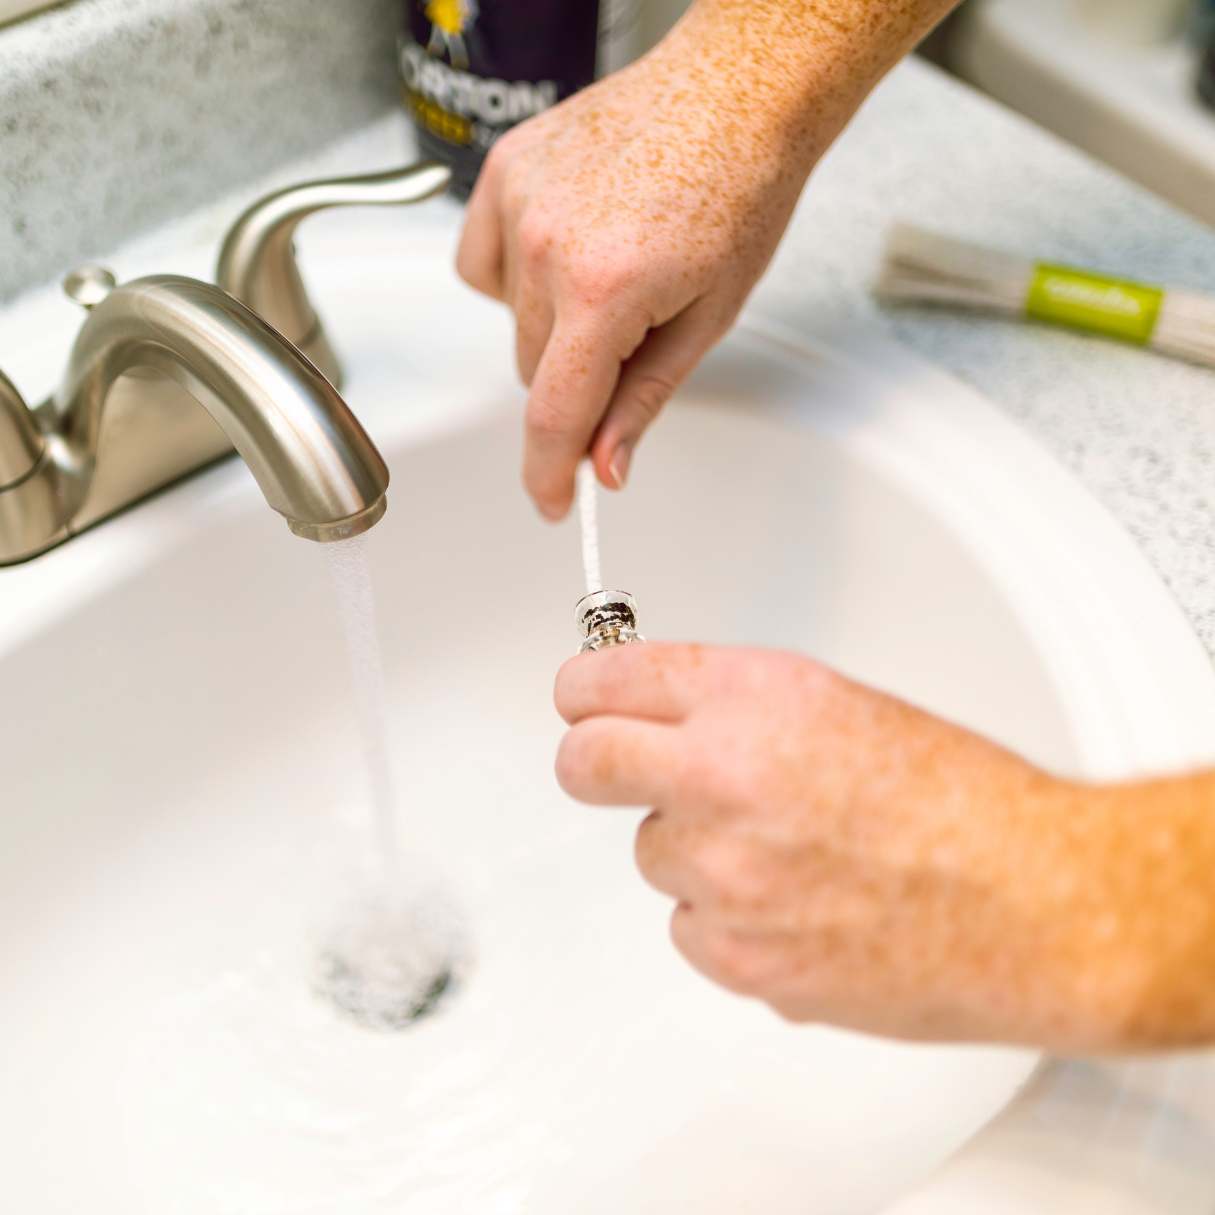
- Open the faucet: Start by opening the faucet connected to the frozen pipe. This allows water to flow through the pipe once it starts thawing. Running water will help melt the ice more quickly and relieve pressure in the pipe.
- Apply gentle heat: Use a hairdryer, heating pad, or hot towels to apply gentle heat to the frozen section of the pipe. Move the heat source back and forth along the length of the pipe, focusing on the frozen area. Be patient and avoid using high heat, as it can cause the pipe to expand rapidly and potentially burst.
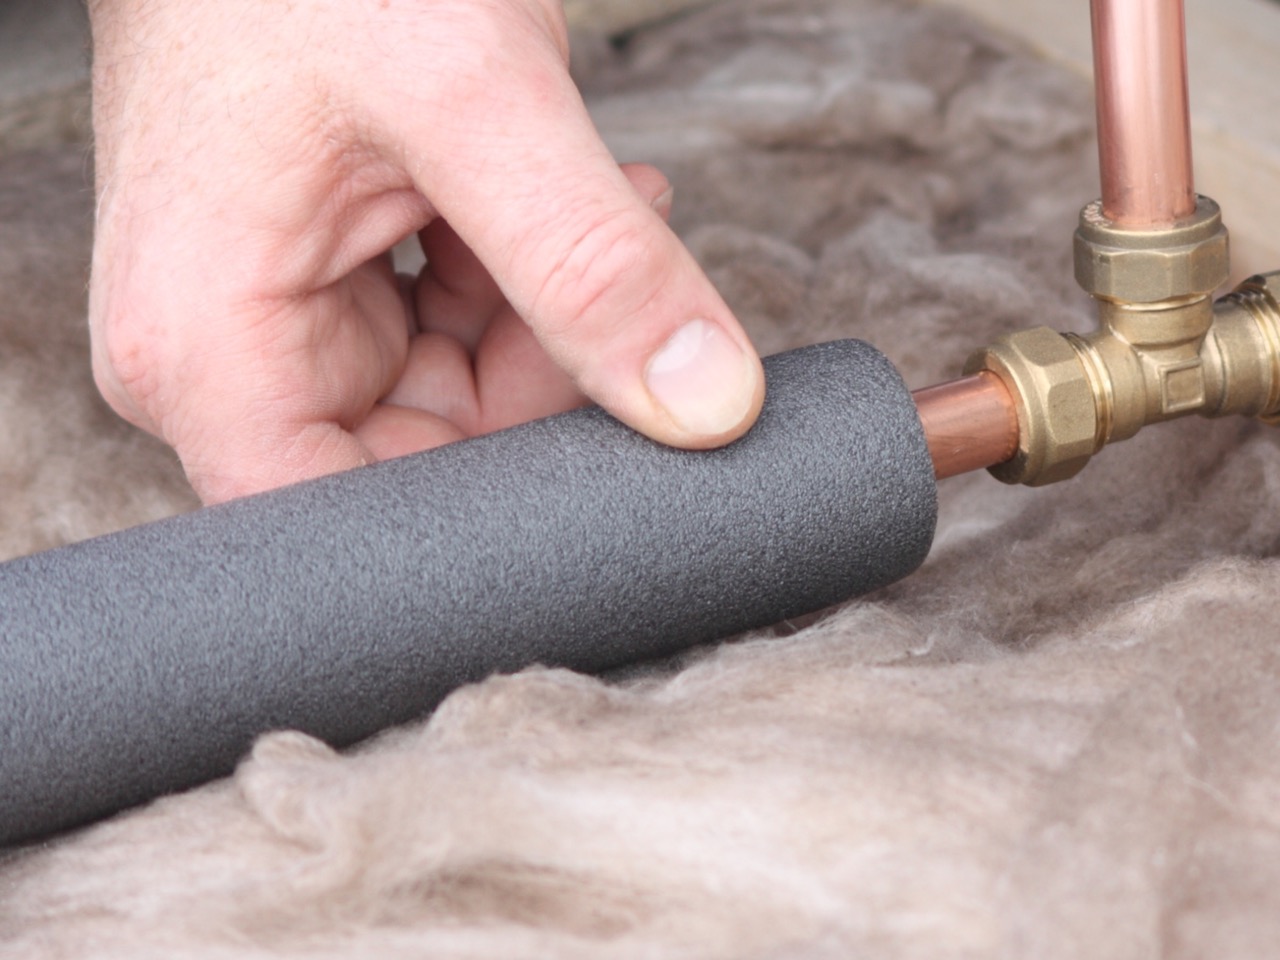
- Wrap pipes with insulation: If the frozen pipe is accessible, consider wrapping it with insulation material, such as pipe sleeves or heat tape. Insulation helps retain heat and prevents further freezing. Make sure to follow the manufacturer’s instructions for proper installation.
- Use warm towels: Dip towels in warm water and wrap them around the frozen pipes. Refresh the towels with warm water as needed. This method slowly raises the temperature of the pipes and aids in thawing.
- Utilize space heaters: Place a space heater in the room where the frozen pipes are located. Ensure proper ventilation and keep the heater a safe distance away from any flammable materials. Allow the heat to circulate in the room, which can help raise the temperature and thaw the pipes slowly.
Remember, slow thawing methods require patience and may take several hours to fully restore water flow. Avoid using any open flames or high-temperature devices to thaw the pipes, as they can be dangerous and cause damage. If you are unsure or if the frozen pipes are not thawing with these methods, it’s best to seek the assistance of a professional plumber.
To thaw frozen plumbing, use a hair dryer or heat lamp to gently warm the affected area. Do not use an open flame to avoid the risk of fire or damage to the pipes.
Read more: How Long To Thaw Pipes With A Hair Dryer
Using Heat to Thaw Frozen Plumbing
If the slow thawing methods are not effective or if you need to speed up the process, using heat can help thaw frozen plumbing more quickly. Here are some heat-based methods to consider:
- Hot water soak: Fill a basin or bucket with hot water (not boiling) and carefully pour it over the frozen pipe. Start from the faucet end and work your way towards the frozen section. The hot water can help melt the ice and restore water flow. Repeat this process several times if needed.
- Heat gun: A heat gun can be effective in thawing frozen pipes. Keep the heat gun moving back and forth along the frozen section of the pipe, maintaining a safe distance to prevent damage. Gradually heat the pipe until the ice inside melts and water starts flowing. Be cautious not to overheat the pipe.
- Portable heater: Position a portable heater near the frozen pipes, directing the heat towards the affected area. Ensure proper ventilation and keep the heater at a safe distance from any flammable objects. The consistent heat from the heater can help thaw the pipes more quickly.
- Infrared lamp: An infrared lamp emits concentrated heat, which can be directed towards the frozen pipes. Place the lamp at a safe distance and angle it towards the frozen section. Leave the lamp on for a period of time, periodically checking for signs of thawing.
- Heat tape: Heat tape is an electrical heating element that can be wrapped around the frozen pipe. Plug in the tape and let it provide constant heat to thaw the ice within the pipe. Follow the manufacturer’s instructions for proper installation and usage.
When using heat to thaw frozen plumbing, exercise caution and monitor the process closely. Avoid applying excessive heat directly to the pipes, as this can lead to damage or even pipe bursts. If the frozen pipes are not thawing or if you are uncomfortable using heat-based methods, it is advisable to contact a licensed plumber for assistance.
Electrical Tools for Thawing Frozen Pipes
In some cases, using electrical tools can provide an effective way to thaw frozen pipes. These tools are specifically designed for thawing purposes and can help speed up the process. However, it’s important to use them with caution and follow the manufacturer’s instructions. Here are some common electrical tools used for thawing frozen pipes:
- Pipe Heating Cables: Pipe heating cables, also known as heat tapes, are designed to wrap around the frozen pipe. These cables produce consistent heat, helping to thaw the ice inside. It’s crucial to carefully follow the manufacturer’s instructions and precautions for proper installation and usage of heating cables.
- Hot Air Guns: Hot air guns, or heat guns, are electrical tools that emit a controlled stream of hot air. Holding the heat gun a safe distance away from the frozen pipe, move it back and forth along the frozen section to gradually thaw the ice. Avoid applying excessive heat and keep the area well-ventilated to prevent any damage or safety hazards.
- Electric Pipe Thawers: Electric pipe thawers are specifically designed devices for thawing frozen pipes. These tools deliver a controlled amount of heat directly into the frozen pipe, rapidly thawing the ice inside. Electric pipe thawers can be rented or purchased, but it’s important to carefully follow the manufacturer’s instructions and safety guidelines.
- Infrared Heat Lamps: Infrared heat lamps emit concentrated heat energy, which can be directed towards the frozen pipes. Position the heat lamp at a safe distance and angle it towards the frozen section. Leave the lamp on for a period of time, periodically checking for signs of thawing. Ensure proper safety precautions and avoid any flammable materials in the vicinity.
- Electric Space Heaters: Electric space heaters can be used to raise the ambient temperature in the room where the frozen pipes are located. By keeping the area warm, the heat from the space heater can assist in thawing the pipes gradually. Place the space heater at a safe distance from any flammable objects and ensure proper ventilation.
When using electrical tools for thawing frozen pipes, always prioritize safety. Follow the manufacturer’s instructions, use the tools with caution, and be aware of any potential hazards. If you are uncertain about using electrical tools or if the frozen pipes are not thawing, it’s best to seek professional help from a licensed plumber.
Precautions After Thawing
After successfully thawing your frozen pipes, it’s important to take some precautions to ensure the smooth operation of your plumbing system and prevent future issues. Here are some essential steps to follow:
- Check for leaks: Thoroughly inspect the thawed pipes and surrounding areas for any signs of leaks or water damage. Look for dripping water, wet spots, or discoloration on walls, floors, or ceilings. If you notice any leaks, address them immediately to prevent further damage.
- Turn on faucets slowly: Slowly turn on the faucets connected to the previously frozen pipes. This gradual process allows the water to flow smoothly and helps release any air pockets that may have formed during the freezing process. Let the water run for a few minutes to ensure a steady flow without any disruptions.
- Monitor water flow and pressure: Pay attention to the water flow and pressure after thawing the pipes. If you notice a significant decrease in water flow or noticeable changes in water pressure, it may indicate a possible blockage or further issues within the plumbing system. In such cases, it’s best to contact a professional plumber for further inspection.
- Insulate exposed pipes: To prevent future freezing issues, consider insulating any exposed pipes in unheated areas of your home, such as basements, attics, or crawl spaces. Insulation sleeves or wrapping can help protect the pipes from freezing temperatures and minimize the risk of future freezing.
- Maintain consistent temperatures: Keep your home at a consistent temperature, especially during periods of freezing weather. This helps maintain a stable environment for your plumbing system and minimizes the risk of frozen pipes. Avoid drastic temperature fluctuations that can potentially lead to freezing.
- Consult a professional plumber: If you encounter persistent issues with frozen pipes or if you are unsure about the condition of your plumbing system after thawing, it’s advisable to seek the assistance of a professional plumber. They can provide a thorough inspection, address any underlying problems, and offer expert recommendations to prevent future frozen plumbing issues.
By following these precautions, you can ensure the smooth functioning of your plumbing system and reduce the chances of encountering frozen pipes again. Regular maintenance and proactive measures will go a long way in preventing future freezing-related headaches.
Preventing Future Frozen Plumbing Issues
Frozen plumbing can be a major inconvenience and lead to costly repairs. To prevent future frozen pipe issues, consider implementing the following preventive measures:
- Insulate exposed pipes: Insulate any exposed pipes in unheated areas of your home, such as basements, attics, or crawl spaces. Use pipe insulation sleeves or wrapping to provide a layer of protection against freezing temperatures. Pay special attention to pipes near exterior walls or those located in areas prone to cold drafts.
- Seal cracks and gaps: Inspect your home for any cracks or gaps that could allow cold air to enter. Use weatherstripping or caulk to seal these openings around windows, doors, and utility entry points. This will help maintain a stable interior temperature and protect your pipes from freezing.
- Keep interior temperatures consistent: Avoid drastic fluctuations in indoor temperature, especially during colder periods. Maintain a consistent temperature throughout your home, even when you’re away. This will help prevent rapid temperature drops that can lead to frozen pipes.
- Open cabinet doors: Open cabinet doors below sinks in the kitchen and bathroom to allow warm air to circulate around the pipes. This will help prevent the pipes from becoming too cold and freezing. Remember to remove any hazardous materials from the reach of children.
- Allow faucets to drip: During extremely cold weather conditions, allow faucets connected to vulnerable pipes to drip slowly. This continuous flow of water can help prevent a complete freeze-up by relieving pressure in the pipes. Although it may increase your water usage slightly, it can potentially save you from costly repairs.
- Drain and disconnect outdoor hoses: Before the onset of freezing temperatures, drain and detach any garden hoses outdoors. Shut off the water supply to outdoor faucets and ensure that the remaining water is completely drained. This prevents water from freezing inside the outdoor plumbing and potentially affecting the connected indoor pipes.
- Install heat trace cables: Consider installing heat trace cables on pipes that are particularly prone to freezing. These cables produce controlled heat that keeps the pipes warm, preventing them from freezing. Ensure proper installation and follow the manufacturer’s instructions for safe and effective usage.
- Have your home assessed: If you frequently experience frozen plumbing issues, consider having a professional plumber assess your home’s plumbing system. They can identify areas of vulnerability and recommend specific measures to prevent future freezing, such as re-routing pipes or adding additional insulation.
By taking these preventive measures, you can significantly reduce the risk of future frozen plumbing issues. Remember that prevention is better than facing the hassle and expense of dealing with frozen pipes. Investing time and effort in protecting your plumbing system will save you from potential headaches down the road.
Read more: How To Thaw Frozen Washer Fluid Lines
Conclusion
Dealing with frozen plumbing can be a challenging and disruptive experience. However, with the right knowledge and preventive measures, you can minimize the risk of frozen pipes and the associated damage. By understanding the causes of frozen plumbing, taking safety precautions, and employing effective thawing methods, you can restore the flow of water and prevent further complications.
Remember to approach thawing techniques with caution, using slow methods initially and gradually applying heat if necessary. Prioritize your safety at all times and avoid using open flames or high-temperature devices that can pose a risk. If you’re unsure about any aspect of thawing frozen pipes, it’s best to consult a professional plumber who can provide expert advice and assistance.
Prevention is key in avoiding future frozen plumbing issues. Insulate exposed pipes, seal cracks and gaps, and maintain consistent interior temperatures to protect your plumbing system from freezing temperatures. Implementing these preventive measures will help safeguard your pipes and minimize the likelihood of encountering frozen plumbing in the future.
By taking the time to understand the causes of frozen plumbing, following safety precautions, and adopting preventive measures, you can ensure that your plumbing system remains functional and reliable throughout the cold winter months. Remember, a little prevention now can save you from the headache and expense of dealing with frozen pipes later on.
Frequently Asked Questions about How To Thaw Frozen Plumbing Pipes
Was this page helpful?
At Storables.com, we guarantee accurate and reliable information. Our content, validated by Expert Board Contributors, is crafted following stringent Editorial Policies. We're committed to providing you with well-researched, expert-backed insights for all your informational needs.

0 thoughts on “How To Thaw Frozen Plumbing Pipes”