Articles
How To Cut Plumbing PVC Pipe
Modified: December 7, 2023
Learn how to cut plumbing PVC pipe with these informative articles. Discover the best techniques and tools for precise and clean cuts.
(Many of the links in this article redirect to a specific reviewed product. Your purchase of these products through affiliate links helps to generate commission for Storables.com, at no extra cost. Learn more)
Introduction
Cutting PVC pipe is a common task in plumbing projects. Whether you are repairing a leak or installing new pipes, knowing how to properly cut PVC pipe is essential. By using the right tools and following the correct techniques, you can achieve accurate and clean cuts.
In this article, we will guide you through the process of cutting PVC pipe step by step. We will discuss the necessary safety precautions, the tools and materials you will need, as well as various methods you can use to make the cuts. By the end of this article, you will have the knowledge and confidence to tackle your PVC pipe cutting projects with ease.
Before we dive into the details of cutting PVC pipe, it’s important to note that safety should always be your top priority. PVC pipes can be sharp when cut, and you want to avoid any accidents or injuries. Therefore, make sure to wear appropriate safety gear, including safety glasses, gloves, and a dust mask if necessary, to protect yourself during the cutting process.
Key Takeaways:
- Prioritize safety by wearing appropriate gear, securing the pipe, and working in a well-ventilated area. Accurate measurements, proper tools, and techniques ensure clean and precise cuts, enhancing your plumbing projects.
- After cutting PVC pipe, clean and debur the edges for a professional finish. Removing burrs and ensuring a clean surface not only improves aesthetics but also ensures proper connectivity and prevents future issues.
Read more: How To Store PVC Pipe
Safety Precautions
Before you begin cutting PVC pipe, it’s important to take certain safety precautions to protect yourself and ensure a smooth and accident-free cutting process. Here are some important safety measures to keep in mind:
- Wear appropriate safety gear: Always wear safety glasses to protect your eyes from flying debris or particles. Additionally, wear gloves to protect your hands from sharp edges and a dust mask if you are cutting PVC pipes in a confined or poorly-ventilated area.
- Ensure a stable work surface: Before you start cutting, make sure you have a stable work surface or a workbench. This will help prevent unnecessary movement or slipping of the PVC pipe, reducing the risk of accidents.
- Secure the PVC pipe: Before making any cuts, ensure that the pipe is securely held in place. You can use clamps or a vise grip to secure the pipe firmly, minimizing the chance of it shifting during the cutting process.
- Use proper tools and techniques: Always use appropriate tools and techniques for cutting PVC pipe. Using improper tools or techniques can lead to uneven cuts or damage to the pipe, increasing the risk of accidents.
- Take breaks if needed: If you are cutting a large number of PVC pipes or working for an extended period of time, take regular breaks to avoid fatigue. Fatigue can lead to decreased focus and increased risk of accidents.
- Clean up properly: After you have finished cutting PVC pipe, clean up your work area. Remove any scraps, debris, or leftover pieces of pipe and properly dispose of them. This will help prevent tripping hazards and keep your workspace organized.
By following these safety precautions, you can ensure a safe and successful PVC pipe cutting experience. Remember, taking the time to prioritize safety is always worth it.
Tools and Materials Needed
Before you start cutting PVC pipe, gather all the necessary tools and materials. Having the right equipment at hand will make the cutting process smoother and more efficient. Here are the tools and materials you will need:
- PVC pipe cutter: A PVC pipe cutter is a specialized tool designed for cutting PVC pipes. It provides clean and precise cuts without exerting much effort. PVC pipe cutters come in different sizes, so make sure to choose one that is suitable for the diameter of the pipe you are working with.
- Hacksaw: A hacksaw is a versatile tool that can also be used to cut PVC pipe. Make sure to use a fine-toothed blade for smoother cuts.
- Miter saw or circular saw: If you have access to a miter saw or circular saw, you can use it to make quick and precise cuts on PVC pipes. Ensure that you have a blade suitable for cutting plastic.
- Rotary tool with cutting wheel: A rotary tool, such as a Dremel, equipped with a cutting wheel attachment is ideal for cutting small sections of PVC pipe or making intricate cuts.
- Reciprocating saw: A reciprocating saw, commonly known as a sawzall, can be used for cutting larger PVC pipes or in situations where flexibility is required.
- Handsaw: If you don’t have access to any power tools, a handsaw can be a reliable option for cutting PVC pipes. Choose a fine-toothed handsaw for cleaner cuts.
- Measuring tape or ruler: Accurate measurements are crucial for making proper cuts. Use a measuring tape or ruler to mark the desired length on the PVC pipe.
- Pencil or marker: Use a pencil or marker to mark the cutting lines on the PVC pipe. This will help guide your cuts and ensure accuracy.
- Safety glasses: Protect your eyes from flying debris or particles by wearing safety glasses.
- Gloves: Use gloves to protect your hands from sharp edges and to provide a better grip on the PVC pipe.
Make sure to gather all these tools and materials before you start cutting PVC pipe. Having everything prepared in advance will save you time and make the process much more efficient.
Measuring and Marking
Precision is key when it comes to cutting PVC pipe. Before making any cuts, you need to accurately measure and mark the desired length on the pipe. Here are the steps to follow for measuring and marking:
- Measure the length: Use a measuring tape or ruler to determine the exact length you want to cut the PVC pipe to. Make sure to account for any fittings or connections that will be added to the pipe.
- Mark the cutting line: Once you have measured the desired length, use a pencil or marker to mark the cutting line on the pipe. Make a straight and clearly visible mark that extends all the way around the circumference of the pipe.
- Double-check the measurements: Before proceeding with the cutting process, double-check your measurements to ensure accuracy. Mistakes in measuring can lead to incorrect cuts, resulting in wasted material or poor fitting.
When marking the cutting line on the PVC pipe, you can use a straight edge or a carpenter’s square to ensure a precise and straight line. This will help guide your cuts and ensure that they are accurate and clean.
Remember, it’s always better to double-check your measurements before cutting the pipe. Taking the time to measure and mark accurately will save you from potential errors and the need to redo the cutting process.
Different Methods for Cutting PVC Pipe
There are several methods you can use to cut PVC pipe, depending on the tools you have available and the desired outcome. Here are some common methods for cutting PVC pipe:
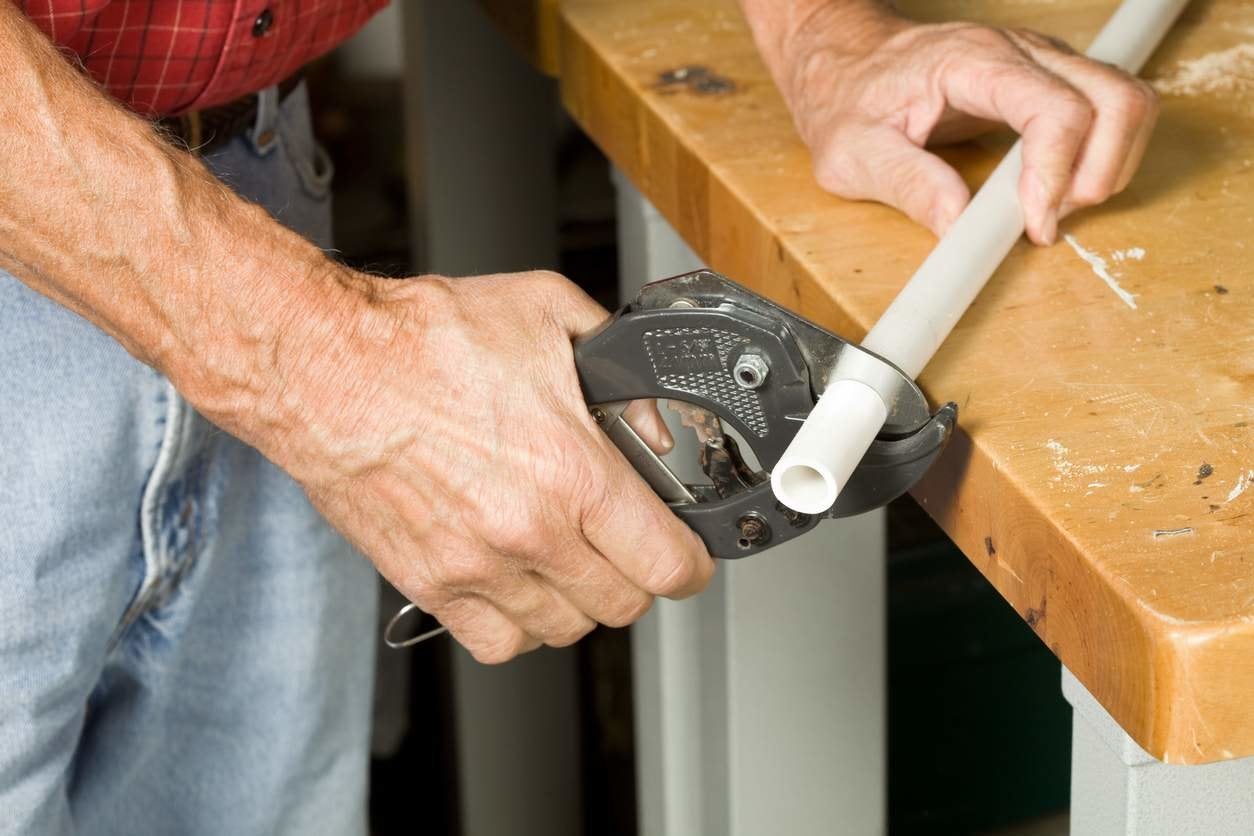
- Using a PVC Pipe Cutter: A PVC pipe cutter is a specialized tool designed specifically for cutting PVC pipes. It provides clean and precise cuts with minimal effort. Simply position the cutter around the pipe, aligning the cutting blade with the marked line, and squeeze the handles to cut through the pipe.
- Using a Hacksaw: If you don’t have a PVC pipe cutter, a hacksaw can be a reliable alternative. Use a hacksaw with a fine-toothed blade, and carefully cut along the marked line. Apply gentle even pressure and make sure to maintain a steady and straight motion to achieve clean cuts.
- Using a Miter Saw or Circular Saw: If you have access to a miter saw or circular saw, you can make quick and precise cuts on PVC pipes. Ensure that you have a blade suitable for cutting plastic, and adjust the blade to the desired cutting angle. Secure the pipe firmly and slowly lower the blade onto the marked line to make the cut.
- Using a Rotary Tool with Cutting Wheel: A rotary tool, such as a Dremel, equipped with a cutting wheel attachment can be used for cutting small sections of PVC pipe or making intricate cuts. Hold the tool firmly and slowly guide the cutting wheel along the marked line, applying gentle pressure until the pipe is cut through.
- Using a Reciprocating Saw: A reciprocating saw, also known as a sawzall, is a versatile power tool that can be used to cut larger PVC pipes or in situations where flexibility is required. Use a blade specifically designed for cutting plastic, and carefully guide the saw along the marked line, maintaining control and stability throughout the cutting process.
- Using a Handsaw: If you don’t have access to any power tools, a handsaw can be a reliable option for cutting PVC pipes. Choose a fine-toothed handsaw for cleaner cuts. Hold the pipe securely and carefully cut along the marked line using a steady back-and-forth motion.
Whichever method you choose, it’s important to follow the proper techniques and take your time to ensure accurate and clean cuts. Remember to wear appropriate safety gear and double-check your measurements before cutting.
Read more: How To Cut PVC Blinds?
Method 1: Using a PVC Pipe Cutter
Using a PVC pipe cutter is one of the easiest and most efficient methods for cutting PVC pipe. Here’s a step-by-step guide on how to use a PVC pipe cutter:
- Measure and mark: Begin by measuring the desired length of the PVC pipe and marking the cutting line using a pencil or marker. Ensure that the line extends all the way around the circumference of the pipe.
- Position the cutter: Place the PVC pipe cutter around the pipe, with the cutting blade aligning with the marked line. Make sure that the cutter is perpendicular to the pipe.
- Secure the pipe: Firmly hold the pipe in place to prevent any movement during the cutting process. You can use clamps or a vise grip to secure the pipe if necessary.
- Make the cut: Squeeze the handles of the PVC pipe cutter together to engage the cutting blade. Apply even pressure and gradually rotate the cutter around the pipe to create an initial groove.
- Continue cutting: Once the groove is established, continue rotating the PVC pipe cutter around the pipe while maintaining firm pressure. The cutter’s blade will gradually cut through the pipe, creating a clean and precise cut.
- Inspect the cut: Once the cut is complete, carefully release the handles of the pipe cutter. Inspect the cut to ensure it is clean and even. Use a utility knife or sandpaper to smooth out any rough edges if necessary.
A PVC pipe cutter is designed to make the cutting process quick and effortless. It provides clean and accurate cuts without the need for excessive force or complicated techniques. By following these steps, you can safely and efficiently cut PVC pipes using a pipe cutter.
Remember to always wear safety glasses and gloves when using a PVC pipe cutter. Additionally, make sure to double-check your measurements and mark the cutting line accurately to achieve the desired results.
Method 2: Using a Hacksaw
If you don’t have access to a PVC pipe cutter, a hacksaw can be a reliable alternative for cutting PVC pipe. Here’s a step-by-step guide on how to use a hacksaw to cut PVC pipe:
- Measure and mark: Begin by measuring the desired length of the PVC pipe and marking the cutting line using a pencil or marker. Ensure that the line extends all the way around the circumference of the pipe.
- Select the right blade: Choose a hacksaw blade with fine teeth that is suitable for cutting plastic. A blade with 18 to 24 teeth per inch is recommended for cleaner cuts.
- Secure the pipe: Use clamps or a vise grip to securely hold the PVC pipe in place, ensuring that it does not move during the cutting process.
- Begin cutting: Position the hacksaw blade on the marked cutting line, applying gentle pressure to initiate the cut. Start with a back-and-forth motion while maintaining control and stability.
- Continue cutting: Once the initial groove is established, continue sawing with steady and even strokes. Apply consistent pressure and keep the saw perpendicular to the pipe to ensure a straight cut.
- Monitor the progress: Take breaks periodically to inspect the cut and make adjustments if needed. Continue sawing until the blade completely cuts through the pipe.
- Smooth the edges: After the cut is complete, use a utility knife or sandpaper to smooth out any rough edges or burrs. This will help achieve a clean and even finish.
Using a hacksaw to cut PVC pipe requires more effort compared to a PVC pipe cutter, but it is a cost-effective method that can be easily done with a few simple tools. Remember to take your time, use smooth and controlled strokes, and ensure that the pipe is securely held in place throughout the cutting process.
Always wear safety glasses and gloves during this method to protect your eyes and hands from debris and sharp edges. Additionally, make sure to double-check your measurements and mark the cutting line accurately to achieve the desired result.
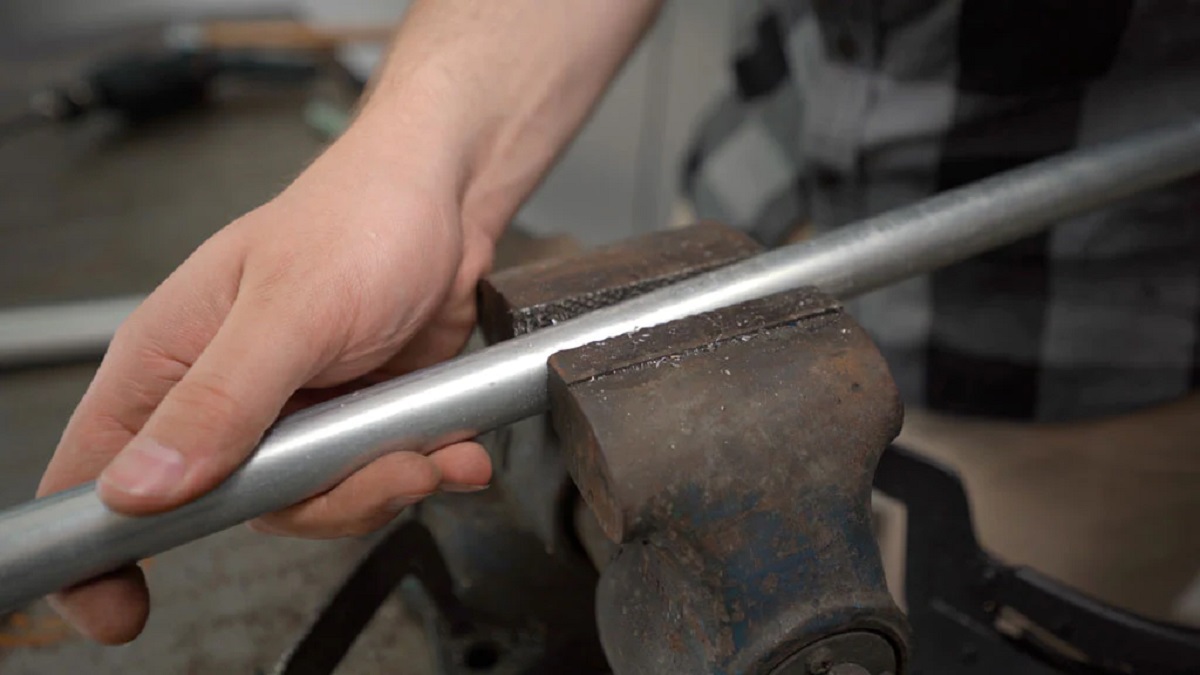
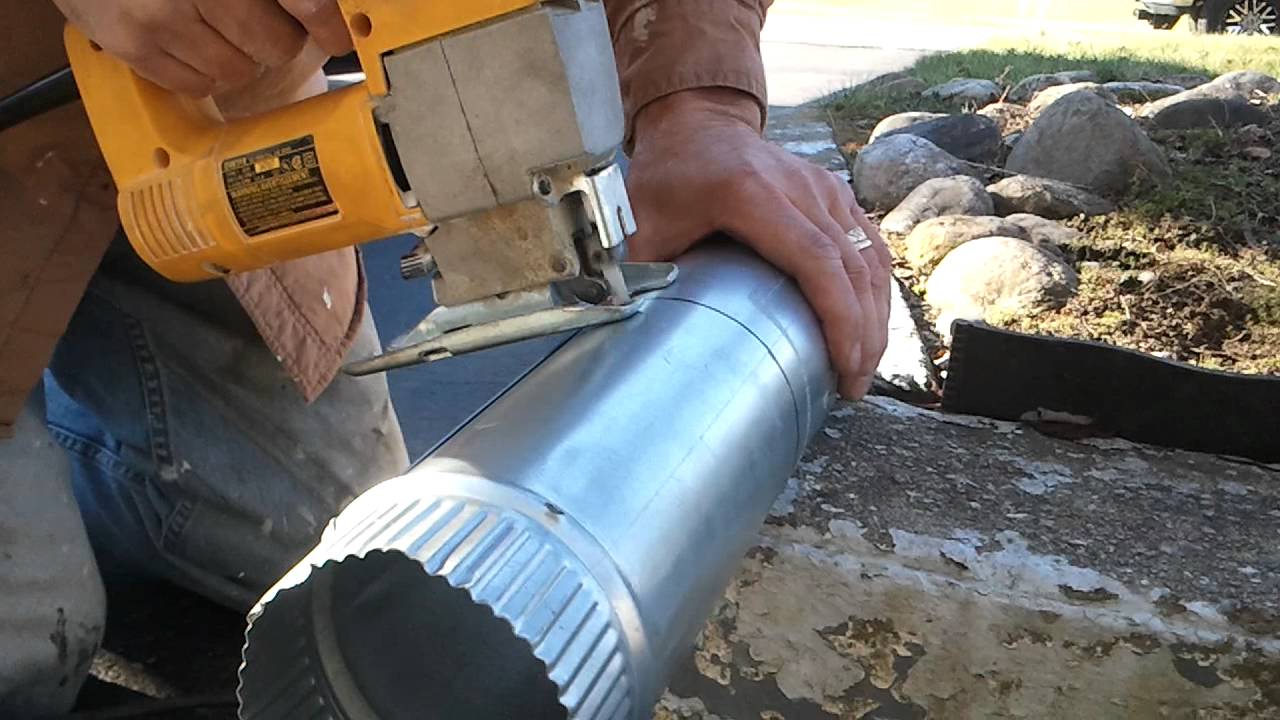
When cutting PVC pipe, use a fine-toothed saw or PVC pipe cutter for a clean and precise cut. Make sure to secure the pipe in place to prevent it from moving while cutting.
Method 3: Using a Miter Saw
If you have access to a miter saw or circular saw, it can be a convenient and efficient tool for cutting PVC pipe. Here’s a step-by-step guide on how to use a miter saw to cut PVC pipe:
- Measure and mark: Begin by measuring the desired length of the PVC pipe and marking the cutting line using a pencil or marker. Ensure that the line extends all the way around the circumference of the pipe.
- Choose the right blade: Select a blade specifically designed for cutting plastic or PVC. Make sure the blade has fine teeth to ensure cleaner cuts.
- Adjust the saw: Set up your miter saw or circular saw in a well-ventilated area or outdoors. Adjust the cutting angle of the saw according to your needs or keep it perpendicular to the pipe for a straight cut.
- Secure the pipe: Use clamps or a vise grip to hold the PVC pipe securely in place to prevent it from moving during the cutting process.
- Cut the pipe: Place the marked cutting line on the saw’s base or table, aligning it with the cutting blade. Start the saw and slowly lower the blade onto the pipe, applying gentle, even pressure.
- Maintain steady motion: Keep the saw steady and guide it along the marked cutting line, maintaining control and stability. Allow the blade to cut through the pipe gradually, ensuring a smooth and precise cut.
- Inspect the cut: Once the saw has completely cut through the pipe, carefully lift the blade and switch off the saw. Inspect the cut to ensure it is clean and even. Use a utility knife or sandpaper to smooth out any rough edges if necessary.
Using a miter saw or circular saw can provide quick and accurate cuts on PVC pipe. However, it is important to follow safety precautions, such as wearing safety glasses and gloves, and securing the pipe properly before making the cut.
Always exercise caution while operating power tools and be mindful of your surroundings. Double-check your measurements and mark the cutting line accurately to achieve the desired result.
Method 4: Using a Rotary Tool with Cutting Wheel
If you need to cut small sections of PVC pipe or make intricate cuts, using a rotary tool with a cutting wheel attachment can be an effective method. Follow these steps to cut PVC pipe using a rotary tool:
- Measure and mark: Begin by measuring the desired length of the PVC pipe and marking the cutting line using a pencil or marker. Ensure that the line extends all the way around the circumference of the pipe.
- Choose the right cutting wheel: Select a cutting wheel attachment that is designed for cutting plastic or PVC. Ensure that the cutting wheel is securely attached to the rotary tool.
- Secure the pipe: Hold the PVC pipe securely in place or use clamps to prevent it from moving during the cutting process.
- Start cutting: Position the cutting wheel at the marked cutting line, and slowly glide the rotary tool along the line. Apply gentle, even pressure to the tool as it cuts through the pipe.
- Follow the cutting line: Maintain a steady hand and guide the rotary tool along the marked cutting line. Keep the tool perpendicular to the pipe and maintain control and stability throughout the cutting process.
- Continue cutting: Gradually cut through the pipe, adjusting the speed and pressure of the rotary tool as necessary. Take breaks if needed to inspect the cut and make adjustments.
- Inspect the cut: Once the cut is complete, carefully release the tool’s trigger and inspect the cut. Ensure that it is clean and even. Use a utility knife or sandpaper to smooth out any rough edges if necessary.
Using a rotary tool with a cutting wheel allows for precise control and is ideal for cutting small or intricate sections of PVC pipe. It is important to wear safety glasses and gloves during this method to protect yourself from debris and sharp edges.
Double-check your measurements and mark the cutting line accurately. Take your time, and ensure that the rotary tool is properly operated and maintained for safe and effective cutting.
Read more: How To Cut PVC Roof Panels
Method 5: Using a Reciprocating Saw
If you are working with larger PVC pipes or need more flexibility in your cutting approach, using a reciprocating saw, also known as a sawzall, can be a suitable option. Follow these steps to cut PVC pipe using a reciprocating saw:
- Measure and mark: Begin by measuring the desired length of the PVC pipe and marking the cutting line using a pencil or marker. Ensure that the line extends all the way around the circumference of the pipe.
- Select the right blade: Choose a blade specifically designed for cutting plastic or PVC. Opt for a blade with fine teeth and set it securely in the reciprocating saw.
- Secure the pipe: Use clamps or a vise grip to secure the PVC pipe in place, ensuring that it does not move during the cutting process.
- Position the saw: Align the blade of the reciprocating saw with the marked cutting line on the PVC pipe. Hold the saw firmly with both hands, get a firm grip, and maintain control over the tool.
- Start the saw: Activate the reciprocating saw, allowing the blade to move back and forth in a cutting motion. Slowly and steadily guide the saw along the marked cutting line, applying light to moderate pressure.
- Continue cutting: As the blade moves back and forth, let it cut through the PVC pipe. Maintain control and stability throughout the cutting process, ensuring that the blade stays aligned with the marked line.
- Inspect the cut: Once the cut is complete, turn off the reciprocating saw and carefully release the trigger. Inspect the cut to ensure it is straight and clean. Use a utility knife or sandpaper to smooth out any rough edges if necessary.
Using a reciprocating saw provides versatility and power when cutting PVC pipe. However, it’s essential to take safety precautions by wearing safety glasses and gloves to protect yourself from debris and sharp edges.
Ensure that you double-check your measurements and mark the cutting line accurately. As with any power tool, exercise caution, maintain control, and be aware of your surroundings while using a reciprocating saw.
Method 6: Using a Handsaw
If you don’t have access to power tools, using a handsaw is a reliable and straightforward method for cutting PVC pipe. Follow these steps to cut PVC pipe using a handsaw:
- Measure and mark: Begin by measuring the desired length of the PVC pipe and marking the cutting line using a pencil or marker. Ensure that the line extends all the way around the circumference of the pipe.
- Select the right handsaw: Choose a handsaw with fine teeth, specifically designed for cutting through plastic or PVC material. A saw with 12 to 18 teeth per inch should work well.
- Secure the pipe: Use clamps or a vise grip to hold the PVC pipe in place, ensuring that it remains steady during the cutting process.
- Start cutting: Position the handsaw at the marked cutting line and align it with a gentle angle. Begin sawing using a back-and-forth motion, exerting light to moderate pressure.
- Maintain control: Keep the saw perpendicular to the pipe and maintain a steady hand as you cut. Apply even pressure and let the saw do the work, allowing the teeth to gradually cut through the PVC pipe.
- Continue cutting: Saw along the marked cutting line, periodically checking your progress and adjusting your grip and angle if necessary. Take breaks if needed to rest and inspect the cut before proceeding.
- Inspect the cut: Once the cut is complete, carefully examine the cut section of the PVC pipe. Ensure that it is straight and clean. Use a utility knife or sandpaper to smooth out any rough edges if necessary.
Using a handsaw to cut PVC pipe is a cost-effective method that requires manual effort. It’s important to wear safety glasses and gloves to protect yourself from debris and sharp edges.
Always double-check your measurements and mark the cutting line accurately. Take your time, maintain control over the saw, and make steady, smooth strokes to achieve a clean cut.
Remember that using a handsaw may take more time and effort compared to power tools. So, be patient and take breaks as needed to avoid fatigue and maintain accuracy in your cuts.
Cleaning and Deburring the Cut Edge
After cutting PVC pipe, it’s important to clean and debur the cut edge to ensure a smooth and professional finish. Here’s how you can clean and debur the cut edge:
- Inspect the cut: Before proceeding with cleaning and deburring, carefully examine the cut edge of the PVC pipe. Look for any rough or jagged areas that may need to be smoothed out.
- Remove burrs: Burrs are raised or rough edges that can occur during the cutting process. Use a utility knife, sandpaper, or a deburring tool to remove any burrs from the cut edge. Gently run the tool along the edge in a circular motion to smooth it out.
- File the edge: If necessary, use a fine file or sandpaper to further refine and smooth the cut edge of the PVC pipe. Work in a back-and-forth motion along the cut edge until it feels completely smooth.
- Clean the pipe: Use a damp cloth or sponge to wipe away any debris, dust, or shavings from the cut area of the pipe. Ensure that the surface is clean and free of any loose particles.
- Rinse the pipe: If needed, rinse the PVC pipe with water to remove any remaining debris or residue. This will help ensure that the pipe is clean and ready for use.
- Dry the pipe: After rinsing, use a clean cloth or towel to dry the PVC pipe thoroughly. Ensuring that the pipe is moisture-free will prevent any potential issues with adhesives or fittings later on.
By following these steps, you can achieve a clean and deburred cut edge on your PVC pipe. This will not only enhance the appearance but also help maintain the integrity of the pipe and ensure proper connections.
Remember to wear safety glasses and gloves during the cleaning and deburring process to protect yourself from any residual debris or sharp edges that may be present.
Once the cleaning and deburring are complete, your PVC pipe is ready for installation or further fittings. Take pride in your workmanship and enjoy the results of your clean and well-prepared cut!
Conclusion
Cutting PVC pipe is a fundamental skill in plumbing projects, and with the right tools and techniques, you can achieve precise and clean cuts. In this article, we discussed various methods for cutting PVC pipe, including using a PVC pipe cutter, hacksaw, miter saw, rotary tool with cutting wheel, reciprocating saw, and handsaw. Each method has its advantages and is suitable for different situations.
Before starting any cutting task, it is crucial to prioritize safety by wearing appropriate safety gear, securing the pipe, and working in a well-ventilated area. Taking the time to measure and mark accurately will ensure that your cuts meet the desired lengths, and using the appropriate tools and techniques will result in clean and precise cuts.
After cutting the PVC pipe, it is important to clean and debur the cut edge for a professional finish. Removing burrs and smoothing the edge will not only improve the aesthetics but also ensure proper connectivity and prevent any potential issues in the future.
Remember, practice makes perfect, and as you gain experience, you will become more proficient in cutting PVC pipe. Take your time, be patient, and always prioritize safety. With each successful cut, you will become more confident in your abilities.
We hope this comprehensive guide has provided you with valuable insights and techniques for cutting PVC pipe. Armed with this knowledge, you are now ready to embark on your plumbing projects with confidence and precision.
Happy cutting!
Frequently Asked Questions about How To Cut Plumbing PVC Pipe
Was this page helpful?
At Storables.com, we guarantee accurate and reliable information. Our content, validated by Expert Board Contributors, is crafted following stringent Editorial Policies. We're committed to providing you with well-researched, expert-backed insights for all your informational needs.


0 thoughts on “How To Cut Plumbing PVC Pipe”