Home>Articles>How To Efficiently Remove Plumbing Glue From Pipes
Articles
How To Efficiently Remove Plumbing Glue From Pipes
Modified: January 21, 2024
Learn how to effectively remove plumbing glue from pipes with this informative articles. Discover expert tips and tricks for a hassle-free solution.
(Many of the links in this article redirect to a specific reviewed product. Your purchase of these products through affiliate links helps to generate commission for Storables.com, at no extra cost. Learn more)
Introduction
Welcome to our guide on how to get plumbing glue off pipes. Plumbing glue, also known as PVC or CPVC cement, is a strong adhesive used in various plumbing projects. While it serves its purpose by creating tight, leak-free connections, it can be challenging to remove if applied incorrectly or if you need to make adjustments. However, with the right tools and techniques, you can effectively remove plumbing glue from pipes without causing damage.
In this article, we will walk you through the step-by-step process of safely and efficiently removing plumbing glue from pipes. We will provide you with valuable information on the various tools and safety measures involved in the process. Whether you are a professional plumber or a DIY enthusiast, this guide will equip you with the knowledge and skills necessary to tackle this common issue.
So, if you’re ready to learn how to say goodbye to unwanted plumbing glue and get your pipes back in top shape, let’s dive in!
Key Takeaways:
- Say goodbye to unwanted plumbing glue by following our step-by-step guide. Safely remove glue from pipes using heat, scraping, solvents, and sanding for a smooth and successful process.
- Equip yourself with the right tools, safety measures, and techniques to effectively remove plumbing glue. From understanding the glue to cleaning the pipe, restore your plumbing system with confidence.
Read more: How To Remove Nail Glue From A Dresser
Understanding Plumbing Glue
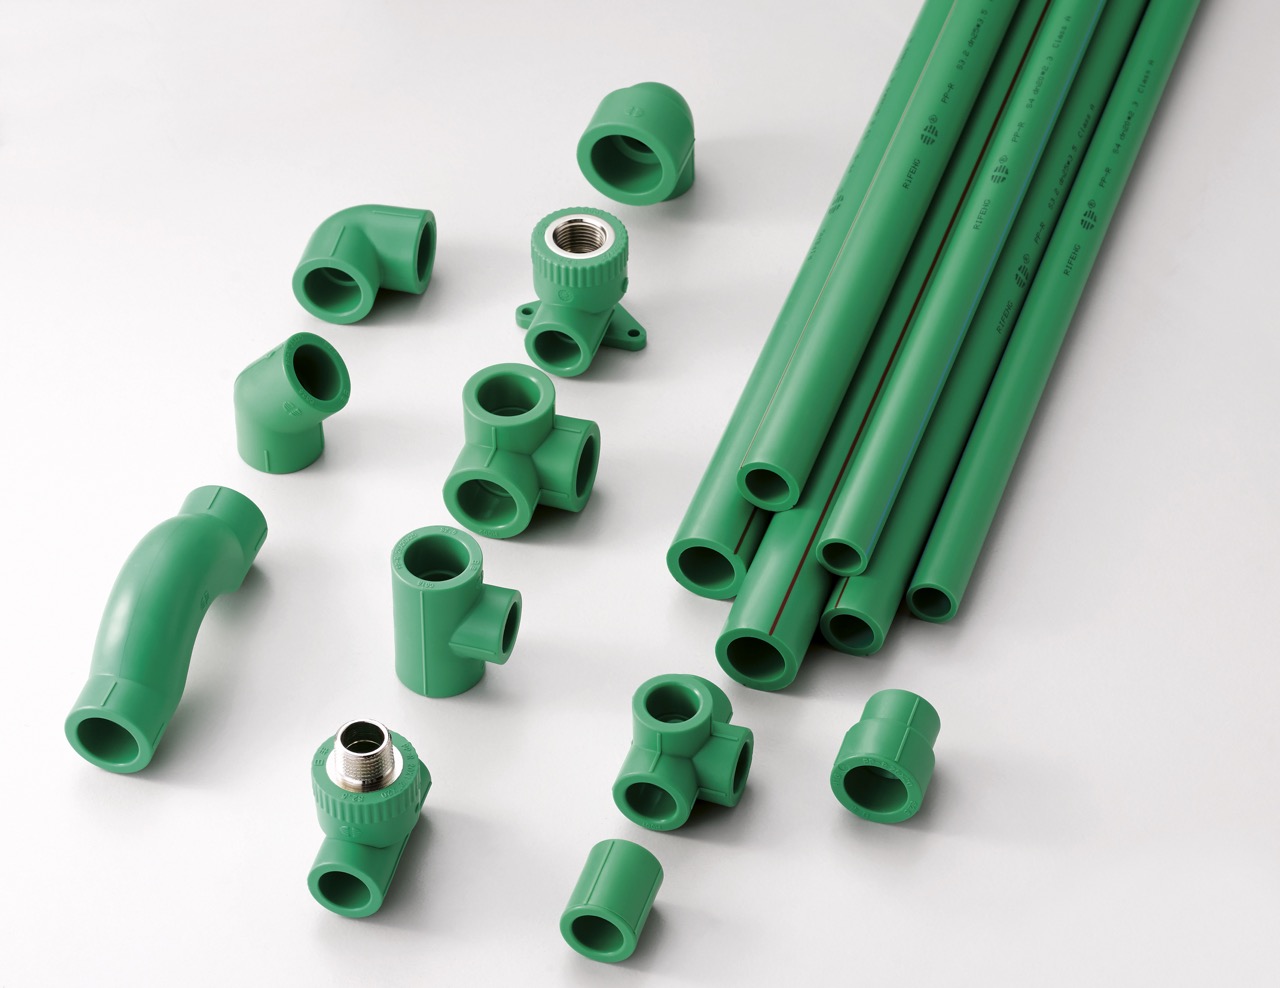
Before we delve into the process of removing plumbing glue from pipes, it’s important to understand what it is and how it works. Plumbing glue, also known as solvent cement or PVC/CPVC cement, is specifically designed for joining and bonding pipes and fittings made of PVC (polyvinyl chloride) or CPVC (chlorinated polyvinyl chloride).
Plumbing glue consists of a mixture of solvents and resins that chemically bond the pipes and fittings together, creating a strong and durable connection. When applied correctly, the glue melts the surfaces of the PVC or CPVC material, allowing them to fuse together as it dries. This fusion results in a water-tight seal that prevents leaks and ensures the integrity of the plumbing system.
However, despite its effectiveness as a bonding agent, there are instances where you may need to remove plumbing glue. This could be due to a mistake during the installation process, the need for repositioning or replacing pipes, or simply wanting to clean up excess glue for aesthetic reasons.
It’s worth noting that removing plumbing glue can be a challenging task, as it is designed to create a permanent bond. However, with the right techniques and precautions, it is possible to safely remove plumbing glue from pipes without causing damage to the underlying material.
In the following sections, we will discuss the tools and safety measures you need to consider before attempting to remove plumbing glue. These precautions are essential to ensure the success of the process and protect both yourself and the integrity of the plumbing system.
Tools and Safety Measures
Before diving into the process of removing plumbing glue from pipes, it’s crucial to gather the necessary tools and ensure that you follow proper safety measures. Here is a list of tools you may need:
- Heat gun or blow dryer
- Utility knife or scraper
- Acetone or PVC pipe cleaner
- Sandpaper or emery cloth
- Protective gloves
- Safety goggles
- Ventilation mask
Now that you have gathered the tools, let’s talk about the safety measures to keep in mind:
- Work in a well-ventilated area: When dealing with chemical solvents or using heat tools, it’s essential to have proper ventilation. Open windows or use exhaust fans to ensure fresh air circulation.
- Protective gear: Wear protective gloves, safety goggles, and a ventilation mask to protect your hands, eyes, and respiratory system from any potential harmful fumes or particles produced during the removal process.
- Turn off water supply: Before starting the removal process, make sure to turn off the water supply to the affected pipe or area. This will prevent any accidental leaks or water flow during the repair.
- Follow manufacturer’s instructions: Different solvents and products may have specific usage instructions. It’s important to read and follow the manufacturer’s guidelines to ensure safe and effective use.
- Be cautious with heat tools: If using a heat gun or blow dryer, be careful to avoid direct contact with the skin or sensitive surfaces. Keep the heat tool moving and at a safe distance to prevent overheating or damage to the pipe.
- Dispose of materials properly: When disposing of used solvents or scraps of plumbing glue, follow local regulations and guidelines. Some solvents may be considered hazardous waste and should be handled accordingly.
By following these safety measures and using the appropriate tools, you can ensure a safe and successful removal process. Now, let’s move on to the step-by-step process of removing plumbing glue from pipes.
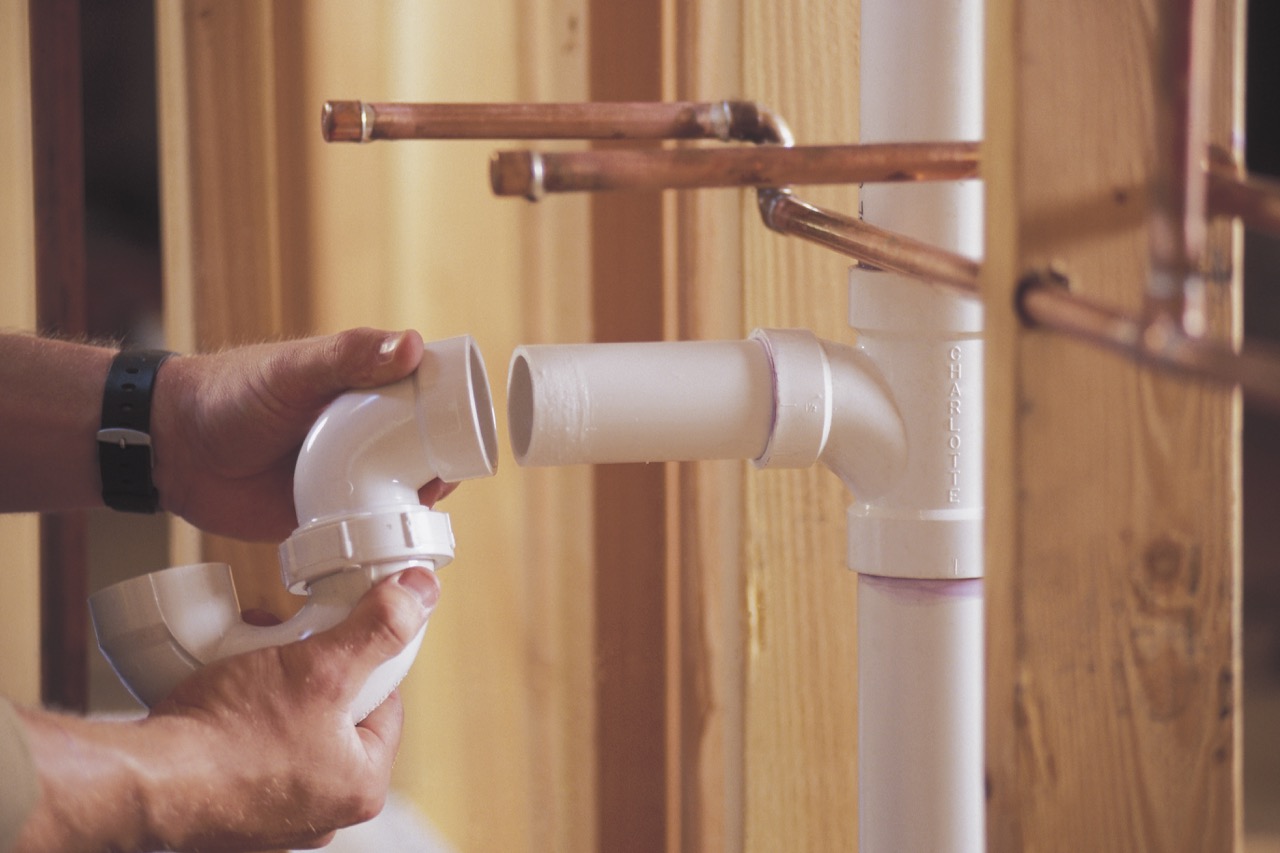
Step 1: Removing the Pipe
The first step in removing plumbing glue from pipes is to detach the affected pipe from the plumbing system. Here’s how you can do it:
- Turn off the water supply: Locate the main water shut-off valve and turn it off to prevent any water flow during the removal process.
- Prepare the workspace: Clear the area around the pipe, ensuring you have enough space to work comfortably. Place a drop cloth or old towel beneath the pipe to catch any debris or falling materials.
- Loosen the pipe fittings: Use a wrench or pliers to carefully loosen the fittings on both ends of the pipe. Turn the fittings counterclockwise until they are loose enough to be removed by hand.
- Remove the pipe: Gently pull the pipe out of the fittings. If the pipe feels stuck, you can try twisting it slightly while pulling to loosen it. Be careful not to apply excessive force or damage the surrounding plumbing components.
- Inspect the pipe: Once you have removed the pipe, inspect it for any signs of damage or excessive glue residue. If there are any visible cracks or significant amounts of glue, you may need to replace the pipe entirely.
It’s important to note that the ease of removing the pipe will depend on various factors such as the type of glue used and the strength of the bond. In some cases, you may need to use additional methods to loosen the glue before removing the pipe entirely.
Now that you have successfully removed the pipe, we can move on to the next step in the process: applying heat to soften the plumbing glue.
Step 2: Applying Heat
Once you have removed the pipe, the next step in removing plumbing glue from pipes is to apply heat. Heating the glued joint will soften the adhesive, making it easier to scrape off later. Follow these steps to apply heat:
- Choose a heat source: Use a heat gun or a blow dryer with a high heat setting. Ensure that the heat source is set to a temperature that can effectively soften the glue without damaging the pipe or surrounding areas.
- Prepare the work area: Place the pipe on a heat-resistant surface or use a bench vise to secure it in place. This will allow you to work with both hands and apply heat evenly to the glued joint.
- Heat the glued joint: Hold the heat gun or blow dryer about 3 to 4 inches away from the glued joint. Move the heat source in a back-and-forth motion, evenly distributing the heat across the joint. Continue heating for a few minutes or until you start noticing the plumbing glue becoming soft and pliable.
- Monitor the temperature: While applying heat, be cautious of the temperature. Avoid overheating the pipe, as this can lead to warping or damage. If you notice any signs of discoloration or excessive heat, immediately remove the heat source.
Applying heat plays a crucial role in softening the plumbing glue, making it more malleable for the next step of scraping off the adhesive. However, it’s important to note that not all types of plumbing glue will respond the same way to heat. Some may require more time and heat exposure to soften, while others may have specific instructions from the manufacturer regarding heat tolerance.
In the next step, we will discuss how to scrape off the softened plumbing glue effectively.
To remove plumbing glue from a pipe, use a heat gun or hairdryer to soften the glue, then scrape it off with a putty knife or sandpaper. Be sure to wear gloves and work in a well-ventilated area.
Read more: How To Remove Glue From Concrete Porch
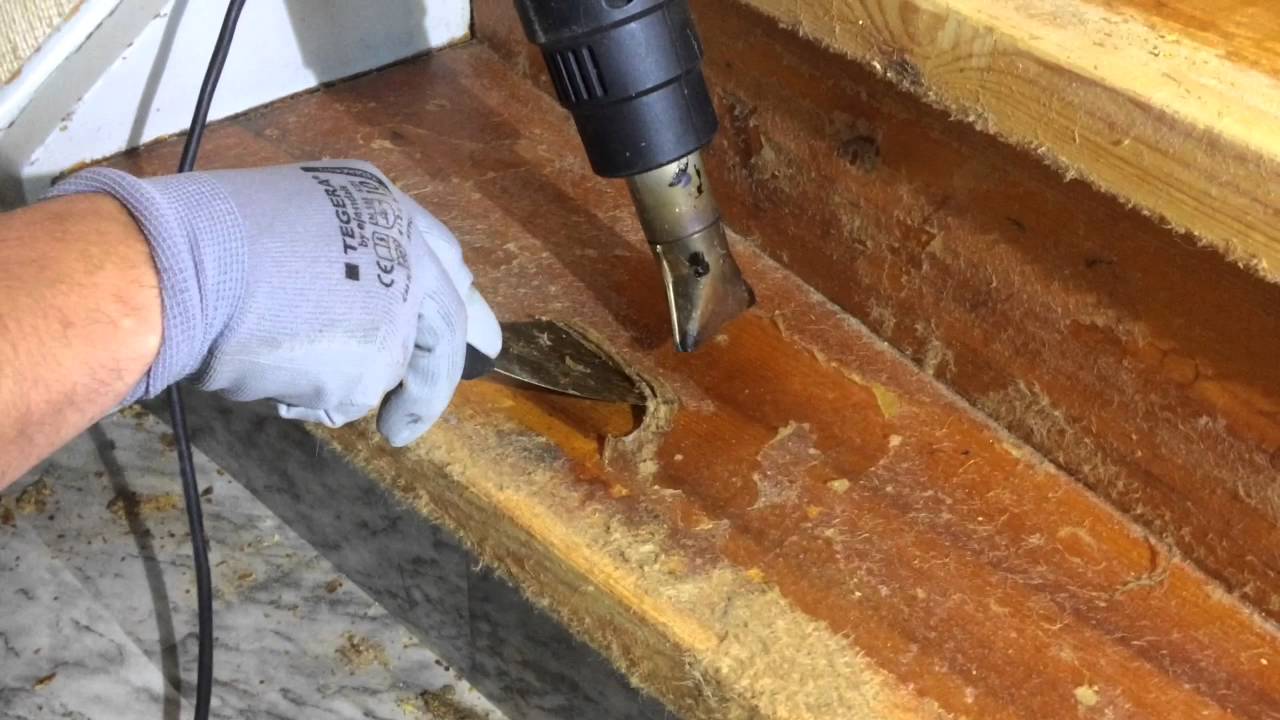
Step 3: Scraping off the Glue
After applying heat to the glued joint and softening the plumbing glue, the next step is to scrape off the adhesive residue. Here’s how you can effectively remove the softened glue:
- Choose a scraping tool: Select a utility knife, scraper, or any other sharp-edged tool that can effectively scrape off the glue without damaging the pipe. Always handle these tools with care to avoid injury.
- Gently scrape off the glue: Using your chosen scraping tool, gently scrape off the softened glue from the surface of the pipe. Work in small, controlled motions, applying light pressure to avoid scratching or cutting the pipe.
- Continue scraping: Keep scraping until you have removed as much of the glue as possible. Take breaks if needed to assess your progress and avoid exerting excessive force on the pipe.
- Inspect the pipe: Once you have scraped off the majority of the glue, inspect the pipe to ensure that all visible adhesive residue has been removed. If there are still remnants, you may need to repeat the heating and scraping process.
It’s important to note that some plumbing glues have different textures and consistencies, which may influence the ease of scraping off the adhesive. Additionally, the duration of heating and the effectiveness of the heat source may also affect the softness of the glue. Adjust your scraping technique accordingly, ensuring that you do not damage the pipe or surrounding areas.
With the glue scraped off, we can now move on to the next step: using solvents to further remove any remaining residue.
Step 4: Using Solvents
After scraping off the majority of the plumbing glue, there may still be some residue left on the pipe. To effectively remove any remaining adhesive, you can use solvents specifically designed for this purpose. Follow these steps to use solvents:
- Choose the right solvent: Acetone or a PVC pipe cleaner are commonly used solvents for removing plumbing glue. Acetone is readily available and breaks down the adhesive, while PVC pipe cleaner is specifically formulated to dissolve PVC glue.
- Apply the solvent: Pour a small amount of the chosen solvent onto a clean cloth or sponge. Gently rub the cloth or sponge onto the remaining glue residue, saturating the area with the solvent. Allow the solvent to sit for a few minutes to effectively break down the adhesive.
- Scrub the residue: Using the cloth or sponge, scrub the remaining glue residue in a circular motion. Apply slight pressure while being careful not to damage the pipe’s surface. Continue scrubbing until the glue residue is completely removed.
- Clean the pipe: Once the glue residue is removed, use a clean cloth or sponge dipped in warm soapy water to wipe down the pipe. This will help remove any traces of solvents and ensure a clean surface.
It’s important to remember that solvents contain chemicals and should be handled with caution. Always work in a well-ventilated area and wear protective gloves and a ventilation mask to prevent any potential skin irritation or inhalation of fumes.
After completing this step, the majority of the plumbing glue should be removed. However, there may still be some lighter residue on the pipe’s surface, which can be addressed in the next step: sanding.
Step 5: Sanding the Pipe
After using solvents to remove the majority of the plumbing glue residue, you may notice that there is still some lighter residue or roughness on the surface of the pipe. To smooth out the pipe and remove any remaining adhesive, you can use sandpaper or emery cloth. Follow these steps to sand the pipe:
- Select the appropriate sandpaper or emery cloth: Choose a fine-grit sandpaper or emery cloth to avoid scratching or damaging the pipe’s surface. A grit between 220 and 320 is typically suitable for this task.
- Wrap the sandpaper or emery cloth around the pipe: Take a piece of sandpaper or emery cloth and wrap it around the affected area of the pipe. Hold it firmly and make sure it covers the entire area with glue residue.
- Begin sanding: Applying light pressure, rub the sandpaper or emery cloth back and forth along the pipe. Move in a circular motion to ensure even sanding. Continue sanding until the residue is removed, and the pipe surface feels smooth and clean.
- Inspect the pipe: After sanding, inspect the pipe’s surface to ensure it is free of any remaining glue residue or rough patches. If necessary, you can repeat the sanding process using a finer grit sandpaper for a smoother finish.
It’s crucial to be gentle while sanding to avoid damaging the pipe’s surface or altering its dimensions. Take your time and work patiently to achieve the desired result.
Once you have finished sanding the pipe, it’s time to move on to the final step: cleaning the pipe to remove any sanding debris and prepare it for reinstallation.
Step 6: Cleaning the Pipe
After completing the previous steps of removing plumbing glue from the pipe, it’s important to thoroughly clean the pipe to remove any remaining debris and prepare it for reinstallation. Follow these steps to clean the pipe:
- Wipe down the pipe: Use a clean cloth or sponge dampened with warm soapy water to wipe down the surface of the pipe. This will help remove any sanding debris, residual solvents, or remaining glue residue.
- Rinse with clean water: After wiping down the pipe, rinse it with clean water to remove any soap residue. Ensure that the entire surface is rinsed thoroughly.
- Dry the pipe: Use a clean, dry cloth to dry the pipe completely. Ensure there is no moisture left on the surface, as this can affect the reinstallation process and potentially lead to further issues down the line.
- Inspect the pipe: Once the pipe is clean and dry, inspect it to ensure there is no visible residue or damage. This is important to ensure the integrity and reliability of the plumbing system.
By following these steps, you can effectively clean the pipe and ensure it is ready for reinstallation or any necessary repairs. Taking the time to properly clean the pipe will contribute to the overall functionality and longevity of the plumbing system.
With the pipe now clean, you have successfully completed the process of removing plumbing glue. You can now proceed with reattaching the pipe to the plumbing system or making any necessary adjustments or replacements.
Remember, it’s always a good idea to refer to the manufacturer’s instructions or consult a professional if you encounter any difficulties or have any concerns throughout the process of removing plumbing glue from pipes.
Congratulations on your successful removal of plumbing glue and restoring your pipes to their original condition!
Read more: How To Remove Gorilla Glue From A Carpet
Conclusion
Removing plumbing glue from pipes may seem like a daunting task, but with the right tools, techniques, and precautions, it can be accomplished effectively and safely. By following the step-by-step process outlined in this guide, you can confidently tackle the task and restore your pipes to their original condition.
Starting with understanding the nature of plumbing glue and how it works, we discussed the importance of gathering the necessary tools and following safety measures. We then walked through each step of the removal process, including removing the pipe, applying heat, scraping off the glue, using solvents, sanding the pipe, and finally, cleaning the pipe.
Throughout the process, it’s crucial to exercise caution and patience. Be mindful of potential dangers, such as overheating the pipe or using solvents in a well-ventilated area. Adhering to safety measures and wearing protective gear will help ensure a smooth and accident-free removal process.
Remember, if you encounter any difficulties during the process or are unsure about certain steps, it’s always wise to consult a professional plumber or refer to manufacturer guidelines for further assistance.
By successfully removing plumbing glue from your pipes, you create the opportunity for repairs, adjustments, or replacements without compromising the integrity of your plumbing system. You can now enjoy leak-free connections and a smooth-running plumbing system.
Thank you for joining us on this journey of removing plumbing glue from pipes. We hope this guide has been informative and helpful in your plumbing endeavors. May you successfully tackle any future challenges with confidence!
Frequently Asked Questions about How To Efficiently Remove Plumbing Glue From Pipes
Was this page helpful?
At Storables.com, we guarantee accurate and reliable information. Our content, validated by Expert Board Contributors, is crafted following stringent Editorial Policies. We're committed to providing you with well-researched, expert-backed insights for all your informational needs.


0 thoughts on “How To Efficiently Remove Plumbing Glue From Pipes”