
Articles
How To Use A Router For Woodworking
Modified: May 6, 2024
Learn the best techniques and tips for using a router in your woodworking projects. Read our informative articles to become a pro in no time.
(Many of the links in this article redirect to a specific reviewed product. Your purchase of these products through affiliate links helps to generate commission for Storables.com, at no extra cost. Learn more)
Introduction
Woodworking is a timeless craft that allows individuals to create beautiful and functional pieces from a medium as versatile as wood. From crafting intricate furniture to building cabinets and shelves, woodworking requires the right tools and techniques to achieve professional results. One such tool that plays a crucial role in woodworking is the router.
A router is a versatile power tool that uses spinning bits to shape, cut, and groove wood. It is a must-have tool for any woodworking enthusiast or professional, offering endless possibilities for creating decorative edges, making joints, and shaping wood to perfection. However, using a router for woodworking requires proper knowledge, skills, and safety precautions.
In this article, we will explore the world of routers and delve into the various aspects of using a router for woodworking. We will guide you through the types of routers available, the importance of choosing the right router for your projects, and the different types of router bits and their selection. We will also discuss the essential steps of setting up the router and provide insights into basic and advanced router techniques that will help you unleash your creativity and achieve professional woodworking results.
But before we dive into the exciting world of routing, it’s vital to emphasize the importance of safety precautions. Woodworking can be a fulfilling and rewarding hobby, but safety should never be compromised. Always wear appropriate safety gear, such as safety glasses, hearing protection, and dust masks, to protect yourself from potential hazards. Additionally, familiarize yourself with the specific safety guidelines and instructions provided by the router manufacturer.
Now, let’s embark on a journey to discover the wonders of using a router for woodworking. Whether you are a beginner looking to enhance your skills or a seasoned woodworker seeking inspiration, this comprehensive guide will equip you with the knowledge and techniques necessary to harness the full potential of this remarkable tool. So, let’s get started!
Key Takeaways:
- Safety should always be the top priority when using a router for woodworking. Familiarize yourself with safety precautions, wear appropriate protective gear, and follow manufacturer’s guidelines to ensure a safe working environment.
- Choosing the right router and router bits, mastering basic and advanced techniques, and maintaining the router are essential for achieving exceptional woodworking results. Embrace creativity and continuous learning to unleash the full potential of this versatile tool.
Read more: How To Use A Router
Safety Precautions
Woodworking can be an enjoyable and rewarding activity, but it’s important to prioritize safety to prevent accidents and injuries. When using a router for woodworking, here are some essential safety precautions to keep in mind:
- Read the Manual: Before operating a router, carefully read and understand the manufacturer’s manual. This will provide valuable information on safety guidelines, proper handling, and maintenance.
- Protective Gear: Always wear appropriate safety gear, including safety glasses, hearing protection, and a dust mask. Routers generate noise, debris, and fine wood dust that can be harmful to your eyes, ears, and respiratory system.
- Secure Workpiece: Ensure that the workpiece is securely clamped to the workbench or router table. This prevents it from moving or shifting during routing, reducing the risk of accidents and ensuring accurate results.
- Disconnect Power: Before changing router bits or making any adjustments, make sure to disconnect the power supply. This prevents accidental starting of the router and keeps you safe from rotating bits.
- Use the Right Router Bit: Use the appropriate router bit for the intended task. Using the wrong bit can lead to kickbacks, overheating, and potential injuries. Be sure to choose a high-quality bit that matches the desired cut and material.
- Feed Direction: When using a handheld router, always move the router against the rotation of the bit. This provides better control and helps prevent the router from jerking or losing control.
- Start with Shallow Cuts: When routing, avoid making deep cuts right away. Start with shallow passes and gradually increase the depth to reduce strain on the router and improve control.
- Avoid Climb Cuts: Climb cutting is a technique where the router moves in the same direction as the rotation of the bit. This technique can be dangerous, causing the router to grab and jerk. Stick to conventional cutting techniques for safer results.
- Keep Hands Clear: Always keep your hands clear of the router bit and away from the cutting area. Use proper push sticks, featherboards, or other accessories to guide and control the workpiece while maintaining a safe distance from the bit.
- Work in a Well-lit Area: Ensure that your workspace is well-lit to clearly see the router, workpiece, and any potential hazards. Good lighting helps you maintain control and enhances your safety while using the router.
These safety precautions provide a foundation for using a router for woodworking safely. However, it’s important to adapt them to your specific woodworking environment and always err on the side of caution. Remember, safety should never be compromised, and by following these guidelines, you can enjoy the art of woodworking with peace of mind.
Types of Routers
Routers come in various types, each designed for specific woodworking tasks. Understanding the different types of routers available will help you choose the right one for your projects. Here are the three main types of routers:
- Fixed Base Router: The fixed base router is the most common type used in woodworking. It features a fixed base that keeps the bit at a constant depth during operation. The depth adjustment is made by loosening and tightening the locking mechanism. This type of router is ideal for tasks that require precision and accuracy, such as creating dadoes, grooves, and decorative edging.
- Plunge Base Router: A plunge base router is designed for tasks that require vertical plunging into the workpiece. It allows you to set the desired cutting depth before lowering the router bit into the material. This type of router is perfect for making through cuts, creating inlays, and routing mortises.
- Combo Router Kit: As the name suggests, a combo router kit consists of both a fixed base and a plunge base, offering the versatility of both types of routers. This kit allows you to switch between fixed and plunge routing modes, providing flexibility for various woodworking applications.
Additionally, routers are available in different sizes, typically measured by the horsepower (HP) rating. Higher HP routers are more powerful and suitable for heavy-duty tasks, while lower HP routers are ideal for lighter, precision-based work. Consider the scale and complexity of your woodworking projects when choosing the appropriate router size.
It’s important to note that these are just the basic types of routers, and the market offers a wide range of models with different features and accessories. Some routers come with variable speed controls, dust collection systems, and even built-in LED lights for improved visibility. Consider your specific woodworking needs, budget, and preferences when selecting the right router for your workshop.
Now that you have a better understanding of the types of routers available, you are ready to move on to the next step – choosing the right router for your woodworking projects. So, let’s explore the factors to consider when selecting a router and ensure you make an informed decision.
Choosing the Right Router
Choosing the right router for your woodworking projects is crucial to achieving optimal results. With the wide variety of routers available in the market, it’s important to consider several factors before making your selection:
- Intended Use: Determine the primary purpose of your router. Are you looking for a router for general woodworking tasks or specialized applications? Understanding your specific needs will help you choose a router that can handle the tasks you have in mind.
- Power and Speed: Consider the power and speed capabilities of the router. Higher horsepower (HP) routers are more powerful and suitable for heavy-duty tasks, while lower HP routers are sufficient for lighter projects. Additionally, routers with variable speed controls offer greater versatility, allowing you to match the router’s speed to the specific material and cut you are working on.
- Ease of Use: Look for a router that is easy to operate and adjust. Check for features like ergonomic handles, smooth depth adjustment mechanisms, and clear markings for accurate settings. A comfortable grip and intuitive controls will make your woodworking experience more enjoyable and efficient.
- Compatibility with Bits: Consider the compatibility of the router with router bits. Look for routers that have a standardized collet size (typically 1/4-inch or 1/2-inch) to accommodate a wide range of router bits. Having the ability to use different types of bits will expand your routing possibilities.
- Router Base: Choose a router with a sturdy and durable base. A solid base provides stability during operation and ensures precise cuts. Look for bases made of high-quality materials, such as aluminum or magnesium, that can withstand the rigors of woodworking.
- Brand and Reputation: Research reputable brands known for producing reliable and high-quality routers. Read customer reviews and seek recommendations from experienced woodworkers to gain insights into the performance and durability of different router models.
- Budget: Set a budget for your router purchase. Routers come in a wide price range, and while it’s important to invest in a quality tool, it’s also essential to consider your budgetary constraints.
Once you have considered these factors, take the time to visit a woodworking supply store or browse online retailers to compare different router models. Feel free to ask questions, seek advice from knowledgeable staff, and read product descriptions to ensure you make an informed decision.
Remember, choosing the right router is a personal decision based on your specific needs, woodworking goals, and budget. Take your time, do your research, and select a router that aligns with your requirements. A well-chosen router will be a valuable asset in your woodworking journey, helping you bring your creative visions to life.
Router Bit Types and Selection
Router bits are the cutting tools that attach to the router and determine the shape and design of the cuts in your woodworking projects. There is a wide variety of router bits available, each designed for different woodworking applications. Choosing the right router bit for your project is essential to achieve the desired results. Here are some common types of router bits:
- Straight Router Bits: Straight router bits are the most basic and versatile type of router bits. They have a straight cutting edge and are used for cutting straight grooves, dados, and rebates. Straight bits are available in different diameters, allowing you to create different-sized channels and grooves.
- Rabbeting Router Bits: Rabbeting bits are used for creating rabbet joints, which are recessed areas often used to join two pieces of wood together. These bits feature a pilot bearing that determines the width and depth of the rabbet.
- Flush Trim Router Bits: Flush trim bits are ideal for making perfectly flush cuts, trimming the edges of one material so it aligns perfectly with another. The cutting edges of these bits have a bearing that runs along the edge of the material, ensuring a precise cut.
- Chamfer Router Bits: Chamfer bits are used to create chamfered edges, which are angled or beveled edges. They are commonly used for decorative purposes or to ease sharp edges on furniture or other wooden pieces.
- Cove Router Bits: Cove bits are used to create concave profiles or decorative edges. They are often used to produce a smooth, rounded edge finish on tabletops, picture frames, and moldings.
- Roundover Router Bits: Roundover bits are similar to cove bits but create a rounded edge with a larger radius. These bits are used to soften the edges of a piece of wood, giving it a more decorative and visually appealing look.
- Dovetail Router Bits: Dovetail bits are designed to create dovetail joints, which are strong and interlocking joints commonly used in drawer construction. These bits come in various angles and sizes to produce different dovetail joint styles.
- Rounding Over Router Bits: Rounding over bits are used to create a rounded edge on the edge of a board or panel. They are often used for trimming the edges of tabletops, cabinets, and shelves, giving them a smooth and finished appearance.
When selecting router bits, consider the specifics of your woodworking project and the desired outcome. Look for high-quality bits made from carbide or high-speed steel for durability. It’s also important to check the shank size of the router bits to ensure compatibility with your router’s collet.
As you gain experience and tackle more complex projects, you may expand your router bit collection to include specialty bits such as raised panel bits, ogee bits, or even custom profile bits. For now, start with a few essential bits that cover the basic cutting needs and gradually build your collection as your woodworking skills progress.
Remember, proper selection and maintenance of router bits are crucial for achieving clean and accurate cuts. Always follow the manufacturer’s guidelines for speed settings, cutting depths, and safety precautions when using router bits for your woodworking projects.
Read more: How To Use Ryobi Router
Setting up the Router
Properly setting up your router is essential to ensure smooth and accurate woodworking operations. Here are the key steps for setting up your router:
- Choose the Right Router Bits: Select the appropriate router bit for your project, considering the desired cut, material, and depth. Ensure that the router bit is securely inserted into the router’s collet and tightened with a wrench.
- Adjust the Router Depth: Determine the desired cutting depth and adjust the router’s depth of cut accordingly. Most routers have a depth adjustment mechanism that allows you to set the depth precisely. Refer to your router’s manual for instructions on adjusting the depth.
- Install the Router Bit: If you are using a plunge router, raise the router bit by releasing the plunge lock and pulling the router up. Then lower the router bit into the desired starting position, aligning it with the marked reference point on the workpiece.
- Secure the Router: If you are using a handheld router, ensure that you have a tight grip on the router handles. For added stability, brace your hands or use a clamp-on edge guide to keep the router steady. If you are using a router table, make sure the router is securely mounted, and the table is level and stable.
- Check the Routing Area: Ensure that the routing area is clear of any obstructions, clutter, or loose objects. Clear the workspace and ensure that the workpiece is properly secured to prevent movements or vibrations that could affect the quality of the cut.
- Turn on the Router: Before turning on the router, double-check that the power cord is connected securely and the switch is in the off position. Once ready, turn on the router, allowing it to reach full speed before making contact with the workpiece.
- Test the Router: Before committing to the actual project, it’s always a good practice to make a test cut or trial run on a scrap piece of wood. This allows you to make any necessary adjustments and ensure the router is set up correctly for the desired cut.
It’s essential to follow the specific instructions provided by your router manufacturer for setting up and adjusting your particular router model. Familiarize yourself with the features and controls of your router, such as speed adjustments, depth locks, and fence adjustments, to optimize its performance.
Remember, safety should always be a priority. Wear appropriate safety gear, such as safety glasses and hearing protection, and work in a well-lit area. Take your time when setting up the router and ensure that each step is done meticulously, as proper setup directly impacts the quality of your woodworking projects.
Now that your router is set up and ready to go, let’s dive into the basic router techniques that will help you unleash your creativity and take your woodworking skills to the next level.
Basic Router Techniques
Now that your router is properly set up, it’s time to explore some basic router techniques that will help you accomplish a variety of woodworking tasks. Here are a few fundamental techniques to get you started:
- Edge Routing: Edge routing is the process of shaping or rounding the edges of a workpiece. To achieve smooth and consistent edges, use a flush trim bit or a rounding over bit. Guide the router along the edge of the workpiece, moving in the opposite direction of the rotation of the bit, for a clean and uniform edge profile.
- Dado and Groove Cutting: Routers excel at cutting dados and grooves, which are channels or slots used to join pieces of wood or accommodate shelves, panels, or other components. Use a straight bit and a straight edge guide to guide the router along the desired path to create precise and accurate dados and grooves.
- Mortise and Tenon Joinery: Mortise and tenon joints are commonly used in woodworking to join two pieces of wood at a right angle. Use a straight bit and a plunge router to remove material and create the mortise. Then, shape the tenon using a straight bit or a dedicated tenon-cutting bit.
- Decorative Edge Routing: Routers are great for creating decorative edges on tabletops, cabinet doors, or other woodworking projects. Use a router with an edge-forming bit, such as a cove bit or a roundover bit, to add visual interest and a professional touch to your workpieces.
- Circular or Curved Cuts: Routers equipped with a guide bushing can create precise circular or curved cuts. Simply attach the appropriate-sized guide bushing to the router base, secure a template to the workpiece, and guide the router smoothly along the template for consistent and accurate cutting.
- Template Routing: Template routing involves using a shaped template to guide the router and create identical copies of a specific shape or pattern. Attach the template to the workpiece and use a flush trim bit or a pattern bit to duplicate the shape accurately.
- Drilling Holes: With the right accessories, routers can also be used for drilling holes. Attach a specially designed router bit called a router drill bit or a dedicated drilling attachment to drill precise and clean holes in your workpieces.
These basic router techniques provide a foundation for your woodworking projects. However, as you gain more experience and confidence, you can explore advanced techniques and experiment with different router bits to expand your creativity and achieve more intricate designs.
Remember to always work at a steady pace, maintain a firm grip on the router, and use both hands for better control and stability. Practice these techniques on scrap wood before working on your actual projects to familiarize yourself with the router’s operation and refine your skills.
Now that you are familiar with the basic router techniques, let’s move on to exploring specific router techniques for creating decorative edges, making joints, and advanced routing tasks.
When using a router for woodworking, always move the router against the rotation of the bit to prevent kickback and ensure a smoother cut.
Creating Decorative Edges
Creating decorative edges is one of the most versatile and visually appealing uses of a router in woodworking. With the right router bit and technique, you can add elegant and unique profiles to your workpieces. Here are some tips for creating decorative edges:
- Choose the Right Router Bit: Select a router bit that matches the desired edge profile. There are various options available, such as ogee, cove, roundover, and Roman ogee bits. Each bit will create a distinct edge profile, so consider the style and design of your project before making a choice.
- Secure the Workpiece: Ensure that the workpiece is properly clamped or secured to prevent any movement during routing. This will help you achieve clean and consistent cuts throughout the process.
- Start with Shallow Passes: When creating decorative edges, it’s best to start with shallow passes rather than trying to achieve the full profile in one go. Make multiple passes, gradually increasing the cutting depth with each pass until you reach your desired edge profile. This approach ensures better control and prevents any tear-out or splintering.
- Use Router Guides and Jigs: To maintain a consistent edge profile, consider using router guides or jigs. These accessories help guide the router along the workpiece and ensure that the bit follows the desired path accurately. Router guides can be purchased or homemade, depending on the specific edge profile you are trying to achieve.
- Adjust Speed and Feed Rate: Depending on the material and the router bit you are using, it may be necessary to adjust the speed and feed rate. For harder woods, slower speeds and a slower feed rate may be required to prevent burning or overheating the wood. Experiment on scrap pieces to find the optimal settings before working on your final project.
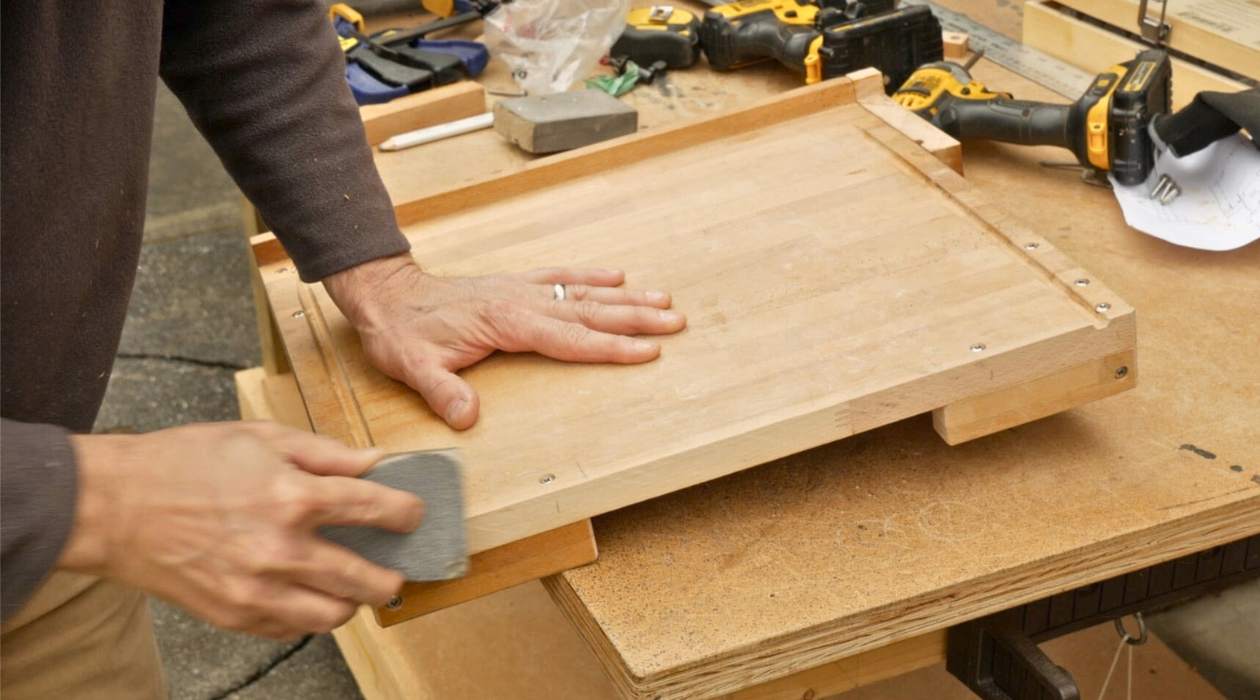
- Sand and Finish: Once you have routed the decorative edge, it’s essential to sand and finish the workpiece to achieve a smooth surface. Use sandpaper or sanding pads to remove any rough edges or imperfections, and apply the desired finish to enhance the appearance and protect the wood.
- Explore Combination Edges: Don’t limit yourself to a single edge profile. Get creative and experiment with combination edges by using multiple router bits to create more intricate and unique designs. Combine roundover profiles with cove profiles or add a decorative bead to your edge profiles to add depth and complexity to your projects.
Creating decorative edges with a router requires practice and attention to detail. Start with simpler profiles and gradually build up your skills to more complex designs. As you gain experience, you will have the ability to create unique and eye-catching edge treatments for your woodworking projects.
Remember to always prioritize safety while working with a router. Wear appropriate safety gear, use push sticks or featherboards to maintain control, and take your time to ensure accurate and quality results. With patience, practice, and a creative mindset, you can transform ordinary pieces of wood into stunning works of art.
Making Dado and Rabbet Joints
Dado and rabbet joints are commonly used in woodworking to create strong and precise connections between parts. These joints effectively join two pieces of wood together, whether for building cabinets, bookshelves, or other furniture pieces. Here’s how you can make dado and rabbet joints using a router:
- Plan and Measure: Determine where you want to create the dado or rabbet joint on your workpiece. Mark the location and measure the width and depth of the joint to ensure accurate cuts.
- Select the Right Router Bit: Choose a straight bit that matches the desired width of the joint. For a dado joint, select a bit that matches the width of the material you will be inserting into the joint. For a rabbet joint, select a bit that matches the width and depth of the rabbet.
- Set the Router Depth: Adjust the router’s cutting depth to match the desired depth of the joint. It’s crucial to make test cuts on scrap wood to ensure the accuracy of the depth setting.
- Secure the Workpiece: Clamp or secure the workpiece firmly to prevent any movement during routing. This will ensure clean and precise cuts.
- Setup Guide Rails: To ensure straight cuts, set up guide rails or use a straightedge as a guide. This will help you guide the router in a straight line along the marked cutting path.
- Router Passes: Start by making several shallow passes rather than trying to make the entire cut in one pass. Gradually increase the depth with each pass until you achieve the desired size and depth of the joint. This technique ensures cleaner cuts and reduces the risk of tear-out.
- Clean Up: After making the initial passes, clean up the joint by removing any remaining material or debris. Use a chisel or a router plane to smooth the bottom and sides of the joint, ensuring a snug fit for the mating piece.
- Test Fit and Adjust: Before final assembly, test fit the mating piece in the joint to ensure a proper fit. Make any necessary adjustments to the joint or the mating piece until they fit together snugly.
- Glue and Clamp: Apply wood glue inside the joint and join the pieces together. Use clamps to secure the joint and allow sufficient drying time for the glue to set, following the manufacturer’s instructions. Wipe off any excess glue with a damp cloth.
- Finishing: After the glue has fully dried, sand and finish the project as desired to achieve a smooth and polished appearance.
Creating dado and rabbet joints with a router provides strong and reliable connections between wooden pieces. With practice, you’ll be able to produce clean, precise joints that enhance the structural integrity of your woodworking projects.
Remember to take your time, work at a steady pace, and always prioritize safety. Wear appropriate safety gear, such as safety glasses, and use push sticks or featherboards to maintain control during the routing process. Practice on scrap wood before working on your actual project to ensure you are comfortable with the router and the joint-making techniques.
By mastering the art of making dado and rabbet joints, you will have a valuable technique to incorporate into your woodworking arsenal, enabling you to create stunning and durable pieces of furniture and other woodworking projects.
Cutting Mortises and Tenons
Mortise and tenon joints are classic and robust woodworking joints used to join two pieces of wood at a right angle. This type of joint is commonly found in furniture, cabinetmaking, and other woodworking projects that require strong and durable connections. Here’s how you can cut mortises and tenons using a router:
- Plan and Measure: Determine the location and size of the mortise and tenon joint on your workpieces. Mark the cuts and measure the width and depth of the mortise and the tenon to ensure accurate cuts.
- Select the Right Router Bit: Choose a straight bit or a dedicated mortising bit that matches the width and depth of the mortise and the tenon. The width of the mortise bit should correspond to the desired width of the tenon, while the depth should match the depth of the mortise.
- Set the Router Depth: Adjust the router’s cutting depth to match the desired depth of the mortise. It’s critical to make test cuts on scrap wood to ensure the accuracy of the depth setting.
- Secure the Workpiece: Clamp or secure the workpieces firmly to prevent any movement during routing. This will ensure clean and precise cuts.
- Create the Mortise: Start by making shallow passes with the router to remove most of the material, gradually deepening the cut with subsequent passes until the desired depth is reached. Use the marked lines as a guide and work in a consistent manner to ensure a clean and accurately sized mortise.
- Create the Tenon: After completing the mortise, mark the dimension for the tenon on the corresponding workpiece. Remove the bulk of the material by making multiple passes along the marked lines, ensuring that the tenon matches the width and thickness of the mortise.
- Refine the Fit: After roughing out the tenon, use chisels or a shoulder plane to refine the fit and achieve a snug fit within the mortise. Test-fit the tenon into the mortise, making any necessary adjustments until the joint fits tightly.
- Glue and Assemble: Apply wood glue to the mortise and insert the tenon, ensuring a proper fit. Assemble the joint and apply clamps to secure it, following the glue manufacturer’s instructions. Clean off any excess glue with a damp cloth.
- Finishing: After the glue has fully dried, sand and finish the project as desired to achieve a smooth and polished appearance.
Cutting mortises and tenons with a router allows for precise and repeatable results, ensuring a strong and reliable joint. By mastering this technique, you’ll be able to create professional-quality woodworking projects that will stand the test of time.
As with any routing task, always prioritize safety. Wear appropriate safety gear, such as safety glasses, and use clamps, push sticks, or featherboards to maintain control during the cutting process. Practice on scrap wood before working on your actual project to familiarize yourself with the router and perfect your mortise and tenon cutting skills.
By incorporating mortise and tenon joints into your woodworking projects, you’ll add a touch of craftsmanship and structural integrity that will elevate your creations to a whole new level.
Router Table Techniques
Using a router table opens up a whole new realm of possibilities in woodworking. A router table provides stability, control, and precision, allowing you to tackle a wide range of tasks with ease. Here are some popular router table techniques to help you maximize the potential of this versatile tool:
- Edge Molding: A router table is excellent for creating decorative edge moldings on your workpieces. Use a variety of router bits, such as beading bits, ogee bits, or cove bits, to shape and profile the edges. Feed the workpiece against the rotation of the bit and use featherboards or a miter gauge to ensure a consistent and uniform cut.
- Rabbets and Dadoes: Router tables are perfect for cutting rabbets and dadoes. Set the desired width and depth on the router bit and use a miter gauge or a fence to guide the workpiece through the cut. Make multiple passes to achieve the desired width and maintain control throughout the process.
- Box Joint or Finger Joint Construction: Router tables make box joint or finger joint construction a breeze. Use a box joint router bit and a miter gauge with a precise stop block to create evenly spaced and interlocking fingers. Adjust the bit’s height to match the thickness of the workpiece for a perfect fit.
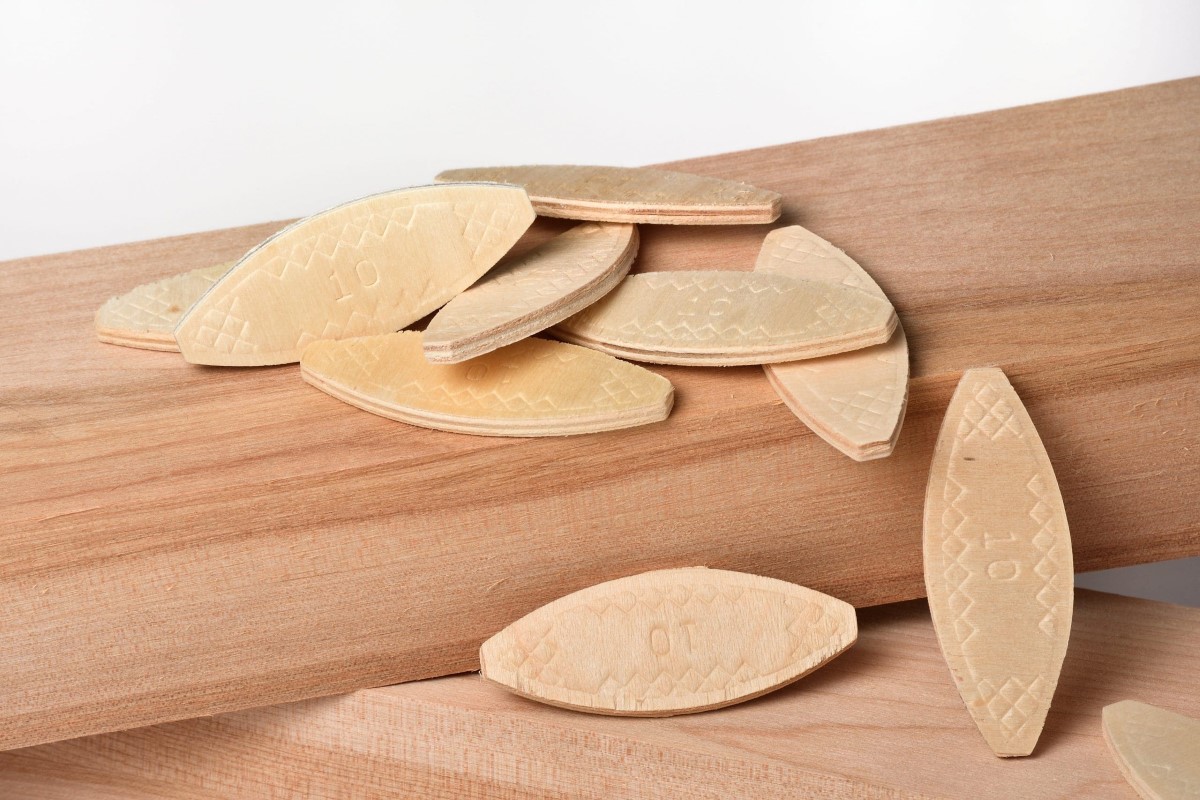
- Slot Cutting: Router tables excel at cutting slots for splines, biscuits, or keys. Use a slot cutting router bit and a miter gauge with a fence to guide the workpiece through the slot cut. Adjust the fence to control the depth and position of the cut accurately.
- Router Table Joinery: A router table is ideal for creating various types of woodworking joints, such as tongue and groove joints, lock miters, or cope and stick joints. Use specialized router bits and jigs to ensure precise cuts and tight-fitting joints. Follow the manufacturer’s instructions and practice on scrap wood before working on your final pieces.
- Raised Panels: Router tables are commonly used to create raised panels for cabinet doors or other woodworking projects. Use a panel raising router bit and a featherboard to guide the workpiece through the cut. Secure the workpiece steadily and take multiple passes to achieve a smooth and flawless panel.
- Template Routing: Router tables are perfect for template routing, allowing you to duplicate shapes and patterns effortlessly. Attach the template to the workpiece and use a flush trim or pattern routing bit to follow the template’s contours. Secure the workpiece firmly and use featherboards or a router table fence for added control.
- Edge Jointing: Router tables can be utilized for edge jointing, especially when working with narrow boards. Attach a straight edge or a jointing fence to the router table and run the board along the fence to create a straight and smooth edge. Take multiple passes with a straight bit for optimal results.
When using a router table, remember to prioritize safety. Always wear safety glasses, use push blocks or featherboards to maintain control, and follow the manufacturer’s instructions for proper tool setup and operation.
Router table techniques offer enhanced precision and control, allowing you to tackle complex woodworking tasks with confidence. By mastering these techniques, you’ll expand your woodworking capabilities and achieve professional-quality results.
Advanced Router Techniques
Once you have mastered the basic router techniques, it’s time to explore more advanced applications of this versatile tool. The following advanced router techniques will allow you to push the boundaries of your woodworking skills and create even more intricate and impressive projects:
- Router Inlay: Router inlay involves cutting a cavity or groove in a workpiece and inserting a contrasting material, such as wood or resin, to create decorative patterns or designs. Use a straight bit or a plunge router with an inlay kit to create precise and clean cavities. Carefully insert the inlay material and sand it flush for a stunning effect.
- Spiral Fluting: Spiral fluting adds an elegant and decorative touch to columns, table legs, or other cylindrical pieces. With the help of a spiral cutting bit and a router, you can create beautiful spiral grooves that wrap around the workpiece. Use a router table or a rotary jig to guide the workpiece smoothly along the spiral path.
- Sliding Dovetails: Sliding dovetails combine the strength of a dovetail joint with the convenience of being able to assemble and disassemble components. Use a dovetail bit and a router table to cut the male and female portions of the joint.
- Vertical Raised Panel Routing: Vertical raised panels are commonly used in cabinet doors, adding depth and sophistication to the design. Use a vertical raised panel bit and a router table to shape the edge of the panel. Secure the workpiece vertically against a fence and make multiple passes, adjusting the bit height for each pass until the desired profile is achieved.
- Custom Molding: With a router table and a selection of specialty router bits, you can create custom molding profiles that add unique character to your woodworking projects. Experiment with different router bits, adjust the fence and the height of the bit, and make multiple passes to achieve intricate and custom-designed moldings.
- Signmaking: Routers are widely used in signmaking to carve intricate designs, letters, or logos into a variety of materials such as wood, acrylic, or composite boards. Attach a lettering or carving bit to the router and follow a template or guide to achieve precise and professional-looking signs.
- Fluting and Reeding: Fluting and reeding involve creating vertical grooves or channels on the surface of a workpiece. Use a fluting or reeding bit and a router table to achieve evenly spaced grooves. Set the desired spacing and depth, secure the workpiece with a fence or a jig, and guide it through the router bit for clean and consistent results.
As you delve into advanced router techniques, always prioritize safety and precision. Wear safety glasses, use push blocks or featherboards, and follow the manufacturer’s guidelines for proper setup and operation of the router and the associated accessories.
Mastering these advanced router techniques will elevate your woodworking projects to a new level of craftsmanship and artistry. With practice and creativity, you can create custom details and intricate designs that will make your work truly stand out.
Maintaining and Caring for your Router
Proper maintenance and care of your router are essential for its longevity and optimal performance. By following these guidelines, you can ensure that your router remains in good condition, allowing you to continue producing quality woodworking projects:
- Clean the Router: Regularly clean your router to remove dust, debris, and resin buildup. Use a soft brush or compressed air to clean the router body and vents. Wipe down the router table and any attachments or accessories to keep them free of sawdust or other contaminants.
- Inspect the Power Cord: Routinely check the router’s power cord for any signs of wear, fraying, or damage. If you observe any issues, replace the cord immediately to prevent electrical hazards.
- Check the Router Bit: Inspect the router bit before and after each use. Look for any signs of damage or dullness, such as chipping or worn cutting edges. Replace or sharpen the bit as needed to ensure clean and efficient cuts.
- Lubricate Moving Parts: Keep the moving parts of your router well lubricated to reduce friction and ensure smooth operation. Apply a light coat of lubricant to the router’s plunge mechanism, depth adjustment, and other moving parts as recommended by the manufacturer.
- Monitor the Motor Temperature: Pay attention to the temperature of the router’s motor during use. Excessive heat can be an indication of overloading or operating the router at the wrong speed. If the router becomes too hot, allow it to cool down before continuing your work.
- Store the Router Properly: When not in use, store your router in a clean and dry environment. It’s best to keep the router in its original case or in a designated storage area to protect it from dust, moisture, and accidental damage.
- Follow Manufacturer’s Recommendations: Always refer to the manufacturer’s guidelines and instructions for specific maintenance and care procedures for your router model. These guidelines may include oiling specific parts, replacing worn components, or performing regular maintenance tasks.
- Keep the Router Sharp: Take the time to sharpen or replace the router bits regularly. Dull bits not only produce subpar results but also put unnecessary strain on the router’s motor, which can lead to overheating and reduced cutting performance.
- Stay Up-to-Date on Safety Guidelines: Regularly review safety guidelines and practices for using a router. Stay informed about any updates or changes in safety recommendations to ensure the safe and secure operation of your router.
By maintaining and caring for your router, you can prolong its lifespan and ensure that it continues to deliver exceptional performance. Regular maintenance and proper storage will allow you to enjoy many years of successful woodworking projects.
Remember, safety should always be a top priority when it comes to using a router. Use appropriate safety gear, such as safety glasses, hearing protection, and dust masks, and follow safe operating practices while using the router to prevent accidents and injuries.
With proper care and maintenance, your router will remain a reliable and indispensable tool in your woodworking workshop, allowing you to explore your creativity and achieve outstanding results.
Read more: How To Use Sketchup For Woodworking
Conclusion
Using a router for woodworking opens up a world of possibilities, allowing you to unleash your creativity and craft stunning pieces of functional and decorative art. Throughout this guide, we have explored various aspects of using a router, from safety precautions to advanced techniques. By following these guidelines, you can confidently and effectively use a router to enhance your woodworking projects.
Remember that safety should always be the top priority. Familiarize yourself with safety precautions, wear appropriate protective gear, and follow the manufacturer’s guidelines to ensure a safe working environment.
Understanding the different types of routers available and choosing the right one for your specific projects is crucial. Take into account the intended use, power and speed capabilities, ease of use, and compatibility with router bits when making your selection.
Router bit selection plays a crucial role in achieving the desired results. From straight bits to decorative edge bits, ensure that you choose the appropriate bit for your project and use it correctly.
Proper setup and care of your router are essential for optimal performance and longevity. Take the time to set up the router correctly, adjust the depth and guides, and ensure the workpiece is secured. Regularly clean and maintain your router, including the router bits, to prevent buildup and maintain sharpness.
By mastering basic techniques such as edge routing, dado and rabbet cutting, and cutting mortises and tenons, you can create sturdy joints and beautifully finished edges. Advancing to router table techniques and exploring advanced techniques like inlay work and spiral fluting will allow you to showcase your craftsmanship and take your woodworking skills to the next level.
Finally, keep in mind that woodworking is a continuous journey of learning and improvement. Practice, experiment, and embrace creativity to develop your unique style and achieve exceptional results.
With the knowledge and skills gained from this guide, combined with your passion for woodworking, you are well-equipped to harness the full potential of a router and create extraordinary pieces that will stand the test of time. So, let your imagination run wild, and happy woodworking!
Finished mastering router techniques? Keep your woodworking journey going by checking out our newest roundup of tools and tips. Whether you're just starting out or looking to refine your skills, our latest article on the best woodworking insights for the upcoming year is packed with must-have information to take your projects to the next level. Don't miss out on this essential read for any craft enthusiast!
Frequently Asked Questions about How To Use A Router For Woodworking
Was this page helpful?
At Storables.com, we guarantee accurate and reliable information. Our content, validated by Expert Board Contributors, is crafted following stringent Editorial Policies. We're committed to providing you with well-researched, expert-backed insights for all your informational needs.


0 thoughts on “How To Use A Router For Woodworking”