Articles
How To Use Ryobi Router
Modified: December 7, 2023
Learn how to use a Ryobi router with our step-by-step articles. Explore tips, tricks, and techniques for mastering your woodworking projects.
(Many of the links in this article redirect to a specific reviewed product. Your purchase of these products through affiliate links helps to generate commission for Storables.com, at no extra cost. Learn more)
Introduction
Welcome to the world of woodworking! Whether you are a beginner or a seasoned DIY enthusiast, using a router can elevate your woodworking projects to the next level. And when it comes to routers, the Ryobi Router is a popular choice due to its versatility, reliability, and affordable price tag.
In this article, we will guide you on how to use the Ryobi Router effectively and safely, so you can unleash your creative potential and achieve professional-looking results. We will cover the essential steps from setting up the router table to routing techniques, maintenance, and cleaning. So, let’s dive in!
Key Takeaways:
- Safety first! Prioritize protective gear, secure workpieces, and follow the user manual for safe and effective use of the Ryobi Router. Embrace creativity while ensuring safety at every step.
- Master the art of routing with the Ryobi Router by understanding its components, setting up the router table, adjusting depth, and utilizing speed control. Practice patience, prioritize maintenance, and unleash your woodworking potential.
Read more: How To Change Bit On Ryobi Router
Safety Precautions
Before we delve into using the Ryobi Router, it is crucial to prioritize safety. Woodworking tools, including routers, can be dangerous if not used properly. Here are some safety precautions to keep in mind:
- Read the Manual: Familiarize yourself with the user manual provided by Ryobi for the specific model of router you are using. This will outline important safety guidelines and operating instructions.
- Wear Protective Gear: Always wear safety glasses or goggles to protect your eyes from flying debris. Additionally, use hearing protection and a dust mask to protect your ears and lungs.
- Secure the Workpiece: Ensure that the workpiece is securely clamped or held in place using appropriate clamps or fixtures. This will prevent any movement or slipping during the routing process.
- Disconnect the Power: Before making any adjustments or changing the router bit, disconnect the router from the power source. This will prevent accidental startup and potential injuries.
- Keep Hands Clear: When the router is in operation, keep your hands away from the router bit and any moving parts. Use push sticks or other tools to guide the wood instead.
- Work in a Well-Ventilated Area: Woodworking can produce dust and fumes. Make sure you are working in a well-ventilated area or use a dust collection system to minimize dust accumulation and maintain air quality.
- Start with a Test Piece: If you are new to routing, start with a test piece to practice and get familiar with the router and its controls before working on your actual project.
- Take Breaks: Woodworking can be physically demanding. Take regular breaks to rest and stretch to avoid fatigue and maintain focus.
- Store Properly: When you are done using the router, always store it in a clean and dry place, out of reach of children or unauthorized users.
Remember, these precautions are just a starting point. Always use your best judgment and prioritize safety above all else when using any power tool, including the Ryobi Router.
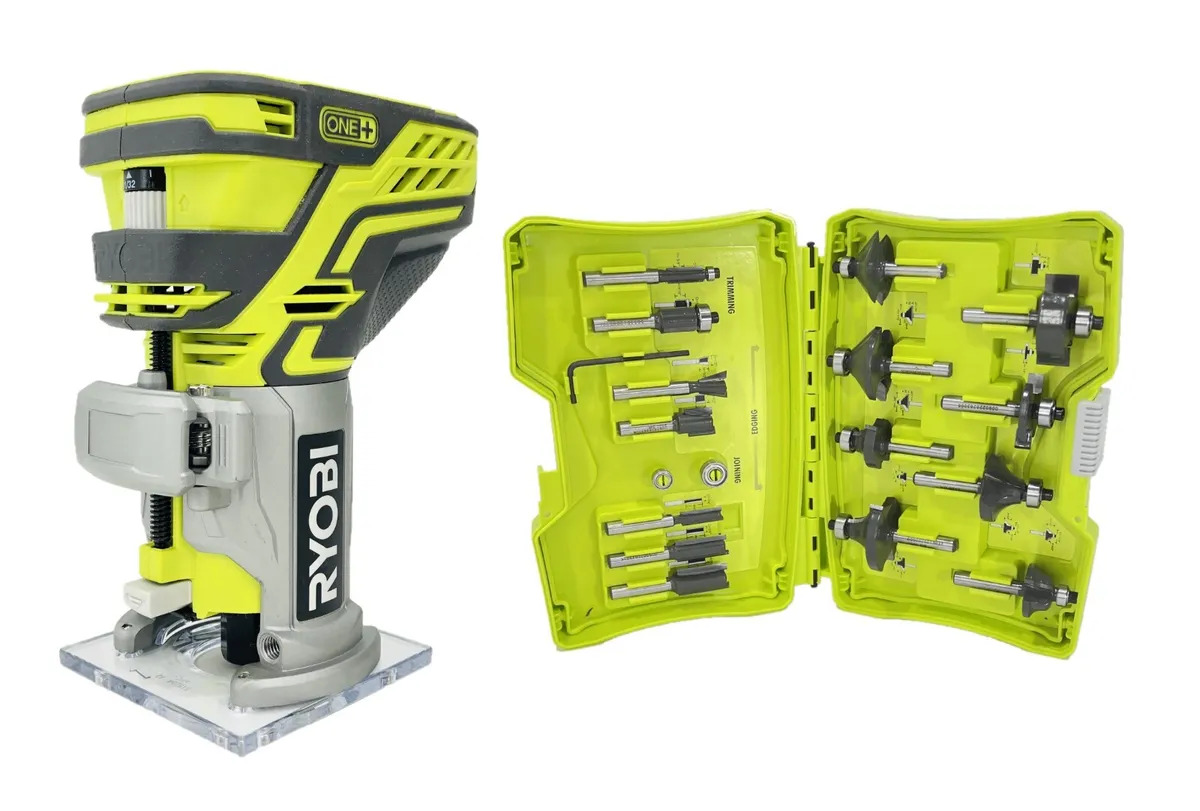
Step 1: Familiarizing Yourself with Ryobi Router Components
Before diving into using the Ryobi Router, it’s important to understand its various components and their functions. This will help you use the router with confidence and make the most out of its features. Here are the key components of the Ryobi Router:
- Motor Housing: This is the main body of the router that houses the motor. It usually includes an on/off switch, speed control dial, and depth adjustment mechanism.
- Base Plate: The base plate is the flat, circular plate attached to the bottom of the motor housing. It provides stability and acts as a guide for the router bit.
- Collet: The collet is a metal sleeve that holds the router bit in place. It is located at the bottom of the motor housing and is tightened using a collet nut.
- Router Bit: The router bit is the cutting tool that shapes and removes material from the workpiece. It comes in various types, such as straight bits, roundover bits, and chamfer bits.
- Depth Adjustment: The depth adjustment mechanism allows you to control the depth of the router bit. It ensures precise and consistent cutting depths depending on your project requirements.
- Handles: Some Ryobi Router models come with handles or grips on the motor housing for added control and stability during use.
- Guide Fence: The guide fence is an optional accessory that can be attached to the base plate. It acts as a guide to help you maintain a straight and consistent cut.
Take some time to inspect and become familiar with each of these components. Read the user manual to understand their specific functions and how to operate them effectively. This will give you a solid foundation for using the Ryobi Router confidently in your woodworking projects.
Step 2: Setting up the Router Table
The router table is a crucial component for using the Ryobi Router effectively. It provides stability and precision for your woodworking projects. Here’s how you can set up the router table:
- Select a Suitable Router Table: Choose a router table that suits your needs and workspace. Look for a table that is sturdy, has adjustable fence options, and offers ample space for your projects.
- Secure the Router: Place the router in the router table opening. Make sure it fits securely and is aligned with the table’s surface. Many router tables have inserts or plates that can be customized to fit different router models.
- Adjust the Router Height: Set the router bit at an appropriate height. The general rule of thumb is to have the bit protruding slightly above the table’s surface. This allows for easy adjustment of the depth during the routing process.
- Attach the Fence: If your router table comes with a fence, attach it securely to the table. The fence acts as a guide to keep your workpiece straight and maintain consistent cuts. Adjust the fence position based on the desired routing path.
- Lock the Router: Once the router is set up and adjusted, lock it in place using the table’s locking mechanism or clamps. This ensures that the router remains stable and doesn’t move during operation.
- Level the Router Table: Ensure that the router table is level and stable. Use a bubble level to check for any unevenness. Adjust the table’s feet or use shims to achieve a leveled surface.
- Test the Setup: Before starting your project, do a test run on a scrap piece of wood to ensure that the router and table are set up correctly. Verify that the router bit is cutting at the desired depth and the fence is guiding the wood accurately.
By following these steps, you can set up the router table and create a solid foundation for your routing tasks with the Ryobi Router. A well-prepared router table will make your woodworking projects more efficient and precise.
Step 3: Installing the Router Bit
Now that you have your router table set up, it’s time to install the router bit into the Ryobi Router. Here’s how you can do it:
- Unplug the Router: Before installing or removing the router bit, always unplug the Ryobi Router from the power source to ensure your safety.
- Loosen the Collet: Locate the collet nut at the bottom of the motor housing and loosen it by turning it counterclockwise. This will allow you to insert the router bit.
- Select the Correct Router Bit: Choose the appropriate router bit for your project. Consider the type of cut you want to achieve, such as a straight cut, a grooved cut, or a decorative edge.
- Insert the Router Bit: Insert the router bit shank into the collet, making sure it fits securely. Push the bit up as far as it will go into the collet.
- Tighten the Collet: With the router bit inserted, firmly grip the router bit’s shaft and tighten the collet nut by turning it clockwise. Use a wrench or a router collet wrench for added grip and leverage.
- Ensure Proper Tightness: Double-check the tightness of the collet nut to ensure that the router bit is securely held in place. However, be cautious not to overtighten as it can damage the bit or the collet.
- Test the Router Bit: Before starting your project, give the router bit a gentle pull to ensure it is securely held in place. If there is any movement, repeat the tightening process.
By following these steps, you can safely and effectively install the router bit into the Ryobi Router. Make sure to always choose the appropriate bit for your project and double-check that it is securely fastened before proceeding.
When using a Ryobi router, always make sure to secure the workpiece properly and adjust the depth of the bit before starting. This will ensure safe and accurate routing.
Read more: How To Use A Router
Step 4: Adjusting the Depth of Cut
Once you have installed the router bit, the next step is to adjust the depth of cut on your Ryobi Router. The depth of cut determines how much material will be removed from the workpiece with each pass. Here’s how you can do it:
- Power Off: Ensure that the router is powered off and unplugged before making any adjustments.
- Locate the Depth Adjustment Mechanism: Look for the depth adjustment mechanism on your Ryobi Router. It is typically a rotating ring or lever located near the base of the router.
- Loosen the Depth Lock: If there is a depth lock, loosen it to allow adjustments. If there is no lock, skip this step.
- Set the Desired Depth: Determine the depth of cut you want to achieve for your project. You can refer to your project plans or use trial and error on a scrap piece of wood to find the right depth.
- Adjust the Depth: Rotate the depth adjustment mechanism clockwise to increase the depth of cut or counterclockwise to decrease it. Gradually make adjustments to achieve the desired depth.
- Lock the Depth: Once you have set the desired depth, lock it in place using the depth lock mechanism, if available. This will ensure that the depth remains consistent during the routing process.
- Verify the Depth: Double-check the depth setting to ensure it matches your requirements. You can measure the depth using a depth gauge or by comparing it to the thickness of your workpiece.
Always remember to make small adjustments when setting the depth of cut and test it on a scrap piece of wood before working on your actual project. This will help you fine-tune the depth and ensure that you achieve the desired results with your Ryobi Router.
Step 5: Using the On/Off Switch and Speed Control
Now that you have adjusted the depth of cut on your Ryobi Router, let’s move on to using the on/off switch and speed control. These features help you control the operation of the router and customize the cutting speed. Here’s how you can use them:
- Power On: Ensure that the router is plugged into a power source and ready to use.
- Locate the On/Off Switch: The on/off switch is usually located on the motor housing. It is a toggle or push-button switch that controls the router’s power.
- Turn On the Router: To start the router, simply toggle or press the on/off switch. The router will power on, and the motor will start running.
- Adjust the Speed: The speed control dial is typically located on the motor housing, near the on/off switch. It allows you to adjust the cutting speed of the router based on your project needs.
- Low Speed for Larger Bits: When using larger router bits or working on harder materials, set the speed to a lower setting. This helps prevent the router from bogging down and ensures smoother cuts.
- High Speed for Smaller Bits: For smaller router bits or softer materials, you can increase the speed for faster cutting. However, always follow the manufacturer’s recommendations and consider the bit size and material hardness.
- Experiment and Test: It’s always a good idea to test different speed settings on a scrap piece of wood before working on your actual project. This allows you to find the right balance of speed and control for optimal results.
- Turn Off the Router: When you’re finished using the router, toggle or press the on/off switch to turn it off. Ensure that the router comes to a complete stop before unplugging it.
By utilizing the on/off switch and speed control features on your Ryobi Router, you have greater control over the cutting process and can achieve precise and desired results. Remember to adjust the speed based on the size of the router bit and the hardness of the workpiece for optimal performance.
Step 6: Routing Techniques and Tips
Now that you have familiarized yourself with the basic operation of the Ryobi Router, let’s explore some routing techniques and tips to help you achieve professional-looking results:
- Start with a Test Piece: Before working on your actual project, always practice and test your routing technique on a scrap piece of wood. This allows you to adjust the depth, make any necessary modifications, and gain confidence before moving on.
- Secure the Workpiece: Ensure that the workpiece is securely clamped or fastened to the router table or workbench. This prevents any movement or slips during the routing process and ensures accurate and consistent cuts.
- Work Against the Router’s Rotation: When routing the edges of the workpiece, move the router against the rotation of the bit. This helps prevent tear-out and produces cleaner and smoother cuts.
- Use Guide Blocks or Fences: To maintain straight and even cuts, consider using guide blocks or fences. These can be attached to the router table or workpiece to guide the router and ensure precise routing along a specific path.
- Take Multiple Passes: If you need to remove a large amount of material, it’s best to make multiple passes with gradually increasing depth. Trying to remove too much material at once can strain the router and result in poor quality cuts.
- Be Mindful of Grain Direction: When routing across the grain, there is a higher chance of tear-out. To minimize this, consider using a sharp bit and making light passes. When routing with the grain, you generally have smoother cuts.
- Use Pilot and Template Bits: Pilot and template bits can be used to create accurate and consistent cuts based on a pre-determined pattern or template. They are great for creating decorative edges or intricate designs.
- Keep the Router Moving: Avoid stopping the router in one spot while it’s running, as this can cause uneven cutting and burn marks. Maintain a steady and fluid motion to achieve clean and smooth cuts.
- Clean the Router Bit: Routinely clean the router bit to remove any build-up of debris. This helps maintain the bit’s sharpness and prolong its lifespan. Avoid using your fingers to clean the bit—use a brush or compressed air instead.
- Practice Patience: Woodworking and routing require patience and practice. Don’t rush the process, and take your time to ensure accuracy and safety. With practice, your routing skills will improve, and you’ll achieve better results.
These routing techniques and tips will help you get the most out of your Ryobi Router. Remember to always prioritize safety and consult the user manual for specific instructions and recommendations for your model.
Step 7: Maintenance and Cleaning
Proper maintenance and cleaning are essential for keeping your Ryobi Router in optimal condition and prolonging its lifespan. Here are some important maintenance tips to follow:
- Regularly Clean the Router: After each use, take the time to clean the router to remove any dust, debris, or resin buildup. Use a brush or compressed air to clean the motor housing, base plate, and collet area. This helps prevent clogs and ensures smooth operation.
- Inspect the Router Bit: Regularly inspect the router bit for any signs of wear, damage, or dullness. Replace the bit if necessary, as a dull bit can cause poor quality cuts and put more strain on the router.
- Check the Power Cord: Examine the power cord for any cuts, fraying, or damage. If you notice any issues, replace the cord immediately to prevent electrical hazards.
- Check and Lubricate Moving Parts: Periodically check the router’s moving parts, such as the depth adjustment mechanism and the on/off switch. Apply a small amount of lubricant to keep these parts moving smoothly.
- Tighten Loose Screws: Routinely check for any loose screws or bolts on the router. Tighten them if necessary to ensure stability and prevent any accidents during use.
- Store in a Dry and Secure Location: When not in use, store the router in a clean, dry, and secure location. This protects it from dust, moisture, and potential damage. Consider using a dust cover or a router case for added protection.
- Follow the Manufacturer’s Recommendations: Refer to the user manual provided by Ryobi for specific maintenance guidelines and recommendations. They may have specific instructions for your model of router.
By following these maintenance tips, you can keep your Ryobi Router in excellent condition and ensure its longevity. Regular cleaning and inspection help maintain optimal performance, improve safety, and deliver consistently high-quality results in your woodworking projects.
Read more: How To Use Ryobi Sander
Conclusion
Congratulations! You have learned how to effectively and safely use the Ryobi Router to enhance your woodworking projects. By following the steps detailed in this article, you have gained the knowledge and skills to set up the router table, install and adjust router bits, and utilize the various features of the router.
Remember to always prioritize safety by following the recommended safety precautions and wearing the necessary protective gear. Take the time to familiarize yourself with the components of the Ryobi Router and read the user manual for specific instructions and guidelines.
Throughout your woodworking journey, continue to practice and experiment with different routing techniques to refine your skills. Take advantage of the router’s speed control, on/off switch, and depth adjustment to achieve precise and professional-looking cuts.
Maintaining and cleaning your Ryobi Router on a regular basis will ensure its optimal performance and longevity. By keeping the router free from dust, inspecting the router bit, and following the manufacturer’s recommendations, you can enjoy years of successful woodworking projects.
Now, armed with this comprehensive understanding of the Ryobi Router, you are ready to embark on your woodworking adventures. Whether you are creating decorative edges, shaping wood, or working on intricate designs, embrace your creativity and enjoy the satisfying results your Ryobi Router and newfound skills will bring.
Frequently Asked Questions about How To Use Ryobi Router
Was this page helpful?
At Storables.com, we guarantee accurate and reliable information. Our content, validated by Expert Board Contributors, is crafted following stringent Editorial Policies. We're committed to providing you with well-researched, expert-backed insights for all your informational needs.


0 thoughts on “How To Use Ryobi Router”