Home>Articles>How To Use Black And Decker Electric Skillet Parts
Articles
How To Use Black And Decker Electric Skillet Parts
Modified: October 27, 2024
Discover useful articles on how to work with Black and Decker electric skillet parts. Get expert tips and guidance for optimal performance and delicious results.
(Many of the links in this article redirect to a specific reviewed product. Your purchase of these products through affiliate links helps to generate commission for Storables.com, at no extra cost. Learn more)
Introduction
Welcome to the world of Black and Decker electric skillets! Whether you’re a seasoned chef looking to upgrade your cooking gear or a novice cook exploring new culinary horizons, the Black and Decker electric skillet is a versatile and convenient appliance that can revolutionize your cooking experience.
In this article, we will delve into the world of Black and Decker electric skillets and discuss the various parts that make up this amazing kitchen tool. We will also provide a step-by-step guide on how to work these parts effectively, along with tips, tricks, and troubleshooting advice to ensure you have the best cooking experience possible.
But before we dive into the specifics, let’s take a moment to understand what makes the Black and Decker electric skillet such a popular choice among cooks of all skill levels.
Black and Decker is a renowned brand known for its high-quality appliances, and their electric skillets are no exception. These skillets are designed with precision and functionality in mind, offering a range of features that make them a must-have in any kitchen.
One of the standout features of the Black and Decker electric skillet is its versatility. With adjustable temperature settings, you have full control over the cooking process, allowing you to fry, sauté, simmer, and even bake with ease. The large cooking surface provides ample space for preparing family-sized meals, while the non-stick coating ensures easy food release and hassle-free cleanup.
Now that we have a general idea of what makes the Black and Decker electric skillet so appealing, let’s explore the various parts that contribute to its functionality. Understanding these parts will not only help you make the most out of your skillet but also allow you to troubleshoot any issues that may arise.
Key Takeaways:
- Master the art of cooking with the Black and Decker electric skillet by understanding its key parts, working them effectively, and troubleshooting common issues. Enhance your culinary experience with this versatile kitchen appliance.
- Unleash your inner chef and revolutionize your cooking experience with the Black and Decker electric skillet. From precise temperature control to non-stick cooking surface, this appliance offers convenience, reliability, and delicious results.
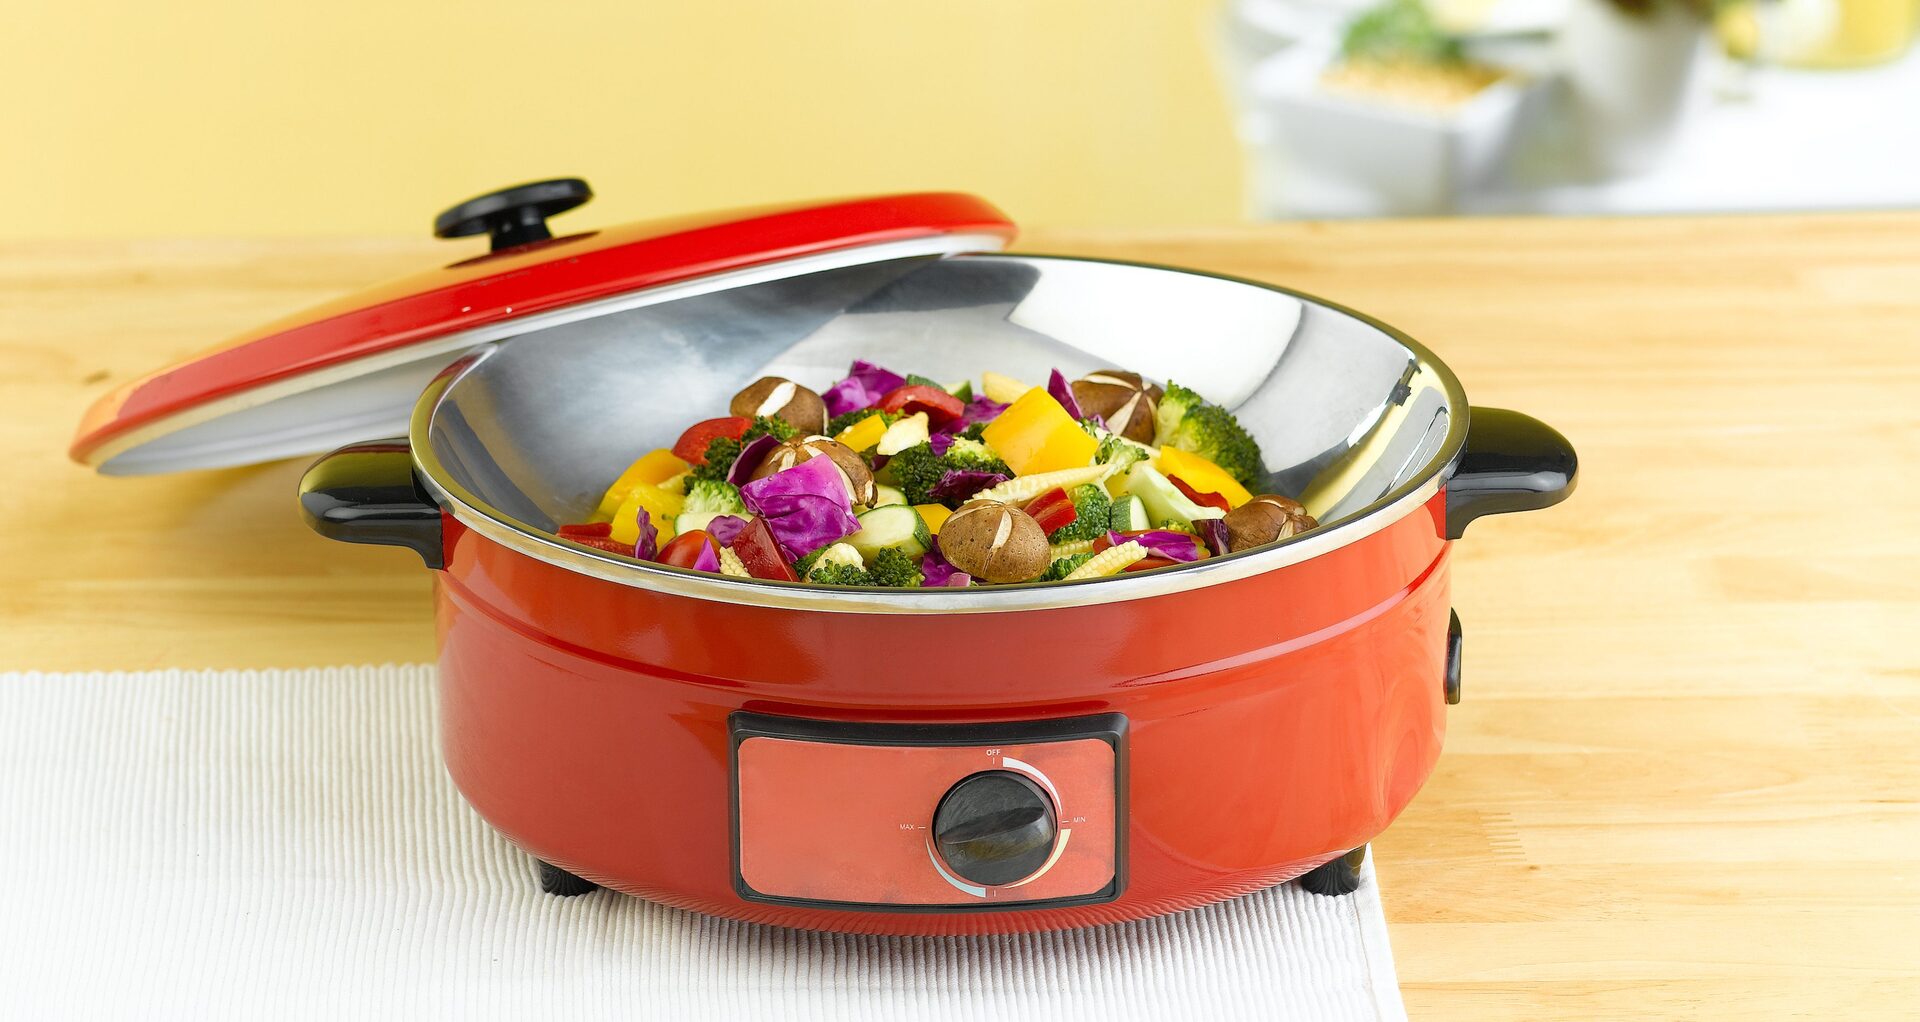
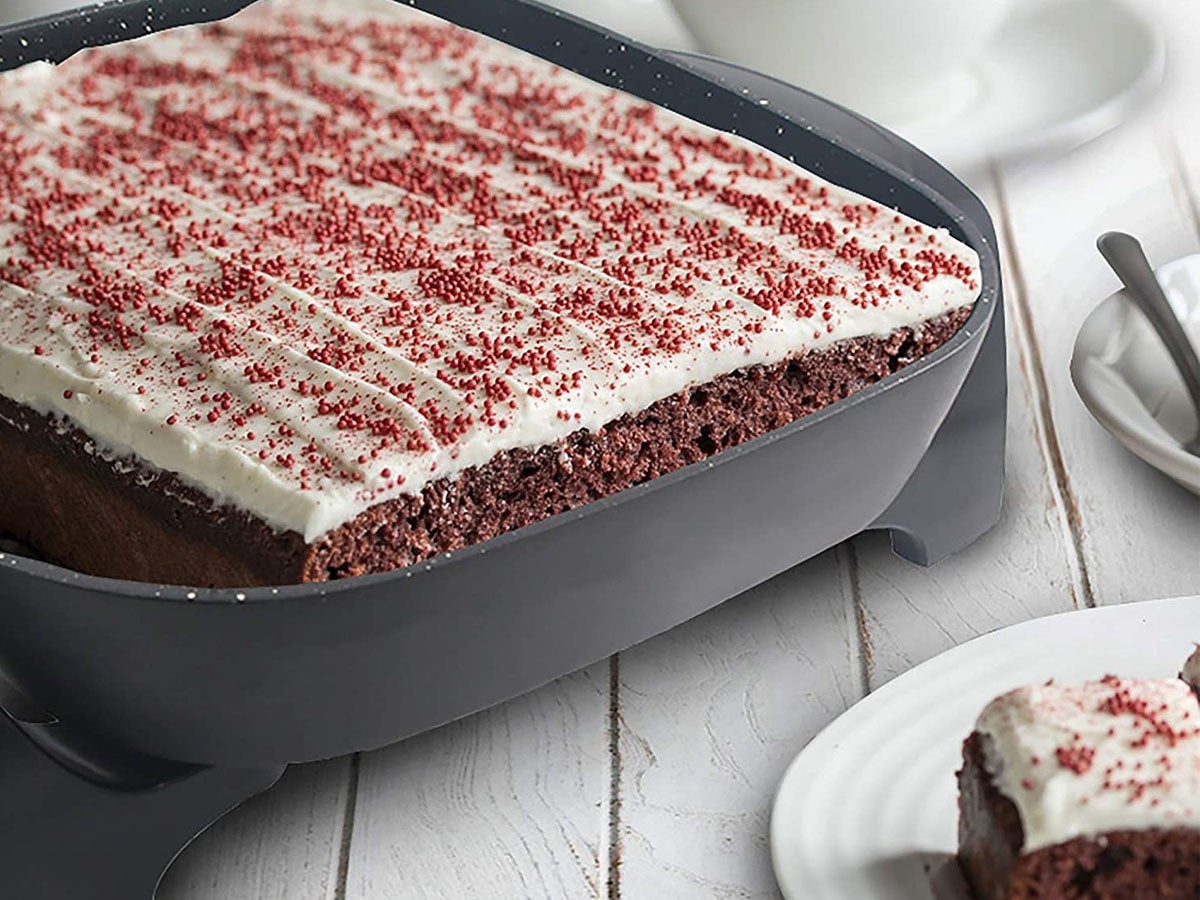
Black and Decker Electric Skillet Overview
The Black and Decker electric skillet is a versatile kitchen appliance that provides a convenient and efficient way to cook a variety of dishes. With its sleek and compact design, it can fit seamlessly into any kitchen space. Whether you’re cooking for a small family or hosting a dinner party, this skillet has got you covered.
The electric skillet is equipped with a heating element located beneath the cooking surface. This allows for even heat distribution and precise temperature control, ensuring that your food cooks evenly and to perfection. The skillet typically features a temperature control dial that allows you to adjust the heat settings according to the recipe you’re preparing.
The cooking surface of the Black and Decker electric skillet is made from a durable and non-stick material. This not only prevents food from sticking to the surface but also makes it easy to clean up afterward. The large cooking area can accommodate a generous amount of food, making it ideal for preparing meals for large groups or batch cooking.
In addition to the basic cooking functionality, some models of the Black and Decker electric skillet come with additional features and accessories. These may include a glass lid for easy monitoring of the cooking progress, a steam rack for steaming vegetables or seafood, and even a removable probe for use as a buffet server. These added features provide versatility and expand the range of dishes you can prepare with your electric skillet.
Furthermore, the Black and Decker electric skillet is designed with safety in mind. It typically features cool-touch handles that stay cool during use, reducing the risk of burns. The skillet also has non-slip feet to ensure stability on your countertop.
Overall, the Black and Decker electric skillet offers a convenient and efficient way to cook a wide variety of dishes. Its versatility, temperature control, and durable design make it a popular choice among home cooks and professional chefs alike. Now that we have an overview of this remarkable kitchen appliance, let’s explore the different parts that make up the Black and Decker electric skillet in more detail.
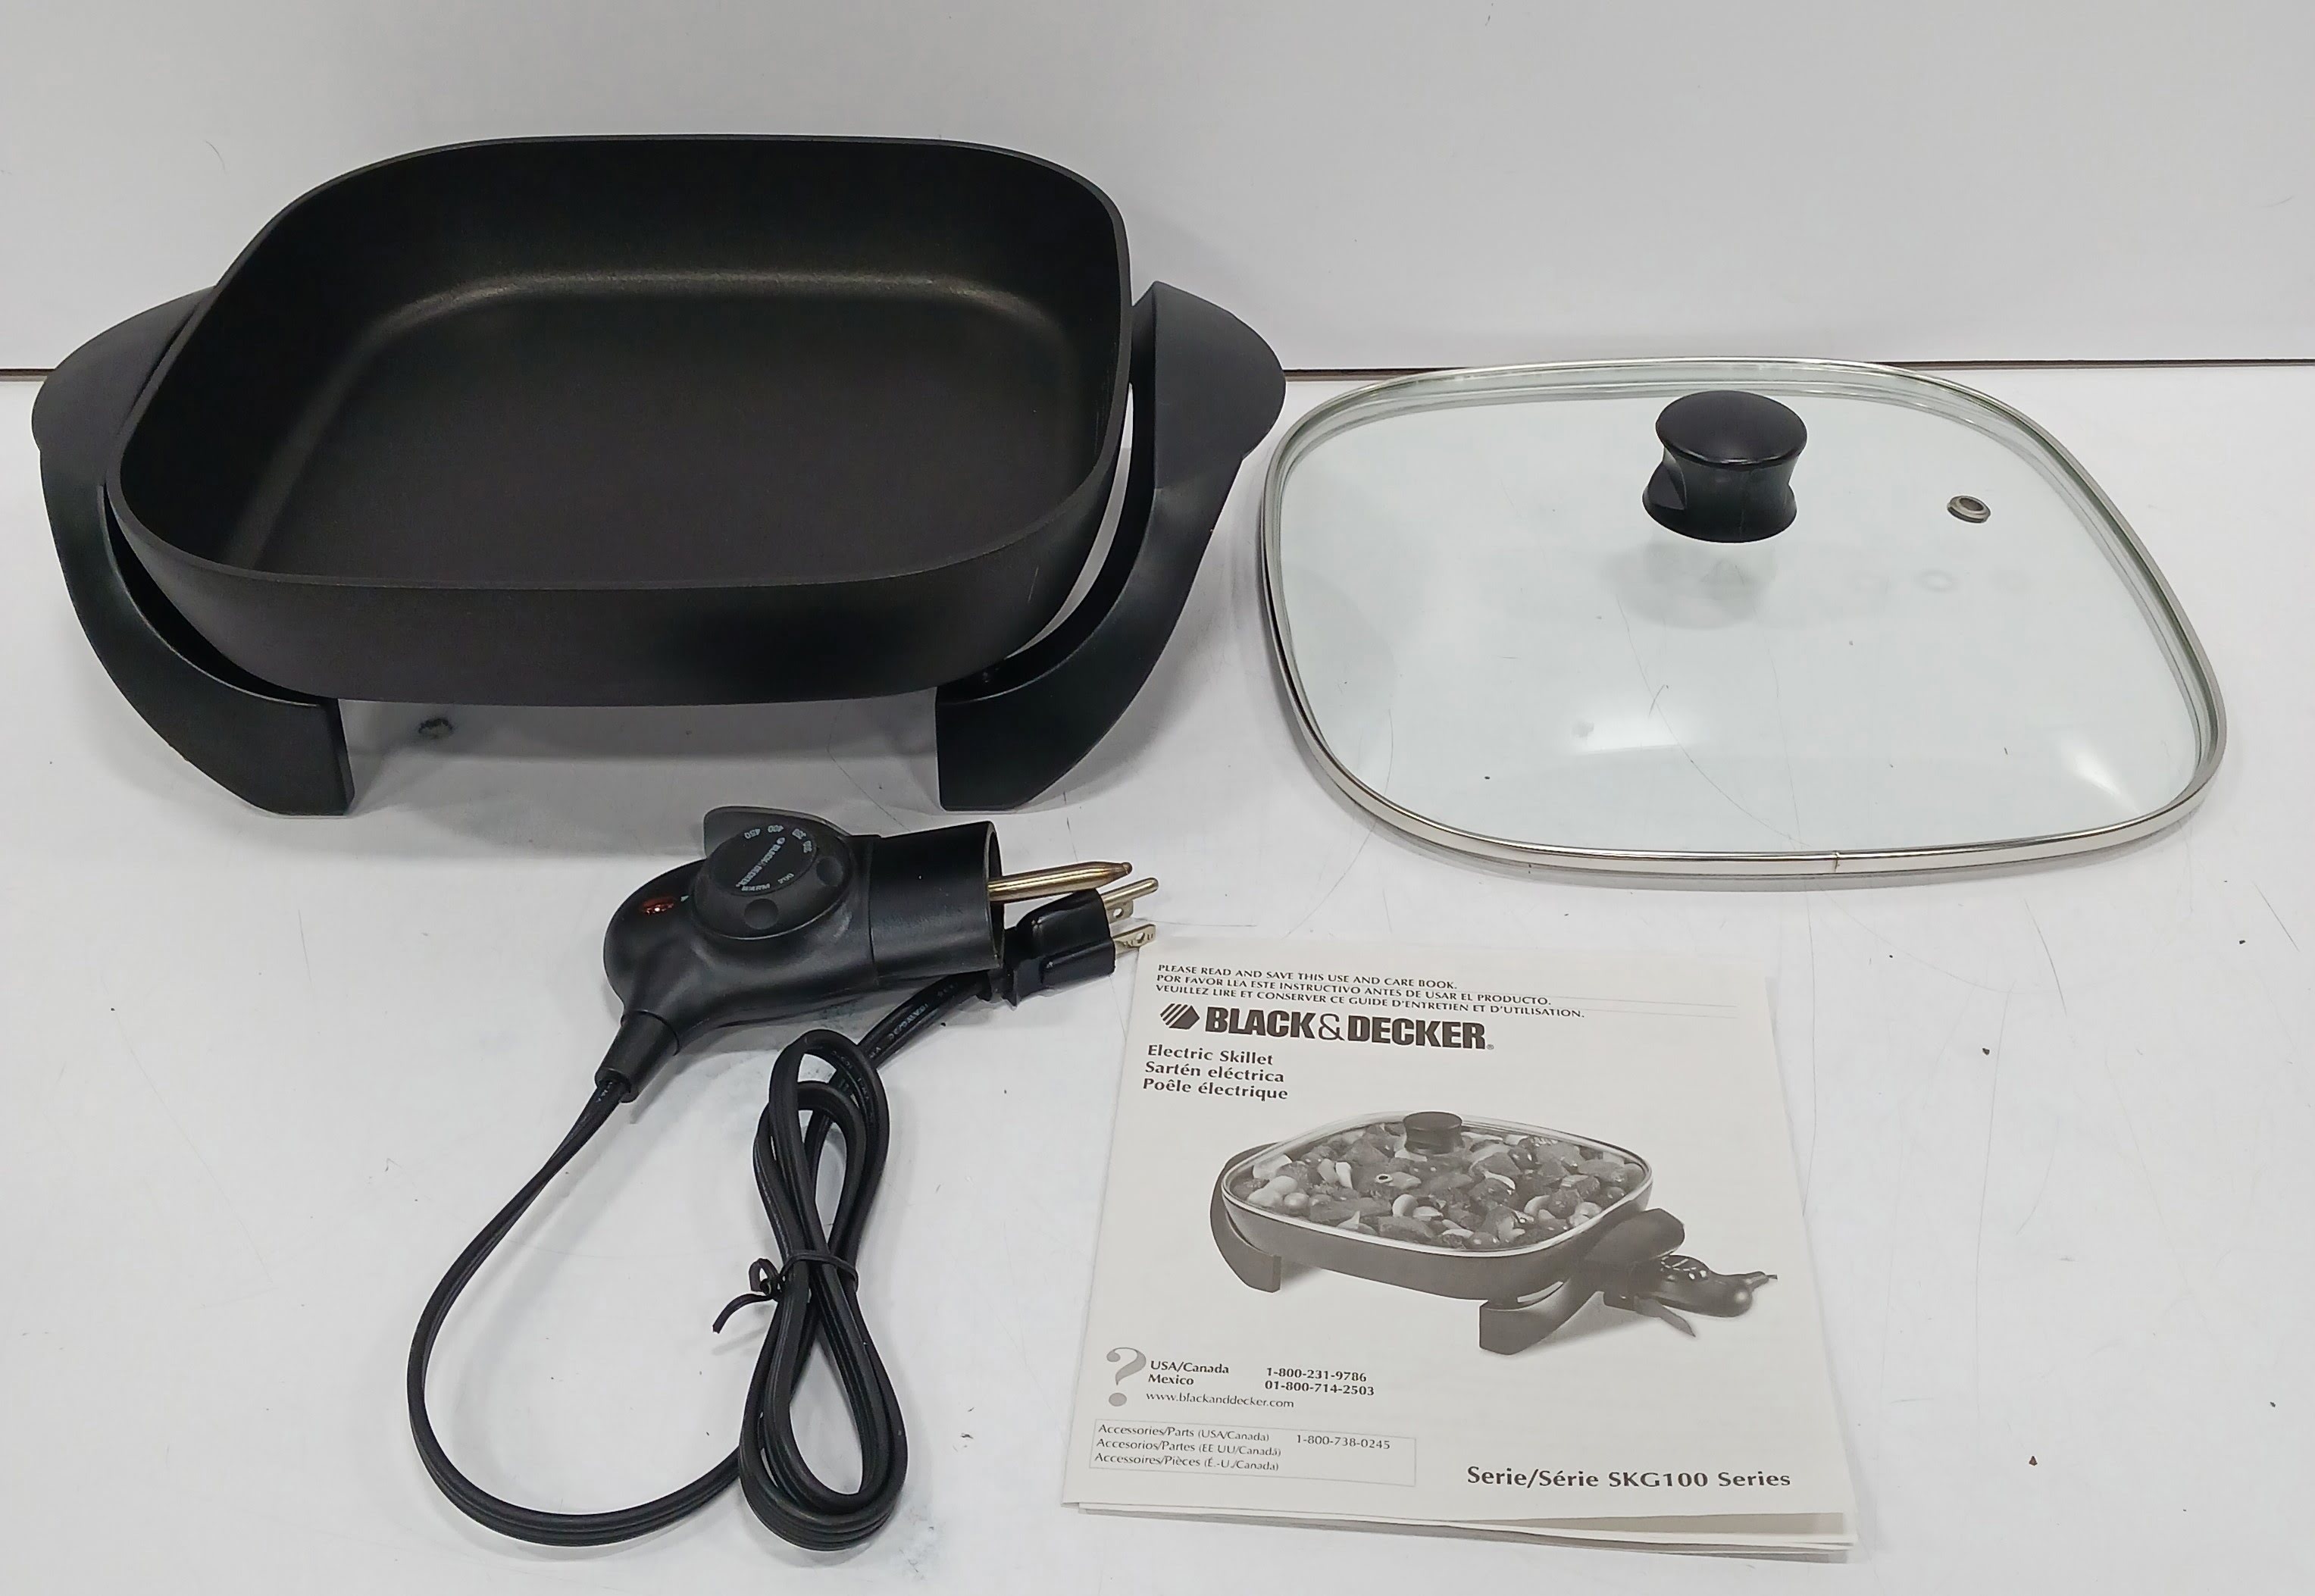
Understanding the Parts of a Black and Decker Electric Skillet
To effectively work with a Black and Decker electric skillet, it’s important to understand the various parts that contribute to its functionality. Familiarizing yourself with these parts will not only help you operate the skillet with ease but also allow you to troubleshoot any issues that may arise during the cooking process.
- Cooking Surface: The cooking surface is the area where you place your food to cook. It is typically made of a non-stick material, ensuring easy food release and effortless cleanup. The size of the cooking surface can vary depending on the model, but it is generally spacious enough to accommodate a variety of dishes.
- Temperature Control Dial: The temperature control dial allows you to adjust the heat settings of the skillet. It usually ranges from low to high, allowing you to cook a wide range of recipes at the desired temperature. Make sure to follow the recipe instructions or adjust the dial to the desired temperature based on your cooking needs.
- Glass Lid: Some models of the Black and Decker electric skillet come with a glass lid. The lid helps to trap heat and moisture, which is particularly useful for cooking dishes that require steaming or trapping flavors. The glass lid also allows you to monitor the cooking process without having to lift the lid, preventing heat and steam from escaping.
- Heat Element: The heat element is located beneath the cooking surface and is responsible for generating the heat to cook your food. It ensures even heat distribution and precise temperature control throughout the cooking process. The heat element is typically powered by electricity and provides consistent heat for efficient cooking.
- Handles: The handles of the Black and Decker electric skillet are designed to stay cool during use. This prevents burns and allows you to safely handle the skillet while cooking. The handles are usually made of heat-resistant materials, providing a comfortable grip and easy maneuverability.
- Power Cord: The power cord connects the electric skillet to a power source. It is detachable, allowing for easy storage and transport. Ensure that the power cord is properly connected and that the power source is compatible with the skillet’s requirements before use.
- Non-slip Feet: The non-slip feet are located on the bottom of the skillet. These feet provide stability and prevent the skillet from sliding or tipping over during use. They also serve as a safety feature, reducing the risk of accidents in the kitchen.
By familiarizing yourself with these key parts of the Black and Decker electric skillet, you can confidently work with this versatile kitchen appliance. In the next section, we will provide a step-by-step guide on how to work these parts effectively to create delicious meals.
Step-by-step Guide on How to Work Black and Decker Electric Skillet Parts
Now that you have a good understanding of the different parts of a Black and Decker electric skillet, let’s walk through a step-by-step guide on how to work these parts effectively for a successful cooking experience.
Step 1: Prepare the skillet – Before using the electric skillet, make sure it is clean and dry. Ensure that the power cord is securely attached and that the skillet is on a stable surface.
Step 2: Connect to power – Plug the power cord into a compatible power outlet. Make sure the skillet is turned off before connecting it to power. You should see the indicator light turn on once the skillet is properly connected.
Step 3: Adjust the temperature – Locate the temperature control dial on the skillet. Turn the dial to the desired temperature setting based on the recipe you are preparing. For lower heat, turn the dial towards the “Low” setting, and for higher heat, turn it towards the “High” setting.
Step 4: Preheat – Allow the skillet to preheat for a few minutes before adding any ingredients. This ensures that the skillet is evenly heated and ready to cook your food.
Step 5: Add ingredients – Once the skillet is preheated, carefully add your ingredients to the cooking surface. Make sure not to overcrowd the skillet to ensure even cooking.
Step 6: Cook as instructed – Follow the recipe instructions for cooking times and techniques. Use a spatula or tongs to flip or stir the ingredients as needed. The even heat distribution of the skillet will help ensure that your food cooks evenly.
Step 7: Monitor the cooking process – If your skillet comes with a glass lid, use it to monitor the cooking process without lifting the lid. This helps retain heat and moisture, resulting in succulent and flavorful dishes.
Step 8: Adjust heat if needed – If you find that your food is cooking too quickly or too slowly, you can adjust the temperature dial accordingly. Gradually increase or decrease the heat to achieve the desired doneness.
Step 9: Turn off and unplug – Once your food is cooked to perfection, turn off the skillet by turning the temperature dial to the off position. Unplug the power cord from the outlet and allow the skillet to cool down before cleaning.
Step 10: Clean and store – After the skillet has cooled down, clean it using warm soapy water and a soft cloth or sponge. Avoid using abrasive cleaners or harsh scrubbers, as they can damage the non-stick surface. Once clean, let it air dry and store it in a cool, dry place or as per the manufacturer’s instructions.
By following these step-by-step instructions, you’ll be able to effectively work with the different parts of your Black and Decker electric skillet and create delicious meals with ease.
When working with Black and Decker electric skillet parts, always make sure to unplug the skillet before cleaning or replacing any parts to avoid any electrical accidents.
Tips and Tricks for Using Black and Decker Electric Skillet Parts
Using a Black and Decker electric skillet can greatly simplify your cooking process and open up a world of culinary possibilities. To enhance your experience and make the most out of your electric skillet, here are some tips and tricks to keep in mind:
- Preheat properly: Preheating the skillet ensures even heat distribution and helps prevent food from sticking to the surface. Give your electric skillet a few minutes to reach the desired temperature before adding ingredients.
- Use the right utensils: When cooking with your electric skillet, opt for non-metal utensils such as wooden or silicone spatulas to prevent scratching the non-stick surface. This will help maintain the durability and longevity of your skillet.
- Experiment with different recipes: The versatility of the electric skillet allows you to explore various cooking techniques. Try stir-frying, sautéing, simmering, or even baking delicious dishes in your skillet. Don’t be afraid to experiment and discover new recipes that suit your taste.
- Optimize temperature settings: Take the time to understand the temperature levels of your electric skillet. By adjusting the temperature dial to the ideal setting for each recipe, you can achieve better cooking results and avoid overcooking or undercooking your food.
- Utilize the glass lid: If your electric skillet comes with a glass lid, make the most of it. Use the lid to trap heat and moisture, which can enhance the flavor and retain nutrients in your dishes. Additionally, monitoring the cooking process through the lid helps prevent heat and steam loss.
- Consider the size of your ingredients: Ensure that the size of the ingredients you are cooking is suitable for the size of your electric skillet. Overcrowding the skillet can lead to uneven cooking and may affect the final result. If necessary, cook in batches to maintain optimal cooking conditions.
- Utilize the “warm” setting: Some electric skillets have a “warm” setting, which is perfect for keeping cooked food warm until ready to serve. This feature is especially useful when hosting parties or preparing multiple dishes simultaneously.
- Take advantage of the non-stick surface: The non-stick coating of the electric skillet makes it easy to clean and prevents food from sticking. Use this to your advantage by minimizing the use of excessive oil or butter, leading to healthier cooking and easier cleanup.
- Properly store your electric skillet: When storing your electric skillet, make sure it is clean and completely dry to prevent any moisture from accumulating. Store it in a cool, dry place to avoid any potential damage to the skillet’s components.
- Read the user manual: While these tips are helpful, it’s always essential to refer to the user manual provided by Black and Decker. The manual contains specific instructions and safety precautions tailored for your specific electric skillet model.
By implementing these tips and tricks, you can enhance your cooking experience and unlock the full potential of your Black and Decker electric skillet.
Common Issues and Troubleshooting for Black and Decker Electric Skillet
While the Black and Decker electric skillet is a reliable kitchen appliance, it is not uncommon to encounter a few issues from time to time. Here are some of the most common issues you may encounter with your electric skillet, along with troubleshooting tips to help you resolve them:
- Inconsistent heating: If you notice that your electric skillet is not heating consistently, the first step is to check the power source. Ensure that the power cord is securely connected to both the skillet and the outlet. If the power source is not an issue, the heat element or temperature control dial may be faulty. In this case, it may be best to contact the manufacturer for further assistance or consult a professional technician.
- Food sticking to the surface: The non-stick surface of the electric skillet should prevent food from sticking. However, if you find that food is sticking, make sure to properly preheat the skillet before adding ingredients. Additionally, ensure that you are using the appropriate amount of oil or butter, as excess oil can cause food to stick. If the issue persists, there may be damage to the non-stick coating, and you may need to replace the skillet.
- Uneven cooking: Uneven cooking can occur if the skillet is not preheated properly or if the heat is not distributed evenly. To tackle this issue, make sure to preheat the skillet for a sufficient amount of time before adding ingredients, and avoid overcrowding the skillet with food. If uneven cooking persists, consider contacting the manufacturer for further assistance.
- Temperature control issues: If you find that the temperature control dial is not functioning accurately, it may be due to a faulty thermostat. In this case, it is recommended to reach out to the manufacturer or consult a professional for repair or replacement of the faulty part.
- Power cord issues: If you experience any issues with the power cord, such as it not properly connecting to the skillet or the power source, check for any physical damage or loose connections. If the cord is damaged, it is crucial to replace it with a new one to ensure safe operation of the electric skillet.
- Cleaning difficulties: Cleaning the electric skillet should be a simple process, thanks to its non-stick surface. However, if you encounter difficulties during cleaning, ensure that you are using the appropriate cleaning tools and non-abrasive cleaners. If the skillet still seems challenging to clean, let it soak in warm soapy water for a longer period to loosen any stubborn residue.
If you face any issues with your Black and Decker electric skillet that are not addressed above, it is best to consult the user manual provided by the manufacturer or contact their customer support for further assistance. They will be able to provide specific troubleshooting steps and guidance based on your skillet model.
By addressing common issues promptly and following the troubleshooting tips provided, you can ensure smooth and uninterrupted usage of your Black and Decker electric skillet for years to come.
Conclusion
The Black and Decker electric skillet is a versatile and efficient kitchen appliance that can revolutionize the way you cook. With its user-friendly design, precise temperature control, and non-stick cooking surface, this skillet offers convenience and reliability for all your culinary needs.
In this article, we have explored the various parts that make up the Black and Decker electric skillet and provided a step-by-step guide on how to work these parts effectively. We have also shared tips and tricks to enhance your cooking experience and troubleshoot common issues that may arise. By following these guidelines, you can make the most out of your electric skillet and enjoy delicious meals with ease.
Remember to always refer to the user manual provided by the manufacturer for specific instructions and safety precautions unique to your electric skillet model. This will ensure that you operate the skillet correctly and maintain its longevity.
Whether you’re sautéing vegetables, frying chicken, or simmering sauces, the Black and Decker electric skillet is a reliable companion that will help you achieve consistent and delicious results. Its versatility and functionality make it a must-have appliance in any kitchen, whether you’re a seasoned chef or a beginner cook.
So go ahead, explore new recipes, experiment with different cooking techniques, and unleash your inner chef with the Black and Decker electric skillet. Enjoy the convenience, versatility, and flavorful results that this remarkable kitchen appliance offers!
Frequently Asked Questions about How To Use Black And Decker Electric Skillet Parts
Was this page helpful?
At Storables.com, we guarantee accurate and reliable information. Our content, validated by Expert Board Contributors, is crafted following stringent Editorial Policies. We're committed to providing you with well-researched, expert-backed insights for all your informational needs.


0 thoughts on “How To Use Black And Decker Electric Skillet Parts”