
Articles
How To Winterize Toilet
Modified: October 20, 2024
Learn how to winterize your toilet with these helpful articles. Protect your plumbing from freezing temperatures and avoid costly repairs.
(Many of the links in this article redirect to a specific reviewed product. Your purchase of these products through affiliate links helps to generate commission for Storables.com, at no extra cost. Learn more)
Introduction
As the winter months approach, it’s important to take steps to protect your home from the harsh weather conditions. One area that often gets overlooked is the toilet. Winterizing your toilet is crucial to prevent freezing, cracking, and costly repairs. By following a few simple steps, you can ensure your toilet continues to function properly throughout the winter season.
In this article, we will guide you through the process of winterizing your toilet. From shutting off the water supply to insulating the tank and bowl, we will cover all the necessary steps to keep your toilet working efficiently in cold weather.
Before we dive into the details, it’s essential to understand why winterizing your toilet is necessary. When temperatures drop, the water in the toilet tank and bowl can freeze, leading to cracks or damage. Additionally, freezing pipes can cause water supply issues throughout your home. By properly winterizing your toilet, you can prevent these problems and ensure everything functions smoothly when you need it most.
Now, let’s get started with the step-by-step guide on winterizing your toilet.
Key Takeaways:
- Protect your toilet from freezing and potential damage during winter by following 7 simple steps, including shutting off the water supply, insulating the tank and bowl, and sealing drafts.
- Ensure a worry-free winter by maintaining a consistent temperature in the bathroom, protecting pipes, and reversing the winterization process when the weather warms up.
Read more: How To Winterize A Hot Tub In The Winter
Step 1: Shut off the water supply
The first step in winterizing your toilet is to shut off the water supply. Locate the shut-off valve, which is typically located near the base of the toilet. Turn the valve clockwise to completely shut off the water flow to the toilet. It’s important to ensure that the valve is fully closed to prevent any water from entering the tank and bowl.
Once the water supply is turned off, flush the toilet to drain any remaining water from the tank and bowl. This will make the winterization process more effective and ensure there is no water left that can freeze and cause damage.
If you find that the shut-off valve is not working properly or there is a leak, it’s recommended to have a professional plumber inspect and repair it before proceeding with the winterization process. A faulty valve or leak can lead to further issues down the line, so it’s best to address it promptly.
By shutting off the water supply to the toilet, you are taking the necessary step to prevent any new water from entering the system and potentially freezing during the cold winter months. This is an essential first step in the winterization process and sets the foundation for the subsequent steps to follow.
With the water supply shut off and the toilet flushed, you are now ready to move on to the next step: draining the toilet tank and bowl.
Step 2: Drain the toilet tank and bowl
After shutting off the water supply, it’s important to drain the toilet tank and bowl to remove any remaining water. This step is crucial to prevent freezing and potential damage during the winter months.
Start by using a sponge, towel, or bucket to soak up any water that may be left in the tank or bowl. Wring out the sponge or towel into the bucket to collect all the water. Be thorough in removing as much water as possible to ensure a complete drainage.
Next, locate the flush valve in the bottom center of the tank. Hold down the flush lever to release any remaining water. Keep the lever depressed until the tank is completely empty. This will force the water out of the bowl as well.
If there is still water in the bowl, you can use a plunger to create suction and remove the water. Place the plunger over the drain hole at the bottom of the bowl and vigorously push and pull to create suction. This should force the water to drain out. Repeat if necessary until the bowl is empty.
Once the tank and bowl are drained, use a sponge or towel to wipe down the interior surfaces and remove any excess moisture. This will help prevent any residual water from freezing and causing damage to the toilet.
Now that the tank and bowl are completely empty, you can proceed to the next step: insulating the toilet tank.
Step 3: Insulate the toilet tank
Insulating the toilet tank is an effective way to prevent the water inside from freezing during the winter months. It helps maintain a stable temperature and protects the tank from potential cracks or damage.
There are a few different methods you can use to insulate your toilet tank. One option is to use a tank insulating kit, which typically includes a foam liner that wraps around the inside of the tank. This foam liner helps to keep the temperature inside the tank stable and prevents the water from getting too cold.
To use a tank insulating kit, carefully read the instructions provided with the kit. Generally, you’ll need to clean the inside of the tank and ensure it is dry before applying the liner. Trim the liner to fit the size and shape of your tank and affix it securely to the interior walls. Make sure it covers all surfaces, including the bottom of the tank.
If you don’t have a tank insulating kit, you can also create your own insulation using materials like bubble wrap or fiberglass insulation. Wrap the tank with several layers of bubble wrap, ensuring that it is tightly secured and covers all sides. Alternatively, you can cut a piece of fiberglass insulation to fit the size of the tank and secure it with tape or straps.
Remember to leave access to the flushing mechanism, float mechanism, and any other components inside the tank. This will allow for easy maintenance and repairs if needed.
Insulating the toilet tank is an effective way to protect it from freezing and maintain its functionality during the winter months. It’s a simple step that can make a big difference in preventing potential damage and costly repairs.
Now that the toilet tank is insulated, it’s time to move on to insulating the toilet bowl.
Step 4: Insulate the toilet bowl
Insulating the toilet bowl is equally important in preventing freezing and maintaining the functionality of your toilet during the cold winter months. By insulating the bowl, you can protect it from potential cracks or damage caused by freezing temperatures.
One of the simplest and most effective ways to insulate the toilet bowl is by using a toilet bowl insulating kit. This kit typically includes a foam liner that fits snugly around the rim and sides of the bowl, creating a barrier against the cold air.
To begin, clean the surface of the toilet bowl rim thoroughly to ensure proper adhesion of the foam liner. Dry the area completely before proceeding. Then, carefully measure and cut the foam liner to fit the shape and size of your toilet bowl.
Apply adhesive to the backside of the foam liner. Position the liner along the rim of the toilet bowl, ensuring that it is centered and securely attached. Press firmly to ensure it adheres well to the bowl. Smooth out any air bubbles or wrinkles in the foam liner for a neat and secure fit.
Alternatively, if you don’t have access to a toilet bowl insulating kit, you can use a thick layer of insulating materials like foam, towels, or blankets. Wrap the insulating material around the bowl, securing it in place with duct tape or rubber bands. Be sure to cover the entire bowl surface and tuck in any loose ends to form a tight seal.
By insulating the toilet bowl, you are adding an extra layer of protection against freezing temperatures. The insulation helps maintain the temperature inside the bowl and prevents water from freezing, ensuring your toilet remains in working order throughout the winter season.
Now that both the toilet tank and bowl are properly insulated, it’s time to move on to the next step: protecting the pipes.
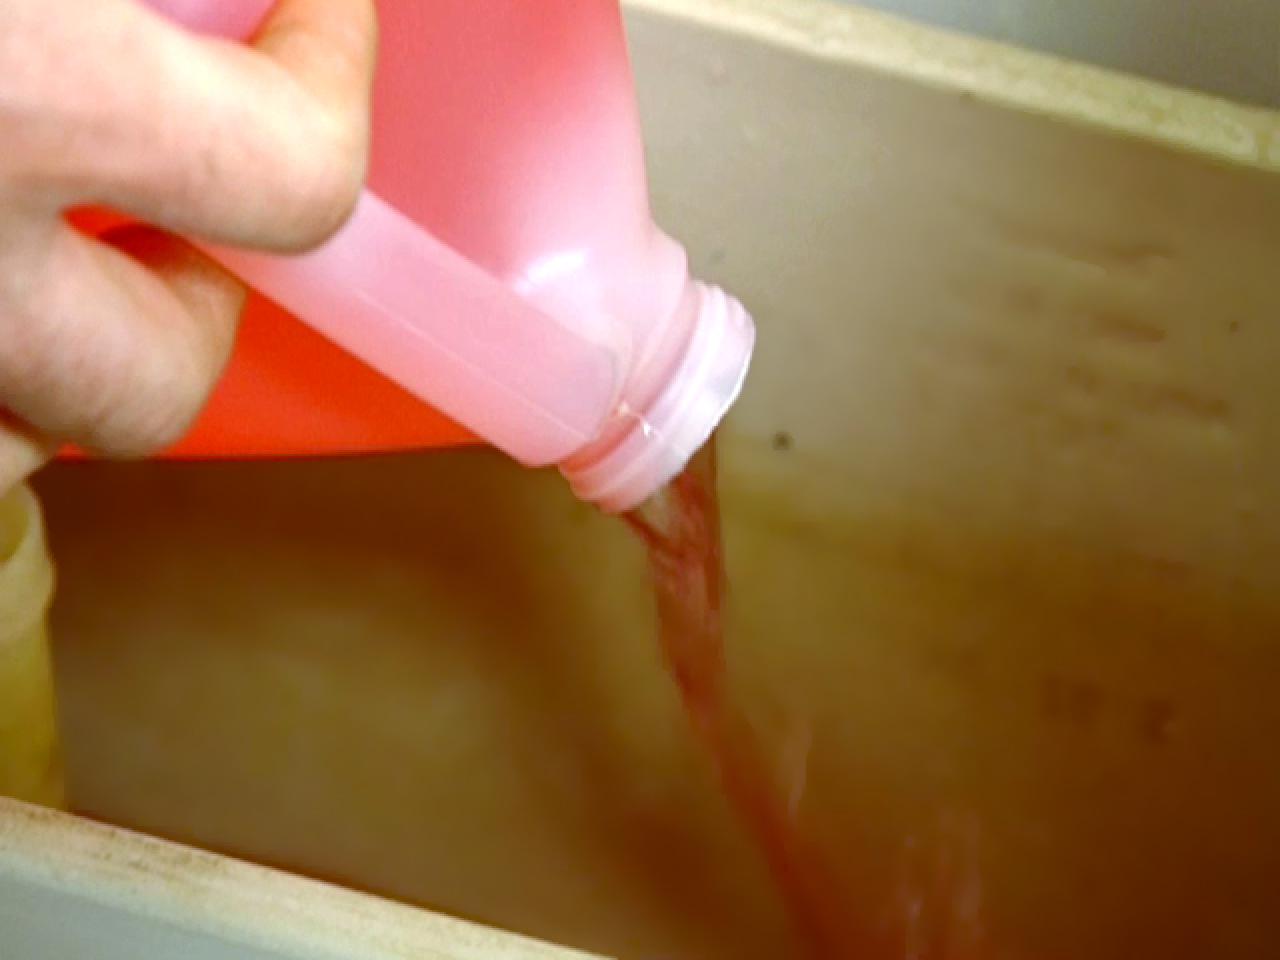
To winterize a toilet, turn off the water supply to the toilet and flush to empty the tank. Use a sponge to remove any remaining water. Add antifreeze to the bowl and tank to prevent freezing. Cover the toilet with a towel or plastic wrap to insulate it.
Read more: How To Winterize A Lawnmower
Step 5: Protect the pipes
Protecting the pipes connected to your toilet is crucial in preventing freezing, leaks, and potential damage during the winter months. Exposed pipes are more vulnerable to freezing and can lead to water supply issues throughout your home.
One effective way to protect the pipes is by using pipe insulation sleeves or wraps. These insulating materials are specifically designed to fit around the pipes and provide an extra layer of insulation against cold temperatures.
Start by measuring the length of the exposed pipes connected to your toilet. Cut the foam or fiberglass pipe insulation to the appropriate size. Ensure that it fits securely around the pipes, covering all exposed areas. Use adhesive or tape to secure the insulation in place if needed.
In addition to insulating the pipes, it’s important to check for any gaps or cracks in the surrounding walls or floor where the pipes pass through. These openings can allow cold air to seep in and potentially freeze the pipes. Use caulk or foam insulation to fill any gaps and seal off these areas to prevent drafts.
Another important step in protecting the pipes is to keep the temperature in your home at a sufficient level throughout the winter. Make sure that the heating system is working properly and set to a temperature that will prevent freezing. If you’ll be away for an extended period, it is advisable to leave the heat on in your home to avoid any potential issues with frozen pipes.
By properly insulating the pipes and sealing off any gaps or cracks, you can minimize the risk of freezing and potential damage. Taking these precautions will help ensure that your toilet and water supply remain operational throughout the winter season.
With the pipes protected, let’s move on to the next step: sealing any drafts.
Step 6: Seal any drafts
Sealing any drafts around your toilet and in the bathroom is an important step in winterizing your toilet. Drafts can allow cold air to enter the room, causing the temperature to drop and potentially freezing the water and pipes.
Start by inspecting the area around your toilet for any gaps, cracks, or openings. Common areas where drafts may occur include around the base of the toilet, along the walls, and around windows and doors.
Use caulk or weatherstripping to seal any gaps or cracks around the base of the toilet. Apply a bead of caulk along the edge where the toilet meets the floor to create a tight seal. Smooth the caulk with a finger or caulk smoothing tool for a neat and finished look.
For any gaps or cracks along the walls, windows, or doors, use weatherstripping or draft stoppers to prevent cold air from entering the room. Apply weatherstripping along the edges of windows and doors to create a barrier against drafts. Install draft stoppers at the bottom of doors to block airflow.
Another area to consider is the bathroom ventilation. Check the exhaust fan and ensure that it is clean and functioning properly. This will help remove excess moisture from the air and maintain a more stable temperature in the bathroom.
By sealing any drafts in the bathroom, you can significantly reduce the potential for freezing and maintain a more comfortable and energy-efficient environment. This will not only benefit your toilet but also the overall comfort of the space.
Now that any drafts have been sealed, let’s move on to the final step of winterizing your toilet: maintaining the temperature in the bathroom.
Step 7: Maintain temperature in the bathroom
Maintaining a consistent temperature in the bathroom is crucial in preventing freezing and ensuring the proper functioning of your winterized toilet. Cold temperatures can be problematic and lead to freezing in the toilet tank, bowl, and pipes.
Start by keeping the bathroom door closed as much as possible to contain the heat within the room. This helps maintain a more stable temperature and prevents cold air from flowing in.
If your bathroom has a heating vent, make sure it is open and unobstructed. This allows warm air to flow into the space, helping to keep the temperature up and prevent freezing.
In addition, consider using a space heater in the bathroom to provide supplemental heat. Place the heater in a safe location, away from water sources and flammable materials. Set it to a temperature that will maintain a comfortable and consistent environment in the bathroom.
Another important aspect is to avoid leaving windows or doors open in the bathroom, especially during the colder months. This can allow cold air to enter, negating your efforts to maintain a warm environment and potentially causing issues with freezing.
Lastly, pay attention to the overall temperature of your home. Keep the thermostat set to a reasonable temperature, especially during extremely cold weather. This will help ensure that the entire house, including the bathroom, remains warm and prevents any potential freezing of the toilet or pipes.
By actively maintaining a suitable temperature in the bathroom, you can safeguard your winterized toilet from freezing and maintain proper functionality throughout the winter season.
Congratulations! You have successfully completed the seven steps to winterize your toilet. By following these guidelines, you have taken important measures to protect your toilet from freezing and potential damage during the cold winter months.
Remember, it’s advisable to reverse the winterization process when the weather warms up to allow your toilet to function normally. Remove insulation, open shut-off valves, and ensure adequate water supply to resume regular use.
Properly winterizing your toilet not only helps prevent freezing and potential damage but also ensures that your plumbing system continues to work efficiently. Take the time now to protect your toilet and enjoy peace of mind in the colder months.
Thank you for reading, and stay warm!
Conclusion
Winterizing your toilet is an essential task to protect it from freezing, cracking, and potential damage during the cold winter months. By following the seven steps outlined in this guide, you can ensure that your toilet remains in optimal working condition and prevent costly repairs.
From shutting off the water supply and draining the tank and bowl to insulating the tank and bowl, protecting the pipes, sealing drafts, and maintaining temperature, each step plays a crucial role in the winterization process.
By taking the time to properly winterize your toilet, you are not only safeguarding it against freezing and potential damage, but also ensuring the overall functionality of your plumbing system. Preventing freezing in the toilet tank, bowl, and pipes can save you from the inconvenience and expense of repairs.
Remember to reverse the winterization process and restore normal operation when the weather warms up. Remove insulation, open shut-off valves, and ensure proper water supply to resume regular use.
As winter approaches, don’t forget to include your toilet in your home maintenance routine. Winterize it to protect against the harsh conditions and guarantee a smoothly running toilet throughout the winter season.
By following the step-by-step guide in this article, you can confidently winterize your toilet and enjoy a worry-free winter. Your efforts will pay off in the form of a well-functioning toilet and a comfortable, protected household.
Thank you for reading, and may your winter be free from plumbing troubles!
Frequently Asked Questions about How To Winterize Toilet
Was this page helpful?
At Storables.com, we guarantee accurate and reliable information. Our content, validated by Expert Board Contributors, is crafted following stringent Editorial Policies. We're committed to providing you with well-researched, expert-backed insights for all your informational needs.






0 thoughts on “How To Winterize Toilet”