
Articles
What Makes Ceiling Paint Different
Modified: October 20, 2024
Learn why ceiling paint is different from regular wall paint and how it can enhance the appearance of your home. Read our articles to discover tips and tricks for painting your ceilings.
(Many of the links in this article redirect to a specific reviewed product. Your purchase of these products through affiliate links helps to generate commission for Storables.com, at no extra cost. Learn more)
Introduction
When it comes to painting the interior of a room, most people focus on the walls and often overlook the importance of the ceiling. However, the ceiling plays a crucial role in the overall aesthetics and ambiance of a space. To give your room a complete makeover, it is essential to pay attention to the type of paint you use for the ceiling.
Ceiling paint is specifically formulated to meet the unique requirements and challenges of painting overhead surfaces. Unlike wall paint, which is designed for vertical application, ceiling paint is formulated to ensure easy application, superior coverage, and long-lasting results.
In this article, we will delve into the features and benefits that make ceiling paint different from regular wall paint. We will explore the various types of ceiling paint available, its coverage and opacity, as well as its ability to visually change the height of a room. Additionally, we will discuss how ceiling paint enhances lighting and reflectivity, its resistance to moisture and stains, and the recommended application techniques and tools to achieve professional results. Let’s dive in!
Key Takeaways:
- Choose the right ceiling paint type, such as stain-blocking or textured, to enhance aesthetics and durability. Consider factors like coverage, opacity, and color to transform the look and feel of your space.
- Properly prepare and apply ceiling paint using recommended techniques and tools for a flawless, professional finish. Select high-quality brands like Sherwin-Williams, Benjamin Moore, Behr, Dulux, or Valspar for optimal results.
Read more: What Are Different Paint Brushes Used For
Different Types of Ceiling Paint
Ceiling paint comes in various types, each with its own unique properties and advantages. Understanding the different types will help you choose the most suitable option for your specific needs.
- Regular Ceiling Paint: Regular ceiling paint is designed to provide a smooth and even finish on overhead surfaces. It is a popular choice for most residential applications. Regular ceiling paint is available in a variety of finishes, including matte, eggshell, satin, and semi-gloss. Matte finish is commonly preferred for ceilings as it helps to minimize the visibility of imperfections and provides a clean, uniform appearance.
- Stain-Blocking Ceiling Paint: Stain-blocking ceiling paint is formulated with special additives that help prevent stains from appearing on the ceiling. It is particularly useful in areas prone to humidity and moisture, such as bathrooms and kitchens. Stain-blocking ceiling paint provides excellent coverage and hides existing stains, making it a great choice for high-traffic areas.
- Textured Ceiling Paint: Textured ceiling paint is designed to add texture and depth to the ceiling surface. It is commonly used to hide imperfections and give the ceiling a unique, decorative look. Textured ceiling paint can be applied with different techniques, including roller application or spraying. Popular textures include popcorn, knockdown, and stucco.
- Low-VOC Ceiling Paint: Low-VOC (Volatile Organic Compounds) ceiling paint is an environmentally friendly option that emits fewer harmful chemicals into the air. If you are looking for a more eco-conscious choice, low-VOC ceiling paint is a great option. It is available in various finishes and provides the same quality and performance as regular ceiling paint.
Choosing the right type of ceiling paint depends on factors such as the desired finish, the level of stain resistance needed, the atmospheric conditions of the room, and personal preference. Consulting with a paint specialist or considering the specific requirements of your project can help you make an informed decision on the best type of ceiling paint to use.
Coverage and Opacity
Coverage and opacity are important factors to consider when selecting ceiling paint. These attributes determine how effectively the paint will hide imperfections and provide an even, consistent color on the ceiling surface.
Ceiling paint is typically formulated to have a higher level of opacity compared to regular wall paint. This means that it has better coverage and can hide stains, discolorations, and surface irregularities more effectively. The high opacity of ceiling paint ensures that the underlying surface does not show through, resulting in a uniform and flawless finish.
When shopping for ceiling paint, you will often notice products that indicate the coverage area in square feet per gallon. This information helps you estimate the quantity of paint needed for your project. The coverage area can vary depending on factors such as the type of paint, the texture of the ceiling, and the application method.
It is important to consider the porosity of the ceiling surface when determining paint coverage. A porous surface, such as an unfinished or previously unpainted ceiling, may require more coats of paint to achieve the desired level of opacity. On the other hand, a previously painted and well-prepared surface may require fewer coats.
For optimal coverage and opacity, it is recommended to apply at least two coats of ceiling paint. This ensures that the paint adequately covers any imperfections, discolorations, or stains on the ceiling, providing a clean and fresh appearance.
Additionally, it is a good practice to test a small section of the ceiling with the chosen paint to gauge its opacity and coverage before undertaking the whole project. This step allows you to make any necessary adjustments in terms of color or additional coats required.
Remember, the higher the opacity of the ceiling paint, the better it will conceal any flaws and create an aesthetically pleasing surface. By choosing a high-opacity ceiling paint and applying multiple coats, you can achieve a beautiful, uniform finish that enhances the overall look of your room.
Visually Changing the Ceiling’s Height
The height of a room’s ceiling greatly influences the overall perception of space. Fortunately, ceiling paint can play a significant role in visually altering the perceived height of a ceiling.
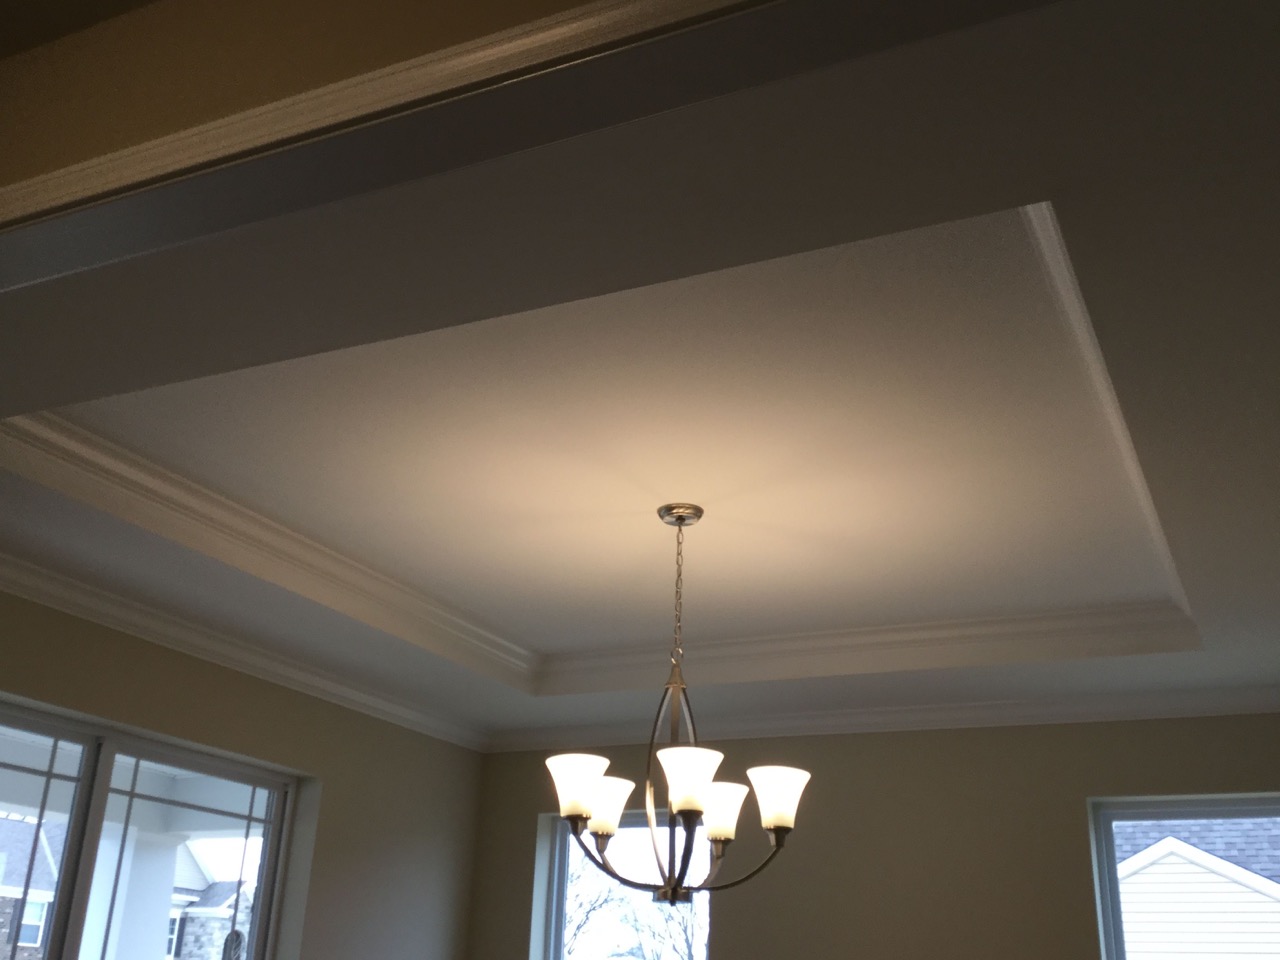
To make a ceiling appear higher, lighter paint colors are generally recommended. Lighter shades, such as whites, pastels, and pale neutrals, reflect more light and create an airy and expansive feeling in the room. By painting the ceiling a lighter color than the walls, you create a contrast that draws the eye upward, giving the illusion of a higher ceiling.
On the other hand, if you want to create a more intimate and cozy atmosphere, consider using darker colors for the ceiling. Darker shades, like deep blues, rich grays, or even black, can create a sense of depth and bring the ceiling visually closer. This can be particularly effective in rooms with very high ceilings, as it helps to create a more balanced and intimate space.
In addition to color selection, the finish or sheen of the ceiling paint can also impact the perceived height of the ceiling. Matte or flat finishes are typically used on ceilings as they minimize glare and create a smooth, even appearance. This finish helps to reduce the visual prominence of the ceiling, making it appear higher than it actually is.
Using techniques such as vertical stripes or patterns on the ceiling can also create the illusion of height. Painted or wallpapered stripes running from the floor to the ceiling draw the eye upward and give the impression of a taller space. However, it’s important to ensure that the stripes are proportionate and balanced with the rest of the room’s décor.
Another technique to visually change the height of a ceiling is to paint it with additional layers of color, creating a gradient effect. Starting with a darker color at the top near the walls and gradually transitioning to a lighter color towards the center of the ceiling can give the illusion of added height and dimension.
Experimenting with different color combinations, finishes, and techniques can help you achieve the desired visual effect and transform the perception of your room’s ceiling height. Remember, the ceiling paint plays a crucial role in the overall aesthetics of your space and can greatly enhance its atmosphere and appeal.
Enhancing Lighting and Reflectivity
Ceiling paint not only impacts the visual aspect of a room but also plays a significant role in enhancing lighting and reflectivity. By choosing the right type of ceiling paint and utilizing specific techniques, you can maximize the amount of natural and artificial light in a space, creating a brighter and more inviting atmosphere.
One of the primary ways ceiling paint enhances lighting is by providing a reflective surface. Light that hits the ceiling is reflected downward, creating a more evenly distributed and diffused light source. This bounce of light helps to eliminate shadows and dark spots, giving the room a brighter appearance.
When selecting ceiling paint to enhance lighting, choosing a paint with a higher reflectance value is crucial. Reflectance value refers to the amount of light that is reflected off a surface. Paints with higher reflectance values, particularly those with a matte or flat finish, are known to reflect more light. This promotes a brighter overall environment in the room.
Another way to enhance lighting is by opting for a lighter color for the ceiling. Lighter shades, such as white or off-white, reflect more light than darker colors. By choosing a lighter color for the ceiling, you can amplify the brightness in the room. This is especially beneficial in spaces with limited natural light, such as basements or rooms with small windows.
In addition to color and reflectance, considering the type of lighting fixtures and bulbs used in the room is also important. LED lights, for example, emit a more natural and bright light compared to traditional incandescent bulbs. Combining LED lighting with the right ceiling paint can have a significant impact on the overall illumination and ambiance of the space.
Furthermore, regularly maintaining and cleaning the ceiling can help retain its reflective properties. Dust, dirt, and grime can diminish the reflectivity of the ceiling surface. By periodically cleaning the ceiling, you ensure that it continues to reflect light effectively, maintaining a bright and well-lit room.
By choosing the appropriate ceiling paint and implementing the right techniques, you can enhance lighting and reflectivity in your space. A well-lit room not only creates a welcoming and pleasant environment but also contributes to a positive and uplifting atmosphere.
When choosing ceiling paint, opt for a flat or matte finish to minimize light reflection and hide imperfections. This will help create a smooth, uniform appearance on your ceiling.
Read more: How To Paint A Ceiling Without Making A Mess
Moisture and Stain Resistance
Ceiling paint is exposed to different elements, such as humidity, moisture, and potential stains. To ensure the longevity and durability of your ceiling, it is important to choose a paint that offers moisture and stain resistance.
In areas like bathrooms, kitchens, and laundry rooms, where moisture levels are high, it is crucial to select a ceiling paint specifically designed to resist the effects of humidity and condensation. These paints contain additives that help prevent moisture from seeping into the substrate, protecting the ceiling from potential damage and discoloration.
Stain resistance is another important feature to consider when choosing ceiling paint. Ceilings are prone to stains from various sources such as cooking grease, nicotine, water leaks, and even handprints. Stain-resistant ceiling paints are formulated to repel stains, making them easier to clean and maintain. These paints have a protective barrier that allows stains to be wiped away without leaving permanent marks or discoloration on the ceiling.
When applying ceiling paint in high-moisture or stain-prone areas, it is recommended to use multiple coats for enhanced protection. Applying two or more coats of paint creates a thicker and more robust barrier against moisture and stains, ensuring greater longevity and resistance.
In addition to using a paint with moisture and stain resistance properties, proper care and maintenance can further prolong the life of your ceiling. Regular cleaning is essential to remove any surface contaminants or buildup that can lead to stains. Using mild, non-abrasive cleaners and a soft cloth or sponge is advised to avoid damaging the painted surface.
If you anticipate frequent exposure to moisture or potential stains, consider applying a clear, protective topcoat over the ceiling paint. This additional layer helps to create an extra barrier of protection, making it easier to clean and preventing stains from penetrating the paint film.
By choosing a moisture and stain-resistant ceiling paint and adopting proper maintenance practices, you can ensure that your ceiling remains pristine, free from water damage, and resistant to unsightly stains. This allows you to enjoy a beautiful and long-lasting ceiling for years to come.
Application Techniques and Tools
Proper application techniques and tools play a crucial role in achieving a flawless and professional-looking finish when painting a ceiling. Here are some key techniques and tools to consider when painting your ceiling:
- Preparation: Before starting the painting process, it is essential to prepare the ceiling surface. This includes repairing any cracks or imperfections, sanding rough spots, and ensuring the surface is clean and free of dust and debris. Proper preparation creates a smooth canvas for the paint and helps ensure better adhesion.
- Cutting-in: Begin by using a high-quality angled brush to “cut-in,” which means painting a straight line along the edges of the ceiling, where it meets the walls and corners. This technique helps create crisp, clean lines and makes it easier to fill in the rest of the ceiling using a roller.
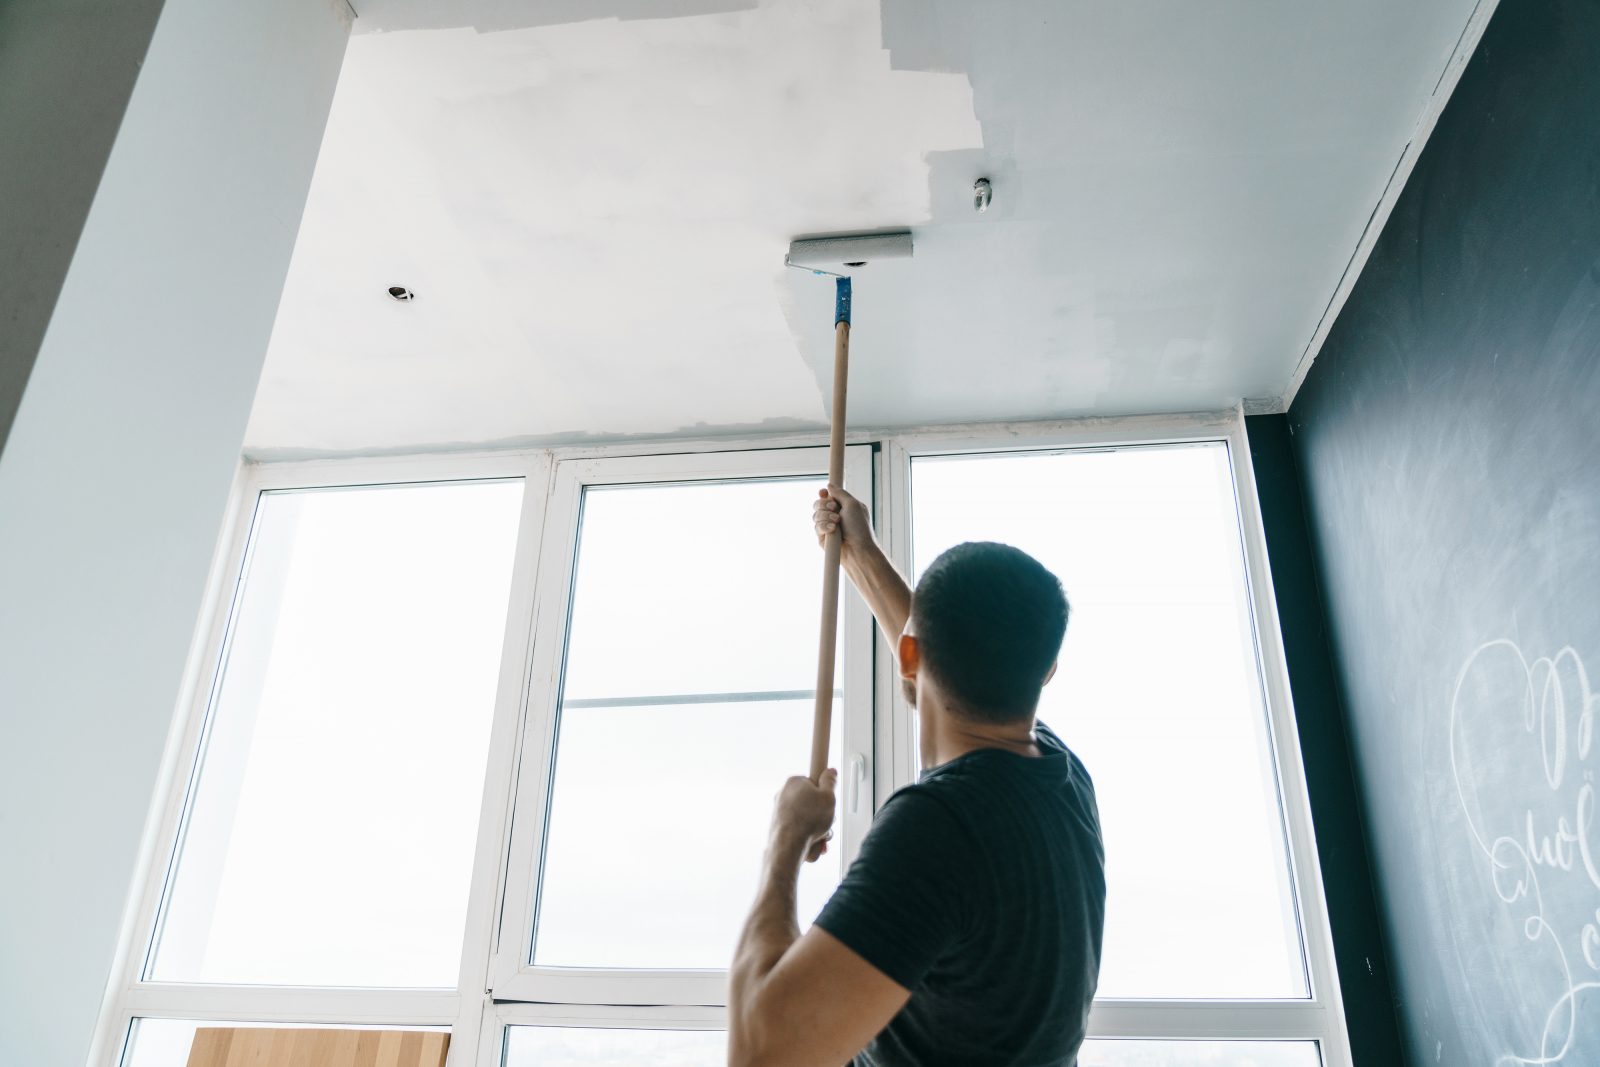
- Roller Application: When applying paint to the main area of the ceiling, use a medium or long-nap roller cover to ensure even coverage. Start from one corner and work your way across the ceiling in small sections, slightly overlapping each stroke. Roll in one direction to avoid creating visible roller marks, and apply light pressure for smoother results.
- Working in manageable sections: To maintain a wet edge and avoid noticeable paint lines, it is important to work in manageable sections. This means completing one section of the ceiling before moving on to the next. If you need to take a break, make sure to stop at a natural break point, such as a corner or edge.
- Multiple coats: For a professional finish, it is recommended to apply at least two coats of ceiling paint. Allow the first coat to dry completely before applying the second coat. This ensures optimal coverage, consistency, and uniform color on the ceiling surface.
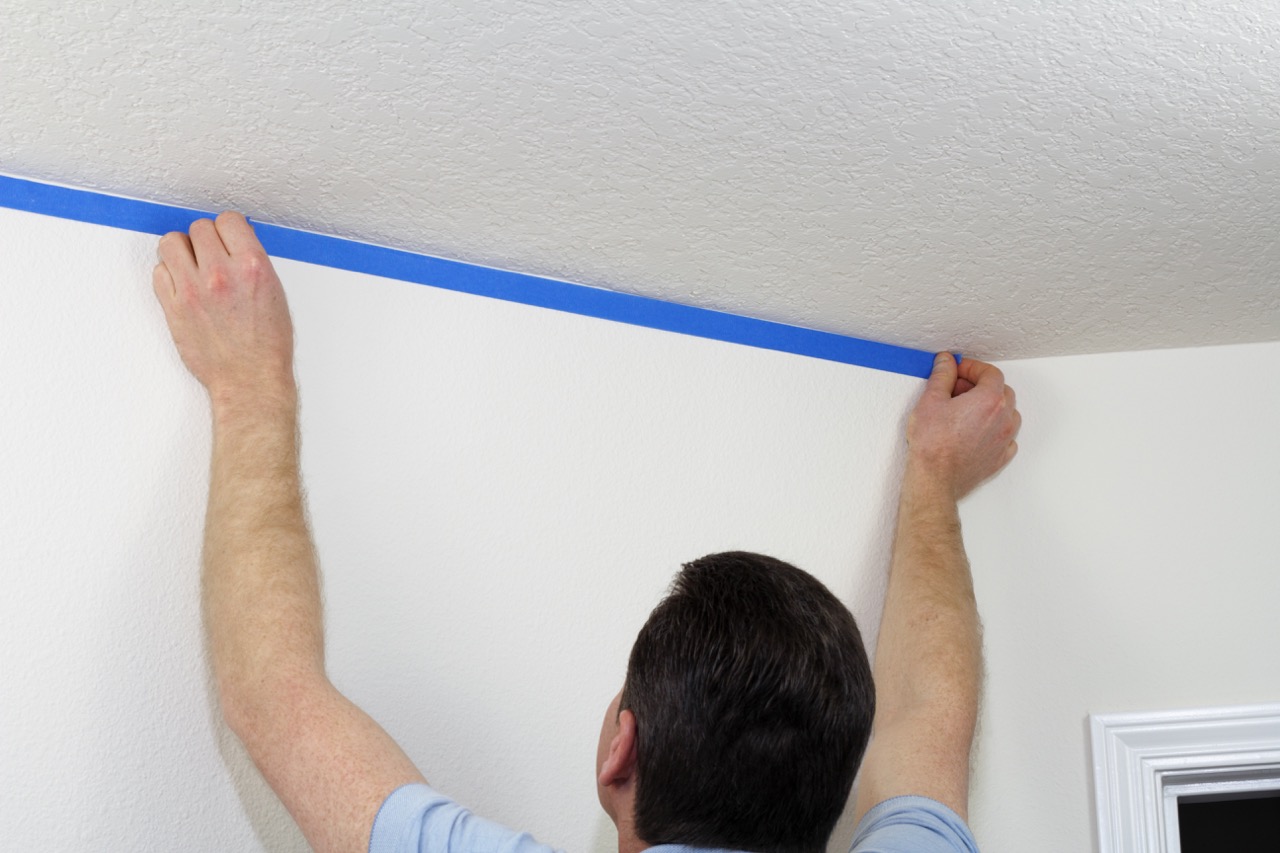
- Protective measures: To prevent splatters and drips from falling onto the floors or furniture, cover and protect the surrounding areas with drop cloths or plastic sheets. Also, wear appropriate protective clothing, such as gloves and goggles, to ensure personal safety during the painting process.
- Painting tools: Along with brushes and rollers, other helpful tools for ceiling painting include extension poles for reaching high ceilings without the need for a ladder, paint trays to hold the paint, paint grids for loading the roller evenly, and painter’s tape to mask off areas you don’t want to paint, such as light fixtures or trim.
By using the right application techniques and tools, you can achieve a smooth and evenly painted ceiling, transforming the overall look and feel of your space into a professionally finished environment. Remember to follow the manufacturer’s instructions on the paint can for proper application and drying times.
Preparing the Ceiling for Painting
Proper preparation is key to achieving a smooth and long-lasting finish when painting a ceiling. Preparing the ceiling ensures that the surface is clean, smooth, and ready to receive the paint. Here are some essential steps to follow when preparing your ceiling for painting:
- Clean the surface: Start by thoroughly cleaning the ceiling to remove any dust, dirt, or grease that may have accumulated over time. A mixture of mild detergent and warm water can be used to gently scrub the surface. Rinse off the cleanser and allow the ceiling to dry completely before proceeding.
- Repair imperfections: Inspect the ceiling for any cracks, dents, or holes. Use a spackling compound or patching material to fill in these imperfections. Once the compound has dried, sand it smooth using fine-grit sandpaper. This step ensures a level and even surface for painting.
- Sand rough spots: If the ceiling has any rough areas or texture buildup, lightly sand them with fine-grit sandpaper. Sanding helps to create a smooth surface, allowing the paint to adhere better and ensuring a more uniform finish.
- Protect surrounding areas: Before you start painting, it’s important to protect the surrounding areas from paint splatters and drips. Cover the floors and furniture with drop cloths or plastic sheets. Use painter’s tape to mask off areas such as light fixtures, trim, or walls that you want to keep paint-free.
- Prime the surface: In some cases, priming the ceiling may be necessary, especially if you’re painting over a dark or stained surface, or if the existing paint is in poor condition. Primer helps to create a smooth base, enhances paint adhesion, and improves color consistency. Follow the manufacturer’s instructions for the appropriate primer to use.
- Ensure proper ventilation: Adequate ventilation is essential when painting a ceiling. Open windows or doors to allow for air circulation. If available, use fans or portable air purifiers to help remove paint fumes from the room. This promotes a healthier and more comfortable painting environment.
- Choose the right paint: Select a high-quality ceiling paint that is specifically formulated for this purpose. Consider the type of finish you want to achieve, such as matte or eggshell, and ensure the paint is compatible with the surface material of your ceiling.
By following these preparation steps, you will create an ideal surface for painting your ceiling. A clean and well-prepared ceiling not only improves paint adhesion but also ensures a smoother painting process and a more professional-looking finish.
Recommended Ceiling Paint Brands
When it comes to choosing the right ceiling paint, selecting a reputable and high-quality brand can make a significant difference in the final result. Here are some recommended ceiling paint brands known for their durability, coverage, and overall performance:
- Sherwin-Williams: Sherwin-Williams is a well-known brand in the paint industry, offering a wide range of paint products for different surfaces. Their line of ceiling paints includes options with excellent coverage, high opacity, and stain-blocking properties. They offer various finishes, from flat to satin, allowing you to achieve the desired look on your ceiling.
- Benjamin Moore: Benjamin Moore is another trusted name in the paint industry, known for their high-quality and versatile products. Their ceiling paints are designed to provide a smooth, even finish and superior hiding power. Benjamin Moore offers a range of options, including stain-blocking and moisture-resistant formulations, to suit various needs and preferences.
- Behr: Behr is a popular brand that offers a wide range of interior and exterior paint products. Their ceiling paints are known for their exceptional coverage and stain-blocking properties. Behr offers ceiling paints in various finishes, including flat and matte, providing options for different aesthetic preferences.
- Dulux: Dulux is a trusted brand known for its high-quality paints and coatings. They offer ceiling paint options that provide excellent coverage, hide imperfections, and resist stains. Dulux ceiling paints are available in different finishes and colors, allowing you to achieve your desired look and ambiance.
- Valspar: Valspar is a brand known for its wide range of paint products suitable for different applications. Their ceiling paints offer excellent coverage, smooth application, and durability. Valspar provides options for stain-blocking and moisture-resistant ceiling paint, ensuring long-lasting protection and a beautiful finish.
When choosing a ceiling paint brand, consider factors such as the specific requirements of your project, the desired finish and durability, as well as personal preferences in terms of color selection. Consult with paint specialists or professionals for personalized recommendations based on your needs.
Remember, it’s always advisable to read and follow the manufacturer’s instructions on the paint can for the best results. Proper application techniques and surface preparation are equally important in achieving a flawless and long-lasting finish regardless of the brand you choose.
Conclusion
Choosing the right ceiling paint is essential for creating a visually appealing and durable finish. Ceiling paint is specifically formulated to meet the unique challenges that come with painting overhead surfaces. By understanding the different types of ceiling paint available, considering factors like coverage and opacity, and taking advantage of its ability to visually change the height of a room, you can transform the look and feel of your space.
Ceiling paint also plays a crucial role in enhancing lighting and reflectivity. By selecting the appropriate paint colors, finishes, and utilizing certain techniques, you can maximize the amount of light in a space, creating a brighter and more inviting atmosphere. Additionally, ceiling paint with moisture and stain resistance properties ensures the longevity and cleanliness of your ceiling, even in high-moisture or stain-prone areas.
When it comes to painting your ceiling, proper application techniques and tools are essential. Preparing the ceiling by cleaning, repairing imperfections, and protecting surrounding areas ensures a smooth and professional finish. Choosing a high-quality ceiling paint brand like Sherwin-Williams, Benjamin Moore, Behr, Dulux, or Valspar can greatly impact the overall outcome of your project.
Remember, a well-painted ceiling is an important aspect of any interior design, contributing to the overall aesthetics and ambiance of a space. By taking the time to select the right ceiling paint and following proper preparation and application techniques, you can achieve a stunning and durable ceiling that enhances the beauty and functionality of your room.
So, whether you’re renovating your home, updating a living space, or simply looking to refresh your ceiling, make sure to give proper attention to choosing the suitable ceiling paint and executing it with care. The result will be a space that is visually appealing, well-lit, and able to withstand the test of time.
Frequently Asked Questions about What Makes Ceiling Paint Different
Was this page helpful?
At Storables.com, we guarantee accurate and reliable information. Our content, validated by Expert Board Contributors, is crafted following stringent Editorial Policies. We're committed to providing you with well-researched, expert-backed insights for all your informational needs.


0 thoughts on “What Makes Ceiling Paint Different”