
Articles
How To Paint A Basement Ceiling
Modified: August 22, 2024
Learn helpful articles on how to paint a basement ceiling and transform your space. Step-by-step guides, tips, and tricks for a professional-looking finish.
(Many of the links in this article redirect to a specific reviewed product. Your purchase of these products through affiliate links helps to generate commission for Storables.com, at no extra cost. Learn more)
Introduction
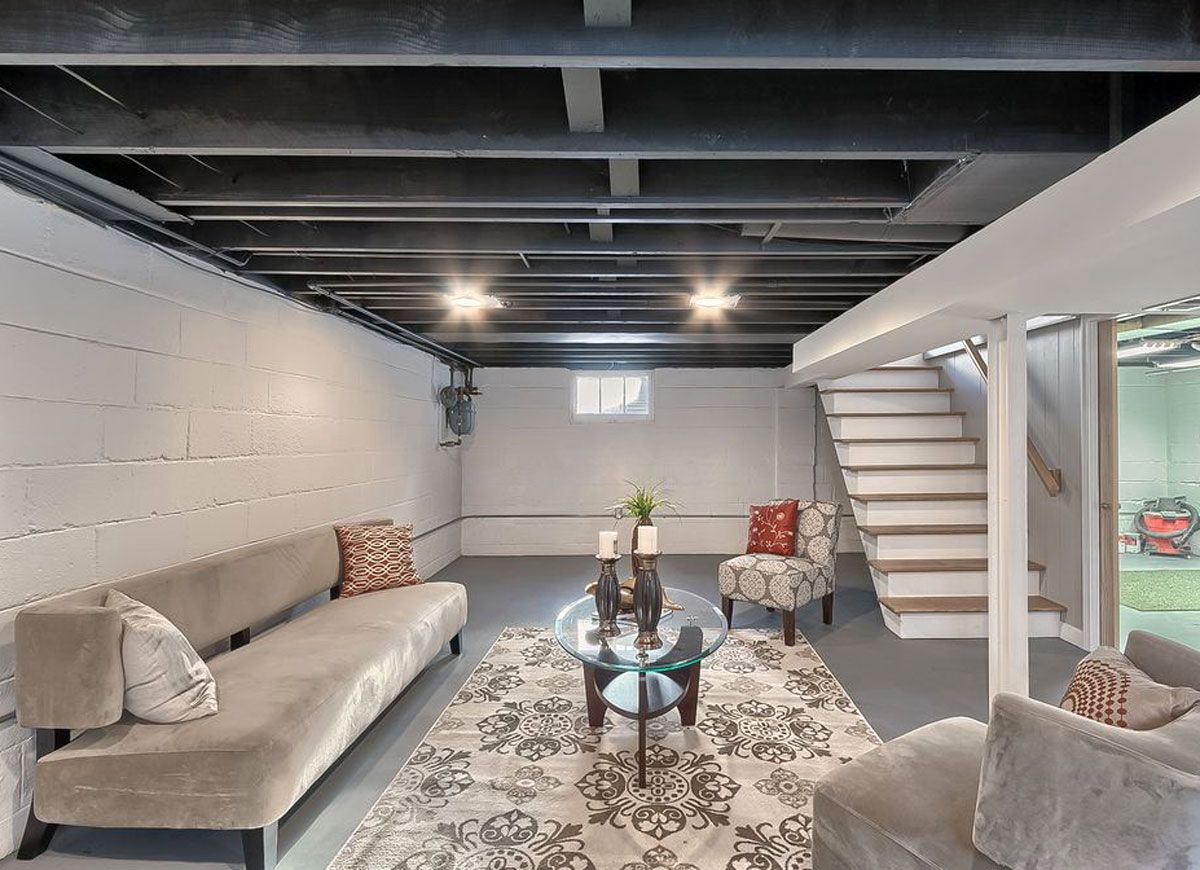
Painting a basement ceiling is a great way to transform a dull and unfinished space into a more inviting and visually appealing area. Whether you’re looking to create a cozy living space, a functional playroom, or even a home gym, painting the ceiling can make a significant impact on the overall ambiance of the room.
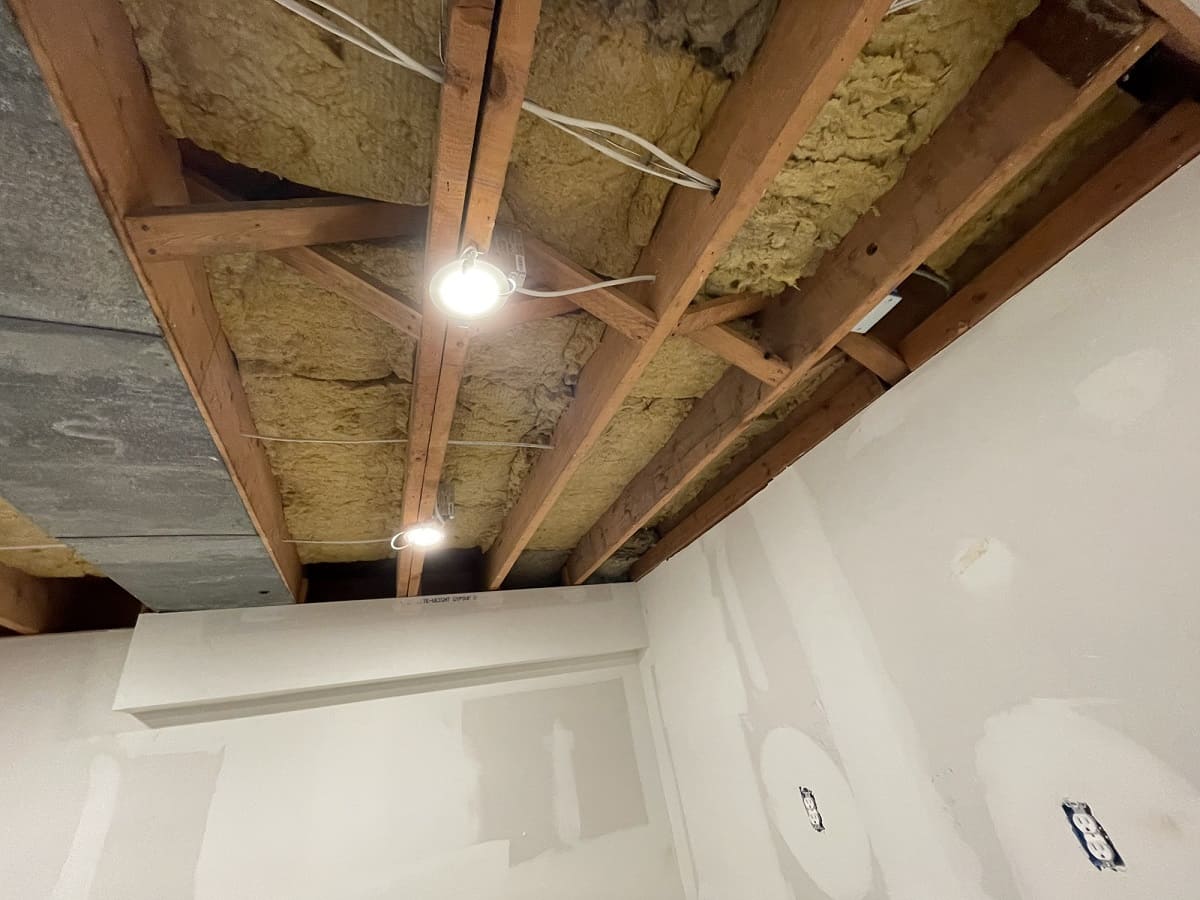
However, painting a basement ceiling can be a challenging task, especially if it is exposed and has visible pipes, ducts, or wiring. The key to a successful basement ceiling painting project lies in proper preparation, choosing the right paint and supplies, and following a systematic approach.
In this article, we will guide you through the step-by-step process of painting a basement ceiling. We will discuss the necessary preparations, recommend tools and materials, and share valuable tips and techniques to help you achieve a professional-looking result.
So, whether you are a seasoned DIY enthusiast or a novice looking to take on your first home improvement project, let’s dive in and learn how to paint a basement ceiling like a pro!
Key Takeaways:
- Transform your basement with a professional-looking ceiling by following step-by-step guidance on preparation, painting, and clean-up. Achieve a visually appealing and inviting space with the right tools and techniques.
- Elevate your basement ambiance with a freshly painted ceiling. From choosing the right paint to applying multiple coats, attention to detail and patience are key to achieving a flawless and long-lasting finish.
Read more: How To Finish A Basement Ceiling
Step 1: Preparing the Basement Ceiling
Before you start painting, it is crucial to properly prepare the basement ceiling to ensure a smooth and long-lasting finish. Follow these steps to get your ceiling ready:
- Clean the ceiling: Begin by removing any dust, dirt, cobwebs, or debris from the ceiling using a vacuum cleaner with a brush attachment or a broom. This step will help the paint adhere better and prevent any particles from getting trapped in the fresh paint.
- Cover the floor and walls: Protect the surrounding areas by laying drop cloths or plastic sheets over the floor and walls. This will catch any drips or splatters and make the cleanup process much easier.
- Mask off any fixtures: If there are light fixtures, fans, or any other fixtures on the ceiling that you don’t wish to paint, cover them with plastic sheets or painter’s tape to keep them safe from paint splatters.
- Repair any imperfections: Inspect the ceiling for any cracks, holes, or other imperfections. Use a putty knife and a patching compound to fill in these areas, following the manufacturer’s instructions. Once the compound is dry, sand it lightly to ensure a smooth and even surface.
- Sand the ceiling: If the existing ceiling has a textured finish or flaking paint, it is recommended to lightly sand the surface using a sanding block or sandpaper. This step will promote better adhesion for the primer and paint.
Taking the time to properly prepare the basement ceiling will contribute to a more professional-looking finish and increase the longevity of the painted surface. Once you have completed these preparation steps, you are ready to move on to selecting the right paint and supplies for your project.
Step 2: Choosing the Right Paint and Supplies
Choosing the right paint and supplies is essential for a successful basement ceiling painting project. Here are some factors to consider when making your selection:
- Type of paint: Opt for a high-quality paint that is specifically formulated for ceilings. Look for a paint that has a flat or matte finish to minimize reflection and hide imperfections.
- Paint color: Select a color that complements the overall design and style of your basement. Lighter colors can make the space feel more open and spacious, while darker colors can create a cozy and intimate atmosphere.
- Paint quantity: Calculate the amount of paint needed based on the square footage of your ceiling. It’s always a good idea to buy a little extra to account for touch-ups or multiple coats.
- Supplies: Gather the necessary supplies, including paintbrushes or rollers, extension poles, paint trays, painter’s tape, drop cloths, sandpaper, and a ladder or scaffold for reaching high areas.
When selecting paint, be sure to read the manufacturer’s instructions for application and drying time. Additionally, consider any special requirements or considerations for your basement environment, such as high humidity or potential water leaks. A waterproof or moisture-resistant paint may be necessary in these situations.
Investing in high-quality paint and supplies will not only make the painting process smoother but also ensure a long-lasting and professional-looking finish. Now that you have everything you need, it’s time to move on to the next step: cleaning the ceiling.
Step 3: Cleaning the Ceiling
Before you begin painting your basement ceiling, it’s important to thoroughly clean the surface to remove any dirt, grease, or residue that could affect the adhesion of the paint. Follow these steps to ensure a clean and prepared ceiling:
- Dust the ceiling: Use a duster or a microfiber cloth to remove any loose dust or cobwebs from the ceiling. This will help create a clean surface for painting.
- Wash the ceiling: Prepare a solution of mild detergent or vinegar mixed with warm water. Use a sponge or a soft cloth to gently wash the ceiling, paying extra attention to any stained or greasy areas. Be careful not to apply excessive moisture that could damage the ceiling or leak into the living space below.
- Rinse the ceiling: Use a clean sponge or cloth soaked in clean water to rinse off any soap residue from the ceiling. Make sure to wring out the sponge or cloth thoroughly to prevent excessive moisture from dripping onto the floor or walls.
- Dry the ceiling: Allow the ceiling to air dry completely or use a clean, dry cloth to pat it dry. Ensure that the surface is completely dry before proceeding to the next step.
Cleaning the ceiling not only removes dirt and grime but also helps improve paint adhesion and ensures a smooth and flawless finish. Once the ceiling is clean and dry, you can move on to the next step: patching and repairing any damages on the ceiling.
Step 4: Patching and Repairing Any Damages
Before you start painting your basement ceiling, it’s important to address any damages or imperfections on the surface. This step will ensure a smooth and uniform finish. Follow these steps to patch and repair any damages:
- Inspect the ceiling: Carefully examine the ceiling for any cracks, holes, or other damages. Pay attention to areas where there may be visible seams or signs of water damage.
- Prepare the surface: Use a putty knife or scraper to remove any loose or flaking paint around the damaged areas. This will help create a clean surface for patching.
- Apply a patching compound: Use a lightweight spackling compound or a joint compound to fill in the cracks or holes. Apply the compound with a putty knife, smoothing it out evenly with the surrounding surface.
- Sand the patched areas: Once the compound is completely dry, lightly sand the patched areas using fine-grit sandpaper. This will ensure a smooth and seamless transition between the patched areas and the rest of the ceiling.
- Remove any dust: After sanding, use a damp cloth or sponge to remove any dust or debris from the patched areas. Allow the surface to dry completely before proceeding.
Patching and repairing any damages on the ceiling is crucial to achieve a professional-looking finish. Take your time to properly fill in the cracks or holes, ensuring that the surface is even and smooth. Once the repairs are complete, you can move on to the next step: priming the ceiling.
Read more: How To Soundproof A Basement Ceiling
Step 5: Priming the Ceiling
Priming the basement ceiling is an essential step in the painting process. A primer helps create a uniform surface, enhances paint adhesion, and ensures better coverage. Follow these steps to prime your ceiling:
- Choose the right primer: Select a high-quality primer that is specifically designed for the surface you are working on, such as a primer suitable for drywall or masonry.
- Prepare the area: Cover the floor and any items below the ceiling with drop cloths or plastic sheets to protect them from primer splatters.
- Stir the primer: Open the primer can and stir the contents thoroughly using a paint stick. This will ensure that the primer is well-mixed and ready for application.
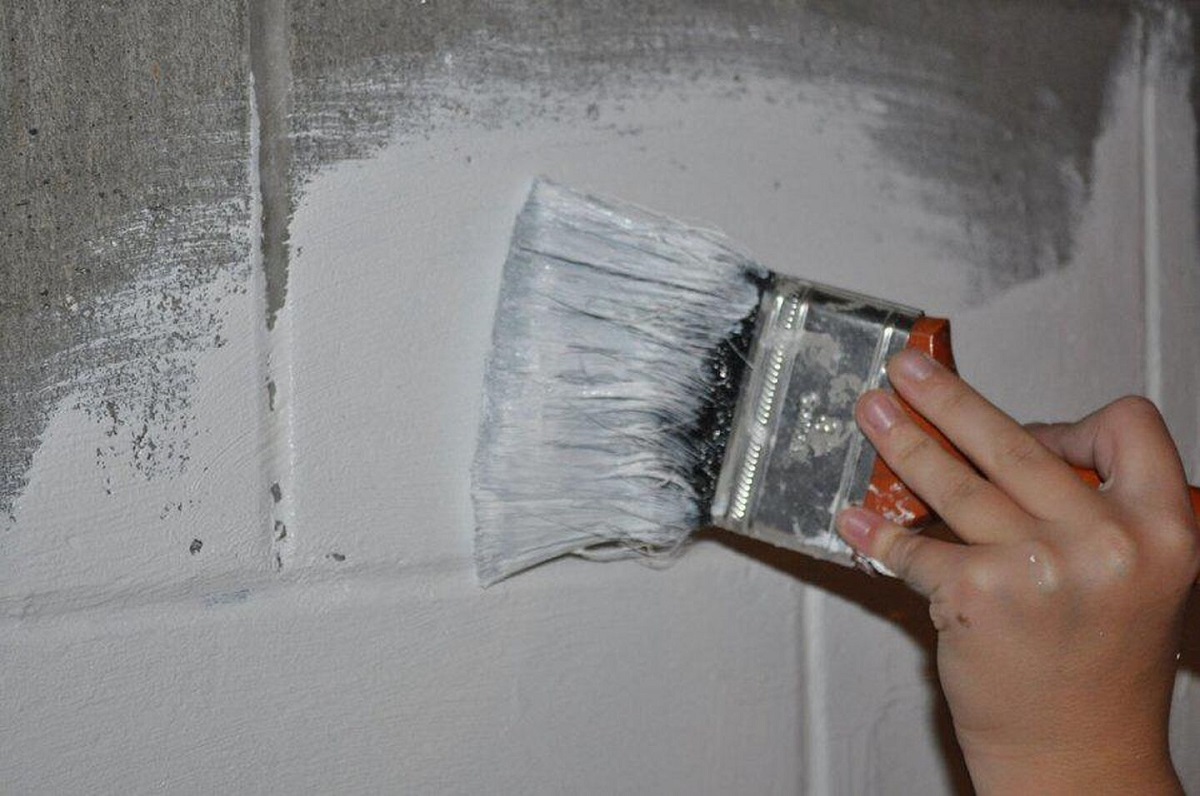
- Apply the primer: Use a paint roller or brush to apply the primer to the ceiling. Start from one end and work your way across the ceiling, applying a thin, even coat. Use a brush to cut in along the edges and corners.
- Allow the primer to dry: Follow the manufacturer’s instructions regarding drying time. It’s typically recommended to wait 24 hours for the primer to dry completely before applying paint.
- Inspect the primed ceiling: Once the primer is dry, inspect the ceiling for any areas that may require additional touch-up or re-priming. Look for uneven spots, missed areas, or any imperfections that may affect the final paint application.
Priming the ceiling prepares the surface for paint and ensures better coverage and adhesion. It also helps seal any repairs or patched areas, creating a smooth and even base for paint application. With the ceiling primed and dry, you are now ready to move on to the exciting part – applying the first coat of paint.
When painting a basement ceiling, use a high-quality primer to ensure good adhesion and coverage, especially if the ceiling is made of concrete or has water stains. This will help the paint to adhere better and last longer.
Step 6: Applying the First Coat of Paint
Now that the ceiling is properly prepped and primed, it’s time to apply the first coat of paint. Follow these steps to achieve a smooth and professional finish:
- Choose the right paint: Use a high-quality latex or acrylic paint that is specifically formulated for ceilings. Stir the paint thoroughly to ensure an even consistency.
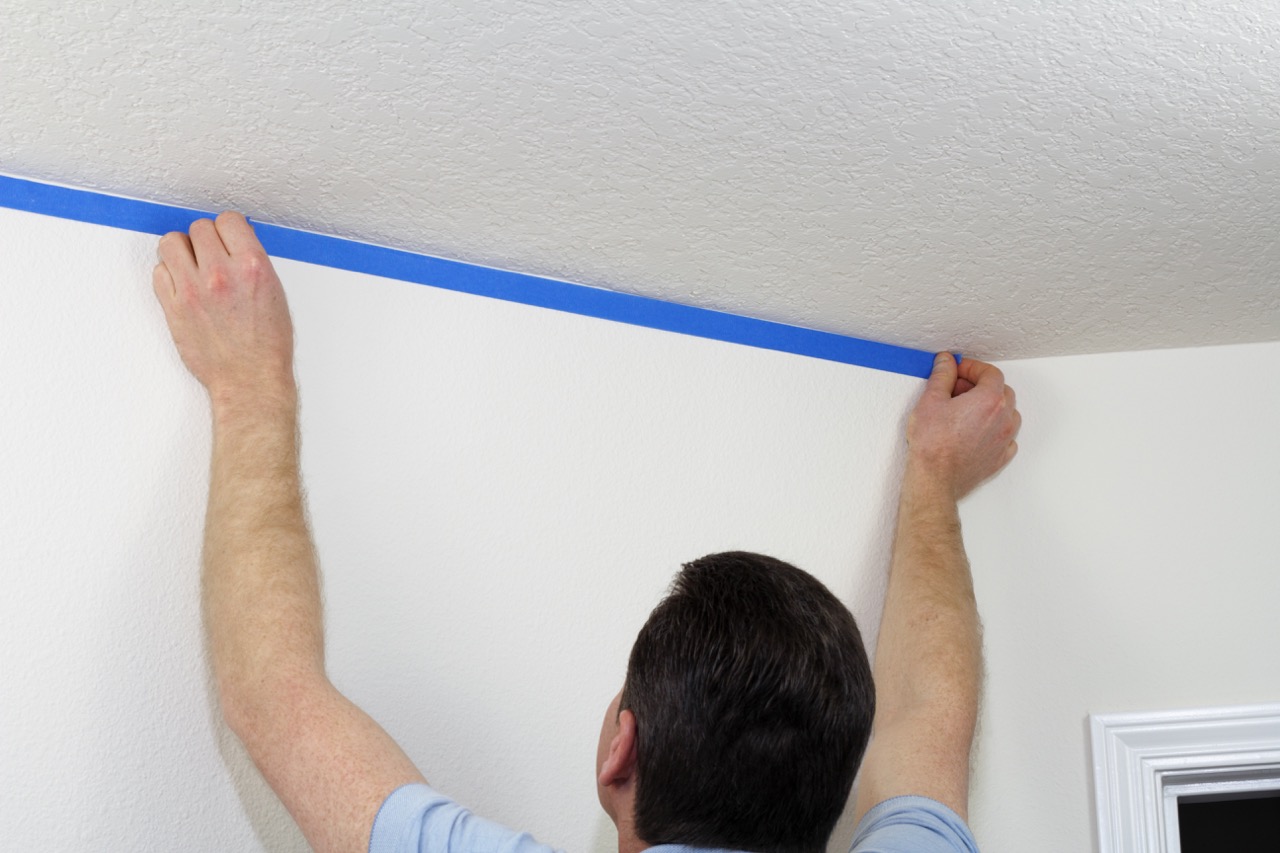
- Prepare the area: Protect the floor and any items in the room with drop cloths or plastic sheets. Use painter’s tape to mask off any fixtures or areas where you want to avoid getting paint.
- Start from the edges: Use a small brush to cut in along the edges and corners of the ceiling. This will create clean lines and make it easier to fill in the larger areas with a roller.
- Apply the paint with a roller: Use a roller with a medium nap to apply the paint to the ceiling. Start from one corner and work your way across the ceiling in small sections, overlapping each stroke slightly for even coverage.
- Work in manageable sections: Avoid painting large areas at once. Instead, divide the ceiling into smaller sections and complete each section before moving on to the next. This will help prevent the paint from drying too quickly and ensure a consistent finish.
- Keep a wet edge: When using a roller, make sure to maintain a wet edge. This means that you should always roll into the area that is still wet, blending it with the previous section to avoid visible lines or streaks.
- Use long, even strokes: Apply the paint using long, even strokes, working in a consistent direction. This will help achieve a smooth and uniform finish.
- Allow the paint to dry: Follow the paint manufacturer’s instructions for drying time. Typically, you will need to wait at least a few hours before applying a second coat.
Applying the first coat of paint to the ceiling is an exciting step that brings your vision to life. Take your time and pay attention to detail for a flawless result. Once the first coat is dry, you can assess if additional coats are needed and move on to the next step accordingly.
Step 7: Applying Additional Coats, if Needed
After the first coat of paint has dried, it’s time to assess whether you need to apply additional coats for optimal coverage and finish. Follow these steps to determine if more coats are necessary:
- Inspect the painted ceiling: Take a close look at the painted ceiling and check for any areas where the paint appears thin or uneven. Look for any visible brush or roller marks, as well as any spots that may require touch-ups.
- Consider the desired finish: Evaluate the overall appearance of the first coat and consider whether you are satisfied with the level of coverage and color intensity. Depending on the type of paint and the color you have chosen, you may need additional coats to achieve the desired look.
- Apply additional coats, if necessary: If you find that the first coat is not providing adequate coverage or if you want to enhance the color intensity, proceed to apply additional coats of paint following the same painting techniques as before. Let each coat dry completely before applying the next.
Remember that the number of coats required may vary depending on various factors such as the quality and opacity of the paint, the color you are using, and the original color of the ceiling. It’s better to apply multiple thin coats rather than one thick coat to achieve a smoother and more durable finish.
Continue to assess the painted ceiling after each additional coat to ensure that you’re achieving the desired result. Once you are satisfied with the coverage and finish, it’s time to move on to the next step: allowing the paint to dry completely.
Step 8: Allowing the Paint to Dry
Once you have finished applying the desired number of coats of paint to your basement ceiling, it’s crucial to allow the paint to dry completely before proceeding with any further steps. Proper drying time ensures a durable and long-lasting finish. Follow these steps to allow the paint to dry effectively:
- Refer to the paint manufacturer’s instructions: Different types and brands of paint may have varying drying times. Consult the paint can or label for specific drying guidelines.
- Provide adequate ventilation: Proper airflow aids in the drying process. Open windows or use fans to improve circulation in the room. However, avoid excessive drafts as it may cause the paint to dry unevenly.
- Keep the environment temperature-controlled: Maintain a consistent room temperature of around 70°F (21°C) for optimal paint drying. Avoid painting in extreme heat or cold as it can affect the drying time and quality of the finish.
- Avoid touching or bumping the painted surface: While the paint is drying, it’s crucial to refrain from touching or bumping the ceiling to prevent smudges, marks, or damage. Exercise caution when moving ladders or scaffolds near the freshly painted area.
- Allow sufficient drying time: Depending on various factors such as humidity, temperature, and the type of paint used, drying time can range from a few hours to several days. Be patient and give the paint ample time to cure before moving on to the next step.
It’s important to note that the paint may appear dry to the touch, but it may still be in the process of curing. To avoid any potential damage or blemishes, allow sufficient drying time as recommended by the manufacturer.
Once the paint is thoroughly dried, you can proceed to the next step: inspecting the painted ceiling for touch-ups and ensuring a flawless finish.
Read more: How To Drywall A Basement Ceiling
Step 9: Inspecting the Painted Ceiling for Touch-ups
After allowing the paint on your basement ceiling to dry completely, it’s essential to inspect the surface for any areas that may require touch-ups or additional attention. This step ensures a flawless and professional-looking finish. Follow these steps for inspecting the painted ceiling:
- Observe the overall appearance: Step back and take a good look at the painted ceiling from a distance. Examine the surface for any visible imperfections, such as streaks, drips, or uneven color.
- Check for missed spots: Inspect the ceiling closely and ensure that every area has been adequately covered with paint. Pay extra attention to corners, edges, and any intricate details where the roller or brush might not have reached.
- Look for uneven texture: Run your hand or a light across the painted ceiling to detect any irregularities. Check for areas that may require additional sanding or smoothing to achieve a uniform texture.
- Address any touch-up requirements: If you notice any flaws or areas that need improvement, mark them with a small piece of painter’s tape or a sticky note. This will help you keep track of the specific locations that require touch-ups.
- Prepare for touch-ups: Gather the necessary supplies such as a small brush, a container of the paint used, and a clean cloth for wiping away any excess paint. Sandpaper may also be required for smoothing out rough patches.
- Perform touch-ups: Take your time to meticulously touch up the marked areas using a small brush. Apply a small amount of paint and feather it out to blend it seamlessly with the surrounding surface. If necessary, apply multiple thin coats for better coverage.
By inspecting the painted ceiling and addressing any touch-up requirements, you can ensure a polished and flawless finish. Once you are satisfied with the touch-ups, you can proceed to the final step: cleaning up and removing any paint stains.
Step 10: Cleaning Up and Removing Any Paint Stains
After completing the painting process for your basement ceiling, it’s essential to clean up the area and remove any paint stains for a tidy and finished look. Follow these steps to effectively clean up and remove any paint stains:
- Remove drop cloths or plastic sheets: Carefully remove the drop cloths or plastic sheets that were used to protect the floor and furniture. Fold them up neatly to contain any paint debris, and dispose of them properly.
- Clean paint brushes and rollers: If you plan to reuse your paint brushes and rollers, thoroughly clean them according to the paint manufacturer’s instructions. Use warm soapy water for latex paint or the appropriate solvent for oil-based paint.
- Wipe off any paint splatters or spills: Inspect the surrounding area for any paint splatters or spills. Use a damp cloth or sponge to gently wipe off any fresh paint stains. For dried paint, carefully scrape it off with a putty knife or use a mild paint remover, following the manufacturer’s instructions.
- Clean paint trays and tools: Clean any paint trays, buckets, or tools that were used for the painting process. Rinse them thoroughly with water or the appropriate cleaning solution to remove any dried paint residue.
- Touch up walls or adjacent surfaces: If any paint accidentally got onto the walls, trim, or other adjacent surfaces, use a touch-up brush or roller to blend in the new paint with the existing color. This will ensure a seamless transition between the ceiling and the surrounding areas.
Properly cleaning up and removing any paint stains not only leaves your basement ceiling looking clean and professional but also helps prolong the life of your painting tools and protects the surrounding surfaces.
With the cleaning process complete, step back and admire your newly painted basement ceiling. Enjoy the transformed space and the sense of accomplishment from completing a successful painting project!
Remember, painting a basement ceiling requires proper preparation, attention to detail, and patience. By following these steps, you can achieve a beautifully painted ceiling that enhances the overall aesthetic and ambiance of your basement.
Conclusion
Painting a basement ceiling is a rewarding home improvement project that can transform a dull and unfinished space into a visually appealing and inviting area. By following the step-by-step process outlined in this article, you can achieve a professional-looking result and create a beautiful ceiling that enhances the overall ambiance of your basement.
From preparing the ceiling and choosing the right paint and supplies to cleaning the surface and patching any damages, each step is crucial for a successful painting project. Priming the ceiling ensures better paint adhesion, and applying multiple coats of paint allows for optimal coverage and a flawless finish.
Inspecting the painted ceiling and addressing any touch-up requirements ensure a polished result, while cleaning up and removing any paint stains leaves the space looking tidy and finished. Taking the time to properly prepare, paint, and clean up will ensure a long-lasting and visually pleasing ceiling that you can enjoy for years to come.
Remember, patience and attention to detail are key when painting a basement ceiling. Take your time, follow the steps, and enjoy the process. Whether you’re creating a cozy living area, a functional playroom, or a home gym, a freshly painted ceiling can make a significant impact on the overall aesthetics and ambiance of the space.
So, gather your supplies, put on your painting clothes, and let your creativity shine as you paint your basement ceiling with confidence and skill. Happy painting!
Frequently Asked Questions about How To Paint A Basement Ceiling
Was this page helpful?
At Storables.com, we guarantee accurate and reliable information. Our content, validated by Expert Board Contributors, is crafted following stringent Editorial Policies. We're committed to providing you with well-researched, expert-backed insights for all your informational needs.


0 thoughts on “How To Paint A Basement Ceiling”