Articles
How To Paint A Ceiling Without Making A Mess
Modified: October 29, 2024
Discover the best articles on how to paint a ceiling without any mess. Get expert tips and tricks for a flawless painting experience.
(Many of the links in this article redirect to a specific reviewed product. Your purchase of these products through affiliate links helps to generate commission for Storables.com, at no extra cost. Learn more)
Introduction
Painting a ceiling can be a daunting task, especially if you’re worried about making a mess. The thought of drips and splatters ruining your furniture and floors can make anyone hesitant to take on the project. But fear not, with the right preparation and techniques, you can paint a ceiling without turning your home into a chaotic paint-splattered disaster.
In this article, we will guide you through the steps to paint a ceiling without making a mess. From preparation to clean-up, we’ll provide you with tips and tricks to ensure a smooth and hassle-free painting process.
Before we begin, it’s important to note that patience and attention to detail are key when painting a ceiling. Take your time, follow the steps carefully, and soon you’ll have a beautifully painted ceiling that adds a fresh and polished look to your space.
Key Takeaways:
- Proper preparation is essential for a mess-free ceiling painting project. From cleaning and repairing the ceiling to protecting furniture and floors, attention to detail at the beginning saves time and effort in the long run.
- Choosing the right paint, tools, and applying multiple coats as needed are crucial for achieving a professional-looking finish. Patience, attention to detail, and thorough cleanup ensure a beautifully painted ceiling without the mess.
Step 1: Preparation
Before jumping into the painting process, proper preparation is essential for a successful and mess-free project. Here are the steps to follow:
- Clean the ceiling: Start by removing any dust, cobwebs, or stains from the ceiling. Use a soft broom or vacuum with a brush attachment to gently sweep away any debris. For stubborn stains, you can use a mild detergent and water solution to spot clean the affected areas.
- Repair any damage: Inspect the ceiling for any cracks, holes, or imperfections. Use a spackling compound to fill in any small holes, and joint compound for larger sections that require repairing. Allow the compound to dry completely before moving on to the next step.
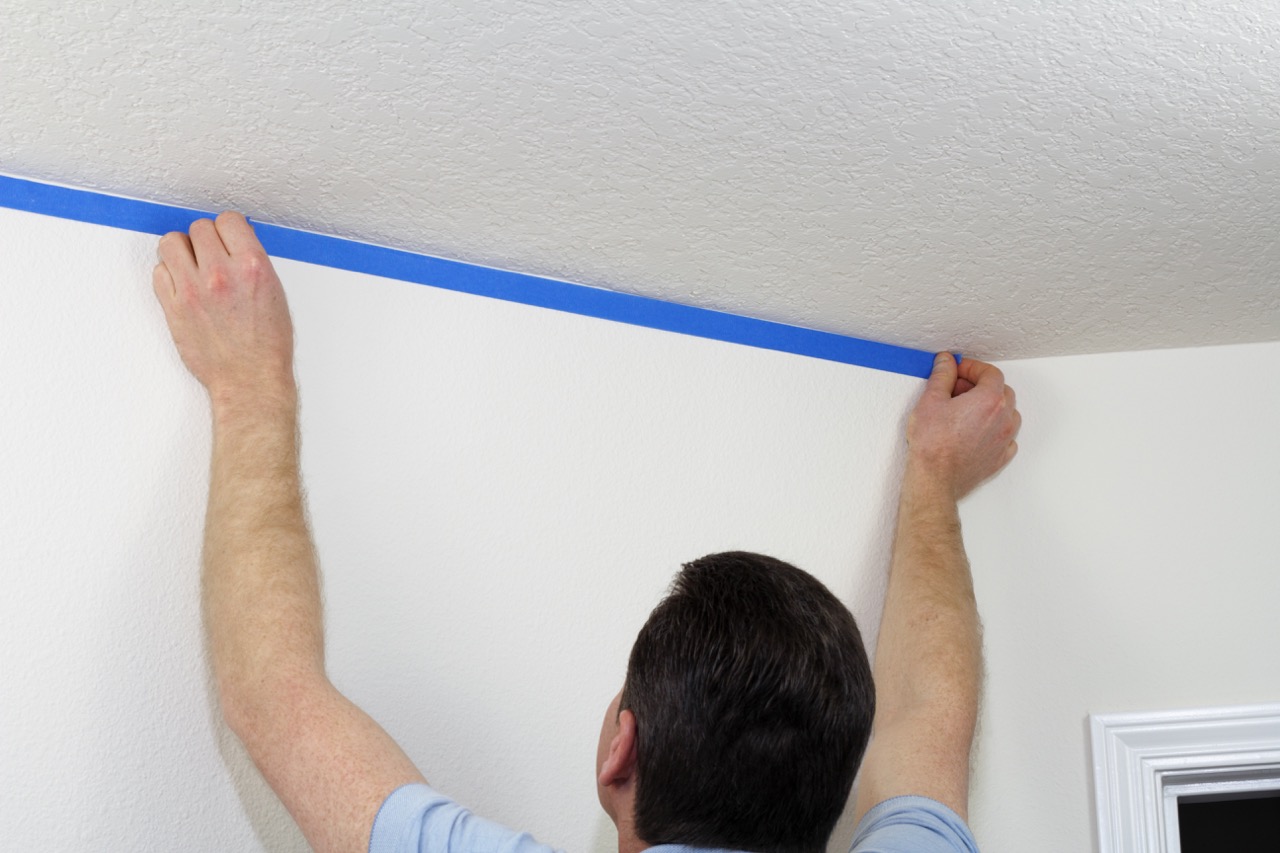
- Protect the walls and trim: Cover the walls and trim with painter’s tape to protect them from accidental paint splatters. Make sure the tape is securely adhered and covers any areas that may be exposed during the painting process.
- Remove light fixtures and coverings: If possible, remove any light fixtures or cover them with plastic bags to protect them from paint splatters. This will make the painting process easier and avoid any potential damage to your fixtures.
Taking the time to properly prepare the ceiling and the surrounding area will help minimize the mess and ensure a smooth painting process. With these initial steps completed, you’re now ready to move on to the next phase of painting your ceiling.
Step 2: Covering Furniture and Floors
One of the biggest concerns when painting a ceiling is protecting your furniture and floors from paint drips and spills. Here are some tips to keep in mind:
- Clear the area: Start by removing any furniture or objects that are directly beneath the ceiling you will be painting. If moving them is not possible, gather them in the center of the room and cover them with drop cloths or plastic sheets.
- Cover the floors: Use drop cloths or old sheets to cover the entire floor area beneath the ceiling. Secure the edges of the coverings with painter’s tape to ensure they stay in place during the painting process. This will prevent any paint from seeping through and damaging your floors.
- Protect furniture: For furniture that cannot be moved, cover them with plastic sheets or drop cloths. Secure the coverings with tape or rubber bands to keep them in place. If there are any exposed surfaces that you want to protect, use painter’s tape to create a barrier.
- Elevate furniture: If possible, lift furniture off the ground using blocks or risers. This will provide an extra layer of protection and prevent any accidental paint splatters from reaching your furniture.
By taking the time to properly cover and protect your furniture and floors, you can have peace of mind knowing that they are shielded from any potential paint mishaps. Remember, prevention is key, so invest some time in this step to save yourself from a messy cleanup later on.
Step 3: Gathering Supplies
Before you start painting your ceiling, it’s important to gather all the necessary supplies. Having everything at hand will make the process more efficient and help you avoid unnecessary interruptions. Here are the supplies you’ll need:
- Paint: Choose a high-quality ceiling paint that matches your desired color. Consider using a paint with a matte or flat finish as it helps to hide imperfections.
- Paint roller: Opt for a medium nap roller cover to ensure even coverage on the textured surface of the ceiling. A roller with an extension pole will make it easier to reach high areas.
- Paint tray: Use a sturdy paint tray to hold the paint while you work. Look for one with a disposable liner for easy cleanup.
- Paintbrush: Have a small paintbrush on hand for cutting in along the edges and corners of the ceiling.
- Painter’s tape: Use painter’s tape to protect walls, trim, and any other areas that you want to keep paint-free.
- Drop cloths or plastic sheets: These will protect your furniture and floors from any potential paint splatters.
- Paint stirrer: Ensure that you have a paint stirrer or stick to thoroughly mix the paint before application.
- Ladder or step stool: Depending on the height of your ceiling, you may need a stable ladder or step stool to safely access the higher areas.
- Rags or paper towels: Keep some rags or paper towels handy for any spills or drips that may occur during the painting process.
- Protective clothing and gear: Wear old clothing, a hat, safety goggles, and a dust mask to protect yourself from any potential paint splatters or fumes.
Gathering these supplies ahead of time will ensure a smooth painting process without any unnecessary disruptions. Double-check the list to make sure you have everything you need, and make any necessary purchases or arrangements before you begin.
Step 4: Using the Right Paint and Tools
Choosing the right paint and tools is crucial for achieving a professional-looking finish on your ceiling. Here are some tips to help you make the right choices:
- Paint type: Opt for a dedicated ceiling paint that is specifically formulated for ceilings. These paints are designed to have high coverage and minimize drips and splatters. Look for a paint with low VOC (volatile organic compounds) to minimize fumes and odors.
- Finish: For most ceilings, a flat or matte finish is recommended. These finishes help to minimize the appearance of imperfections and provide a smooth, even look.
- Roller cover: Use a roller cover with the appropriate nap (the thickness of the fabric) for your ceiling texture. A roller cover with a longer nap is suitable for heavily textured ceilings, while a shorter nap works well for smoother surfaces. Test the roller cover on a small section of the ceiling to ensure it applies the paint evenly.
- Brush size: Choose a small to medium-sized brush with synthetic bristles for cutting in along the edges and corners of the ceiling. The brush should be comfortable to hold and provide good control for precise application.
- Extension pole: Attach an extension pole to your roller handle to easily reach high areas of the ceiling without the need for a ladder. Make sure the extension pole is secure and stable to prevent accidents.
- Paint tray and liner: Use a sturdy paint tray with a disposable liner for easy cleanup. The tray should be wide enough to accommodate the roller without causing excessive paint splatters.
- Paint stirrer: Before starting, thoroughly mix the paint using a paint stirrer or stick. This ensures an even consistency and color throughout the paint.
Using the right paint and tools will greatly impact the quality of your ceiling painting job. Take the time to choose high-quality materials and test them out in a small area before applying them to the entire ceiling. This way, you can ensure a smooth and professional finish that lasts.
Use a high-quality angled brush to cut in around the edges of the ceiling, then use a roller with an extension pole for the main surface. Start from the farthest corner and work towards the door to avoid stepping on wet paint.
Read more: How To Use Hand Mixer Without Making A Mess
Step 5: Preparing the Ceiling
Now that you have all your supplies and the right paint and tools, it’s time to prepare the ceiling for painting. Follow these steps to ensure a smooth and flawless application:
- Remove any loose paint or debris: Use a scraper or putty knife to gently remove any loose paint or debris from the ceiling surface. This will create a clean and smooth base for the new paint.
- Fill in cracks and holes: Inspect the ceiling for any cracks or holes and use a spackling compound or joint compound to fill them in. Smooth the compound with a putty knife and allow it to dry as per the manufacturer’s instructions.
- Sand the surface: If there are any rough or uneven areas on the ceiling, lightly sand them using a fine-grit sandpaper. This will help create a smooth and even surface for the paint to adhere to.
- Clean the ceiling: Using a slightly damp cloth or sponge, wipe down the ceiling to remove any dust, dirt, or debris. This will ensure that the paint adheres properly and doesn’t trap any impurities.
- Apply painter’s tape: Use painter’s tape to mask off any areas such as trim, light fixtures, or walls that you want to keep paint-free. Make sure the tape is firmly pressed down to prevent any paint from seeping underneath.
By properly preparing the ceiling, you are setting the stage for a successful painting process. Taking the time to address any cracks or imperfections and ensuring a clean surface will help the paint adhere better and result in a professional-looking finish. Once the ceiling is prepared, you are ready to begin applying the paint.
Step 6: Applying the First Coat
With the ceiling properly prepared, it’s time to start applying the first coat of paint. Follow these steps for a smooth and even application:
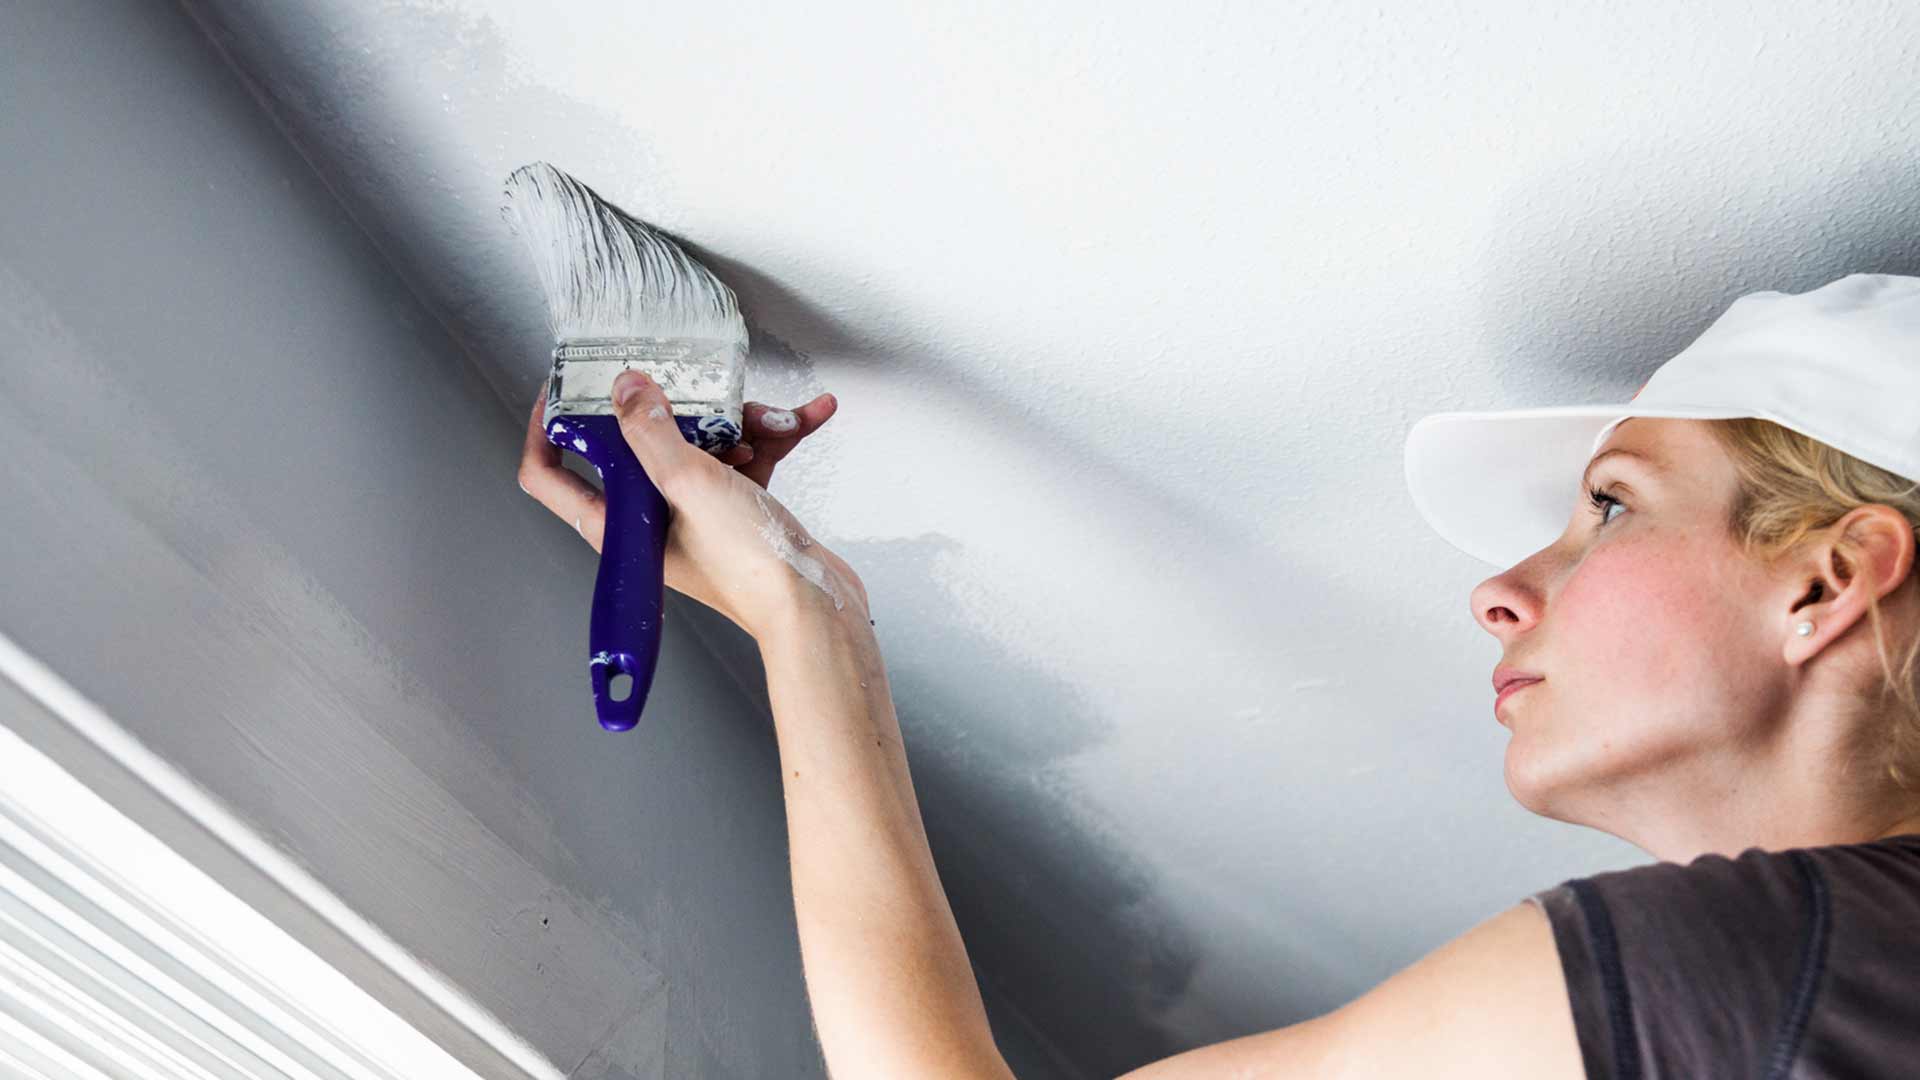
- Start with the edges: Using a small brush, cut in along the edges of the ceiling, around light fixtures, and in the corners. Take your time and ensure clean lines and edges.
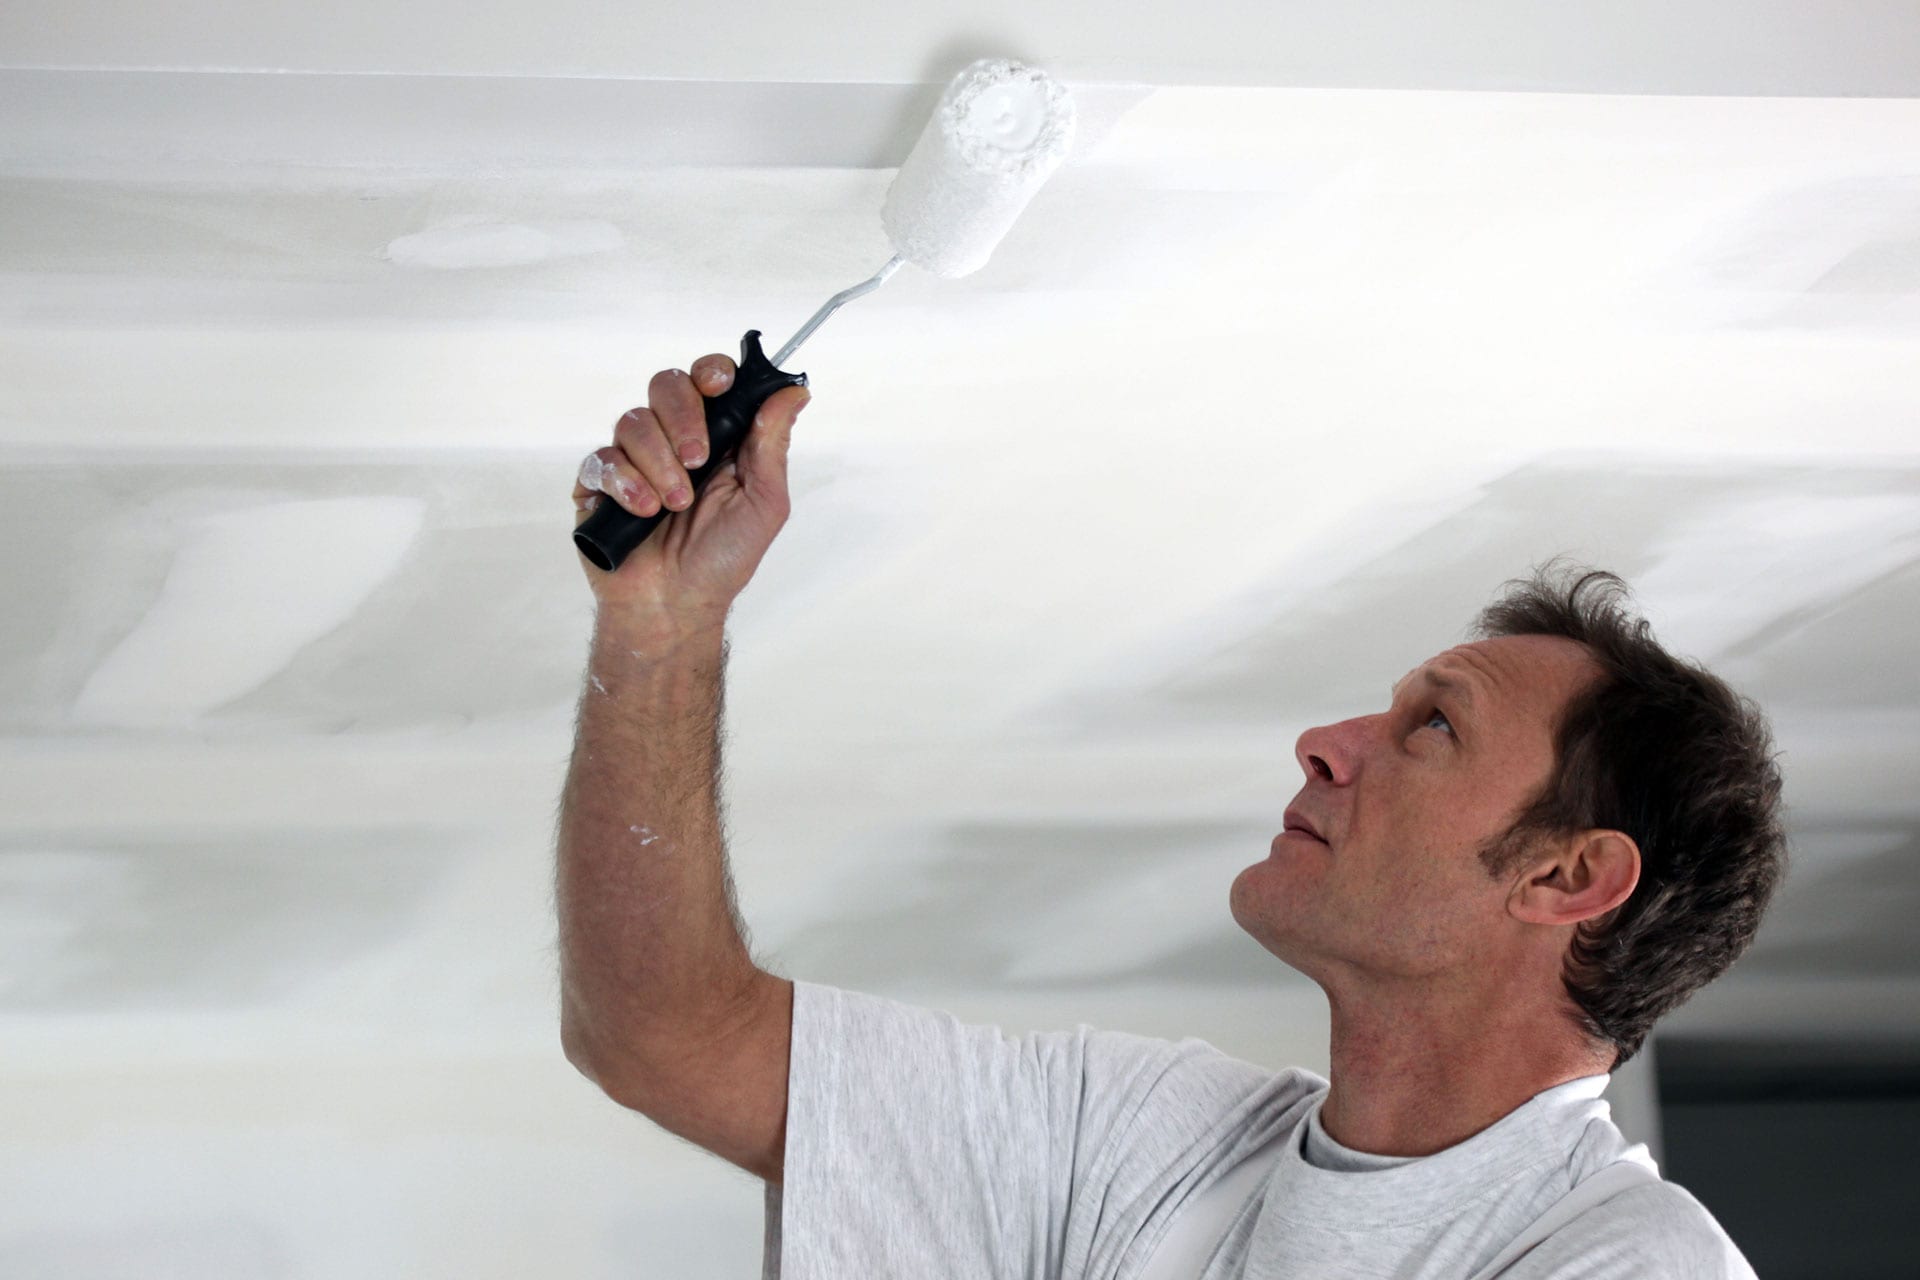
- Load the roller: Pour a sufficient amount of paint into the paint tray. Dip the roller in the paint and roll it back and forth to evenly distribute the paint on the roller cover. Avoid overloading the roller to prevent drips.
- Roll the ceiling: Starting from a corner, roll the paint onto the ceiling in a “W” or “M” pattern. Apply gentle pressure and maintain a consistent speed to ensure even coverage. Work in small sections, overlapping each stroke slightly for a seamless finish.
- Apply in manageable sections: Paint one section of the ceiling at a time, moving across the room. Avoid painting large areas at once to prevent the paint from drying too quickly.
- Check for consistency: Periodically step back and assess the coverage and consistency of the paint. Make sure there are no thin or missed spots. If necessary, apply more paint to achieve an even and uniform coating.
- Blend the edges: Once you have finished rolling the main areas, use a dry brush to lightly feather the edges where the cut-in and rolled sections meet. This helps blend the paint for a seamless finish.
Take your time and work systematically to ensure even application and coverage. The first coat may not completely cover the previous color or imperfections, but it provides a base for subsequent coats. Allow the first coat to dry according to the manufacturer’s instructions before moving on to the next step.
Step 7: Applying Additional Coats (if needed)
After the first coat of paint has dried, it’s time to assess whether additional coats are needed. Follow these steps to achieve a smooth and flawless finish:
- Inspect the coverage: Once the first coat is dry, examine the ceiling for any areas where the previous color or imperfections are still visible. Look for streaks, thin spots, or unevenness in the paint.
- Sand and prep (if necessary): If you notice any imperfections, lightly sand the affected areas using a fine-grit sandpaper. Wipe away any dust with a clean cloth. Fill in any remaining gaps or holes with spackling compound, and sand again if needed.
- Apply additional coats: If the coverage is not satisfactory or if you prefer a more opaque finish, apply additional coats of paint following the same techniques used for the first coat. Be sure to allow enough drying time between coats as directed by the paint manufacturer.
- Keep an eye on the consistency: As you apply the additional coats, be mindful of the consistency of the paint. Aim for a smooth and even application, ensuring there are no visible brush strokes or roller marks.
- Blend the edges: Just like in the previous step, use a dry brush to feather the edges between the rolled and cut-in sections. This will help blend the paint for a seamless transition.
- Repeat as necessary: Depending on the desired finish and the condition of the ceiling, you may need to apply two or more additional coats. Take your time and assess the results after each application, making adjustments as needed.
Remember, applying additional coats of paint will enhance the coverage, color saturation, and overall appearance of the ceiling. Take care to ensure each coat is dry and surfaces are clean between applications. Once you’re satisfied with the results, proceed to the final step of the painting process – cleaning up.
Step 8: Cleaning Up
After completing the painting process, it’s important to properly clean up to leave your space looking tidy and fresh. Follow these steps to ensure a thorough cleanup:
- Store leftover paint: If you have any leftover paint, tightly seal the container and store it in a cool, dry place for future touch-ups or projects. Be sure to label the container with the color and type of paint.
- Dispose of debris: Collect any used paint trays, roller covers, brushes, and other disposable supplies. Place them in a trash bag and dispose of them according to your local waste management regulations.
- Clean brushes and rollers: If you plan to reuse your brushes and rollers, clean them immediately after use. Rinse them with water or use an appropriate cleaning agent recommended by the paint manufacturer. Remove excess paint and store them in a clean and dry place.
- Remove painter’s tape: Once the paint is dry to the touch, carefully remove the painter’s tape from the walls, trim, and any other areas where it was applied. Peel the tape away slowly and at a sharp angle to prevent any damage or peeling of the newly painted surfaces.
- Clean the workspace: Thoroughly clean the area where you painted, including the floors, furniture, and any other surfaces that may have been exposed to paint splatters. Use a damp cloth or sponge to wipe away any remaining paint, and clean the floors according to their specific requirements.
- Inspect the result: Take a moment to step back and admire your freshly painted ceiling. Look for any touch-ups or areas that may require additional attention. Make note of these areas and address them once the paint has fully dried.
Cleaning up properly not only helps maintain the appearance of your space, but it also ensures the longevity of your painting tools and materials. Completing this final step of the process will leave you with a clean and beautiful ceiling, free of any paint-related mess.
Frequently Asked Questions about How To Paint A Ceiling Without Making A Mess
Was this page helpful?
At Storables.com, we guarantee accurate and reliable information. Our content, validated by Expert Board Contributors, is crafted following stringent Editorial Policies. We're committed to providing you with well-researched, expert-backed insights for all your informational needs.


0 thoughts on “How To Paint A Ceiling Without Making A Mess”