
Articles
How To Paint Vaulted Ceiling
Modified: October 19, 2024
Discover the best articles on how to paint a vaulted ceiling, including step-by-step instructions and expert tips. Achieve a professional finish with our comprehensive guides.
(Many of the links in this article redirect to a specific reviewed product. Your purchase of these products through affiliate links helps to generate commission for Storables.com, at no extra cost. Learn more)
Introduction
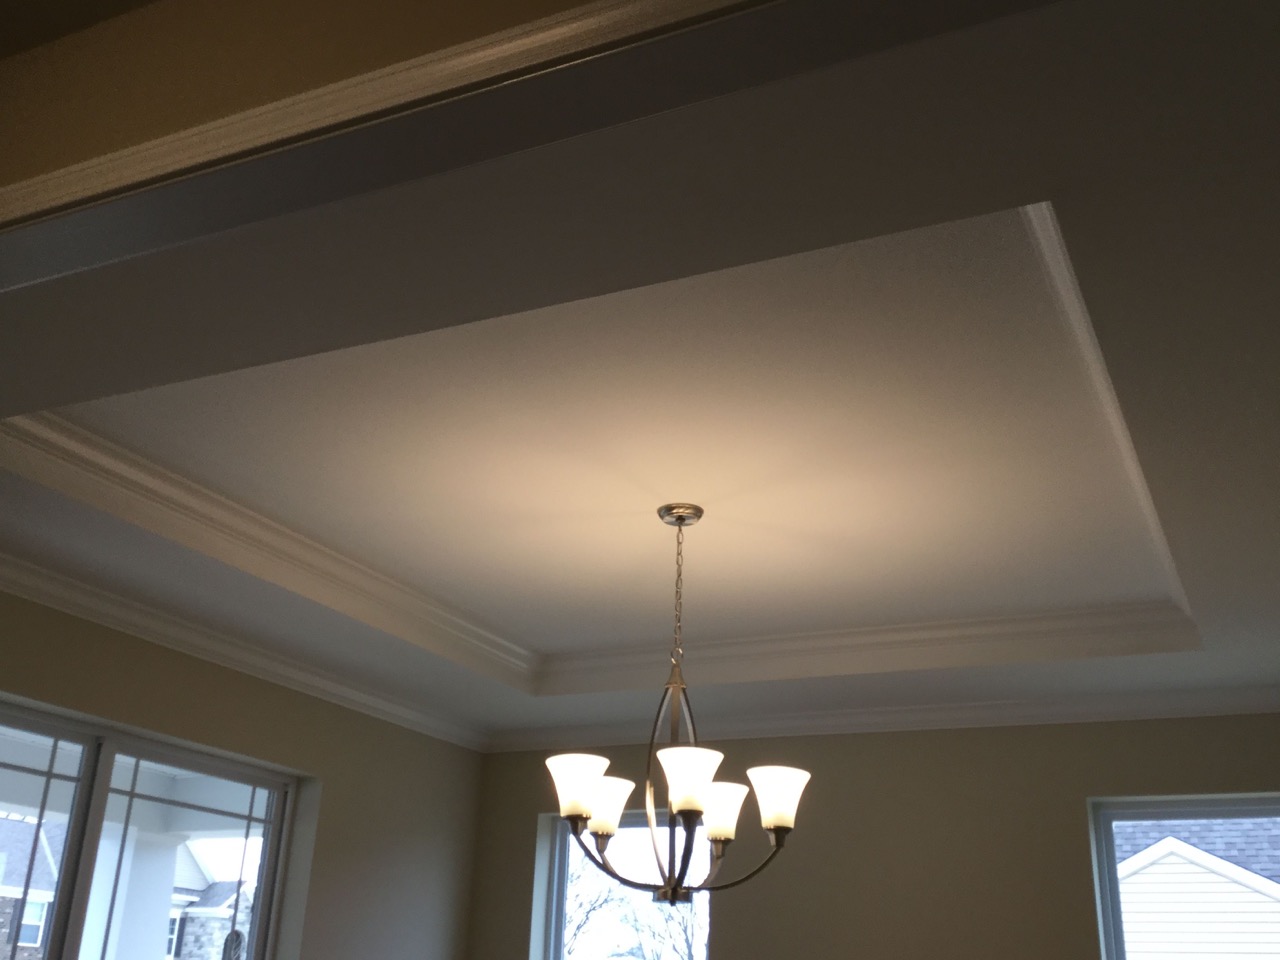
Welcome to our comprehensive guide on how to paint a vaulted ceiling. Whether you’re looking to freshen up the look of your space or want to take on a new DIY project, painting your vaulted ceiling can make a significant impact on the overall aesthetics of your home. Vaulted ceilings, with their unique angles and heights, can present a challenge when it comes to painting, but with the right materials, technique, and some helpful tips, you can achieve professional-looking results.
In this article, we will walk you through the step-by-step process of painting a vaulted ceiling. We will cover everything from the materials you will need to the best techniques for tackling this project. By the end, you will have the knowledge and confidence to transform your vaulted ceiling into a stunning focal point that enhances the beauty of your space.
So, let’s dive in and discover the secrets to painting a vaulted ceiling!
Key Takeaways:
- Transform your space with a stunning vaulted ceiling by following our comprehensive guide. From materials to painting techniques, achieve professional results with confidence and creativity.
- Elevate your painting project with expert tips on safety, ladder usage, and high ceiling painting. Embrace the process, prioritize preparation, and enjoy the transformative results.
Read more: What Is A Vaulted Ceiling
Materials Needed
Before you begin painting your vaulted ceiling, it’s important to gather all the necessary materials. Here’s a list of items you’ll need:
- Drop cloths or plastic sheets: These will protect your floors and furniture from paint splatters or spills.
- Ladder or scaffolding: Depending on the height of your vaulted ceiling, you’ll need a stable and sturdy ladder or scaffolding to reach the upper areas.
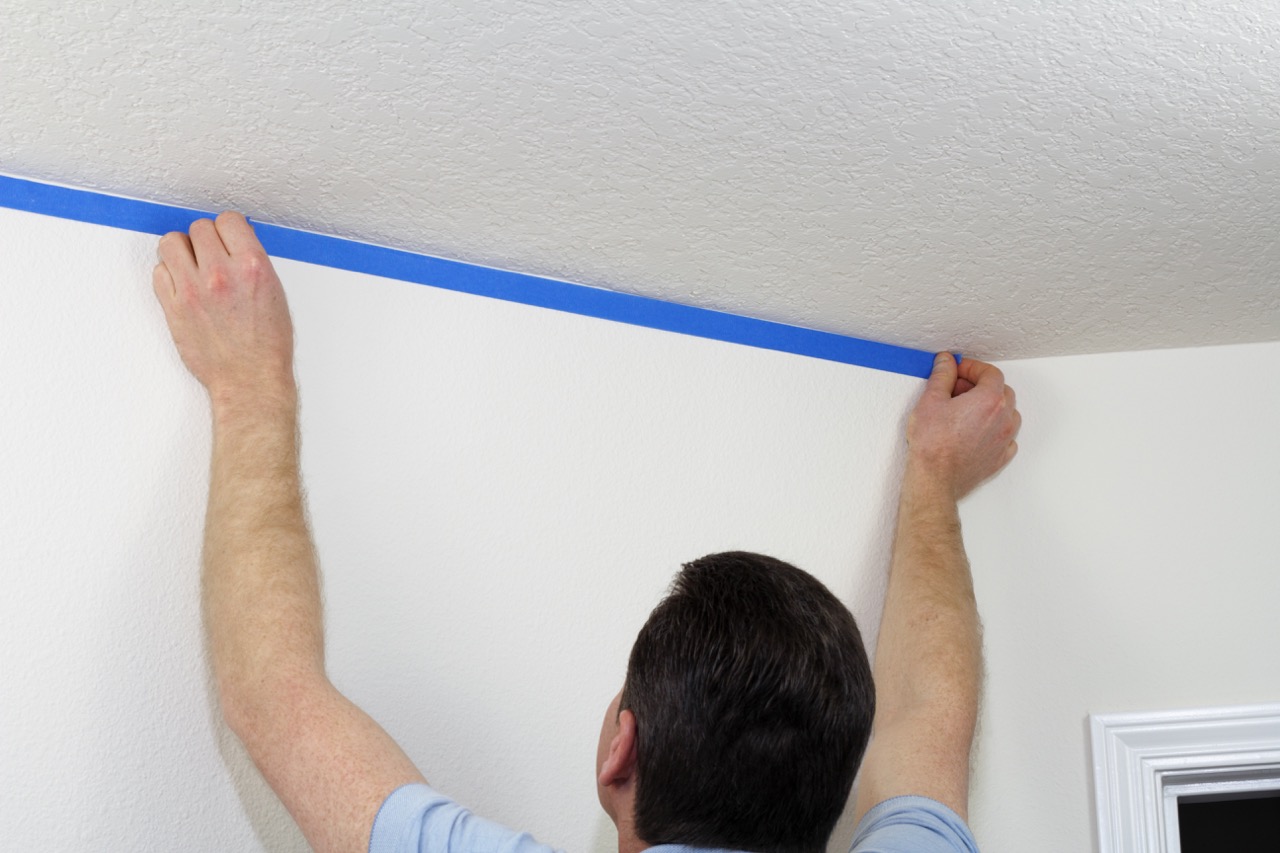
- Painter’s tape: Use painter’s tape to mask off any areas or trim that you don’t want to get paint on, such as light fixtures or crown molding.
- Paintbrushes: Invest in high-quality brushes that are suitable for the type of paint you’re using. A smaller brush is ideal for cutting in along edges and corners, while a larger brush is great for larger areas.
- Paint roller and extension pole: A roller allows you to cover large sections of the ceiling quickly. Choose one with a long handle or an extension pole to comfortably reach the high areas.
- Paint tray: Use a paint tray to pour the paint into for dipping your roller.
- Paint: Select a high-quality paint in the color of your choice. Opt for a paint with a flat or matte finish to minimize the appearance of imperfections.
- Primer: If your ceiling is new or has significant stains or damage, using a primer before painting is recommended. This will provide a smooth base and help the paint adhere better.
- Rags or paper towels: Keep rags or paper towels on hand for any spills or drips.
- Dust mask and safety goggles: Protect yourself by wearing a dust mask to avoid inhaling paint particles and safety goggles to shield your eyes from any splatters.
Having all these materials readily available before you start will make the painting process much smoother and more enjoyable.
Preparing the Area
Properly preparing the area before you start painting is crucial to ensure a smooth and clean finish. Follow these steps to prepare your vaulted ceiling:
- Clear the space: Remove any furniture or items from the room or cover them with drop cloths or plastic sheets to protect them from paint splatters or dust.
- Protect the floors: Lay down drop cloths or plastic sheets on the floor to catch any paint drips or spills. Secure them in place using painter’s tape.
- Clean the ceiling: Dust and wipe down the vaulted ceiling to remove any dirt, cobwebs, or debris. Use a soft cloth or a long-handled duster to reach high areas.
- Repair any damage: Inspect the ceiling for any cracks, holes, or other damage. Use spackling compound to fill in the gaps and sand the area smooth once dry.
- Apply painter’s tape: Use painter’s tape to mask off any areas or trim that you do not want to get paint on, such as light fixtures or crown molding.
By taking the time to prepare the area properly, you will create a clean and workable space for painting your vaulted ceiling. This will help you achieve professional-looking results and minimize any potential mess or damage to furniture or floors.
Choosing the Paint
When it comes to choosing the right paint for your vaulted ceiling, there are a few factors to consider:
- Finish: Opt for a flat or matte finish paint for your ceiling. These finishes help to minimize the appearance of imperfections and provide a smooth, even look.
- Color: Decide on the color that best suits your space and desired atmosphere. Lighter shades can make the room feel more open and spacious, while darker shades can create a cozy and dramatic effect.
- Type of paint: Water-based latex paint is a popular choice for ceilings because it provides good coverage and is easy to clean up. Consider using paint with a low odor if you have sensitivities.
- Quality: Invest in a high-quality paint to ensure long-lasting results. Cheaper paints may require more coats and may not provide the same level of coverage and durability.
Once you have chosen the paint, it’s always a good idea to test the color on a small section of the ceiling before committing to painting the entire area. This way, you can see how the color looks in your space and make any adjustments if needed.
Remember, if your ceiling is new or has significant stains or damage, it’s advisable to use a primer before applying the paint. This will create a smooth base and help the paint adhere better, ensuring a professional finish.
Now that you have selected the perfect paint for your vaulted ceiling, it’s time to move on to the next step: priming!
Priming the Ceiling
Before you start painting your vaulted ceiling, it’s important to prime the surface. Priming serves as a preparatory step that creates a smooth base for the paint and enhances its adhesion. Follow these steps to prime your ceiling:
- Cover the floor and furniture: Lay down drop cloths or plastic sheets to protect the floors and furniture from paint drips or spills.
- Prepare the primer: Stir the primer thoroughly to ensure it is properly mixed. Pour the primer into a paint tray for easy access.
- Cut in along the edges: Use a small paintbrush to carefully cut in along the edges and corners of the ceiling. This includes areas that are difficult to reach with a roller, such as the corners where the ceiling meets the walls or any architectural details.
- Apply primer with a roller: Attach a roller to an extension pole or use a ladder to reach high areas. Dip the roller into the primer and evenly distribute it on the roller by rolling it back and forth in the paint tray.
- Start rolling the ceiling: Begin rolling the primer onto the ceiling in smooth, even strokes. Work in small sections, overlapping each stroke to ensure even coverage.
- Allow the primer to dry: Follow the drying time mentioned on the primer’s label. It typically takes a few hours for the primer to dry completely.
- Inspect and touch up: After the primer has dried, inspect the ceiling for any missed spots or areas that need touch-up. Use a small paintbrush to touch up those areas with primer.
Priming not only helps to create a reliable surface for the paint to adhere to but also ensures better color coverage and enhances the longevity of the paint job. Now that the ceiling is properly primed, you’re ready to move on to the exciting part – painting the vaulted ceiling!
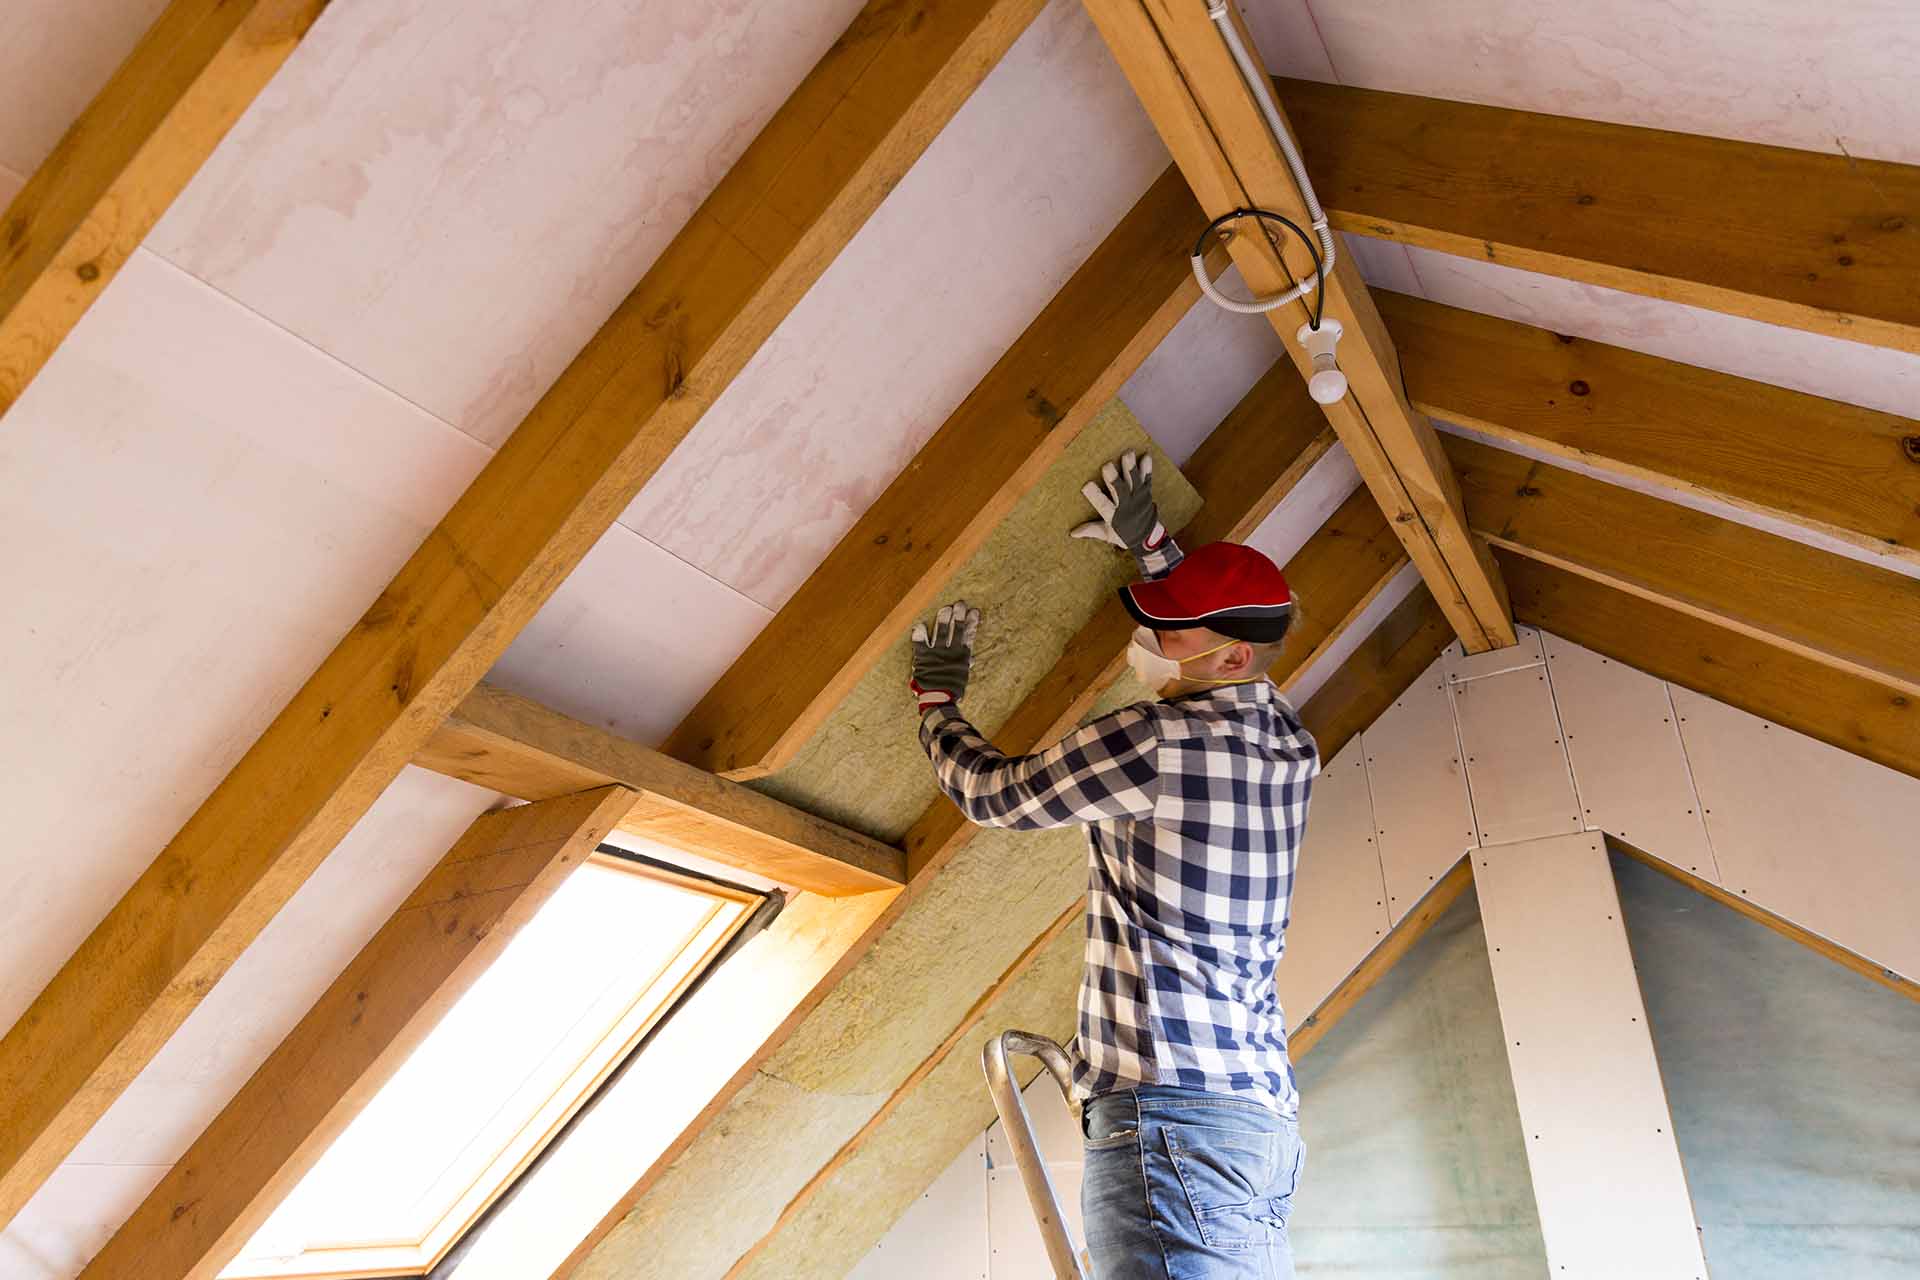
Use a sturdy ladder or scaffolding to reach high areas. Start by cutting in the edges with a brush, then use a roller for the larger sections. Work in small sections to avoid drips and ensure even coverage.
Read more: How Much To Vault A Ceiling
Painting Technique
When it comes to painting a vaulted ceiling, the right technique is essential to achieve a smooth, even finish. Follow these steps to master the painting technique:
- Start with a cut-in: Use a smaller paintbrush to carefully cut in along the edges and corners of the ceiling. This includes areas that are difficult to reach with a roller, such as the corners where the ceiling meets the walls or any architectural details. Take your time and be precise to create clean lines.
- Use a roller with an extension pole: Attach a roller to an extension pole or use a ladder to reach high areas of the ceiling. Begin by dipping the roller into the paint tray and evenly distribute the paint by rolling it back and forth.
- Work in sections: Divide the ceiling into manageable sections and start rolling the paint onto the surface using long, overlapping strokes. Roll in one direction to ensure an even coat of paint.
- Blend the edges: To prevent visible lines or overlapping marks, blend the edges of each section while the paint is still wet. Use a technique known as feathering, where you lightly roll over the edge of the painted section to create a smooth transition between the sections.
- Maintain a “W” or “M” pattern: To cover larger areas efficiently, follow a “W” or “M” pattern while rolling the paint. Start at one end of the section and roll up and down in a zigzag motion. Repeat this process until the entire section is covered.
- Avoid overloading the roller: Make sure not to overload the roller with too much paint, as it can lead to drips and an uneven finish. Roll off any excess paint on the tray before applying it to the ceiling.
- Apply multiple thin coats: It’s better to apply multiple thin coats of paint rather than one thick coat. This helps to achieve better color coverage and prevents the paint from sagging or dripping.
- Take breaks and step back: Painting a vaulted ceiling can be physically demanding. Take regular breaks to rest your arms and step back to assess your progress. This will allow you to ensure even coverage and make any necessary adjustments.
By following these painting techniques, you’ll be able to achieve a professional-looking finish on your vaulted ceiling. Remember to work systematically, take your time, and maintain a consistent technique throughout the painting process.
Working with Ladders
When painting a vaulted ceiling, working with ladders is often necessary to reach the higher areas. Here are some tips to ensure safety and efficiency when using ladders:
- Choose a sturdy ladder: Select a ladder that can securely support your weight and provides stability. Avoid using chairs or other makeshift platforms, as they may not provide sufficient stability or safety.
- Set up the ladder correctly: Place the ladder on a flat and stable surface. Ensure that all four legs are firmly planted on the ground and locked in place. If needed, use ladder levelers or adjustable leg extensions to ensure stability on uneven surfaces.
- Position the ladder at the correct angle: The ladder should be positioned at a 75-degree angle from the ground. This means for every 4 feet of height, the ladder base should be positioned 1 foot away from the wall or work surface.
- Secure the ladder: If possible, secure the ladder at the top and bottom using straps or bungee cords to prevent any accidental movement while you’re working on the vaulted ceiling.
- Use ladder accessories: Consider using ladder accessories such as ladder stabilizers, ladder stand-offs, or ladder mitts to provide additional stability and prevent damage to the walls or ceiling.
- Keep your balance: Maintain three points of contact with the ladder at all times – two hands and one foot or two feet and one hand. Avoid overreaching or leaning too far to maintain balance.
- Take breaks and stay hydrated: Painting a vaulted ceiling can be physically demanding, especially when working on a ladder. Take regular breaks, stay hydrated, and listen to your body to prevent any injuries or fatigue.
- Have someone to assist: Consider having a helper nearby to provide additional support, especially when moving the ladder or when handing you materials and tools.
Remember, safety should always be a top priority when working with ladders. Make sure to follow the manufacturer’s guidelines for the specific ladder you are using, and take necessary precautions to ensure a safe and secure working environment.
Tips for Painting High Ceilings
Painting high ceilings can present some challenges, but with the right techniques and tools, you can achieve excellent results. Here are some tips to make painting high ceilings easier and more efficient:
- Use the right tools: Invest in an extension pole for your paint roller to help you reach the higher areas of the ceiling without the need for a ladder. This will save you time and effort, and allow for smoother strokes.
- Wear protective gear: Put on a dust mask and safety goggles to protect yourself from dust, paint particles, and debris that may fall from the ceiling during the painting process.
- Start from the top: Begin painting the high ceilings first before moving on to the lower areas. This way, if paint drips or splatters occur, they won’t ruin the freshly painted lower surfaces.
- Work in manageable sections: Divide the ceiling into smaller, manageable sections to focus on one area at a time. This will ensure even coverage and allow you to maintain a consistent technique throughout.
- Use proper lighting: Make sure the area is well-lit to ensure you can see any missed spots or uneven coverage. Use a combination of natural light and artificial lighting to create optimal visibility.
- Take breaks: Painting high ceilings can be physically demanding. Take regular breaks to rest your arms, stretch, and hydrate to prevent fatigue and ensure accuracy in your painting technique.
- Use appropriate ladder or scaffolding: If using a ladder or scaffolding is necessary to reach certain areas, ensure that it is set up properly and stable. Have someone hold the ladder or assist for added safety.
- Utilize reflective surfaces: Consider placing mirrors or using a small handheld mirror to help you see hard-to-reach areas of the ceiling while standing on the ground.
- Be mindful of drips: When working on high ceilings, keep an eye out for any paint drips that may occur. Catch them early and address them immediately to prevent streaks or unevenness in the paint job.
- Test your technique: Before tackling the entire ceiling, practice your painting technique on a small, inconspicuous area to ensure that you are comfortable and satisfied with the results.
By following these tips, painting high ceilings can become a more manageable task. Remember to work diligently and be patient, as the end result will be a beautifully painted vaulted ceiling.
Cleaning Up
Once you have finished painting your vaulted ceiling, it’s important to properly clean up to ensure a tidy and organized space. Here are some steps to follow for an effective cleanup:
- Allow the paint to dry: Before you start cleaning, make sure the paint has fully dried according to the manufacturer’s instructions. This will prevent smudges or smears on the freshly painted surface.
- Remove drop cloths or plastic sheets: Carefully remove the drop cloths or plastic sheets from the floor and furniture, ensuring that any paint drips or spills are contained within the covering.
- Clean your brushes and rollers: Rinse your brushes and rollers thoroughly with water or the appropriate cleaning solvent, depending on the type of paint used. Remove excess paint and gently squeeze out any remaining moisture. Pat the brushes and rollers dry with a clean cloth or paper towels.
- Store the tools properly: Once your brushes and rollers are clean and dry, store them in a cool, dry area to prevent damage or bristle distortion. Hanging them or storing them in their original packaging can help maintain their shape.
- Dispose of waste properly: If there is any leftover paint or empty paint cans, dispose of them according to your local regulations and guidelines. Some areas may require you to take them to a designated recycling center or hazardous waste facility.
- Clean the work area: Use a damp cloth or sponge to wipe down any surfaces that may have been splattered with paint, such as walls, trim, or light fixtures. Be gentle to avoid marring the freshly painted surfaces.
- Vacuum or sweep the floor: Thoroughly vacuum or sweep the floor to remove any paint chips, dust, or debris that may have accumulated during the painting process.
- Inspect the final result: Take a moment to step back and admire your freshly painted vaulted ceiling. Check for any missed spots or areas that may need touch-ups, and address them as necessary.
Remember, proper cleanup not only leaves your space looking neat and tidy but also helps to prolong the life of your painting tools and maintain a clean and inviting environment. By following these cleanup steps, you’ll be able to wrap up your painting project on a high note.
Read more: How To Decorate A Vaulted Ceiling Wall
Conclusion
Congratulations! You have successfully learned how to paint a vaulted ceiling. By following the steps outlined in this comprehensive guide, you can transform your space and create a visually appealing focal point. Painting a vaulted ceiling may seem daunting at first, but with the right materials, techniques, and a little bit of patience, you can achieve professional-looking results.
Remember to gather all the necessary materials, properly prepare the area, and choose the right paint and primer for your ceiling. Use the recommended techniques such as cutting in along the edges, rolling in sections, and blending the paint to achieve a smooth and even finish. Utilize ladders or scaffolding safely and take breaks when needed to maintain a steady hand and prevent fatigue.
Throughout your painting journey, always prioritize safety and take necessary precautions. Wear protective gear, secure your ladders, and work in well-lit spaces. Keep your work area clean and organized, and properly dispose of any waste or leftover paint.
Finally, step back and admire your hard work. A freshly painted vaulted ceiling can completely transform the look and feel of a room, adding a touch of elegance and beauty. Take the time to appreciate the before and after, and make any necessary touch-ups or adjustments if needed.
We hope this guide has been helpful in providing you with the knowledge and confidence to tackle your vaulted ceiling painting project. Remember, practice makes perfect, so don’t be afraid to experiment and refine your technique. Enjoy the process and embrace your inner creativity as you enhance the visual appeal of your space with a beautifully painted vaulted ceiling.
Frequently Asked Questions about How To Paint Vaulted Ceiling
Was this page helpful?
At Storables.com, we guarantee accurate and reliable information. Our content, validated by Expert Board Contributors, is crafted following stringent Editorial Policies. We're committed to providing you with well-researched, expert-backed insights for all your informational needs.


0 thoughts on “How To Paint Vaulted Ceiling”