Articles
What To Do If You Drop Your Phone In Toilet
Modified: August 28, 2024
Discover practical tips and helpful advice on what to do if you drop your phone in the toilet. Read informative articles to salvage your device and minimize damage.
(Many of the links in this article redirect to a specific reviewed product. Your purchase of these products through affiliate links helps to generate commission for Storables.com, at no extra cost. Learn more)
Introduction
Dropping your phone into a toilet can be a nightmare scenario. With our reliance on smartphones for communication, work, and entertainment, the thought of losing such a valuable device can induce panic. However, if you find yourself in this unfortunate situation, there are steps you can take to increase the chances of salvaging your phone.
Acting quickly and following the right procedures can make all the difference in saving your phone from water damage. In this article, we will walk you through the necessary steps to take if you drop your phone in the toilet. By following these steps carefully, you may be able to prevent any long-term damage and get your phone back in working condition.
Before we dive into the steps, it’s important to note that these tips are applicable to water-resistant phones. If you own an older model or a phone without water resistance, the chances of saving it may be slimmer. However, it’s still worth giving these steps a try, as they have proven successful for many.
Now, let’s get started with Step 1: Retrieve your phone quickly.
Key Takeaways:
- Act quickly, retrieve your phone from the toilet, turn it off, and remove exterior accessories to minimize water damage. Follow the drying process with patience and test your phone for functionality to increase the chances of salvaging it.
- Placing your phone in rice or silica gel packets can aid in the drying process, but be patient and wait at least 48 hours before testing your phone. Monitor for long-term effects and consider preventive measures for future protection.
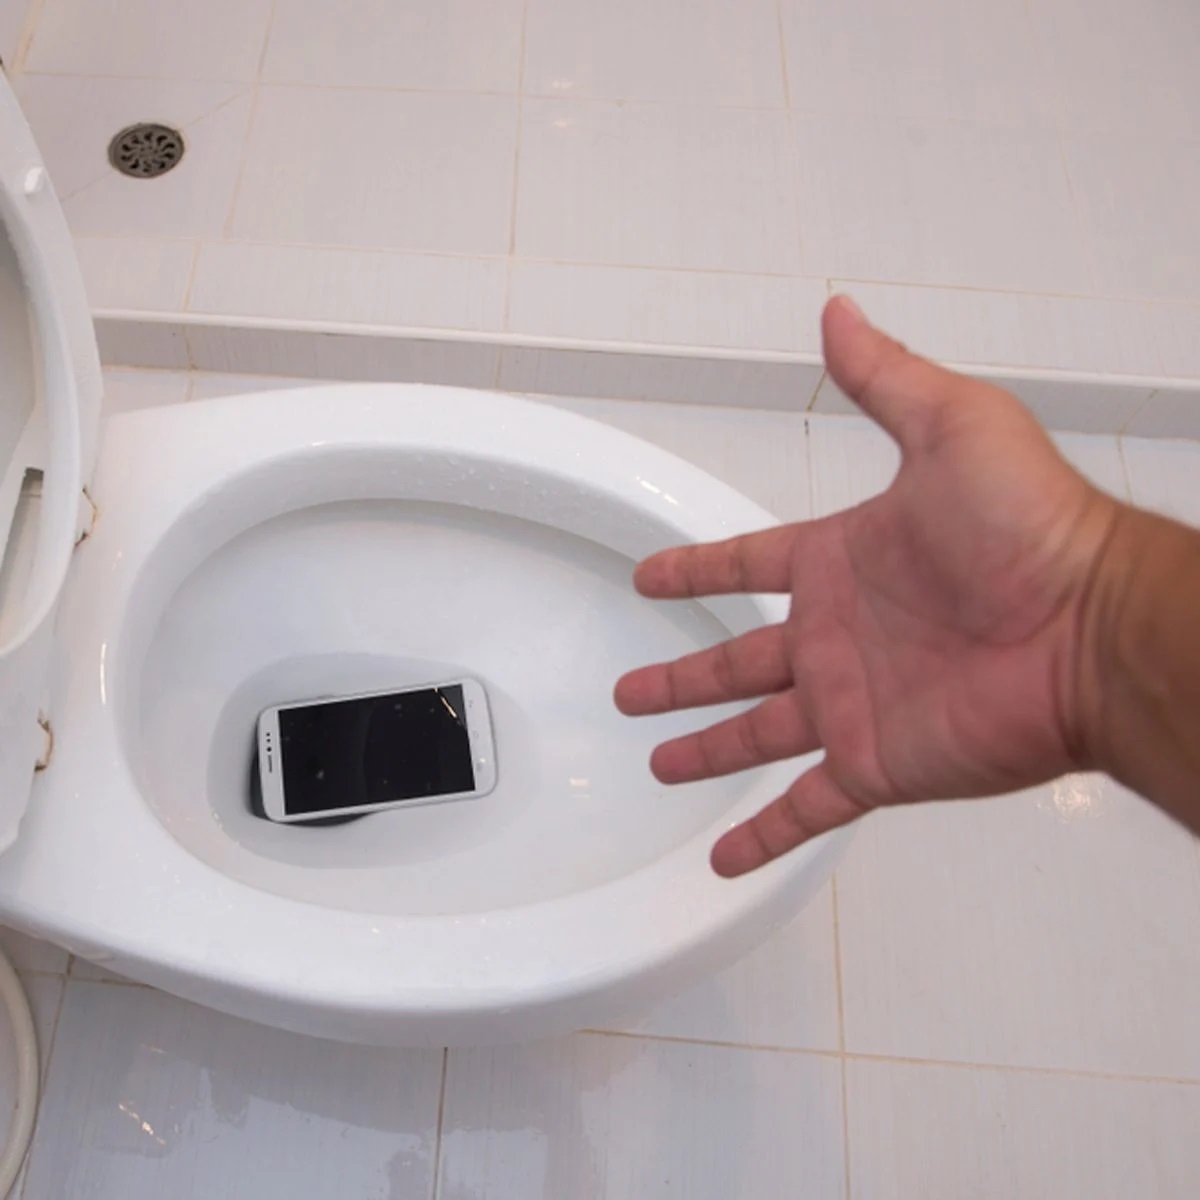
Step 1: Retrieve your phone quickly
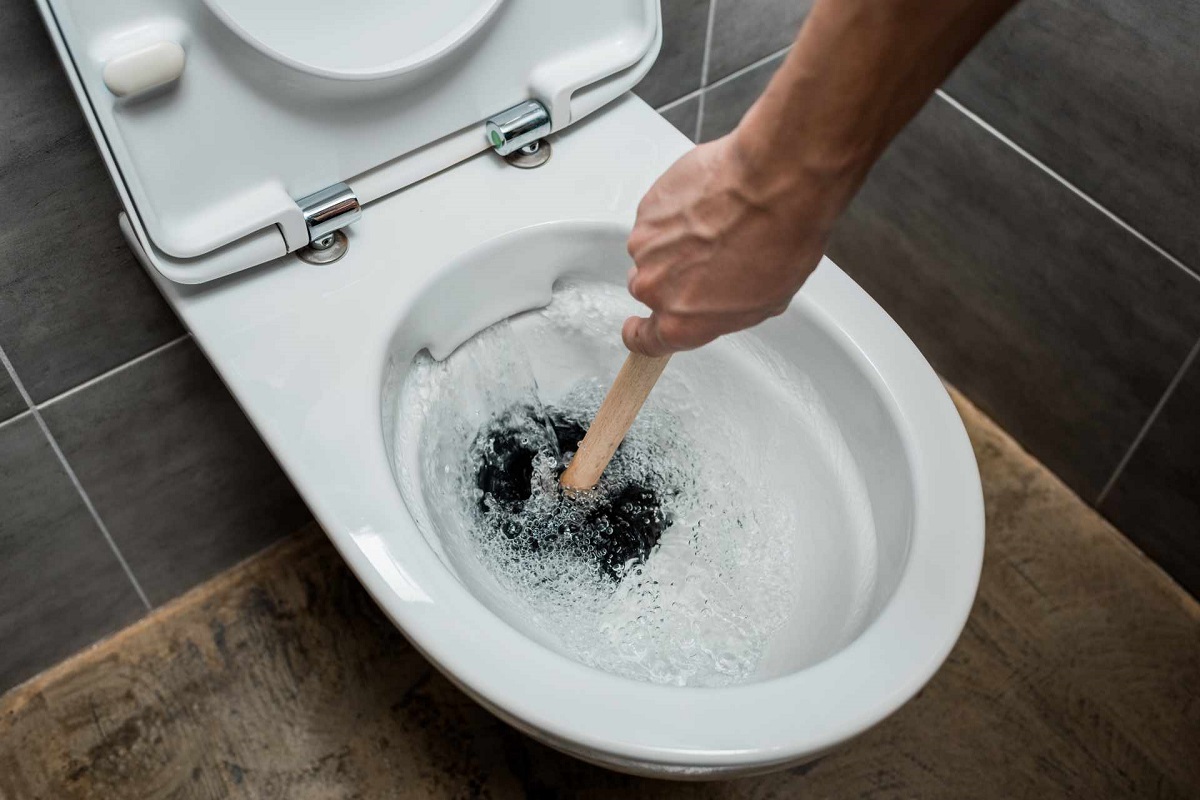
As soon as you drop your phone into the toilet, time becomes a critical factor. The longer your phone stays submerged, the higher the chances of water seeping into its delicate components. Therefore, it’s essential to act swiftly and efficiently to minimize the damage.
Start by making sure your hands are clean and free from any substances that might harm your phone. Gently reach into the toilet bowl and retrieve your phone as quickly as possible. Be careful not to drop it back or push it further into the water.
If you cannot reach your phone with your hands alone, try using a tool like tongs or a spatula to retrieve it. Just make sure that the tool you choose is clean and won’t cause any scratches or further damage to your phone.
Once you have successfully retrieved your phone, carefully inspect it for any visible signs of damage, such as cracks or waterlogged ports. Take note of these observations as they will be helpful in assessing the severity of the situation in the following steps.
Now that you have successfully retrieved your phone, it’s time to move on to Step 2: Turn off your phone immediately.
Step 2: Turn off your phone immediately
After retrieving your phone from the toilet, the next crucial step is to turn it off immediately. Water and electricity do not mix well, and leaving your phone powered on can increase the risk of short circuits and irreparable damage.
To turn off your phone, press and hold the power button until the option to power off appears on the screen. If your phone has physical buttons, you can also try holding down the volume down button and power button simultaneously until the screen goes blank.
If your phone doesn’t respond to these methods, or the touch screen is unresponsive, do not panic. Try removing the battery if it is removable. This will ensure a complete shutdown of the device.
Now that your phone is turned off, it’s time to move on to Step 3: Remove any exterior accessories and cases.
Removing any accessories such as cases, screen protectors, or other attachments is crucial at this stage. These items can trap moisture and hinder the drying process, increasing the risk of further damage.
Gently remove the case and any other accessories from your phone. Shake off any water droplets and pat them dry with a clean towel or cloth. If the case or accessories are wet, set them aside to dry separately.
Remember, the goal is to remove as much moisture as possible from both your phone and its accessories. This will help to prevent the formation of corrosive substances that can damage the internal components over time.
With your phone turned off and the exterior accessories removed, let’s move on to Step 4: Dry your phone with a towel.
Step 3: Remove any exterior accessories and cases
One of the essential steps in saving your phone after it has been dropped in the toilet is removing any exterior accessories and cases. This step is crucial to prevent moisture from getting trapped and causing further damage to your device.
Start by removing any protective cases, screen protectors, or other attachments from your phone. Gently peel them off and set them aside to dry separately. Wipe away any water droplets or moisture from these accessories using a clean, dry towel or cloth.
Once you’ve removed the accessories, carefully examine them for any signs of water damage. Look for any discoloration, warping, or noticeable moisture. If you detect any damage, it’s best to replace these accessories to avoid any potential problems in the future.
The removal of exterior accessories and cases allows for proper airflow and ventilation around your phone. This increased airflow can aid in the drying process and reduce the humidity that could lead to corrosion on the internal components.
Ensure that both your phone and the accessories are completely dry before moving on to the next step. Using a clean, dry towel or cloth, gently pat them down to absorb any remaining moisture. Avoid rubbing or pressing too hard, as this may cause damage to the sensitive surface of your phone or its accessories.
With the exterior accessories and cases removed, you are now ready to proceed to Step 4: Dry your phone with a towel.
Step 4: Dry your phone with a towel
After removing any exterior accessories and cases from your phone, it’s time to start the drying process. Drying your phone with a towel helps to remove excess water on the surface and in the ports, reducing the risk of internal damage.
Begin by taking a clean, dry towel or cloth and gently pat down the entire surface of your phone. Make sure to pay extra attention to the areas with visible water droplets, such as the screen, camera lens, and charging port.
Avoid rubbing the towel harshly against the phone, as this could push water deeper into the device or cause scratches on the screen. Instead, use a gentle patting motion to absorb the moisture.
While drying your phone, be cautious not to let any water from the towel drip into the ports or openings. If necessary, you can use a cotton swab or a soft brush to carefully remove any water trapped in these areas.
In addition to drying the exterior, make sure to gently shake the phone to remove any excess water that may be trapped in the speaker grilles or other openings. Point the phone’s openings downward to allow gravity to assist in the water drainage.
Continue the drying process until the phone’s exterior feels mostly dry to the touch. However, it’s important to note that the surface dryness does not guarantee the absence of moisture in the internal components of the phone.
With your phone adequately dried, it’s time to move on to Step 5: Remove excess moisture with a vacuum or compressed air.
If you drop your phone in the toilet, immediately remove it, power it off, and dry it with a towel. Then, place it in a bag of uncooked rice to absorb the moisture. Do not try to turn it on until it’s completely dry.
Step 5: Remove excess moisture with a vacuum or compressed air
After drying your phone with a towel, there may still be residual moisture lingering in hard-to-reach areas. To ensure the best chance of saving your phone from water damage, it’s crucial to remove this excess moisture.
One effective method to remove excess moisture is by using a vacuum cleaner or compressed air. These tools can help dislodge any trapped water droplets and accelerate the drying process.
If you choose to use a vacuum cleaner, make sure to set it to a low suction setting or use a specialized attachment for delicate electronics. Position the nozzle near the phone’s openings, such as the charging port or headphone jack, and gently suction the area without making direct contact with the device.
Alternatively, compressed air can be used to blow away any moisture from the phone. Hold the canister in an upright position and direct short bursts of air into the phone’s openings. Be cautious not to hold the canister too close to the phone or use excessive force, as this can cause damage to the internal components.
During this step, it’s important to remember that excessive heat from a hairdryer or compressed air can actually harm your phone. Avoid using heat as a means to dry your device, as it can potentially cause further damage or warping.
After using the vacuum or compressed air, take a moment to inspect your phone for any water droplets that may have been dislodged. Use a clean, dry towel or cloth to gently pat the phone once more to absorb any remaining moisture.
Now that you have successfully removed excess moisture from your phone, proceed to Step 6: Place your phone in a bowl of rice or silica gel packets.
Step 6: Place your phone in a bowl of rice or silica gel packets
Placing your phone in a bowl of rice or silica gel packets is a popular and widely recommended method for drying out electronic devices, including smartphones. The rice or silica gel works to absorb moisture from the surrounding environment, helping to expedite the drying process.
The first option is to use rice, which is readily available in most households. Take a bowl and fill it with raw, uncooked rice. Create a small indentation in the rice and carefully place your phone in it. Ensure that the phone is completely covered by the rice to maximize the moisture absorption.
Alternatively, if you have silica gel packets on hand, they can be even more effective at absorbing moisture. Silica gel packets are commonly found in packaging for various products, such as shoes, bags, or electronics. They can also be purchased separately if needed.
To use silica gel packets, place a few packets in a sealable plastic bag or container along with your phone. Make sure the phone is surrounded by the packets to maximize the moisture absorption. Seal the bag or container tightly to create a controlled environment.
Both rice and silica gel packets work by drawing moisture away from your phone. Leave your phone in the rice or silica gel container for at least 48 hours, allowing enough time for the drying process to occur. It’s important to resist the temptation to check on your phone during this time, as opening the container can introduce moisture back into the environment.
While the effectiveness of rice or silica gel in drying out a phone is still debated, many people have reported successful results with this method. However, it’s important to note that this method may not work for severe water damage or in all circumstances.
After the 48-hour period has elapsed, carefully remove your phone from the rice or silica gel and move on to Step 7: Wait for at least 48 hours.
Step 7: Wait for at least 48 hours
After placing your phone in a bowl of rice or silica gel packets, it’s essential to exercise patience and allow sufficient time for the drying process to take place. Waiting for a minimum of 48 hours will give your phone the best chance of removing any remaining moisture and preventing further damage.
During this waiting period, it’s vital to keep your phone in a dry and warm environment. Avoid exposing it to excessive humidity, direct sunlight, or extreme temperature fluctuations, as these factors can affect the drying process and potentially damage your phone further.
Resist the temptation to power on or test your phone prematurely. Even if the exterior appears dry, there may still be residual moisture in the internal components. Rushing to turn on the phone before it has fully dried can lead to shorts circuits or other irreversible damage.
While waiting, take this opportunity to back up any important data from your phone. If there is any permanent damage to the device, it will ensure that you don’t lose any valuable information or memories. It’s always a good practice to regularly back up your data to prevent loss in any unforeseen circumstances.
After the 48-hour waiting period has passed, it’s time to move on to Step 8: Test your phone.
Remember, the success of drying out your phone after it has been submerged in water can vary depending on multiple factors, including the extent of the water damage and the specific phone model. If you have followed all the previous steps carefully and allowed sufficient drying time, there is a reasonable chance of saving your phone.
However, if your phone does not work or exhibits unusual behavior after the allotted drying time, it may require professional repair. In such cases, it’s advisable to consult with a qualified technician or contact the manufacturer for further guidance.
Now that you’ve patiently waited for at least 48 hours, let’s move on to the final step: Step 8: Test your phone.
Step 8: Test your phone
After waiting for at least 48 hours and allowing your phone to thoroughly dry, you can now proceed to the final step: testing your phone. Testing your phone will help determine if it has fully recovered from the water damage and is in proper working condition.
Before turning on your phone, visually inspect it for any signs of remaining moisture or damage. Check for water droplets, condensation on the screen, or any visible signs of corrosion on the ports or connectors. If you notice any of these issues, it’s advisable to seek professional assistance for repair.
Once you’ve ensured the phone is visually dry and undamaged, you can proceed to power it on. Press and hold the power button until the screen lights up. If your phone doesn’t respond right away, try charging it to rule out any battery-related issues.
During the initial startup, pay close attention to any error messages, unusual behavior, or malfunctioning features. Test all the essential functions of your phone, including the touch screen, camera, speakers, microphone, and connectivity options like Wi-Fi and Bluetooth.
If your phone functions properly and without any issues, congratulations! You’ve successfully revived your phone after a water mishap. However, if you notice any abnormalities or persistent problems, it’s best to consult a professional technician or contact your phone’s manufacturer for further assistance.
It’s important to remember that even if your phone appears to be working fine initially, long-term effects of water damage, such as corrosion or component deterioration, may still manifest over time. Therefore, it’s advisable to monitor your phone closely in the weeks and months following the incident and be prepared to seek professional help if needed.
In the future, consider taking preventive measures to avoid such accidents, such as using waterproof or water-resistant phone cases, carrying your phone in a secure pocket or bag, or even investing in insurance coverage for your device.
By following the eight steps outlined in this guide, you have a better chance of saving your phone from water damage and getting it back to full functionality. Remember to act quickly, remove moisture, and be patient in the drying process. With a little luck and proper care, your phone can survive its unexpected encounter with the toilet.
Now go ahead and enjoy your fully functioning phone once again!
Read more: What Is A Drop-In Bathtub?
Conclusion
Dropping your phone in the toilet can be an alarming and distressing experience. However, with the right knowledge and prompt action, there is a chance to salvage your phone and prevent permanent water damage. By following the eight steps outlined in this guide, you can increase the likelihood of successfully recovering your phone and getting it back to proper working condition.
Remember, time is of the essence when it comes to water damage. Act quickly to retrieve your phone from the toilet and turn it off immediately to prevent any potential short circuits. Remove any exterior accessories and cases to promote airflow and minimize moisture retention. Dry your phone with a towel, and use a vacuum or compressed air to remove excess moisture from hard-to-reach areas.
Placing your phone in a bowl of rice or silica gel packets can further aid in the drying process, but it’s important to be patient and wait at least 48 hours before attempting to power on your device. After the waiting period, carefully test your phone to ensure it is functioning correctly and monitor it for any potential long-term effects of water damage.
If, despite your best efforts, your phone does not recover or shows persistent issues, it’s advisable to seek professional assistance or contact the manufacturer for further guidance.
In the future, take precautions to protect your phone from accidental water damage. Invest in water-resistant phone cases, be mindful of where you place your phone, and consider backing up your data regularly to prevent any loss in case of water damage incidents.
By following these steps and being proactive, you can increase your chances of saving your phone and avoid the stress of losing valuable data and communication capabilities. Remember, accidents happen, but with the right actions, you can continue to enjoy the benefits of your phone for years to come.
Frequently Asked Questions about What To Do If You Drop Your Phone In Toilet
Was this page helpful?
At Storables.com, we guarantee accurate and reliable information. Our content, validated by Expert Board Contributors, is crafted following stringent Editorial Policies. We're committed to providing you with well-researched, expert-backed insights for all your informational needs.


0 thoughts on “What To Do If You Drop Your Phone In Toilet”