Home>Furniture & Design>Bathroom Accessories>How Do You Tighten A Toilet Seat
Bathroom Accessories
How Do You Tighten A Toilet Seat
Modified: February 28, 2024
Learn how to tighten a toilet seat easily with our bathroom accessories. Follow our simple steps for a secure and stable toilet seat. Keep your bathroom in top condition!
(Many of the links in this article redirect to a specific reviewed product. Your purchase of these products through affiliate links helps to generate commission for Storables.com, at no extra cost. Learn more)
Introduction
Tightening a loose toilet seat is a common household maintenance task that can be easily accomplished with the right tools and a little know-how. A wobbly toilet seat not only detracts from the aesthetics of the bathroom but can also be a source of annoyance and discomfort. Whether you have a standard toilet seat or a modern soft-close seat, ensuring that it is securely fastened is essential for both safety and convenience.
In this comprehensive guide, we will walk you through the step-by-step process of tightening a toilet seat, covering different types of seats and the specific techniques required for each. By following these instructions, you can restore stability to your toilet seat and prevent potential mishaps in the future.
Loose toilet seats are often caused by the gradual loosening of the bolts or hinges that secure them to the toilet bowl. This can occur over time due to regular use, as well as the natural expansion and contraction of materials in response to changes in temperature and humidity. Additionally, improper installation or overtightening of the bolts can lead to premature loosening of the seat.
By addressing this issue promptly, you can avoid the inconvenience of a shifting toilet seat and the potential hazards associated with an unstable fixture. Whether you are a seasoned DIY enthusiast or a novice homeowner, this guide will equip you with the knowledge and skills needed to tackle this common household maintenance task with confidence.
Now, let's delve into the specific steps and techniques required to tighten both standard and soft-close toilet seats, ensuring that your bathroom remains a comfortable and safe space for all who use it.
Key Takeaways:
- Keep your toilet seat stable and secure by tightening the bolts with an adjustable wrench for standard seats, and inspecting and adjusting the hinges for soft-close seats. Regular maintenance ensures a safe and comfortable bathroom experience.
- Gather essential tools like an adjustable wrench and screwdriver, and identify your toilet seat type to effectively tighten it. Conduct a thorough stability test to ensure a wobble-free and secure fixture for a reliable bathroom environment.
Read more: How To Tighten A Loose Toilet Seat
Step 1: Gather the necessary tools
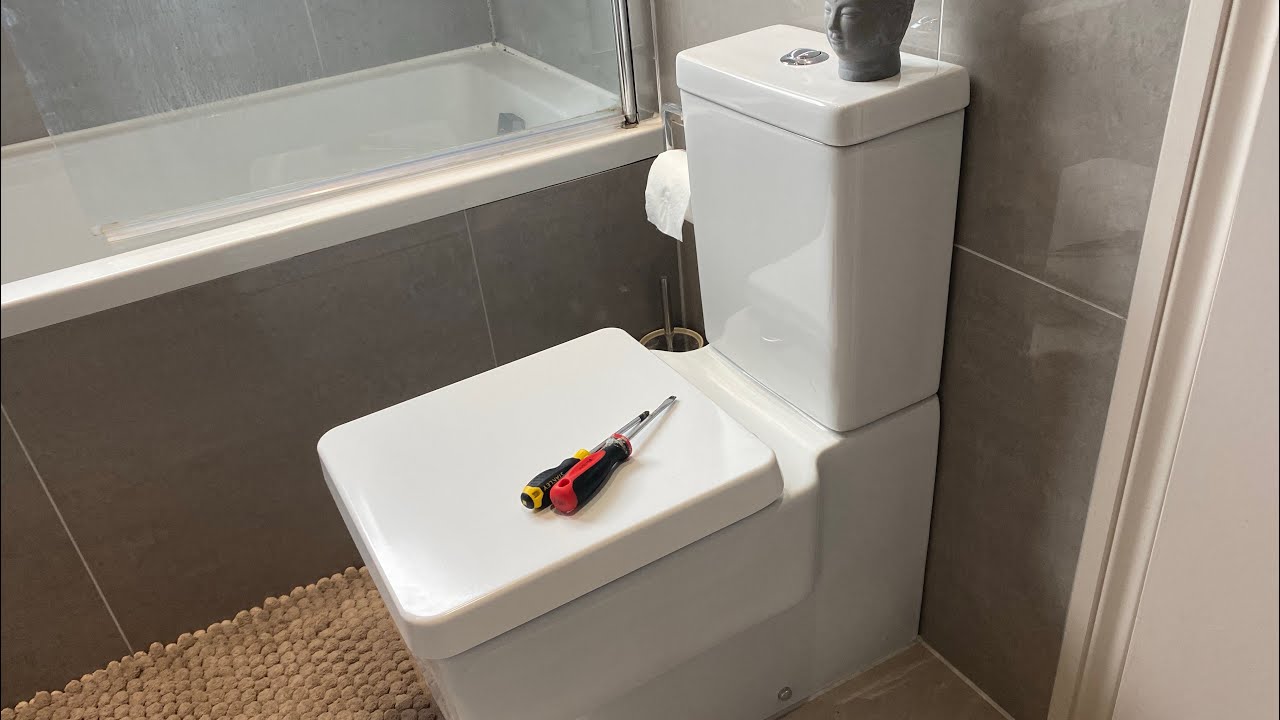
Before embarking on the task of tightening a loose toilet seat, it is essential to gather the appropriate tools to ensure a smooth and efficient process. Having the right tools at your disposal will not only simplify the task but also minimize the risk of causing damage to the toilet seat or the surrounding fixtures. Here are the essential tools you will need:
-
Adjustable Wrench: An adjustable wrench is a versatile tool that allows you to tighten or loosen nuts and bolts of various sizes. It is a crucial tool for securing the bolts that hold the toilet seat in place.
-
Screwdriver: Depending on the type of fasteners used to secure the toilet seat, you may need a flat-head or Phillips-head screwdriver. This tool is essential for accessing and tightening the screws or bolts that attach the seat to the toilet bowl.
-
Hex Key (Allen Wrench): Some modern toilet seats, particularly those with soft-close hinges, may utilize hex key fasteners. Having a set of hex keys of different sizes will enable you to tighten or adjust these specialized fasteners with precision.
-
Gloves: It is advisable to wear protective gloves, such as latex or rubber gloves, to safeguard your hands during the maintenance process. Gloves can also provide a better grip when handling tools and working in the potentially damp environment of the bathroom.
-
Clean Cloth or Paper Towels: Keeping a clean cloth or a roll of paper towels handy is useful for wiping away any accumulated grime, dust, or moisture around the toilet seat and its fasteners. This ensures a clean working environment and prevents debris from interfering with the tightening process.
By ensuring that you have these essential tools readily available, you can approach the task of tightening the toilet seat with confidence and efficiency. With the necessary tools in hand, you are now prepared to proceed to the next step of identifying the type of toilet seat and the specific tightening techniques required for each type.
Step 2: Identify the type of toilet seat
Before proceeding with the tightening process, it is crucial to identify the type of toilet seat you have, as different types require distinct tightening techniques. Understanding the specific features and fastening mechanisms of your toilet seat will enable you to apply the most effective method for securing it to the toilet bowl.
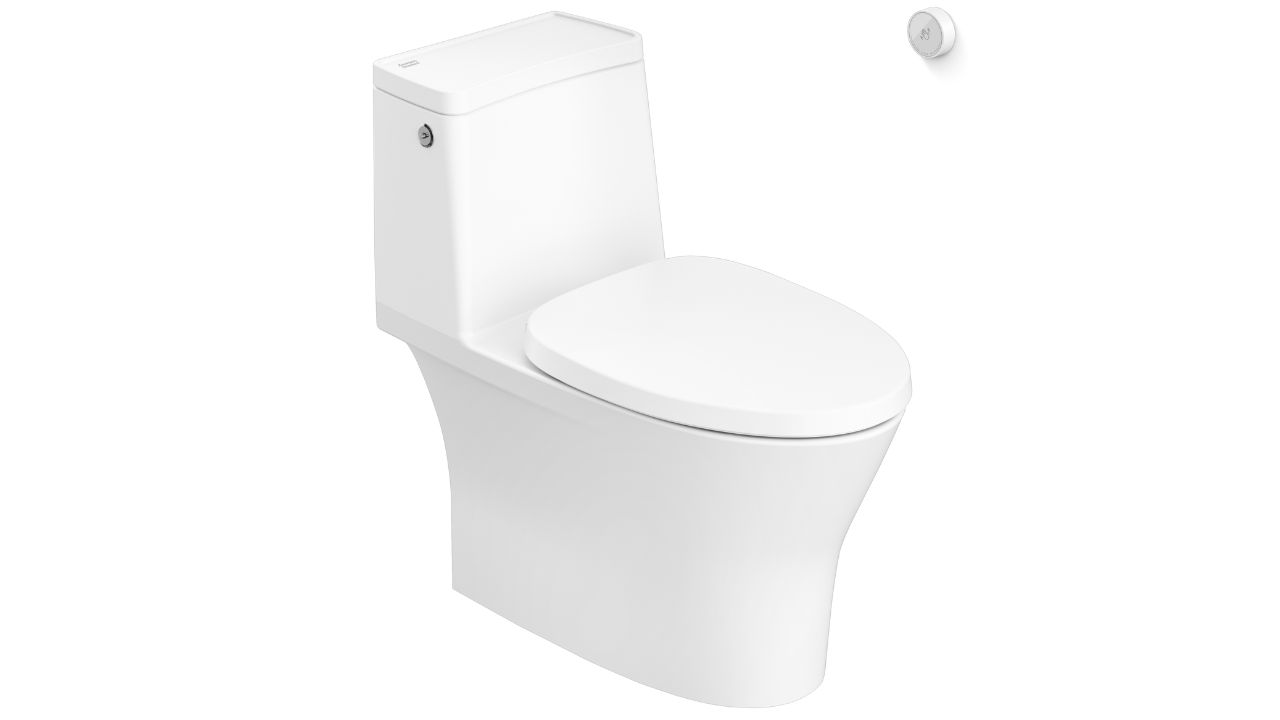
Standard Toilet Seat:
Standard toilet seats are typically secured to the toilet bowl with two bolts and nuts located at the rear underside of the seat. These bolts pass through the hinge holes on the toilet bowl and are fastened with nuts to hold the seat in place. Identifying a standard toilet seat is relatively straightforward, as it features a traditional design with visible hinge holes and exposed fasteners.
Soft-Close Toilet Seat:
Modern soft-close toilet seats are equipped with specialized hinges that allow for a slow and controlled closing motion, preventing slamming and reducing the risk of pinched fingers. These hinges may utilize different fastening mechanisms, such as quick-release buttons or hidden screws, to secure the seat to the toilet bowl. Soft-close toilet seats often have a sleek and streamlined appearance, with minimal visible hardware, making them easily distinguishable from standard seats.
By recognizing the specific characteristics of your toilet seat, you can proceed with the appropriate tightening method tailored to its design. Whether you have a standard toilet seat with visible bolts or a soft-close seat with concealed fasteners, understanding the unique features of your seat is the first step toward effectively addressing any looseness or instability.
Identifying the type of toilet seat you have sets the stage for the subsequent steps, allowing you to apply the correct tightening techniques and achieve a secure and stable fixture. With this essential knowledge in hand, you are now ready to move on to the specific tightening procedures tailored to each type of toilet seat.
Read more: How To Tighten A Toto Toilet Seat
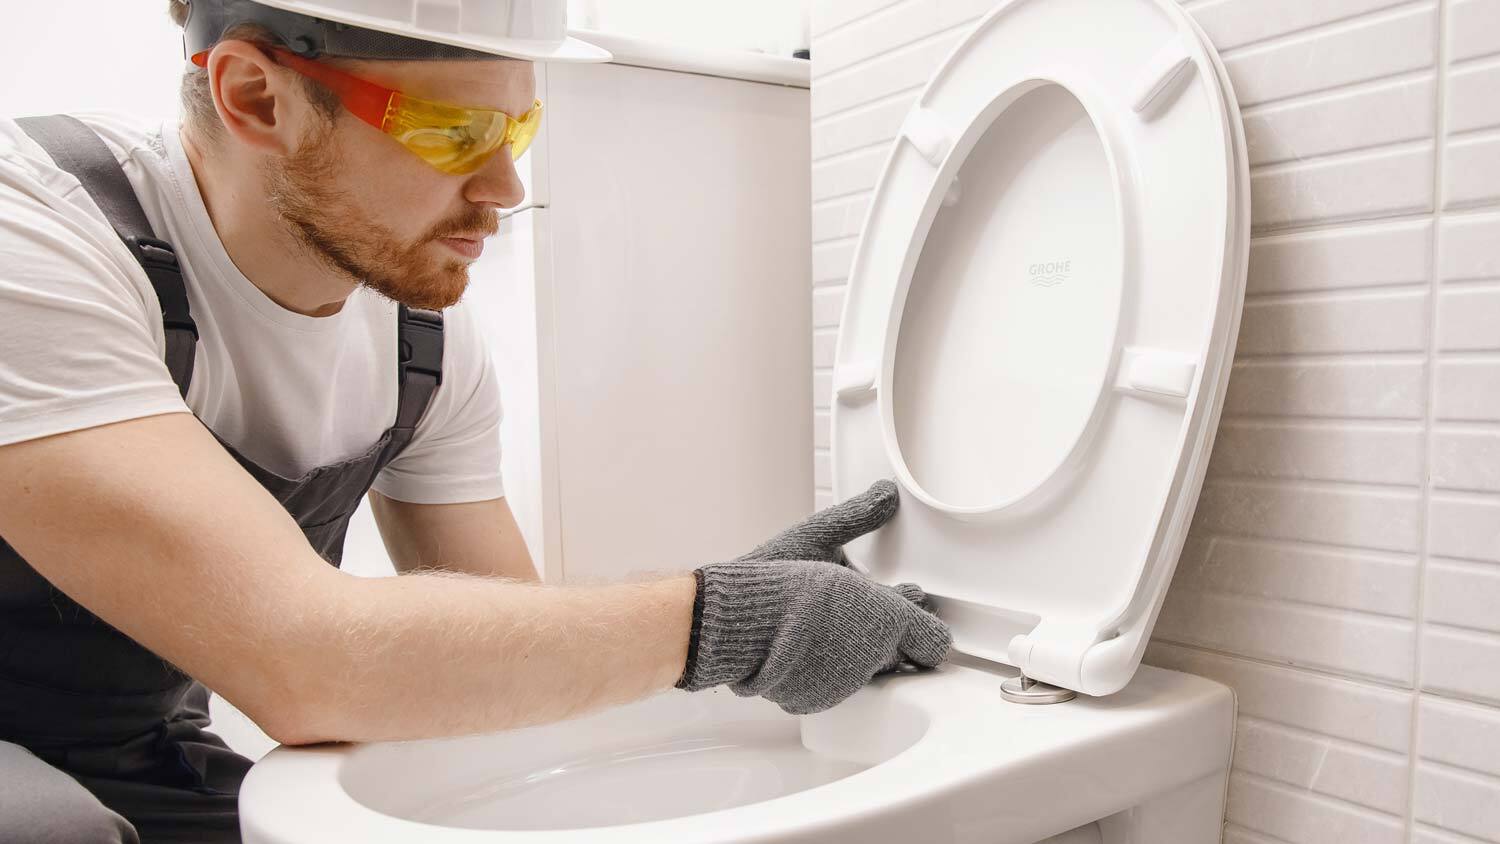
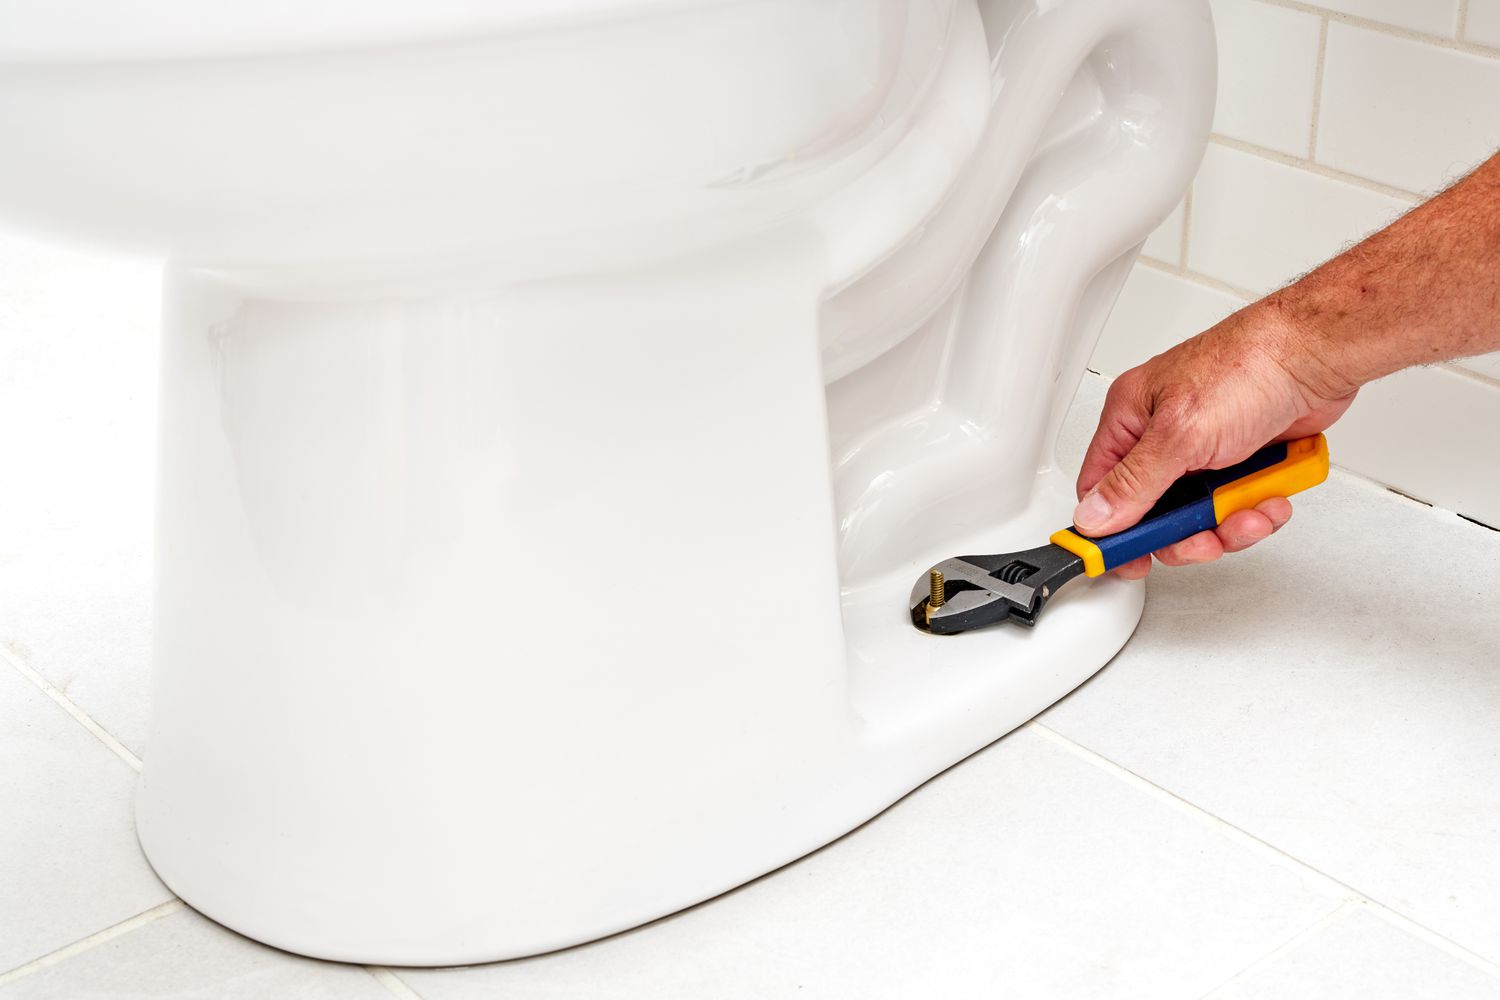
Step 3: Tighten the bolts on a standard toilet seat
Tightening the bolts on a standard toilet seat is a straightforward process that can effectively address any wobbliness or instability. By following the steps outlined below, you can ensure that your standard toilet seat is securely fastened to the toilet bowl, providing a stable and reliable fixture in your bathroom.
-
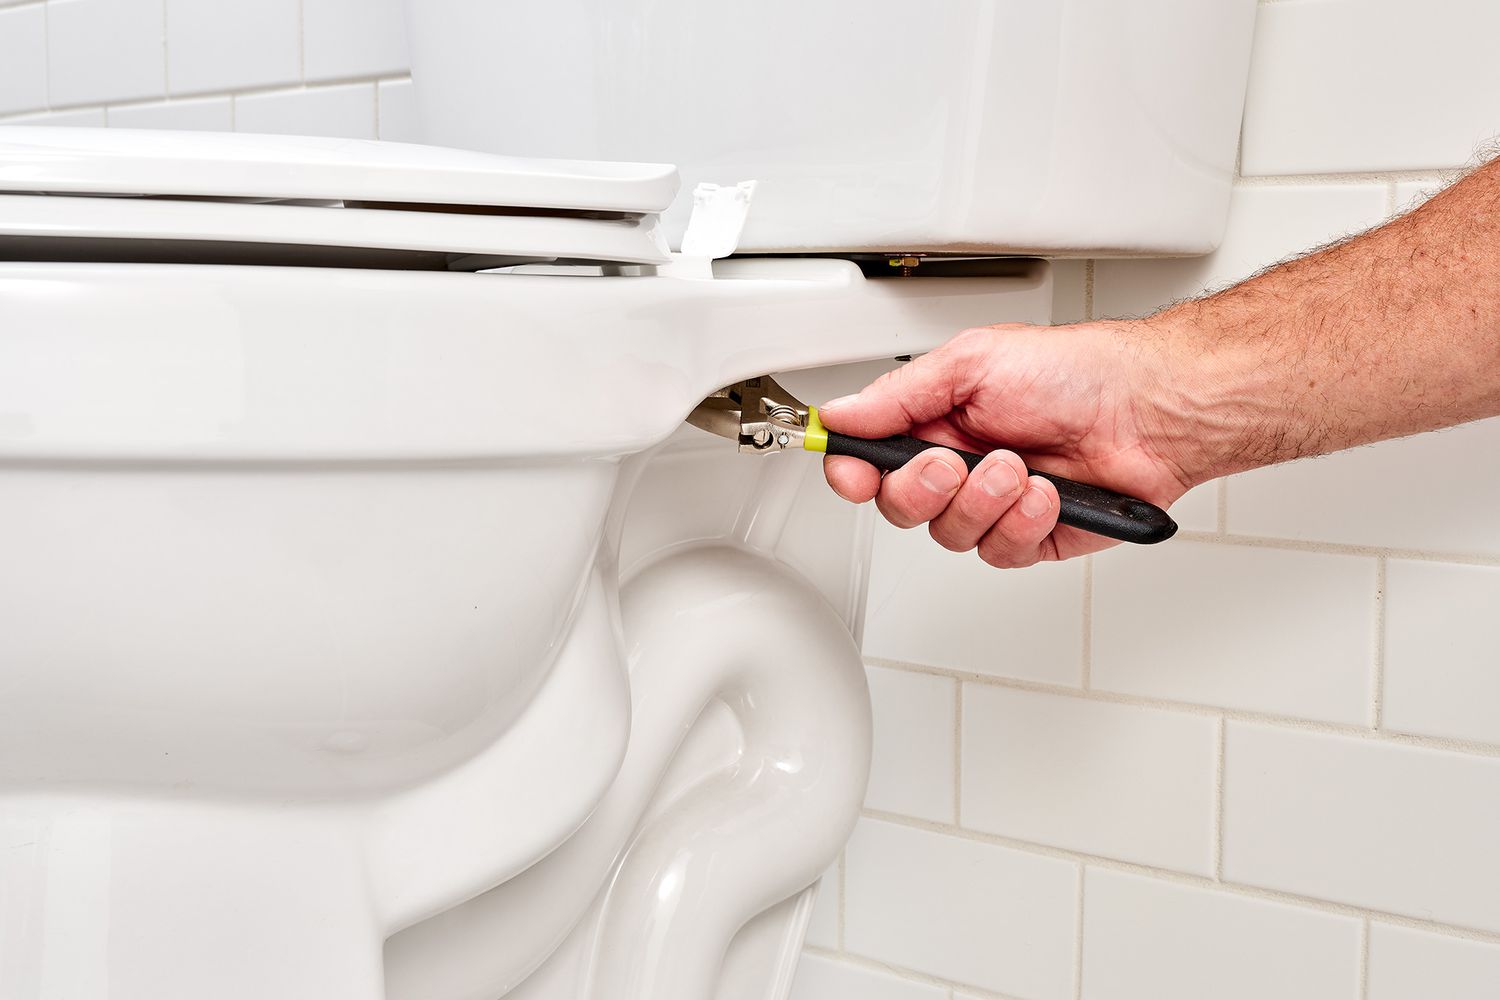
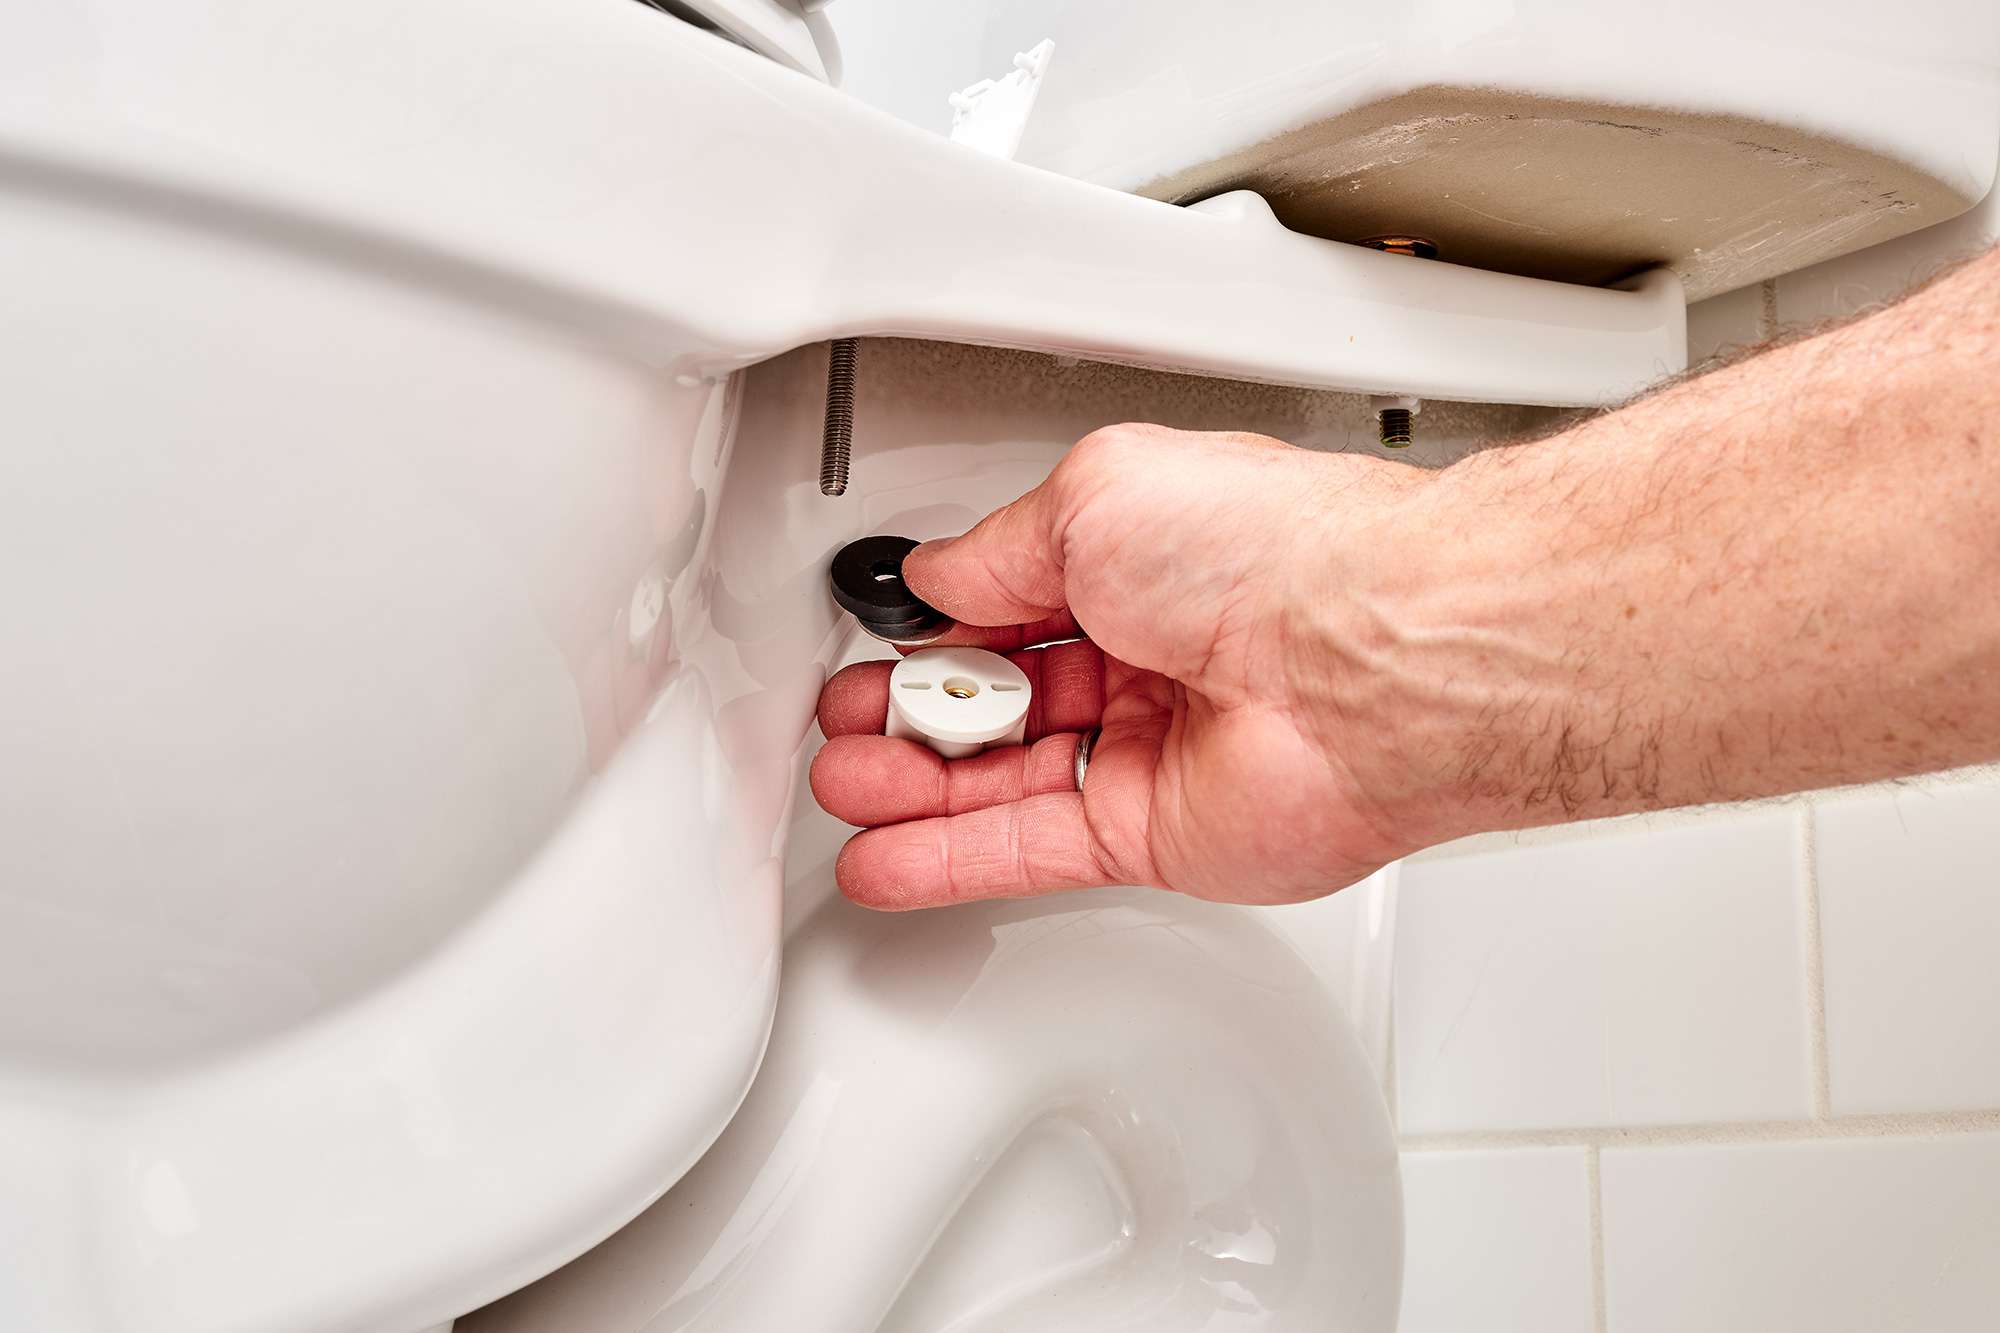
Locate the Bolts: Begin by lifting the seat and locating the bolts and nuts at the rear underside of the toilet bowl. These bolts are typically positioned near the hinges and are accessible once the seat is lifted into an upright position. Identify the specific points where the bolts pass through the hinge holes on the toilet bowl, as these are the areas that require tightening.
-
Secure the Nuts: Using an adjustable wrench, carefully tighten the nuts that secure the bolts in place. Turn the nuts in a clockwise direction to ensure a snug fit, taking care not to overtighten them, which could lead to damage or cracking of the toilet bowl. As you tighten the nuts, periodically check the stability of the seat to gauge the effectiveness of the adjustments.
-
Test for Stability: Once the nuts are adequately tightened, gently lower the toilet seat and test it for stability. Sit on the seat and apply slight pressure to assess whether it remains firmly in place without any wobbling or shifting. If the seat feels secure and stable, the tightening process has been successful. However, if there is still noticeable movement, revisit the bolts and nuts to ensure they are properly fastened.
-
Final Adjustments: If necessary, make minor adjustments to the tightness of the nuts to achieve the desired level of stability. It is important to strike a balance between securely fastening the seat and avoiding excessive force that could compromise the integrity of the toilet bowl or the seat itself.
By following these steps, you can effectively tighten the bolts on a standard toilet seat, restoring stability and ensuring a secure fixture in your bathroom. Regularly checking and maintaining the tightness of the bolts will help prevent future loosening, prolonging the lifespan of the toilet seat and enhancing the overall safety and comfort of your bathroom environment.
Step 4: Tighten the hinges on a soft-close toilet seat
Tightening the hinges on a soft-close toilet seat requires a slightly different approach compared to standard seats, as these modern fixtures often feature specialized mechanisms for securing the seat to the toilet bowl. Soft-close toilet seats are designed to provide a smooth and controlled closing action, minimizing noise and reducing the risk of accidental slams. To ensure that a soft-close toilet seat remains stable and wobble-free, it is essential to address any looseness in the hinges using the following steps:
-
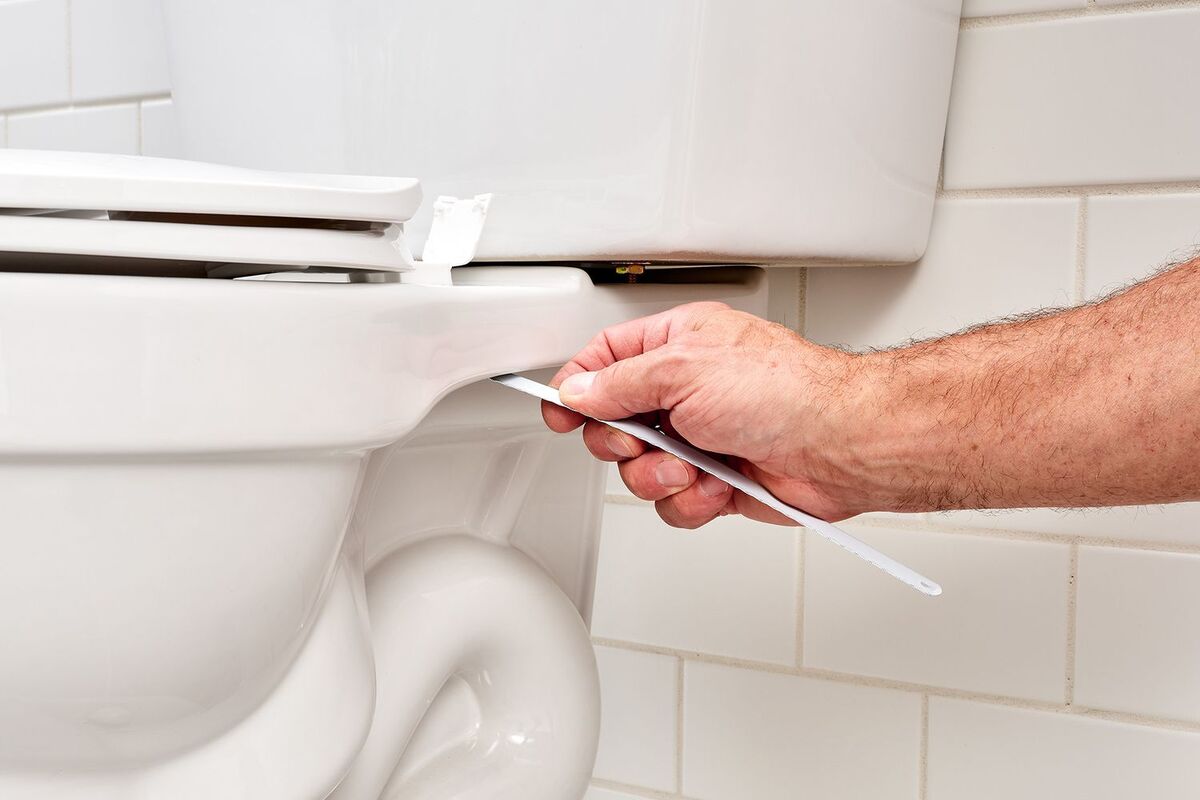
Access the Hinges: Soft-close toilet seats are designed with concealed hinges that may be located beneath protective covers or caps. These covers are typically positioned at the rear of the seat, and they can be gently lifted or removed to reveal the hinge mechanisms. Carefully lift the seat to access the hinges and identify the specific points where adjustments are needed.
-
Inspect the Fasteners: Once the hinges are accessible, inspect the fasteners securing the seat to the toilet bowl. Depending on the design of the soft-close seat, the fasteners may consist of screws, bolts, or specialized connectors. Use a screwdriver or a hex key, as appropriate, to check the tightness of the fasteners and identify any areas of looseness or movement.
-
Tighten the Fasteners: Using the appropriate tool, such as a screwdriver or a hex key, proceed to tighten the fasteners that secure the hinges to the toilet bowl. Apply gentle but firm pressure to ensure that the fasteners are securely in place. It is important to avoid over-tightening, as this could lead to damage or distortion of the hinge components.
-
Test for Stability: After tightening the fasteners, lower the toilet seat and test it for stability. Gently apply pressure to the seat to assess whether the hinges remain secure and free from wobbling or shifting. The soft-close mechanism should continue to function smoothly, and the seat should remain firmly in place without any noticeable movement.
-
Adjust as Needed: If any residual wobbliness or instability is detected, revisit the fasteners and make further adjustments as needed. It may be necessary to fine-tune the tightness of the fasteners to achieve the desired level of stability while ensuring that the soft-close feature operates as intended.
By following these steps, you can effectively tighten the hinges on a soft-close toilet seat, preserving its functionality and enhancing the overall comfort and convenience of your bathroom. Regular maintenance and periodic checks of the hinges will help prolong the lifespan of the soft-close seat and ensure a reliable and secure fixture in your home.
To tighten a toilet seat, use a screwdriver to tighten the bolts underneath the seat. Make sure the seat is centered and level before tightening.
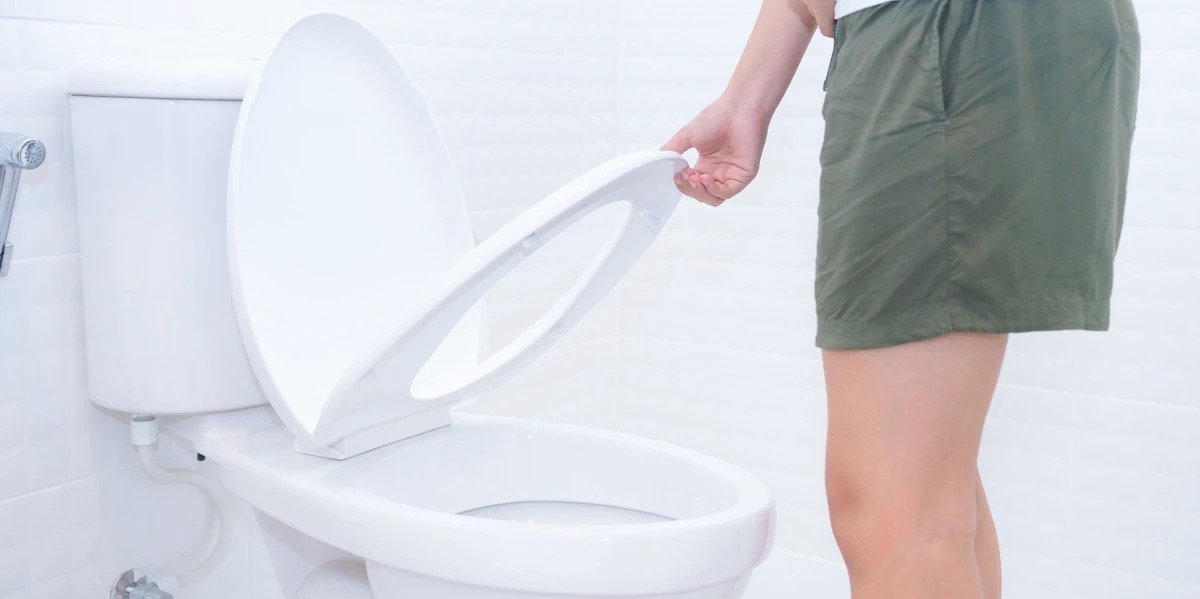
Step 5: Test the toilet seat for stability
After completing the tightening process for your toilet seat, it is crucial to perform a thorough stability test to ensure that the fixture is secure and wobble-free. Testing the toilet seat for stability not only validates the effectiveness of the tightening efforts but also provides peace of mind, knowing that the seat can withstand regular use without any issues. Here's how to conduct a comprehensive stability test for your toilet seat:
-
Visual Inspection: Begin by visually inspecting the entire toilet seat assembly. Check for any visible gaps between the seat and the toilet bowl, as well as any signs of misalignment or unevenness. Ensure that the seat is centered and properly aligned with the bowl, as this can impact its stability during use.
-
Physical Pressure Test: Apply gentle but deliberate pressure to different areas of the toilet seat, including the front, sides, and rear. Press down on the seat and gently shift your weight to simulate the typical movements and pressures experienced during normal use. Pay attention to any movement or shifting of the seat, as well as any creaking or unusual sounds that may indicate instability.
-
Side-to-Side Movement: Grasp the edges of the toilet seat and gently attempt to wiggle it from side to side. A stable and securely fastened seat should exhibit minimal to no lateral movement. If you detect any noticeable wobbling or shifting, it may indicate that the seat requires further tightening or adjustment.
-
Front-to-Back Movement: Similarly, test for front-to-back movement by applying pressure to the front and rear edges of the seat. The seat should remain firmly in place without any significant rocking or instability. If there is noticeable movement in either direction, it is essential to address the underlying cause, such as loose bolts or hinges.
-
Operational Check: If you have a soft-close toilet seat, test the functionality of the soft-close mechanism by gently lowering the seat and observing its controlled closing action. Ensure that the seat closes smoothly and quietly without any abrupt movements or resistance. The soft-close feature should continue to operate as intended, even after the tightening process.
-
Reassessment and Adjustment: If any instability or movement is detected during the stability test, revisit the specific areas that require attention. Re-tighten the bolts or hinges as needed, making incremental adjustments until the seat remains stable and secure during the stability test.
By conducting a comprehensive stability test, you can verify the effectiveness of the tightening process and address any remaining issues that may compromise the stability of the toilet seat. A stable and secure toilet seat not only enhances the comfort and safety of your bathroom but also contributes to a more enjoyable and hassle-free user experience for all occupants.
Conclusion
In conclusion, maintaining a stable and secure toilet seat is essential for ensuring the comfort, safety, and functionality of your bathroom. By following the step-by-step guidelines provided in this comprehensive guide, you can effectively address the common issue of a loose toilet seat, regardless of whether you have a standard or soft-close fixture.
The process begins with gathering the necessary tools, including an adjustable wrench, screwdriver, hex key, gloves, and a clean cloth or paper towels. These tools enable you to approach the task with confidence and precision, minimizing the risk of damage to the toilet seat or surrounding fixtures.
Identifying the type of toilet seat you have is the next crucial step, as it allows you to tailor the tightening techniques to the specific design and fastening mechanisms of your seat. Whether you have a standard toilet seat with visible bolts or a modern soft-close seat with concealed hinges, understanding the unique features of your fixture is essential for achieving a secure and stable result.
For standard toilet seats, the process involves locating and securing the bolts with an adjustable wrench, followed by thorough stability testing to ensure a firm and stable fit. On the other hand, tightening the hinges on a soft-close toilet seat requires accessing and inspecting the fasteners, followed by careful adjustments and a comprehensive stability test to validate the effectiveness of the tightening efforts.
The final step involves conducting a thorough stability test, encompassing visual inspection, physical pressure testing, and operational checks to ensure that the toilet seat remains stable and wobble-free during use. Any remaining issues are addressed through reassessment and further adjustments, ensuring a reliable and secure fixture in your bathroom.
By proactively addressing the issue of a loose toilet seat and maintaining its stability, you can create a more comfortable and user-friendly bathroom environment for yourself, your family, and your guests. Regular checks and maintenance of the toilet seat's tightness will help prevent future loosening, prolonging the lifespan of the fixture and minimizing the need for extensive repairs or replacements.
Incorporating these maintenance practices into your household routine will contribute to the overall well-being and functionality of your bathroom, allowing you to enjoy a secure and stable toilet seat for years to come. With the knowledge and skills gained from this guide, you are well-equipped to tackle this common household maintenance task with confidence and efficiency.
Frequently Asked Questions about How Do You Tighten A Toilet Seat
Was this page helpful?
At Storables.com, we guarantee accurate and reliable information. Our content, validated by Expert Board Contributors, is crafted following stringent Editorial Policies. We're committed to providing you with well-researched, expert-backed insights for all your informational needs.


0 thoughts on “How Do You Tighten A Toilet Seat”