Home>Articles>What To Look For In The Final Walkthrough Before Closing

Articles
What To Look For In The Final Walkthrough Before Closing
Modified: October 27, 2024
Discover the key elements to consider during the final walkthrough before closing. Explore this informative articles to ensure a smooth transition into your new home.
(Many of the links in this article redirect to a specific reviewed product. Your purchase of these products through affiliate links helps to generate commission for Storables.com, at no extra cost. Learn more)
Introduction
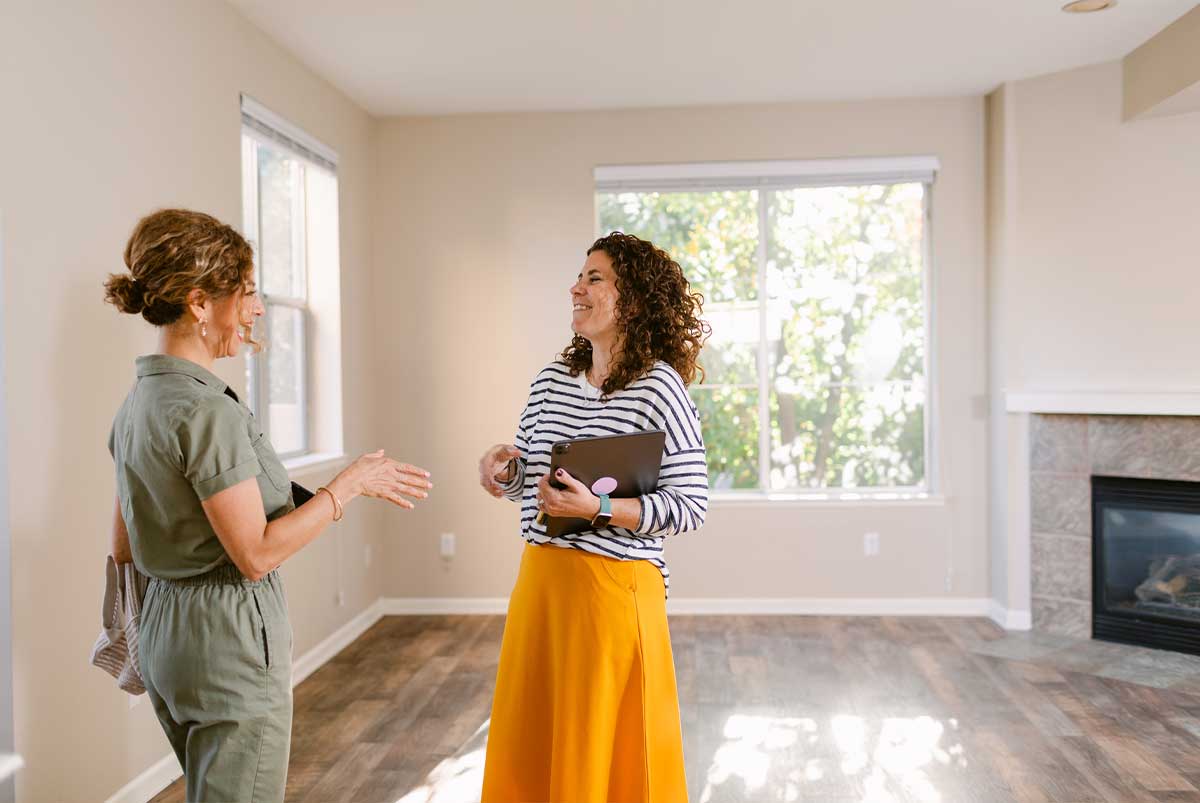
The final walkthrough is a crucial step in the home buying process. It is the buyer’s last opportunity to thoroughly inspect the property before closing the deal. The main objective of the final walkthrough is to ensure that the property is in the agreed-upon condition and that any requested repairs have been completed.
During the final walkthrough, buyers have the chance to assess the overall condition of the property and identify any last-minute issues or concerns. It is a chance to verify that everything is in working order and that there are no surprises waiting after the closing.
In this article, we will discuss what to look for in the final walkthrough to ensure a smooth and successful closing. From evaluating the exterior to inspecting the interior, we will cover all the important aspects that buyers need to consider. We will also highlight key tips for handling potential issues that may arise during this stage.
By understanding the purpose of the final walkthrough and being aware of what to look for, buyers can feel confident and informed during this crucial step. Let’s dive in and explore the key elements to consider during the final walkthrough process.
Key Takeaways:
- The final walkthrough is crucial for verifying repairs, assessing the property’s condition, and addressing last-minute concerns. Thorough inspection, effective communication, and documentation are essential for a successful closing.
- Buyers should pay attention to the exterior, interior, major systems, and potential issues during the final walkthrough. Bringing a trusted advisor, scheduling ample time, and trusting instincts can enhance the evaluation process.
Read more: What Is A Home Safety Walkthrough
Understanding the Purpose of the Final Walkthrough
The final walkthrough is an essential part of the home buying process. It serves multiple purposes that are crucial for both buyers and sellers. Let’s delve into these purposes in more detail:
– Verifying completed repairs and requested items: One of the main objectives of the final walkthrough is to ensure that any repairs or agreed-upon changes requested during the negotiation phase have been completed. Buyers should carefully inspect the property to confirm that all repairs have been made to their satisfaction. This includes checking that any items, such as appliances or fixtures, that were supposed to be repaired or replaced have been fulfilled.
– Assessing the overall condition of the property: The final walkthrough provides an opportunity for buyers to assess the general condition of the property before closing the deal. It is important to check for any unforeseen damage or issues that may have occurred since the last visit. This includes looking for signs of wear and tear, water damage, or any other potential problems.
– Identifying any last-minute issues or concerns: The final walkthrough allows buyers to catch any last-minute issues or concerns before closing on the property. This could include finding unexpected damages, leaks, or problems with major systems, such as HVAC or plumbing. By identifying these issues during the walkthrough, buyers can communicate with the seller and resolve any outstanding concerns before finalizing the transaction.
During the final walkthrough, buyers should take their time and thoroughly inspect every aspect of the property. It is advisable to bring a checklist or make notes to ensure that nothing is overlooked. Paying attention to details is crucial, as it can save buyers from future headaches and expenses.
In addition to the buyer’s responsibilities, sellers also have an important role during the final walkthrough. They should ensure that the property is in the agreed-upon condition and that all repairs and requested items have been completed as per the contract. Sellers should also be prepared to address any questions or concerns that arise during the walkthrough.
Overall, the purpose of the final walkthrough is to provide buyers with peace of mind and confidence in their purchase. By verifying completed repairs, assessing the overall condition of the property, and identifying any last-minute issues or concerns, buyers can move forward with closing the deal, knowing they have made an informed decision.
Exterior Evaluation
During the final walkthrough, it’s important to thoroughly inspect the exterior of the house. This includes checking the condition of the roof, siding, and landscaping, as well as assessing the functionality of doors, windows, and lighting fixtures. Let’s explore these aspects in more detail:
– Inspecting the exterior of the house: Start by taking a walk around the property to assess the overall condition. Look for any signs of damage, such as cracks in the walls, peeling paint, or loose bricks. Check for any visible structural issues that may need attention.
– Checking the condition of the roof, siding, and landscaping: The roof is one of the most critical components of a house. Look for any missing or damaged shingles, signs of leaks, or sagging areas. Examine the condition of the siding and ensure there are no signs of rot or pest damage. Take a close look at the landscaping, including the lawn and plants, and ensure they are well-maintained.
– Assessing the functionality of doors, windows, and lighting fixtures: Open and close all doors and windows to ensure they operate smoothly. Check for any cracks or damage in the glass and ensure that the window locks and handles are working properly. Test all the lights and fixtures to make sure they function as expected.
While evaluating the exterior, it’s important to pay attention to any potential safety hazards. Look for tripping hazards, such as cracked pavements or uneven steps. Check the condition of handrails and make sure they are secure. It’s also a good idea to verify the functionality of outdoor amenities, such as sprinkler systems or security lights.
Taking the time to carefully inspect the exterior during the final walkthrough can save you from unexpected surprises and costly repairs down the line. If you notice any concerns or issues, it’s important to communicate them with the seller or your real estate agent to ensure they are addressed before closing the deal.
Interior Inspection
One of the crucial aspects of the final walkthrough is inspecting the interior of the house. This involves checking each room for cleanliness and organization, testing electrical outlets, switches, and appliances, and assessing the plumbing system and water pressure. Let’s delve deeper into these considerations:
– Checking each room for cleanliness and organization: Start by walking through each room individually and take note of its cleanliness and organization. Ensure that the floors, walls, and ceilings are clean and in good condition. Look for any signs of damage, such as stains or cracks. Check that any agreed-upon repairs or changes have been completed.
– Testing electrical outlets, switches, and appliances: In each room, test all electrical outlets and switches to make sure they are functioning properly. Plug in a small electronic device, like a phone charger, to ensure there is power. Test light switches to ensure they control the appropriate lights. If appliances were included in the sale, such as the refrigerator or oven, make sure they are in good working order.
– Assessing the plumbing system and water pressure: Turn on all faucets, showers, and toilets to check for any leaks or issues with water flow. Assess the water pressure to ensure it’s adequate throughout the house. Check under sinks and around toilets for any signs of water damage or leaks. Flush toilets and listen for any unusual sounds or running water.
During the interior inspection, pay attention to any signs of mold or mildew. Look for water stains on walls or ceilings that may indicate a previous or ongoing issue. Check for any signs of pests, such as droppings or damaged woodwork.
It’s also essential to assess the functionality of the heating, ventilation, and air conditioning (HVAC) system. Test the thermostat to ensure proper temperature control and regulate the airflow. Listen for any unusual sounds or odors coming from the HVAC system.
By thoroughly inspecting the interior of the house, you can identify any potential issues or concerns before closing the deal. If any problems arise during the final walkthrough, discuss them with the seller or your real estate agent to ensure they are addressed promptly. Remember to document any deficiencies or concerns with detailed notes and photographs for future reference.
Reviewing Major Systems
During the final walkthrough, it’s crucial to review the major systems of the house to ensure they are in proper working condition. This includes evaluating the HVAC system, testing smoke detectors and carbon monoxide alarms, and checking the condition of the water heater and ventilation systems. Let’s explore these considerations in more detail:
– Evaluating the HVAC system for proper functioning: Test the heating and cooling systems to ensure they are operating effectively. Adjust the thermostat to verify that the temperature changes accordingly. Listen for any unusual noises and check for any signs of leaks. If possible, review any maintenance records to ensure that the HVAC system has been properly maintained.
– Testing smoke detectors and carbon monoxide alarms: It’s essential to check that all smoke detectors and carbon monoxide alarms are functioning correctly. Press the test button on each device to ensure it triggers the alarm. Replace the batteries if needed, ensuring that they are fresh and working properly. Review the location of these devices to ensure they are installed in the recommended areas.
– Checking the condition of the water heater and ventilation systems: Inspect the water heater for any signs of damage or leaks. Look for rust or corrosion and ensure that the pressure relief valve is functioning correctly. Test the hot water faucets to ensure that the water is heated satisfactorily. Assess the ventilation systems in bathrooms and the kitchen to ensure that they are properly working and removing steam, odors, and smoke.
Reviewing the major systems of the house is vital to ensure that they are in good condition and meet your expectations. These systems play a crucial role in maintaining comfort, safety, and efficiency within the home. If any concerns or issues arise during your inspection, it’s important to address them with the seller or your real estate agent to ensure they are resolved prior to closing.
Additionally, it’s always a good idea to gather any documentation related to the maintenance and servicing of these systems. This includes records of HVAC maintenance, inspections of smoke detectors and carbon monoxide alarms, and any warranties or guarantees associated with major systems.
By thoroughly reviewing and evaluating the major systems of the house, you can have peace of mind knowing that they are functioning properly and ready for use upon closing on the property.
Read more: What Is The Final Completion In Construction
Verifying Repairs and Agreement Fulfillment
One of the essential aspects of the final walkthrough is to verify that any requested repairs and agreed-upon changes have been completed. This includes reviewing any warranties or guarantees provided by the seller and confirming the inclusion of all agreed-upon fixtures and appliances. Let’s explore these considerations in more detail:
– Ensuring that requested repairs and agreed-upon changes have been completed: Prior to the final walkthrough, buyers may have requested repairs or changes to be made as part of the negotiation process. It’s crucial to ensure that these repairs and changes have been fully addressed and completed to your satisfaction. Carefully inspect the areas or items that were in need of repair or replacement to confirm that they have been resolved accordingly.
– Reviewing any warranties or guarantees provided by the seller: Sellers may offer warranties or guarantees on specific components of the house. For example, they may provide a warranty on the roof, appliances, or HVAC system. During the final walkthrough, review the terms and conditions of these warranties to understand your rights and responsibilities as the new owner. It’s also a good practice to ask the seller for any relevant documentation or paperwork associated with these warranties.
– Confirming the inclusion of all agreed-upon fixtures and appliances: Ensure that all agreed-upon fixtures and appliances are present and in the expected condition. This includes items such as light fixtures, ceiling fans, window treatments, and kitchen appliances. Check that they are functional and match the description in the sales contract. If any items are missing or not as agreed upon, address the issue with the seller or your real estate agent to seek a resolution or compensation.
During this stage, it’s important to have a copy of the sales contract and any related documents readily available. Review the contract to refresh your memory on the specific details of the agreed-upon repairs, changes, or included fixtures and appliances. Compare the contract with the current condition of the property to ensure that all aspects are fulfilled as per the agreement.
By verifying repairs, reviewing warranties, and confirming the inclusion of agreed-upon items, you can have confidence that the terms of the sales contract have been met. This step ensures transparency and protects your interests as the buyer. If any discrepancies or concerns arise during the final walkthrough, discuss them with the seller or your real estate agent to come to a resolution before closing on the property.
Check for any repairs or agreed-upon changes from the inspection. Test all appliances, lights, and faucets. Look for any new damages or issues.
Spotting Potential Issues or Concerns
During the final walkthrough, it’s important to be vigilant and spot any potential issues or concerns that may exist within the property. This includes looking for water damage, leaks, or signs of pests, checking for any structural issues or cracks in walls and ceilings, and investigating any suspicious odors or mold growth. Let’s explore these considerations in more detail:
– Looking for water damage, leaks, or signs of pests: Inspect each room for any signs of water damage, such as stains or discoloration on walls or ceilings. Check around windows, doors, and plumbing fixtures for any signs of leaks. Look for evidence of pests, such as droppings, chewed wires or wood, or insect activity. Pay extra attention to areas susceptible to water damage, such as bathrooms, basements, and areas near plumbing fixtures.
– Checking for any structural issues or cracks in walls and ceilings: Carefully examine the walls and ceilings for any cracks, bulging, or sagging. These could indicate potential structural issues that need attention. Look for signs of previous repairs or renovations that may not have been properly completed. Pay attention to the stability of doors and windows and ensure they open and close smoothly.
– Investigating any suspicious odors or mold growth: Take note of any unusual or strange odors throughout the property. This could indicate underlying issues, such as water damage, mold, or other concerns. Investigate the source of the odor and determine if further action is needed. Additionally, keep an eye out for any mold growth, especially in areas prone to moisture, such as bathrooms or basements. Mold growth can have health implications and should be addressed promptly.
If you identify any potential issues or concerns during the final walkthrough, it’s important to communicate them with the seller or your real estate agent. They can help address these issues or provide clarification before closing on the property. It’s essential to document any findings with detailed notes and photographs for future reference or potential disputes.
Remember, the final walkthrough is your last chance to identify any hidden issues before you become the owner of the property. By being thorough and observant, you can ensure that any potential problems are addressed and resolved to your satisfaction.
Documenting Findings
During the final walkthrough, it’s crucial to document any findings or concerns to ensure clarity, transparency, and protection for all parties involved. This includes taking detailed notes and photographs of any deficiencies, communicating any issues to the seller or real estate agent, and keeping a record for future reference or potential disputes. Let’s explore these considerations in more detail:
– Taking detailed notes and photographs of any deficiencies or concerns: As you go through the property, it’s important to take thorough notes of any deficiencies or concerns you come across. These notes should include specific details, such as the location of the issue, the nature of the problem, and any relevant observations. Be as specific as possible to ensure a clear record of the issues. Additionally, take photographs to visually capture the conditions and provide supporting evidence.
– Communicating any issues to the seller or real estate agent: If you identify any significant issues or concerns during the final walkthrough, it’s important to communicate them promptly to the seller or your real estate agent. Clearly articulate the problems and provide supporting documentation to ensure a comprehensive understanding of the issues. Effective communication ensures that the seller is made aware of any potential concerns and allows for discussions on how to address them.
– Keeping a record for future reference or potential disputes: It’s essential to keep a detailed record of all the findings, discussions, and actions taken during the final walkthrough. This record serves as a reference point for any potential future disputes or clarifications. It can also be beneficial for tracking the progress of repairs or changes that were agreed upon during the negotiations. By maintaining a well-documented record, you can protect your interests and have evidence to refer back to if needed.
Having comprehensive documentation of the final walkthrough helps establish a clear understanding of the condition of the property at the time of the sale. It safeguards both the buyer and the seller, ensuring transparency and reducing the risk of miscommunication or disagreements. Keep your documentation in a safe place so that it can be easily accessed if required in the future.
By taking detailed notes, capturing photographs, effectively communicating any issues, and maintaining a record, you can ensure a smooth and well-documented final walkthrough process. This attention to detail not only provides peace of mind but also helps in resolving any potential disputes that may arise down the line.
Conclusion
The final walkthrough is a crucial step in the home buying process. It offers buyers the opportunity to verify that the property is in the agreed-upon condition, all repairs have been completed, and there are no last-minute issues or concerns. By following a systematic approach during the final walkthrough, buyers can ensure a smooth and successful closing.
Throughout the process, it is important to understand the purpose of the final walkthrough, which includes verifying completed repairs, assessing the overall condition of the property, and identifying any last-minute issues or concerns. By being thorough and diligent, buyers can address any potential problems before closing, giving them confidence in their purchase decision.
Inspecting the exterior and interior of the house is an essential part of the final walkthrough. By evaluating the condition of the roof, siding, and landscaping, as well as testing electrical outlets, switches, and appliances, buyers can ensure functionality and identify any deficiencies. Assessing the plumbing system, major systems such as HVAC, smoke detectors, and carbon monoxide alarms, and confirming the fulfillment of repairs and agreements further ensures a comprehensive evaluation of the property.
During the final walkthrough, it’s also crucial to be vigilant and spot any potential issues or concerns. This includes looking for water damage, leaks, signs of pests, checking for structural issues or cracks in walls and ceilings, as well as investigating suspicious odors or mold growth. By addressing these issues before closing, buyers can avoid potential headaches and expenses in the future.
Documenting findings during the final walkthrough is paramount. Taking detailed notes, capturing photographs of deficiencies or concerns, communicating any issues with the seller or real estate agent, and keeping a record for future reference or potential disputes provides a transparent and well-documented account of the property’s condition.
In conclusion, the final walkthrough is a critical step in the home buying process that should not be overlooked. By understanding its purpose, thoroughly inspecting the property, verifying repairs, and documenting findings, buyers can ensure a smooth closing and have peace of mind in their new home. It’s always advisable to consult with a professional, such as a home inspector or real estate agent, to provide guidance and expertise throughout the final walkthrough process.
Read more: What Is A Closed Basement
Additional Tips for the Final Walkthrough
In addition to the key considerations mentioned earlier, here are some additional tips to keep in mind for a successful final walkthrough:
1. Bring a trusted advisor: Consider bringing along a trusted advisor, such as a home inspector or experienced friend/family member, who can provide an unbiased opinion and help you identify any potential issues or concerns.
2. Schedule ample time: Allocate enough time for the final walkthrough to thoroughly inspect the property. Rushing through the process may lead to overlooking important details.
3. Check all utilities: Ensure that all utilities, including water, electricity, and gas, are turned on during the final walkthrough. This will allow you to test all systems and confirm their functionality.
4. Test security features: If the property has security features, such as an alarm system or surveillance cameras, make sure to test them and ensure they are in proper working condition.
5. Open and close all doors and windows: Test all doors and windows to ensure they open and close smoothly. Look for any signs of damage, such as cracks, rot, or broken locks.
6. Ask about maintenance history: Inquire about the maintenance history of major systems, appliances, and other features included in the sale. Understanding the maintenance and care given to these components can provide valuable insights into their condition.
7. Take note of emergency shut-off locations: Familiarize yourself with the location of shut-off valves for water, gas, and electricity. Knowing how to quickly shut off these utilities can be crucial in emergency situations.
8. Pay attention to neighborhood surroundings: Take a walk around the neighborhood during the final walkthrough. Look for any potential factors that may impact your quality of life, such as noisy neighbors, busy streets, or proximity to commercial areas.
9. Consider a second visit: If there were significant issues or concerns identified during the first visit, consider scheduling a second visit before the final walkthrough to ensure that they have been properly addressed.
10. Trust your instincts: Lastly, trust your instincts during the final walkthrough. If something doesn’t feel right or raises a red flag, don’t hesitate to ask questions and seek clarification. It’s better to address any concerns upfront rather than regretting later.
Remember, the final walkthrough is your last opportunity to thoroughly inspect the property before closing. By following these additional tips and being thorough in your evaluation, you can ensure that you are making an informed decision and that the property meets your expectations.
Final Thoughts
The final walkthrough is a critical step in the home buying process that should not be taken lightly. It provides buyers with the opportunity to verify the condition of the property, ensure that repairs have been completed, and address any last-minute concerns or issues. By following the steps outlined in this article and paying attention to the additional tips, you can approach the final walkthrough with confidence and thoroughness.
Remember, the final walkthrough is not just about ticking off a checklist of items; it’s about fully evaluating the property and ensuring it meets your expectations. Take your time during the walkthrough, carefully inspecting each aspect of the exterior and interior. Document any deficiencies or concerns with detailed notes and photographs and communicate them to the seller or real estate agent.
Effective communication is key during the final walkthrough. If you discover any issues, promptly address them with the seller or your real estate agent to come to a resolution. Keep a record of all discussions, agreements, and actions taken during the walkthrough for future reference or potential disputes.
While the final walkthrough is important, it’s essential to remember that it’s not meant to be a substitute for a professional home inspection. It is still advisable to engage the services of a qualified home inspector to thoroughly evaluate the property’s condition and identify any underlying issues that may not be apparent during the walkthrough.
By approaching the final walkthrough with diligence, attention to detail, and a willingness to ask questions, you can minimize surprises and ensure a smooth transition into your new home. It is an opportunity to clarify expectations, review agreements, and address any concerns before the transaction is finalized.
Ultimately, the final walkthrough should provide you with the peace of mind that you are making an informed decision and that the property meets your standards. By utilizing the information and tips provided in this article, you can optimize the final walkthrough process and confidently move forward with closing on your new home.
Frequently Asked Questions about What To Look For In The Final Walkthrough Before Closing
Was this page helpful?
At Storables.com, we guarantee accurate and reliable information. Our content, validated by Expert Board Contributors, is crafted following stringent Editorial Policies. We're committed to providing you with well-researched, expert-backed insights for all your informational needs.


0 thoughts on “What To Look For In The Final Walkthrough Before Closing”