Articles
Who Fixes Siding On House
Modified: February 23, 2024
Looking for expert articles on who fixes siding on house? Find all the information you need to restore and maintain your siding with our comprehensive guides and tips.
(Many of the links in this article redirect to a specific reviewed product. Your purchase of these products through affiliate links helps to generate commission for Storables.com, at no extra cost. Learn more)
Introduction
Having a well-maintained exterior is crucial for any homeowner. It not only enhances the curb appeal of your house but also provides protection against the elements. One of the key components of the exterior is the siding. Siding not only adds aesthetic value to your home but also serves as a protective barrier against moisture, wind, and other external factors.
However, over time, siding can become damaged or worn out. It’s important to address these issues promptly to prevent further damage and maintain the overall integrity of your home. But who should you call when the siding on your house needs fixing? In this article, we will explore the different options available for fixing siding damage and guide you through the process.
Key Takeaways:
- Promptly addressing siding damage is crucial for maintaining the integrity of your home’s exterior. Regular inspections, proper maintenance, and timely repairs can prevent extensive damage and costly replacements.
- Whether hiring a professional contractor or tackling repairs yourself, prioritizing safety, attention to detail, and following manufacturer’s recommendations are essential for successful siding repair and maintenance.
Read more: How To Fix Siding On House
Understanding Siding Damage
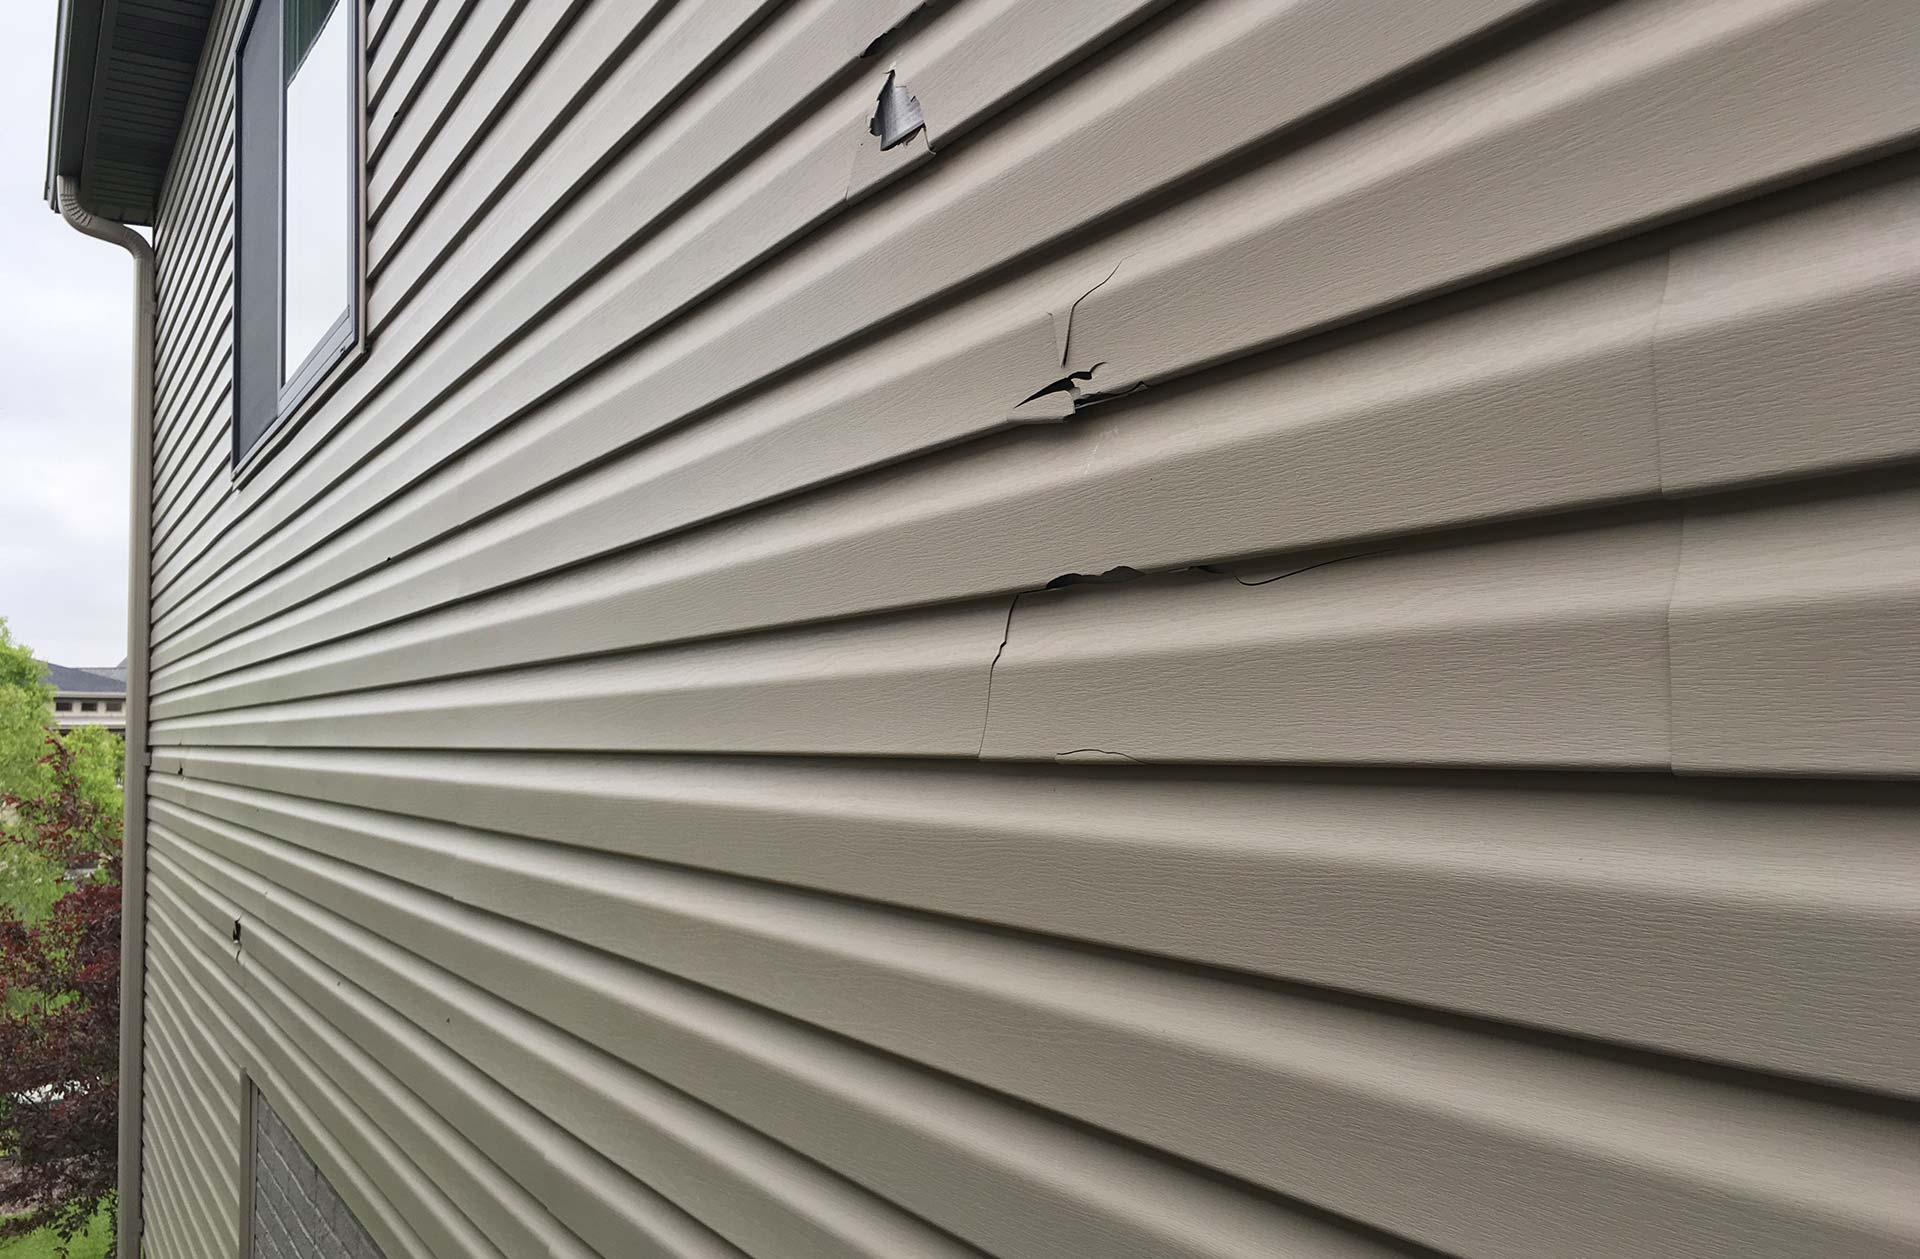
Siding damage can occur for various reasons, including severe weather conditions, improper installation, age, and regular wear and tear. Understanding the different types of siding damage can help you identify issues early on and take necessary actions to rectify them.
Some common types of siding damage include:
- Cracks: Cracks can occur due to impact or as a result of temperature fluctuations. They can range from small hairline cracks to larger, more significant cracks.
- Warping: Warping typically happens when moisture penetrates the siding material, causing it to expand and contract. This can result in a warped appearance that affects both the aesthetics and functionality of the siding.
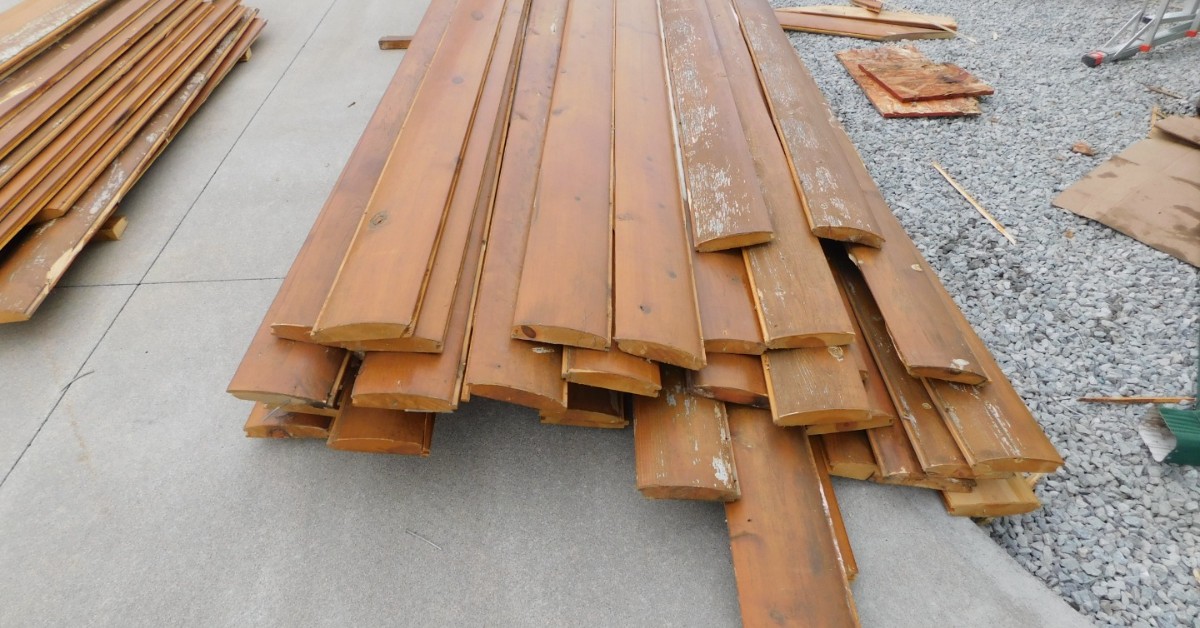
- Rot: Certain siding materials, such as wood, are more prone to rotting over time if not properly maintained. Rot can compromise the structural integrity of the siding and may require immediate attention.
- Mold and Mildew: Excessive moisture can lead to the growth of mold and mildew on the siding surface. Besides being unattractive, mold and mildew can pose health risks and should be dealt with promptly.
- Fading and Discoloration: Over time, exposure to sunlight and other environmental factors can cause siding to fade and lose its original color. This not only affects the visual appeal of your home but can also indicate weathering and aging of the material.
It’s important to inspect your siding regularly for signs of damage. By being proactive, you can prevent minor issues from escalating into bigger problems that may require extensive repairs or even replacement.
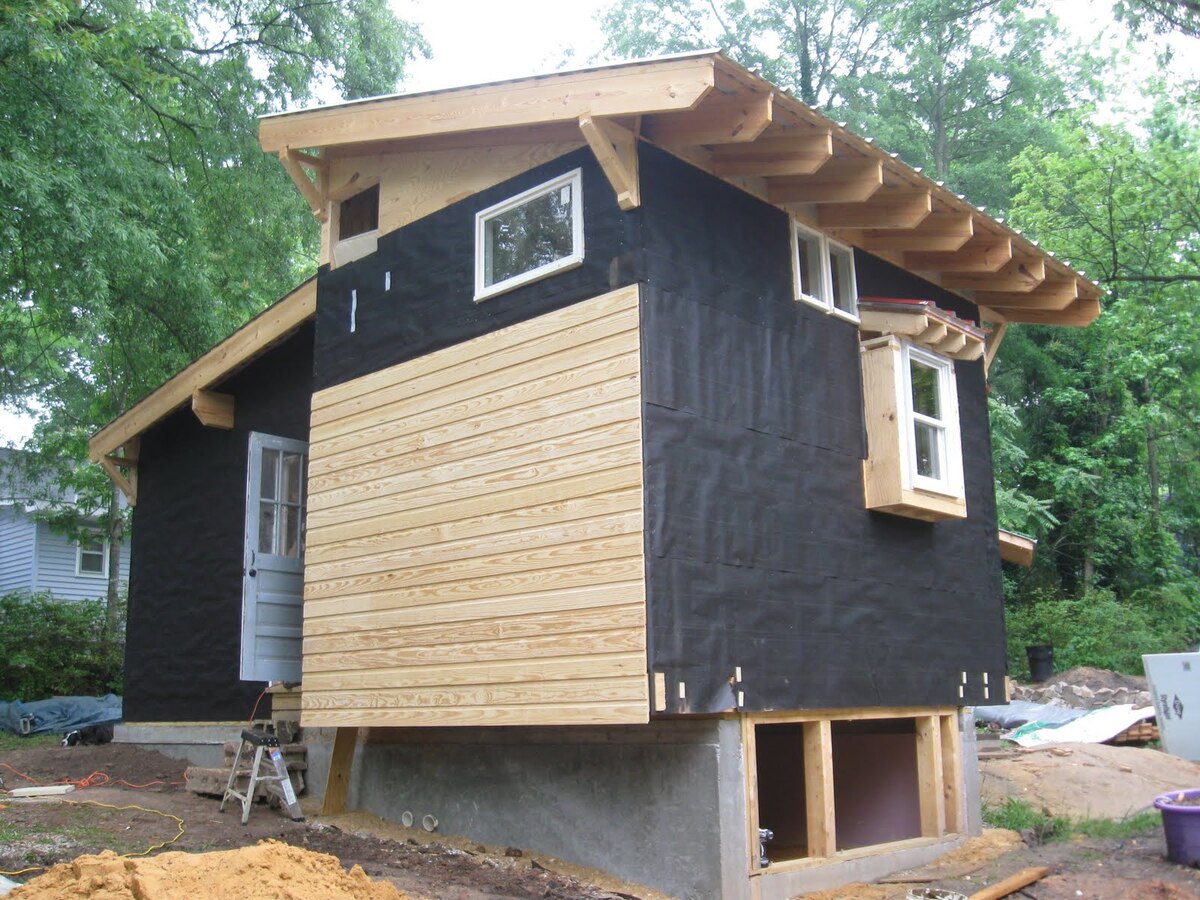
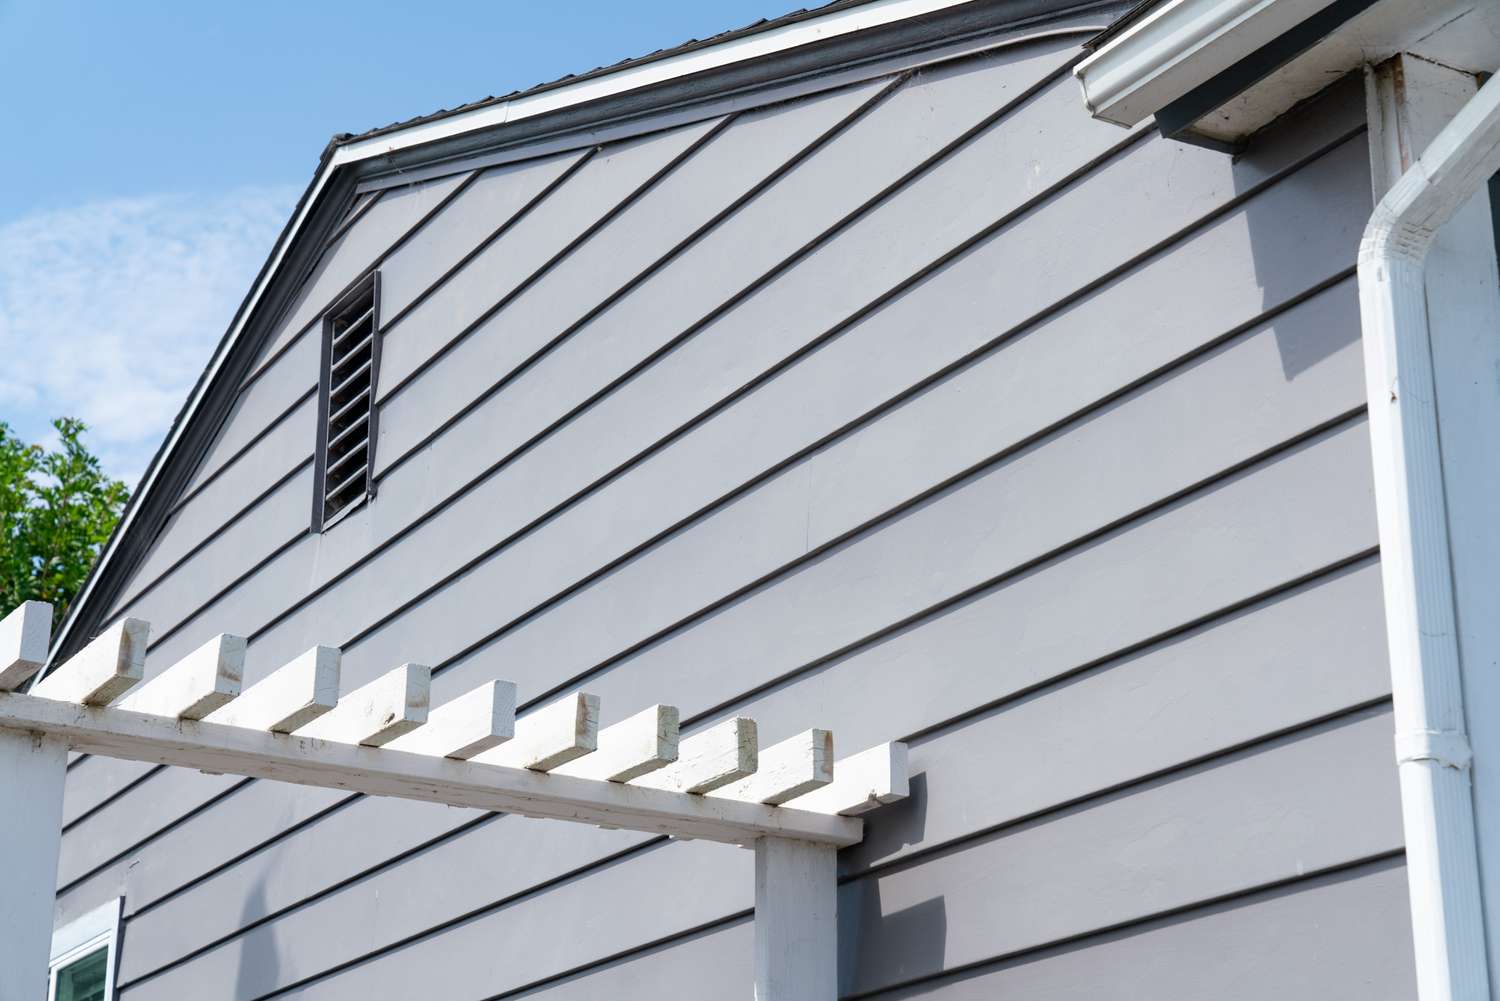
Types of Siding Materials
When it comes to siding repair or replacement, there are various types of materials available. Each material has its own set of advantages and considerations, so it’s essential to choose the right one for your specific needs and preferences. Let’s take a closer look at some of the most common siding materials:
- Vinyl Siding: Vinyl siding is a popular choice due to its affordability, durability, and low maintenance requirements. It is available in a wide range of colors and styles, making it versatile and customizable for different architectural designs.
- Wood Siding: Wood siding provides a natural and timeless look. It offers excellent insulation properties and can be painted or stained to achieve the desired aesthetic. However, it requires regular maintenance to protect against rot, pests, and weathering.
- Fiber Cement Siding: Fiber cement siding is a durable and long-lasting option. It is resistant to rot, fire, and insects, making it a popular choice for homeowners looking for low-maintenance siding. Additionally, it can mimic the appearance of wood or other materials.
- Aluminum Siding: Aluminum siding is known for its durability and resistance to fire. It is lightweight and offers superior weather resistance. However, it may dent easily and can be prone to oxidation if not properly maintained.
- Brick and Stone Veneer: Brick and stone veneer siding provide a sophisticated and luxurious look to your home. They offer durability and exceptional resistance to weather conditions. However, they can be more expensive and require professional installation.
Before making a decision, consider factors such as budget, maintenance requirements, climate, and architectural style. It’s also advisable to consult with a professional siding contractor who can assess your specific needs and recommend the most suitable siding material for your home.
Signs of Siding Problems
Identifying signs of siding problems early on can help prevent further damage and save you from expensive repairs. Here are some common indications that your siding may require attention:
- Cracks or Gaps: Cracks or gaps in the siding can allow moisture to seep in, leading to potential water damage and mold growth. Inspect your siding for any visible cracks or gaps, especially around windows, doors, and corners.
- Warping or Buckling: If your siding appears warped or buckled, it may indicate moisture issues and compromised structural integrity. This could be a result of improper installation, moisture infiltration, or other underlying issues.
- Peeling or Chipped Paint: If your siding has paint that is peeling or chipped, it’s a sign that the protective layer has deteriorated. This can make the siding more vulnerable to damage and should be addressed promptly.
- Mold or Mildew Growth: The presence of mold or mildew on your siding indicates excessive moisture retention. This could be due to poor ventilation or water infiltration, which should be investigated and resolved to prevent further damage and potential health risks.
- Faded or Discolored Siding: Over time, siding materials can fade or become discolored due to exposure to sunlight and harsh weather conditions. While this may be purely aesthetic, it can also indicate aging or damage to the siding material itself.
- Higher Energy Bills: If you notice a significant increase in your energy bills, it could be a sign that your siding is not providing adequate insulation. Damaged or poorly insulated siding can allow air leakage, making your heating and cooling systems work harder.
Regularly inspect your siding for these signs and take immediate action if you notice any issues. Timely repairs or maintenance can help extend the lifespan of your siding and protect your home from potential damage.
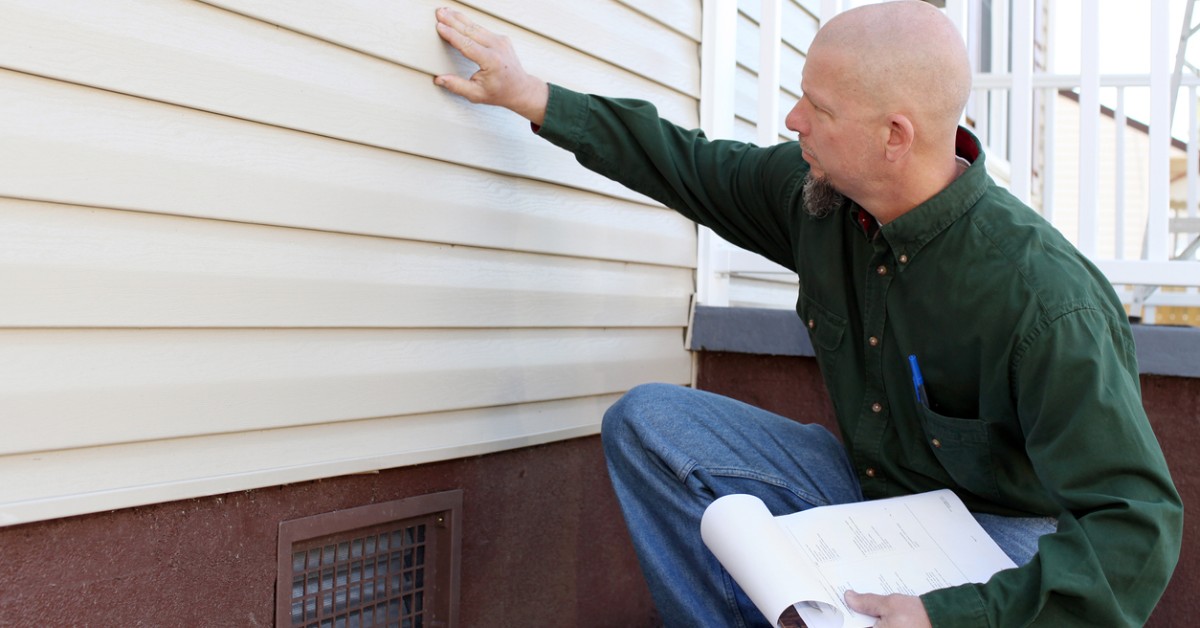
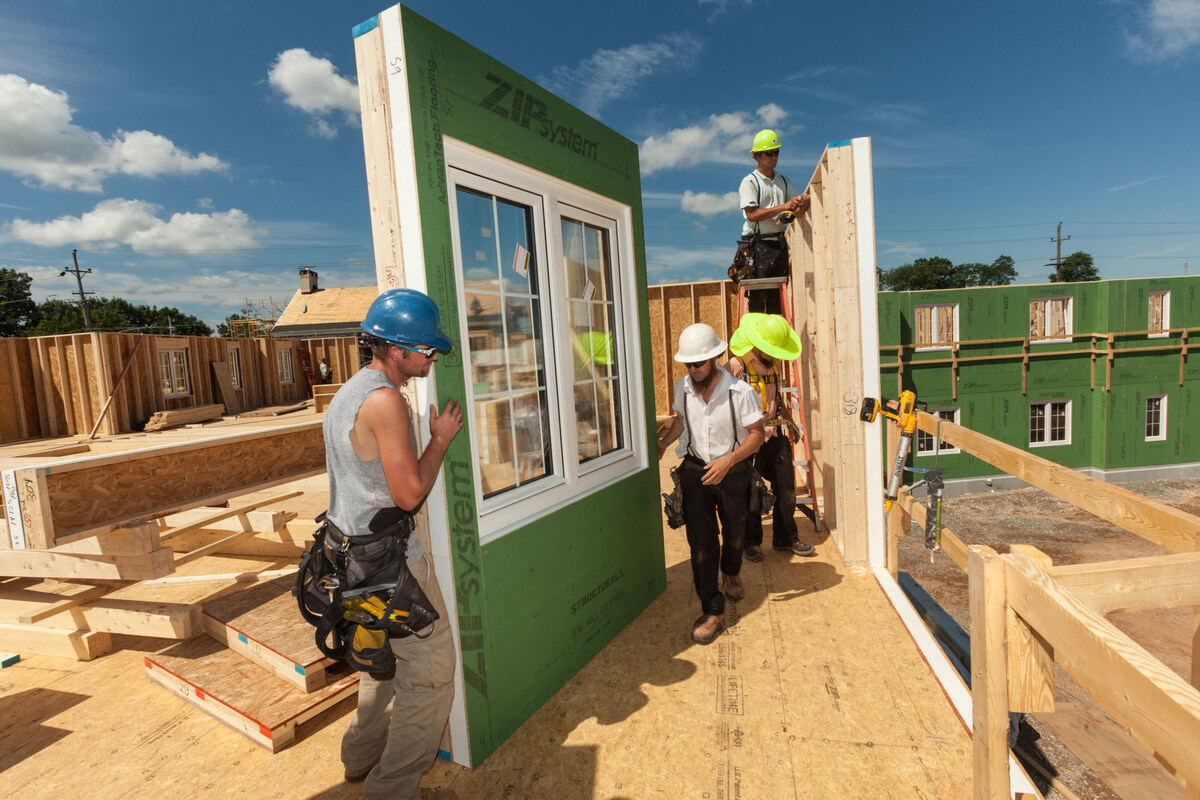
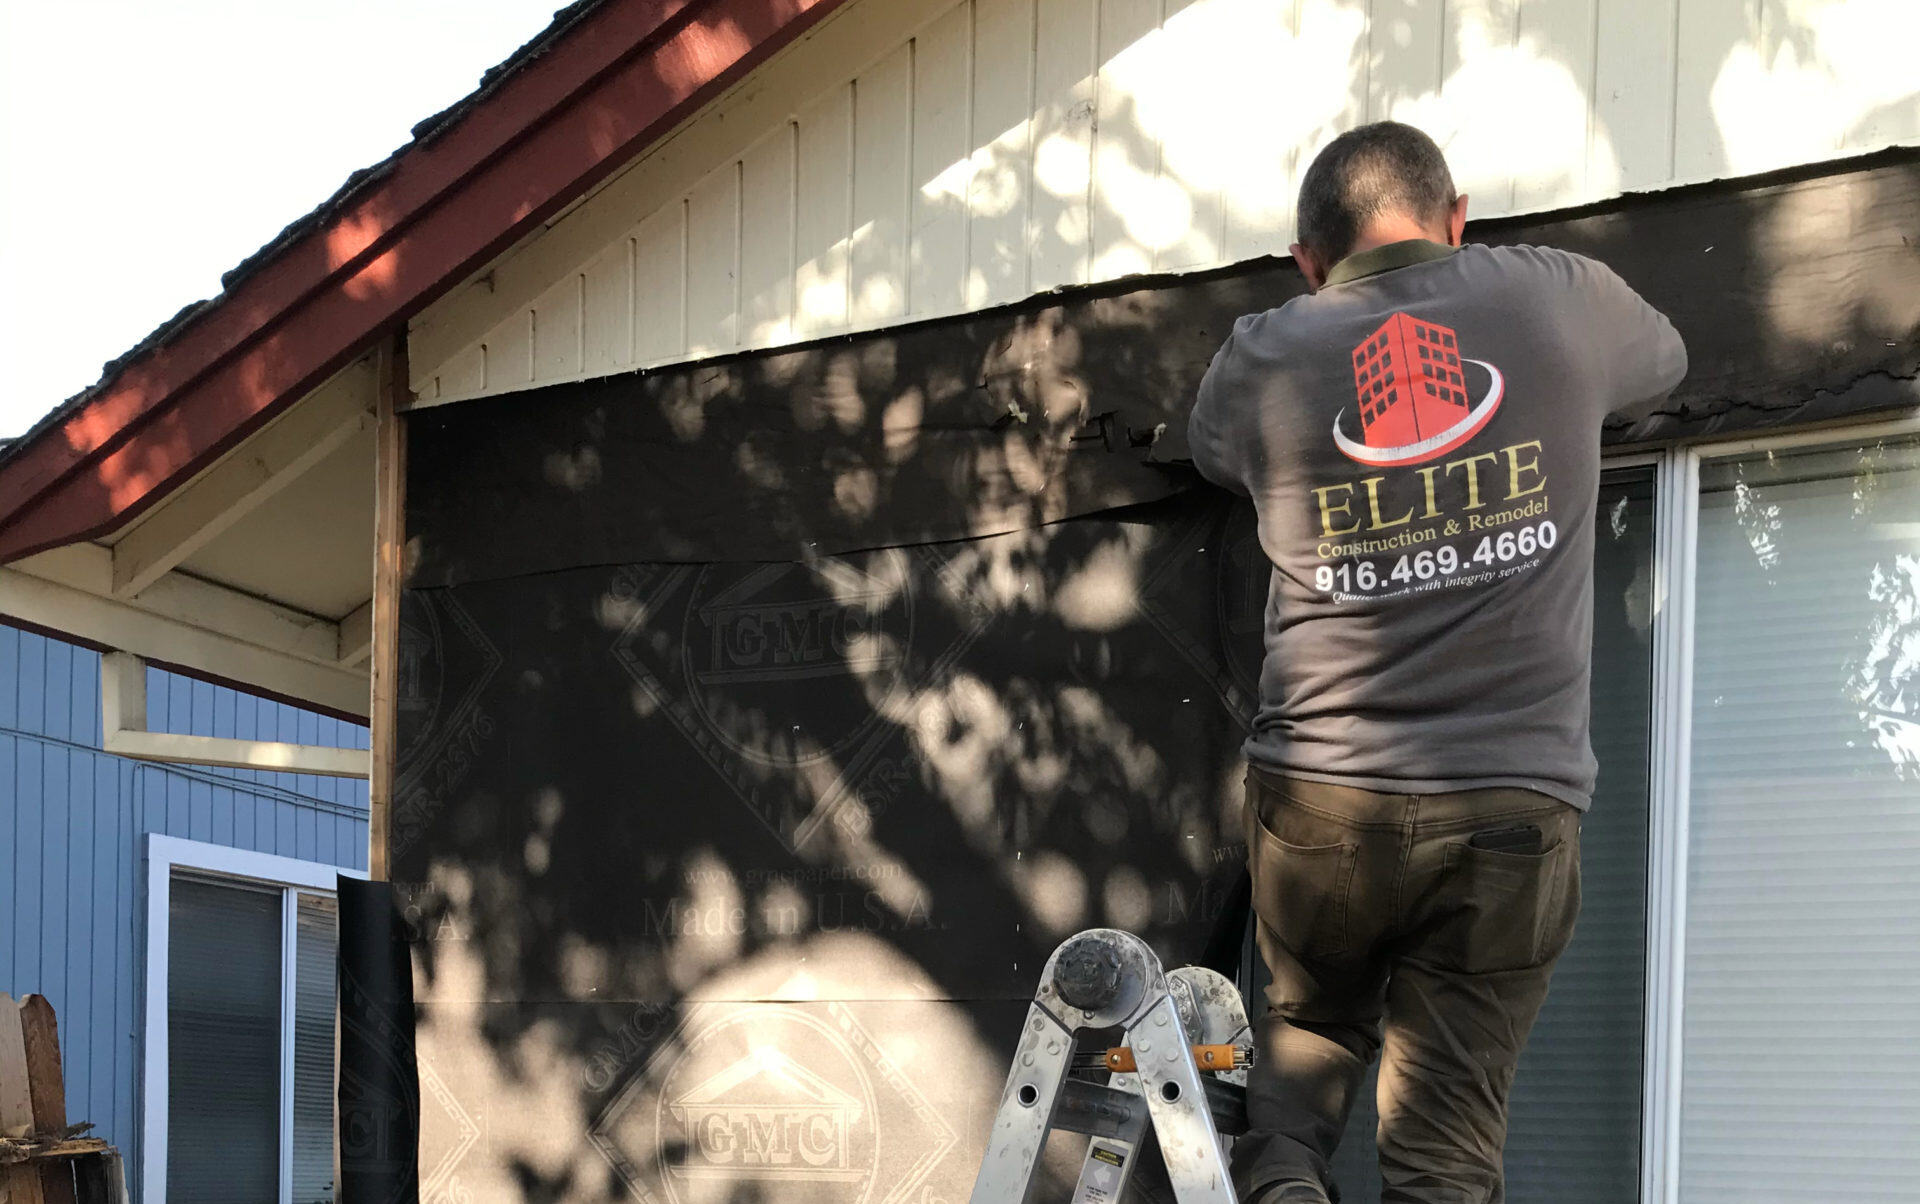
Hiring a Professional Contractor
When it comes to repairing or replacing siding, hiring a professional contractor is often the best choice. They have the knowledge, experience, and specialized tools to efficiently assess and address any siding issues. Here are some key considerations when hiring a professional contractor:
- Research and Recommendations: Start by researching local siding contractors in your area. Seek recommendations from friends, family, or neighbors who have recently had their siding repaired. Look for contractors who are licensed, insured, and have positive reviews or testimonials.
- Experience and Expertise: Opt for contractors with years of experience in siding repair. They should have expertise in handling various siding materials and repairing different types of damage. Ask for a portfolio of their past projects to assess the quality of their work.
- Licensing and Insurance: Ensure that the contractor you choose has the necessary licensing required by your local authority. Additionally, verify that they have liability insurance to protect you and their employees in case of accidents or property damage during the repair process.
- Written Estimates and Contracts: Obtain written estimates from multiple contractors and compare their pricing, warranties, and proposed timeline for the project. Once you’ve chosen a contractor, make sure to sign a detailed contract that outlines all the work to be done, materials to be used, and the agreed-upon payment schedule.
- Ask for References: Request references from past clients and take the time to contact them. This will give you insights into the contractor’s professionalism, reliability, and the quality of their work.
- Communication and Customer Service: Choose a contractor who is responsive and communicates effectively. They should be willing to address any concerns or questions you may have, and provide regular updates throughout the project.
Hiring a professional contractor ensures that your siding repair is done correctly, efficiently, and up to industry standards. It also gives you peace of mind knowing that you have trusted experts working on your home.
Read more: Who Sells Certainteed Siding
DIY Siding Repair Guide
If you’re comfortable working on home improvement projects and have the necessary tools and skills, you may consider tackling siding repair as a DIY project. Here is a step-by-step guide to help you with the process:
- Assess the Damage: Start by inspecting the siding to identify the extent of the damage. Determine whether the siding needs to be repaired or replaced entirely.
- Gather Necessary Tools and Materials: Make sure you have all the tools and materials required for the repair, including a pry bar, hammer, utility knife, replacement siding pieces, caulking, and nails or screws.
- Remove Damaged Siding: Use a pry bar to carefully remove the damaged siding. Be cautious not to damage the surrounding siding or underlying structure.
- Cut and Prepare Replacement Piece: Measure and cut the replacement siding piece to fit the area. Ensure that it matches the color and texture of the existing siding.
- Install the Replacement Piece: Apply a bead of caulking along the edges of the replacement piece and slide it into place. Secure it with nails or screws.
- Seal and Finish: Apply additional caulking along the joints and edges of the replaced siding to seal it properly. Smooth out the caulk for a neat finish.
- Inspect and Clean: Once the repair is complete, inspect the area to ensure the siding is securely in place. Clean the repaired area to remove any debris or residue.
While DIY siding repair can be rewarding, it’s important to be realistic about your abilities and the complexity of the project. If you’re unsure or the damage is extensive, it’s best to consult with a professional contractor to avoid any potential mistakes or further damage.
Remember to prioritize safety throughout the repair process. Use proper safety equipment, work on a stable surface, and take necessary precautions to prevent accidents or injuries.
By following this guide and taking your time with the repair, you can save money and restore the functionality and appearance of your siding.
It’s best to hire a professional siding contractor to fix siding on your house. They have the experience and tools to ensure the job is done correctly and efficiently. Always ask for references and check their credentials before hiring.
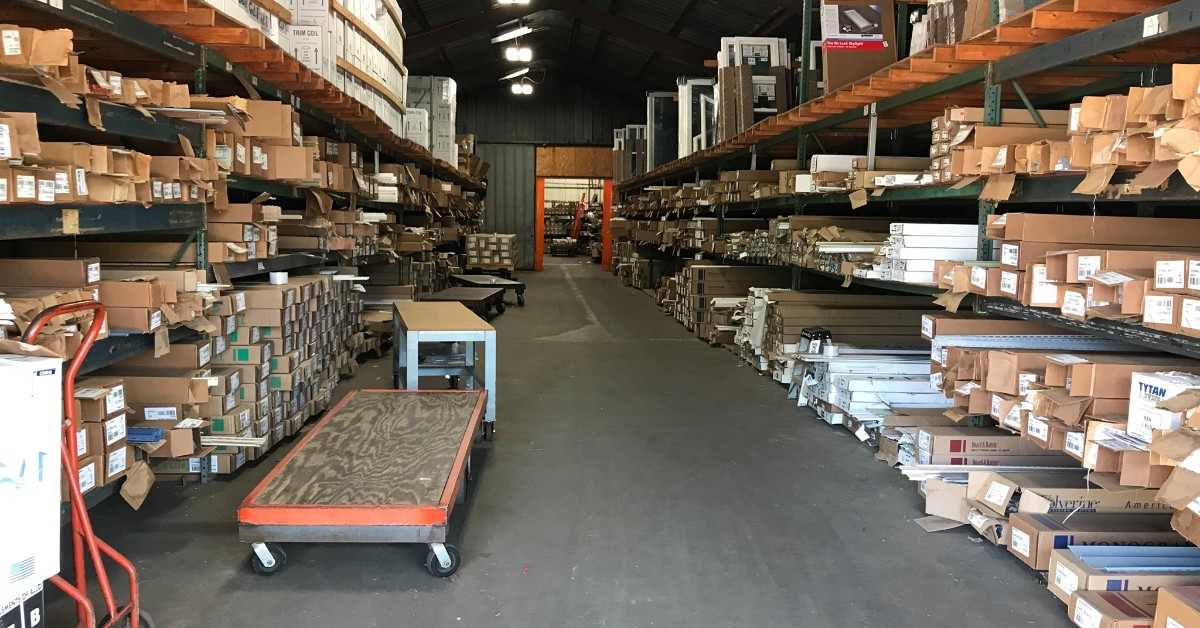
Necessary Tools and Materials
Before you begin any siding repair project, it’s important to have the right tools and materials on hand. Having the proper equipment will ensure a smoother and more efficient repair process. Here are the necessary tools and materials you’ll need for most siding repair jobs:
Tools:
- Pry bar: A pry bar is essential for removing damaged siding pieces without causing further damage to the surrounding area.
- Hammer: A hammer is needed for securing new siding pieces in place or for removing nails from the old siding.
- Utility Knife: A utility knife will come in handy for cutting and shaping the siding material.
- Caulking Gun: A caulking gun is necessary for applying caulk or adhesive to seal the siding joints.
- Tin Snips: Tin snips are useful for cutting metal siding materials.
- Measuring Tape: A measuring tape will help you accurately determine the size and dimensions of the replacement siding pieces.
- Screwdriver or Drill: Depending on the type of siding and fasteners used, you may need a screwdriver or drill for installation.
- Ladder or Scaffolding: If your siding repair involves higher areas, you’ll need a ladder or scaffolding to safely reach and work on the damaged sections.
- Safety Equipment: Don’t forget to wear safety glasses, gloves, and other protective gear when working with tools and materials.
Materials:
- Replacement Siding: Depending on the type of siding material used on your house, you’ll need to purchase matching replacement siding pieces.
- Caulk or Adhesive: Caulk or adhesive will be required to seal the joints and edges of the siding to prevent water infiltration.
- Nails or Screws: Use nails or screws specifically designed for siding to secure the replacement pieces to the exterior of your home.
- Paint or Stain: If you are repairing wood siding, you may need paint or stain to match the color and finish of the existing siding.
- Primer: Depending on the condition of the siding and the type of replacement material used, you may need primer to prepare the surface for paint or stain.
It’s always a good idea to double-check the specific tools and materials needed based on your siding type and the extent of the repair. Consult with a professional or refer to manufacturer recommendations to ensure you have everything you need for a successful siding repair project.
Preparing for Siding Repair
Before you embark on a siding repair project, it’s important to properly prepare to ensure a smooth and successful repair process. Taking the time to prepare will help you work efficiently and minimize any potential issues. Here are some essential steps to follow when preparing for siding repair:
- Identify the Problem Areas: Start by inspecting the siding of your house to identify the areas that require repair. Look for cracks, warping, or any other signs of damage.
- Gather the Necessary Tools and Materials: Ensure you have all the tools and materials required for the repair, such as a pry bar, hammer, replacement siding pieces, caulking, nails or screws, and any additional items specific to your siding type.
- Clear the Work Area: Remove any obstacles or objects that may obstruct your access to the damaged siding. Clearing the work area will make it easier to perform the repairs and ensure safety.
- Protect Landscaping and Surrounding Areas: Cover any delicate plants, flowers, or furniture near the work area to protect them from debris or damage during the repair process.
- Consider Safety Precautions: Prioritize safety by wearing appropriate protective gear, such as safety goggles, gloves, and sturdy footwear. If you’re working at heights, make sure to use a stable ladder or scaffolding and have someone assist you if needed.
- Prepare the Replacement Siding: If you’re using replacement siding pieces, make sure they are cut to the correct size and shape before starting the repair process. This will save time and ensure a seamless installation.
- Read the Manufacturer’s Instructions: If you’re using specific siding repair products or materials, be sure to read and follow the manufacturer’s instructions for proper installation and use. This will ensure the repair is done correctly and prevent any potential issues down the line.
By taking the time to prepare adequately, you’ll set yourself up for a successful siding repair project. Proper preparation will help you work efficiently, ensure the longevity of the repairs, and ultimately maintain the overall integrity and appearance of your home’s exterior.
Step-by-Step Siding Repair Process
Siding repair can be a straightforward process if you follow the right steps and take your time. Here is a general step-by-step guide to help you navigate through the siding repair process:
- Prepare the Work Area: Clear the area around the damaged siding and remove any obstacles that may interfere with the repair process.
- Remove the Damaged Siding: Use a pry bar to carefully remove the damaged siding pieces. Start at the bottom and work your way up to avoid causing unnecessary damage to the surrounding areas.
- Clean the Substrate: Inspect the underlying substrate for any signs of damage or moisture. Clean the area thoroughly, removing any dirt, debris, or old caulk or adhesive.
- Measure and Cut Replacement Siding: Measure the dimensions of the damaged area and cut the replacement siding piece to fit. Use a utility knife or tin snips to make precise cuts.
- Apply Caulk or Adhesive: Apply a bead of caulk or adhesive to the back of the replacement siding piece, as well as along the edges of the surrounding siding. This will help create a secure and watertight seal.
- Install the Replacement Siding: Slide the replacement siding piece into place, lining it up with the existing siding. Press firmly to ensure a snug fit. Secure the siding with nails or screws, making sure they are flush with the surface.
- Seal the Joints: Apply additional caulk or adhesive to seal the joints and edges of the repaired area. Smooth out the caulk for a neat and finished appearance.
- Inspect and Clean: Inspect the repaired area to ensure that the siding is securely in place and that there are no visible gaps or issues. Clean the area, removing any debris or excess caulk.
- Paint or Stain (if necessary): If you are working with wood siding or if the repaired area requires it, apply paint or stain to match the color and finish of the existing siding. Follow the manufacturer’s instructions for the proper application.
It’s important to note that the specific steps may vary depending on the type of siding and the extent of the damage. For more complex repairs or if you’re unsure, consult with a professional contractor to ensure the repair is done correctly and effectively.
By following these steps and paying attention to detail, you can successfully repair damaged siding and restore the functionality and appearance of your home’s exterior.
Read more: How To Install Siding On House
Tips for Maintaining Siding
Maintaining your siding is essential to keep it in good condition and prolong its lifespan. By following these tips, you can protect your siding from damage, prevent costly repairs, and maintain the overall beauty of your home’s exterior:
- Clean Regularly: Regularly clean your siding using a soft brush, sponge, or pressure washer. Remove dirt, debris, and any mildew or mold buildup. Avoid using abrasive materials or harsh chemicals that can damage the siding material.
- Inspect for Damage: Conduct routine inspections to identify any signs of damage, such as cracks, warping, or loose siding pieces. Address any issues promptly to prevent further damage or water infiltration.
- Trim Trees and Vegetation: Trim back any trees, shrubs, or vines that may come in contact with the siding. Overgrown vegetation can cause moisture buildup and potentially damage the siding material.
- Maintain Proper Drainage: Ensure that your gutters and downspouts are clean and functioning properly. Proper drainage will prevent water from overflowing and running down the siding, which can cause water damage and staining.
- Address Mold and Mildew: If you notice any mold or mildew growth on your siding, address it promptly. Use a solution of water and mild detergent or a specialized cleaner recommended for the siding material to remove the mold and prevent further growth.
- Protect Against Fading: Minimize prolonged exposure to direct sunlight, as it can cause fading or discoloration of certain siding materials. Consider using window coverings or installing awnings to provide shade and protect the siding.
- Avoid Harsh Chemicals: When cleaning or maintaining your siding, avoid using harsh chemicals, abrasive cleaners, or power washing at high pressures. These can damage the siding material and remove protective coatings.
- Repair Peeling Paint or Caulk: If you notice peeling paint or caulk, repair it promptly. Remove any loose or peeling paint and apply a fresh coat to protect the siding from moisture and further damage.
- Consult with Professionals: For major repairs, extensive damage, or maintenance concerns, consult with a professional siding contractor. They can provide expert advice, assess the condition of your siding, and address any issues professionally.
- Follow Manufacturer’s Recommendations: Always refer to the manufacturer’s guidelines and recommendations for maintaining your specific siding material. They will provide valuable instructions on cleaning products, maintenance techniques, and any warranty requirements.
By following these maintenance tips, you can ensure that your siding remains in good condition, preserving the beauty and integrity of your home’s exterior for years to come.
Conclusion
Maintaining the siding on your house is essential for both aesthetic and functional reasons. Whether you choose to hire a professional contractor or tackle the repairs yourself, it’s important to address siding damage promptly to prevent further issues and maintain the integrity of your home’s exterior.
By understanding the signs of siding problems and being aware of the different types of siding materials, you can make informed decisions when it comes to repair or replacement. Regular inspections and proper maintenance can also help prevent extensive damage and costly repairs down the line.
When hiring a professional contractor, ensure they are experienced, licensed, and insured. Obtaining written estimates and references, as well as effective communication, will help you choose the right contractor for your siding repair needs.
If you decide to take on siding repair as a DIY project, make sure you have the necessary tools and materials, and follow a step-by-step process to ensure a successful outcome. Prioritizing safety and attention to detail are crucial for a successful repair.
Lastly, incorporating regular maintenance practices such as cleaning, inspecting, and addressing issues promptly will help preserve the quality and appearance of your siding. Following manufacturer’s recommendations, protecting against fading, and consulting with professionals when needed will contribute to the longevity of your siding.
Remember, properly maintained siding not only enhances the curb appeal of your home but also provides protection against the elements. Take pride in your home’s exterior and ensure that your siding remains in excellent condition for years to come.
Frequently Asked Questions about Who Fixes Siding On House
Was this page helpful?
At Storables.com, we guarantee accurate and reliable information. Our content, validated by Expert Board Contributors, is crafted following stringent Editorial Policies. We're committed to providing you with well-researched, expert-backed insights for all your informational needs.


0 thoughts on “Who Fixes Siding On House”